

Page 1
Cover Roller Spa Cover Removal System
INSTRUCTIONS
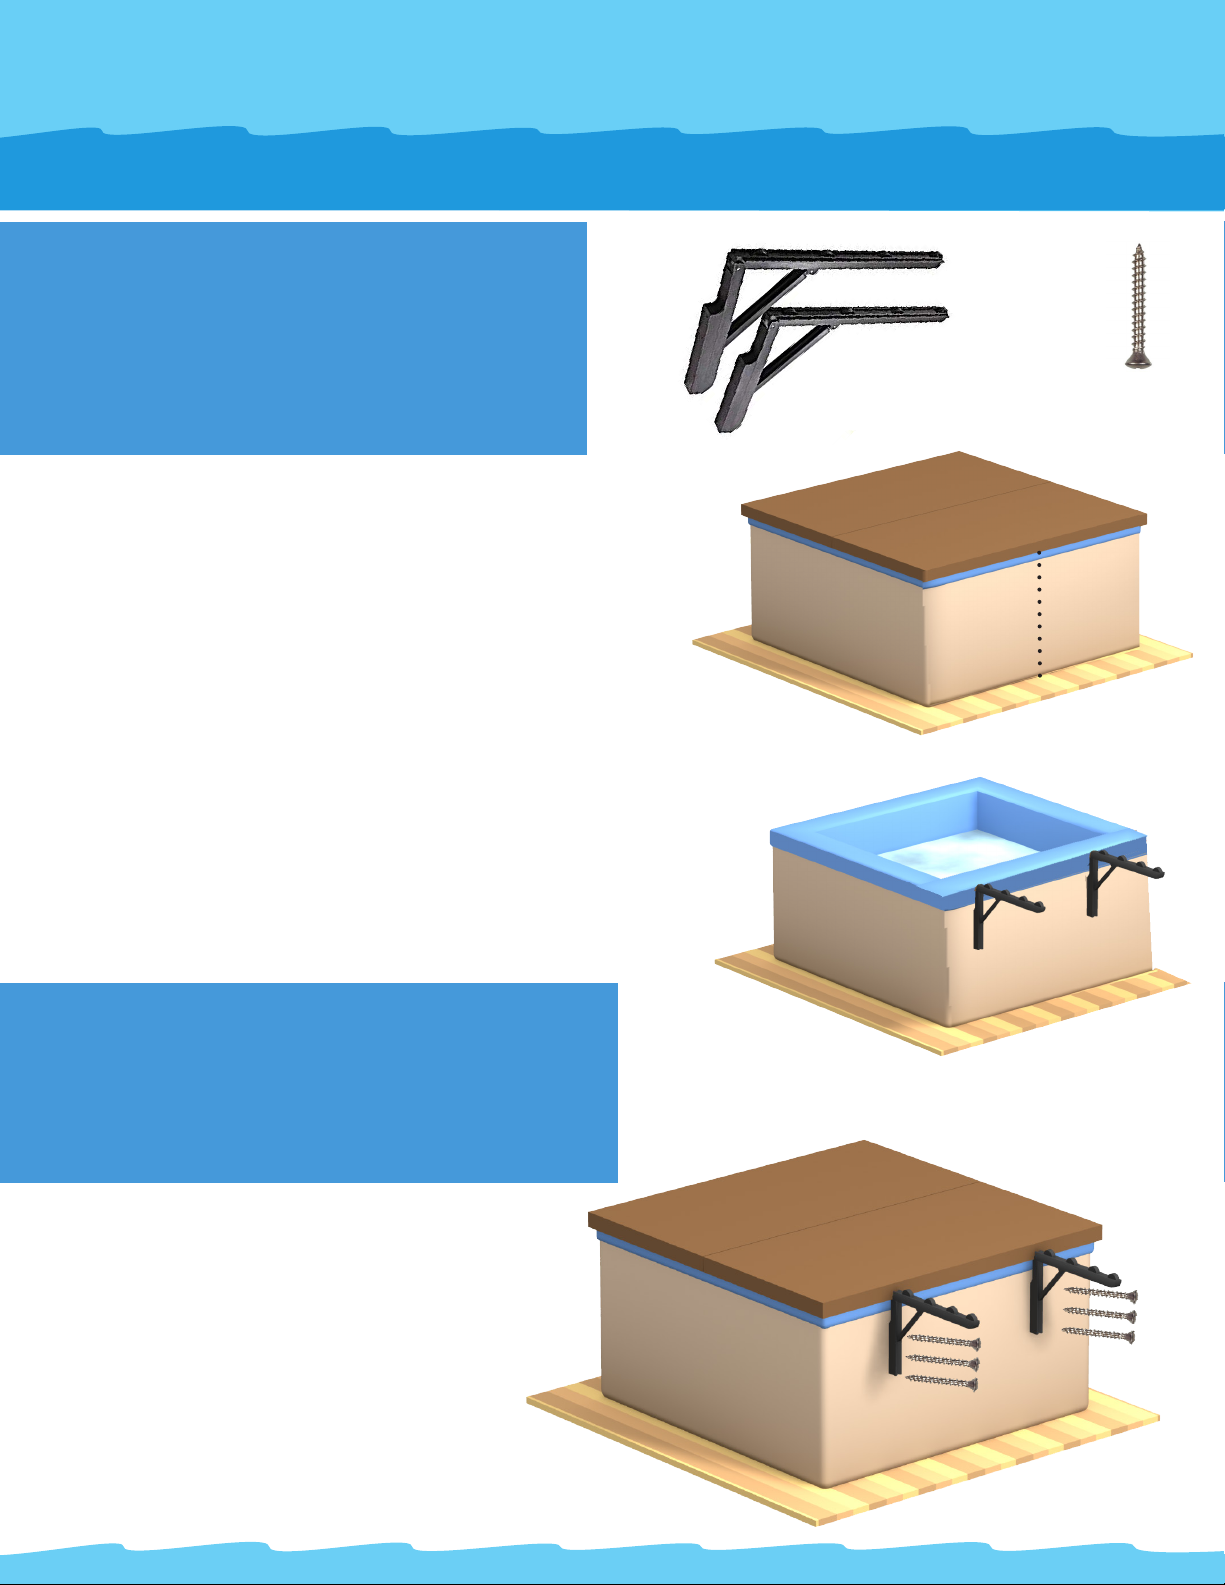
PARTS LIST
DESCRIPTION QTY
A.
Roller Rack
B. #10 x 1” Mounting Screws 12
Tools Needed: Power/Cordless Drill with
Phillips bit and a tape measure.
Position one Roller Rack (A) so it is
halfway between the spa edge and the
midline (Figure 1) and its top surface is
1
2
flush with the top of the spa (Figure 2).
Mark the position of the rack’s 6 screw
holes in the skirt. Repeat this procedure
with the other Roller Rack (A) on the
opposite side of the midline.
Secure each Roller Rack to the spa skirt
by inserting all six #10 screws (F) tightly
into the screw holes that you marked in the
previous step. (Figure 3)
A.
2
B.
Midline
Figure 1
PRO TIP
If your spa cover is heavy, it is probably
saturated with water. Water saturated foamfilled covers have very little insulating “R”
value and their access weight will damage the
roller system. If your cover is water saturated,
it is time to purchase a new cover.
Figure 2
Figure 3
Page 2
How to Use
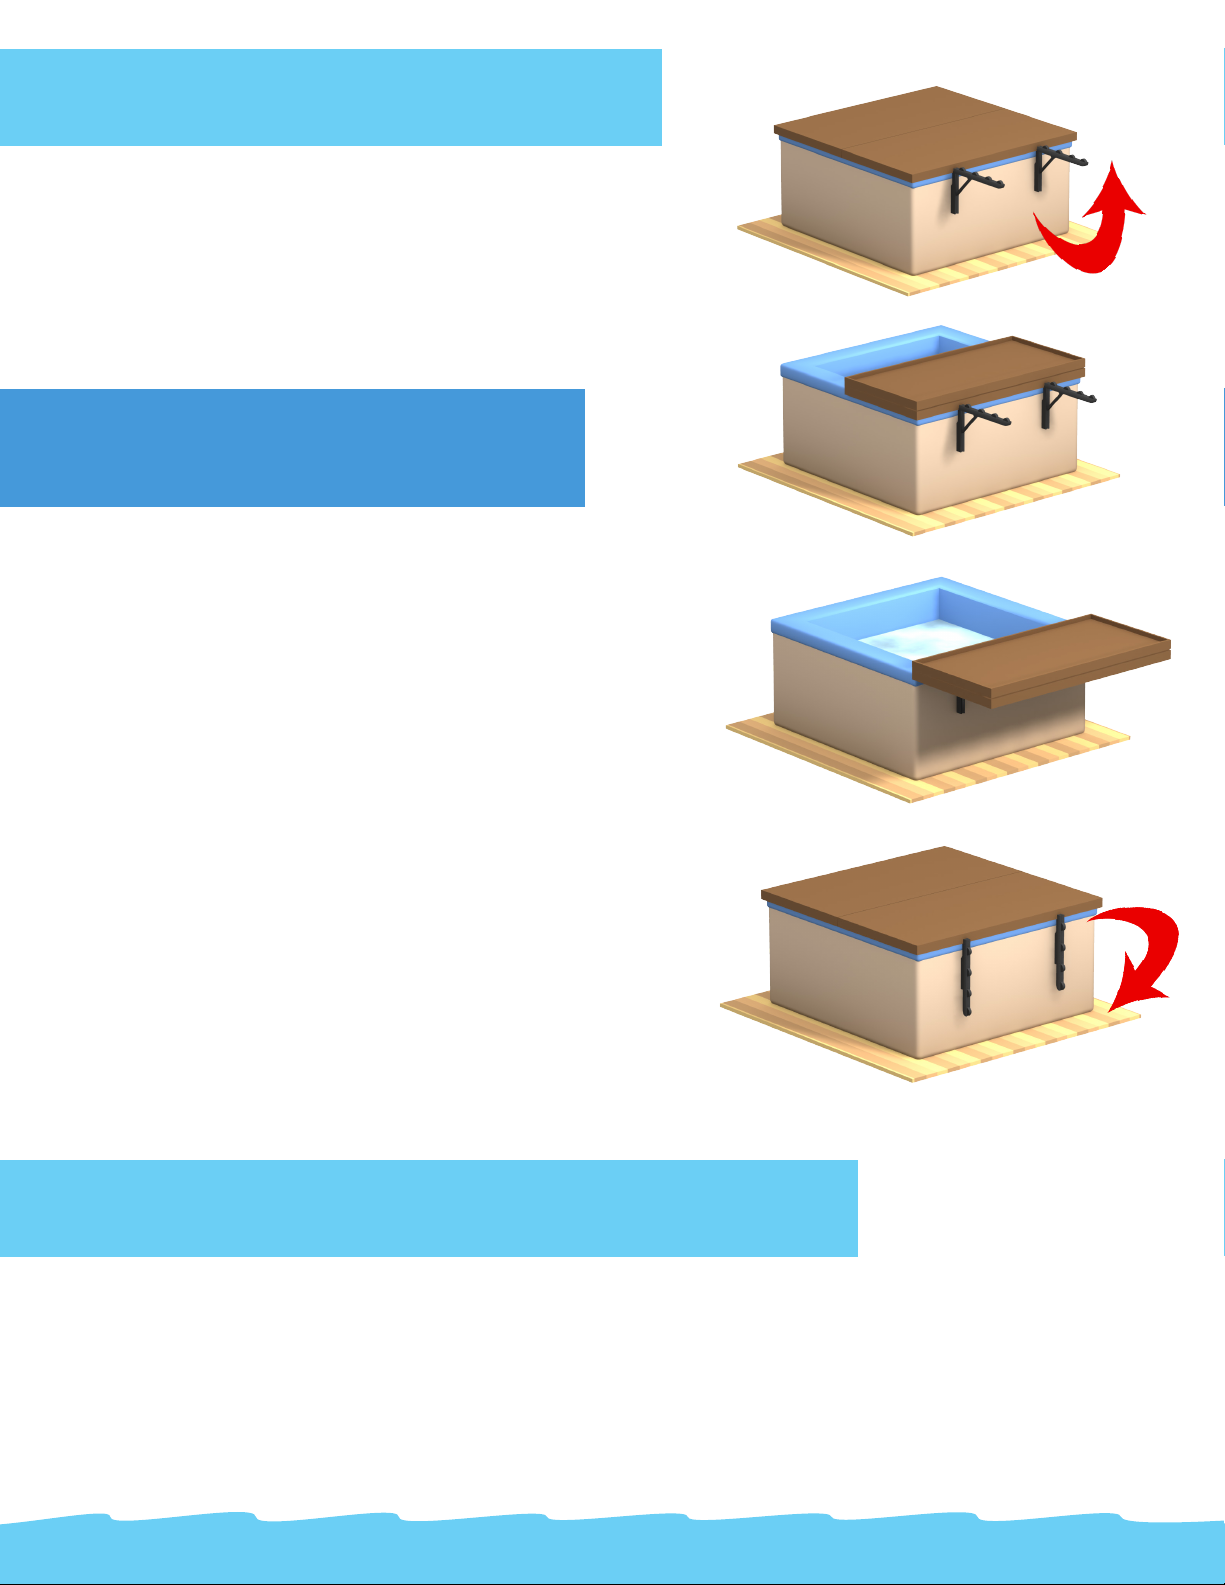
Lock each of the Roller Racks into
position by rotating counterclockwise,
then securing the bottom edge of the
1
brace (Figure 1).
PRO TIP
Do not extend the roller rack arm more
than 90° upward, or damage to the joint
may result.
Flip one cover half over the other.
(Figure 2)
Figure 1
Figure 2
Figure 3
2
Push the spa cover on top of the roller
racks. Now, enjoy your spa! (Figure 3)
3
When done, push the folded spa cover
back over the spa, then flip the upside
half back onto the spa. Release the
4
Warnings
braces & rotate each roller rack clockwise to the rest position. (Figure 4)
Figure 4
• DO NOT sit on open cover. DAMAGE WILL RESULT.
• DO NOT mount roller racks on the front or the equipment side of spa. DAMAGE WILL RESULT.
• DO NOT twist or move roller racks sideways. DAMAGE WILL RESULT.
• DO NOT allow weight resting on the roller system to exceed 75 lbs. DAMAGE WILL RESULT.
• For safety reasons, the roller system should be secured in the lowered position after each use.
• If there is snow on the cover, remove all snow before opening or DAMAGE WILL RESULT.
 Loading...