

Page 1

SmartQ T7
ENGLISH USER MANUAL version 1
Dear Users,
Many thanks for selecting our product. We sincerely hope you enjoy and get
best multimedia experience from our product.
All information on this manual is correct during publishing. However, due to
continuous update and improvement on our products, there might be tiny
difference on appearance and function between the software of your device
and the description on this manual.
1. GENERAL INSTRUCTIONS
1.1. Product care
Notice
This manual contains important safety precautions and information of correct
use. Please be sure to read this manual carefully before use so as to avoid any
accidents.
¾ Please do not place the product in hot, wet or dusty environment.
¾ Please do not place the product in hot environment. Especially in summer,
do not place it in a car with all windows closed.
¾ Avoid dropping or clashing the product and not shake the TFT screen
violently, or it may cause a damage or abnormal display to the screen.
¾ Please select a suitable volume and avoid loud sound while using
earphones. Please turn down the volume or stop using if you get a roaring
in your ears.
¾ For following situations, please charge the product.
A. The icon of the battery shows without power
B. System automatically shut down, and it turns off soon after restart.
C. Operation key shows no reaction.
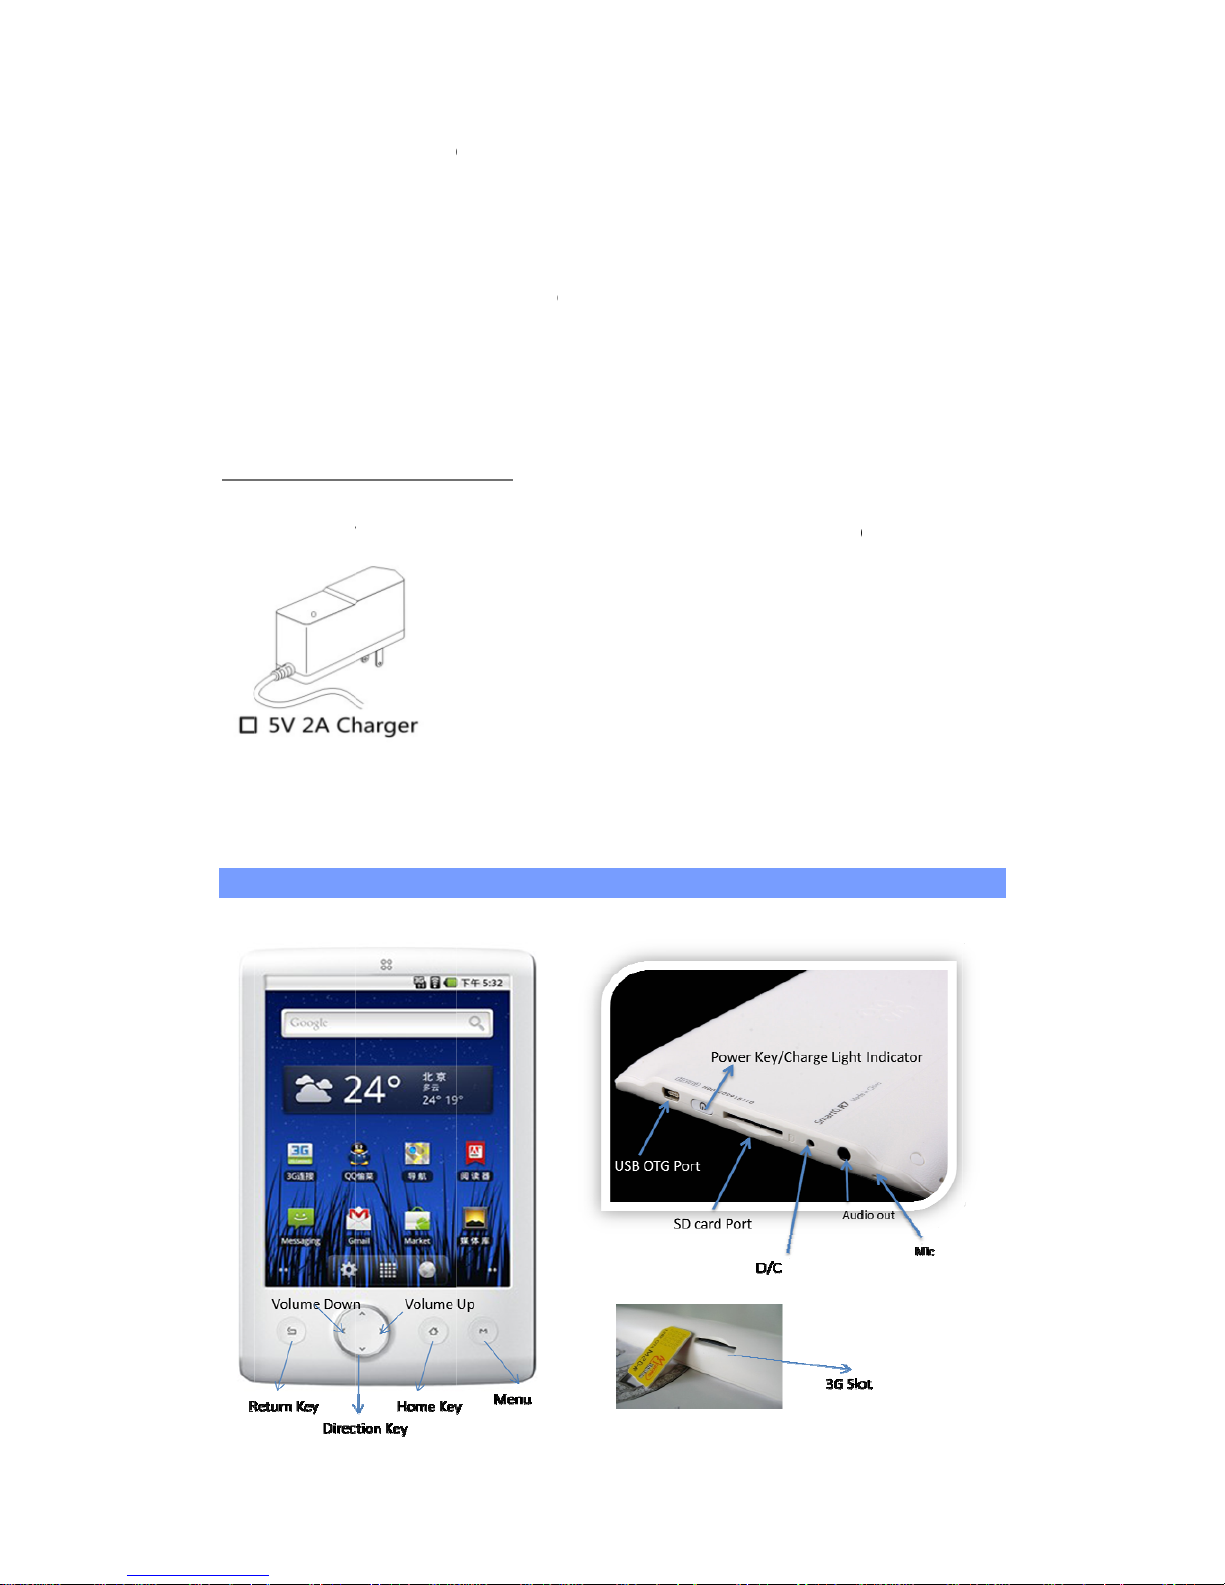
[Notes]: Chargers of other models cannot be used for this device because
it may cause a burn out, which we are not responsible for. Please contact
with our relevant department if you need original chargers.
¾ Please do not disconnect the device while formatting, downloading and
uploading, or it may cause application errors.
¾ We are not responsible for any memory erase loss caused by damage or
maintain the product, or other personal reasons. Please do not
disassemble the product personally, and avoid cleaning the product with
ethyl alcohol, thinner, or benzene.
¾ Do not use this product in the areas which prohibit use of electronic
Page 2
¾
※
W
pro
★
T[Noapp
1.2
1.2.
Be
f
2.
2.1
devices,
f
Please d
o
might ca
u
e reserv
e
duct are s
u
his devic
e
tes]: All i
m
earance
o
. First ste
p
1. CHARGI
N
ore using
y
PRES
E
. SmartQ
D
or exampl
e
not use
t
se a car
a
the right
bject to c
do not s
u
ages on
f the prod
u
s
G THE BA
T
your
Sma
r
NTA
T
escripti
o
, on an a
i
his produ
c
ccident.
to improv
e
hange wit
h
pport wat
e
this man
u
cts are s
u
TERY
tQ T7 for
t
ION
n
rplane.
t while d
r
the prod
u
out prior
n
rproof fu
n
al are onl
bject to c
h
he first ti
m
iving or
w
ct. Specif
otice!
ction.
y for refe
r
ange wit
h
e, compl
e
alking in t
h
ication an
d
ence! Sp
e
out prior
n
tely charg
e
e street,
design o
f
cification
otice!
e
its batte
r
or it
the
and
y.
Page 3
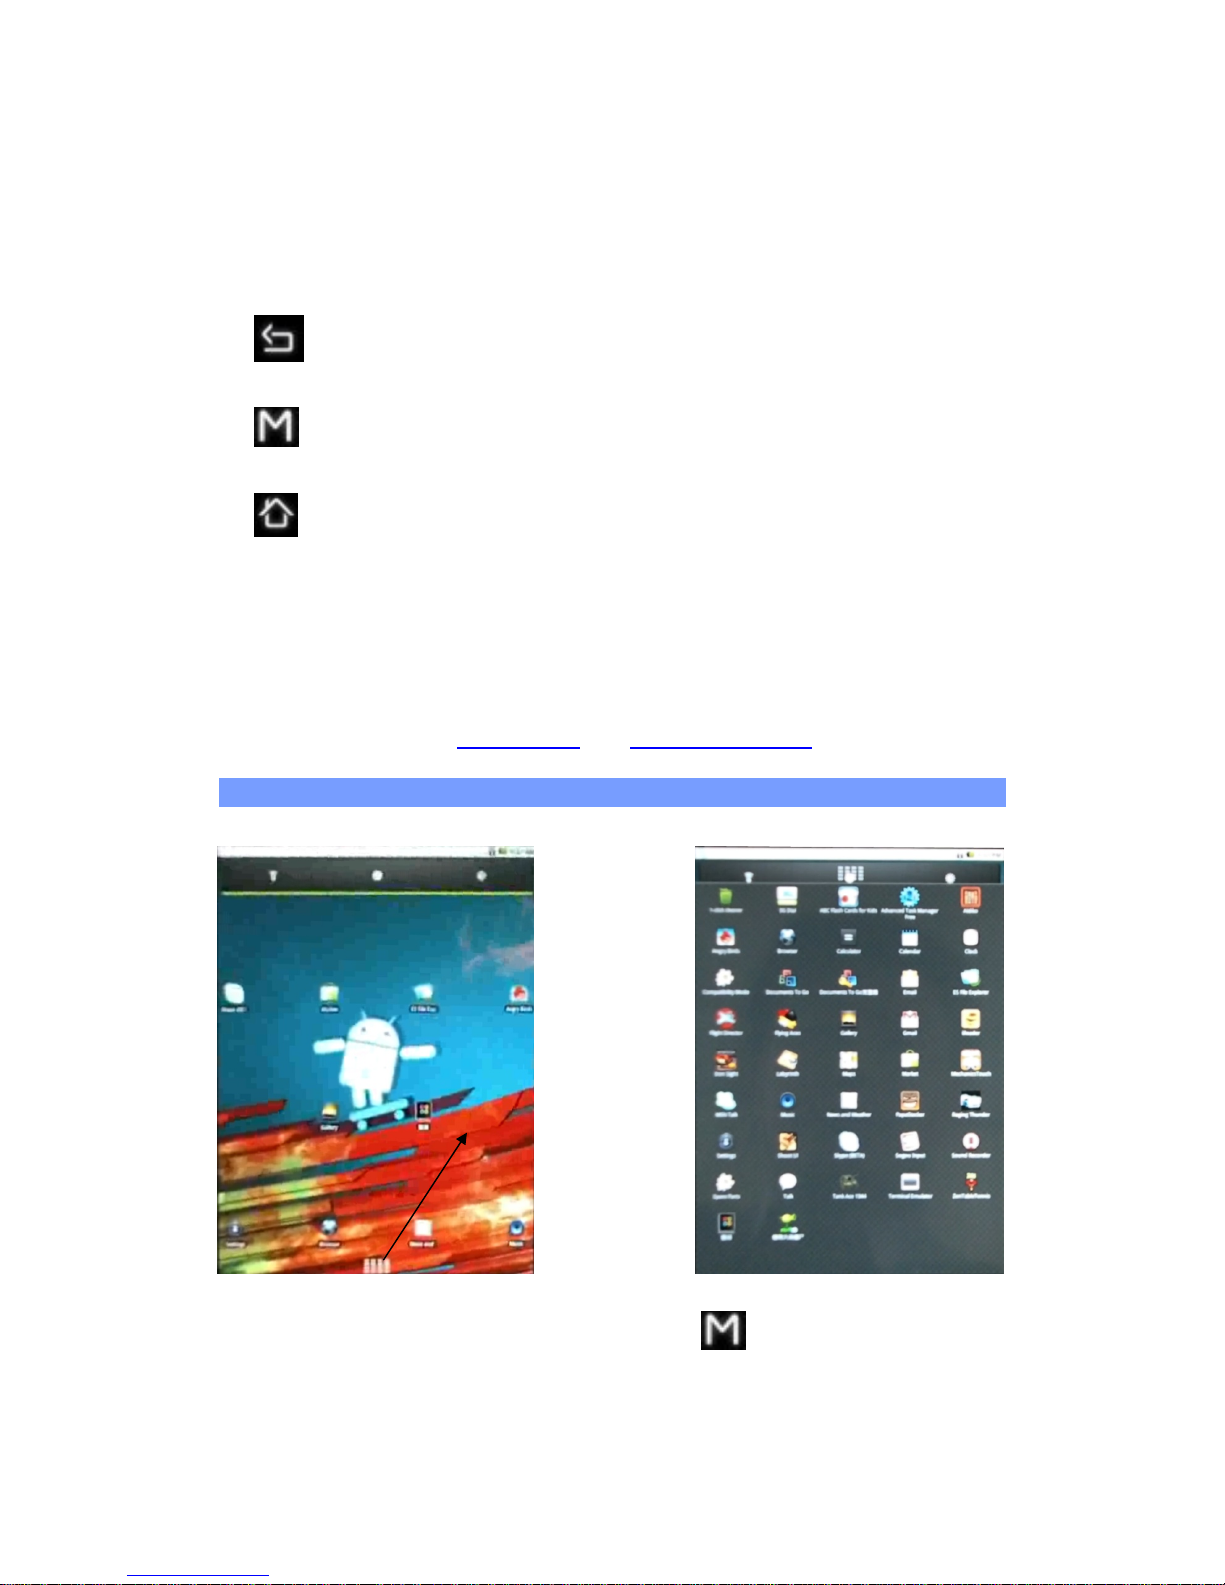
1. Volume Buttons: to increase/decrease volume.
2. Power Keys Press and hold to turn your SmartQ on/off. Press quickly to go
into sleep mode. Press and hold to see the available shutdown options.
- Silent mode: To make the device in silent mode
Reboot: Restarts the device
Power off: Shuts off the device completely. No battery power is used.
3. Go Back: You can always go back to the previous screen by pressing
this button.
4. Menu list: By tapping on the menu icon, you can see the available
options for the current screen.
5. Home: Wherever you are in the interface, you can go back directly to
the central Home screen by tapping on this icon. Hold down to select and jump
to a recent application.
6. Headphone / Video* out jack: For headphones or audio
7. Microphone: for recording your voice (see the app named Sound
Recorder).
8. Mini USB jack: To connect your SmartQ to your computer using the
supplied USB cable (to transfer files and charge the battery).
2.2. Using the SmartQ T7 interface
Change the Wallpaper taps on the menu icon and then selects
Wallpapers.
Move an item to another part of the screen. Hold your finger on it until it
enlarges, then drag it to the desired location (make sure there is enough
UpwardSlipTapingtheIcon
Page 4

sp
a
Ma
on
o
to
a
Ma
loc
a
De
l
to t
3.
Wh
re
m
to
sconhomWiF
Bri
gWiFWiF
to i
tcon
set
t*Th
3.1
Be
f
se
e
is
o
firs
t
1.
G
2. I
3. I
f
se
t
an
d
ref
r
4.
T
tap
ce), and r
e
ke an ap
p
ne of the
n empty
p
ke a shor
t
tion and
t
ete a scr
e
he Applic
a
MAKI
N
en you do
ember to
ave batte
r
trol widge
t
e screen
i on and
o
htness) a
s
i connecti
i zone th
a
. Every ti
m
figured o
n
ing is ena
e SmartQ
. Enablin
g
ore launc
h
if you alr
e
n when y
o
need to
a
o to the
H
n the Sett
i
the WiFi
tings. Th
e
show all
t
eshed co
n
ap on the
are secu
r
the pass
w
lease it.
shortcut
:
applicatio
n
lace on o
n
cut or a
b
hen choo
s
en item:
H
tions Tab
G CO
not need
t
deactivat
e
y power.
T
t
found on
allows yo
u
ff (WiFi,
S
s
needed.
on, you n
e
t will allo
w
e the Sm
a
ce, it will
a
bled).
T7 is not
e
WiFi
ing an Int
e
ady have
ur device
ctivate th
e
ome scre
e
ngs scre
e
is off, tap
o
SmartQ
T
he wirele
s
tinuously.
network
y
ed conne
c
ord field t
o
Open th
e
s. It will
e
e of the fi
v
ookmark
:
e from th
e
old down
o
which has
NNEC
T
he WiFi,
p
them in o
he Powe
r
the far lef
t
to turn th
ync, and
To confi
g
ed to be i
n
you to c
o
rtQ is in
r
ttempt to
quipped
w
rnet appli
a connect
is connec
t
WiFi and
n, tap on
n, select
W
n the Wi-
F
7will sca
n
s network
ou want t
o
tions (req
make th
e
Applicati
o
nlarge an
d
e home s
Hold you
list.
o
n the ite
m
become
a
ION
lease
rder
e
ure a
a
nnect
ange of a
make a c
o
ith Bluet
o
cation su
c
ion. The i
c
ed to a W
i
configure
the Menu
ireless
&
line to t
u
automati
c
s in range
connect
t
uires a pa
s
keyboar
d
ns Tab a
n
jump to t
creens an
d
r finger on
until it e
n
trash bin
.
network t
h
nnection (
oth®.
h as the
w
on in t
h
Fi networ
k
a WiFi ne
t
icon and t
network
rn it on.
T
ally for a
v
of your d
e
o. Networ
k
sword).
* appear,
d press a
n
he home
s
then let
g
the scree
n
larges an
d
at you ha
v
so long a
s
eb brows
e
e top righ
t
. If not co
n
work.
hen selec
t
settings.
hen selec
t
ailable Wi
vice. The
s shown
w
If it is a se
enter the
r
d hold do
creen. Sli
d
o.
at an e
m
then dra
g
e already
the WiFi
r, check t
o
t
of the sc
r
nected, y
Settings
.
t
Wi-Fi
Fi networ
k
list is
ith the ic
o
cured net
w
equired
wn
e it
pty
it
een
ou
s
n
ork,
Page 5

network information** and then tap on Connect. Your SmartQ will now attempt
to establish a connection to that WiFi access point with the network
parameters you entered
*Turn the device sideways to go to landscape view in order to have bigger
keys to type on.
** For free access WiFi points, there is no need to enter any special
information. For secured networks, you will need either a key (a series of
numbers and/or letters) of the type WEP, WPA, or WPA2, or you will need to
have a WiFi access point that uses the WiFi protection standard WPS (WiFi
Protected Setup). Check with the person who manages the WiFi network to
obtain the exact connection parameters required.
3.1.1. ADVANCED CONNECTION
To manually scan for available WiFi networks, go to the Wi-Fi settings screen,
tap on the Menu icon, then tap on Scan.
3.2.1. POSSIBLE SOLUTIONS
1. Check your WiFi router/modem documentation to see if it has a pairing
button that needs to be pressed. Some modems have such a button that must
be pressed the very first time you try to make a WiFi connection with a new
device.
2. If you have to enter a password (a security code of type WEP or WPA) be
very careful that you do not confuse a 1 and I (one and letter “I”), a 0 and O
(zero and letter “O”), or U and V. These are common mistakes.
3. When entering a security code for your WiFi access, check the box Show
password which will allow you to see exactly what you are typing in. This will
avoid any mistakes.
4. Try temporarily shutting off the encryption system of your WiFirouter/modem
to see if the problem has to do with the encryption system you are using. The
preferred encryption system is the WPA2.
3.2. Enabling 3G dial
Click "Settings"-> "Wireless and network"->" 3G dial " select the 3G dial. After
the successful dial the upper right status bar, will display 3G connectivity icon.
4. TRANSFERRING FILES
Page 6
Wh
mu
scab
4.3
Wi
n
tra
y
Wi
n
Re
m
5.
set
t
5.1
Wh
the
Wi
-
en you w
a
ic, video,
le.
. Disconn
e
dows®
dows®
ovable
D
SETTI
U
spase
th
ings.
. Wireles
s
en you do
m in order
Fi: Tap o
n
nt to tran
s
or applica
e
cting
XP:
Click
7:
Click o
isk .
NGS
e the set
t
rticular n
e
ttings tha
t
e Menu ic
o
& netwo
r
not need
t
to save b
a
this line t
o
fer files to
tions (.ap
k
on the "s
a
and sel
e
n the "saf
e
ings to m
o
eds. You
c
you don’t
n t
o
k setting
s
he WiFi o
r
ttery pow
e
enable
o
or from th
files)) yo
u
fely remo
v
ct the S
m
ly remov
e
dify your
S
c
an scroll
t
initially se
access
m
Bluetoot
h
r.
r disable t
e SmartQ
(
can tran
s
e" green
a
artQ.
" icon in t
h
then
martQ to
t
he scree
n
e. When it
ore optio
n
® connec
t
he WiFi c
o
photos, d
o
fer them
v
rrow icon
e system
and sel
e
function f
o
up and d
o
is possibl
e
s within
o
ions, you
c
nnection.
cuments,
ia the US
B
in the sys
tray
e
ct the
r your
wn to rev
, you can
ne of the
an deacti
v
tem
eal
use
ate
Page 7

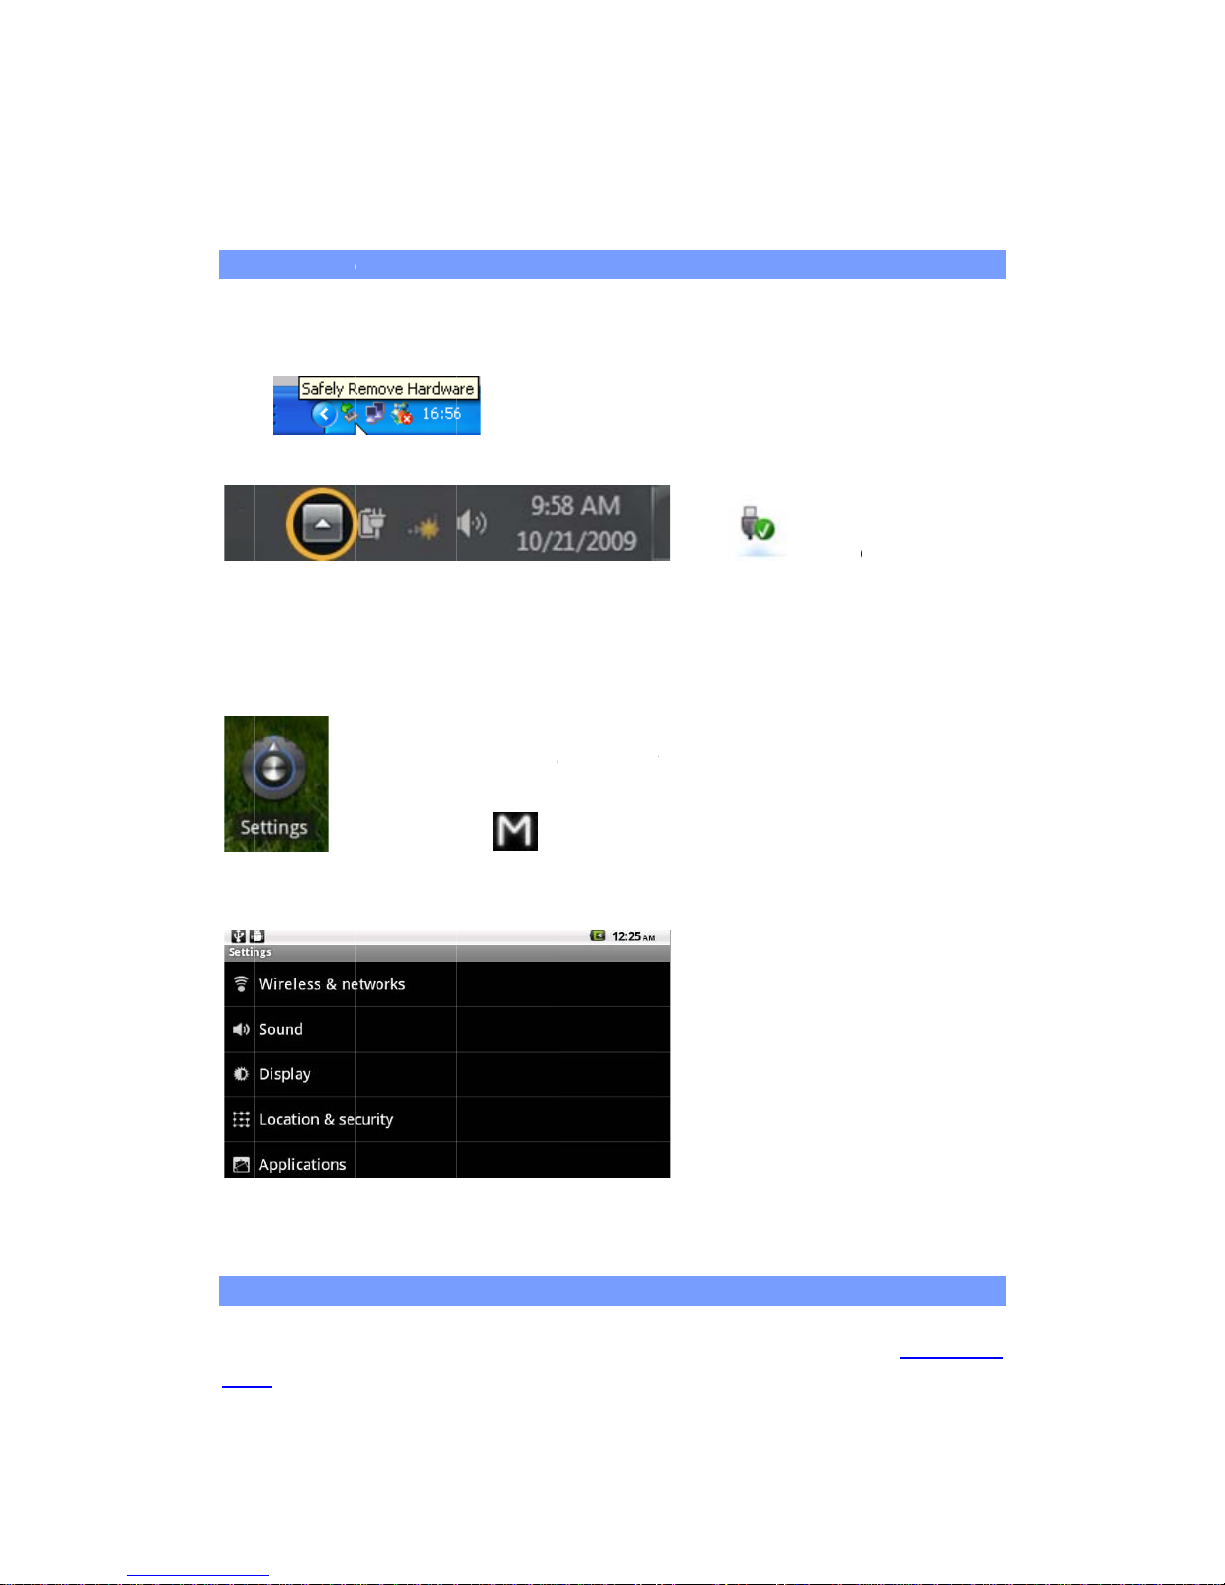
Wi-Fi settings: Allows you to set up and manage your WiFi networks. See:
Making a WiFi Connection.
5.2. Sound & Display
Sound > Audio settings: Sets the sound's overall level of bass, treble, 3D,
and balance.
Sound > Volume: Sets the volume for music and videos. You can also adjust
the sound by using the volume buttons on the device.
Sound > Notification ringtone: Sets the sound type for system notifications.
Audible selection: Enables/disables the touch-screen click sound.
Orientation: Allows you to set the orientation of the screen to a fixed position
or based on the physical orientation of the device.
Animation: Enables/disables the display of animations when opening and
closing applications.
Brightness: Allows you to adjust the brightness of the screen. Reducing the
brightness will reduce battery consumption.
Screen timeout: Allows you to adjust the delay before the screen
automatically turns off and the device locks itself.
To turn the screen back on, press the Power button once, and press it again to
unlock the screen.
5.3. Location & security
Use wireless networks: This screen gives you the possibility to allow certain
Android™ applications to determine your current location via the WiFi
connection.
Visible passwords: Enables/disables passwords to be shown as they are
typed.
Install from SD card: Install encrypted certificates from an SD card.
Set password: Set or change the credential storage password.
5.4. Applications
Page 8

Un
k
ap
p
Ma
n
ins
t
Ru
n
De
v
scr
e
5.5
Se
t
5.7
Se
t
fas
t
5.8
Au
t
yo
u
cur
r
CA
ac
c
6.
nown so
lications.
age app
l
alled on y
o
ning ser
v
elopmen
enshot s
e
. Account
tings to m
a
. Langua
g
your pref
e
er and m
o
. Date & t
i
omatic:
E
r SmartQ
ent date
&
UTION: If
ess certai
n
INTE
R
B
e
to
n
efin
6.
1
urces: All
o
ications:
Y
ur device
ices: Vie
w
t: Advanc
e
tting (scr
e
s and sy
n
nage dat
a
e & keyb
o
rred lang
u
re accura
t
me
nable this
is connec
t
time ma
n
the time
&
web pag
NET
N
fore laun
c
the Intern
twork (
ger to scr
o
. WEB BR
O
w the ins
t
Y
ou can v
or uninst
a
and con
d options
en image
c
synchro
n
ard
age and
r
e text inp
u
option if
y
ed to a Wi
ually.
date are
n
es.
AVIG
A
hing any
a
et, make
s
icon on t
h
ll the cur
r
WSER ME
N
allation of
iew inform
ll the appl
trol curren
for softw
a
saved to t
ization.
egion, an
d
t.
ou want t
o
Fi networ
k
ot correc
t
TION
pplicatio
n
ure that y
o
e top rig
h
ent web p
U ITEMS
non-Andr
o
ation abo
u
ication.
tly runnin
g
re develo
p
he root).
configur
e
set the cl
. Disable
t
ly set, you
that nee
d
u are co
n
t of the sc
age horiz
o
id™ Mar
k
t all the a
p
services.
ers. Inclu
d
the text
s
ock auto
m
his option
might not
s to make
nected to
reen). Yo
u
ntally or v
e
et
plications
es a
ettings for
atically w
h
to set the
be able t
o
a connec
t
a WiFi
can use
y
ertically.
en
ion
our
Page 9

New Window: Opens a new browser window.
Bookmarks: You can also just tap on the bookmark icon on the top right of
each page. Here you can see your list of bookmarks. Just tap on one of them
to open it in the current window. Holding down on a bookmark will give you
access to several options (you will be able to edit it, rename it, delete it, etc.).
To add a new bookmark, tap on the top left box that shows * Add. The two
other tabs allow you to access your Most visited sites and your History. In the
History tab, the Menu icon allows you to clear the history.
Windows: When you have several windows currently opened, tap on
Windows to display the list of currently open windows. Tap on one to open it.
Refresh / Stop: Will stop loading the web page, if it is currently loading. Will
refresh the current web page once it has stopped loading.
Forward: Will go to the next page that you browsed.
More: Will give you access to other options (Find on page to search for a
specific word on the current page, Select text to select a section of text to put
into the system clipboard -- which you can then paste into another application
such as an e-mail by holding down your finger in a text field), Page info to get
information about the current web page, Downloads to view the list of items
you have downloaded from the Internet. Go to Home > Files > Downloads to
see the actual files that are saved on your device.
SETTINGS ALLOWS ADJUSTING how the navigator works.
Please note that some Web features requiring special plug-in software or
Active X controls may not work in this special version of the Web Browser.
7. APPSLIB AND APPLICA TIONS
7.1. Downloading and installing applications
Tap on this icon (WiFi Internet connection needed) to go to the
online Apps Market. This online library of free and purchasable
applications has hundreds of fun games and useful applications to
Page 10
download and use.
7.2. Deleting an application
Tap on this icon (found in the applications tab) and you'll see a list of
all the applications that have been installed on your device. Scroll
down to the application that you want to delete and then tap on it.
The application will be permanently deleted.
8. VIDEO
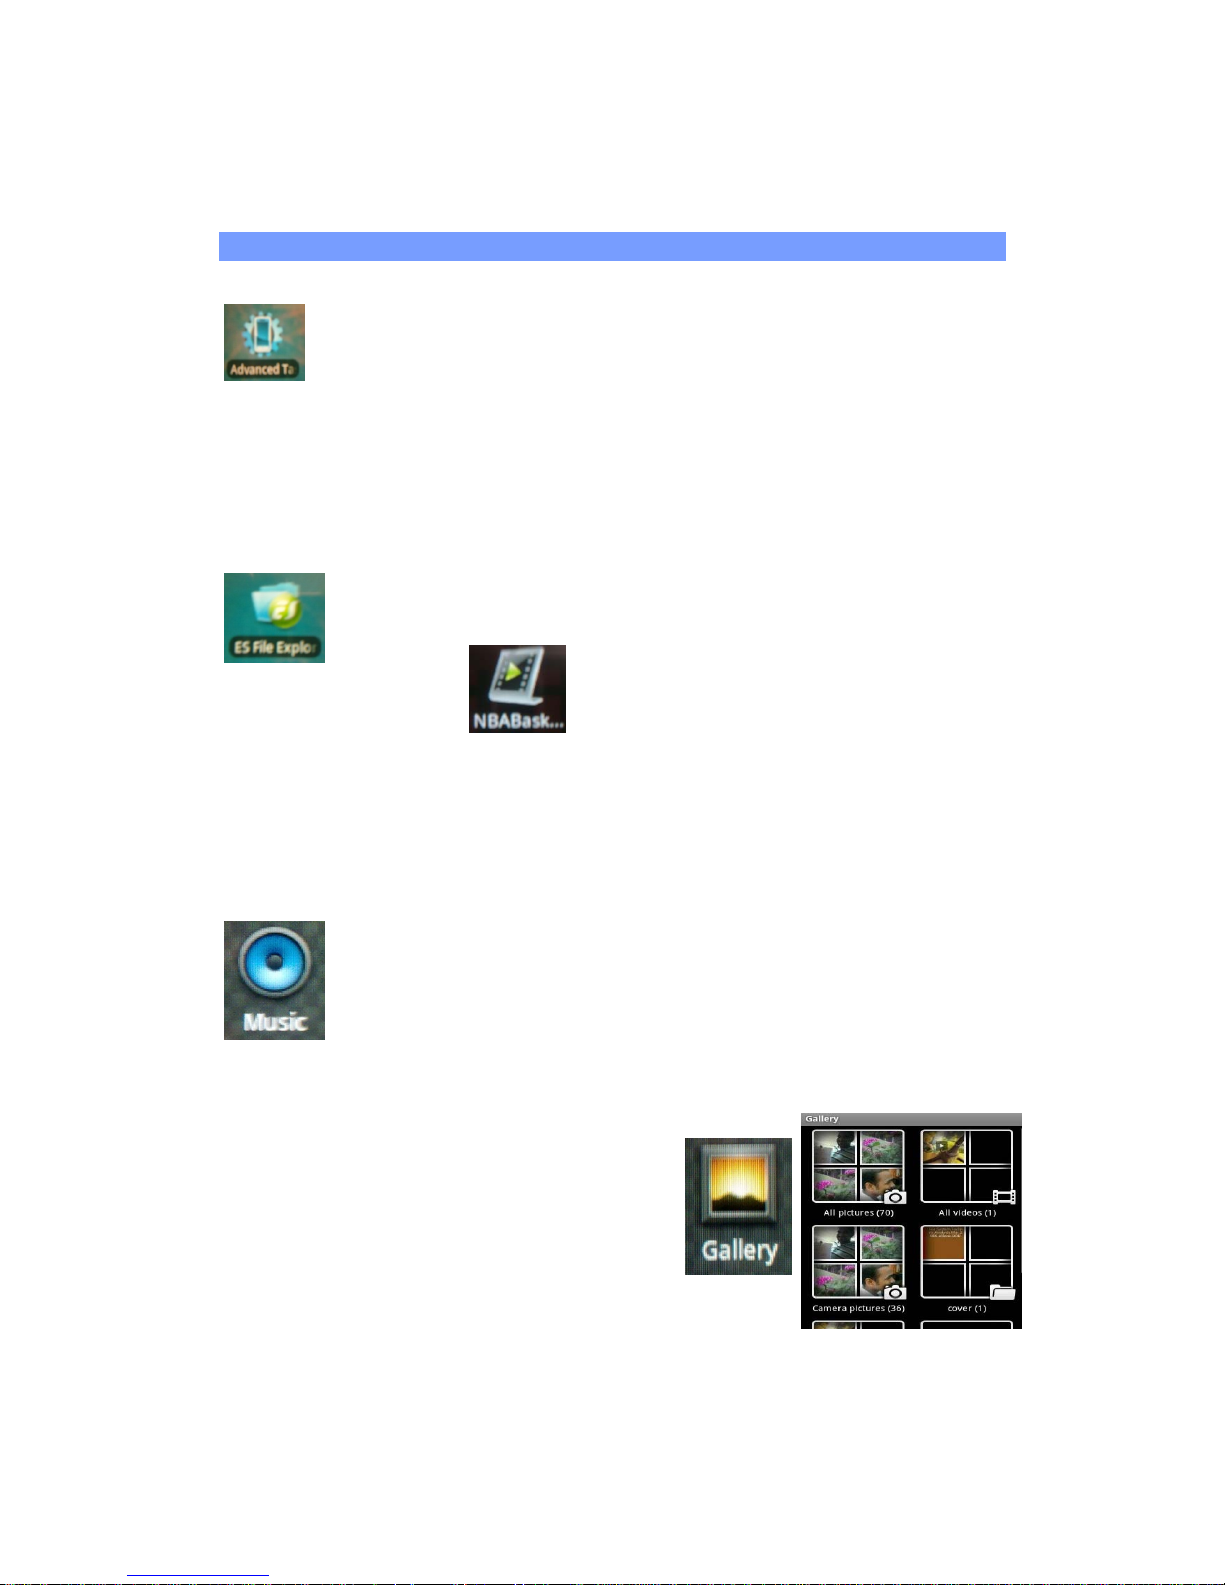
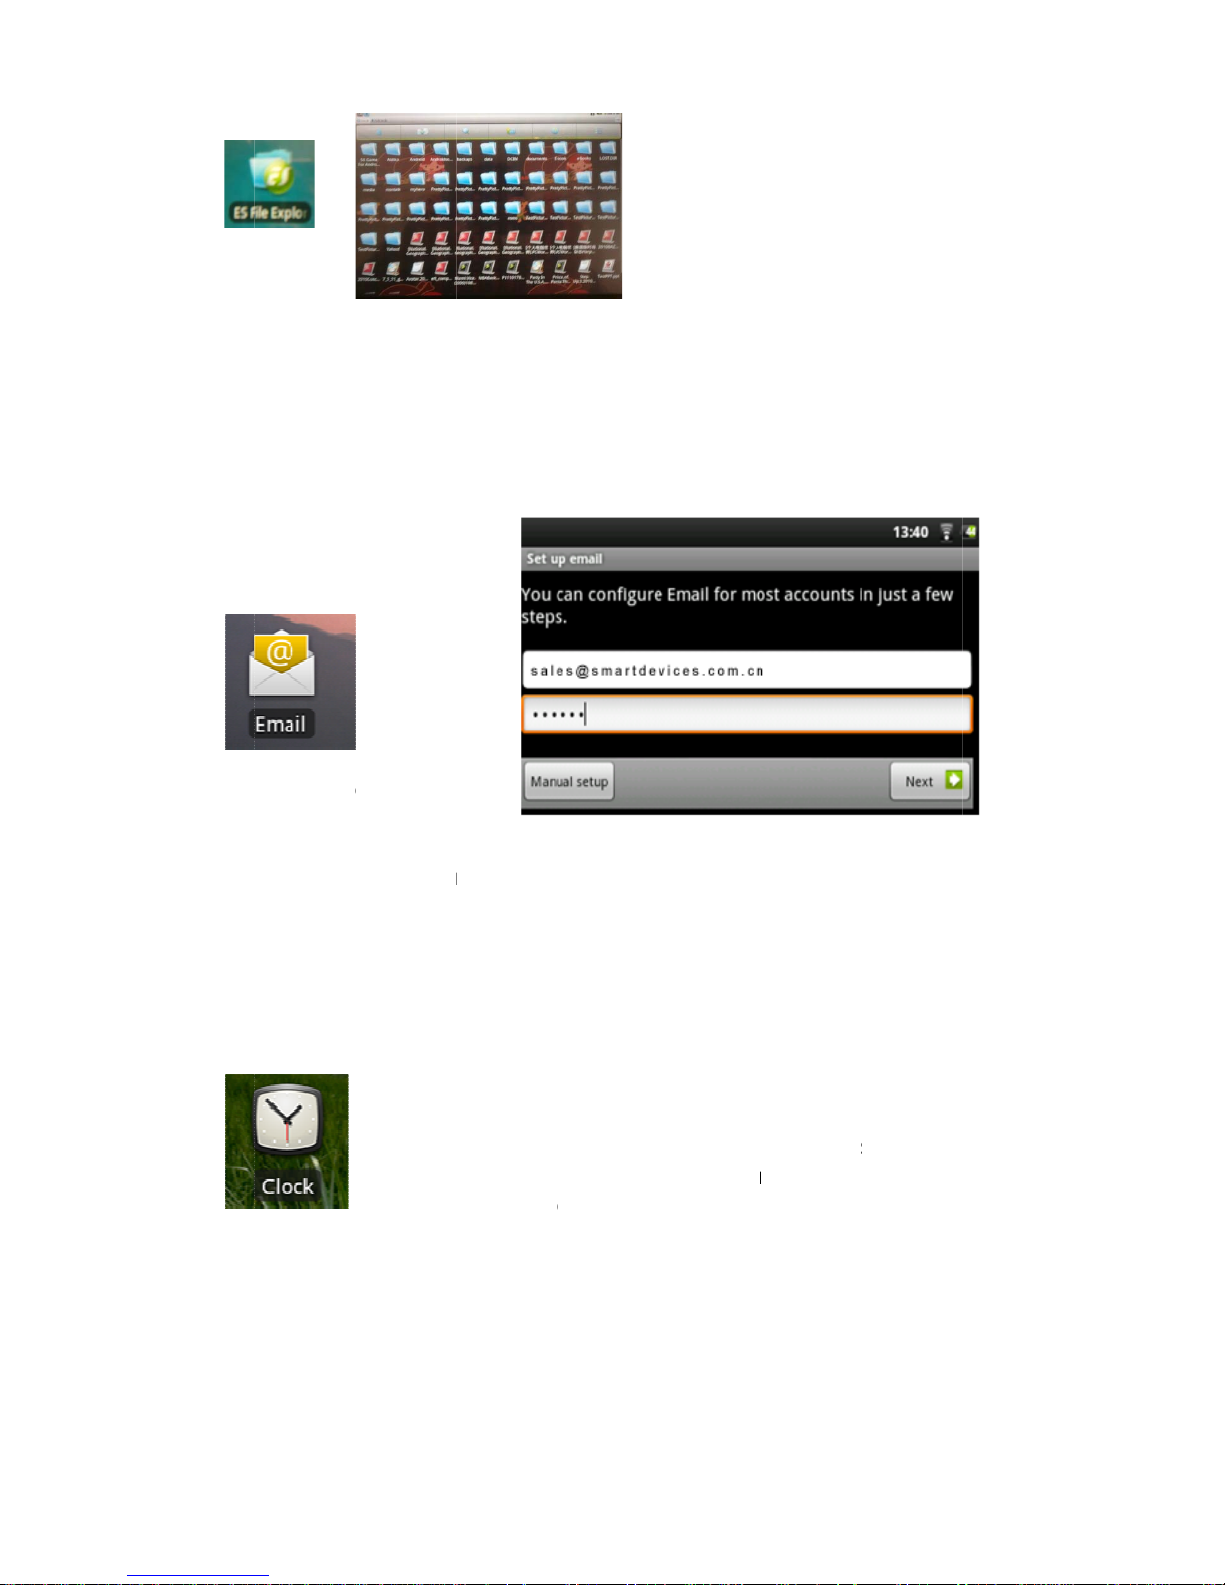
Copy the Video file into your TF card, put into the device TF
card slot, Press ES File Explore to enter into your TF card,
select file as , click the video file, then you can enjoy
your video.
9. MUSIC
Click Music Icon in the main menu to enjoy your music on your TF card
10. GALLERY
The gallery organizes your photos for you
by the folders you have put them into and
by the date the photos were taken.
11. FILES
Page 11
Us
edoc
1
2
Th
eyouche
ser
vTyppagweb
inc
onee
ent
1
3
De
e
on/
o
1
4
“ES File
ument to
e
. EMA
se are st
a
rself. You
ck with y
o
ice provi
d
ically ther
e
es on ser
v
site for s
e
ming and
d to enter
ire email s
. CLO
C
p sleep),
ff button
o
. LOC
A
Explore” t
o
nter into i
IL & C
O
ndard em
a
will need
t
ur Interne
t
er to find
t
paramet
e
needed t
o
set up b
o
incoming
outgoing
mail.
e
are "Hel
p
ice provi
d
tting up e
m
outgoing
m
into the
m
etup only
r
K
This appli
c
digital clo
c
on the scr
alarms (h
e
Deep Sle
e
the alarm
nce to p
u
L SLI
see the
d
t. ( click th
NTA
C
il and co
n
o
he
rs
th
and
"
er's
ail for va
ail serve
ail setup.
equires y
o
ation is
m
k on the
s
een, give
s
adphone
s
p mode (l
o
will not br
t it in regu
DESH
O
ocument
o
e .apk file
TS
tacts appl
i
rious ema
i
r names a
If you hav
e
ur user n
a
ore than
a
creen, pla
access t
o
needed t
o
ng press
ing it out
o
lar sleep
m
WS
n your T
F
to install t
h
cations th
a
l program
s
nd other i
n
a Googl
e
me and
p
simple cl
o
ys a rand
o
your mus
hear the
m
on power
f this slee
p
ode.
card; clic
e applica
t
t you will
. This will
formation
Gmail™
a
assword.
ck. It dis
p
m slide s
h
ic, and let'
s
). If yo
u
button >
P
mode. J
u
k the
t
ion)
need to s
e
give you
t
that you
w
ccount, t
h
lays a sty
l
ow that fl
o
s you set
r device i
s
ower off
>
st press t
h
t up
he
ill
e
ish
ats
in
e
Page 12
1
5
So
mpow
1.
P
2.
M
car
d
3.
Pcop
4. I
nkeydonsys
1
6
US
1
7
To
ap
p
foll
o
by
f
Sm
. UPG
R
e standa
er.
lease ba
c
ake sure
by FAT
3
lease do
w
y the "Sm
Shutdo
w
, in the m
e
’t take the
tem.
. ACC
E
B Host c
a
. CALI
calibrate t
h
ears, pre
s
wed
ive cross
c
artQ T7 w
ADE
rd USB d
e
kup perso
there is s
u
2.
nload the
artQT7_A
D
n mode,
c
antime pr
SD card
o
SSO
R
ble
BRAT
E
e touch s
s the “
enter tap
ill automa
t
THE D
vices ma
y
nal data s
a
fficient sp
a
firmware
f
" file to y
o
onnect th
e
ess the p
o
ut until th
e
IES A
This
Hos
t
THE
creen, the
” k
e
to comple
ically boot
WiFi:
T
Sync:
often
g
applic
a
Brigh
t
scree
n
EVICE
not functi
o
ved in th
e
ce on th
e
ile on you
r
ur SD ca
r
charger
p
wer key,
u
device fi
r
ND PL
cable will
port.
TOUC
H
system st
y until the
te the cali
b
.
urn on/of
f
Shut off t
h
oes out t
o
tion data.
ness: All
o
brightnes
n if they
c
T7.
Micro SD
compute
r
d root dir
e
ress and
h
ntil you s
e
st time su
c
UG-IN
S
allow you
r
SCR
arts when
screen c
a
ration. C
a
the WiFi
m
e synchro
the web t
o
ws three l
e
s.
onsume t
o
card, and
, after yo
u
ctory.
old the T
7
e the upg
r
cessfully
SmartQ t
o
EEN
the boot
A
libration a
libration i
s
odule.
nizing tha
t
o
synchro
n
vels of
o much
format th
e
unzip the
3G in the
ade interf
a
entering i
n
o
have a
U
ndroid ico
ppears,
complet
e
ize
SD
file,
“M”
ce,
the
SB
n
,
 Loading...