

Smartpond WPR2000 User Manual
MODEL #WPR2000
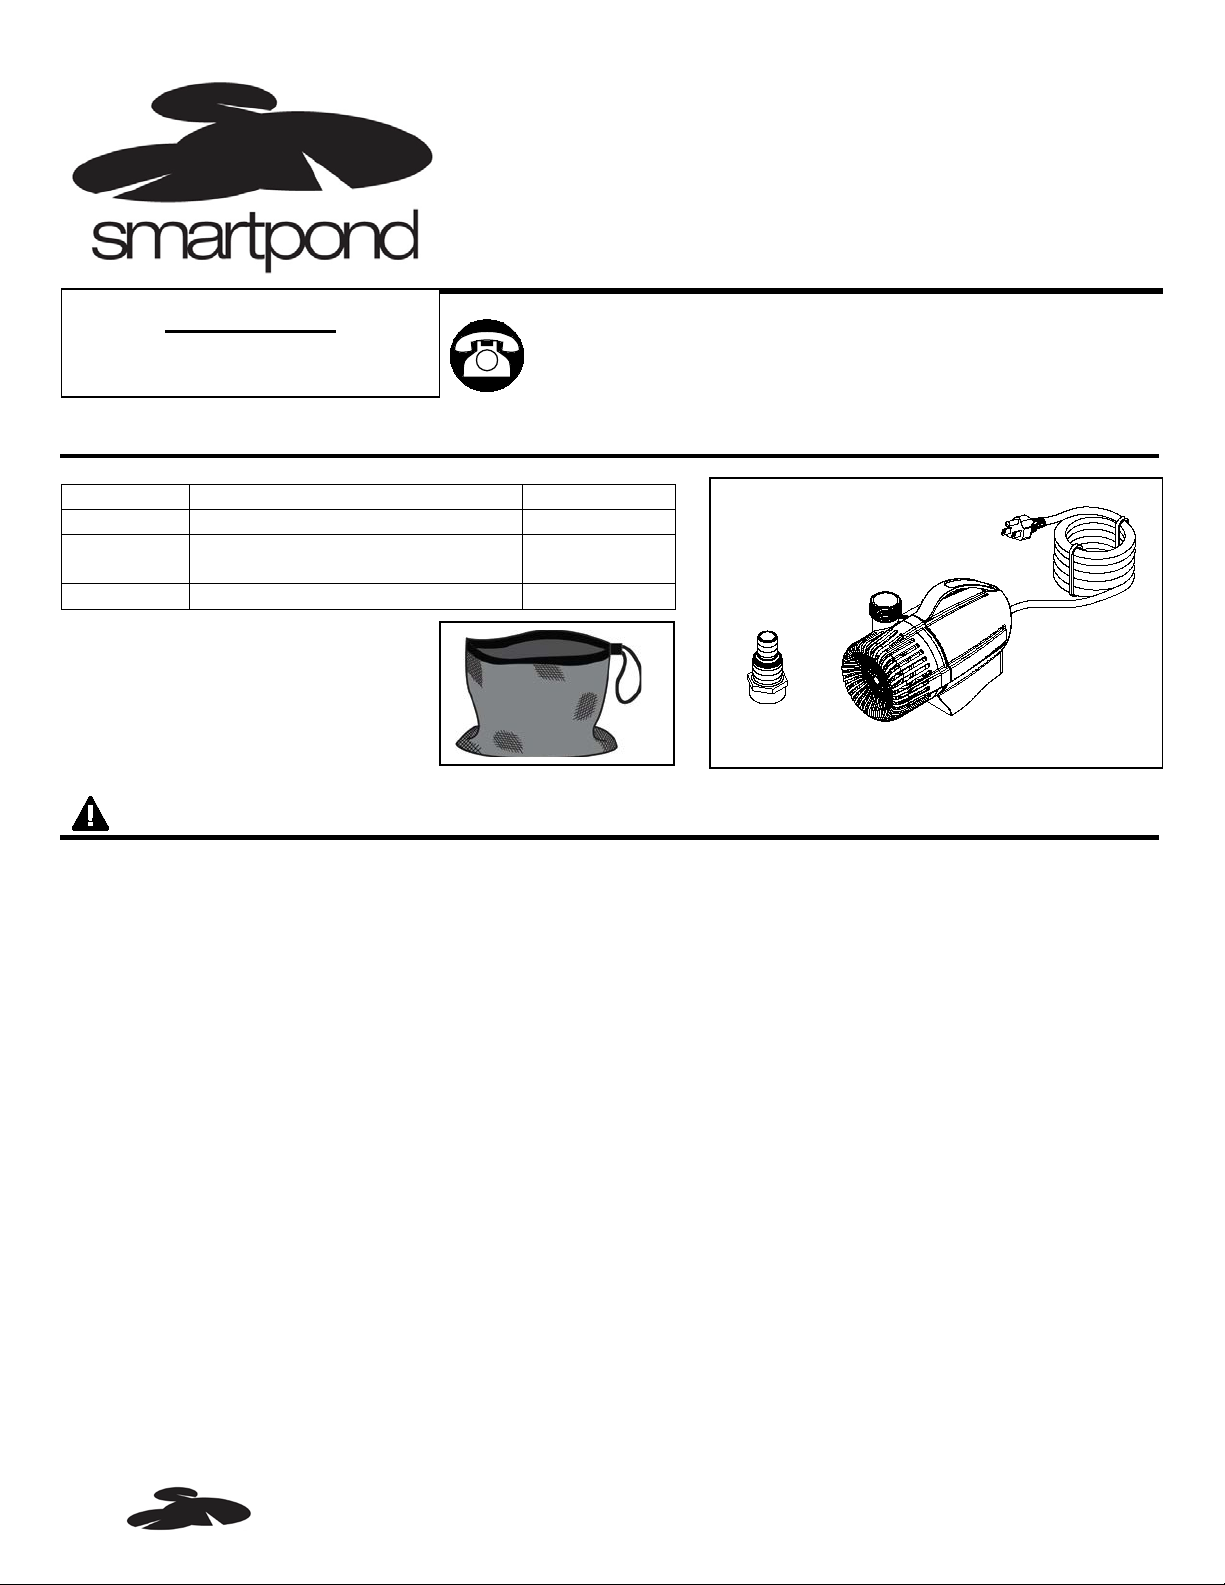
PACKAG E CONTENTS
WARNINGS AND CAUTIONS
Part
Description
Quantity
A
Pump
1
1 in. and 1-1/2 in. ID tubing
adapter
C
pumpshield™
1
A
B
C
®
Questions, problems, m i ssing parts? Before returning
REMINDER
BEFORE RETURNING TO STORE.
Submersible Waterfall Pump
2000 Gallons Per Hour
CALL 1-888-755-4497
B
WARNING
• Risk of electrical shock. This pump is supplied with a grounding conductor and grounding–type
attachment plug. To reduce the risk of electric shock, be certain that it is connected only to a properly
grounded, grounding-type receptacle.
• Do not exceed the voltage show n on the pump.
• Always disconnect pump from the power source before beginning any maintenance or work on the
pump.
• Inspect cord for damage before installation and/or maintenance. Replace the entire pump a ssembl y if
damage is found.
• Do not remove the grounding p in from the power cord plug.
• Risk of electrical shock: This pump has not been investigated for use in swimming pools or marine
areas.
CAUTION
• This pump has been evaluated f or use with water only.
• Use a proper power source as in dicated on the pump label.
• Keep the cord away from hig h t em per at ures or other heat sources.
• Do not pump heated liquids .
• Do not let the pump run dry. Pump must be completely submerged for pr oper operation and cooling.
• Operate in fresh water only. Avoid heavily chlorinated w at er and water with high pH levels .
• Do not lift the pump by its power cord.
WWW.SMART-POND.COM
PLEASE CALL 1-888-755-4497 BEFORE RETURNING TO THE STORE.
to your retailer, call our cust om er ser vice department at
1-888-755-4497, 8 a.m.-6 p.m., EST, Monday-Friday, or
email us at customercare@smart-pond.com.
1

PREPARATION
Before beginning assem bl y or operation of product, make sure all parts are present. Com par e parts with
OPERATION INSTRUCTIONS
Cut ring
Tubing
Adapter
Pump
GFCI
package contents list and diagram above. If any part is missing or damaged, do not attem pt t o ass emble,
install or operate the prod uct. Contact customer service for replacement parts.
• Estimated Assembly Ti me: 5 minutes
• Tools required for assembly: hacksaw.
1. For maximum water flow, i t is rec ommended that the largest
tubing size for your pump is use d. I f usin g 1 in. ID tubing,
proceed to step 2. If using 1-1/2 in. ID tubing, cut the adapter
as shown using a hacksaw. Fig. 1
Fig. 1
2. Connect tubing to the outl et of t he pump using an adapter.
Fig. 2
NOTE: Tubing is NOT INCLUDED.
Fig. 2
3. Place the pump inside the pumpshield™. Pull the drawstring
until the pumpshield™ is fully closed ar ound the tubing and
power cord. Tie a knot in the draw st r ing. Fig. 3
Fig. 3
4. Place the pump into the water and connect to a proper power
source. Fig. 4
Fig. 4
PLEASE CALL 1-888-755-4497 BEFORE RETURNING TO THE STORE.
WWW.SMART-POND.COM
 Loading...