

Smartpond DP210 User Manual

MODEL #DP210
PACKAG E CONTENTS
WARNINGS AND CA UTIONS
Part
Description
Quantity
A
Pump
1 B Inlet screen
1 C Flow control
1
A C B
Questions, problems, m i ssing parts? Before returning
REMINDER
BEFORE RETURNING TO STORE.
Submersible Pond Pump
210 Gallons Per Hour
CALL 1-888-755-4497
WARNING
• Risk of electrical shock. This pump is supplied with a grounding conductor and grounding–type
attachment plug. To reduce the risk of electric shock, be certain that it is connected only to a properly
grounded, grounding-type receptacle.
• Do not exceed the voltage show n on the pump.
• Always disconnect pump from the power source before beginning any maintenance or work on the
pump.
• Inspect cord for damage before installation and/or maintenance. Replace the entire pump assembly if
damage is found.
• Do not remove the grounding p in from the power cord plug.
• To reduce the risk of electric shock, use only on portable, self -contained fountains no larg er than 5 ft. in
any dimension.
• Risk of el ectrical sh ock – This pump has not been investigated for use in swimming pools or marine
areas.
CAUTION
• This pump has been evaluated f or use with fresh water only .
• Use a proper power source as in dicated on the pump label.
• Keep the cord away from hig h t em per at ures or other heat source s.
• Do not pump heated liquids.
• Do not let the pump run dry. Pump must be completely submerged for proper operation and co oling.
• Operate in fresh water only. Avoid heav ily chlorinated water and wat er w it h hi gh pH levels.
• Do not lift the pump by its power c ord.
PLEASE CALL 1-888-755-4497 BEFORE RETURNING TO THE STORE.
WWW.SMART-POND.COM
to your retailer, call our cust om er ser vice department at
1-888-755-4497, 8 a.m.-6 p.m., EST, Monday-Friday, or
email us at customercare@smart-pond.com.
PREPARATION
Before beginning assembly or operation of product, make sure all parts are present. Compare parts with
OPERATION INSTRUCTIONS
CARE AND MA INT ENANCE
GFCI
Pump
Inlet screen
Flow control
Tubing
package contents list an d diagram above. If any part is miss in g or damaged, do not attempt to as semble,
install or operate the product. Contact customer service for replacement parts.
• Estimated Assembly Ti me: 5 minutes
• No tools required for assembly.
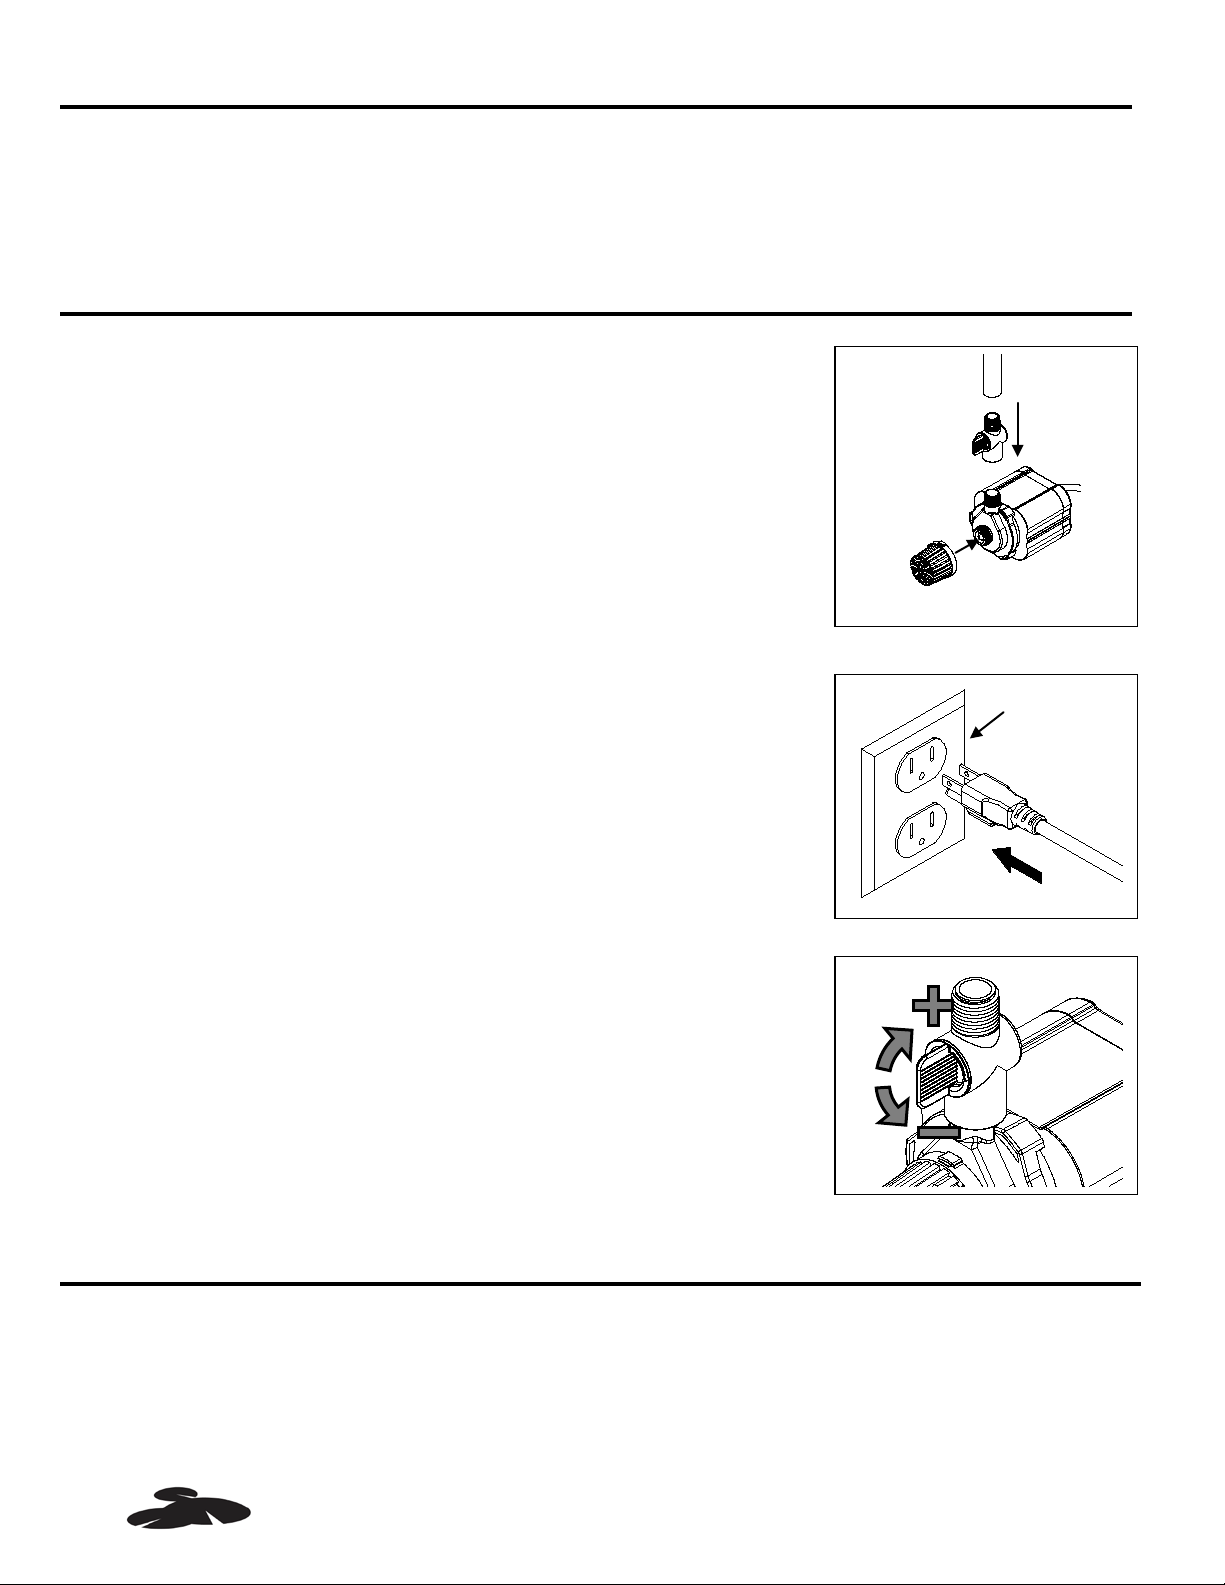
1. Screw the inlet screen to the intake of the pump, and then connect
tubing to the outlet of the pump with flow control.
Fig. 1
NOTE: Tubing is NOT INCLUDED.
Fig. 1
2. Place the pump into the wat er and c onnect to a proper power
source. Fig. 2
Fig. 2
3. Adjust the flow control to the pr eferred setting. Fig. 3
Fig. 3
• Regular cleaning of the pump may be necessary depending upon the environment in which it is
operated. Clean the pump w hen it is visibly soiled or when a drop in performance is detected.
• Before cleaning, always disconnect the pump from the power source.
• Remove all parts from the pum p and clean in warm, soapy wat er .
• Disassemble inlet screen and/or pump cover, and remove the impeller housing to expose the
impeller assembly. Use a soft cloth or brush to clean the impeller assembly and the inside of the
impeller housing. Refer to the diagram in the replacement parts lis t .
PLEASE CALL 1-888-755-4497 BEFORE RETURNING TO THE STORE.
WWW.SMART-POND.COM
 Loading...