

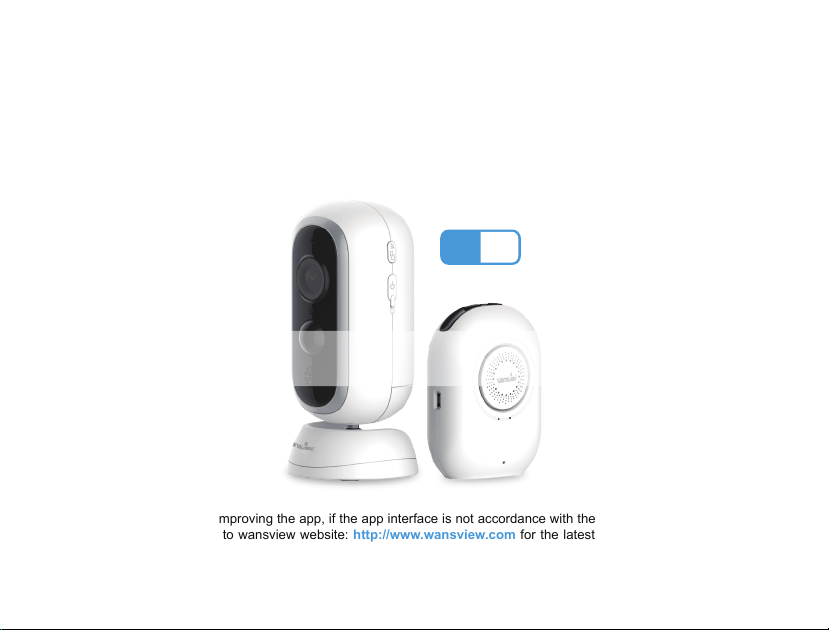
Wire-Free Battery-Powered
1080P Indoor & Outdoor Home Security Camera
User Manual
B1 T1
Base Station
We keep improving the app, if the app interface is not accordance with the instructions,
please go to wansview website: http://www.wansview.com for the latest instructions.
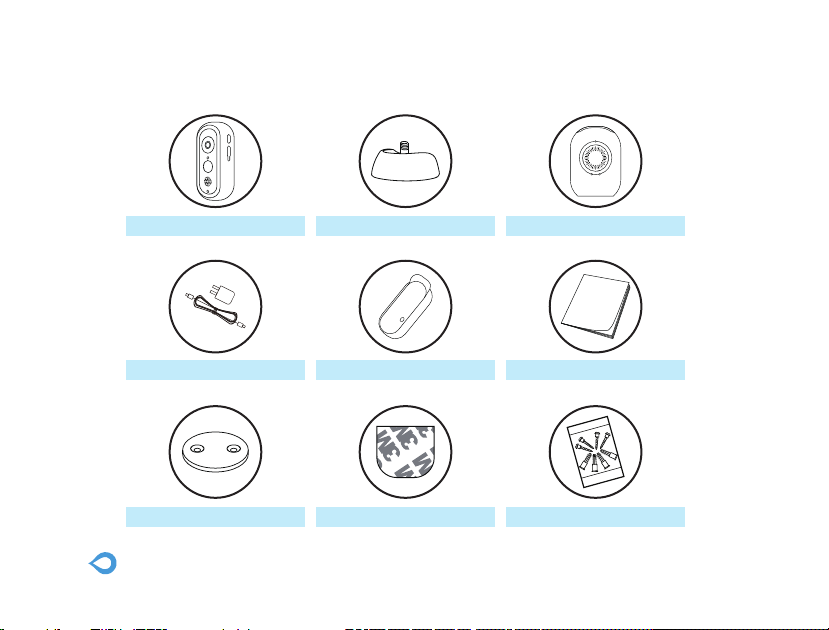
What’s in the Box
Battery camera
Power adapter Installation guideWeathproof cover
Magnetic wall mount 3M tape
2
Base stationBase bottom
Mounting screws&Anchors
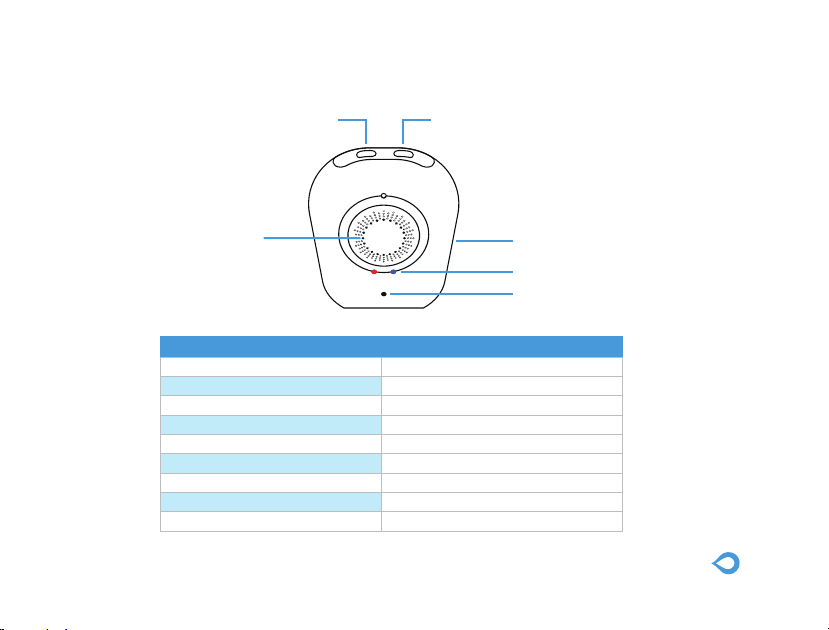
Product Diagram(Base Station)
WiFi Pair ButtonSync Button
Speaker
Memory card slot
Indicator Light
Microphone
Base Station
Speaker
Microphone
Micro Memory Card
Internet Connection
Max Number of Connected Cameras
Adapter Power
Dimensions
Weight
Working Environment -10°C to 50°C / 14°F to 122°F,RH≤95%
Built-in 1W 8Ω
Built-in
Up to 128GB
Wire-Free Connection
4
5V 2A
60*31.5*81.9mm
54g
3

LED Indicator & Working Status(Base Station)
LED indicaton
OFF
Solid on in red
Flashes red&blue slowly alternately
Solid on in blue
Flashes blue slowly
Flashes red quickly
Button Controls(Base Station)
Botton
Wi-Fi Configuration Button
Sync Button
press the Wi-Fi Configuration Button
& Sync Button at the same time
4
function operation
Pair with the WIFI
pair with the camera
Restore to factory settings
working status
Sleep mode/Power Off
NO Internet
WIFI configuration
connected to internet
pairing mode
Restore to factory setting
Press and hold 5 seconds to enter pairing mode
with the LED indicator flashing red&blue slowly
Press and hold 6-8 seconds to enter pairing mode
with the LED indicator flashing blue slowly
press and hold for 3 seconds
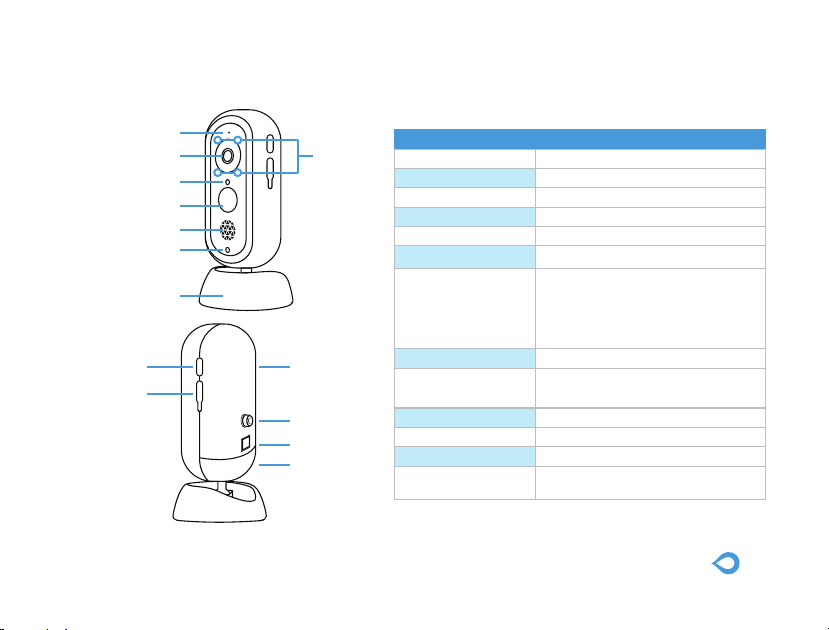
Product Diagram(Camera)
Microphone
2.0 MP Lens
Photoresistance
Motion sensor
Speaker
Indicateor light
Base
Sync Button
Micro USB
Night
vision LED
Battery
compartment
Screw
Button
Battery Cover
Camera
Lens
Sensor
Resolution
Microphone
Speaker
PIR Detection
Battery life
Weight
Adapter Power
Internet 2.4G Wi-Fi, Effective Range
Weather Proof IP65
Dimensions 61.8*61.8*130.2mm
Working Environment
105°wide angle ,f=2.0
1/2.7 inch
1080P(1920*1080)Full HD Resolution
Built-in
Built-in 1W 8Ω
Detection angle110
Two 18650 Lithium batteries(not
include) last up to,Battery life will vary
based on device settings,
usage, and environmental factors.
Actual results may vary.
193g
5V 2A or Two 18650 Lithium batteries
(not include )
-10°C to 50°C / 14°F to 122°F,
RH≤95%
5

LED Indicator & Working Status (Camera)
LED indicaton
OFF
solid on in red
flashes red & blue slowly
solid on in blue
working status
Sleep mode/Power Off
Connected the Base station or charge the camera
pairing mode
fully charged
Button Controls(Camera)
Botton
Sync Button pair with the Base station
function operation
Press and hold 10 seconds to enter pairing mode
with the red&blue LED indicator flashing red&blue
slowly
Caution
·
Use the included power adapters only to charge the camera and the base station within the permitted voltage range.
·
Only the camera is waterproof. The base station and adapters are for indoor use only.
Make sure the internet is functional and fast for live data feed.
·
·
Do not use the product at temperatures higher or lower than the specified range.
Do not use in environments with strong electromagnetic interferences or near corrosive substances.
·
·
The warranty does not cover defects and damages caused by misuse, unauthorized dismantling, or natural hazards.
·
The 18650 battery life varies according to the frequency of the triggers and the video resolution settings.
The PIR motion sensor can only detect motions within a certain ranges and will not be activated by motions out of the range
·
6
Get Started
Download APP
1 Go to the App Store or Google Play to search and download “wansview” APP to your smart
phone or tablet.
2 Or scan below QR code to get the APP.
7

Power On Base Station
1 Connect the base station to a power source.
8
2 Please make sure the base station is in the
same room,close to the router,before
performing the setup.
Note:
The LED indicator on the base station will keep
blue when connected to the internet successfully.

Power the Camera
1 Please install two 18650 lithium batteries in
the camera before use.
PRESS
2 Coming with micro USB connector on the
battery, the wifi camera can be charged by
universal 5V 2A phone adapter,Save your
money for new batteries continuously.(No
power adapter packed in).
tips:In order to extend the working time of the
battery, please turn off the motion sensor when
using it outdoors.

Connect Base Station to Network
Connect your mobile phone with 2.4G WiFi. (5G is not supported for the camera)If you are using
a dual band router, make sure your 2.4G WiFi name is different from your 5G one.
1 Launch Wansview App,
Click on Add Battery
Camera.
2 Select [Add Base Station
via WiFi method]
3 Click on [Start to sync
Base Station]
9

4 Long press [WiFi Pair Button]
on the Base station until you hear
[Please Sync the Base Station to
the Router], then Click on [Red
and Blue lights flash alternately].
10
5 Scan the QR code on the
back of the Base Station.
5 Name Base Station, then
click on [Next]

7 Your home WiFi will be
located, please input your
WiFi password correctly.
Click on [Connect to WiFi].
8 Base Station will try to
connect 2.4G, and you will
hear [Received WiFi
Information] from the Base
Station
9 Once the Base Station is
connected, you will hear
[Succeed to Connect Router
] and Add Base Station
Successfully.
11

Sync Battery Camera to Base Station
1 Click On [Start to pair
Battery Camera].
12
2 Ensure that the camera
is inserted workable
battery or plugged with
power supply, then click on
[Continue].
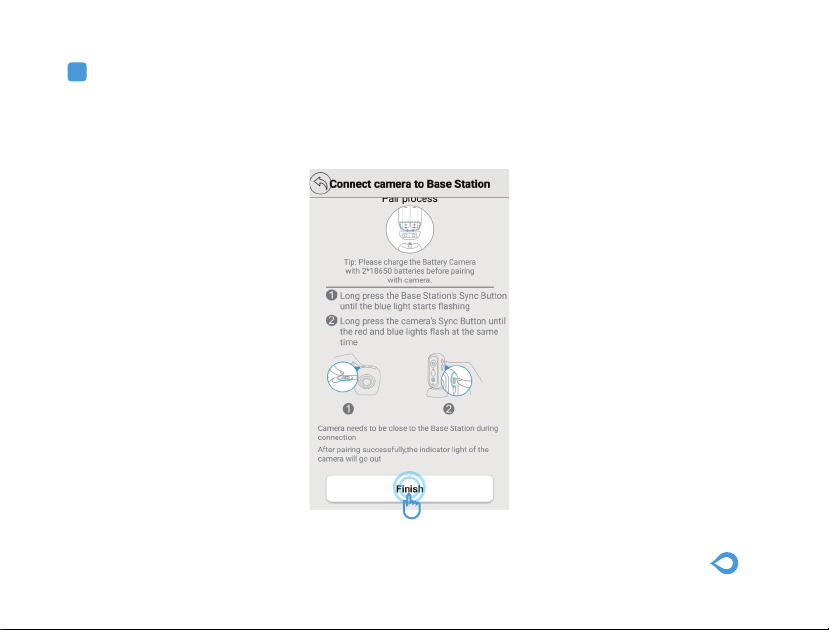
3 Long Press the [Sync Button] on Base Station until the blue light starts flashing and hear
[Entering Sync Mode].
Then long press the [Sync Button] on Battery Camera until the red&blue lights flash at the
same time. Click on [Finish] When you hear [Sync Succeed] and Base Station will be Online.
13

Click On the portrait of the Base Station, it will automatically jump to the page
list and display the current channel and power. Clicking in will display the current battery camera
online.
Low power
Tip: When the battery is low, it
may affect the use of your camera.
Please replace the battery or
Charging
14
power the camera.

Full screen view
monitorExit video
Flip
16
Intercom
Screen capture
Video
Mirror
Mirror flip
15

Fasten the mounting screws into the wall and
attach the magnetic mount.
When you are mounting the camera to
drywall, be sure to use the plastic anchors.
On a desktop or a shelfOn the wall(Camera)
1718

On the wall(Base Station)
Common FAQ
1.When the
Reply:Please replace the battery or power the device in time.
2. When the base station cannot connect to the router
Reply: Is the base station too far away from the router, check if the
mobile APP is updated, and the password is correctly entered when
pairing, please check the wireless password.
3. The battery camera cannot be paired successfully with the base station.
Reply: Is it too far away, please close and reconnect
APP prompts low battery, some functions may not start.
19

Sample Description: Base Station
Trade Mark: N/A
Model number: 850G, 851G, 852G, T1, T2, T3.
Operating Temperature: ‐10° C to 40° C
This product is a fixed location. To comply with RF exposure requirements, a minimum separation distance of 20cm must be maintained
between the user’s body and the device, including the antenna. Use only the supplied or an approved antenna.
This device in compliance with the essential requirements and other rele
have been carried out.
1. CAUTION : RISK OF EXPLOSION IF BATTERY IS REPLACED BY AN INCORRECT TYPE. DISPOSE OF USED BATTERIES
ACCORDING
TO THE INSTRUCTIONS
2. The device complies with RF specifications when the device used at 20cm from your body
Manufacturer's Name: Shenzhen Smarteye Digital Electronics Co.,Ltd.
This product can be used across EU member states
FCC WARNING
This device complies with part 15 of the FCC Rules. Operation is subject to the following two conditions: (1) this device may not cause harmful
interference, and (2) this device must accept any interference received, including interference that may cause undesired operation.
Any changes or modifications not expressly approved by the party responsible for compliance could void the user's authority to operate the
equipment.
This equipment has been tested and found to comply with the limits for a Class B digital device, pursuant to Part 15 of the FCC Rules.
NOTE:
These limits are designed to provide reasonable protection against harmful interference in a residential installation. This equipment generates,
uses and can radiate radio frequency energy and, if not installed and used in accordance with the instructions, may cause harmful interference
to radio communications. Howeve
If this equipment does cause harmful interference to radio or television reception, which can be determined by turning the equipment of
on, the user is encouraged to try to correct the interference by one or more of the following measures:
-- Reorient or relocate the receiving antenna.
-- Increase the separation between the equipment and receive
-- Connect the equipment into an outlet on a circuit di
-- Consult the dealer or an experienced radio/TV technician for help.
o maintain compliance with FCC
T
20cm the radiator your body: Use only the supplied antenna.
FCC ID: ZCB-850G
, there is no guarantee that interference will not occur in a particular installation.
r
f
from that to which the receiver is connected.
ferent
’
s RF Exposure guidelines,
vant provisions of Directive 2014/53/EU. All essential radio test suites
r.
This equipment should be installed and operated with minimum distance
f and
between

LET US KNOW
WHAT YOU THINK
Thank you so much for your order and trust to Wansview.Please feel free to contact us if you
have any questions about the product application.
As a young and growing company, it would mean the world to us if you could leave an
honest review about our product and services.
US/CA: service2@wansview.com
UK:service3@wansview.com
Facebook: www.facebook.com/WansviewClub/
Youtube: https://www.youtube.com/channel/UCPRXQcIkLsMAWQtpGxVx_jw
The instruction is for reference only. Slight differences may be found in the user interface.All
the designs and software here are subject to change without prior written notice.
For latest instructions, please go to www.wansview.com to download.
US/CA:service2@wansview.com
UK:service3@wansview.com
 Loading...