

SMART desks iLid Touch Assembly & Instruction Manual
ASSEMBLY INSTRUCTIONS
Touch
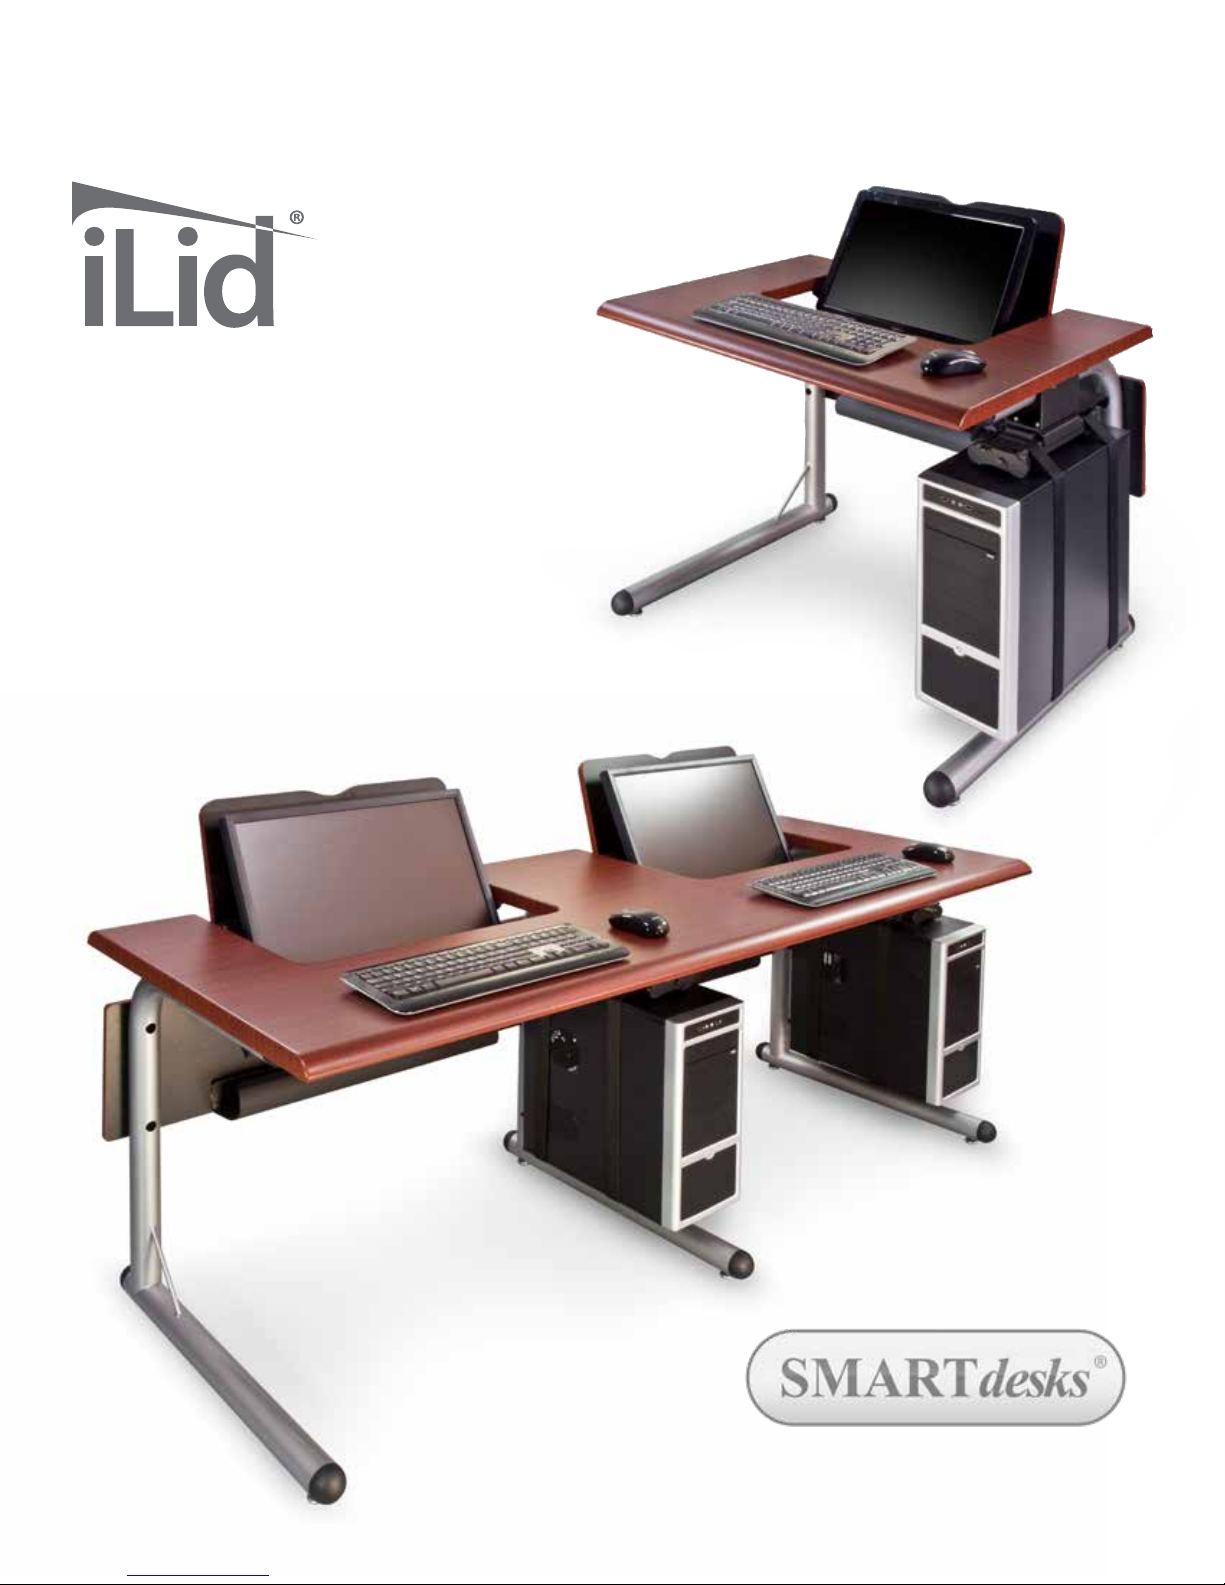
Tables for VESA Mounted Touch Screens and PCs.
Shown with optional EZ Cinch CPU holder, not inlcuded.
Modeled with LCD screens, CPUs, wireless keyboards and mice, not included.
iLid® Tables are available with laminate
tops and PVC edge trim (not shown) and
thrmofoil tops with contoured self edges
(shown).
Design of parts are subject to change.
©2018 CBT Supply, Inc. All rights reserved. SMARTdesks® and
iLid® are registered trademarks of CBT Supply, Inc. Designs
are proprietary to CBT Supply, Inc. manufactured for each
customer with customization.
www.smartdesks.com
800 770 7042
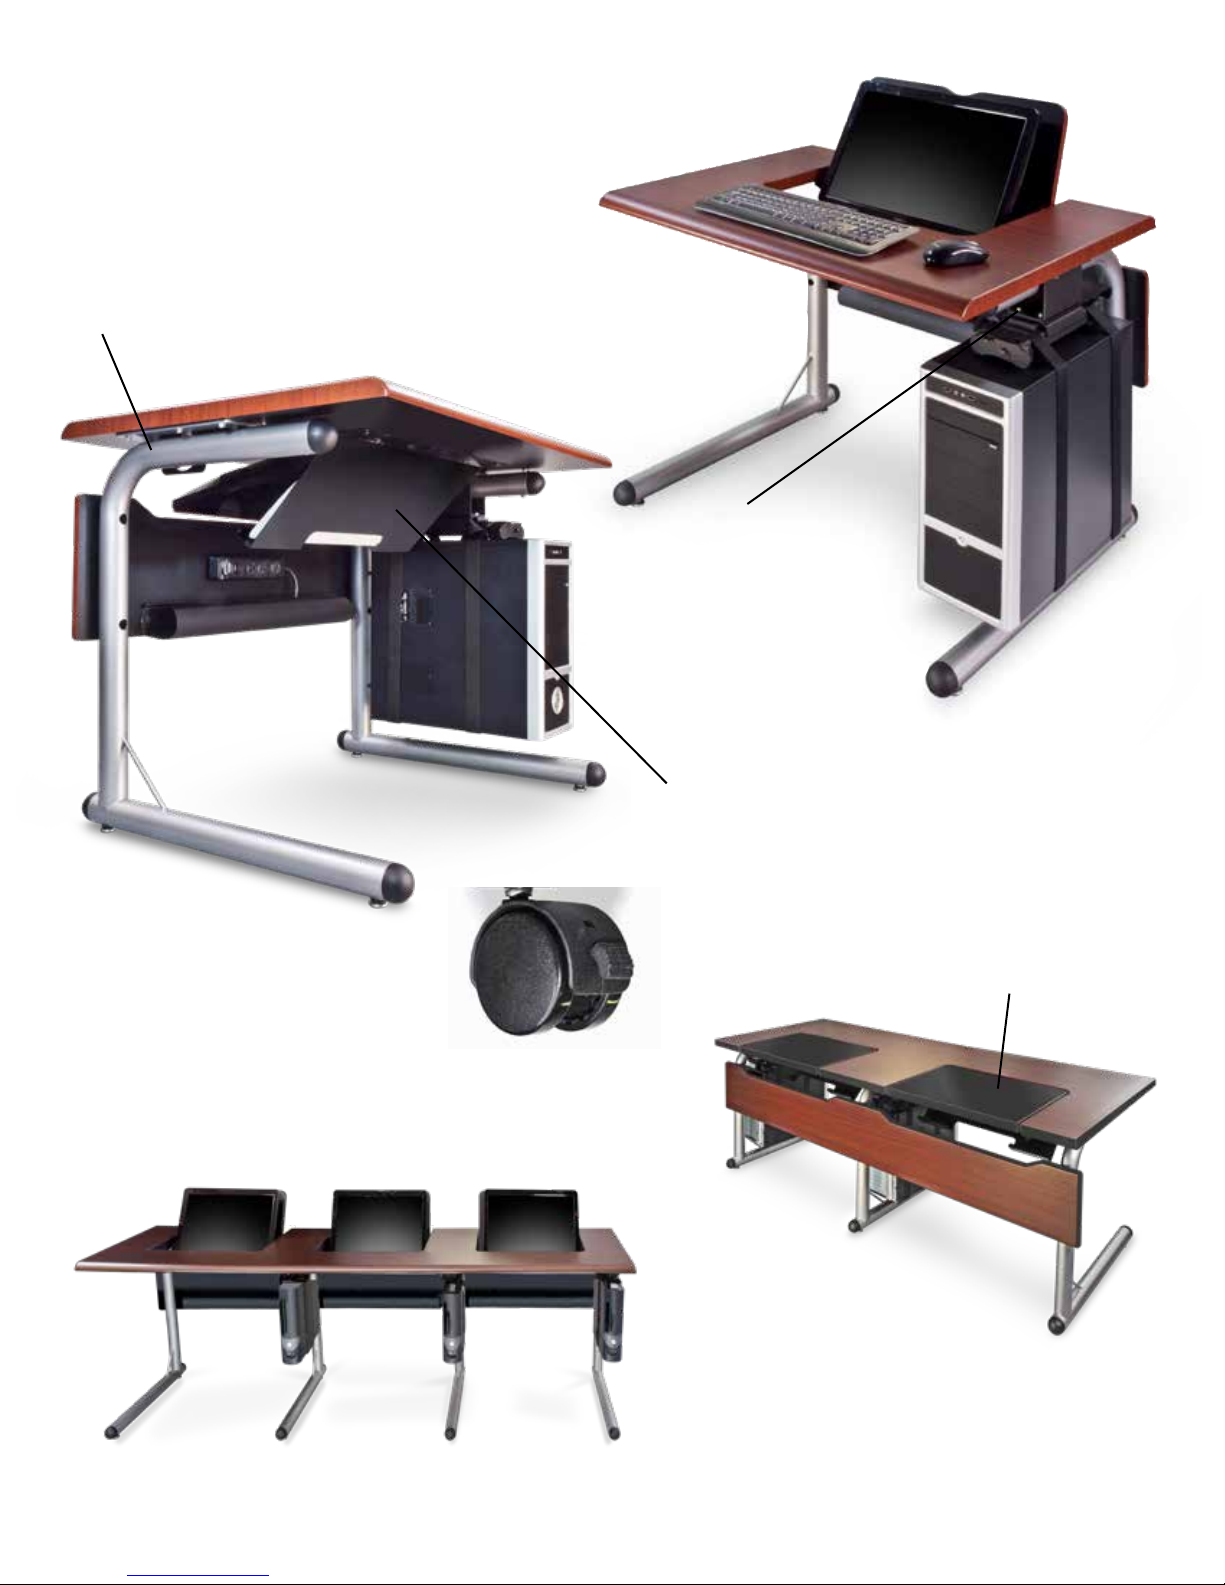
Parts Identification
Available in thermofoil with contoured self edges
or laminate with PVC edges.
Legs:
iLid® Tables are available in singles with two legs,
doubles with three legs and triples with four legs.
CPU Holders are options.
They mount with a
braket over the
preferred leg, installing
with the hex/phillips
head 1/4-20 bolts. CPU
holders have separate
mounting instructions.
Legs may have 1” adjustable floor glides
(standard) or locking casters (optional).
Modesty panel attaches with wood screws that hang on keyhole
mounts on legs. Neatlinks wire management channels and power
strips install on the modestey panels with wood screws.
Keyboard storage tray (shown) or retractable dual
arm 26” x 8” keyboard tray installs here with wood
screws.
The standard iLid top color is black. Thermofoil
designs may be specified to match the top.
This double table shows the laminate treatment with PVC edge trim on top, modestey
panel, and standard, black iLid top. Each iLid
top installs with a set of mounting hinges.
iLid® Table Instructions ©2018 CBT Supply, Inc. 2 Technical Support: 800-770-7042
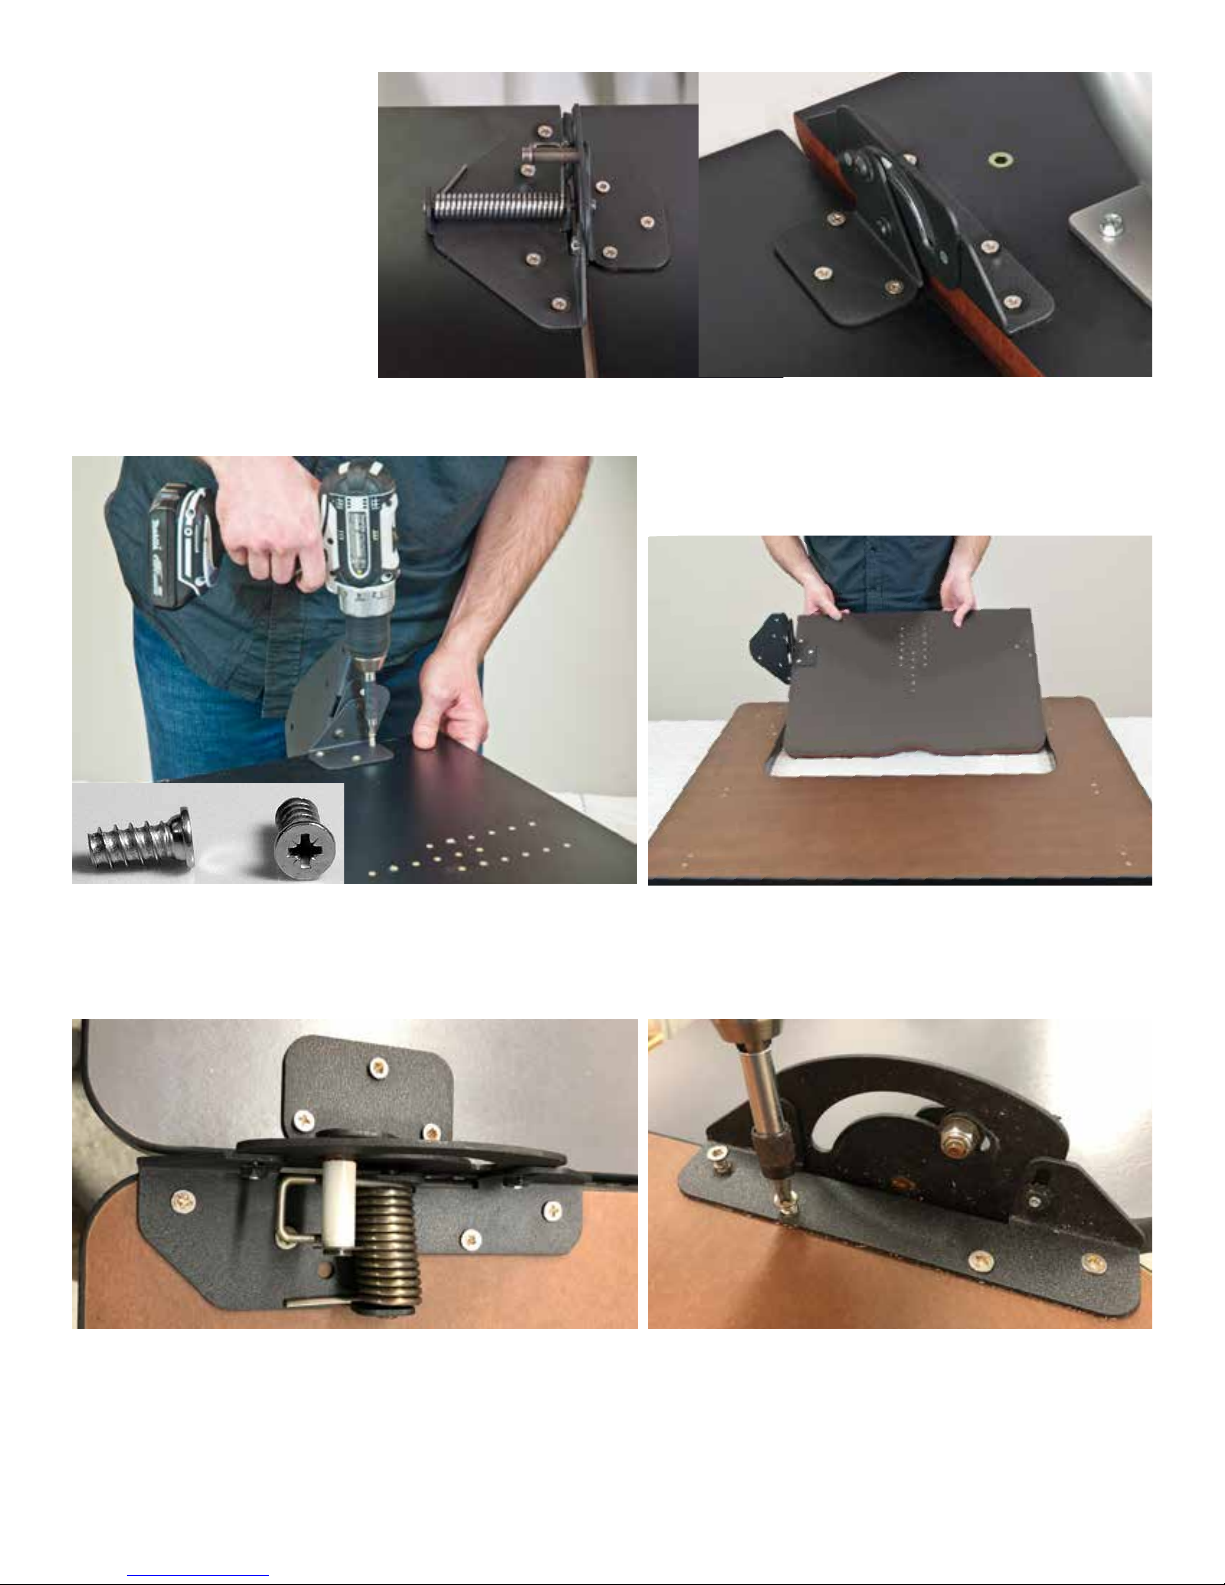
Install iLid into
table top
There are two types of hinges
that are mounted in pairs.
Start by mounting the spring
loaded hinge to the lid on
the user’s left side.
Each iLid mounts with a spring-loaded hinge and a passive friction hinge.
The spring will keep the lid in the open position. Use three
Euro Screws to install.
The spring will need to be tensioned to get the bracket in
this position for installation. Once in place over the pilot
holes, install with Euroscrews.
On a padded work surface, place the table top face
down. Put the iLid with springloaded hinge in place.
Next, the passive friction hinge can be installed
with Euroscrews.
iLid® Table Instructions ©2018 CBT Supply, Inc. 3 Technical Support: 800-770-7042
 Loading...