

ASSEMBLY INSTRUCTIONS
TABLES
A grouping is arranged, then the casters are
locked to keep the arrangement stable. Plako®
interlocking plates are fixed to the underside
to provide additional connected stability to the
arrangement.
Three legs are attached to each iGroup Table
Element, using 8 hex head/phillips drive 1/4-20
bolts, provided for each leg.
www.smartdesks.com
800-770-7042
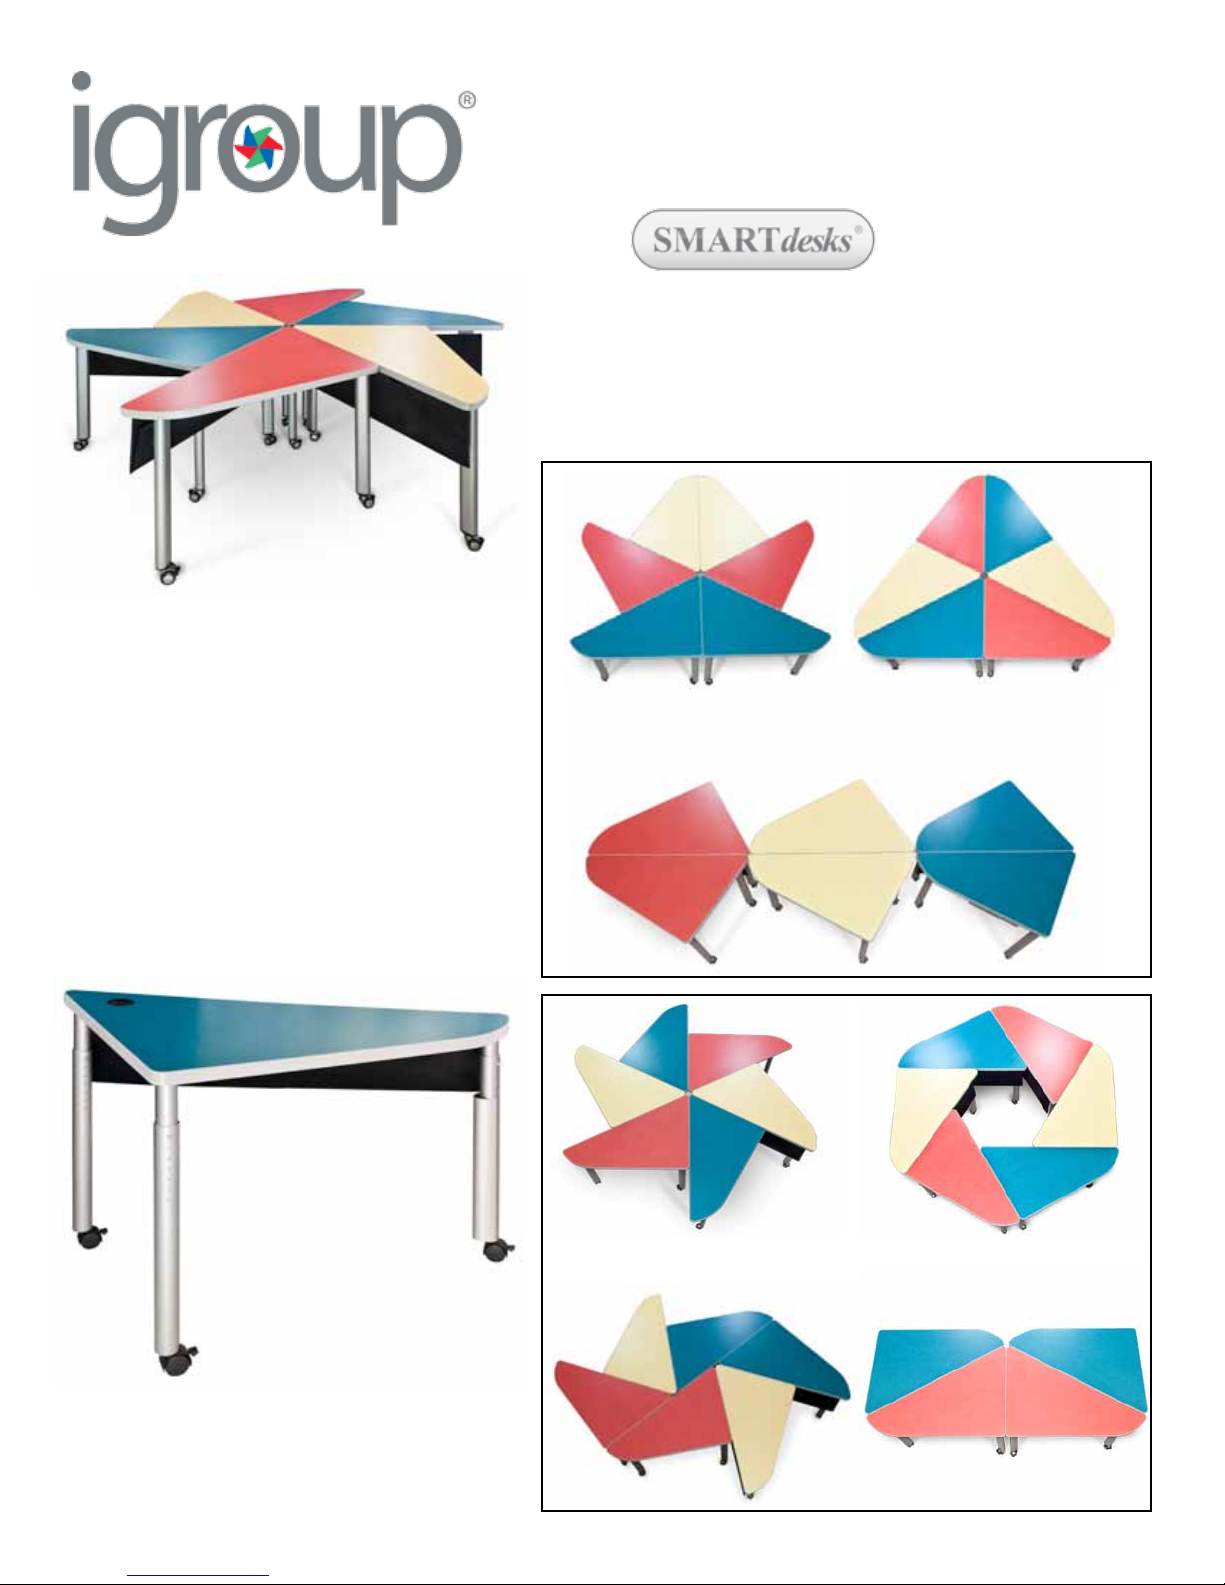
iGroup® Tables are shaped in right triangles with a curve on the
user side. They are produced to order with this curve on the
right or left side, usually in sets, to produce mirror-image shapes
or radial shapes.
These are Mirror-Image shapes made up of equal
numbers of Lefts and Rights.
Mesh modesty panels provide wire management with hook/loop closures. They hang from
two hooks which are attached with screws.
Legs may be fixed height or adjustable height.
They install the same way. A SnapChase™
wire management sleeve is shown installed on
a rear leg.
These are Radial Shapes
made up of All Lefts or All Rights.
© 2014 CBT Supply, Inc. dba SMARTdesks® All rights reserved. SMARTdesks is a registered trademark of CBT Supply, Inc.

Install three legs
Use a Phillips #2 drive or 3/8” hex drive to
install eight 1/2” bolts for each leg.
Install Plako joining plates
Plako clips are used to hold the igroup
table elements together as configured.
The pilot hole pattern is a group of four.
Use four 1-1/8” wood screws per hub to
install using #2 Phillips driver. The clips
interlock to form the joining plate.
© 2014 CBT Supply, Inc. dba SMARTdesks® All rights reserved. SMARTdesks is a registered trademark of CBT Supply, Inc.

Install modesty panel hooks.
Install two hooks for suspending the modesty
panels. Each installs into pilot holes with two
wood screws, each.
Modesty panel: steel frame with mesh fabric and hookloop closures for wire management.
Hang the wire management modesty panel on
two hooks.
Press SnapChase™ wire management channel onto the preferred
leg for wire management. SnapChase™ fits any leg and is easily
repositioned.
© 2014 CBT Supply, Inc. dba SMARTdesks® All rights reserved. SMARTdesks is a registered trademark of CBT Supply, Inc.
 Loading...