

Smart Companion K9000 User Manual

USER GUIDE
PRODUCT SPECIFICATIONS | GETTING STARTED | STATUS AND DESCRIPTIONS
ACTIVATION INSTRUCTIONS | FLEET CENTER WEB SPECIFICATIONS

K9000-SMART COMPANION SPECIFICATIONS
THE WORLD’S SMALLEST FULL BAND 3G/2G PERSONAL TRACKER
SPECIFICATIONS:
• Size: 77 mm x 47 mm x 20 mm
• Weight: 70g
• Charging voltage: Micro USB charging
port, DC 4.2 V-5.5 V/400mA
• Power consumption: 60mA standby
current and 5mA
deep sleep
• Operating temperature: -20°C to 55°C
• Humidity: 5% - 95%
• Memory: 8MB byte of internal memory
with store &
forward capacity
• Sensor: 3D acceleration sensor
• Frequency Band:
- UMTS/HSPA+: Five band
800/850/900/1900/2100 MHz
- GSM: Quad band
850/900/1800/1900 MHz
• Positioning accuracy: 10m
• IP65 Water resistant, specialized
design guarantees a stable operating
performance.
• Working hour: 180 hours in standby
mode (using deep sleep and left
untouched); 20 hours in normal mode
(location every 10 min by default)
• Charging empty battery: 8 hours
FUNCTIONALITY:
• Real-time location query
• Tracking by time interval
• 3G (WCDMA) network. Full band
worldwide roaming 3G/2G auto switch
• SOS alert
• Low battery alert
• Create up to 8 preferred areas
• Geo fence alerts
• Request a location update
at anytime
• Man down alert
• Moving alert
• Speeding alert
• Direction change report
K9000 KIT INCLUDES:
• 1 Smart Companion
• 1 compatible battery
• 1 Special USB Cable
• 1 Lanyard
• Quick Start Guide
LET’S GET YOU STARTED!
01
02
04
03
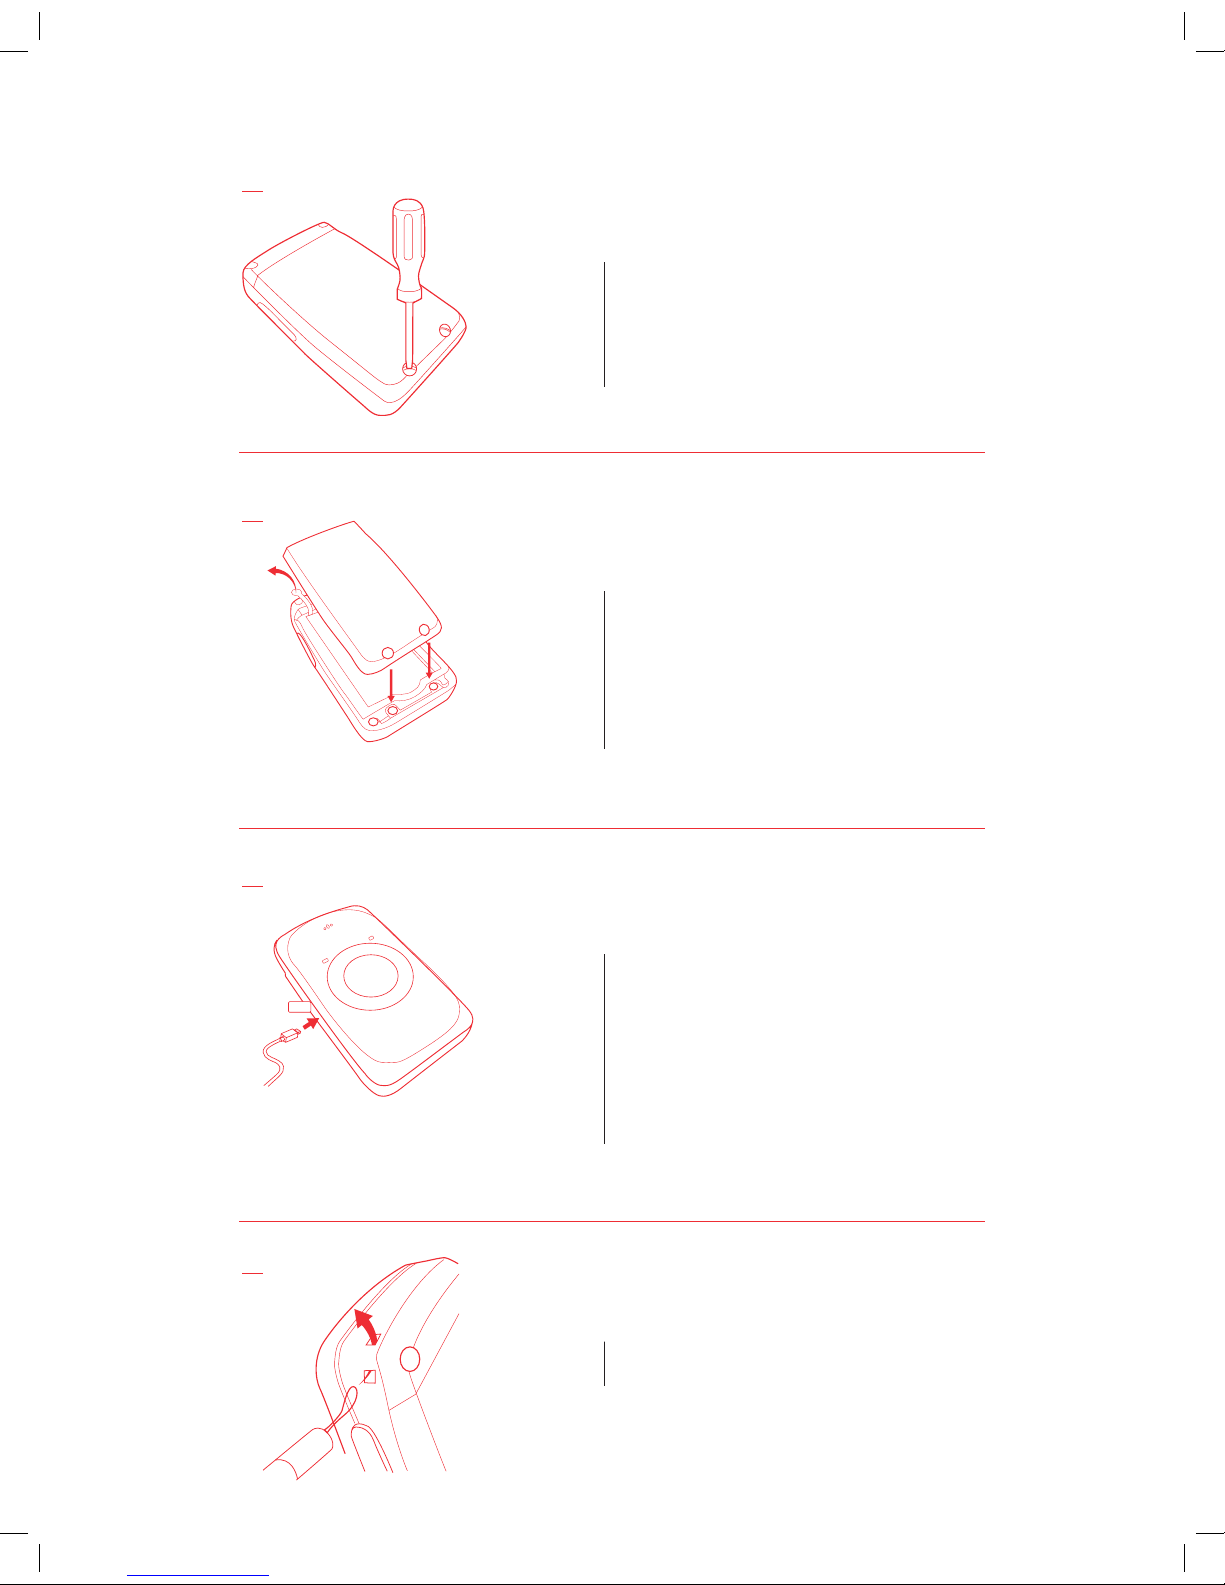
Removing the battery cover_
With back panel facing you use the mini
screwdriver to remove the two screws
to release the back cover.
Lift up the back cover from the notch at
the bottom of the device
Putting back the battery cover_
Remove the battery and pull tab
Insert the contact sides of the battery
first and gently push the battery cover
downward until it locks into place.
Fasten the screws on the back cover
with the mini screwdriver
Attach lanyard_
Slide the lanyard through the slot and hook
it over the small projection.
Charging the battery_
To charge battery, connect the device
through the USB cable, to a computer or
a USB adapter.
Device should be turned off and charged
for 8 hours.
Do not remove the battery unless
necessary while charging.
* Note: Device may heat up during charging, this is normal and
does not affect your device’s lifespan or performance.
If the battery is low, it may affect positioning and data transmission. The battery must be charged before use.
 Loading...