

Page 1
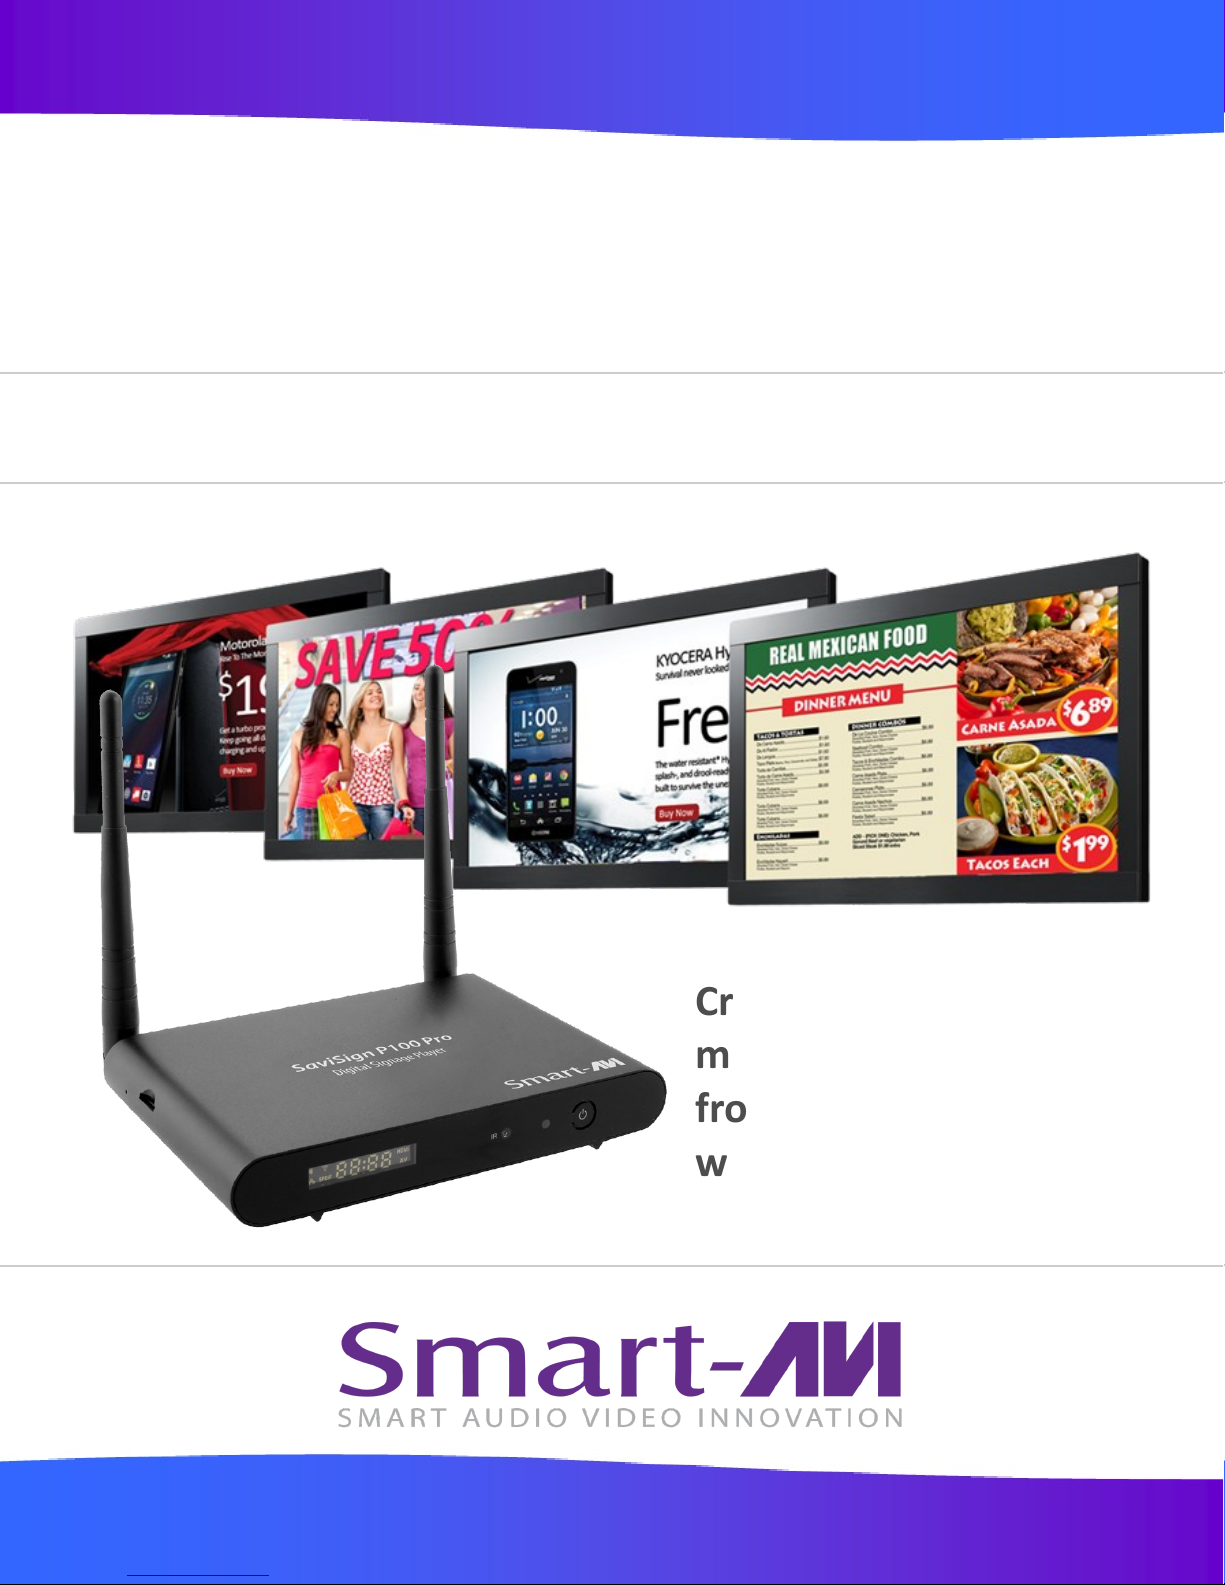
SaviSign P100 Pro
User Manual
4K Wi-Fi enabled signage player with creave soware manager.
Made in U.S.A. www.SmartAVI.com 1-800-AVI-2131
Create, distribute, and
manage your signage
from anywhere in the
world over the Internet!
1
Page 2

TABLE OF CONTENTS
PRODUCT PHOTOS
INTRODUCTION
FEATURES
APPLICATIONS
TECHNICAL SPECIFICATIONS
HARDWARE INSTALLATION (P100 Pro)
STARTING SaviSign Manager
SaviSign Manager Window Controls
SaviSign Manager Components
TEMPLATE MANAGER
PLAYLIST MANAGER
3
3
4
4
5
6
7
8
8
9
10-13
STATION MANAGER 14-15
USER MANAGER 15
LIMITED WARRANTY STATEMENT 16
2
Page 3
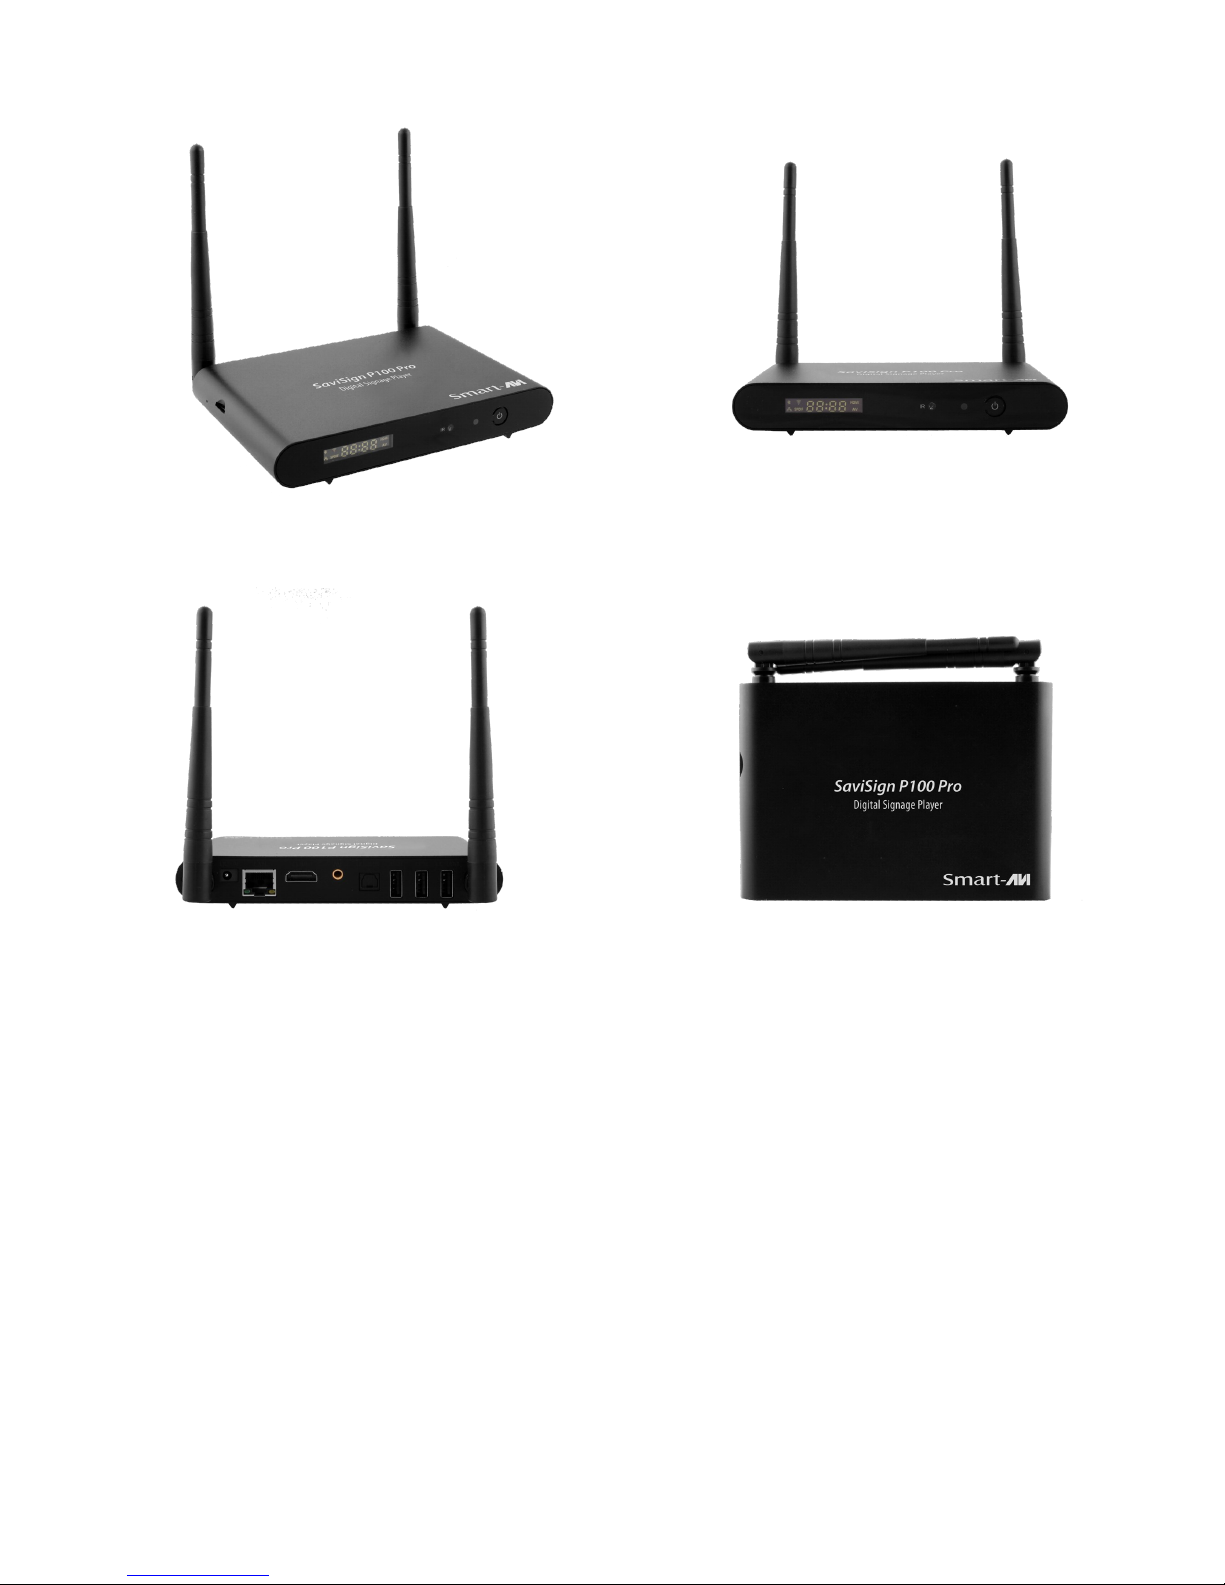
SaviSign P100 Pro Front View
Rear View Top View
INTRODUCTION
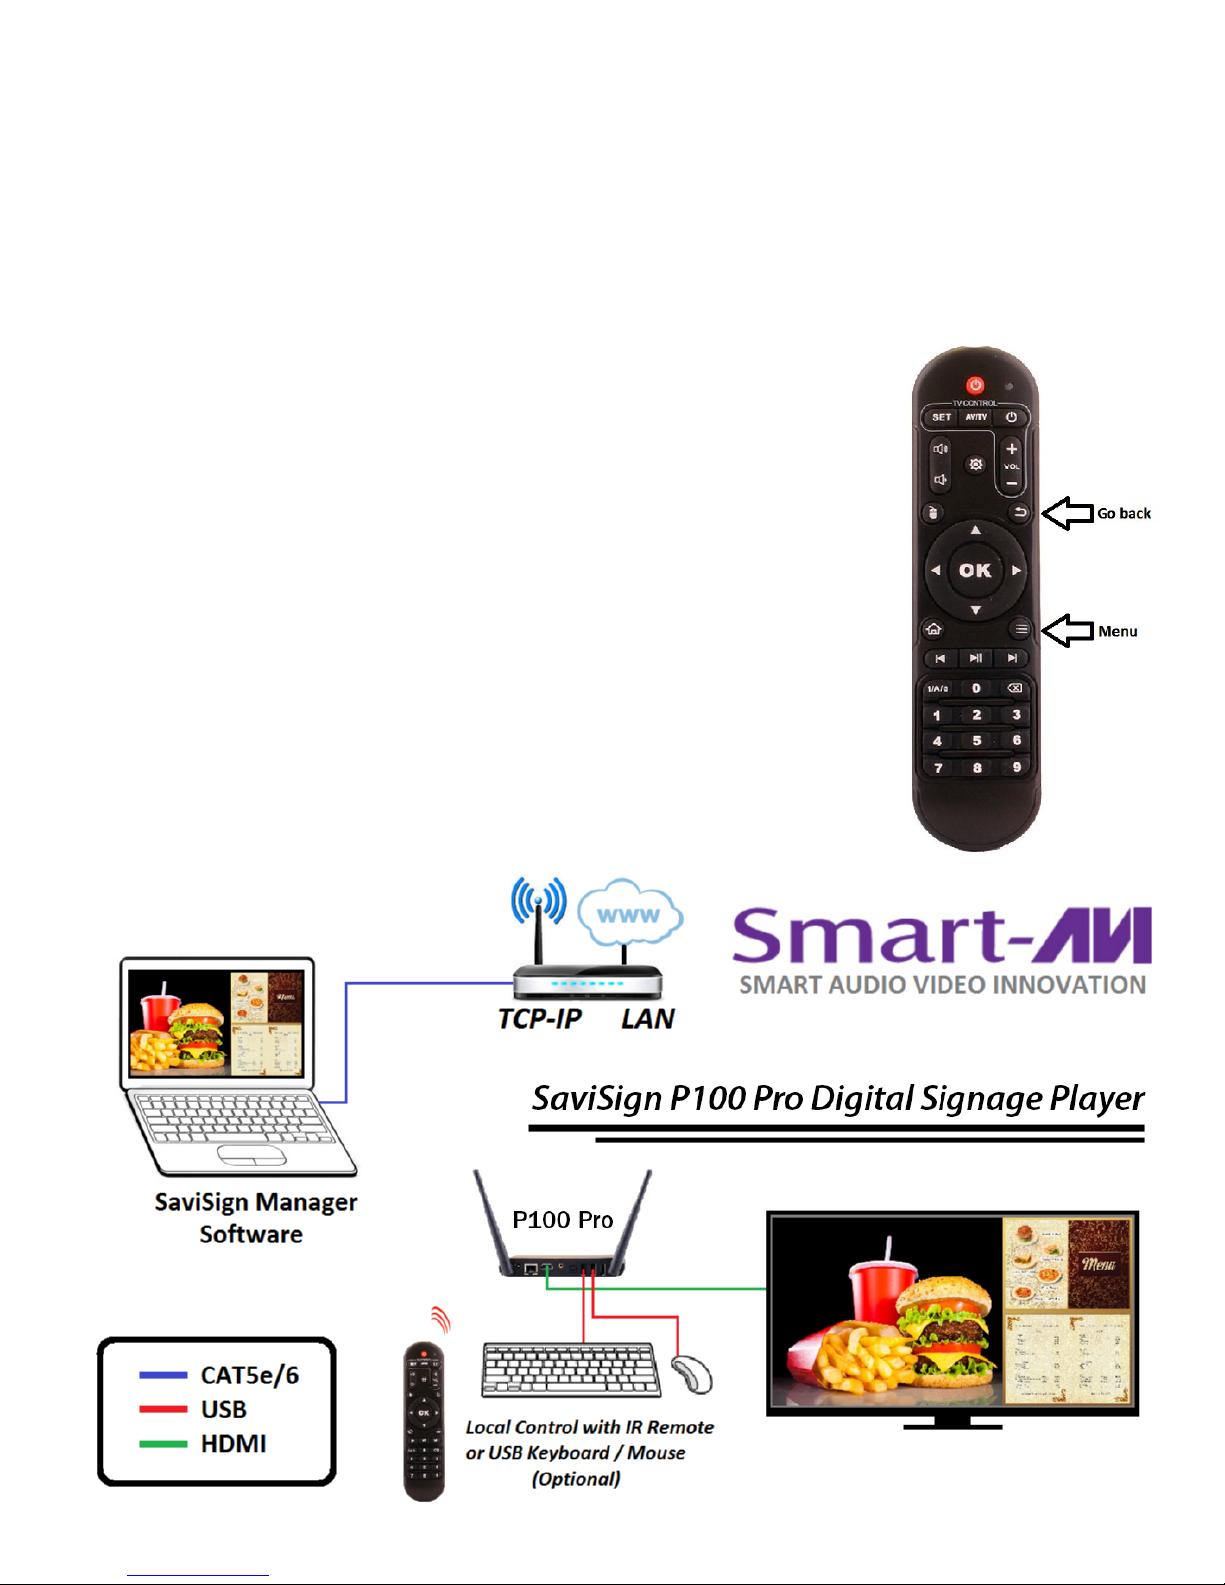
The SaviSign P100 Pro is a digital signage player that can be remotely accessed and controlled with
SmartAVI’s SaviSign Manager software over WIFI, Ethernet, or LAN.
The P100 Pro can display pre-made templates and user created layouts from SaviSign Manager, as well
as various digital media formats. With UHD resolutions up to 4K (3840x2160 @ 30Hz), the SaviSign
P100 Pro is the perfect choice for high quality signage displays. Connect the P100 Pro to HDTVs,
projectors, digital billboards, video wall installations, and more!
SmartAVI designed the P100 Pro for maximum flexibility and ease. Access, control, and update the unit
from anywhere in the world via the Internet directly from your PC with SaviSign Manager. The SaviSign
Manager features an easy-to-use interface with click-and-drag operation. Customize pre-made templates
with text, pictures, and video; create playlists and schedule them. Oversee signage from a central
workstation and send it to displays all over the world with web support. SaviSign Manager also supports
multiple languages and blank, fully customizable templates for enhanced personalization.
The P100 Pro is also optionally compatible with USB peripherals like keyboards, mice, and storage
devices. Users can also control the P100 via Infrared signals with our packaged IR remote controller.
3
Page 4

FEATURES
WIFI-Enabled design for wireless access to your signage content
FREE SaviSign Manager software for creating, scheduling, distributing, and updating your signage
FREE IR remote control
UHD resolutions up to 4K (3840×2160)
Compatible with USB keyboards & mice
32 gig on-board storage
Supports USB 2.0 transparent peripherals
Plug-and-play for immediate use
CUSTOMIZABLE TEMPLATES:
SaviSign Manager offers fully customizable and pre-made signage templates out of the box. SaviSign
Manager’s pre-made templates keep things easy with simple with flexible layouts perfect for enhancing
signage with media and informative content. Add pictures, video, text, and more. Import your own designs.
Edit any template at any time. Scale, filter, schedule, and create in the manner that best fits your needs.
CREATE SIGNAGE PLAYLISTS:
Playlist Manager is the heart of SaviSign software. Here you can manage, create, adjust, schedule, and
release signage. SaviSign’s Playlist Manager is an all-in-one signage hub, complete with creation, editing,
and scheduling tools. Add pictures, video, text, sounds, animated features, feeds, and more to your digital
signage. Create drop-zones for dynamic media, and display it to best fit your needs. From there, you can
schedule your signage to display at the time of your choosing. Loop a single board or string playlists
together. Publish, transmit, and switch between playlists at will in real-time: with SaviSign Playlist
Manager.
STATION MANAGER:
SaviSign Station Manager lets users oversee and control multiple players, computers, or digitally
connected signage workstations from a central PC. Adjust display options, formatting, and output options
with our settings slider, or keep an eye on your signage details with our enhanced activity log. You can
even take screenshots of connected stations for later use.
USER MANAGER:
SaviSign User Manager offers flexibility for supervisors. Assign roles to SaviSign users, giving them
access to change media, text, and schedules to fit their responsibilities. Manage passwords, available
players, administrative tiers and custom configurations.
APPLICATIONS
Retail
Transportation
Corporate
Education
Restaurants
Hospitality
Entertainment
Supermarkets
Weather
Stock Market
and more
4
Page 5
TECHNICAL SPECIFICATIONS
VIDEO
(1) HDMI 2.0A;
Output Interfaces
Decoded Formats
(1) CVBS Composite;
(1) Optical
VP9-10 Profile-2 up to 4K×2K @60fps
H.265 HEVC MP-10 @L5.1 up to 4K×2K
@60fps
H.264 AVC HP @L5.1 up to 4K×2K
@30fps
H.264 MVC up to 1080P @60fps
MPEG-4 ASP @L5.1 up to 1080P @60fps
WMV/VC-1 SP/MP/AP up to 1080P
@60FPS
AVS-P16(AVS+)/AVS-P2 JiZhun Profile up
to 1080P @60FPS
MPEG-2 MP/HL up to 1080P @60FPS
MPEG-1 MP/HL up to 1080P @60FPS
RealVIDEO 8/9/10 up to 1080P
@60FPS
Support MKV/WMV/MPG/MPEG/DAT/
AVI/MOV/ISO/MP4/RM
AUDIO
Decoding Formats MP3, AAC, WMA, RM, FLAC, Ogg
NETWORK
WIFI 2.4GHz/5.8GHz Dual-band
Ethernet 10M/100M/1000M
Interfaces 1x1000M LAN Port
CONTROL
Remote Control Infrared (IR)
OTHER
Power Supply PS12VDC2.5A
Dimensions 6.0” W x 1.0” H x 5.0” D
Weight 0.45 lbs
Storage Temperature --4 to 149 °F (-20 to 65°C)
Working Temperature 32 to 122°F (0 to 50°C)
Storage Humidity Up to 90% RH (no condensation)
Working Humidity Up to 85% RH (no condensation)
5
Page 6
HARDWARE INSTALLATION (P100 Pro)
1. Connect an HDMI monitor to the HDMI connector on the P100 Pro with an HDMI cable and power on
the display.
2. Connect the supplied power adapter to the P100 Pro and plug it in.
3. Optionally connect a USB keyboard and Mouse to the P100 Pro.
4. Connect the RJ45 connector on the P100 Pro to your network with a CAT5e/6 cable or connect to the
P100 Pro with WIFI.
5. Power on the P100 Pro by pressing the power button on the front of the unit and wait for the P100
Pro to initialize.
Initial set up using the IR Remote Control:
1. Press the menu button on the supplied remote control. Use the arrows on
the remote to highlight “Find local server” and press the ok button on the
remote.
2. If the P100 Pro does not find your servers IP address automatically you must
manually enter it. For example, if your server is in a remote location not on
your local area network you will need to enter the IP address manually.
3. Select and click “SAVE”.
Initial set up using a USB Keyboard & Mouse:
1. Press [CTRL] & [Esc] to display the P100 Pro menu.
2. Press [Esc] or right click the mouse to turn off the on screen keyboard.
3. Use the arrow keys to select “Find local server” and Press [Enter} to execute
the selection or use the mouse to left click on the “Find local server” slider
to execute the selection.
4. If the P100 Pro does not find your servers IP address automatically you must
manually enter it. For example, if your server is in a remote location not on
your local area network you will need to enter the IP address manually.
6
Page 7

STARTING SaviSign Manager
Execute SaviSignServer.exe
Execute SaviSignManager.exe
A login screen will appear. See Figure 5-2
In the “COMPUTER” field, enter the IP address of the computer the SaviSign Server is running on.
If you don’t know your computer’s IP address do the following steps.
1. Find and execute the program “Command Prompt”
2. In the Command Prompt window type “ipconfig” and press enter.
3. Your IP address will be listed on the line that says “IPv4 Address”. See Figure 5-1 below
Figure 5-1
The “USER NAME” is administrator and
the PASSWORD: is admin.
Figure 5-2
7
Page 8

SaviSign Manager Window Controls
Figure 6-1
SaviSign Manager Components
This software is an all-in-one digital signage management solution that offers the design, scheduling, and
command tools you need to make amazing signage. SaviSign Manager is composed of four main
components: Template Manager, Playlist Manager, Station Manager, and User Manager. Please read
through the following descriptions for a better understanding of these key management features. They
each have a more detailed section on their use in this manual.
TEMPLATE MANAGER
View, Select, Create, Edit, Delete, Rename Digital Signage Templates
All templates are accessible via the template library. The template library is divided into two categories:
Horizontal and Vertical Designs. Horizontal Designs are most commonly used for HDTV screens and
standard menu displays, while Vertical Designs are great for tablets and wall-mounted information
boards. Choose which design type best fits your signage situation, then select a template listed in the
library below.
PLAYLIST MANAGER
View, Create, Edit, Delete, Rename, Preview Digital Signage Playlists
The Playlist Manager is the one-stop content and distribution hub of SaviSign Manager software. Here you
can add media, schedule signage playback, and manually control active signage playlists.
STATION MANAGER
SaviSign Station Manager controls signage players and devices from the convenience of your PC
workstation. Monitor each unit’s status and enhance performance with simple customization settings.
Each connected player and signage device is listed in the Station Manager. Station Manager lists the
name of each device, their model type and current status. By default, every unit is selected for uniform
performance, but each can be selected individually for a more dynamic setup.
USER MANAGER
SaviSign User Manager configures, organizes and prioritizes signage accessibility for individual users
across your connected network. Here you can add new signage users, remove inactive ones, duplicate
individual user settings, and get details on each one’s properties.
8
Page 9

TEMPLATE MANAGER
View, Select, Create, Edit, Delete, Rename Digital Signage Templates
Figure 7-1
Create Template
Making a template is easy with SaviSign Manager: add click-and-drag media drop zones, scrolling text,
new background imagery, and more! When you are finished creating your new template, click the “Save”
icon in the bottom right hand corner of your work space so you can store your design for later use.
Select the design you want to work with from the template library and click the “Create Template” button.
Input your new template’s name, resolution, and select a layout on the right for the workspace that best
fits your needs. When you’re ready, press “OK”. You will then be placed in the Edit Template area.
Edit Template:
Select a template from your library
and click the “Edit Template” button
to further customize its design.
Editing templates is a useful way to
make quick adjustments to your
favorite menu layouts, and further
enhance those who need a little
something extra.
When your finished
Figure 7-2
Finishing up:
Select the template you want to add to your signage, and click the arrow at the bottom right-hand corner
of your template library. In The pop-up window, name your new signage playlist schedule and press “OK”
To continue. This will take you to the Playlist Manager where you can customize the template more for
specific displays.
9
Page 10

PLAYLIST MANAGER
View, Create, Edit, Delete, Rename, Preview Digital Signage Playlists
Figure 8-1
The Playlist Manager is the one-stop content and distribution hub of SaviSign Manager software. Here you
can add media, schedule signage playback, and manually control active signage playlists. The four-step
playlist creation center consists of:
Edit Template: When you first enter the playlist
manager you can further customize the selected
template for this specific display. You can add or
remove the background image and add or remove
zones that can contain text, pictures, video, audio,
and more. Adjust drop-zones, window dimensions,
and template background imagery before adding
your media content. When you are done here click
the next button in the lower right of the window to
move to the next step.
Figure 8-2
Create Playlist: Add text, pictures, video, audio, and more to your drop-zones. When you are done here
click the next button in the lower right of the window to move to the next step.
Create Schedule: Assign times for your signage to display. When you are done here click the next button
in the lower right of the window to move to the next step.
Publish: Finalize signage and prep for scheduled distribution.
When you are finished with each step, click the NEXT>> button to continue.
10
Page 11

PLAYLIST MANAGER (Continued)
Figure 9-1
Create Playlist
Assign media files and custom text to your template’s drop-zones. Select your desired drop zone for the
media, and one of the following buttons to:
Add Web Links
Great for interactive, web-connected displays, drop-zones with these links connect to websites
for a more engaging user experience
Add Video
Select a drop-zone and assign an MP4 video file to play within the window. Have it perform to
your specifications with custom timing, loops, and scaling features.
Add Pictures
Select a drop-zone and insert still images to give your signage a nice visual flourish. Adjust
scaling, resolution, and timing for dynamic displays!
Update Firmware
Keep your signage players performing optimally by updating firmware in the playlist itself.
Schedule Task
Use custom and premade schedules to display content in a selected area.
11
Page 12

PLAYLIST MANAGER (Continued)
Add RSS Feeds
Add scrolling, internet-based newswire text to your signage for updates on sports, entertainment,
and current events.
Add Audio
Enhance your signage with music or sound effects to best fit your needs. Simply select a drop
zone and add the audio files you want; loop a single track, or have them play individually when
selected.
Add Twitter
Add Twitter links to keep up with news, sports, or your favorite celebrities.
Add Text
Create custom messages in drop-zones and text-boxes: add animated scrolling messages or
blocks of information with ease.
Delete Task
Select and remove tasks from drop-zones.
Create Schedule
Now that you’ve crafted your ideal signage, it’s time to show it to the world! Display your signage and
enthrall audiences when you need with the “Create Schedule” feature.
Schedule Start Type
Select the way your signage will display from the
drop-down tab. These include:
Run Once
Select a specific time for your signage to play.
Signage will play one time, then deactivate once
playback is complete.
Figure 10-1
Run Periodically
Signage plays continuously in defined time-frames. Loop playback, repeat schedules.
Run on Player Start
Signage will start playing automatically when connected player powers up. Assign playback timeframe,
loops, and repeated schedules for customized performance.
Trigger
Manually activate and distribute signage with direct control from your PC.
12
Page 13

PLAYLIST MANAGER (Continued)
Publish Playlist
Select a signage player or players to finalize your new signage creation.
Browse through, select, and adjust your customized signage playlists with ease. Control
playback and active signage manually, or preview your playlists for a better look at your work
before it is released.
Zoom In/Zoom Out
Get a closer look at your playlists or shrink them for an expanded list.
Edit Playlist
Reconfigure playlist settings and content with ease.
Rename Playlist
Add a custom label to your selected playlist.
Delete Playlist
Remove selected playlist from your playlist library.
Play
Activate selected signage playlist on connected player (will start when it was scheduled to).
Skip
Start playing to the next active playlist in your library.
Stop
Cease signage playback.
On/Off
Activate playlists ready for display and deactivate those that are not.
Save Playlist
Store selected playlists to computer hard-drive or USB flash-drive.
Preview
Get a better look at your full-screen signage before it is displayed for the public.
13
Page 14

STATION MANAGER
SaviSign Station Manager controls signage players and devices from the convenience of your PC
workstation. Monitor each unit’s status and enhance performance with simple customization settings.
Each connected player and signage device is listed in the Station Manager. Station Manager lists the
name of each device, their model type, and current status. By default, every unit is selected for uniform
performance, but each can be selected individually for a more dynamic setup.
Figure 12-1
Settings
Station Manager Settings allow users to configure connected signage devices to best fit their
needs. Settings can be assigned to every device or individually depending on user preference.
Settings include: IP Address, Client Name & Client Password
Status
Logs provide a detailed view of the current status of your connected signage hardware;
information about product versions, unit names, connected monitors, and disk space offer a
better idea of how well your hardware is performing at any given time.
Screenshot
Capture a still image of your current signage directly from a player. Great for checking visuals
remotely and ensure signage displays are operating at optimal settings.
Client Media
Take a more detailed look at the media files currently running on your signage hardware. Offers
information on file names, types, and sizes.
Rename Player
Change the name of the selected player to a desired name.
Client Groups
Display current list of client groups.
Delete Player
Delete selected player from the list.
Re-set Player
Clear custom settings on selected players and return them to their factory defaults.
14
Page 15

STATION MANAGER (Continued)
Clean Media
Refresh the media currently running on your signage devices for improved performance.
Restart Player
Shut down and restart selected hardware remotely.
Clear Logs
Clear logs.
Save Logs
Save logs to a file.
USER MANAGER
SaviSign User Manager configures, organizes and prioritizes signage accessibility for individual users
across your connected network. Here you can add new signage users, remove inactive ones, duplicate
individual user settings, and get details on each one’s properties.
The User Manager lists local and network connected SaviSign users. This list includes user names, their
access rights to certain management functions, and their primary workstations in the network
environment.
Figure 14-1
Add User
Create a new user profile for controlling and creating signage. Assign a new user name, along
with the user’s full name, and a description of their position. New users are also required to
provide a new password for logging into SaviSign Manager; confirm the new password and
assign user access rights.
Remove User
If a user ceases to engage in signage management, you may remove that user with this
function. Confirm the user no longer utilizes SaviSign Manager and the selected user will be
deleted.
Duplicate User
Make an exact copy of your selected user, including their preferences and access rights.
15
Page 16

LIMITED WARRANTY STATEMENT
A. Extent of limited warranty
Smart-AVI Technologies, Inc. warrants to the end-user customers that the Smart-AVI product specied above
will be free from defects in materials and workmanship for the duraon of 1 year, which duraon begins on
the date of purchase by the customer. Customer is responsible for maintaining proof of date of purchase.
Smart-AVI limited warranty covers only those defects which arise as a result of normal use of the product,
and do not apply to any:
a. Improper or inadequate maintenance or modicaons
b. Operaons outside product specicaons
c. Mechanical abuse and exposure to severe condions
If Smart-AVI receives, during applicable warranty period, a noce of defect, Smart-AVI will at its discreon
replace or repair defecve product. If Smart-AVI is unable to replace or repair defecve product covered by
the Smart-AVI warranty within reasonable period of me, Smart-AVI shall refund the cost of the product.
Smart-AVI shall have no obligaon to repair, replace or refund unit unl customer returns defecve product
to Smart-AVI.
Any replacement product could be new or like new, provided that it has funconality at least equal to that of
the product being replaced.
Smart-AVI limited warranty is valid in any country where the covered product is distributed by Smart-AVI.
B. Limitaons of warranty
To the extant allowed by local law, neither Smart-AVI nor its third party suppliers make any other warranty or
condion of any kind whether expressed or implied with respect to the Smart-AVI product, and specically
disclaim implied warranes or condions of merchantability, sasfactory quality, and tness for a parcular
purpose.
C. Limitaons of liability
To the extent allowed by local law the remedies provided in this warranty statement are the customers sole
and exclusive remedies.
To the extant allowed by local law, except for the obligaons specically set forth in this warranty statement,
in no event will Smart-AVI or its third party suppliers be liable for direct, indirect, special, incidental, or
consequenal damages whether based on contract, tort or any other legal theory and whether advised of
the possibility of such damages.
D. Local law
To the extent that this warranty statement is inconsistent with local law, this warranty statement shall be
considered modied to be consistent with such law.
16
Page 17

NOTICE
The information contained in this document is subject to change without notice. SmartAVI makes no warranty of any kind with regard to this material, including but not limited to, implied warranties of merchantability and fitness for particular purpose. SmartAVI will not be liable for errors contained herein or for incidental or consequential damages in connection with the furnishing, performance or use of this material.
No part of this document may be photocopied, reproduced, or translated into another language without
prior written consent from SmartAVI Technologies, Inc.
20171208
11651 Vanowen St. North Hollywood, CA 91605
Designed and Manufactured in the USA
800.AVI.2131
Tel: (818) 503-6200 | Fax: (818) 503-6208
SmartAVI.com
17
 Loading...