

Page 1
What’s in the Box?
PART NO. QTY DESCRIPTION
RDU-2P-TX 1 2 DVI-D and USB switch with integrated ex-
tender, over CAT6 STP Extender Transmitter
RDU-2P-RX 1 2 DVI-D and USB switch with integrated ex-
tender, over CAT6 STP Extender Receiver
Power Supply 2 PS5VDC4A
Technical Specications
VIDEO
Format DVI-D Single Line
Maximum Pixel Clock 165 MHz
Input Interface (TX) (2) DVI-D 29-pin female
Output Interface (RX) (1) DVI-D 29-pin female
Resolution Up to 1920 x 1200 @60Hz
DDC 5 volts p-p(TTL)
Input Equalization Automatic
Input Cable Length Up to 20 ft.
Output Cable Length Up to 20 ft.
USB
Signal Type USB 1.1 (Fully Transparent)
Input Interface (TX) (2) USB Type B (Female)
Output Interface (RX) (4) USB Type A (Female)
OTHER
Power External 100-240 VAC/5VDC4A @20W
Dimensions 9 in W x 1 in H x 3 in D
Weight 1 lb
Operating Temp. 0-55 °C (32-131°F)
Storage Temp. -20-85 °C (-4-185 °F)
Humidity Up to 95%
© Copyright 2010 Smart-AVI, All Rights Reserved
NOTICE
The information contained in this document
is subject to change without notice. Smart-AVI makes
no warranty of any kind with regard to this material,
including but not limited to, implied warranties of
merchantability and fitness for any particular purpose.
Smart-AVI will not be liable for errors contained herein or for
incidental or consequential damages in connection with the
furnishing, performance or use of this material.
No part of this document may be photocopied, reproduced or
translated into another language without prior written consent
from Smart-AVI.
For more information, visit www.smartavi.com.
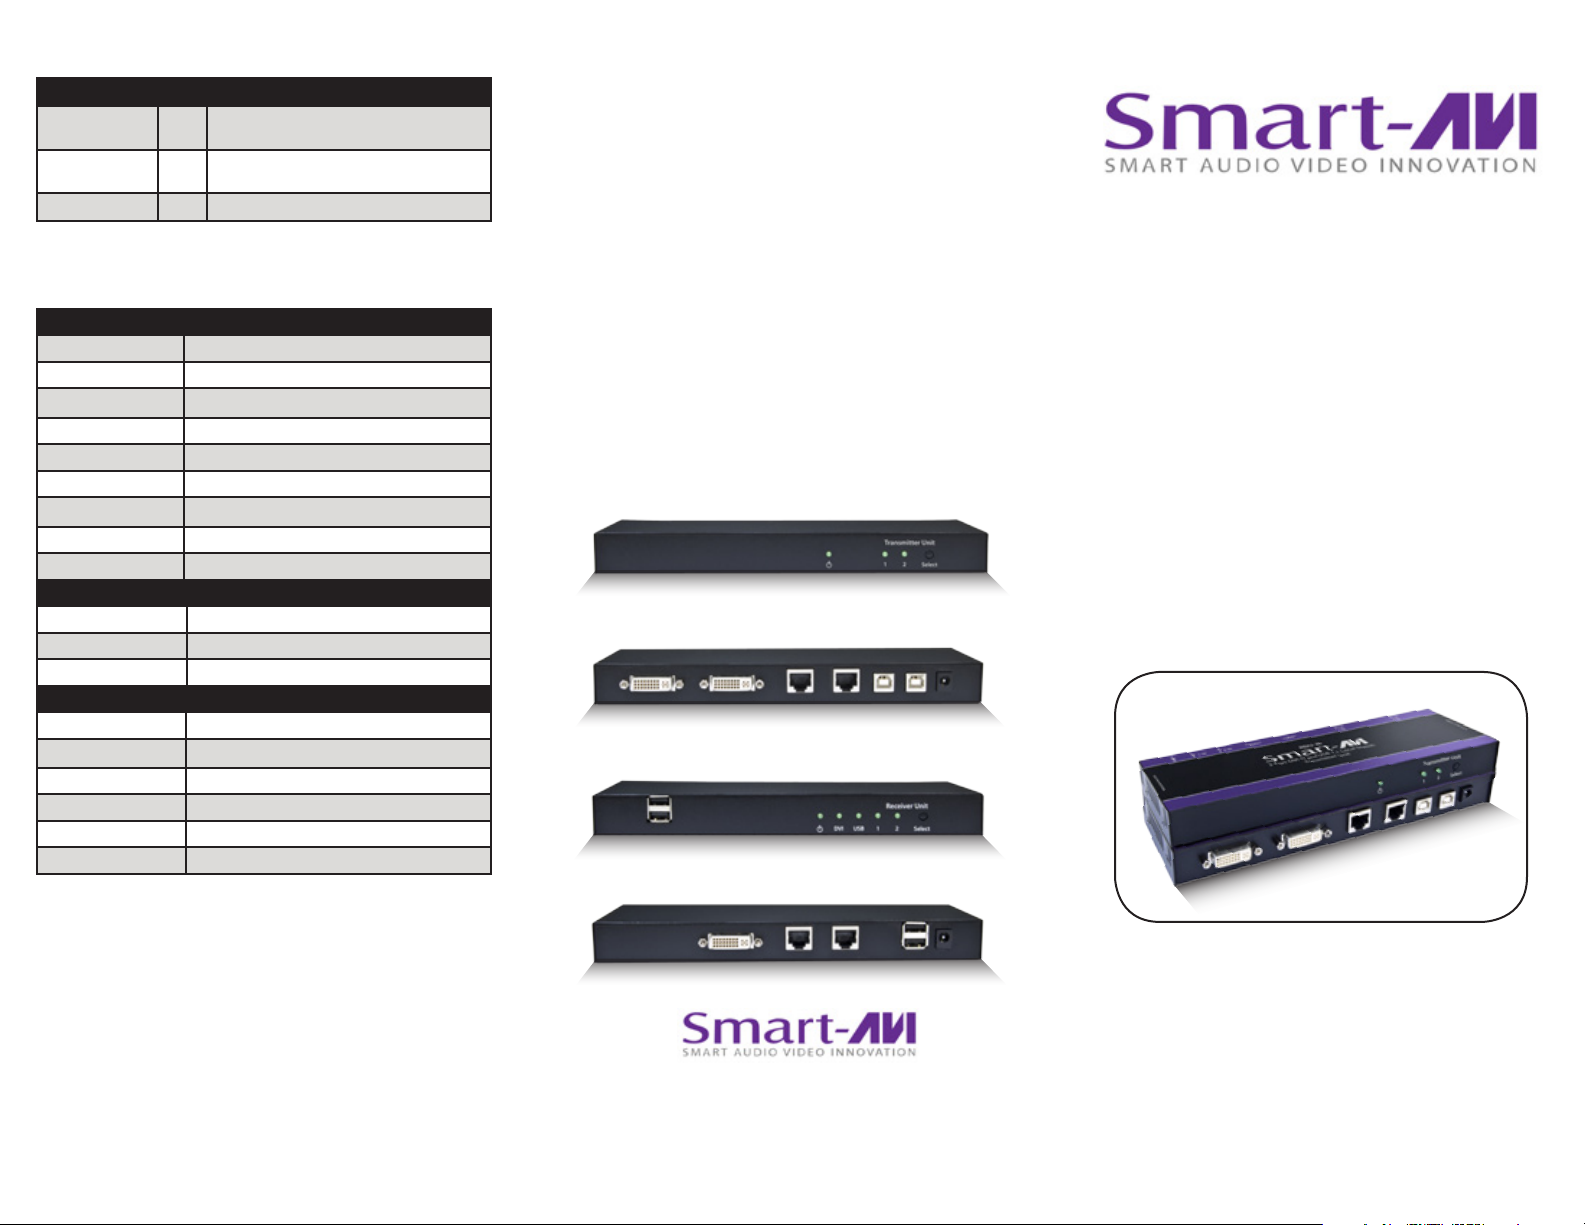
RDU-2PTX Front
RDU-2PTX Rear
RDU-2PRX Front
Installation
Manual
RDU-2P
2-Port DVI-D and USB 1.1 Extender
with Integrated Local/Remote Switch
RDU-2PRX Rear
SmartAVI, Inc. / Twitter: smartavi
2840 N. Naomi Ave. Burbank, CA 91504
Tel: (818) 565-0011 Fax: (818) 565-0020
http://www.SmartAVI.com
2-Port DVI-D and USB 1.1
Local/Remote Switch - Extends up to
275 feet over STP Cable
www.smartavi.com
Page 2
Introduction
The RDU-2P is a perfect solution for sharing the output of
two computers from a remote location. It extends DVI-D
and USB 1.1 from two computers to a remote location up
to 275 feet away. Both the transmitter and receiver have
an integrated remote switch, allowing you to switch
between the two computers locally or from the remote
location. With its DDC learning capabilty, the RDU-2P is
fully plug-and-play.
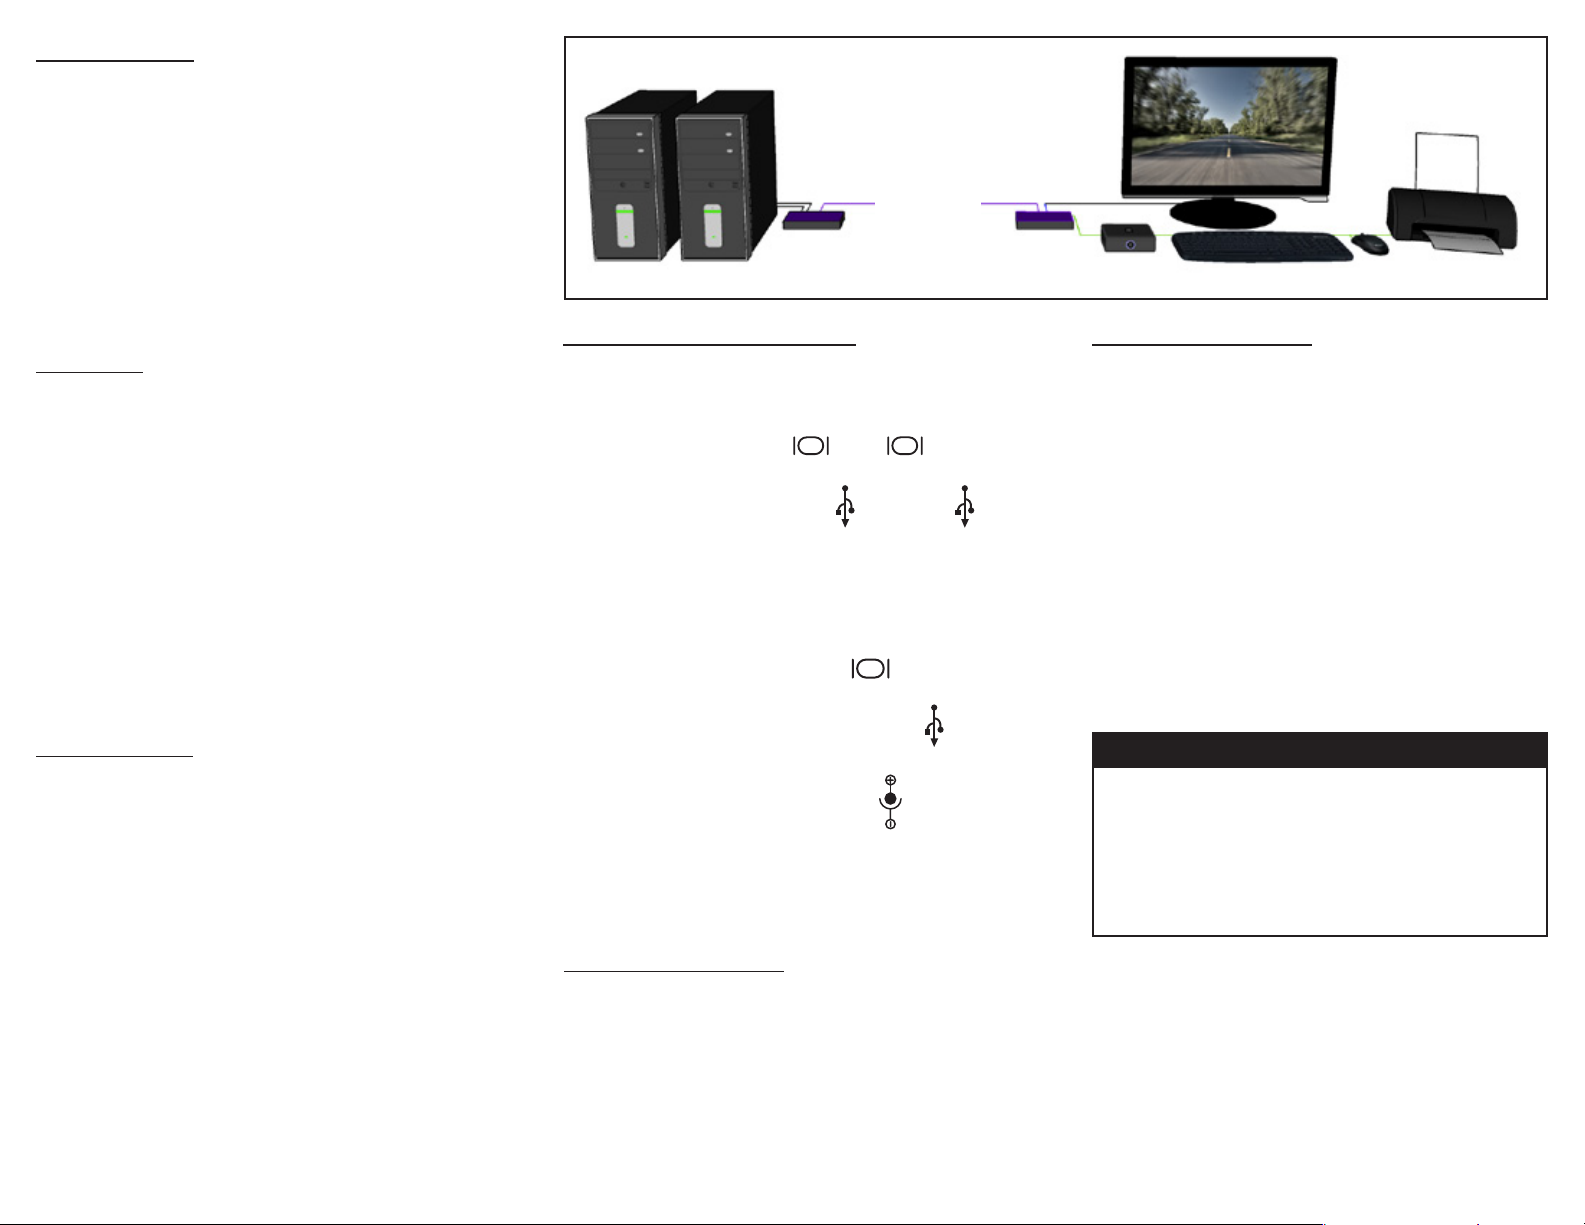
Product - Installation Diagram
DVI-D MONITOR
275 ft over CAT5
RDU-2PRX
COMPUTER
RDU-2PTX
COMPUTER
USB HARD DRIVE
USB KEYBOARD USB MOUSE
USB PRINTER
Features
• DDC from internal table for Mac/PC
• DDC learning from display
• Switches inputs locally and from the remote unit
• Supports Mac, PC, and Linux DVI
• Supports High Resolution 1920x1200 60Hz WUXGA
• Uses universal DVI Single Link connectors
• Zero pixel loss with TMDS signal correction
• Supports all USB 1.1 Devices Transparently
(Flash Drives, Printers, Cameras, Scanners, etc.)
• Supports USB 1.1 keyboard and mouse
• Front panel tactile port switch on both
the transmitter and receiver
Applications
• Medical Applications
• Industrial Work Areas
• Home Theater Integration
• Digital Signage Deployment
• Information Kiosks/Displays
• Film/Recording Studios
Connecting the RDU-2P
1. Power o all devices.
2. Connect two DVI-D sources to the DVI-D ports of
the RDU-2PTX labeled and
3. Connect two USB sources to the USB ports of the
the RDU-2PTX labeled and
4. Connect the RDU-2PTX to the the RDU-2PRX with
two STP (Sheilded Twisted Pair) cables using the
rear ports labeled and
5. Connect a DVI monitor to the port on the
rear of the RDU-2PRX.
6. Connect up to 4 USB 1.1 devices to the ports
on the RDU-2PRX.
7. Connect the power supply to the ports on the
RDU-2PTX and RDU-2PRX.
8. Power on the RDU-2P using the front switch.
9. Power on the computers, displays and USB 1.1
devices.
IN 1
<DVI> <USB>
IN 2IN 1
IN 2
OUT
Learning the DDC
1. Disconnect the power from the RDU-2P-TX
(Transmitter).
2. Hold down the SELECT button while reconnecting
the power.
3. Continue to hold SELECT until both the 1 and 2
LEDs are both illuminated.
4. Release the SELECT button.
5. Use SELECT to alternate between the two DDC
modes of the RDU-2PTX. The two DDC learning
modes are 1:Learn Screen and 2: Factory Default.
6. When you have selected the desired learning
mode, wait 5 seconds for both LEDs to ash.
7. When the LEDs stop ashing, the DDC has been
learned.
ABOUT DDC
DDC provides plug-and-play capability to your
displays. When you plug a display into your
computer, the DDC table in the display tells the
computer the optimal resolution to use. In order
to preserve this plug-and-play capability, we have
integrated DDC learning into all of our DVI Solutions.
Using the RDU-2P
1. To switch between the two sources, simply press
the SELECT button on the front of the RDU-2PTX
(locally) or RDU-2PRX (remotely).
2. The selected source will be indicated by the LED
lights on the front panel.
3. Activity will be indicated by the LEDs on the front
of the RDU-2PRX.
 Loading...