

Page 1
SMARTBoard 2000 series
smar ttech.com/docfeedback/171178
Display
USER’S GUIDE
FOR SBD-2075
Page 2

Product registration
If you register your SMART product, we’ll notify you of new features and software upgrades.
Register online at smarttech.com/registration.
Keep the following information available in case you need to contact SMART Support.
Serial number:
Date of purchase:
Trademark no tice
SMARTBoard , s marttech, the SMART logo and all SMART taglines are trademarks or regis tered trade marks of SMARTT echnolog iesU LC in the U.S. and/or other
countries. All third -party pr oduct and company names may b e trademarks o f their res pective owners.
Copyrigh t n otice
© 20 17SMARTTechnolo gies ULC. All rights re ser ved. No p art of this publication may b e repr oduced , transmitted, transcrib ed, stored in a re trieval system o r
translated into any language in any form by any means without the p rio r w ritten conse nt of S MARTT echnologi esULC. Information i n this manual is subject to change
without notice and d oe s not repr ese nt a commitmento n the p art of SMART.
This prod uct and/or use there of is covere d by o ne o r more of the fol lowing U.S. patents:
www.smarttech.com/patents
05/2017
smar ttech.com/kb/171178
Page 3

Important information
Failure to follow the installation instructions shipped with your SMART product could result in
personal injury and product damage which may not be covered by your warranty.
Do not open or disassemble the SMART product. You risk electrical shock from the high voltage
inside the casing. Opening the casing also voids your warranty.
Do not stand (or allow children to stand) on a chair to touch the surface of your SMART product.
Rather, mount the product at the appropriate height.
Do not climb (or allow children to climb) on a wall- or stand-supported SMART product. Climbing on
the SMARTproduct could result in personal injury or product damage.
Individuals under the age of 18 require adult supervision when using this SMART Product.
To reduce the risk of fire or electric shock, do not expose your SMART product to rain or moisture.
If your SMART product requires replacement parts, make sure the service technician uses
replacement parts specified by SMART Technologies or parts with the same characteristics as the
original.
Ensure that any cables extending across the floor to your SMART product are properly bundled
and marked to avoid a trip hazard.
Do not insert objects inside the cabinet ventilation holes, because they could touch dangerous
voltage points and cause electric shock, fire or product damage which may not be covered by
your warranty.
Do not place any heavy objects on the power cable. Damage to the cable could cause shock, fire
or product damage which may not be covered by your warranty.
Useonly extension cords and outlets into which this product’s polarized plug can be fully inserted.
Use the power cable provided with this product. If a power cable is not supplied with this product,
please contact your supplier. Use only power cables that match the AC voltage of the power outlet
and that comply with your country’s safety standards.
smar ttech.com/kb/171178
Page 4

If the glass is broken, do not touch the liquid crystal. To prevent injury, handle glass fragments with
care when disposing of them.
Do not move or mount the display by connecting rope or wire to its handles. Because the display is
heavy, rope, wire or handle failure could lead to personal injury.
To prevent personal injury, do not attempt to mount or carry the interactive flat panel using your
own strength. Instead, use a lifting device with the included attachable eyebolts. The eyebolts are
not post-installation hardware.
Use only VESA®-approved mounting hardware.
Disconnect all power cables for your display from the wall outlet and seek assistance from
qualified service personnel when any of the following occurs:
l The power cable or plug is damaged
l Liquid is spilled into the display
l Objects fall into the display
l The display is dropped
l Structural damage such as cracking occurs
l The display behaves unexpectedly when you follow operating instructions
smar ttech.com/kb/171178
Page 5

Regulatory information
This device complies with directive 2014/53/EU.
This device complies with class A of CISPR 32 and may cause radio interference in a residential
environment.
Canada statement
This device complies with Industry Canada's licence-exempt RSSs. Operation is subject to the
following two conditions:
1. This device may not cause interference; and
2. This device must accept any interference, including interference that may cause undesired
operation of the device.
The device meets the exemption from the routine evaluation limits in section 2.5 of RSS 102 and
compliance with RSS-102 RF exposure, users can obtain Canadian information on RF exposure and
compliance.
This transmitter must not be co-located or operating in conjunction with any other antenna or
transmitter. This equipment should be installed and operated with a minimum distance of 20
centimeters between the radiator and your body.
The device for operation in the band 5150-5250 MHz is only for indoor use to reduce the potential
for harmful interference to co-channel mobile satellite systems
Le présent appareil est conforme aux CNR d'Industrie Canada applicables aux appareils radio
exempts de licence. L'exploitation est autorisée aux deux conditions suivantes :
1. l'appareil ne doit pas produire de brouillage;
2. l'utilisateur de l'appareil doit accepter tout brouillage radioélectrique subi, même si le
brouillage est susceptible d'en compromettre le fonctionnement.
Le dispositif rencontre l'exemption des limites courantes d'évaluation dans la section 2.5 de RSS
102 et la conformité à l'exposition de RSS-102 rf, utilisateurs peut obtenir l'information canadienne
sur l'exposition et la conformité de rf.
smar ttech.com/kb/171178
Page 6

Cet émetteur ne doit pas être Co-placé ou ne fonctionnant en même temps qu'aucune autre
antenne ou émetteur. Cet équipement devrait être installé et actionné avec une distance minimum
de 20 centimètres entre le radiateur et votre corps.
les dispositifs fonctionnant dans la bande 5150-5250 MHz sont réservés uniquement pour une
utilisation à l'intérieur afin de réduire les risques de brouillage préjudiciable aux systèmes de
satellites mobiles utilisant les mêmes canaux;
FCC warning
This equipment has been tested and found to comply with the limits for a Class A digital device,
pursuant to Part 15 of the FCC Rules. These limits are designed to provide reasonable protection
against harmful interference when the equipment is operated in a commercial environment. This
equipment generates, uses and can radiate radio frequency energy and, if not installed and used in
accordance with the manufacturer’s instructions, may cause harmful interference to radio
communications. Operation of this equipment in a residential area is likely to cause harmful
interference in which case the user will be required to correct the interference at his own expense.
FCC Radiation Exposure Statement
This device complies with FCC radiation exposure limits set forth for an uncontrolled environment
and it also complies with Part 15 of the FCC RF Rules. This equipment must be installed and
operated in accordance with provided instructions and the antenna(s) used for this transmitter must
be installed to provide a separation distance of at least 20 cm from all persons and must not be co-
located or operating in conjunction with any other antenna or transmitter. End-users and installers
must be provided with antenna installation instructions and consider removing the no-collocation
statement.
This device complies with Part 15 of the FCC Rules. Operation is subject to the following two
conditions:
1. this device may not cause harmful interference, and
2. this device must accept any interference received, including interference that may cause
undesired operation.
Any changes or modifications not expressly approved by the party responsible for compliance
could void the user's authority to operate the equipment.
smar ttech.com/kb/171178
Page 7

Contents
Important information 3
Regulatory information 5
Canada statement 5
FCC warning 6
FCC Radiation Exposure Statement 6
Chapter 1 1
About the display 1
Turning on the display for the first time 2
Connecting to a network 2
Chapter 2 7
Using Screen Share 7
Using Input 15
Using settings 16
Using the OSD menu 20
3
5
Updating system software 24
Applying an automatic system software update manually 24
Updating system software manually 24
Appendix A 25
Troubleshooting the display’s software 25
i smar ttech.com/kb/171178
Page 8

Page 9

Chapter 1
Chapter 1
About the display
[Overview]
The SMARTBoard 2075 display is a 75" non-touch LED display with built-in screen sharing that
supports iOS, Android and Microsoft platforms. The 4K ultra-high-definition display serves as an
active collaboration hub between student and teacher devices to allow for greater levels of
student engagement. The SMARTBoard 2075 display is a cost-effective solution that offers
educators flexibility in their implementation of technology in classrooms for whole class and small
group collaboration.
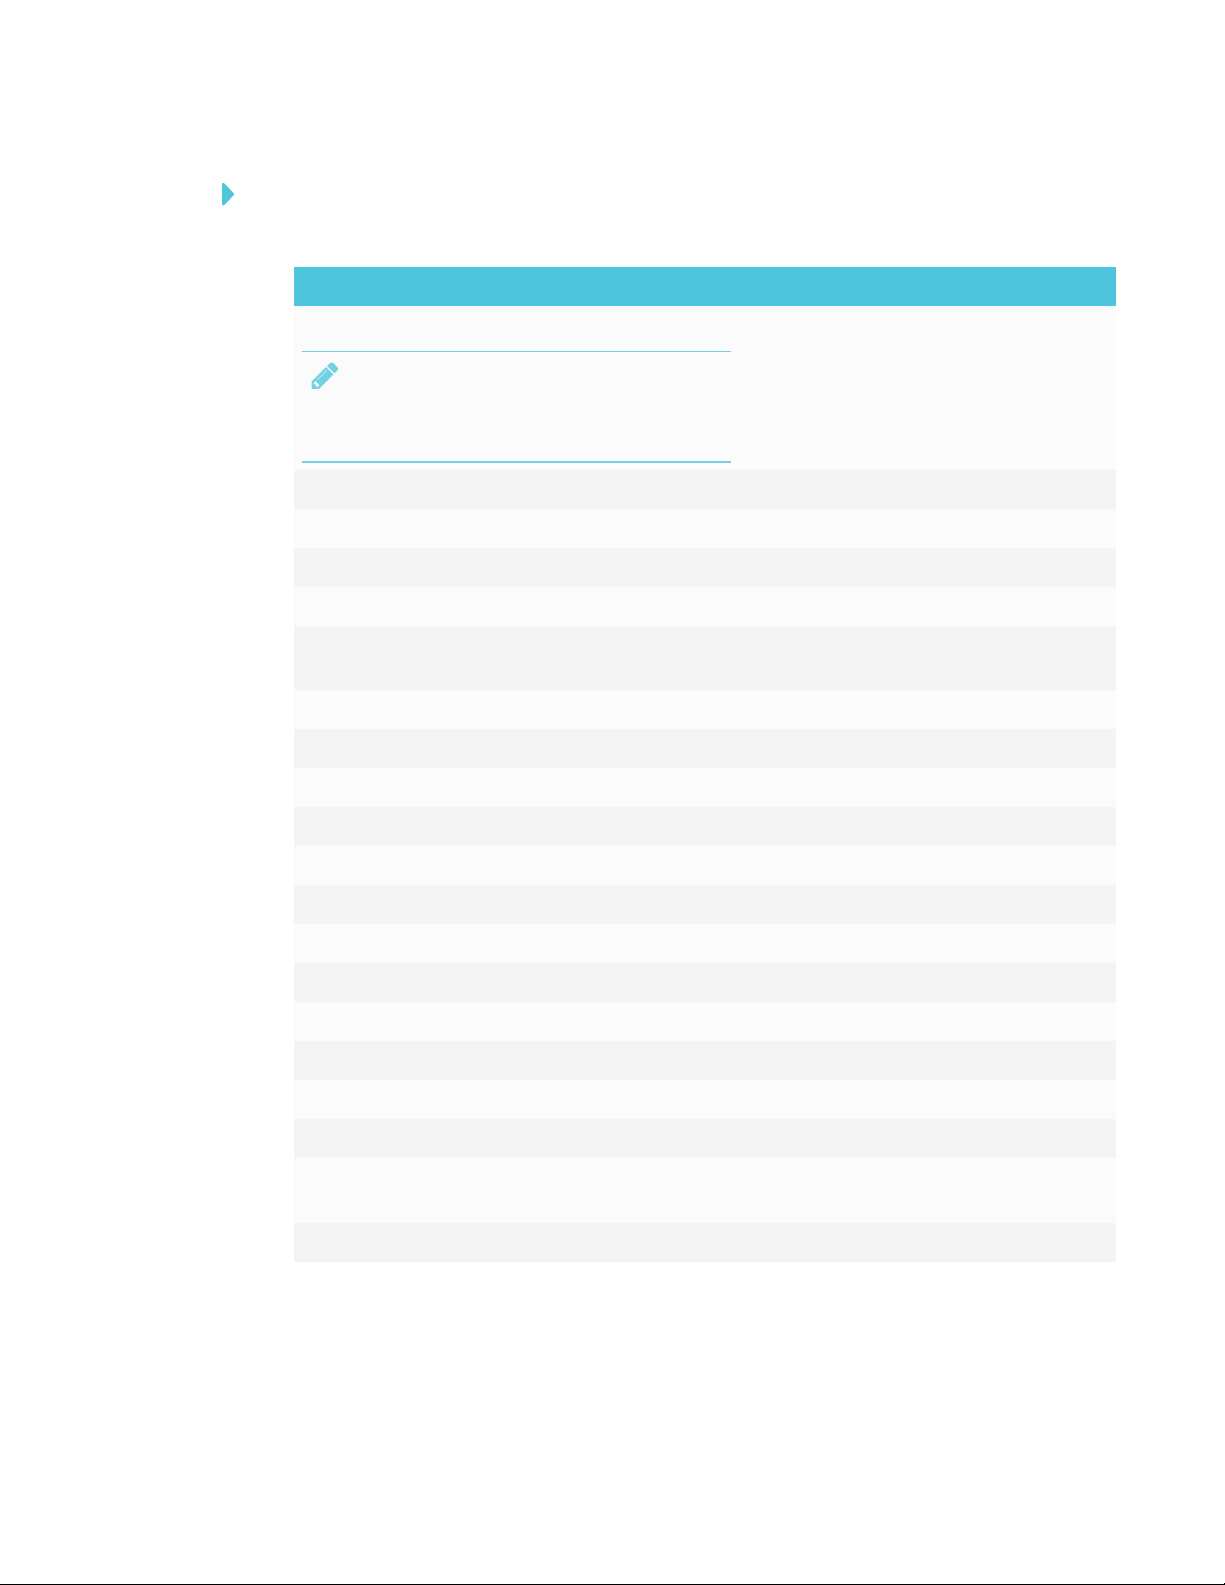
Features
The display includes the following features
Feature Description
4K ultra high definition
Screen sharing apps
1 smar ttech.com/kb/171178
Page 10

CHAPTER 1
CHAPTER 1
Turning on the display for the first time
Turn on the display after mounting it and connecting power and devices.
To turn on the display for the first time
(missing or bad snippet)
1. Select your preferred language, and then tap Next.
2. Select your country, and then tap Next.
3. Name the display, and then tap Next.
4. Set the date and time, and then tap Next.
5. If the display isn’t using a wired network connection, select a wireless network, and then tap
Next.
6. Tap Finish.
The Welcome screen appears.
Connecting to a network
You can connect the display to a network using either Wi-Fi or an Ethernet connection. Before you
do so, your organization’s network administrators need to configure the network for the display.
Configuring the network for the display
Network administrators need to configure the network so users can use the Screen Share app,
update the system software automatically over the air and enable the display to set the date and
time automatically.
Configuring the network for iQ functions
Network administrators need to configure the network so users can update the display’s firmware
and system software automatically over the air and to allow apps to function properly.
2 smar ttech.com/kb/171178
Page 11
CHAPTER 1
CHAPTER 1
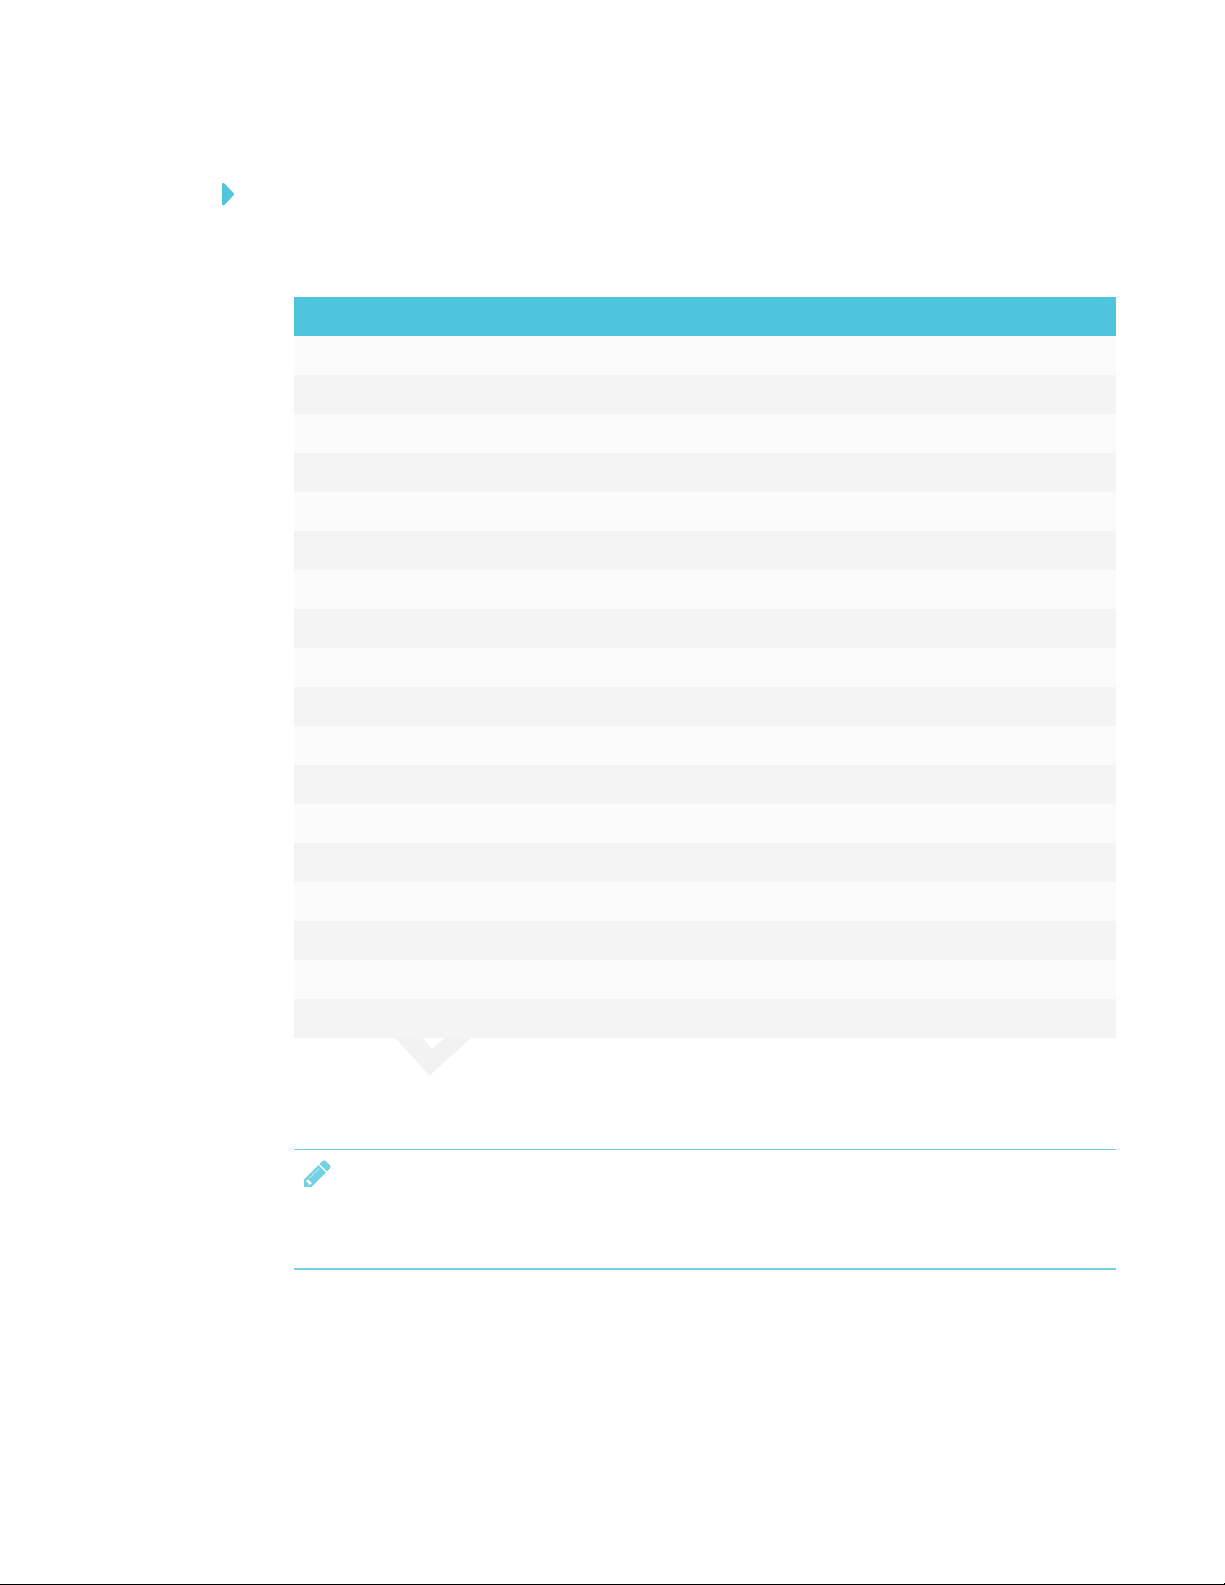
To configure the network
Add these URLs to the network whitelist.
URL Feature
https://ws.kappboard.com
Automatic iQ system software update
NOTE
Block access to https://ws.kappboard.com to
prevent automatic iQ system software updates
https://*.mixpanel.com iQ system software
*.hockeyapp.net iQ system software
https://*.smarttech-prod.com SMARTNotebook® Player
http://*.loggly.com SMARTNotebook Player
http://*.smarttech.com iQ system software, Workspaces, app,
Activities app, SMARTNotebook Player
https://*.smarttech.com SMARTNotebook Player
https://www.fabric.io/ SMARTNotebook Player
https://*.classlab.com Workspaces app, Activities app
https://www.firebase.com/test.html Workspaces app, Activities app
https://*.smartamp.com Workspaces app, Activities app
https://*.google.com Activities app
http://*.google-analytics.com Activities app
https://www.gstatic.com Activities app
https://*.firebaseio.com Activities app
https://*.cloudfront.com Activities app
https://content.googleapis.com Workspaces app
https://gstatic.com Workspaces app
https://*.youtube.com Workspaces app, SMARTNotebook
Player
https://api.datamarket.azure.com Workspaces app
3 smarttech.com/kb/171178
Page 12
CHAPTER 1
CHAPTER 1
To allow mobile devices and computers to use AirPlay and Google Cast to use the Screen Share
app
1. Open the required TCP/UDP ports:
Protocol Port range Feature
TCP 80 Outbound http
UDP 123 Network Time Protocol
TCP 3689 iTunes music sharing
TCP 5000 Audio streaming
TCP 5353 mDNS
UDP 5353 mDNS
TCP 7000 Picture sharing
TCP 7001 Video streaming
UDP 7010 Display mirroring
UDP 7011 Display mirroring
TCP 7100 Display mirroring
TCP 47000 Audio negotiation
TCP 49152–65535 Dynamic ports
UDP 49152–65535 Dynamic ports
TCP 49228 Google Cast
TCP 50259 Google Cast
UDP 54780 Google Cast
UDP 62572 Google Cast
2. Configure the network to allow Bonjour and mDNS (multicast).
3. Configure the network to allow Network Time Protocol (NTP) requests to Internet time servers.
NOTE
Using a 5 GHz network connection may provide a better experience with the Screen Share
app.
4 smarttech.com/kb/171178
Page 13

CHAPTER 1
CHAPTER 1
To allow SMARTNotebook Player to connect to the display
NOTE
The network may have been configured to allow Network Time Protocol in To allow mobile
devices and computers to use AirPlay and Google Cast to use the Screen Share app.
Configure the network to allow Network Time Protocol (NTP) requests to Internet time servers
Connecting the display to a network
The display can connect to a network using either Wi-Fi or an Ethernet connection. Network
administrators can also add a browser proxy.
To connect to a Wi-Fi network
(missing or bad snippet)
1. Tap Wi-Fi.
NOTE
Ensure Wi-Fi is turned On.
2. Select a wireless network.
If the Wi-Fi network is not password protected, the display connects to the network.
3. If the network requires a password, enter the Wi-Fi password and tap Connect.
OR
If the network requires a user name and password, enter the user name and Wi-Fi password
and tap Connect.
TIP
Use the crosshairs to move the on-screen keyboard.
To connect to an Ethernet network
NOTE
The network must provide network settings via DHCP. If you require a static IP, use DHCP
reservation on your router.
5 smar ttech.com/kb/171178
Page 14

CHAPTER 1
CHAPTER 1
To add a proxy
(missing or bad snippet)
1. Tap Wi-Fi.
2. Tap and hold the network to which you’re adding a proxy.
A dialog box appears.
3. Tap Modify network.
4. Select Show advanced options.
5. In the Proxy box, select Manual.
6. Enter the information in the Proxy hostname, Proxy port and Bypass proxy boxes.
7. Tap Save.
Evaluating the impact of Screen Share on your network data usage
When you connect your device or computer to the display using Screen Share, the screen sharing
protocol compresses the image from your device or computer. The protocol may transmit only
areas of the screen that change. This can make it difficult to estimate the impact of Screen Share
on a network where many users would like to screen share simultaneously.
For example, in a school where 30 teachers are using Screen Share simultaneously, 10% of
teachers might be streaming video while 90% might be sharing static content with occasional
updates. In such an instance, you could expect to see an additional 5 Mbps in network traffic. Use
the following table to help estimate the impact of wireless Screen Share on your network.
Content being shared Data rate transmission
Static content with minor screen movement 20 kb/sec
Static content with periodic scrolling or
refreshes
Gaming or streaming video with major screen
Spikes briefly to 500–600 kb/sec, returns to 20
kb/sec
700 kb/sec–1.2 Mbps
changes
6 smar ttech.com/kb/171178
Page 15

Chapter 2
Chapter 2
Using Screen Share
You can share content wirelessly to the display from your computer or mobile device.
NOTE
If you want to change the display’s name, see the SMARTBoard 2000 series displays
installation and maintenance guide (smarttech.com/kb/xxxxxx) for instructions.
Sharing content from the Chrome™ browser to the display
You can use the Chrome browser and Google Cast™ (a browser extension for Chrome) to share the
desktop or a specific browser tab from your computer.
NOTES
l Use Chrome version 52 and later to share content.
l Make sure your computer is connected to the same network as the display. See Confirming
the display and mobile device or computer are connected to the same network on page14
for more information.
To download the Chrome browser
1. On your computer, go to google.com/chrome.
2. Click Download > For personal computers >Download Chrome.
3. Follow the on-screen instructions.
To share content from the browser tab to the display
On the remote, press Input button to open the launcher.
1.
The launcher appears.
7 sm arttech.com/kb/171178
Page 16

CHAPTER 2
CHAPTER 2
Select Screen Share and press OK.
2.
NOTE
Remember the display’s name.
3. On your computer, open the Chrome browser.
4. Open the tab you want to share to the display.
In the top right corner of your browser, click the Cast icon .
5.
6. Select the display’s name.
NOTE
When you’re sharing content, the Cast icon turns blue.
To share content from your desktop to the display
On the remote, press Input button to open the launcher.
1.
The launcher appears.
Select Screen Share and press OK.
2.
3. On your computer, open the Chrome browser.
In the top right corner of your browser, click the Cast icon .
4.
5. Click the drop-down menu beside Cast to.
6. Click Cast desktop.
7. Select the display’s name.
8. In the Share your screen dialog box, click Entire screen.
NOTE
When you’re sharing content, the Cast icon turns blue.
Sharing content from your Windows® computer to the display
You can use the Chrome browser to share content from your Windows computer.
You can purchase AirParrot®, an application that allows you to share your display, a single
application or a media file. See airsquirrels.com/airparrot/features/win.
8 smar ttech.com/kb/171178
Page 17

CHAPTER 2
CHAPTER 2
If your computer is running Windows 10, Windows 8 or Windows 8.1 operating system, you can use
Miracast to share content.
NOTE
Make sure your computer is connected to the same network as the display. See Confirming the
display and mobile device or computer are connected to the same network on page14 for
more information.
Using Miracast to share content from Windows 8 operating system
To share content from the Windows 8 operating system
On the remote, press Input button to open the launcher.
1.
The launcher appears.
Select Screen Share and press OK.
2.
NOTE
Remember the display’s name.
3. Swipe in from the right edge of the screen, and then tap Devices.
OR
With a mouse, point to the lower-right corner of the screen, move the pointer up and click
Devices.
4. Click Project > Add a wireless display and select the display.
To choose how content is shared from the Windows 8 operating system
On the remote, press Input button to open the launcher.
1.
The launcher appears.
Select Screen Share and press OK.
2.
NOTE
Remember the display’s name.
9 smar ttech.com/kb/171178
Page 18

CHAPTER 2
CHAPTER 2
3. Swipe in from the right edge of the screen, and then tap Devices.
OR
With a mouse, point to the lower-right corner of the screen, move the pointer up and click
Devices.
4. Click Project and select:
o
PC screen only. No content is shared to the display.
o
Duplicate. Content is shared on both screens.
o
Extend. The computer’s desktop is extended across the computer and display’s screen.
You can move items between the two screens.
o
Second screen only. Content is shared to the display. The computer’s screen is blank.
Using Miracast to share content from the Windows 10 operating system
To share content from a computer using Windows 10 system software
1. On the computer, turn on Wi-Fi.
On the remote, press Input button to open the launcher.
2.
The launcher appears.
Select Screen Share and press OK.
3.
NOTE
Remember the display’s name.
On the computer, click action center > Connect and select the display.
4.
Supported Chrome browsers
Chrome browser version 52 or later
10 smar ttech.com/kb/171178
Page 19

CHAPTER 2
CHAPTER 2
Sharing content from your Apple product to the display
For a list of supported Apple products, see Supported Apple devices and operating systems on
the next page.
NOTE
Make sure your Mac computer or iOS device is connected to the same network as the display.
See Confirming the display and mobile device or computer are connected to the same network
on page14 for more information.
To mirror your Mac computer’s desktop to the display
On the remote, press Input button to open the launcher.
1.
The launcher appears.
Select Screen Share and press OK.
2.
NOTE
Remember the display’s name.
On your Mac computer, click the AirPlay icon in the menu bar.
3.
4. Select the display’s name.
The AirPlay icon turns blue when your Mac computer is sharing content with AirPlay.
To extend your Mac computer desktop to the display
On the remote, press Input button to open the launcher.
1.
The launcher appears.
Select Screen Share and press OK.
2.
NOTE
Remember the display’s name.
On your Mac computer, click the AirPlay icon in the menu bar.
3.
4. Select the display’s name.
11 smar ttech.com/kb/171178
Page 20

CHAPTER 2
CHAPTER 2
The AirPlay icon turns blue when your Mac computer is sharing content with AirPlay.
Click the AirPlay icon , and then click Extend Desktop.
5.
To mirror your iOS device’s screen to the display
On the remote, press Input button to open the launcher.
1.
The launcher appears.
Select Screen Share and press OK.
2.
NOTE
Remember the display’s name.
3. On your iOS mobile device, open the Control Center.
4. Tap AirPlay.
5. Select the display’s name.
6. Select Mirroring.
7. Select an app.
The content appears on the display.
Supported Apple devices and operating systems
The following Apple operating systems support Screen Share.
l iOS 9 or later
l OSX 10.11 (El Capitan) or later
The following Apple devices support Screen Share.
l iPhone 4S or later
l iPad 2 or later
l iPod touch (5th generation) or later
Sharing content from your Android™ mobile device
For a list of supported Android products, see Supported Android devices and operating systems
on page14.
For more information, see Cast your Android screen from the Google Home app.
12 smarttech.com/kb/171178
Page 21

CHAPTER 2
CHAPTER 2
NOTE
Make sure your Android mobile device is connected to the same network as the display. See
Confirming the display and mobile device or computer are connected to the same network on
the next page for more information.
To share your Android mobile device’s screen on the display using the Google Home app
1. Download the Google Home app from Google Play™.
On the remote, press Input button to open the launcher.
2.
The launcher appears.
Select Screen Share and press OK.
3.
NOTE
Remember the display’s name.
4. On your Android mobile device, open the Google Home app.
In the top left corner, press the navigation drawer .
5.
6. Tap Cast Screen.
7. Select the display’s name.
NOTE
If you don’t see the display you want, tap MORESETTINGS to show more displays.
To share your Android mobile device’s screen on the display from the notification shade
1. On your device, swipe down to open the notification shade.
2. Tap Cast.
3. Select the display’s name.
If you don’t see the display you want, tap MORESETTINGS to show more displays.
NOTES
l Make sure your Android mobile device is connected to the same network as the display.
l Not all apps are Google Home-enabled.
13 smarttech.com/kb/171178
Page 22

CHAPTER 2
CHAPTER 2
Supported Android devices and operating systems
l All devices running Android 4.4.2 or later support the Cast Screen feature.
See Optimized devices for Android Screen casting.
NOTE
Not all mobile devices have beenoptimized for screen casting.
l Make sure Power Saving mode is off on your Android mobile device. Power Saving mode can
limit the mobile device’s processing power, which could affect the performance of the Cast
Screen feature.
Stop sharing content
TIP
You can disconnect your mobile device or computer to stop sharing content to the display.
To stop sharing content to the display
1. On the remote, press Back.
The message “Want to disconnect?” appears.
2. Select Yes and press OK.
Confirming the display and mobile device or computer are connected
to the same network
To confirm the display and mobile device or computer are connected to the same network
On the remote, press Input button to open the launcher.
1.
The launcher appears.
Select Screen Share and press OK.
2.
3. Note the network the display is connected to.
4. On your mobile device or computer, confirm which network the mobile device or computer is
connected to. Consult the mobile device or computer’s user guide for more information.
14 smarttech.com/kb/171178
Page 23

CHAPTER 2
CHAPTER 2
Using Input
You can present content from your computer on the display when you connect a
computer to the display.
Showing content on the display
To show content on the display
On the remote, press Input button to open the launcher.
1.
The launcher appears.
2. Use the arrow button to select the input source and press OK.
The display looks for a connection, and the content appears on the screen.
Naming the video input ports
You can add a custom name, up to 35 characters, for each video input.
To name a video input
1. Open the launcher.
The launcher appears.
Tap Input .
2.
The display looks for a connection, and the port previews appears on the screen.
3. Tap [pen icon] to edit the video input port’s name.
4. Using the on-screen keyboard, enter a name for the video input port.
5. Tap Done on the on-screen keyboard.
Stop showing content on the display
To stop showing content on the display
Open the launcher and select another app.
15 smarttech.com/kb/171178
Page 24

CHAPTER 2
CHAPTER 2
Using settings
About device 16
Diagnostics 17
Language 17
Country 17
Wi-Fi 18
Advanced Wi-Fi options 18
Ethernet 19
Date & time 19
Usage Data 19
Auto Update 20
Screen Share 20
You can access the display’s settings using the icon in the launcher.
About device
NOTE
To find the display’s serial number, see <XREF>.
Option Values Function Notes
Product information
Board nam e
Legal Infor mation
Board information
Build number
Up time
Board configuration
[N/A] Select a name for your
display
[N/A] Shows the open source
licenses, the SMART end
user license agreement
and SMART intellectual
property information
[N/A] Shows the iQsystem
software’s version number
[N/A] Shows how long the
display has been turned on
[N/A]
[N/A]
[N/A]
Turning offthe display resets
the up time to 0 .
Factory data reset
16 smarttech.com/kb/171178
[N/A] Resets all options to their
default values
Only administrators should
reset the display.
Page 25

CHAPTER 2
CHAPTER 2
Diagnostics
Option Values Function Notes
Write logs to USB
[N/A] Copy diagnosticlogs to a USB drive [N/A]
Language
Option Values Function Notes
Language
[Languages] Sets the language for the settings
menu
(missing or bad snippet)
Country
Option Values Function Notes
Country
[Countries] Sets the display’s country [N/A]
17 smarttech.com/kb/171178
Page 26

CHAPTER 2
CHAPTER 2
Wi-Fi
NOTE
To add a proxy, see Connecting the display to a network on page5.
Option Values Function Notes
Wi-Fi
Scan
WPSPin Entry
Wi-Fi Direct
Advanced
WPSpush button
Add network
[Wireless
networks]
[N/A] Scan for wireless networ ks
[N/A] [N/A] Not used
[N/A] [N/A] Not used
[N/A] Set advanced options for Wi-Fi See Advanced Wi-Fioptions below.
[N/A] Connect to a wireless network
[N/A] Add a wireless network [N/A]
Select a wireless network Turn on Wi-Fito discover networks.
Tap More to access this option.
[N/A]
using Wi-FiProtected Setup
Advanced Wi-Fi options
Option Values Function Notes
Advanced
Network notification
Keep Wi-Fion during
sleep
[N/A] Notifies you when an open wireless
network is available
Always
Only when
plugged in
Never
Determines if the Wi-Fi remains on
when the display goes to sleep
[N/A]
[N/A]
Scanning always
available
Wi-Fi frequencyband
Install certificates
Wi-Fi optimization
MACaddress
IPaddress
18 smarttech.com/kb/171178
[N/A] Allow Google’s location ser viceand
other applications to scan for
networks, even when Wi-Fiis
turned off
Auto
5 Ghz
2.4 Ghz
[N/A] Install certificates to connect toa
[N/A] Minimize battery usage when Wi-Fi
[N/A] Shows the display’s MACaddress [N/A]
[N/A] Shows the display’s IPaddress [ N/A]
Wi-Fi frequencyband [N/A]
network
is enabled
[N/A]
[N/A]
[N/A]
Page 27

CHAPTER 2
CHAPTER 2
Ethernet
NOTE
Manual configuration isn’t available. The IPaddress is automatically configured via DHCP.
Option Values Function Notes
IP address
MACaddress
[N/A] Shows the display’s IPaddress [ N/A]
[N/A] Shows the display’s MACaddress [N/A]
Date & time
Option Values Function Notes
Automatic date & time
Set date
Set time
Select time zone
Use 24-hour format
Choose date format
[N/A] Sets the display’s date and time
automatically
[N/A] Sets the display’s date Disable Automatic date & time to
[N/A] Sets the display’s time Disable Automatic date & time to
[N/A] Sets the display’s time zone [N/A]
[N/A] Shows the display’s time using the
24-hour clock
[N/A] Sets the display’s date format [N/A]
Configure the network to a llow
Network Time Protocol (NTP)
requests to Internet time servers.
See page2.
set the date manually.
set the time manually.
[N/A]
Usage Data
Option Values Function Notes
Share Usage Data
19 smarttech.com/kb/171178
[N/A] Sends usage statistics and error
reports to SMART
[N/A]
Page 28

CHAPTER 2
CHAPTER 2
Auto Update
NOTE
To prevent automatic system software updates, block access to https://ws.kappboard.com.
Option Values Function Notes
Updates Channel
Checkfor Updates Now
Stable Channel
Beta Channel
[N/A] Checksfor updates to the system
Sets which system software
updates the display r eceives
software
NOTE
The display must be connected
to the Internet to checkfor
system software updates.
When switching from the Beta
Channel to the Stable Channel,a
factory r eset occurs. See page16
for more information about factory
reset.
If an update is available, the text
changes toApply update now.
Screen Share
Option Values Function Notes
Screen Share
Reset
[N/A] Closes and restarts Screen Shar e
app and its discovery services
You can restart Screen Share as a
troubleshootingstep if a mobile
device or computer can’tfind or
connect to the display.
Using the OSD menu
You can access the on-screen display (OSD) menu by using the control panel on the side of the
display or the remote control.
Changing settings in the on-screen display menu
To change settings with the control panel
1. Press the Menu button on the side control panel.
The on-screen display menu appears.
2. Press the up and down arrows to highlight a menu, and then press Input to select it.
3. Press the up and down arrows to highlight a menu option, and then press Input to select it.
4. Press the left and right arrows to change the setting.
5. Press Menu to navigate backwards until the on-screen menu closes.
20 smarttech.com/kb/171178
Page 29

CHAPTER 2
CHAPTER 2
Picture menu
Option Values Function Notes
Brightness 0–10 0 Sets the overall brightness of the
image and background
Contrast 0–100 Sets the difference in brightness
between the lightest and darkest
parts of the image
Sharpness 0–100 Sets the image sharpness
Color temperature Native
6500K
9300K
User
Color control Red 0–100 Sets the amount of red in the ima ge
Green 0–100 Sets the amount ofgreen in the
Blue 0–100 Sets the amount of blue in the image
Sets the color temperature
image
[N/A]
[N/A]
[N/A]
Select User to customize red,
green and blue settings in the
Color control option.
You can modify this value
only if you select User in the
Color temperature option.
You can modify this value
only if you select User in the
Color temperature option.
You can modify this value
only if you select User in the
Color temperature option.
Picture mode Standard
Highbright
Soft
Standard
Picture reset Yes
No
Sets the picture mode
Resets all settings in the Picture menu
to their default values
[N/A]
[N/A]
Screen menu
Option Values Function Notes
H-position 0–100
V-position 0–100
Clock 0–100
Sets the horizontal position
of the image
Sets the vertical position of
the image
[N/A]
[N/A]
[N/A]
[N/A]
21 smarttech.com/kb/171178
Page 30

CHAPTER 2
CHAPTER 2
Option Values Function Notes
Clock phase 0–100
Blank Off
On
Dimming 10–100 Sets the image dimming
Aspect ratio Wide
4:3
Screen r eset No
Yes
[N/A]
Turns the image off
Sets the aspect ratio
Resets all settings in the Screen
menu to their defaultvalues
[N/A]
[N/A]
[N/A]
[N/A]
[N/A]
Audio menu
Option Values Function Notes
Speaker Internal
External
Audio source HDMI 1
HDMI 2
DP
Audio 1
Audio 2
Sets the speaker output
Sets the audio input
[N/A]
[N/A]
Audio reset Yes
No
Resets all settings in the Audio
menu to their defaultvalues
[N/A]
Configuration 1 menu
Option Values Function Notes
Auto adjust What are the
values?
Language English
What’s the
second Asian
language here?
Auto source No
Yes
Configuration reset No
Yes
Factory reset No
Yes
What does thisdo?
Sets the language
Turns input auto-source on or off
Resets all settings in the
Configuration 1 menu to their
default values
Resets all OSD menu settings to
their default values
You can modify this value
only if you select the VGA
input.
[N/A]
[N/A]
[N/A]
[N/A]
22 smar ttech.com/kb/171178
Page 31

CHAPTER 2
CHAPTER 2
Configuration 2 menu
Option Values Function Notes
OSDturn off 5-120 seconds Sets the time of inactivitybefore the
on-screen display menu tur ns off
Freeze function Off
On
OSDH-position 1-10 0 Sets the horizontal position of the
OSDV-position 1 -100 Sets the vertical position of the OSD
OSDrotation Landscape
Portrait
Monitor information [N/A] Displays the model name, serial
Turns the picture fr eeze frame on
or off
OSDmenu
menu
Sets the rotation position of the
OSDmenu
number, and operating time
[N/A]
[N/A]
[N/A]
[N/A]
[N/A]
[N/A]
Advance menu
Option Values Function Notes
Gamma selection Mode 1
Mode 2
Mode 3
Over scan Off
On
Sets the color gamma value
Turns over scan on or off
[N/A]
Over scan increases the
picture size on the display
IR control Norm al
Lock
Keypad control Unlock
Lock
DDC/CI On
Off
Advanced option reset No
Yes
Turns the remote control feature
on or off
Turns the OSDkeypad on or off [N /A]
Turns access to Extended Display
Identification Data (EDID) on or off
Resets all settings in the Advanced
menu to their defaultvalues
[N/A]
[N/A]
[N/A]
23 smarttech.com/kb/171178
Page 32

CHAPTER 2
CHAPTER 2
Updating system software
When the SMARTBoard 2000 series display is connected to the Internet, it updates its system
software automatically.
When an update to the system software is available, the display downloads the update in the
background then waits for four hours of inactivity. When that happens, the display shows a
two-minute countdown before beginning the update. The countdown can be interrupted at any
time. The update begins when the countdown is complete. The display shows a blank screen for
four minutes. When the update is complete, the display shows the Whiteboard and any content
that was on Whiteboard before the update.
NOTE
You can configure your organization’s network to allow or prevent automatic system software
updates (see Configuring the network for the display on page2).
Applying an automatic system software update manually
If the display has downloaded the system software update but hasn’t yet applied the update, you
can start the update process manually from Settings.
To apply an automatic system software update manually
(missing or bad snippet)
1. Scroll to Auto Update.
2. Under Check for Updates Now, tap Apply Update Now.
Updating system software manually
You can download system software updates at smarttech.com/downloads and update your display
using a USB drive.
24 smarttech.com/kb/171178
Page 33

Appendix A
Appendix A
Troubleshooting the display’s software
This section explains how to troubleshoot the display’s software.
Resolving issues with SMARTNotebook Player
(missing or bad snippet)
Resolving issues with Input
Issue Solutions
There is an issue with the image. l Make sure the video cable is securelyfastened to both your computer and the
display.
l Replace the video cable with a better quality video cable.
l If you’re using two connectedvideo cables, use one longer cable or move the
computer so it’swithin a single cable length ofthe display.
l If you’re using a display adapter with your video cable, try a different display
adapter.
l (missing or bad snippet)
l The computer’s video resolution settings and refresh r ates aren’t supported by
the display. The display supports the followingresolutions and refresh rates:
o
1920 ×1080 at 60 Hz
o
1600 × 900 at 60 Hz
o
1280 ×720 at 60 Hz
There is an issue with audio. l (missing or bad snippet)
l Turn off the mute setting on your computer.
l Turn up the volume on your computer.
l Turn up the volume on the display.
See <XREF>.
25 smarttech.com/kb/171178
Page 34

APPENDIX A
APPENDIX A
Resolving issues with Screen Share
TIP
Restart the Screen Share app and its discovery services:
On the remote, press up and select Screen Share.
Resolving issues with Android™ mobile devices
Issue Solutions
The display’s name doesn’t appear
in the list of a vailabledevices.
l Make sure your mobile device is on the same network as the display.
l Not allAndroid devices can initiate Screen Share from the notification drawer.
Download the G oogle Home app from G ooglePlay™ to use Screen Share.
l If your display is using a wired network connection,try connecting it to a wireless
network.
NOTE
Wired and wireless networks don’t often share the same networksubnet.
Connecting the display to a wireless network might helpthe connection
between the display and a mobiledevice or computer that’sconnected
wirelessly.
l Make sure the display and mobile device are set tothe correct date and time.
See Date & time on page19 and your mobile device’s documentation.
l Make sure the display and mobile device are set tothe correct date and time.
l On your mobile device, turn Airplane mode on and then off again.
l Restart your Android mobile device.
NOTE
Restarting your mobiledevice can clear network address information that
your mobile device had cached.Restartingthe mobile device can a lso
reinitialize audio and video encoders that might have stopped working
properly.
l On the remote, press up and select Screen Share.
l Restart your display.
See <XREF>.
l If you’ve restarted your display and still don’t see the display’s name in the listof
devices, wait several minutes and then try to connect to the display again.
l Ensure you have the latest operating software on your Androidmobile device.
Make sure no system updates are pending for your Android mobile device.See
the mobile device’s user guide for more information.
The display’s name appears in the
listof available devices but you’re
unable to connectto it.
26 smarttech.com/kb/171178
l Open the Screen Share app.
a.
On the remote, press Input button to open the launcher.
The launcher appears.
b.
Select Screen Share and press OK.
Page 35

APPENDIX A
APPENDIX A
Issue Solutions
The video is choppy or the audio
isn’tin sync with the video.
l If your network is slow or congested,Screen Shar e is affected.Contact your
administrator.
l Your mobile device could be connected to different access points than your
display, which can increase latency. Turn Airplane mode on and then off on your
mobile device to try to connect toa closer access point.
l Sharing videos or playing video games with frequent screen updates r equires
more network bandwidth. Try reducing the video quality to improve
performance.
See Evaluating the impactof Screen Share on your networ k data usage on
page6.
l Sharing videos or playing video games with frequent screen updates r equires
more network bandwidth. Try reducing the video quality to improve
performance.
l Your mobile device may not be optimizedfor sharing its screen and is limited to
lower qua lity performance. Try connecting with a different mobile device.
l Ensure you have the latest operating software on your Androidmobile device.
Make sure no system updates are pending for your Android mobile device.See
the mobile device’s user guide for more information.
The video has no audio. l Make sure the volume on your mobile device is turned up and the display is not
muted.
l Turn up the volume on the display.
See <XREF>.
l Make sure you have the latest operating software on your Android mobile
device.
l Restart your mobile device.
The screen is notresponding to
touch or you’re unable to write or
draw with the pens.
The issues persist even after you’ve
restar ted your Android mobile
device and ensured it is on the
same network as the display.
Touch interactions ar e not supported while using Screen Share.
Contact your system administrator.
27 smarttech.com/kb/171178
Page 36

APPENDIX A
APPENDIX A
Resolving issues with Apple devices
Issue Solutions
The display’s name doesn’t appear
in the list of a vailabledevices.
l Make sure your mobile device or computer is on the same network as the
display.
l If your display is using a wired network connection,try connecting it to a wireless
network.
NOTE
Wired and wireless networks don’t often share the same networksubnet.
Connecting the display to a wireless network might helpthe connection
between the display and a mobiledevice or computer that’sconnected
wirelessly.
l Make sure the display and computer are set to the correct date and time.
See Date & time on page19 and your computer’s documentation.
l Make sure the display and computer are set to the correct date and time.
l On your mobile device, turn Airplane mode on and then off on your mobile
device.
l Restart your mobile device.
NOTE
Restarting your mobiledevice can clear network address information that
your mobile device had cached.Restartingthe mobile device can a lso
reinitialize audio and video encoders that might have stopped working
properly.
l On the remote, press up and select Screen Share.
l On your computer, turn Wi-Fi off and then backon, or disconnect and then
reconnect the Ethernet cable.
l Restart your computer.
The display’s name appears in the
listof available devices but you’re
unable to connectto it.
NOTE
Restarting your computer can clear network address information that your
computer had cached. Restarting the computer can also reinitialize audio and
videoeconders that might have stopped workingproperly.
l Restart your display.
See <XREF>.
l If you’ve restarted your display and still don’t see the display’s name in the listof
devices, wait several minutes and then try to connect to the display again.
l Make sure your computer or device has the latest operating system software.
Open the Screen Share app.
a.
On the remote, press Input button to open the launcher.
The launcher appears.
b.
Select Screen Share and press OK.
28 smar ttech.com/kb/171178
Page 37

APPENDIX A
APPENDIX A
Issue Solutions
The video is choppy or the audio
isn’tin sync with the video.
l If your network is slow or congested,Screen Shar e is affected.Contact your
administrator.
l The display and the mobile device or computer could be connected to different
wireless access points,which can increase latency. On the mobile device, turn
Airplane mode on and back off to try toconnect to a closer access point.On the
computer, disconnect and then reconnectthe Ethernet cable or turn Wi-Fi off
and then back on to try to connectto a closer access point.
l Reduceyour computer’s display resolution to 1920 × 1080 or lower.
l Sharing videos or playing video games with frequent screen updates r equires
more network bandwidth. Try reducing the video quality to improve
performance.
See Evaluating the impactof Screen Share on your networ k data usage on
page6.
l Sharing videos or playing video games with frequent screen updates r equires
more network bandwidth. Try reducing the video quality to improve
performance.
l Make sure your computer or device has the latest operating system software.
The video has no audio. l Make sure the volume on your iOS device is turned up and the display is not
muted.
l Make sure the Ring/Silent switch isn’t set tosilent on your mobile device.
l Turn up the volume on the display.
See <XREF>.
The screen is notresponding to
Touch interactions ar e not supported while using Screen Share.
touch or you’re unable to write or
draw with the pens.
The issues persist even after you’ve
restar ted your Mac computer or
iOSmobile device and ensured
they ar e on the same network as
the display.
Contact your system administrator.
29 smarttech.com/kb/171178
Page 38

APPENDIX A
APPENDIX A
Resolving issues with Chrome™ browser and Chromebook™
Issue Solutions
The display’s name doesn’t appear
in the list of a vailabledevices.
l Make sure your computer is on the same network as the display.
l If your display is using a wired network connection,try connecting it to a wireless
network.
NOTE
Wired and wireless networks don’t often share the same networksubnet.
Connecting the display to a wireless network might helpthe connection
between the display and a mobiledevice or computer that’sconnected
wirelessly.
l Make sure the display and computer are set to the correct date and time.
See Date & time on page19 and your computer’s documentation.
l Make sure the display and computer are set to the correct date and time.
l On your computer, turn Wi-Fi off and then backon, or disconnect and then
reconnect the Ethernet cable.
l Restart your computer.
NOTE
Restarting your computer can clear network address information that your
computer had cached. Restarting the computer can also reinitialize audio and
videoencoders that might have stopped workingproperly.
l For more information about the Google Cast browser extension, see Casting a
tab or entire desktop.
l Restart your display.
See <XREF>.
l If you’ve restarted your display and still don’t see the display’s name in the listof
devices, wait several minutes and try to connect to the display a gain.
The display’s name appears in the
listof available devices but you’re
unable to connectto it.
Open the Screen Share app.
a.
On the remote, press Input button to open the launcher.
The launcher appears.
b.
Select Screen Share and press OK.
30 smar ttech.com/kb/171178
Page 39

APPENDIX A
APPENDIX A
Issue Solutions
The video is choppy or the audio
isn’tin sync with the video.
Parts of the ima ge do not display
correctly when sharing streaming
videoto the display.
The screen is notresponding to
touch or you’re unable to write or
draw with the pens.
l If your network is slow or congested,Screen Shar e is affected.Contact your
administrator.
l Not alldevices are designed for video encoding for Screen Sharing, so video
streaming might not behave as expected.
l Sharing videos or playing video games with frequent screen updates r equires
more network bandwidth. Try reducing the video quality to improve
performance.
See Evaluating the impactof Screen Share on your networ k data usage on
page6.
l Sharing videos or playing video games with frequent screen updates r equires
more network bandwidth. Try reducing the video quality to improve
performance.
l Screen Share has not been optimized for performance with Chromebooks.For
best results,limit usage to static content.
l The display and the computer might be connected to different wireless access
points,which can increase latency.On the computer, disconnectand then
reconnect the Ethernet cable or turn Wi-Fioff and then backon to tr y to connect
to a closer access point.
l (missing or bad snippet)
Touch interactions ar e not supported while using Screen Share.
31 smarttech.com/kb/171178
Page 40

APPENDIX A
APPENDIX A
Resolving issues with Windows computers
Issue Solutions
The display’s name doesn’t appear
in the list of a vailabledevices.
l Make sure your computer is on the same network as the display.
l If your display is using a wired network connection,try connecting it to a wireless
network.
NOTE
Wired and wireless networks don’t often share the same networksubnet.
Connecting the display to a wireless network might helpthe connection
between the display and a mobiledevice or computer that’sconnected
wirelessly.
l Make sure the display and computer are set to the correct date and time.
See Date & time on page19 and your computer’s documentation.
l Make sure the display and computer are set to the correct date and time.
l On your computer, turn Wi-Fi off and then backon, or disconnect and then
reconnect the Ethernet cable.
l Restart your computer.
NOTE
Restarting your computer can clear network address information that your
computer had cached. Restarting the computer can also reinitialize audio and
videoencoders that might have stopped workingproperly.
l Restart your display.
See <XREF>.
l If you’ve restarted your display and still don’t see the display’s name in the listof
devices, wait several minutes and try to connect to the display a gain.
l Make sure the operating system on your computer is up to date.
l Windows Wireless Display (Miracast) is currently not supported.
o
Use Google Cast from Chrome browser.
See Sharing content from your Windows computer to the display on
page8.
o
Use Google Cast from Chrome browser.
See the SMARTBoard 2000 series displays quick reference
(smarttech.com/kb/xxxxxx).
o
You can purchase AirParrot, an application that allows you to share your
computer’s display, an application,audio or a m edia file.
See AirParrot.
l If you’ve restarted your display and still don’t see the display’s name in the listof
devices, wait several minutes and then try to connect to the display again.
The display’s name appears in the
listof available devices but you’re
unable to connectto it.
32 smarttech.com/kb/171178
Open the Screen Share app.
a.
On the remote, press Input button to open the launcher.
The launcher appears.
b.
Select Screen Share and press OK.
Page 41

APPENDIX A
APPENDIX A
Issue Solutions
The video is choppy or the audio
isn’tin sync with the video.
Which version of Chrome browser
supports Screen Share?
The screen is notresponding to
touch or you’re unable to write or
draw with the pens.
l If your network is slow or congested,Screen Shar e is affected.Contact your
administrator.
l The Wi-Fi signal could be weak.Contact your administrator.
l Your device could be connected to a different access point than your display,
which can increase latency. Turn Airplane mode on and then off on your
computer totry to connecting to a closer access point.
l Sharing videos or playing video games with frequent screen updates r equires
more network bandwidth. Try reducing the video quality to improve
performance.
See Evaluating the impactof Screen Share on your networ k data usage on
page6.
l Sharing videos or playing video games with frequent screen updates r equires
more network bandwidth. Try reducing the video quality to improve
performance.
l (missing or bad snippet)
l Reduceyour display’s resolution to 1920 × 1 080 or lower.
l Make sure the operating system on your computer is up to date.
l If you’re using AirParrot, make sure AirParrot is up to date.
l If you’re using Chrome, the browser is version 52 or later and is up to date.
l If you’ve restarted your display and still don’t see the display’s name in the listof
devices, wait several minutes and then try to connect to the display again.
Chrome browser version 52 or later
Touch interactions ar e not supported while using Screen Share.
Advanced troubleshooting for Screen Share
Issue Solutions
Mobile devices and computers can’t find
the display.
l Schoolnetworks often blocka number of network ports.
Ask the administrator toallow
o
o
o
o
See To allow mobile devices and computers to use AirPlay and Google Cast
to use the Screen Share app on page4 for more information.
l The display’s casting IDmay not have propagated yet through the network
or may be cached on the network when it’s not actually available.
Wait several minutes and attempt to connect again.
l You’re usingMiracast or an unsupported wireless screen casting method.
See Using Screen Share on page7.
l You’re usingMiracast or an unsupported wireless screen casting method.
See the SMARTBoard 2000 series displays quick reference
(smarttech.com/kb/xxxxxx).
TCPports 7000, 8008, 8009, 47000, 7100, 49228,50259
UDP ports 62572and 54780
If using Google Cast, UDP port 1900
If using Windows computer or a Mac computer, UDP port 5353.
33 smarttech.com/kb/171178
Page 42

APPENDIX A
APPENDIX A
Issue Solutions
Screen Share is not workingfor
Windows computers.
Screen Share is not workingfor Mac
computers.
AirPlay is not displaying on an iOS
mobile device.
Screen Share is not workingon Android
devices.
l There might be an issue with the Windows firewall.
o
Windows 7operating system: See Allow a program to communicate
through Windows Firewall.
o
Windows 8operating system: SeeWindows Firewall from start to
finish.
l Your antivirus productmight be blocking access. See the antivirus product’s
help for more information.
l There might be an issue with the Mac firewa ll.See OSX:About the
application firewall.
l Your antivirus productmight be blocking access. See the antivirus product’s
help for more information.
l The network must be configured to run Bonjour and mDNS, and Multicast
must be enabled.
l Ensure your device and display are on the same VLAN or subnet.
l Ensure the iOS device is on the same network as the display.
l Try connectingthe display with a wired network connection.
l See Get help with AirPlay a nd AirPlay Mirroring on your iPhone, iPad,or iPod
touch.
l Ensure your Andr oid mobile device is on the sa me network as the display.
l Casting the screen is a vailableon mobile devices running Android 4.4.2or
later.
l Turn off the device’s Power Saving mode.
l If you’ve downloaded the Google Cast a pp, see Cast your Android screen
from the Chrome Cast app.
l Your antivirus productmight be blocking access. See the antivirus product’s
help for more information.
l Your network consists of multiple access points connected to a single
wireless LAN controller (WLC).
o
See Chrome Cast Deployment Guide,Release 7.6.
o
See Chrome Cast mDNS Service in order to Cast Screen
Configuration on WLC.
Screen Share app closes unexpectedly
or the video stops playing on the display.
34 smarttech.com/kb/171178
l If your display is connected to a 2.4 GHz network,connect your display to a
5 GH z network.
l Select a less congested Wi-Fichannel.
Page 43

Page 44

SMARTTECHNOLOGIES
smar ttech.com/support
smar ttech.com/contactsupport
smar ttech.com/kb/171178
 Loading...