

Page 1

Exclusively Manufactured & Distributed by:
SMART Worldwide
(an SMA Worldwide Ltd. Company)
SMA House, Langley Waters, Home Park
Kings Langley, Herordshire, WD4 8LZ
SMART Worldwide Ltd 2016 ©
www.smartworldwidefun.com
Model: PT300
SMART (an SMA Worldwide Ltd. Company) have a policy of continuous improvement
and we reserve the right to change specications and colours without notice.
SMART is a registered trademark of SMA Worldwide Ltd, London, England.
www.smartworldwidefun.com
© SMA Worldwide Ltd. 2016
Page 2
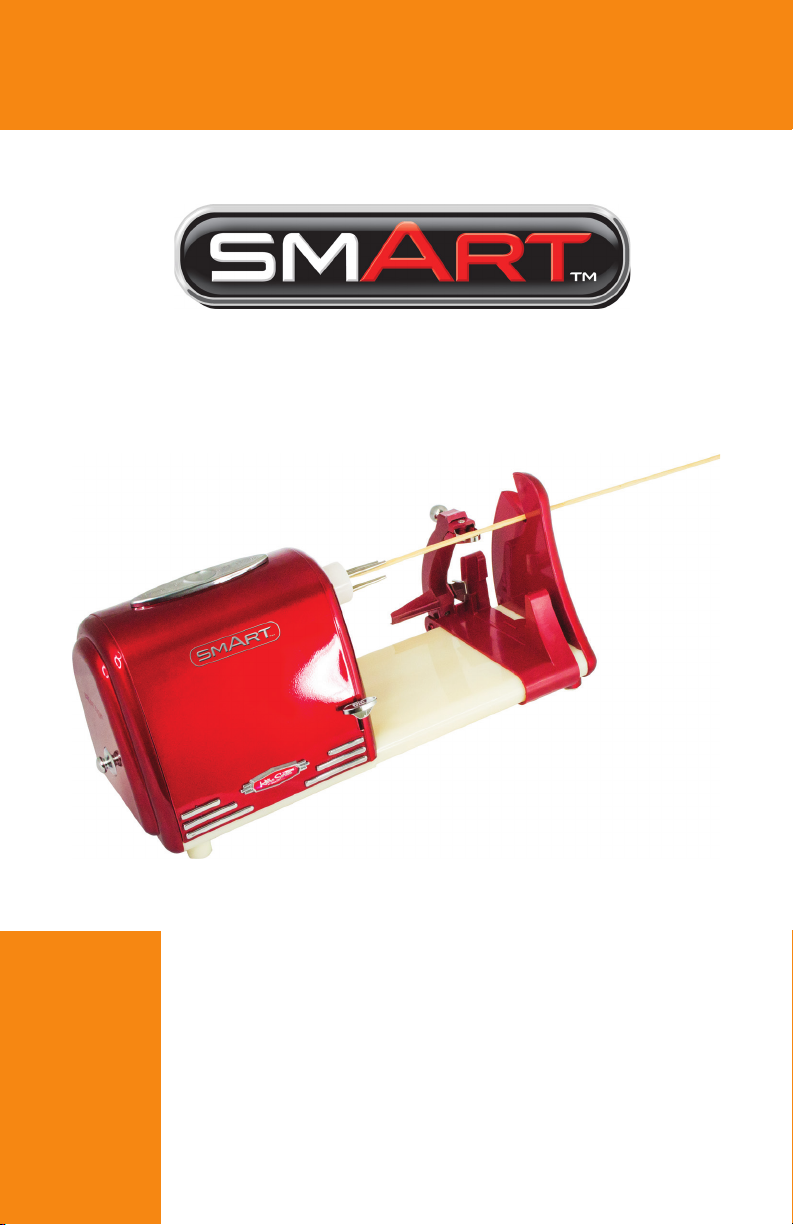
PT300
SMART Retro Electric Spiraliser, Slicer & Peeler
Instructions & Recipes
Page 3
Make everyday a party!
Visit www.smartworldwidefun.com for more fun products.
CONTENTS
IMPORTANT PRECAUTIONS . . . . . . . . . . . . . . . . . . . . . . . . . . . . . . . . . . . . . 3
ENGLISH
IMPORTANT SAFEGUARDS . . . . . . . . . . . . . . . . . . . . . . . . . . . . . . . . . . . . . 3
INTRODUCTION . . . . . . . . . . . . . . . . . . . . . . . . . . . . . . . . . . . . . . . . . . . . 4
PARTS & ASSEMBLY . . . . . . . . . . . . . . . . . . . . . . . . . . . . . . . . . . . . . . . . . . 5
HOW TO OPERATE .
HELPFUL TIPS . . . . . . . . . . . . . . . . . . . . . . . . . . . . . . . . . . . . . . . . . . . . 10
CLEANING & MAINTENANCE . . . . . . . . . . . . . . . . . . . . . . . . . . . . . . . . . . . 10
RECIPES . . . . . . . . . . . . . . . . . . . . . . . . . . . . . . . . . . . . . . . . . . . . . . . . 11
SMART CONVERSION TABLE . . . . . . . . . . . . . . . . . .
RETURNS & WARRANTY . . . . . . . . . . . . . . . . . . . . . . . . . . . . . . . . . . . . . . 15
. . . . . . . . . . . . . . . . . . . . . . . . . . . . . . . . . . . . . . . . . . 6
. . . . . . . . . . . . . . . . . 14
SAFET Y
Your safety and the safety of others is very important.
We have provided many important safety messages in this
manual and on your appliance. Always read and obey all safety
messages.
This is the safety alert symbol.
This symbol alerts you to potential hazards that can
kill or hurt you and others.
All safety messages will follow the safety alert symbol.
All safety messages will tell you what the potential hazard is, tell
you how to reduce the chance of injury, and tell you what can
happen if the instructions are not followed.
220-240 Volts, 50/60 Hz
20 Watts
2
Page 4

IMPORTANT PRECAUTIONS
1. NEVER immerse motor or plug in water.
2. NEVER use near water.
3. NEVER use an abrasive sponge or cloth on the appliance.
4. NEVER use a scouring pad on the appliance.
5. NEVER leave appliance unattended while in use.
6. Unplug unit from outlet when not in use, before placing or removing parts and during
cleaning.
7. DO NOT operate this appliance with a damaged cord or plug, nor if the appliance ever
malfunctions.
8. DO NOT put in a dishwasher.
9. Blades are EXTREMELY SHARP. Use EXTREME CAUTION when operating this appliance.
10. Keep out of reach of children.
11. This appliance is NOT A TOY.
12. Unsupervised young children and cognitively challenged individuals should never operate
this appliance.
13. Young children should be supervised while in proximity of the appliance to ensure that they
do not play with it.
IMPORTANT SAFEGUARDS
Basic safety precautions should always be followed when using electrical appliances, including
the following:
ENGLISH
1. Read all instructions before operating this appliance.
2. Keep hands away from blade mechanism.
3. DO NOT touch moving parts.
4. To protect against electrical shock do not immerse cord, plug or motor in water or other
liquids.
5. Close supervision is necessary when any appliance is used near children.
6. Unplug from outlet when not in use, before removing parts and before cleaning.
7. DO NOT operate any appliance with a damaged cord or plug, nor if the appliance has been
damaged in any manner. Return the appliance to the nearest repair shop for examination or
repair.
8. The manufacturer does not recommend the use of accessory attachments. Use of accessory
attachments may cause injuries.
9. DO NOT use outdoors.
10. Position the appliance as close to the outlet as possible to prevent injury due to tripping
over cord.
11. DO NOT place on or near a hot gas or electric burner, nor in a heated oven.
3
Page 5

12. Check appliance for presence of foreign objects prior to use.
13. DO NOT use the appliance for other than its intended use.
14. DO NOT place ngers or utensils into feed or discharge areas.
15. DO NOT press the Drive / Twist button when appliance is not ready to be
used.
16. An appliance that is plugged into an outlet should not be left unattended
ENGLISH
while in operation.
17. A short power supply cord is provided to reduce the risk resulting from
becoming entangled or tripping over a long cord.
18. Longer detachable power supply cords can be used if care is exercised in their
use.
19. The marked electrical rating of an extension cord should be at least as great as
the electrical rating of the appliance.
20. This appliance has a BS plug (Three pin earthed plug). To reduce the risk
of electric shock, this plug is intended to t into a UK cered outlet only
one way. If the plug does not t fully into the outlet. If it sll does not t,
contact a qualied electrician. Do not aempt to modify the plug in any way.
INTRODUCTION
Thank you for purchasing the SMART Retro Electrical Spiraliser & Peeler. Now you
can easily enjoy a multitude of peeled, spiraled and shredded snacks the whole
family will enjoy. SMART Retro Electrical Spiraliser & Peeler’s included cutting blades
work great on a variety of vegetables and fruit, so you can enjoy potatoes, apples,
zucchini, and more. Have fun, get creative, and enjoy your SMART Retro Electrical
Spiraliser & Peeler!
This package includes:
• Spiral Blade, Small Shredded Blade & Medium Shredded Blade for perfectly
peeled, spiraled and shredded potatoes.
• Convenient storage compartment for Cord, Spiral Blade, Small Shredded Blade,
Medium Shredded Blade, Peel Fork & Cut Fork.
• 10 bamboo skewers.
4
Page 6

PARTS & ASSEMBLY
PARTS
ENGLISH
Drive/ON Twist/OFF
ASSEMBLY
Your SMART Retro Electrical Spiraliser & Peeler comes fully assembled when
removed from the box. The Spiral Blade, Small Shredded Blade, Medium Shredded
Blade, Cut Fork, and Peel Fork will be the only loose parts included, and can be found
the Storage Compartment. Prepare for rst use by thoroughly washing the Spiral Blade,
Small Shredded Blade, Medium Shredded Blade, Cut Fork, and Peel Fork in warm,
sudsy water and dry thoroughly. USE EXTREME CAUTION when handling the Blades
as they are very sharp and may cause injury if used improperly. DO NOT submerge
the Base in water. To clean the Base when needed, use a damp cloth to wipe the
exterior, and then dry o with a clean, non-abrasive towel.
5
Page 7

HOW TO OPERATE
Now that you have cleaned and reassembled your SMART Retro Electrical Spiraliser &
Peeler, peeling, spiraling and shredding is both easy and fun!
NOTE: Using the correct Cut Fork/Peel Fork and Blade is extremely important. Incorrect
use may damage the appliance.
ENGLISH
SHRED
1. To prepare SMART Retro Electrical Spiraliser & Peeler, hold down Clutch Release
button and move Peeling Arm to end furthest from Fork Mount. Be sure Peeling Arm Release is in
the down position. NOTE: If you want to simultaneously peel and shred, be sure Peeling Arm
Release is in the up position.
2. Attach Cut Fork to Fork Mount by aligning notches on Cut Fork to grooves on Fork Mount,
then twisting the Cut Fork clockwise to secure.
3. Follow section on "ATTACHING BLADES TO BLADE MOUNT" on page 8 to attach Small
Shredded Blade or Medium Shredded Blade to Blade Mount.
4. Press end of potato into center of Cut Fork.
5. When ready to peel, slide the Power Button to Drive/ON and the Shredded Blade will begin
to shred your potato.
6. When done shredding, slide the Power Button to Twist/OFF.
7. Carefully remove remaining potato from 'SMART’s Retro Electrical Spiral/Twister/Peeler.
8. Repeat steps 1-8 to shred additional potatoes.
9. When done using the SMART Retro Electrical Spiraliser & Peeler, detach the Cut Fork
by twisting counter-clockwise and pulling away from the Fork Mount.
PEEL
1. To prepare SMART Retro Electrical Spiraliser & Peeler hold down Clutch Release button
to slide Peeling Arm to end furthest from Fork Mount.
2. Carefully push end of potato into points of Peel Fork, making sure it is centered. Next,
attach Peel Fork to Fork Mount by aligning notches on Peel Fork to grooves on Fork Mount.
Twist Peel Fork clockwise to secure into place.
3. Move the metal Peeling Arm Release to the up position so that the Peeling Arm can move
freely.
4. When ready to peel, slide the Power Button to Drive/ON and the Peeling Arm will begin
peeling the potato.
5. When done peeling, slide the Power Button to Twist/OFF.
6. Return the Peeling Arm to its starting position and carefully remove the Peel Fork and
peeled potato from the Fork Mount. Slide potato o points of Peel Fork.
7. Repeat steps 1-5 to peel additional potatoes.
8. When done using the SMART Retro Electrical Spiraliser & Peeler, detach the Peel Fork
by twisting counter-clockwise and pulling away from the Fork Mount.
6
Page 8

SPIRAL
1. To prepare SMART Retro Electrical Spiraliser & Peeler, hold down Clutch Release button
and move Peeling Arm to end furthest from Fork Mount. Be sure Peeling Arm Release is in the
down position.
2. Attach Cut Fork to Fork Mount by aligning notches on Cut Fork to grooves on Fork Mount,
then twisting the Cut Fork clockwise to secure.
3. Follow section on "ATTACHING BLADES TO BLADE MOUNT" on page 8 to attach Spiral Blade
to Blade Mount.
4. Press end of potato into center of Cut Fork.
5. When ready to peel, slide the Power Button to Drive/ON and the Spiral Blade will begin to
spiral cut your potato.
6. When done spiral cutting, slide the Power Button to Twist/OFF.
7. Carefully remove remaining potato from Cut Fork and the spiraled potato from the SMART
Retro Electrical Spiraliser & Peeler.
8. Repeat steps 1-8 to spiral additional potatoes.
9. When done using the SMART Retro Electrical Spiraliser & Peeler, detach the Cut Fork by
twisting counter-clockwise and pulling away from the Fork Mount.
SPIRAL ON A STICK
1. To prepare SMART Retro Electrical Spiraliser & Peeler, hold down Clutch Release button
and move Peeling Arm to end furthest from Fork Mount. Be sure Peeling Arm Release is in the
down position.
2. Attach Cut Fork to Fork Mount by aligning notches on Cut Fork to grooves on Fork Mount,
then twisting the Cut Fork clockwise to secure.
3. Follow section on "ATTACHING BLADES TO BLADE MOUNT" on
page 8 to attach Spiral Blade to Blade Mount.
4. Next, carefully pierce center of potato, lengthwise, with
pointed end of Bamboo Skewer. Stop when pointed end of Bamboo
Skewer reaches end of the potato.
5. Thread visible end of Bamboo Skewer through hole near top
of Spiral Blade and notch cutout on top of end panel. Center and
press end of potato into center of Cut Fork.
6. When ready to peel, slide the Power Button to Drive/ON and the Spiral Blade will begin to
spiral cut your potato.
7. When done spiral cutting, slide the Power Button to Twist/OFF.
8. Carefully remove potato from SMART Retro Electrical Spiraliser & Peeler and evenly fan
out potato spirals on Bamboo Skewer.
9. Repeat steps 1-8 to spiral additional potatoes.
10. When done using the SMART Retro Electrical Spiraliser & Peeler, detach the Cut Fork by
twisting counter-clockwise and pulling away from the Fork Mount.
When nished using , follow section on "REMOVING BLADES FROM BLADE MOUNT" on page 8 to
remove Blades from Blade Mount.
ENGLISH
7
Page 9

ATTACHING BLADES TO BLADE MOUNT
USE EXTREME CAUTION when handling all Blades! They are
extremely sharp and may cause injury if used improperly.
ENGLISH
1. Take note of the notches on
the Blade Mount. Make sure the
Peeling Arm Release is in the
down position.
2. Angle and slide chosen
Blade between the two notches
on the arm of the Blade Mount
as shown below.
3. Simultaneously push top
of Blade back while pushing
bottom of Blade towards Fork
Mount to snap into place. Some
may nd it easiest to secure
using two hands on either side
of the Blade.
4. When secured, Blade will
click and stand vertical.
8
Page 10

REMOVING BLADES FROM BLADE
MOUNT
1. Simultaneously push bottom of Blade back while pushing top of Blade towards Fork
Mount to remove. Blade will
click upon removal.
NOTE: Once attached, Blade is dicult to remove. Removing
Blade requires more pressure than attaching. Some may nd
it easiest to remove using two hands on either side of the
Blade.
ENGLISH
9
Page 11

HELPFUL TIPS
CHOOSING FRUITS & VEGETABLES
The SMART Retro Electrical Spiraliser & Peeler works best with fruits and vegetables
that are rm, blemish free, and symmetrically shaped. Avoid using soft fruits and
vegetables. Soft fruit and vegetables will have problems peeling and staying in place
on the Cut Fork/Peel Fork.
ENGLISH
Try using the SMART Retro Electrical Spiraliser & Peeler with sweet potatoes, apples,
beets, zucchini, cucumbers, and more!
PEEL AND SPIRAL/SHRED AT THE SAME TIME
Save time by peeling at the same time you shred or spiral cut. While following
the steps to SPIRAL or SHRED, simply make sure the Peeling Arm Release is in the up position, so
that the Peeling Arm can move freely.
PEELING TOO MUCH / NOT ENOUGH
If the Peeling Blade is taking o too much peel or not enough peel, you may need to
adjust the Peeling Blade. Generally, the Peeling Blade works best when adjusted to
about ¹⁄₈ inch past the head of the Peeling Arm. To adjust Peeling Blade, loosen the
screw slightly. The blade can be moved forwards to remove more peel or backwards
to remove less peel. Firmly tighten the screw after adjustment has been made. Finding
the desired result may require a few tests and further blade adjustments.
NOTE: Use caution when adjusting, blade is sharp!
PEELING ARM SHUDDERS / STUCK
If the Peeling Arm is dicult to move or will not move when the Power Button is
turned to Drive/ON, be sure base of SMART Retro Electrical Spiraliser & Peeler is clean
and clear of all potato pieces. The starch found in potatoes may become sticky when
peeled and make moving the Peeling Arm dicult. A particularly dense potato may
also cause the Peeling Arm to shudder. If this happens, a less dense potato must be
used or you risk damaging the appliance.
CLEANING & MAINTENANCE
1. Make sure Power Button is in the Twist/OFF position. Unplug the unit from the electrical
outlet.
2. Wash all loose parts in warm, soapy water. Rinse and dry.
3. Wipe the Base with a damp, non-abrasive cloth, and dry.
4. When all parts are clean and dry, place the Spiral Blade, Small Shredded Blade, Medium
Shredded Blade, Cut Fork, Peel Fork and Power Cord in the Storage Compartment.
NOTE: To protect the motor plug from getting wet, never immerse the Base in any
liquid. Never place any parts in the dishwasher. Always wash by hand.
To prolong the life of your SMART Retro Electrical Spiraliser & Peeler, be sure to
follow the cleaning instructions above after each and every use.
10
Page 12

RECIPES
Finish making your SMART Retro Electrical Spiraliser & Peeler creations in an oven,
deep fryer, dehydrator, or microwave. Once cooked to your liking, top o with salt,
cajun seasoning, parmesan cheese, or your own seasoning innovation!
Try some of these great tasting recipes:
SPIRAL BARBECUE POTATO CHIPS
• 1 large potato
• 1/2 tsp. paprika
• 1/2 tsp. garlic salt
• 1/4 tsp. sugar
• 1/4 tsp. onion
powder
• 1/8 tsp. ground
mustard
• 1/4 tsp. chili
powder
• Dash of cayenne
pepper
• 1 qt. ice water
• Canola oil, for deep
fryer
Follow the SPIRAL ON A STICK directions on page 7 to
prepare the potato.
Keeping the potato on the Skewer, submerge the potato
in a large bowl of ice water for at least 30 minutes.
In a small bowl, combine all of the seasonings and spices.
Pat dry the potato and add to deep fryer. Potato is done
when golden brown in color.
Transfer potato to paper towels and uniformly sprinkle
barbecue seasoning on the chips.
Enjoy immediately.
Serves one.
ENGLISH
SHREDDED POTATO PANCAKES
• 2 eggs
• 2 tbsp. all-purpose
flour
• 1/4 tsp. baking
powder
• 1/2 tsp. salt
• 1/4 tsp. pepper
• 6 medium
potatoes, peeled and
shredded
• 1/2 cup finely
chopped onion
• 1/4 cup vegetable
oil
Using the Small Shredded Blade or the Medium Shredded
Blade, follow the SHRED directions on page 6 to prepare
the potatoes.
In a large bowl, beat together eggs, our, baking powder,
salt, and pepper. Mix in potatoes and onion.
Heat oil in large skillet over medium heat.
In batches, drop heaping tablespoonfuls of the potato
mixture into the skillet. Press them to atten. Cook about
3 minutes on each side, until browned and crisp.
Drain on paper towels.
Serves six.
11
Page 13

CRISPY BAKED POTATOES
• 10 medium, yellow
potatoes, peeled &
halved
• 2 tbsp. olive oil
• 1 tbsp. butter,
ENGLISH
melted
• Sea salt for sprinkling
CLASSIC HASH BROWNS
• 2 russet potatoes,
peeled & shredded
• 2 tbsp. clarified
butter
• 1 pinch paprika, or
to taste
• 1 pinch cayenne
pepper, or to taste
• Salt and ground
black pepper to taste
Follow the PEEL directions on page 6 to prepare the
potatoes.
Cut peeled potatoes lengthwise.
Place potatoes in a large saucepan of cold water. Bring
to a boil over high heat. Boil for 5 minutes, then drain.
Place potatoes, at face down, on a tray lined with paper
towels. Set aside for 20 minutes to cool.
Pre-heat oven to 350F (180C). Brush 2 large baking trays
with a little olive oil. Mix together the butter, 1/4 tsp. sea
salt and remaining olive oil in a small bowl.
Use a fork to scrape the curved side of the potato lengthways. Place potatoes in a single layer, at side down, on
the baking trays.
Brush potatoes with butter/oil mixture. Bake in oven for
50 minutes or until golden brown. Sprinkle with sea salt
to serve.
Serves ve.
Using the Small Shredded Blade, simultaneously peel and
shred the potatoes by following the SHRED directions on
page 6.
Place shredded potatoes into a large bowl lled with cold
water. Stir until water is cloudy, drain, and cover potatoes
again with fresh cold water. Stir again to dissolve excess
starch. Drain potatoes well, pat dry with paper towels, and
squeeze out any excess moisture.
Heat claried butter in a large non-stick pan over medium
heat. Sprinkle shredded potatoes into the hot butter
and season with salt, black pepper, cayenne pepper, and
paprika.
Cook potatoes until a brown crust forms on the bottom,
about 5 minutes. Continue to cook and stir until potatoes
are browned all over, about 5 more minutes.
Serves two.
12
Page 14

ONION STRAWS
• 2 cups buttermilk
• 2 large sweet
onions, shredded
• 2 cups all-purpose
flour
• 2 tbsp. cornmeal
• 1 tbsp. salt
• 1 tbsp. ground
black pepper
• 2 tsp. cayenne
pepper
• 1/2 tsp. paprika
• 1 qt. vegetable oil
for frying, or as needed
ZUCCHINI PARMESAN CHIPS ON A STICK
• Vegetable oil for
deep fryer
• 1 cup Panko
• 1/2 cup grated
Parmesan cheese
• 2 zucchinis, spiral
cut on a stick
• 1/2 cup all-purpose
flour
• 2 large eggs,
beaten
Follow the SHRED directions on page 6, using either the
Small Shredded Blade or Medium Shredded Blade, to
prepare the onions.
Pour buttermilk into a bowl. Place shredded onion into
buttermilk, cover the bowl with plastic wrap, and refrigerate for 1 hour.
Heat oil in a deep fryer or large saucepan to 400 degrees F
(200 degrees C).
Whisk our, cornmeal, salt, black pepper, cayenne pepper,
and paprika together in a bowl.
Working in batches, remove onions from buttermilk,
letting any excess liquid drip o, place onions in our
mixture and toss to coat. Shake any excess our mixture
o onions.
Cook onion rings in the preheated oil until golden brown,
about 3 to 4 minutes.
Transfer rings with a slotted spoon to a paper towel-lined
plate to drain.
Serves eight.
Follow the SPIRAL ON A STICK directions on page 7 to prepare the zucchinis.
Add vegetable oil to deep fryer and set to medium high
heat.
In a large bowl, combine Panko and Parmesan; set aside.
Working in batches, dredge each zucchini chips on a stick
in our, dip into eggs, then dredge in Panko mixture,
pressing carefully to coat.
Add zucchinis to the deep fryer, 1 at a time, and cook until
evenly golden and crispy.
Transfer to a paper towel-lined plate.
Serves four.
ENGLISH
13
Page 15

SMART CONVERSION TABLE
1 cup our = 125g our
1 cup butter = 225g butter
1 cup brown sugar = 170g brown sugar
1 cup granulated sugar = 170g granulated sugar
ENGLISH
1 cup icing sugar = 100g icing sugar
1 cup uncooked rice = 170g rice
1 cup chopped nuts = 100g chopped nuts
1 cup fresh breadcrumbs = 150g fresh breadcrumbs
1 cup sultanas = 140g sultanas
1 shot = 11/2 ounces (45 ml)
1 cup = 5.33 shots (239 ml)
10 ounces = 0.625 pounds
14
Page 16

RETURNS & WARRANTY
SMART Retro Electric Spiraliser & Peeler, PT300
Should you have any questions, please contact the seller.
Exclusively Manufactured and Distributed by:
SMART Worldwide
(an SMA Worldwide Ltd. Company)
SMA House
Langley Waters, Home Park
Kings Langley, WD4 8LZ
s
.
w
w
w
Hertfordshire
United Kingdom
Phone: Please see website for details
Web: www.smartworldwidefun.com
w
w
w
.
s
m
Email: sma@smagm.com
Customer Service Inquiry
To submit a Customer Service inquiry, go to www.smartworldwidefun.com
and ll out the Customer Service Inquiry form and click the Submit button.
This appliance is designed and built to provide many years of satisfactory performance under normal household use. The distributor pledges to the original
owner that should there be any defects in material or workmanship during
the rst 90 days of purchase, we will repair or replace the unit at our option.
Our pledge does not apply to damages caused by shipping, mishandling or
unit being dropped. A product deemed defective either from manufacturing
or being mishandled is up to the distributor’s discretion. In order to obtain
service under this warranty, please contact the seller as the rst port of call.
This warranty does not apply to re-manufactured merchandise.
Please read these instructions carefully. Failure to comply with these instructions, damages caused by improper replacement parts, abuse or misuse will
void this pledge to you and is being made in place of all other expressed
warranties.
For more information, visit us online at www.smartworldwidefun.com
Like us on Facebook at www.facebook.com/SMARTWorldwide
Follow us on Twitter at @SMARTWorldwide1
View us on YouTube at www.youtube.com/user/SmartWorldwideFun
l
d
r
w
o
i
w
t
r
a
m
To activate
your warranty
please visit
our website
a
r
t
w
d
d
i
w
o
d
r
l
e
f
u
n
.
c
o
m
m
o
c
.
n
u
f
e
ENGLISH
15
 Loading...