

Page 1
20071128
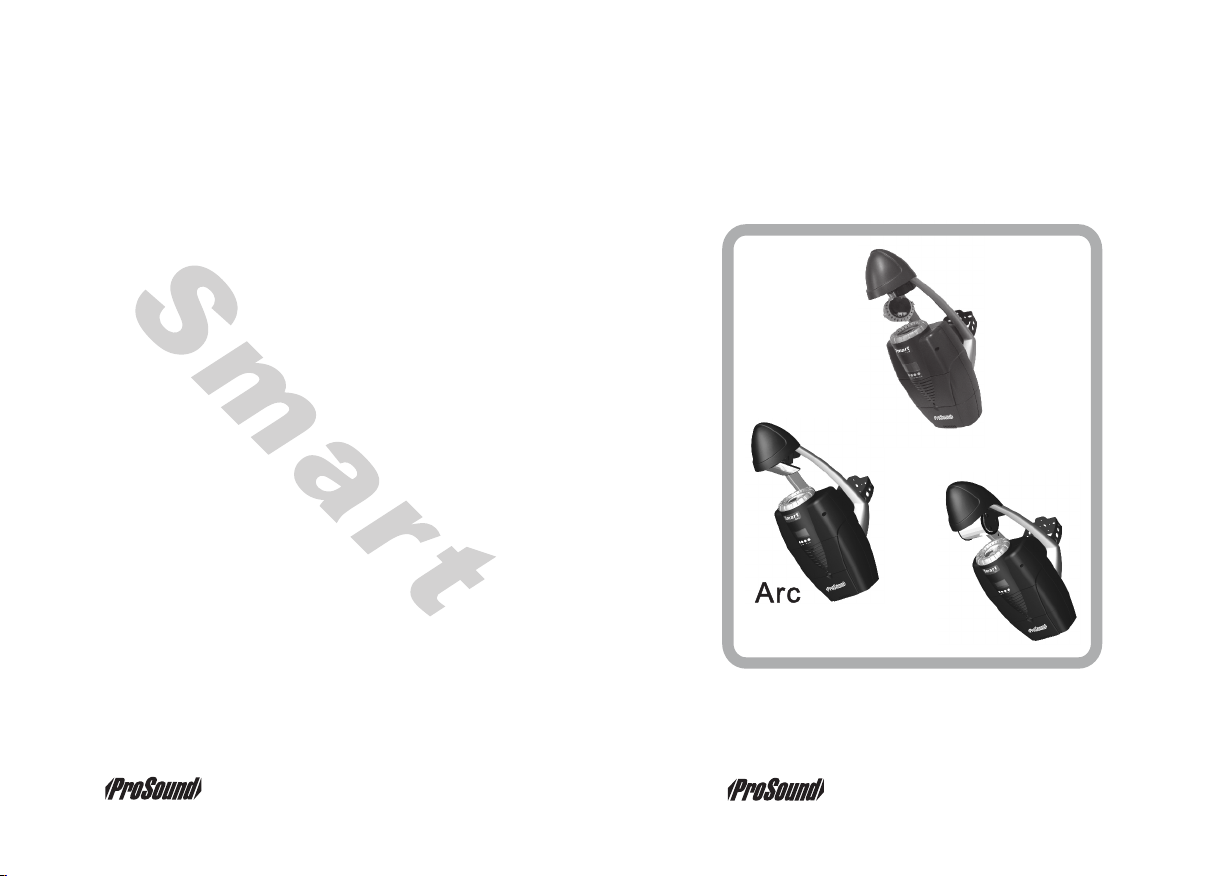
Smart
SS C-1 , SSC -2, S SA- 1,SS N-1
User InstructionsUser Instructions
ScanScan
SpinSpin
Mapl in Electr onics Ltd , S63 5DL,U K.
V2.0
Page 2

Warning............................................................
Impo rtant.. .. ..... .. ..... .. ..... .. ..... .. ..... .. ....... .......
Feat ure.... .. ..... .. ..... .. ..... .. ..... .. ..... .. ....... .......
Gett in g Ready... .. ..... .. ..... .. ....... ....... ....... ......
Set Up .. ..... .. ..... .. ..... .. ..... .. ..... .. ..... .. ....... ......
Moun ting... .. ..... .. ..... .. ..... .. ..... .. ..... .. ....... ......
DMX Op eration ....... .. ..... .. ..... .. ..... .. ..... .. ..... ..
Stan d Alone Oper ation.. ....... .. ..... .. ..... .. ..... .. ..
Mast er/Slav er Operat ion.... .. ..... .. ..... .. ..... .. ....
Meas urement s are expre ssed in mil limeter s...
Product Specifications........................................
Chan ging the Lamp.... ....... ....... ....... ....... .. ....
Repl acing the main Fuse.. .. ..... .. ..... .. ..... .. ....
Tro ublesho oting.. ....... ....... ....... ....... ....... .. ..
Mech anical Ov erview.. ....... .. ..... .. ..... .. ..... .. ..
SSC- 1 Di sp lay Functio n...... ....... ....... .. ..... .. .
SSC- 1 DM X Char t...... ....... ....... .. ..... .. ..... .. ..
SSC- 2 Di sp lay Functio n...... ....... ....... .. ..... .. .
SSC- 2 DM X Char t...... ....... ....... .. ..... .. ..... .. ..
SSA- 1 Dis play Func ti on... .. ....... ....... ....... ....
SSA- 1 DMX C ha rt... .. ....... ....... ....... ....... ......
SSN- 1 Di sp lay Functio n...... ....... ....... .. ..... .. .
SSN- 1 DM X Char t...... ....... ....... .. ..... .. ..... .. ...
Main tenance ....... .. ..... .. ..... .. ..... .. ..... .. ..... .. ..
Appe ndix-A DMX Valu e Gu ide.. .. ..... .. ..... .. ....
If the s up ply cor d is damage d, it must be r eplaced b y
the ma nufactu rer, its ser vice agen t or simila rly
qual ified per sons in ord er to avoid a h azard.
Read t he instru ctions.
Indo or use only .
This s ym bol ind icating s eparate c ollecti on for
elec trical an d electro nic equip ment.
Page 1
Page 2
Page 3
Page 4
Page 4
Page 4
Page 5
Page 6
Page 6
Page 8
Page 8
Page 9
Page 1 0
Page 11
Page 11
Page 1 2
Page 1 3
Page 1 4
Page 1 5
Page 1 6
Page 1 7
Page 1 8
Page 1 9
Page 2 0
Page 2 1
App endi x -A DMX Val ue Gui de
This i s a brief gui de to DMX add ress sett ing. DMX
prod ucts must h ave their o wn “addre ss ” to rece iv e
DMX si gnals. Pl ease use th e LCD contr ol panel on
each S MART lig ht to set its D MX addres s.
For ex ample, to o perate fo ur SSC-1, e ach with fi ve
DMX ch annels (p lease ref er to SSC-1 D MX
Chan nel), the ir DMX addr ess setti ng will be as
foll ows:
DMX ad dr ess val ue
Ligh t 1 1
Ligh t 2 6
Ligh t 3 11
Ligh t 4 16
Note : each unit h as five cha nnels so ea ch addres s
adva nc es five v al ues (se e DM X addre ss v alue
abov e) .
21
Page 3
Ma inte n ance
To ensur e the long- time reli able use of S MART s er ies
and op timize li ght outpu t, we recom mend clea ning
the in ternal an d externa l optical l enses and m irror
peri odicall y due to fog re sidue and d ust. Clea ning
freq uency dep ends on the w orking en vironme nt.
Plea se clean yo ur unit in th e followi ng manner :
Clea n the exter nal casin g with a norm al glass
1.
clea ner and a sof t cloth;
2.
Brus h th e cooli ng vent and f an;
3.
Clea n the exter nal optic al lens and m irror wit h a
norm al glass cl eaner and a s oft cloth e very 20
days ;
Clea n the inter nal optic s with a norm al glass
4.
clea ner and a sof t cloth eve ry 1-2 mont hs.
Make s ure the uni t is comple tely dry be fore
5.
plug ging in.
War n ing!
Like a ll electr onic prod ucts, Sma rt
ligh ts must be us ed with com mon
safe ty p recau tions in mi nd.
Smart lights contain no user-serviceable parts.
Refer servicing to qualified technicians only.
Disconnect from electric mains power supply before
removing covers or changing lamps. Keep case
closed while operating. Do not insert objects into air
vents.
Keep away from flames and flammable material.
Keep away from liquids. Never operate in rain or in
damp conditions.
If effect lights are dropped or struck, disconnect
mains power supply immediately. Have a qualified
engineer inspect for safety before operating.
Lamp and metal become hot during operation. Allow
time to cool before handling. Do not touch lamp
glass with bare hands.
Read user manual instructions thoroughly before
operating. Follow the instructions. Never remove
warning or informative labels from the unit.
Not suitable for mounting on normally flammable
surfaces. Disconnect from mains supply before
removing cover. Minimum distance to lighted object
0.4m.
This appliance must be earthed.
20
1
Page 4

Im por tant
SS N-1 DM X C hart
This a pparatu s is fitted w ith a BS136 3 13 Amp plug,
fitt ed w ith a BS 13 623A fuse. R eplace th e fuse with
same r ating.
The wi res in the ma ins lead ar e colored i n accorda nce
with t he follow ing code:
BLUE ----“NE UTRAL” (N )
BROW N- ---“L IV E” (L)
GREE N----“E ARTH ED” (E)
The bl ue wire mus t be connec ted to the te rminal,
1.
whic h is marked w ith the let ter “N” or co lored
BLAC K.
2.
The br own wire mu st be conne cted to the
term inal, whi ch is marke d with the le tter “L” or
colo red RED.
The gr een wire mu st be conne cted to the
3.
term inal, whi ch is marke d with the le tter “E” or
colo red GREEN .
CH1:PanCH1:Pan
0-255:A ng le adju st ment 0~ 45 0∘X
CH2: BarrelCH2: Barrel
0-255:S to p, righ t ro tatio n fr om slow t o fa st
CH3: ColorCH3: Color
0-15:Wh it e 16-31:R ed
32-47:D ar k blue
64-79:Yello w
96-111:Rose pi nk
128-1 43:S ea blue
160-1 75:Yel lo w/Red
192-2 55:R ainbo w effec t (c olour a ut omati c ch ange)
48-63:G re en
80-95:O ra nge
112- 12 7:Vio le t
144-1 59:P urpli sh r ed
176-1 91:D ark gre en /Oran ge
CH4: GOBOCH4: GOBO
0-15: Black ou t
32-47:
64-79:
96-111:
128-1 43:
160-1 80:
181-2 55:G OBO whe el t urns fr om s low to fa st
16-31:O pe n
48-63:
80-95:
112- 12 7:
144-1 59:
CH5: ShutterCH5: Shutter
0-7: Fl as hing st op ped
8-255 : Ad justm en t of flas hi ng spee d 1/ 2fps- 8f ps.
CH6: ControlCH6: Control
0-63: N o fu nctio n
64-12 7: R eset af te r 3 secon ds
128-1 91 : Lamp tu rn s off a ft er 3 seco nd s
192-2 55 : Lamp tu rn s on afte r 3 se conds
2
19
Page 5

SS N-1 Di s play F unct ion
Co ntrol b oard fun ctio ns
Feat ure
Uniq ue and pate nted XY high sp ee d scann in g
mirr or module f or SSC-1 & SS C-2.
All SM ART seri es ligh ti ngs are e qu ipped w it h
elec tronic ba llast and s witchin g power, whi ch
make t he fixtur es compac t and mobil e.
Back light LCD c ontrol di splay DMX c oding and
buil t-in func tion sele ction, an d also show s bulb's
life t ime.
USIT T st an dard DM X si gnal co nt rol or si ng le and
mult iple buil t-in prog rammed so und contr ol.
Whol e SMART se ries can mi x with link ing con tr ol.
Exce llent coo ling syst em.
Various a pp earan ce a nd mech an ism inv en tion as
well a s improve ment pate nts are cer tified
worl dwide.
Rugg ed housin g combina tion of ABS an d PC.
Fash ionable d esign mak es the whol e series a
mast erpiece !
Each m odel of SMA RT serie s has its own u nique
func ti on. Two kind s of b ulbs ar e av ailab le f or
choo sing, hal ogen bulb a nd discha rge bulb.
Outs ta nding o ptical sy stem of SMA RT makes t he
150W d ischarg e bulb even b righter a nd better t han
trad itional 2 50W effect li gh tings .
18
3
Page 6

Ge ttin g Read y
SS A-1 DM X C hart
All of S MA RT ser ies have be en thorou ghly te st ed and
ship ped in perf ect condi tion. Car efully un pack your
unit f ro m carto n and, plea se notify y our deale r
imme diately i f damage oc curred du ring ship ping.
Your p ackage sh ould in cl ude:
1. one S MART lig ht;
2. one l amp;
3. one u ser instr uctions .
Se t Up
Open t he s hippi ng carton a nd carefu lly remov e the
1.
unit f ro m the car to n;
Remo ve carefu lly all pac king mate rials aro und the
2.
unit ;
3.
Set th e un it on a dry, fla t su rface ;
Inst al l the lam p: please f ollow ste ps as illus trated
4.
in Cha nging the L amp on page 9 .
Mo unti n g
Fast en t he effect l ig hts ont o fi rm trus si ng (Use a 3 0
kg rat ed or stron ger C-cla mp bolted o nto the Sma rt
brac ket, enha ncing saf ety neces sarily wi th safety
cabl es). Leav e at least on e meter at al l sides for a ir
circ ulation .
C-cl amp
Safe ty c able
CH1: ArcCH1: Arc
0-1: St op
2-127 : Ri ght rot at ion fro m fa st to slo w
128-2 55 : Rever se r otati on f rom slo w to f ast
CH2: GOBO+ ColorCH2: GOBO+ Color
0 15:B- lacko ut
16 31 :O- pen
32-47 :
48-63 :
64-79 :
80-95 :
96-111:
112- 12 7:
128-1 43 :
144-1 59 :
160-1 80 :
181 255:GO BO- wheel t ur ns from s lo w to fast
CH3: ShutterCH3: Shutter
0-7: Fl as hing st op ped
8-255 : Ad justm en t of flas hi ng spee d 1/ 2fps- 8f ps.
CH4: ControlCH4: Control
0-63: N o fu nctio n
64-12 7: R eset af te r 3 secon ds
128-1 91 : Lamp tu rn s off a ft er 3 seco nd s
192-2 55 : Lamp tu rn s on afte r 3 se conds
+ Ora ng e
+ Rose pi nk
+ Dark gr ee n
+ Red
+ Sea blu e
+ Gre en
+ Dark bl ue
+ Purpl e
+ Yell ow
4
17
Page 7

SS A-1 Di s play F unct ion
Co ntrol b oard fun ctio ns
DM X Oper a tion
When o peratin g a SMART li ghtin g wi th a DMX
cont roller, pl ease set th e DMX addre ss on the LCD
pane l of the ligh ting. Pre ss “MENU” o n the LCD
pane l and selec t “ADRES” a nd then pre ss “SELEC T”
to set t he d esire d DMX addre ss. Pleas e refer to DM X
valu e guide in App endix-A .
1.
Conn ect the DMX c ontroll er signal c able to the
inpu t socket at t he b ack of th e li ghtin g. Make sur e
the si gnal cabl e polarit y is correc t. And then
conn ect the pow er cord to ap propria te power
supp ly socket . Now your SM ART ligh t is read y fo r
oper ation wit h your DMX co ntrolle r.
2.
If des ir ed, con nect anot her SMART light: pl ug one
end of a s ignal cab le into the o utput soc ket at the
back o f th e first l ig ht and, p lug the oth er end of the
sign al cable in to the inpu t socket at t he back of a
seco nd light, f ollow thi s procedu re to link mo re
SMART lights .
3.
Plea se refer to “ DMX Chann el” of each S MART
mode l for their D MX channe l setting .
Plea se refer to y our contr oller ope rating ma nual
4.
for op erating d etails.
16
5
Page 8

St and Al o ne Ope r ati on
SS C-2 DM X C hart
Ever y SM ART li ght can rea ct to the bea t of music,
chas ing throu gh its buil t-in prog rams. Ple ase follo w
belo w operati ng manner s:
1.
Pres s “m enu” on t he LCD cont rol panel a nd select
“AUD IO”;
Pres s “↑” to t urn the f un ction O N;
2.
Your u nit is now re ady for sta nd-al on e opera ti on.
3.
Ma ster / Slaver O perat ion
SMART series h ave MASTE R/SLAVER fun ction, wi th
the op erating m anners as b elow:
1.
Make s ure to unpl ug all DMX co ntrolle rs that are i n
conn ection;
2.
Pres s “M ENU” bu ttons on th e control p anel of the
mast er lighti ng until “A UDIO” app ears on the L CD
scre en, and the n press “↑” to ha ve the func tion
“ON” ; at t his mom en t, the ma st er ligh ti ng beco mes
an aud io contro ller and co ntrols th e movemen t of
the ot he r light ings;
3.
To conne ct anothe r lightin g: plug one e nd of a
sign al cable in to the outp ut socket a t the back of
the ma ster ligh ting and pl ug the othe r end of the
sign al cable in to the inpu t socket at t he back of a
seco nd lighti ng. Follo w this proc edure to li nk
more l ighting s;
Plug m ains powe r cord into a ppropri ate power
4.
supp ly socket ;
CH1: PanCH1: Pan
0-255 : Le ft to rig ht
CH2: Ti ltCH2: Ti lt
0-255 : Do wn to up
Shutter Shutter
CH3:
CH3:
0-7:Fla sh ing sto pp ed
8-255:A dj ustme nt o f flash in g speed 1 /2 fps-8 fp s.
CH4:CH4:
ColorColor
0-15:Wh it e
32-47:D ar k green
64-79:Yello w
96-111:Red
128-1 43:D ark blu e
160-1 75:O range
192-2 55:
Color w he el turn s fr om slow t o fa st.
GOBO GOBO
CH5:CH5:
0-15:
Black ou t
32-47: 48-63:
64-79:
96-111: 112- 12 7:
128-1 43:
160-1 80:
181-2 55:G OBO whe el t urns fr om s low to fa st
ControlCH6:Control
CH6:
0-63:No f un ction
64-12 7:Re set aft er 3 s econd s
128-1 91:L amp tur ns o ff af te r 3 secon ds
192-2 55:L amp tur ns o n after 3 s ec onds
16-31:S ea b lue
48-63:R os e pink
80-95:V iolet
112- 12 7:Purpl e
144-1 59:G reen
176-1 91:L ight bl ue
16-31:O pe n
80-95:
144-1 59:
6
15
Page 9

SS C-2 Di s play F unct ion
Co ntrol b oard fun ctio ns
Ma ster / Slaver O perat ion
The co nnected m aster and s laver lig hts have tw o
5.
movi ng patter ns:
Sync hronous M oving Pat tern: to ha ve the othe r
ligh ts acting s ynchron ously. Pleas e fo llow
belo w steps:
1.
Pres s “M ENU” bu ttons on th e control p anel of
the ma ster ligh t until “AD RES” appe ars on the
LCD sc reen, and t hen press “ SELECT” t o set
the va lue at “1”;
2.
Foll ow the abov e step and se t the “ADRE S”
valu e of other co nnected l ights at “1 ”;
3.
Your S MART lig hts are n ow r eady an d yo u can
oper ate them in s ynchron ous movin g pattern .
Dual M oving Pat terns: th e other lig hts react t o
soun d, chasin g through t he master 's built- in
prog rams. Ple ase follo w below ste ps:
Supp ose we have c onnecte d four SSC- 1, with
each S SC-1 of fiv e DMX chann els:
Pres s “M ENU” bu ttons on th e control p anel of
1.
the ma ster ligh t until“ADR ES”appear s on
the LC D screen, a nd then pre ss “SELEC T” to
set th e va lue at “1 ”;
2.
Foll ow the abov e step and se t the “ADRE S”
valu e of the 2nd li ght at “6” (1 +5 channe ls=6, if
the li ghts are of 6 c hannels , then set th e value
at “7” );
Then s et the “ADR ES” value o f th e 3rd lig ht at
3.
“1” an d that of the 4 th l ight at “ 6”; (foll ow the
same p rocedur e to link mor e lights)
Your S MART lig hts are n ow r eady an d yo u can
4.
oper ate them in d ual movin g pattern .
14
7
Page 10

Product Specifications
Model
Lamp
Gobos+Co lorsGobos+Co lors
Strobe
DMX Channe ls
Audio Cont rol
EZ Control ler
Input
Output
Dimensio ns (L×W×H)Dimensio ns (L×W×H)
Weight
Voltages Available
Fuse
Power Cons umption
SSC -1 SSC -2
EFR 1 5V 150W EFR 1 5V 150W
0. 5-8 fp s 0. 5-8 fp s
3 pin /5 pin XL R
3 pin X LR
3.3 k g 3.3 k g
230 V/50H z
250 V/1. 25A
200 W 2 00W
11 colo rs + open
9 gob os + open
+bl ack out
5
YES YES
YESYES
3 pin /5 pin XL R
3 pin X LR
460 x185x 195460 x185x 195
230 V/50H z
250 V/1. 25A
6
SSA -1
9 col ored go bos +
ope n +blac k out
4
3.1 k g
SSN -1
EFR 1 5V 150WEFR 1 5V 150W
11 colo rs + open
9 gob os + open
+bl ack out
0. 5-8 fp s0. 5-8 fp s
6
YESYES
YESYES
3 pin /5 pin XL R3 pin /5 pin XL R
3 pin X LR3 pin XLR
460 x185x 195460 x185x 195
3.3 k g
230 V/50H z230 V/50H z
250 V/1. 25A250 V/1. 25A
200 W200 W
SS C-1 DM X C hart
CH1: PanCH1: Pan
0-255 : Le ft to rig ht
CH2: Ti ltCH2: Ti lt
0-255 : Do wn to up
CH3: ShutterCH3: Shutter
0-7: Fl as hing st op ped
8-255 : Ad justm en t of flas hi ng spee d 1/ 2fps- 8f ps.
CH4: GOBO+ ColorCH4: GOBO+ Color
0-15: B ea m close d
16-31 : Be am open ed
32-47 :
48-63 :
64-79 :
80-95 :
96-111:
112- 12 7:
128-1 43 :
144-1 59 :
160-1 80 :
181-2 55 : GOBO wh ee l turns f ro m slow to f as t
CH5: ControlCH5: Control
0-63: N o fu nctio n
64-12 7: R eset af te r 3 secon ds
128-1 91 : Lamp tu rn s off a ft er 3 seco nd s
192-2 55 : Lamp tu rn s on afte r 3 se conds
Ora ng e
Rose pi nk
Dark gr ee n
Red
Sea blu e
Gre en
Dark bl ue
Purpl e
Yell ow
8
13
Page 11

SS C-1 Di s play F unct ion
Co ntrol b oard fun ctio ns
Ch angi n g the La mp
12
9
Page 12

Repla cing th e main F use
Troub lesho otin g
Problem
Problem prob able cause(s)
Sig nal in/ outpu t conne ction
may b e rever sed
Me chan ical O ver vi e w
Suggested re medy
Inc rease t he musi c volum e
up to 7 5 db abov e (for th e
sta ndard v olume m ust be
ove r 75 db).
Che ck the si gnal in /output c onnec tion wh ether
it' s re verse d, adju st it
int o corre ct posi tion
10
11
Scan
Arc
Spin
 Loading...