

SmarLink MEDI-MINDER Installation Manual
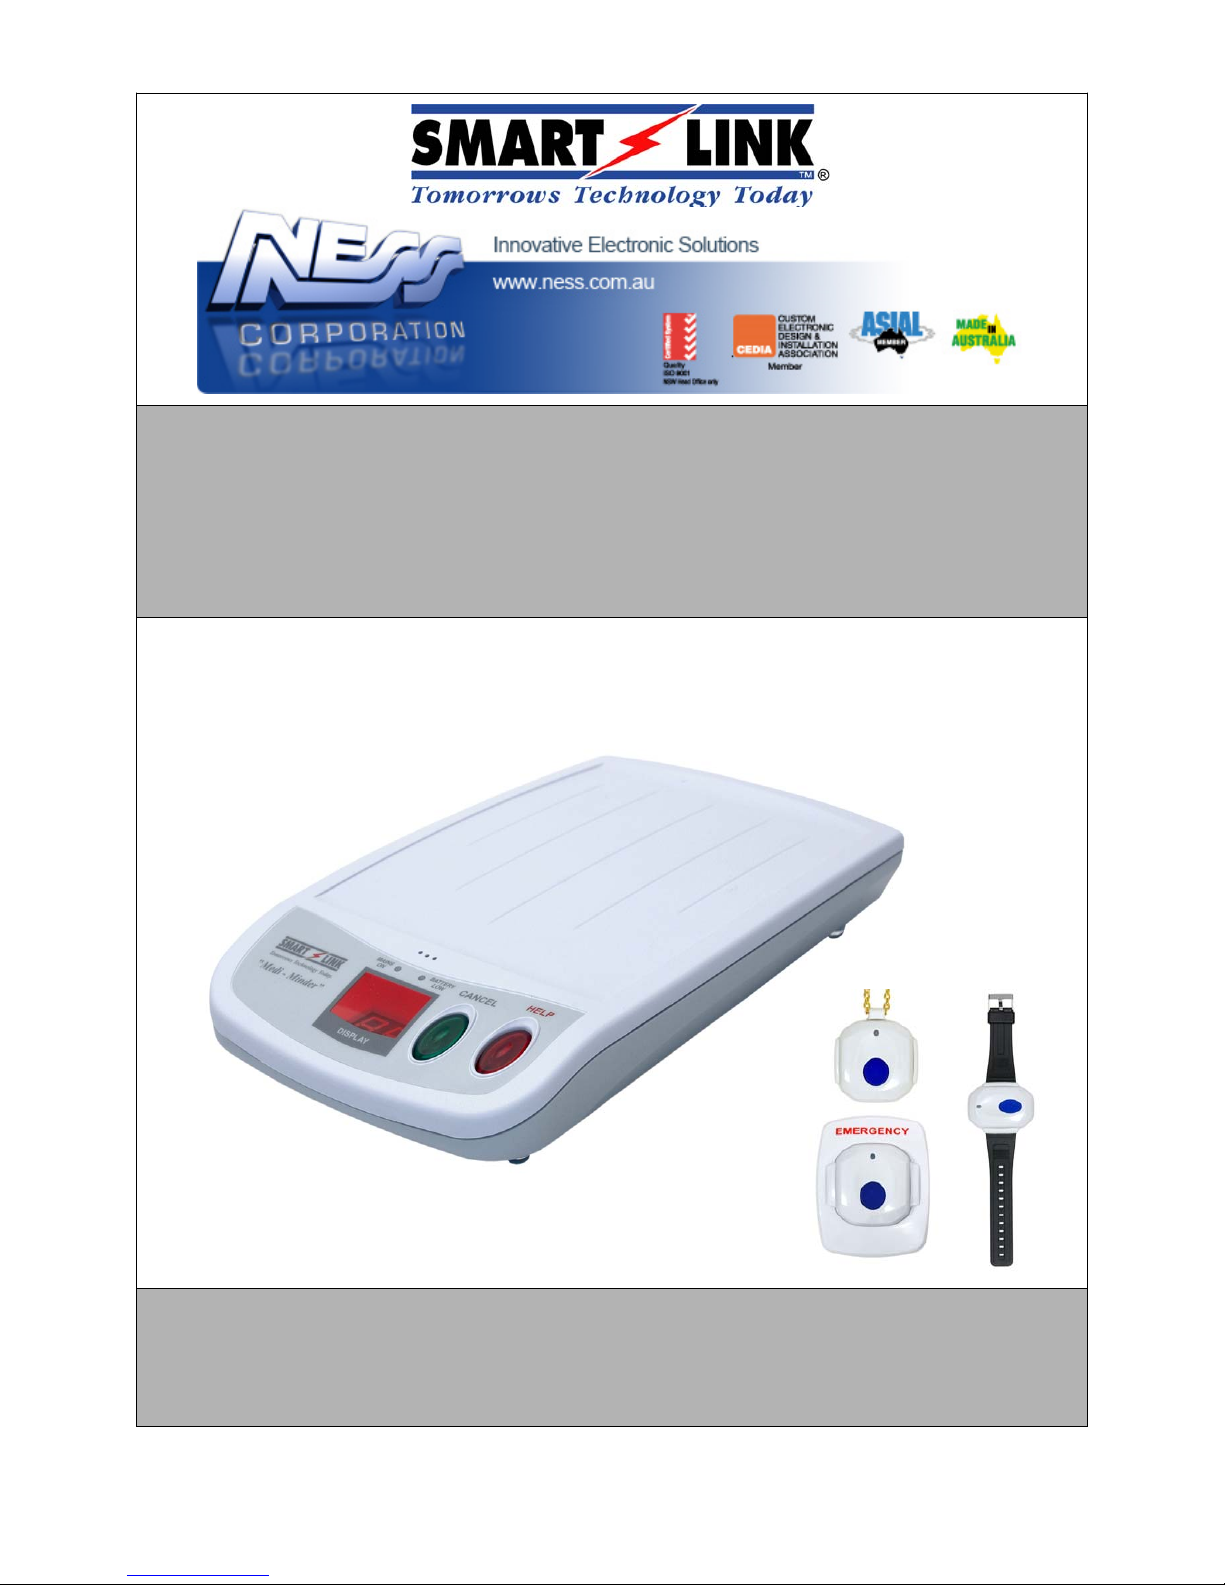
MEDI-MINDER
INSTALLATION MANUAL
Medi-Minder Installation Manual Rev1.11

Medi-Minder Installation Manual Rev1.11
1
“A division of NESS CORPORATION PTY LTD”
© Copyright SmartLink
September 2014
Unit 4/56 Norcal Rd,
Nunawading VIC 3131 Australia
Tel: +61 3 9875 6400 Facsimile: +61 3 9875 6422
Email: smartlink@ness.com.au
Web Site: www.smartlink.com.au
SmartLink Medi-Minder Installation Manual Rev 1.11
Document Part Number:
For Products: Medi-Minder Unit
© 2012 Ness Corporation Pty Ltd ABN 28 069 984 372
Specifications may change without notice.
Ness Corporation manufacturing processes are accredited to ISO9001 quality standards and all possible care and diligence has been applied during
manufacture to ensure the reliable operation of this product. However there are various external factors that may impede or restrict the operation of this
product in accordance with the product’s specification.
These factors include, but are not limited to:
1. Erratic or reduced radio range. Ness radio products are sophisticated low power devices, however the presence of in-band radio signals, high power
transmissions or interference caused by electrical appliances such as wireless routers, cordless phones, computers, TVs and other electronic devices may
reduce the range performance. While such occurrences are unusual, they are possible. In this case it may be necessary to either increase the physical
separation between the Ness receiver and other devices or if possible change the radio frequency or channel of the other devices.
2. Unauthorised tampering, physical damage, electrical interruptions such as mains failure, electrical spikes or lightning.

Medi-Minder Installation Manual Rev1.11
2
1. Contents
1. C
ONTENTS
.................................................................................................................. 2
2. E
QUIPMENTLIST
....................................................................................................... 2
3. I
NTRODUCTION
.......................................................................................................... 3
4. M
EDI-MINDERFEATURES
.........................................................................................4
5. P
ROGRAMMING
..........................................................................................................5
5.1 PROGRAMMING RULES...........................................................................................................................................5
5.2 P
ROGRAMMING OPTIONS....................................................................................................................................... 5
5.3 P
RODUCT PROGRAMMING (DEFAULT =MEDI-MINDER ADEMCO)........................................................................5
6. P
ROGRAMMINGOPTIONS
..........................................................................................6
6.1 PROGRAMMING MAIN MENU OPTIONS..................................................................................................................6
6.2 P
ROGRAMMING SUB MENU OPTIONS.....................................................................................................................7
7. S
ETTINGTIME
&D
ATE
...........................................................................................22
8. U
PDOWNLOADSOFTWARE
..................................................................................... 22
9. C
ELLULARSIGNALQUALITY
................................................................................. 23
10. C
ELLULAR
UDP/S
ERVER
........................................................................................23
11. N
ORMAL/OPERATIONMODE
.................................................................................. 24
12. D
ISPLAYS
&W
ARNINGS
..........................................................................................24
13. D
IALLERREPORTINGFORMAT
.............................................................................. 25
13.1 ADEMCO HIGH SPEED EXTENDED REPORTING...............................................................................................25
13.2 CONTACT ID R
EPORTING................................................................................................................................26
13.3 BRITISH DTMF (UNIVERSAL) R
EPORTING..................................................................................................27
14. S
PECIFICATIONS
.......................................................................................................28
2. Equipment List
A Medi-Minder Unit consists of the following equipment:
1. Medi-Minder Unit
2. Waterproof 2 Way Pendant (106-183)
3. 9VDC 300mA Regulated Plug Pack (840-050)
4. Lead Assy Medical Alarm (450-124)
5. User Manual (890-442)
Medi-Minder Installation Manual Rev1.11
3
3. Introduction
Your SmartLink Medi-Minder unit has been designed to provide you with the freedom and peace of mind in that, should
you need assistance or HELP, it is available to you 24 hours a day with the simple press of a Button.
The modern slim line design of the SmartLink Medi-Minder unit allows it to be installed unobtrusively anywhere and is
ready when you need help. HELP can be summonsed by pressing a Button on your personal Pendant or Wristwatch, which
you can wear both inside your home or outside in the garden, ready for any emergency, giving you the freedom you enjoy
for total control at all times.
The SmartLink Medi-Minder unit has been built to the highest of technical standards for the protection of people and
property and manufactured to Australian and International quality standards.
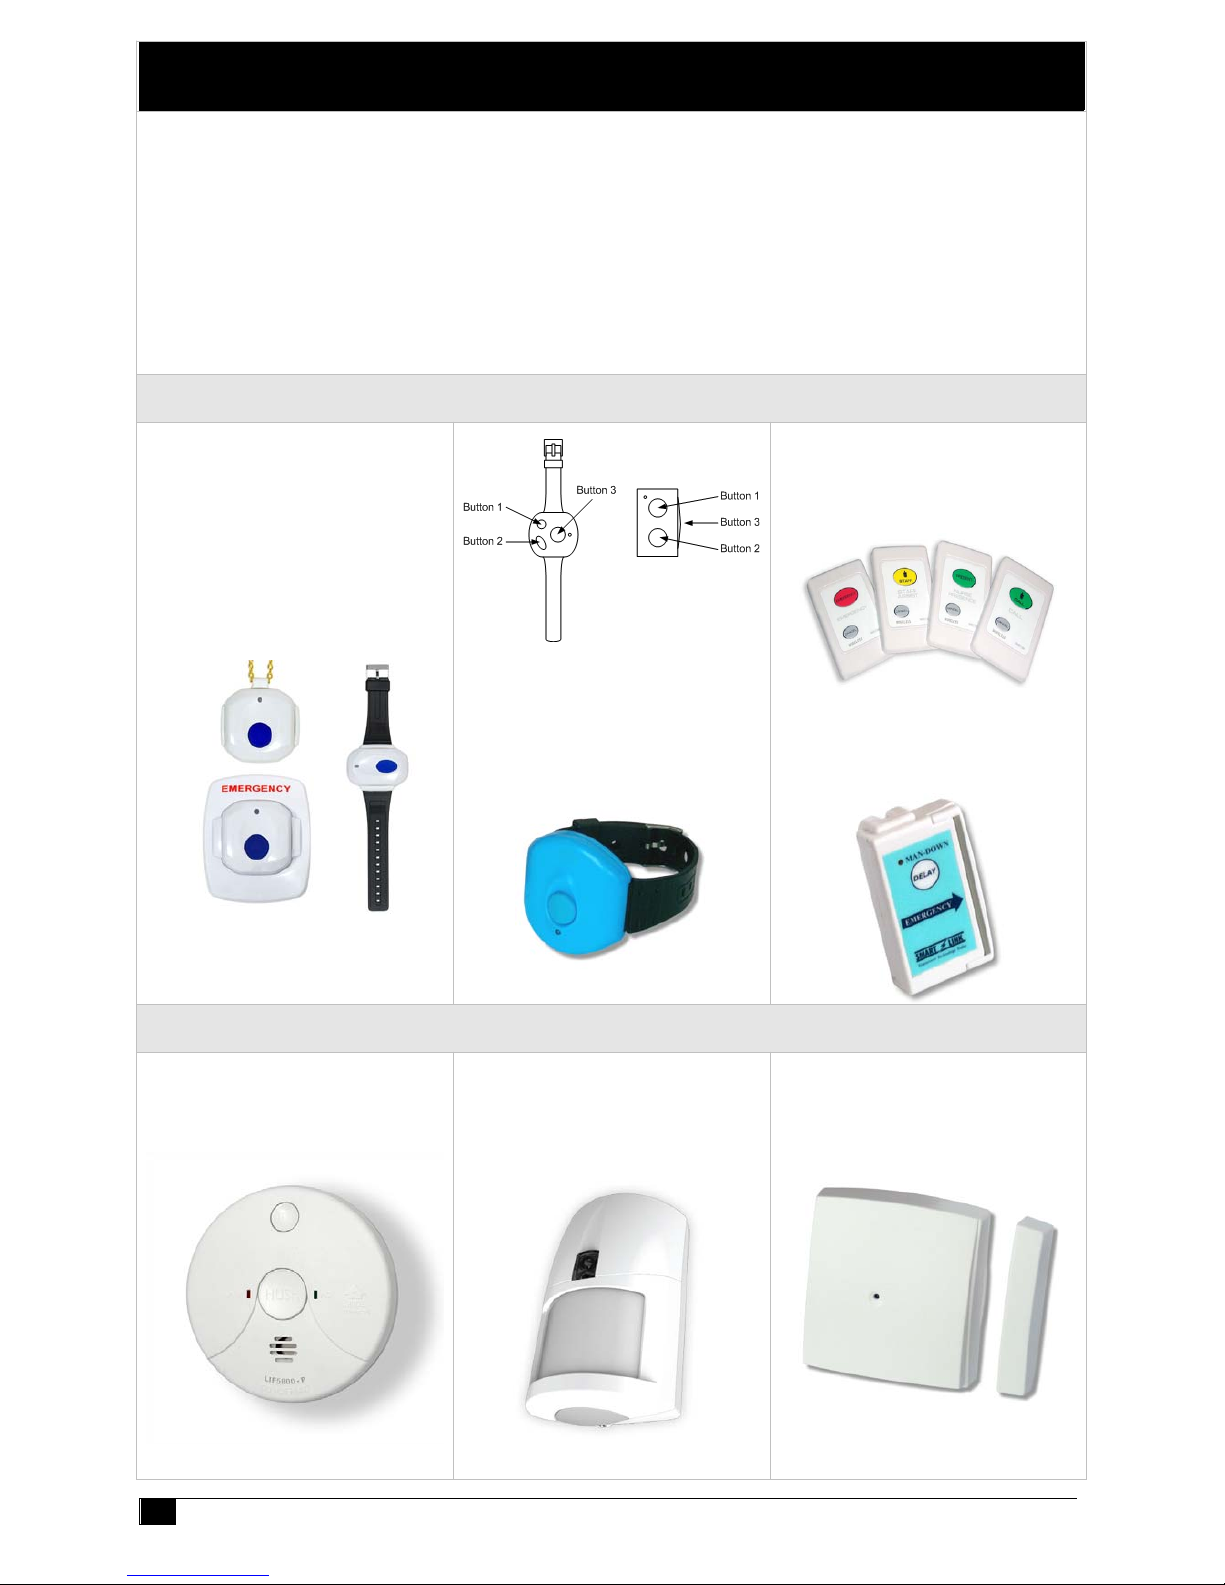
Your SmartLink Medi-Minder unit can be supplied with additional fixed or portable Radio Key Pendants, which can be
worn or placed around the home as needed. Please contact your supplier for more information.
RADIO KEY PENDANTS
Wristwatch, Neck Chain or
Fixed Waterproof 2-Way
Long Range Pendants
(915.8MHz to 927.2MHz)
(Part No. 106-183)
Button 1 = ARM or CALL
Button 2 = OFF or CANCEL
Button 3 = PANIC
Dementia Proximity Key
(Blue Colour)
(Part No. 100-677)
New Wall Mounted
Call Points (Wireless)
(Part No. 100-821)
Man-Down
Water Resistant Pendant
(Part No. 100-698)
RADIO DETECTORS
PSA 240VAC Smoke Detector
with 9V Rechargeable Battery
(Part No. 100-054)
Radio PIR Detector (with
Inbuilt LED Night Light)
(Part No. 106-174)
Radio Reed Switch
(Inactivity)
(Part No. 100-529)
Medi-Minder Installation Manual Rev1.11
4
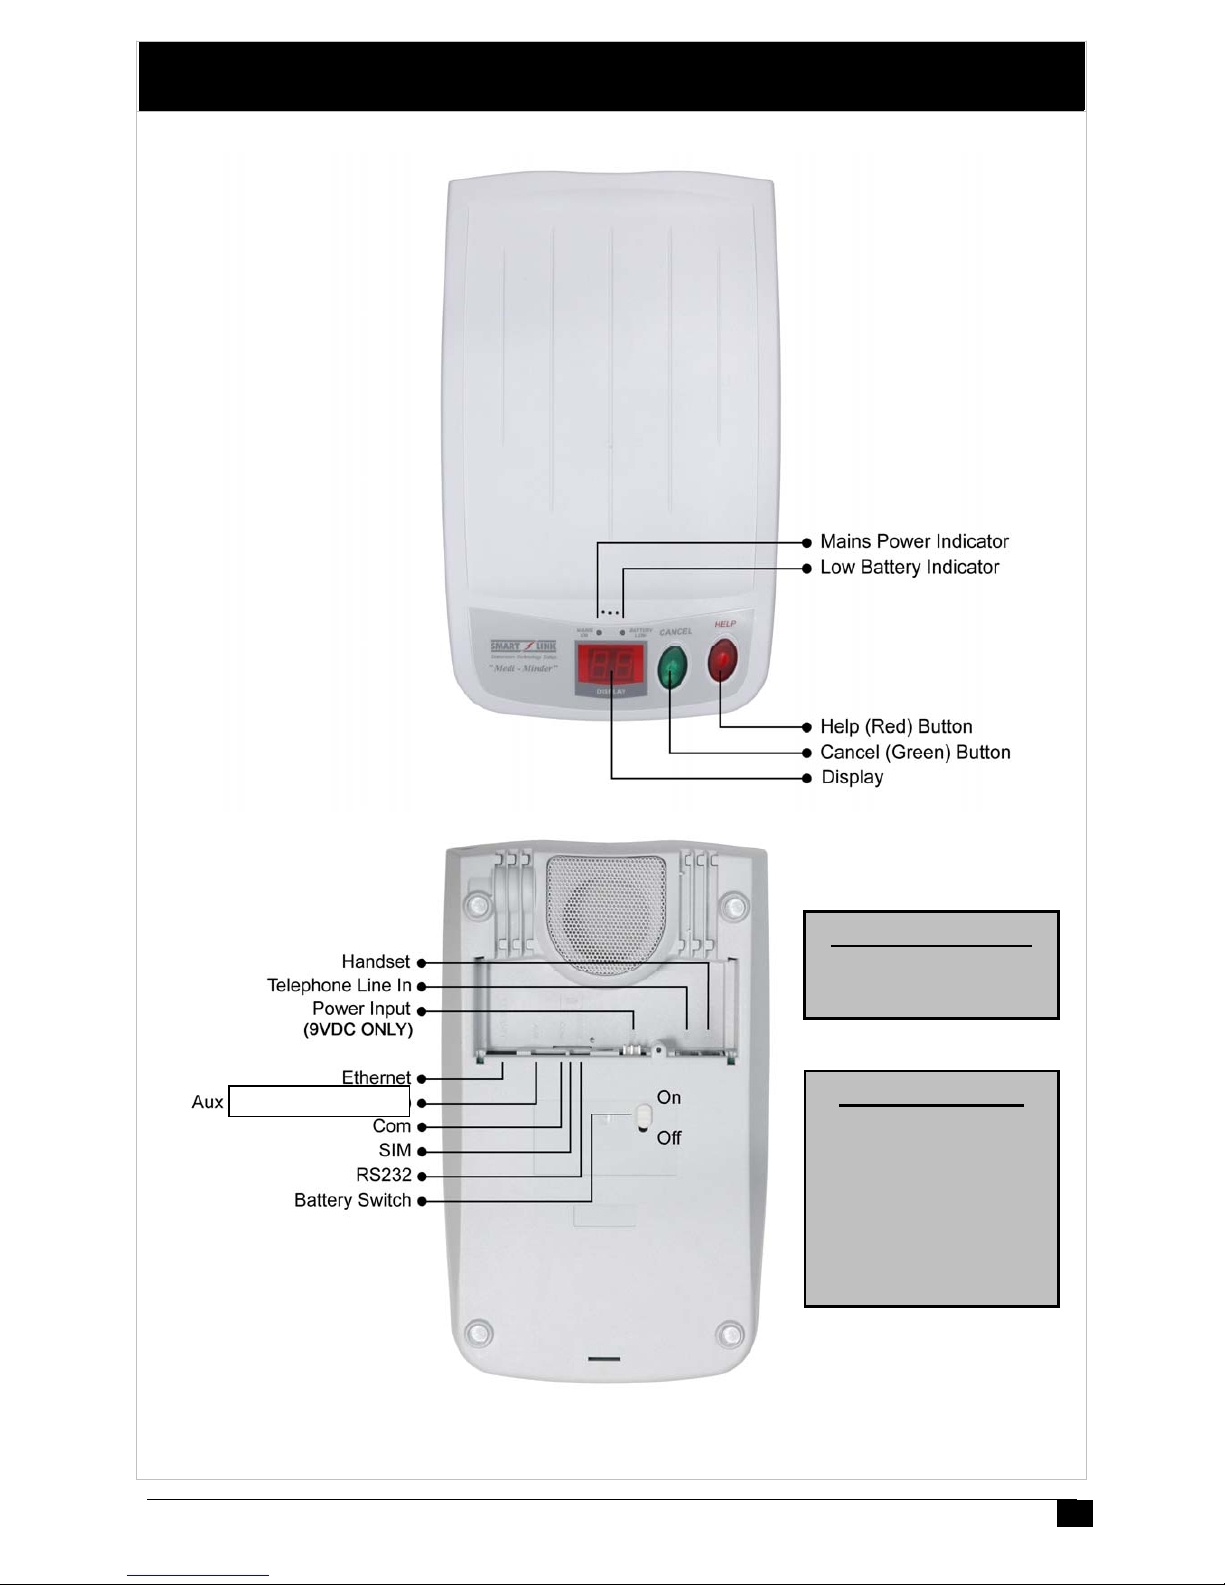
4. Medi-Minder Features
Rechargeable Battery
4.8V 1600mAh Ni-MH
(Part No. 142-031)
Aux Inputs/Outputs
(Part No. 450-191)
Common - Black
Input 1 - Red
Input 2 - White
Output 1 - Green
Output 2 - Brown
Output 3 - Blue
Medi-Minder Installation Manual Rev1.11
5
5. Programming
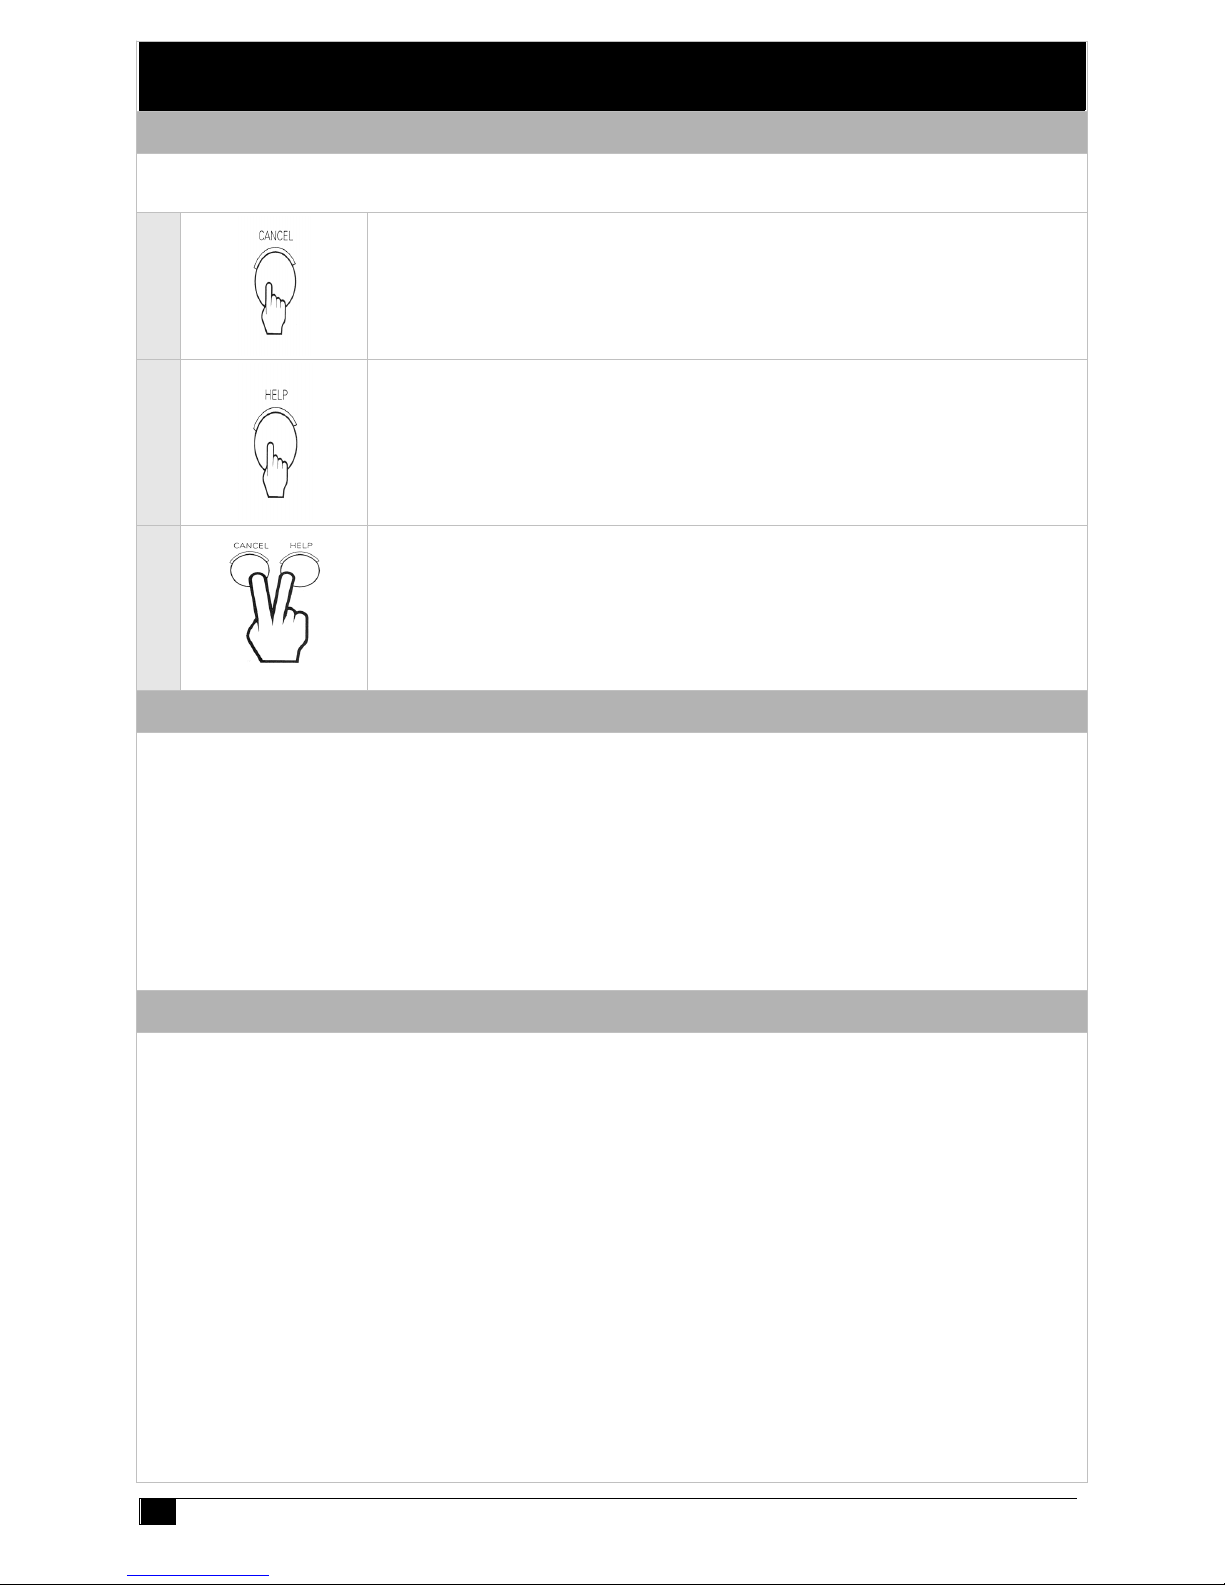
5.1 Programming Rules
The easiest way to program the Medi-Minder unit is to
use the large CANCEL (Green) Button and the HELP (Red) Button on the Medi-Minder unit.
1
Press the CANCEL (Green) Button on the Medi-Minder unit to scroll through the Main
Menu Options or the Sub Menu Options.
2
Press the HELP (Red) Button on the Medi-Minder unit to view the programmed value for
that option. The values will be displayed flashing. To step through values, press the HELP
(Red) Button again.
3
To store an option selected, press the CANCEL (Green) and HELP (Red) Buttons at the
same time. The Medi-Minder unit will beep twice while flashing the display to acknowledge
that the option has been selected.
5.2 Programming Options
NOTE: If NO Buttons on the Medi-Minder unit or the Radio Key Pendants have been pressed within 5 minutes, the MediMinder unit will revert back to NORMAL OPERATION MODE (NB: A Client Account Number and at least one Phone
Number must be programmed in for the Medi-Minder unit to Exit Program Mode and enter Normal Operation Mode).
To enter Programming Options:
1. The Medi-Minder unit must be turned Off by unplugging the Mains and the Battery Switch must also be Off.
2. Turn the Battery Switch to On and plug in the Mains.
3. The Medi-Minder unit will display the version number eg. “1.1”for 2 seconds and beep once.
4. “_A” is displayed to indicate that it is in Programming Options.
5. Now go to Section 6. Programming Options.
5.3 Product Programming (Default = Medi-Minder Ademco)
Skip this Section if you’re NOT changing the Product Type.
The Product Type is programmed by entering the Special Code on the Medi-Minder unit. This will reset all Programming
Options and will have to be completely reprogrammed again in the new mode. If the code is unknown then the MediMinder unit will default to the previous Product Type and it’s Option Programming will be maintained. The Medi-Minder
unit will remain in this Mode for only 5 minutes if the code hasn’t been entered.
To enter Product Programming:
1. The Medi-Minder unit must be turned Off by unplugging the Mains and the Battery Switch must also be Off.
2. Hold down the CANCEL (Green) and HELP (Red) Buttons and Power up the Medi-Minder unit.
3. The Medi-Minder unit will beep once while “PP” will be displayed to indicate that it is in Product Programming.
4. Using the CANCEL (Green) and HELP (Red) Buttons, a Code may be entered as follows:
a. Medi-Minder ADEMCO - Press CANCEL, CANCEL, CANCEL, HELP
b. Medi-Minder CONTACT ID - Press CANCEL, HELP, CANCEL, HELP
c. Medi-Minder BRITISH DTMF - Press HELP, HELP, CANCEL, HELP
5. Press the CANCEL (Green) and HELP (Red) Buttons at the sa me time to acknowledge en
d
of Produc
t
Programming. The Medi-Minder unit will beep once while “_A” is displayed to indicate that it is in Programming
Options. Now go to Section 6. Programming Options.

Medi-Minder Installation Manual Rev1.11
6
6. Programming Options
6.1 Programming Main Menu Options
The easiest way to program the Medi-Minder unit is to
use the large CANCEL (Green) Button and the HELP (Red) Button on the Medi-Minder unit.
Press the CANCEL (Green) Button to scroll through the Main Menu Options.
Option Page Descriptions
7 CLIENT ACCOUNT Programming Options
7 PHONE NUMBERS Programming Options
8 SERVER Options (Medi-Minder 3G Version Only)
9 PENDANTS Programming Options
10 DETECTORS Programming Options
11 HARDWIRED INPUTS Programming Options
11 AUXILIARY OUTPUTS Programming Options
12 PREFERENCES Programming Options
16 SYSTEMS Programming Options
17 CELLULAR Options (Medi-Minder 3G Version Only)
18 DAYLIGHT Programming Options
19 TIMERS Programming Options
20 REPORTS Programming Options
21 DOORBELL TUNES Programming Options
21 EXIT PROGRAM MODE

Medi-Minder Installation Manual Rev1.11
7
6.2 Programming Sub Menu Options
The Sub Menu Options are displayed for each particular Main Menu Option.
6.2.1 CLIENT ACCOUNT NUMBER Programming Option
Client Account Number (Default - unprogrammed)
Note - ADEMCO & CONTACT ID Versions - 4 Digits Only.
Note - BRITISH DTMF Version only - up to 12 Digits maximum.
1. “_A” is displayed. Press the HELP Button.
2. “CA”isdis
play
ed. Press the HELP Button again to viewprogrammedClient AccountNumber. The
programmed Client Account Number will flash on status display. If you wish to view the Client Account
Number again, press the CANCEL and then HELP Button. “ -” is displayed and flashes on the unit.
3. Pressing the HELP Button again to step through the digits (1, 2, 3, 4, 5, 6, 7, 8, 9 an
d
0). To STORE each
digit, press the CANCEL and HELP Buttons at the same time to store each digit. The unit will beep twice
and display the next digit to be programmed. Repeat this process until all digits are programmed.
4. Press the CANCEL Button to display the
p
rogrammed PhoneNumber stored. The unitwill flash on status
display for each digit and beep twice at the end of the Client Account Number stored.
5. Press the CANCEL Button to move to the next Program Option.
6.2.2 PHONE NUMBERS Programming Options - 30 Digits Maximum
Primary Phone Number - Monitoring Centre Phone Number 1
Star Hash Pause
1. “_n” is displayed. Press the HELP Button.
2. “n1” is displayed. Press the HELP Button again to view
p
rogrammed PhoneNumber. Theprogrammed
Phone Number will be flashed on status display. If you wish to view the Phone Number again, press the
CANCEL and then HELP Button. “ -” is displayed and flashes on the unit.
3. Pressin
g
the HELP Button againtostepthroughthedigits(0, 1, 2, 3, 4, 5, 6, 7, 8, 9, t, H and -).To
STORE
each digit, press the CANCEL and HELP Buttons at the same time to store each digit. The unit
will beep twice and display the next digit to be programmed. Repeat this process unt il all digits are
programmed.
4. Press the CANCEL Button to display the
p
rogrammedPhoneNumberstored. The unit willbeflashedon
status display for each digit and beeps twice at the end of the Phone Number stored.
5. Press the CANCEL Button to move to the next Program Option.
Secondary Phone Number – Monitoring Centre Phone Number 2
Mobile Phone Number 1 – Voice Only Reporting Number 1
Mobile Phone Number 2 – Voice Only Reporting Number 2
Default Values – Deletes/Erases all the Phone Programming to Default Values
Warning! This will Deletes/Erases all Programmed Phone Numbers n1 to n4
6. “dF”isdisplayed. Press the CANCEL and HELP Buttons atthesametimeandthe unitwillbeepsthree
times to indicate that ALL Phone Numbers (n1 to n4) have been Erased.
7. Press the CANCEL Button to move to the next Program Option.
Medi-Minder Installation Manual Rev1.11
8
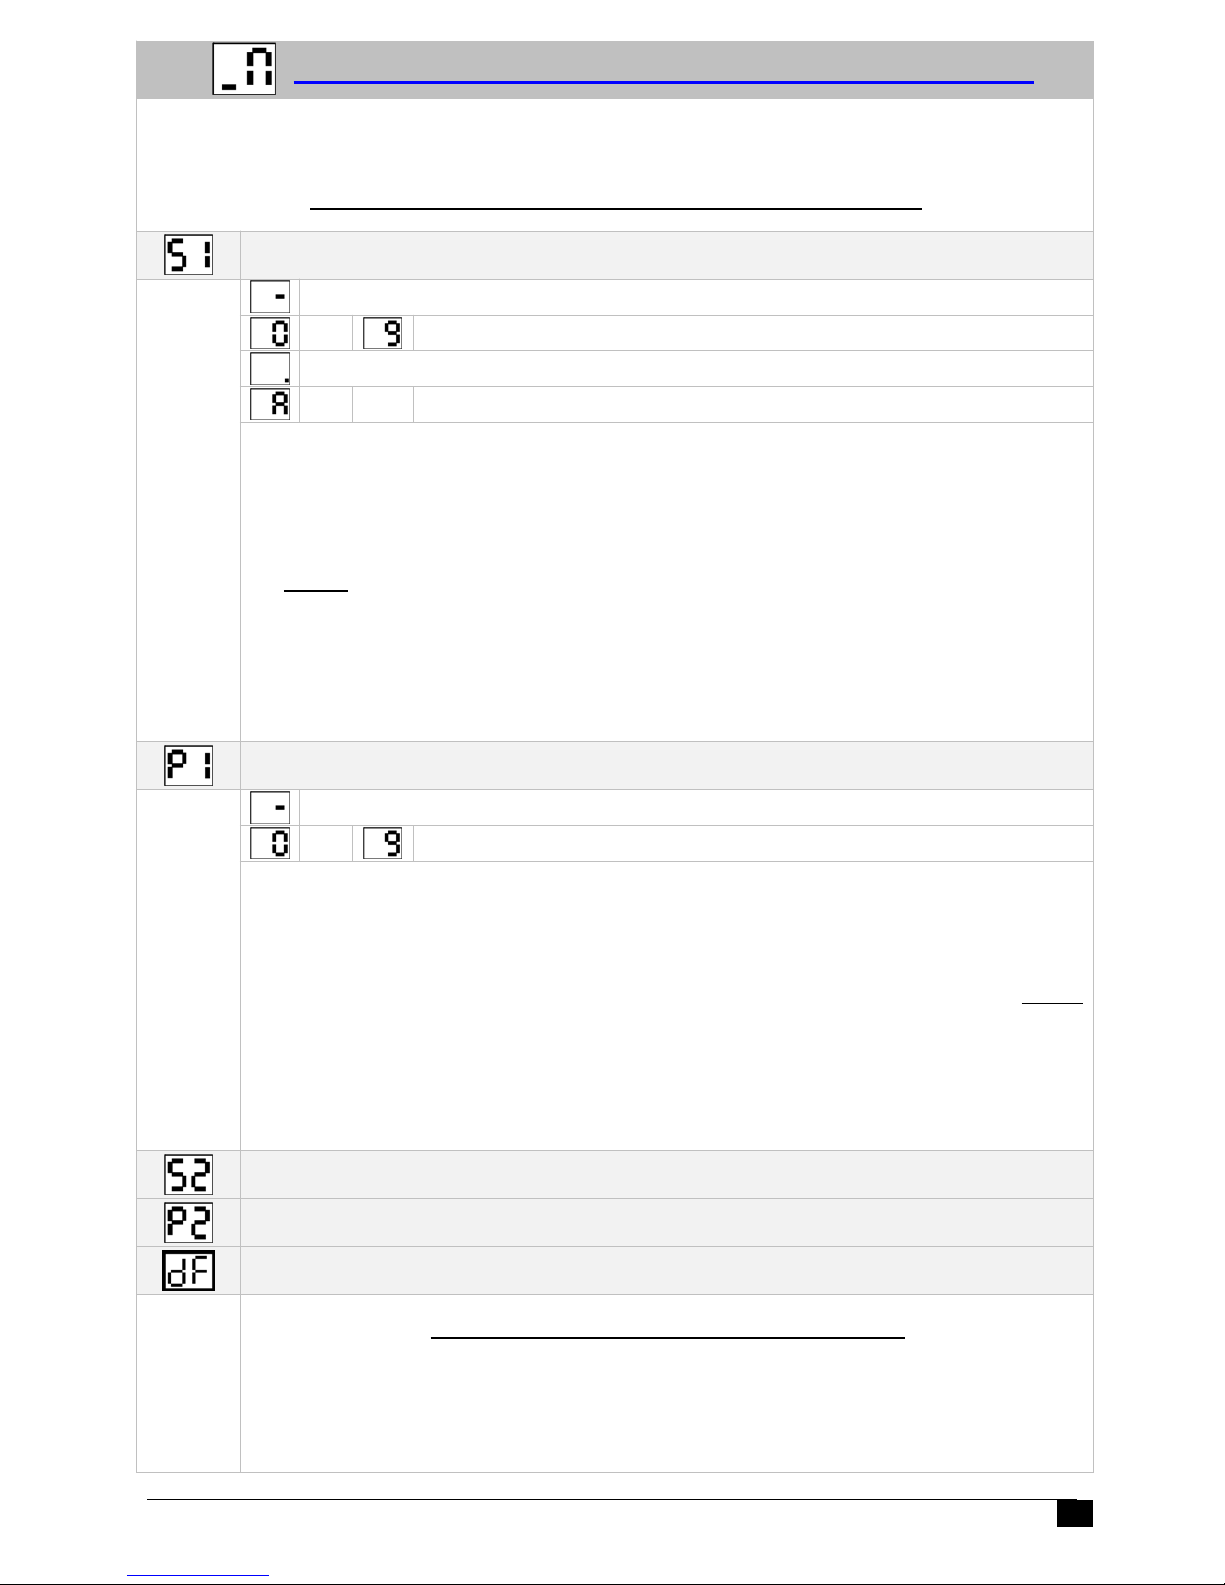
6.2.3 SERVER Programming Options (Medi-Minder 3G Version Only)
Note: The easiest way to program the
SERVER Programming Options is to use the
SmartLink Up/Download Programmer Software (MediMinder)
Server 1 IP Address - (up to 30 Digits/Characters Maximum)
Note: Programmed as the first Digit will delete Server 1 URL
to Digits - 0 to 9
Dot
to Characters - A to Z and a to z
1. “_N” is displayed. Press the HELP Button.
2. “S1”isdisplaye
d
. Press the HELP Button again to viewprogrammed Server 1 IP Address.The
programmed Server 1 IP Address will be flashed on status display. If you wish to view the Server 1 IP
Address again, press the CANCEL and then HELP Button. “ -” is displayed and flashes on the unit.
3. Pressing the HELP Button again to step through the digits (0, 1, 2, 3, 4, 5, 6, 7, 8, 9, 0, ., A to Z). To
STORE
each digit, press the CANCEL and HELP Buttons at the same time to store each digit. The unit
will beep twice and display the next digit to be programmed. Repeat this process unt il all digits are
programmed.
4. Press the CANCEL Button to display the
p
rogrammedServer 1 IP Address stored. The unit willbe
flashed on status display for each digit and beeps twice at the end of the Server 1 IP Address stored.
5. Press the CANCEL Button to move to the next Program Option.
Server 1 Port Number - (up to 5 Digits Maximum)
Note: Programmed as the first Digit will delete Server 1 Port Number
to Digits - 0 to 9
6. “P1” is displayed. Press the HELP Button.
7. “ -” is displayed. Press the HELP Button again to view
p
rogrammed Server 1 Port Number.The
programmed Server 1 Port Number will be flashed on status display. If you wish to view the Server 1 Port
Number again, press the CANCEL and then HELP Button. “ -” is displayed and flashes on the unit.
8. Pressin
g
the HELP Button again to stepthrough the digits(0, 1, 2, 3, 4, 5, 6, 7, 8, an
d9)
.ToSTORE
each digit, press the CANCEL and HELP Buttons at the same time to store each digit. The unit will beep
twice and display the next digit to be programmed. Repeat this process until all digits are programmed.
9. Press the CANCEL Button to display the
p
rogrammed Server 1 Por
t
N
umberstored. The unitwillbe
flashed on status display for each digit and beeps twice at the end of the Server 1 Port Number stored.
10. Press the CANCEL Button to move to the next Program Option.
Server 2 IP Address - (up to 30 Digits/Characters Maximum)
Server 2 Port Number - (up to 5 Digits Maximum)
Default Values – Deletes/Erases all the Server Programming to Default Values
Warning! This will Deletes/Erases all Programmed Servers
11. “dF”isdisplayed. Press the CANCEL and HELP Buttons atthesametimeandthe unitwillbeeps three
times to indicate that ALL Server Numbers (S1, P1, S2 and P2) have been Erased.
12. Press the CANCEL Button to move to the next Program Option.
 Loading...