

Page 1

EN
PV Inverter
SUNNY MINI CENTRAL 9000TL / 10000TL / 11000TL
with Reactive Power Control
User Manual
SMC9-11TLRP-BA-en-30 | TBEN-SMCTLRP | Version 3.0
Page 2

Page 3

SMA Solar Technology AG Table of Contents
Table of Contents
1 Information on this Document. . . . . . . . . . . . . . . . . . . . . . . 5
2 Safety . . . . . . . . . . . . . . . . . . . . . . . . . . . . . . . . . . . . . . . . . . 7
2.1 Intended Use. . . . . . . . . . . . . . . . . . . . . . . . . . . . . . . . . . . . . . . . 7
2.2 Safety Precautions. . . . . . . . . . . . . . . . . . . . . . . . . . . . . . . . . . . . 8
3 Product Description . . . . . . . . . . . . . . . . . . . . . . . . . . . . . . . 9
3.1 Sunny Mini Central 9000TL / 10000TL / 11000TL with
Reactive Power Control. . . . . . . . . . . . . . . . . . . . . . . . . . . . . . . . 9
3.2 Type Label . . . . . . . . . . . . . . . . . . . . . . . . . . . . . . . . . . . . . . . . 11
3.3 Electronic Solar Switch (ESS) . . . . . . . . . . . . . . . . . . . . . . . . . . 13
3.4 Display and LEDs . . . . . . . . . . . . . . . . . . . . . . . . . . . . . . . . . . . 14
3.5 Communication. . . . . . . . . . . . . . . . . . . . . . . . . . . . . . . . . . . . . 15
4 Display . . . . . . . . . . . . . . . . . . . . . . . . . . . . . . . . . . . . . . . . 16
4.1 Operating the Display . . . . . . . . . . . . . . . . . . . . . . . . . . . . . . . 16
4.2 Display Messages during the Start-Up Phase . . . . . . . . . . . . . . 16
4.3 Display Messages during Operation . . . . . . . . . . . . . . . . . . . . 17
4.4 Display Messages during a Fault . . . . . . . . . . . . . . . . . . . . . . . 17
4.5 DC Overvoltage . . . . . . . . . . . . . . . . . . . . . . . . . . . . . . . . . . . . 17
5 LED Signals . . . . . . . . . . . . . . . . . . . . . . . . . . . . . . . . . . . . . 18
6 Cleaning the Inverter . . . . . . . . . . . . . . . . . . . . . . . . . . . . . 19
7 Glossary . . . . . . . . . . . . . . . . . . . . . . . . . . . . . . . . . . . . . . . 20
8 Contact . . . . . . . . . . . . . . . . . . . . . . . . . . . . . . . . . . . . . . . . 21
User Manual SMC9-11TLRP-BA-en-30 3
Page 4

Table of Contents SMA Solar Technology AG
4 SMC9-11TLRP-BA-en-30 User Manual
Page 5
SMA Solar Technology AG 1 Information on this Document
1 Information on this Document
Validity
This document is valid for the following device types:
• SMC 9000TLRP-10
• SMC 10000TLRP-10
• SMC 11000TLRP-10
Target Group
This document is intended for end users.
Additional Information
Links to additional information can be found at www.SMA-Solar.com:
Document title Document type
Operating parameters Technical description
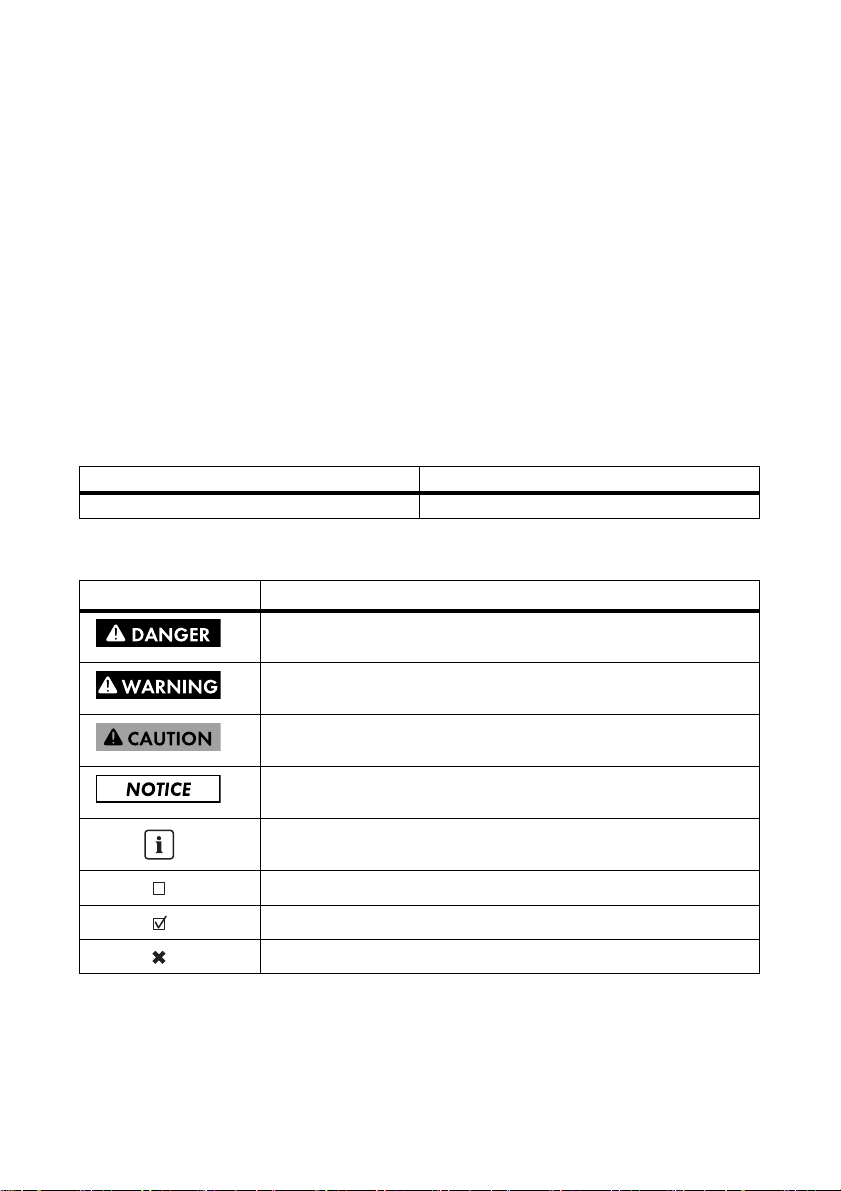
Symbols
Symbol Explanation
Indicates a hazardous situation which, if not avoided, will result in death
or serious injury
Indicates a hazardous situation which, if not avoided, could result in
death or serious injury
Indicates a hazardous situation which, if not avoided, could result in
minor or moderate injury
Indicates a situation which, if not avoided, could result in property
damage
Information that is important for a specific topic or goal, but is not
safety-relevant
Indicates an essential requirement for achieving a specific goal
Desired result
A problem that might occur
User Manual SMC9-11TLRP-BA-en-30 5
Page 6
1 Information on this Document SMA Solar Technology AG
Typography
Typography Usage Example
bold •Display messages
• Elements of a user
• Select the Fan test
parameter and set to 1.
interface
• Parameters
• Connections
• Elements to be selected
• Elements to be entered
Nomenclature
In this document, the Sunny Mini Central is also referred to as "inverter" or "product".
Abbreviations
Abbreviation Designation Explanation
AC Alternating Current ‒
DC Direct Current ‒
EC European Community ‒
LED Light-Emitting Diode ‒
MPP Maximum Power Point ‒
PV Photovoltaics ‒
RP Reactive Power ‒
6 SMC9-11TLRP-BA-en-30 User Manual
Page 7

SMA Solar Technology AG 2 Safety
2Safety
2.1 Intended Use
The Sunny Mini Central is a transformerless PV inverter, which converts the direct current of the
PV array to grid-compliant alternating current and feeds it into the electricity grid.
Figure1: Operating principle of a PV plant with Sunny Mini Central
The Sunny Mini Central is suitable for indoor and outdoor use.
For safety reasons, it is not permitted to modify the product or install components that are not explicitly
recommended or distributed by SMA Solar Technology AG.
The Sunny Mini Central may only be used in countries for which it is approved or released by
SMA Solar Technology AG and the network operators.
The enclosed documentation is an integral part of this product. Read and follow the documentation
to make proper and optimum use of the Sunny Mini Central. Keep the documentation in a convenient
place for future reference.
User Manual SMC9-11TLRP-BA-en-30 7
Page 8

2 Safety SMA Solar Technology AG
2.2 Safety Precautions
Electric Shock
High voltages that can cause fatal electric shocks are present in the live components of the inverter.
The following work must be carried out by an electrically skilled person only:
• Electrical installation
•Repairs
• Modifications
Burn Hazards
Some parts of the enclosure can become hot during operation.
• During operation, touch the inverter on the enclosure lid only.
Inverter Damage
Overvoltage can destroy the inverter.
• If the yellow LED flashes four times and the inverter shows the display message
!PV-Overvoltage! - !DISCONNECT DC!, inform the installer IMMEDIATELY.
8 SMC9-11TLRP-BA-en-30 User Manual
Page 9

SMA Solar Technology AG 3 Product Description
3 Product Description
3.1 Sunny Mini Central 9000TL / 10000TL / 11000TL with Reactive Power Control
The Sunny Mini Central is a transformerless PV inverter, which converts the direct current of the
PV array to grid-compliant alternating current and feeds it into the electricity grid.
Figure2: Design of the Sunny Mini Central
Item Designation
A Ventilation grid
BType label
C Electronic Solar Switch (ESS)
DLEDs
EDisplay
FEnclosure lid
G Enclosure lid screws
User Manual SMC9-11TLRP-BA-en-30 9
Page 10

3 Product Description SMA Solar Technology AG
Symbols on the Inverter
Symbol Designation Explanation
Tapping You can operate the display by tapping it:
• Tapping once: Switches on display
backlight or switches to the next display
message.
• Tapping twice in quick succession: The
inverter shows the display messages from
the start-up phase.
After two minutes, the backlight switches off
automatically.
Inverter This symbol defines the function of the green LED.
The green LED indicates the operating state of
the inverter.
Earth fault This symbol defines the function of the red LED.
The red LED indicates an earth fault, a defective
varistor or a defective string fuse. Inform your
installer.
Observe the
documentation.
QR Code
®
This symbol defines the function of the yellow LED
which indicates a fault or disturbance. Inform
your installer.
The QR Code® refers to the SMA bonus
programme (for further information, please see
www.SMA-Bonus.com).
10 SMC9-11TLRP-BA-en-30 User Manual
Page 11

SMA Solar Technology AG 3 Product Description
3.2 Type Label
The type label uniquely identifies the inverter. The type label is located on the right-hand side of the
enclosure.
Figure3: Design of the type label
Item Designation Explanation
A Model Inverter device type
B Serial No. Inverter serial number
C Device-specific characteristics -
D Additional information Field for additional information, e.g. details of
standards
E Date Inverter manufacture date (year-month-day)
You will need the information on the type label to ensure safe use of the inverter and when seeking
customer support from the SMA Service Line. The type label must be permanently attached to the
inverter.
User Manual SMC9-11TLRP-BA-en-30 11
Page 12

3 Product Description SMA Solar Technology AG
Symbols on the Type Label
Symbol Designation Explanation
Danger to life due to high
voltages
Risk of burns due to hot surfaces The inverter can get hot during
Observe the documentation. Observe all documentation that is
Without transformer The inverter does not have a transformer.
DC Direct current
AC Alternating current
The inverter operates at high voltages.
All work on the inverter must be carried
out by skilled persons only.
operation. Avoid contact during
operation.
supplied with the inverter.
Degree of protection The inverter is protected against dust
intrusion and water jets from all angles.
Outdoor The inverter is suitable for outdoor
installation.
Proper disposal Do not dispose of the inverter together
with the household waste.
CE marking The inverter complies with the
requirements of the applicable EC
directives.
RAL quality mark for solar
products
The inverter complies with the
requirements of the German Institute for
Quality Assurance and Labelling.
Australian mark of conformity The inverter complies with the
requirements of the applicable
Australian guidelines.
12 SMC9-11TLRP-BA-en-30 User Manual
Page 13

SMA Solar Technology AG 3 Product Description
Symbol Designation Explanation
Korean mark of conformity The inverter complies with the
requirements of the applicable Korean
guidelines.
Chinese mark of conformity The inverter complies with the
requirements of the applicable Chinese
guidelines.
3.3 Electronic Solar Switch (ESS)
The Electronic Solar Switch is part of the DC disconnection unit of the inverter. The Electronic Solar
Switch must be securely plugged in at the bottom of the inverter and may only be removed by an
electrically skilled person.
User Manual SMC9-11TLRP-BA-en-30 13
Page 14

3 Product Description SMA Solar Technology AG
3.4 Display and LEDs
The display and the LEDs of the inverter are located on the enclosure lid and indicate the operating
state of the inverter.
Figure4: Design of the display
Item Designation Explanation
A Display Two--line LC text display for displaying operating
data
B Tap symbol You can operate the display by tapping it (see
Section 4.1"Operating the Display",page16).
C Green LED Indicates the operating state of the inverter.
D Red LED Indicates an earth fault, a defective varistor or a
defective string fuse
E Ye llo w L ED In dicat es a fau lt or d ist urb ance. Rea d th e manu al
to remedy the fault or disturbance
The display shows the current operating data of the inverter (e.g. status, power, input voltage) and
faults or disturbances.
The LEDs indicate the operating state of the inverter, and clarify the messages in the display using
different blink codes (see Section 5"LED Signals",page18).
14 SMC9-11TLRP-BA-en-30 User Manual
Page 15

SMA Solar Technology AG 3 Product Description
3.5 Communication
The inverter is equipped with a slot for connecting an SMA communication interface (e.g., RS485 or
Bluetooth
communicate with special SMA communication products (e.g. data logger, software) or other
SMA inverters. The inverter parameters can only be set via SMA communication products.
If you have ordered an inverter with a communication interface, it will be delivered with the
communication interface built in.
Depending on the type of communication, RS485 or Bluetooth, the parameters and messages will be
displayed differently in the communication products.
In the inverter display, the parameters and messages are depicted independently of the connected
communication interface and may also differ.
®
Wireless Technology). By means of the communication interface, the inverter can
Example: Display of parameter for fan test
• When using RS485 communication: parameter Fan-Test
•When using Bluetooth communication: parameter Fan test
User Manual SMC9-11TLRP-BA-en-30 15
Page 16

4 Display SMA Solar Technology AG
SMC xxx
Wrxxx
PowerBalancer
PowerGuard
4Display
4.1 Operating the Display
You can operate the display by tapping the enclosure lid.
• To switch on the backlight, tap once.
•To switch to the next display message, tap once.
• To display the messages from the start-up phase again, tap twice.
4.2 Display Messages during the Start-Up Phase
• To view the display messages of the start-up phase again during regular operation, see
Section 4.1"Operating the Display",page16.
Display message Description
Inverter device type
Firmware version of the internal processors
Configured country data set
(example: VDE-AR-N4105-MP)
Configuration of the SMA Power Balancer
(example: PowerGuard)
16 SMC9-11TLRP-BA-en-30 User Manual
Page 17

SMA Solar Technology AG 4 Display
4.3 Display Messages during Operation
When the inverter is in operation, the following messages alternate on the display. Each display
message appears for five seconds, then the cycle starts again.
Display message Description
Current feed-in power and voltage of the PV array
Current values for reactive power Qac and
displacement power factor cos φ (PF)
Energy produced so far and total number of hours in
feed-in operation
Energy generated on the current day and MPP status
message
4.4 Display Messages during a Fault
Display message Description
Energy generated on the current day
(example: 0Wh) and status message
(example: Disturbance)
Operating state (example: disturbance) and
error message (example: Vac-Bfr)
Measured value at the time of the disturbance
(example: 261 V) and current measured value
(example: 245 V)*
* This display message only appears if a measured value is responsible for the fault.
• If an error message is displayed, contact your installer.
4.5 DC Overvoltage
Display message Description
The DC input voltage into the inverter is too high.
• Contact your installer immediately.
User Manual SMC9-11TLRP-BA-en-30 17
Page 18

5 LED Signals SMA Solar Technology AG
5LED Signals
Designation Status Cause and corrective measures
All LEDs glowing The inverter is initialising.
flashing The start-up phase is beginning.
If th e DC voltage is very low in the start-u p phase, all th ree
LEDs go out and the start-up phase recommences. If
irradiation is very low, all three LEDs flash. This flashing
indicates a normal operating state. It does not mean that
a fault has occurred.
off The ESS is not plugged in or the irradiation level is zero.
• Plug in the ESS securely.
Green LED glowing Indicates the operating state of the inverter. The specific
status message is shown in the display.
flashing The DC input voltage is still too low. Once the DC input
voltage is sufficiently high, the inverter goes into
operation.
Red LED glowing Earth fault
The specific error or fault message is shown in the display.
• Contact your installer.
flashing Varistor or string fuse defective
The s pecific error or fault message is sho wn in the display .
• Contact your installer.
Yellow LED glowing Probably a fault or warning has been issued.
The specific error or fault message is shown in the display.
• Contact your installer.
flashing Probably a fault or warning has been issued.
The specific error or fault message is shown in the display.
• Contact your installer.
18 SMC9-11TLRP-BA-en-30 User Manual
Page 19

SMA Solar Technology AG 6 Cleaning the Inverter
6 Cleaning the Inverter
• If the inverter is dirty, clean the enclosure lid, the display and the LEDs using only clear water
and a cloth.
User Manual SMC9-11TLRP-BA-en-30 19
Page 20

7 Glossary SMA Solar Technology AG
7Glossary
Derating
A controlled reduction in performance, usually dependent on component temperatures
SMA Power Balancer
The SMA Power Balancer is a serial feature of the Sunny Mini Central. The SMA Power Balancer
prevents the formation of an excessive unbalanced load during three-phase feed-in. This is enabled
by connecting three Sunny Mini Centrals to a three-phase feed-in unit via a control cable.
Unbalanced Load
The unbalanced load is the difference between the power being fed into the grid by the individual
line conductors. This depends on the configured country data set and may be between
4.6 kVA and 6 kVA.
Varistor
The varistors protect the electronics in the inverter from atmospherically coupled energy peaks, such
as those which can occur e.g. when lightning strikes nearby.
20 SMC9-11TLRP-BA-en-30 User Manual
Page 21

SMA Solar Technology AG 8 Contact
8Contact
If you encounter technical problems, first contact your installer. The following information is required
in order to provide you with the necessary assistance:
•Inverter device type
• Inverter serial number
• Type and number of the PV modules connected
• LED signal, error or fault of the inverter
• Optional equipment, e.g. communication products
SMA Solar Technology AG
Sonnenallee 1
34266 Niestetal, Germany
www.SMA.de
SMA Service Line
Inverters: +49 561 9522 1499
Communication: +49 561 9522 2499
Fax: +49 561 9522 4699
E‑Mail: ServiceLine@SMA.de
User Manual SMC9-11TLRP-BA-en-30 21
Page 22

Page 23

SMA Solar Technology AG Legal Provisions
Legal Provisions
The information contained in this document is the property of SMA Solar Technology AG. Publishing its content, either partially or
in full, requires the written permission of SMA Solar Technology AG. Any internal company copying of the document for the
purposes of evaluating the product or its correct implementation is allowed and does not require permission.
SMA Factory Warranty
The current warranty conditions come enclosed with your device. These are also available online at www.SMA-Solar.com and can
be downloaded and are available on paper from the usual sales channels if required.
Trademarks
All trademarks are recognized even if these are not marked separately. Missing designations do not mean that a product or brand
is not a registered trademark.
The Bluetooth
SMA Solar Technology AG is under licence.
QR Code
SMA Solar Technology AG
Sonnenallee 1
34266 Niestetal
Germany
Tel. +49 561 9522-0
Fax +49 561 9522-100
www.SMA.de
E-Mail: info@SMA.de
© 2004 to 2012 SMA Solar Technology AG. All rights reserved
®
word mark and logos are registered trademarks owned by Bluetooth SIG, Inc. and any use of such marks by
®
is a registered trademark of DENSO WAVE INCORPORATED.
User Manual SMC9-11TLRP-BA-en-30 23
Page 24

XXX4."4PMBSDPN
4."4PMBS5FDIOPMPHZ
4."4PMBS5FDIOPMPHZ"(
XXX4."EF
4.""NFSJDB--$
XXX4.""NFSJDBDPN
4."5FDIOPMPHZ"VTUSBMJB1UZ-UE
XXX4.""VTUSBMJBDPNBV
4."#FOFMVY413-
XXX4."#FOFMVYDPN
4."#FJKJOH$PNNFSDJBM$P-UE
XXX4."$IJOBDPN
4."$[FDI3FQVCMJDTSP
XXX4."$[FDIDPN
4."'SBODF4"4
XXX4."'SBODFDPN
4.")FMMBT"&
XXX4.")FMMBTDPN
4."*C©SJDB5FDOPMPHB4PMBS4-
XXX4."*CFSJDBDPN
4."*UBMJB4SM
XXX4."*UBMJBDPN
4."5FDIOPMPHZ,PSFB$P-UE
XXX4.",PSFBDPN
 Loading...