

Page 1
US
Sunny Boy Accessories
SUNNY BOY COMBINER BOX TLUS
SBCBTL6
Installation Guide
SBCBTLUS-IUS094510 | IMUS-SBCBTLUS | Version 1.0
Page 2

Page 3

SMA America, LLC Legal Restrictions
Copyright © 2010 SMA America,LLC. All rights reserved.
No part of this document may be reproduced, stored in a retrieval system, or transmitted, in any form
or by any means, electronic, mechanical, photographic, magnetic or otherwise, without the prior
written permission of SMA America,LLC.
SMA America,LLC makes no representations, express or implied, with respect to this documentation
or any of the equipment and/or software it may describe, including (with no limitation) any implied
warranties of utility, merchantability, or fitness for any particular purpose. All such warranties are
expressly disclaimed. Neither SMA America,LLC nor its distributors or dealers shall be liable for any
indirect, incidental, or consequential damages under any circumstances.
(The exclusion of implied warranties may not apply in all cases under some statutes, and thus the
above exclusion may not apply.)
Specifications are subject to change without notice. Every attempt has been made to make this
document complete, accurate and up-to-date. Readers are cautioned, however, that
SMAAmerica,LLC reserves the right to make changes without notice and shall not be responsible for
any damages, including indirect, incidental or consequential damages, caused by reliance on the
material presented, including, but not limited to, omissions, typographical errors, arithmetical errors
or listing errors in the content material.
All trademarks are recognized even if these are not marked separately. Missing designations do not
mean that a product or brand is not a registered trademark.
The Bluetooth
®
word mark and logos are registered trademarks owned by Bluetooth SIG, Inc. and
any use of such marks by SMA America,LLC is under license.
SMA America, LLC
3801 N. Havana Street
Denver, CO 80239 U.S.A.
Installation Guide SBCBTLUS-IUS094510 3
Page 4

Important Safety Instructions SMA America, LLC
IMPORTANT SAFETY INSTRUCTIONS
SAVE THESE INSTRUCTIONS
This manual contains important instructions for the Sunny Boy Combiner Box that must be followed
during installation and maintenance of the Sunny Boy Combiner Box.
The Sunny Boy Combiner Box is designed and tested according to international safety requirements,
but as with all electrical and electronic equipment, certain precautions must be observed when
installing and/or operating the Sunny Boy Combiner Box. To reduce the risk of personal injury and
to ensure the safe installation and operation of the Sunny Boy Combiner Box, you must carefully read
and follow all instructions, cautions and warnings in this installation guide.
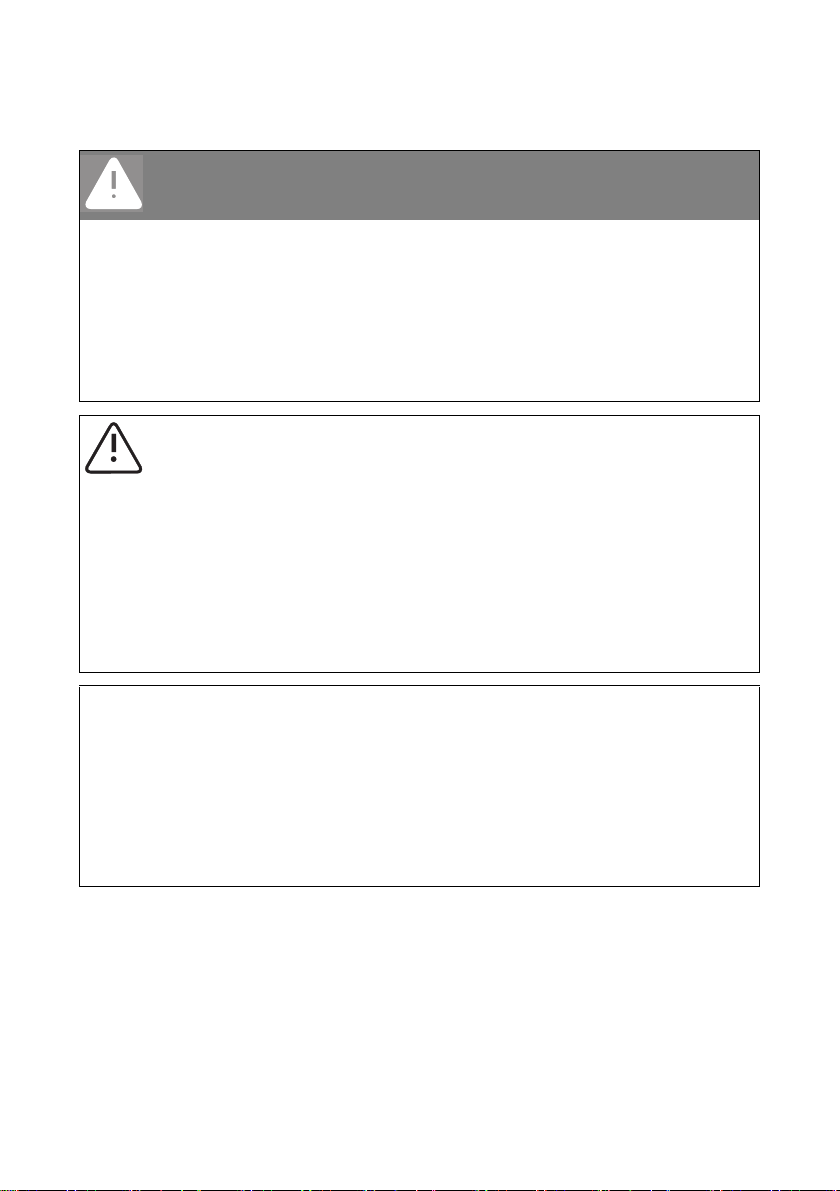
Warnings in this document
A warning describes a hazard to equipment or personnel. It calls attention to a procedure or practice,
which, if not correctly performed or adhered to, could result in damage to or destruction of part or all
of the SMA equipment and/or other equipment connected to the SMA equipment or personal injury.
DANGER
DANGER indicates a hazardous situation which, if not avoided, will result in death or
serious injury.
WARNING
WARNING indicates a hazardous situation which, if not avoided, could result in death or
serious injury.
CAUTION
CAUTION indicates a hazardous situation which, if not avoided, could result in minor or
moderate injury.
NOTICE
NOTICE is used to address practices not related to personal injury.
4 SBCBTLUS-IUS094510 Installation Guide
Page 5
SMA America, LLC Important Safety Instructions
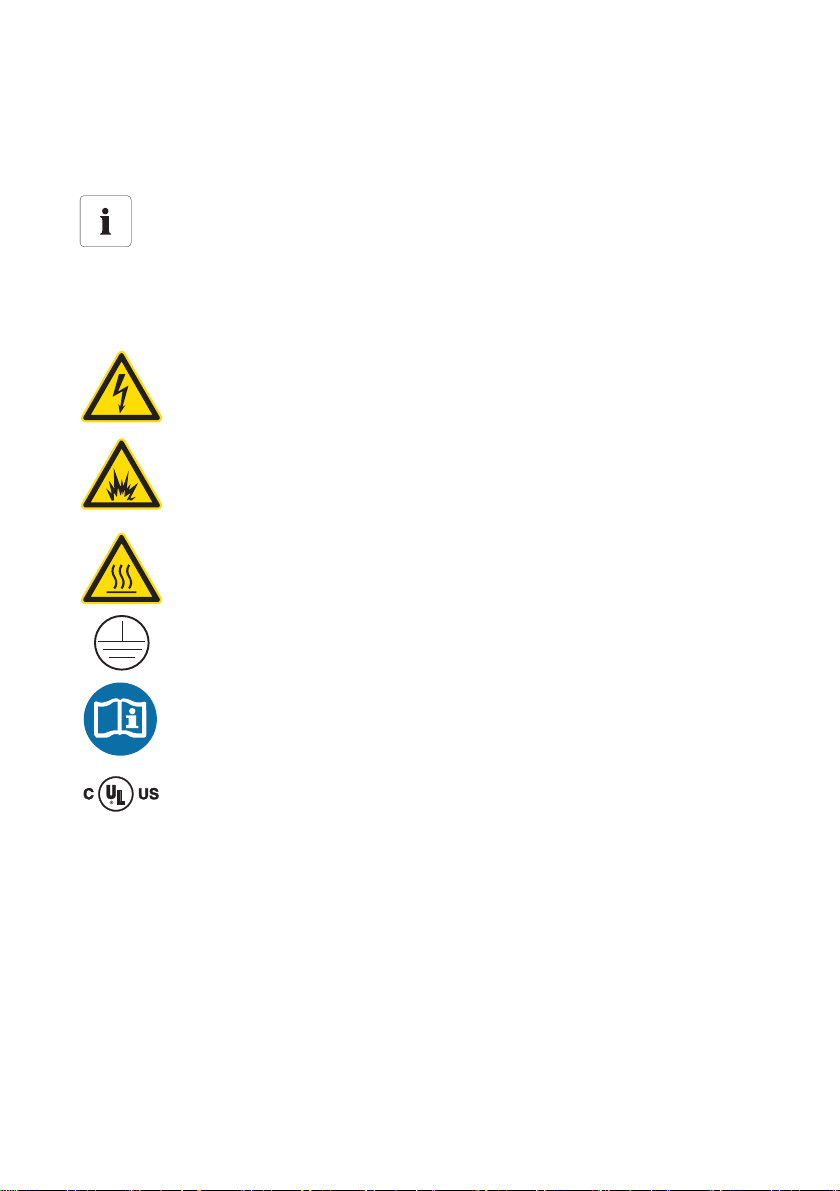
Other Symbols in this document
In addition to the safety and hazard symbols described on the previous pages, the following symbol
is also used in this installation guide:
Information
This symbol accompanies notes that call attention to supplementary information that you
should know and use to ensure optimal operation of the system.
Markings on this product
The following symbols are used as product markings with the following meanings.
Warning regarding dangerous voltage
The product works with high voltages. All work on the product must be done as
described in it‘s documentation.
Electric arc hazards
The product has large electrical potential differences between its conductors. Arc flashes
can occur through air when high-voltage current flows. Do not work on the product
during operation.
Beware of hot surface
The product can become hot during operation. Do not touch the product during
operation.
Earth Ground
Observe the operating instructions
Read the product’s documentation before working on it. Follow all safety precautions
and instructions as described in the documentation.
UL1741 is the standard applied by Underwriters Laboratories to the Sunny Boy
Combiner Box to certify that it meets the requirements of the National Electrical Code
Installation Guide SBCBTLUS-IUS094510 5
®
.
Page 6

General Warnings SMA America, LLC
General Warnings
General Warnings
All electrical installations must be done in accordance with the local and National
Electrical Code
®
AN SI/ NFPA 70 . Fo r in sta lla tio n in Can ada the inst allati ons mus t be done
in accordance with applicable Canadian standards.
The Sunny Boy Combiner Box contains no user-serviceable parts. For all repair and
maintenance, always return the unit to an authorized SMA Service Center.
Before installing or using the Sunny Boy Combiner Box, read all of the instructions,
cautions, and warnings on the Sunny Boy Combiner Box in this installation guide.
Before connecting the Sunny Boy Combiner Box to the electrical utility grid, contact the
local utility company. This connection must be made only by qualified personnel.
Wiring of the Sunny Boy Combiner Box must be made by qualified personnel only.
6 SBCBTLUS-IUS094510 Installation Guide
Page 7

SMA America, LLC Table of Contents
Table of Contents
1 Notes on this manual. . . . . . . . . . . . . . . . . . . . . . . . . . . . . . 9
1.1 Target group . . . . . . . . . . . . . . . . . . . . . . . . . . . . . . . . . . . . . . . . 9
1.2 Validity . . . . . . . . . . . . . . . . . . . . . . . . . . . . . . . . . . . . . . . . . . . . 9
1.3 Nomenclature. . . . . . . . . . . . . . . . . . . . . . . . . . . . . . . . . . . . . . . 9
2 Security . . . . . . . . . . . . . . . . . . . . . . . . . . . . . . . . . . . . . . . . 10
2.1 Appropriate usage . . . . . . . . . . . . . . . . . . . . . . . . . . . . . . . . . . 10
2.2 Safety precautions . . . . . . . . . . . . . . . . . . . . . . . . . . . . . . . . . . 11
3 Unpacking. . . . . . . . . . . . . . . . . . . . . . . . . . . . . . . . . . . . . . 12
3.1 Unpacking and inspection . . . . . . . . . . . . . . . . . . . . . . . . . . . . 12
3.2 Scope of delivery . . . . . . . . . . . . . . . . . . . . . . . . . . . . . . . . . . . 12
3.3 Identifying the Sunny Boy Combiner Box . . . . . . . . . . . . . . . . . 13
4 Mounting. . . . . . . . . . . . . . . . . . . . . . . . . . . . . . . . . . . . . . . 14
4.1 Safety . . . . . . . . . . . . . . . . . . . . . . . . . . . . . . . . . . . . . . . . . . . . 14
4.2 Selecting the mounting location . . . . . . . . . . . . . . . . . . . . . . . . 15
4.2.1 Conditions for installation . . . . . . . . . . . . . . . . . . . . . . . . . . . . . . . . . . . . . . . 15
4.2.2 Dimensions . . . . . . . . . . . . . . . . . . . . . . . . . . . . . . . . . . . . . . . . . . . . . . . . . . 16
4.3 Wall mounting . . . . . . . . . . . . . . . . . . . . . . . . . . . . . . . . . . . . . 17
4.3.1 Stone wall mounting . . . . . . . . . . . . . . . . . . . . . . . . . . . . . . . . . . . . . . . . . . . 17
4.3.2 Wood wall mounting . . . . . . . . . . . . . . . . . . . . . . . . . . . . . . . . . . . . . . . . . . 17
4.3.3 Mounting the Sunny Boy Combiner Box. . . . . . . . . . . . . . . . . . . . . . . . . . . . 18
5 Inserting the strings . . . . . . . . . . . . . . . . . . . . . . . . . . . . . . 19
6 Electrical connection. . . . . . . . . . . . . . . . . . . . . . . . . . . . . . 20
6.1 Connection area . . . . . . . . . . . . . . . . . . . . . . . . . . . . . . . . . . . . 20
6.2 Fuse sizing . . . . . . . . . . . . . . . . . . . . . . . . . . . . . . . . . . . . . . . . 21
6.3 Connecting equipment ground . . . . . . . . . . . . . . . . . . . . . . . . . 22
6.4 Connecting PV modules . . . . . . . . . . . . . . . . . . . . . . . . . . . . . . 23
Installation Guide SBCBTLUS-IUS094510 7
Page 8

Table of Contents SMA America, LLC
6.4.1 Inserting the string fuses . . . . . . . . . . . . . . . . . . . . . . . . . . . . . . . . . . . . . . . . 23
6.4.2 Connecting the negative strings . . . . . . . . . . . . . . . . . . . . . . . . . . . . . . . . . . 24
6.4.3 Connecting the positive strings . . . . . . . . . . . . . . . . . . . . . . . . . . . . . . . . . . . 24
6.5 Connecting the inverter. . . . . . . . . . . . . . . . . . . . . . . . . . . . . . . 25
6.5.1 Connecting DC+ . . . . . . . . . . . . . . . . . . . . . . . . . . . . . . . . . . . . . . . . . . . . . . 25
6.5.2 Connecting DC − . . . . . . . . . . . . . . . . . . . . . . . . . . . . . . . . . . . . . . . . . . . . . 26
7 Commissioning . . . . . . . . . . . . . . . . . . . . . . . . . . . . . . . . . . 26
8 Opening and closing . . . . . . . . . . . . . . . . . . . . . . . . . . . . . 27
8.1 Opening the Sunny Boy Combiner Box . . . . . . . . . . . . . . . . . . 27
8.2 Closing the Sunny Boy Combiner Box . . . . . . . . . . . . . . . . . . . 28
9 Replacing string fuses . . . . . . . . . . . . . . . . . . . . . . . . . . . . 29
10 Maintenance. . . . . . . . . . . . . . . . . . . . . . . . . . . . . . . . . . . . 31
11 Technical Data . . . . . . . . . . . . . . . . . . . . . . . . . . . . . . . . . . 32
11.1 Cable requirements. . . . . . . . . . . . . . . . . . . . . . . . . . . . . . . . . . 33
12 Contact . . . . . . . . . . . . . . . . . . . . . . . . . . . . . . . . . . . . . . . . 34
8 SBCBTLUS-IUS094510 Installation Guide
Page 9

SMA America, LLC Notes on this manual
1 Notes on this manual
This manual describes the installation and commissioning of the Sunny Boy Combiner Box SBCBTL6.
Keep this manual in a convenient place for future reference
1.1 Target group
This manual is for qualified personnel only. Qualified personnel have received training and have
demonstrated skills and knowledge in the construction and operation of the device. Qualified
personnel are trained to deal with the dangers and hazards involved in installing electric devices.
1.2 Validity
This manual is valid for the Sunny Boy Combiner Box TLUS. It does not cover any details concerning
connected equipment. Information concerning the connected equipment is provided by the
manufacturer.
1.3 Nomenclature
In this document SMA America Production, LLC is referred to in the following as SMA. In this manual
the Sunny Boy Combiner Box TLUS is referred to as Sunny Boy Combiner Box.
Installation Guide SBCBTLUS-IUS094510 9
Page 10
Security SMA America, LLC
2 Security
2.1 Appropriate usage
The Sunny Boy Combiner Box is a string combiner connecting up to 6 strings and linking them to the
inverter. All inputs must be fused in accordance with National Electrical Code® NEC 690. The
Combiner Box is designed for the use with transformerless SMA PV inverters.
The Sunny Boy Combiner Box can only be used in ungrounded array installations.
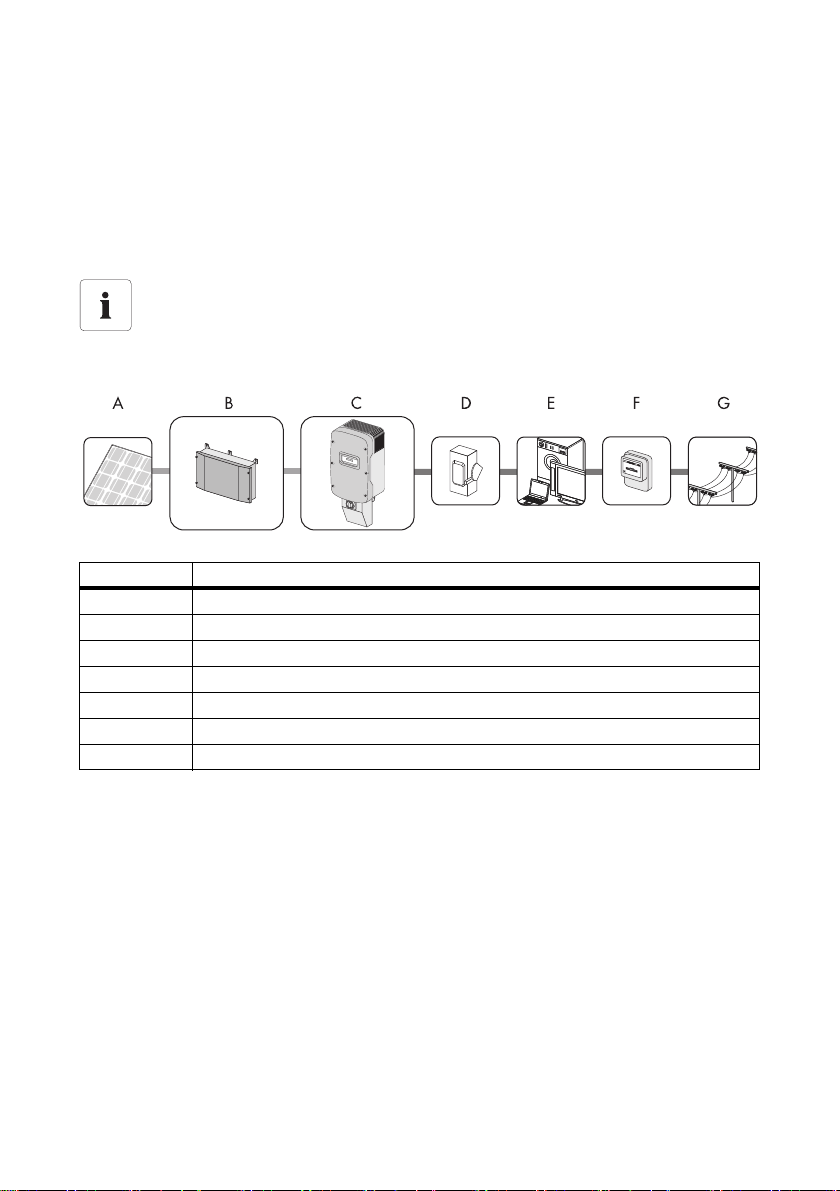
Principle of a PV power system with the Sunny Boy Combiner Box
Position Description
APV modules
B Sunny Boy Combiner Box
C Sunny Boy with DC Disconnect
D AC main circuit breaker
ELoad
F Meter
GGrid
Do not use the Sunny Boy Combiner Box for purposes other than those described here. Alternative
uses, modifications to the Sunny Boy Combiner Box or the installation of components not expressly
recommended or sold by the manufacturer void the warranty claims and operation permission.
10 SBCBTLUS-IUS094510 Installation Guide
Page 11
SMA America, LLC Security
2.2 Safety precautions
DANGER
Risk of electric shock due to high voltages inside the Sunny Boy Combiner Box.
Death or serious injuries will result.
• All work on the Sunny Boy Combiner Box must be carried out by qualified personnel
only.
• All work on the Sunny Boy Combiner Box must be done in accordance with this
manual only.
• Pay attention to all safety precautions.
WARNING
Risk of electric shock during operation of a damaged Sunny Boy Combiner Box.
Death or serious injuries will result.
• The Sunny Boy Combiner Box may only be used when it is technically faultless.
• Operate the Sunny Boy Combiner Box only if no damage is visibly evident.
• Inspect the Sunny Boy Combiner Box for damage on a regular basis.
• Ensure that all external safety features are freely accessible at all times, and that they
are regularly tested for correct functionality.
NOTICE
Electrostatic discharge is possible when components are touched.
Damage to components will result.
• Follow ESD protective provisions.
• Remove existing electrostatic charges by touching a grounded metal surface (e.g.
housing).
Installation Guide SBCBTLUS-IUS094510 11
Page 12

Unpacking SMA America, LLC
3 Unpacking
3.1 Unpacking and inspection
All SMA Sunny Boy Combiner Boxes are checked before shipping and packaged in sturdy boxes.
However the sturdy boxes do not guarantee that damage will not occur during shipping and delivery.
It is important to carefully inspect the shipping box and contents prior to installation. If you detect any
external damage after unpacking, report the damage immediately to your SMA dealer and to the
shipping company that delivered the unit. If it becomes necessary to return the Sunny Boy Combiner
Box, use the original packing material.
If you need assistance with a damaged Sunny Boy Combiner Box, contact your SMA dealer or SMA.
Contact information for SMA is provided in chapter 12”Contact” (page34).
3.2 Scope of delivery
Position Number Description
A1Sunny Boy Combiner Box
B 1 Installation Guide
C12Fuse holder
The Sunny Boy Combiner is shipped without any fuses. For correct operation fuses have to
be purchased by the installer.
12 SBCBTLUS-IUS094510 Installation Guide
Page 13

SMA America, LLC Unpacking
3.3 Identifying the Sunny Boy Combiner Box
The Sunny Boy Combiner Box can be identified by the type label. The type label (G) is located on the
right side of the enclosure.
Position Description
A Type plate
BProduct name
C Item number
D Serial number
EDate of manufacture
F Technical data
G Position of type label
Installation Guide SBCBTLUS-IUS094510 13
Page 14

Mounting SMA America, LLC
4 Mounting
4.1 Safety
DANGER
Danger to life due to fire or explosion.
There is always a certain risk with electric devices that a fire can occur, even though
greatest attention was paid to avoid this during the development.
• Do not install the Sunny Boy Combiner Box on flammable construction material.
• Do n ot i nst all the Sun ny B oy C ombine r Bo x in are as w her e hi ghl y flammable material
is stored.
• Do not install the Sunny Boy Combiner Box in potentially explosive areas.
WARNING
The Sunny Boy Combiner Box becomes hot during operation.
Danger of burn injuries.
• Mount the Sunny Boy Combiner Box so that it cannot be touched accidentally.
CAUTION
Falling of the Sunny Boy Combiner Box may cause injuries.
Crushing of body parts will result.
Consider the weight of the Sunny Boy Combiner Box of approx. 8
14 SBCBTLUS-IUS094510 Installation Guide
1
/2 lbs (3.9 kg).
Page 15

SMA America, LLC Mounting
4.2 Selecting the mounting location
4.2.1 Conditions for installation
• The installation method and mounting location must be suitable for the weight and dimensions
of the Sunny Boy Combiner Box (see section 11”Technical Data” (page32)).
• Mount on a solid surface.
• The mounting location must be accessible at all times.
• Never install the device with a forward tilt.
• Do not install horizontally.
• The connection area (A) must point downwards.
• Vertical installation or tilted backwards by max. 45°.
• During installation cover the PV modules with opaque material.
• The ambient temperature must be below 140°F (60°C) to ensure optimal operation.
• Do not expose the Sunny Boy Combiner Box to direct sunlight, in order to avoid excessive
heating.
• Observe the minimum clearances to walls, other
devices or objects in order to guarantee sufficient
heat dissipation.
Position Clearance
Top 12in. (300 mm)
Bottom 12in. (300 mm)
Left 12in. (300 mm)
Right 12in. (300 mm)
Front 2in. (50 mm)
If the Sunny Boy Combiner Box is installed in an outdoor environment:
Observe a minimum clearance of 36in. (900mm) to the ground.
Installation Guide SBCBTLUS-IUS094510 15
Page 16

Mounting SMA America, LLC
4.2.2 Dimensions
Mounting holes on backside
16 SBCBTLUS-IUS094510 Installation Guide
Page 17

SMA America, LLC Mounting
4.3 Wall mounting
Th e Su nny Boy Com bin er B ox can b e mo unt ed o n st one, br ick , so lid walls o r wo ode n wa lls wit h po les .
Be sure to use appropriate type of mounting hardware for the wall material.
1
You may use screws of size 10, 12 or 14. The recommended length of the screws is 1
⁄2 in. to 13⁄4in.
4.3.1 Stone wall mounting
Attach the Sunny Boy Combiner Box using 3 screws.
• 1 screw on the upper left side.
• 1 screw on the upper right side.
• 1 screw below.
• Use stainless screws or comparable with fender
washers.
Mount the Sunny Boy Combiner Box as described in
section 4.3.3”Mounting the Sunny Boy Combiner Box”
(page18).
4.3.2 Wood wall mounting
Attach the Sunny Boy Combiner Box to a pole using 2
screws.
• 1 screw on the upper side.
• 1 screw below.
• Use stainless steel screws or comparable and
washers.
Mount the Sunny Boy Combiner Box as described in
section 4.3.3”Mounting the Sunny Boy Combiner Box”
(page18).
Installation Guide SBCBTLUS-IUS094510 17
Page 18

Mounting SMA America, LLC
4.3.3 Mounting the Sunny Boy Combiner Box
When mounting use the Sunny Boy Combiner Box as a template.
1. Place the Sunny Boy Combiner Box at the mounting position on the wall. Level the Sunny Boy
Combiner Box.
2. Mark the mounting position through the mounting holes.
DANGER
Risk of electric shock by drilling into power cables.
Death or serious injuries will result.
• Check installation location for power cables.
CAUTION
Falling of the Sunny Boy Combiner Box may cause injuries.
Crushing of body parts will result.
• Ensure that there are studs in the wall at places where you intend to drill holes.
3. Remove the Sunny Boy Combiner Box and drill the marked mounting holes.
4. Insert the wall anchors.
5. Place the Sunny Boy Combiner Box on the wall. Align the mounting holes with the drilled holes.
6. In ser t th e screw s th rou gh t he moun tin g ho les of t he Sunn y Bo y Co mbi ner Box. Tig hten th e sc rew s
clockwise.
7. Ensure that the Sunny Boy Combiner Box is attached firmly to the wall.
☑ The Sunny Boy Combiner Box is mounted to the wall.
18 SBCBTLUS-IUS094510 Installation Guide
Page 19

SMA America, LLC Inserting the strings
5 Inserting the strings
NOTICE
Infiltration of water during mounting and installation of the product.
Damage to the product will result.
• Do not open the Sunny Boy Combiner Box when it is raining or when there is very
high humidity > 95%.
• For conduit hubs, use only UL listed rainproof, or wet location hubs complying with
UL 514B for entry into the enclosure.
Position Description
ADC input
BGrounding
CDC combined output
1. Determine the number of the required strings referring to your system calculation.
2. Open the Sunny Boy Combiner Box (see 8.1”Opening the Sunny Boy Combiner Box”
(page27)).
3. Break out the number of knockouts needed for the cable conduits. For each string cable a
seperate conduit is needed.
4. Insert the cable conduit fittings into the knockout holes.
5. Pull the cable conduits into the fittings and tighten them.
6. Draw the string cables through the cable conduits into the Sunny Boy Combiner Box.
☑ The cables are inserted into the Sunny Boy Combiner Box.
Installation Guide SBCBTLUS-IUS094510 19
Page 20

Electrical connection SMA America, LLC
6 Electrical connection
6.1 Connection area
Position Description
A Combined out negative
B Combined out positive
C Raceway
D Equipment grounding
E Positive string inputs
F Negative string inputs
20 SBCBTLUS-IUS094510 Installation Guide
Page 21

SMA America, LLC Electrical connection
6.2 Fuse sizing
Fuses are used to protect wiring and equipment from excessive currents that can cause damage,
heating or in extreme cases even fire. If the fuse rating is too small the fuses can trip during normal
operation. If the fuse rating is too large, the fuses cannot provide adequate protection. In PV systems,
the minimum and maximum size of the standard fuses are determined by the electrical ratings of the
PV module as well as National Electrical Code
manufacturer for appropriate fuse ratings.
The maximum string fuse rating for the Sunny Boy Combiner Box is 20A.
®
requirements. Be sure to consult your PV module
The minimum size of fuses and wiring is calculated by using the Short Circuit Current Rating (Isc) of
the PV module. The National Electrical Code
®
requires that all fuses and wiring must be sized for a
minimum of 1.56 times of the Isc of the PV module used in the system.
• To determine the proper size of PV string fuses calculate 1.56 x Isc of the PV module and round
up to the next standard fuse size.
If the Isc of the PV module equals 6.9 Adc, then the fuse size is determined by
1.56 x 6.9 = 10.76. The next standard fuse size would be a 12A, 600V DC fuse.
PV string fuses
1. Determine the required number and type of fuses.
– Use the same number of fuses for negative and positive string input.
2. Determine the required fuse size referring to your system calculation.
– Place fuses only in positions with corresponding numbers.
– Insert all fuse holders provided with the Sunny Boy Combiner Box.
The table below shows the string current per number of strings:
Number of strings Maximum string current Maximum continuous string current
3 18.70A 12.00A
4 14.00A 9.00A
5 11.20A 7.20A
6 9.40A 6.00A
Sunny Boy Combiner Box requirements
NEC 690.15-18 allows the use of fuse holders as a suitable means of disconnecting PV arrays for
servicing. Additional external DC disconnects at the inverter may be required by the local authority
having jurisdiction.
Installation Guide SBCBTLUS-IUS094510 21
Page 22

Electrical connection SMA America, LLC
6.3 Connecting equipment ground
The PV system grounding must be installed in accordance with the requirements of sections 690.43
through 690.47 of the National Electrical Code
be in accordance to the Canadian Electrical Code Part II.
The installer bears the responsibility for correct installation.
Use only 194 °F (90 °C) rated copper wire for wiring connections to the Sunny Boy Combiner Box.
DANGER
Risk of electric shock when touching the DC cable attached to the PV module.
Death or serious injuries will result.
Voltage is present in PV modules exposed to light.
• Cover the PV modules with opaque material during installation and maintenance.
• Follow all safety precautions of the module manufacturer.
The grounding terminal block (A) is located at the bottom
right corner of the Sunny Boy Combiner Box. Following
components may be connected to the grounding
terminals:
• AC equipment-grounding
• DC equipment-grounding
1 terminal of the block remains unused.
®
, ANSI/NFPA 70. In Canada, wiring methods shall
Consider the required cable sizes and torques. Refer to 11.1”Cable requirements” (page33).
NOTICE
Danger of fire
The cable cross-section of the equipment grounding must not be smaller than the one of
Combined-Out.
1. Strip the cable by approx. 0.3 in. (8mm).
2. Open the screw terminals completely by turning
them counterclockwise with a flat-he ad scr ewdri ver.
3. Plug the stripped cable into the screw terminal.
4. Tighten the screw terminal clockwise.
☑ The components are grounded.
22 SBCBTLUS-IUS094510 Installation Guide
Page 23

SMA America, LLC Electrical connection
6.4 Connecting PV modules
6.4.1 Inserting the string fuses
1. Open the Sunny Boy Combiner Box as described in section 8.1”Opening the Sunny Boy
Combiner Box” (page27).
2. Insert fuses into the fuse holders.
3. Insert all fuse holders provided with the Sunny Boy
Combiner Box.
4. Close the Sunny Boy Combiner Box as described in section 8.2”Closing the Sunny Boy
Combiner Box” (page28).
☑ The string fuses are inserted.
Installation Guide SBCBTLUS-IUS094510 23
Page 24

Electrical connection SMA America, LLC
6.4.2 Connecting the negative strings
Use the "Negative String Inputs" screw terminals(A).
1. Strip the cable by approx. 0.3 in. (8mm).
2. Open the screw terminals completely by turning
them counterclockwise with a flat-head screwdriver.
3. Plug the stripped cable into the screw terminal.
4. Tighten the screw terminal clockwise.
☑ The negative strings of the PV modules are connected.
6.4.3 Connecting the positive strings
Use the "Positive String Inputs" screw terminals (A).
1. Strip the cable by approx. 0.3 in. (8 mm)
2. Open the screw terminals completely by turning
them counterclockwise with a flat-head screwdriver.
3. Plug the stripped cable into the screw terminal.
4. Tighten the screw terminal clockwise.
☑ The positive strings of the PV modules are connected.
24 SBCBTLUS-IUS094510 Installation Guide
Page 25

SMA America, LLC Electrical connection
6.5 Connecting the inverter
Route the cables of the combined screw terminal to the inverter along the raceway printed on the
board (see figure on page 20).
Consider the required cable sizes and torques. Refer to 11.1”Cable requirements” (page33).
6.5.1 Connecting DC+
Connect the DC+ conductors of the DC inverter/
disconnect at the inverter to the "Combined Out+" screw
terminals (A).
1. Strip the cable by approx. 0.3 in. (8 mm)
2. Open the screw terminals completely by turning
them counterclockwise with a flat-head screwdriver.
3. Plug the stripped cable into the screw terminal.
4. Tighten the screw terminal clockwise.
☑ DC+ of the inverter is connected.
Installation Guide SBCBTLUS-IUS094510 25
Page 26

Commissioning SMA America, LLC
6.5.2 Connecting DC −
Co nne ct t he D C − co ndu cto rs o f th e DC Dis con nec t at the
inverter/disconnect to the "Combined Out − " screw
terminals (A).
1. Strip the cable by approx. 0.3 in. (8 mm).
2. Open the screw terminals completely by turning
them counterclockwise with a flat-head screwdriver.
3. Plug the stripped cable into the screw terminal.
4. Tighten the screw terminal clockwise.
5. Close the Sunny Boy Combiner Box as described in section 8.2”Closing the Sunny Boy
Combiner Box” (page28).
☑ DC − of the inverter is connected.
7 Commissioning
The Sunny Boy Combiner Box is only one part of the whole PV system. Therefore the commissioning
of the Sunny Boy Combiner Box can not be performed separately.
All parts of the PV power system must be installed and set up prior to commisioning.
26 SBCBTLUS-IUS094510 Installation Guide
Page 27

SMA America, LLC Opening and closing
8 Opening and closing
8.1 Opening the Sunny Boy Combiner Box
DANGER
Risk of electric shock when opening the Sunny Boy Combiner Box under load.
Death or serious injuries will result.
• Cover the PV modules with an opaque material during installation.
DANGER
High voltages are present in the Sunny Boy Combiner Box.
Death or serious injury due to electric shock will result.
• Switch off the inverter as described in the installation guide of the inverter.
1. Untighten the four screws of the enclosure lid. Pull
the lid forward smoothly.
2. Place the lid aside. There it will be out of your way
while you are connecting wires and cables to the
Sunny Boy Combiner Box.
☑ The Sunny Boy Combiner Box is opened.
Installation Guide SBCBTLUS-IUS094510 27
Page 28

Opening and closing SMA America, LLC
8.2 Closing the Sunny Boy Combiner Box
1. Check wire routing to ensure that no wires can interfere with the seal of the lid.
2. Check the seal on the inside of the lid to ensure it is undamaged and in correct position.
3. Ca refull y po sition the lid on t he fron t of the Sunny B oy
Combiner Box. Ensure that no pressure is exerted on
the connections when the lid is attached.
4. While holding the lid in place turn the four screws until they are snug tight. Be careful not to
cross-thread any of the screws.
5. Tighten the screws clockwise with a torque of
35in‑lbs. (4 Nm).
☑ The Sunny Boy Combiner Box is closed.
28 SBCBTLUS-IUS094510 Installation Guide
Page 29

SMA America, LLC Replacing string fuses
9 Replacing string fuses
DANGER
Danger to life due to high voltages on exposed contacts.
• All fuse holders must be plugged in, even if the fuse holder is blank.
DANGER
Danger to life due to high voltages within the device.
• Do not touch power cables and screw terminals.
NOTICE
Risk of fire due to incorrectly dimensioned fuse.
Injuries due to fire.
• For continuous protection, only replace fuses with fuses of the same type and size.
• Place the new fuses at exactly the same locations as the previous fuses.
1. Open the Sunny Boy Combiner Box as described in section 8.1”Opening the Sunny Boy
Combiner Box” (page27).
2. Remove all fuse holders.
Installation Guide SBCBTLUS-IUS094510 29
Page 30

Replacing string fuses SMA America, LLC
3. Pull the fuses out of the fuse holders.
4. Insert the new fuses into the fuse holders.
5. Insert all fuse holders provided with the Sunny Boy
Combiner Box.
6. Close the Sunny Boy Combiner Box as described in section 8.2”Closing the Sunny Boy
Combiner Box” (page28).
☑ The string fuses are replaced.
30 SBCBTLUS-IUS094510 Installation Guide
Page 31

SMA America, LLC Maintenance
10 Maintenance
The Sunny Boy Combiner Box is designed to provide many years of trouble-free service.
Performing regular maintenance will help to ensure long life and high efficiency of your PV system.
Maintenance may include:
• Inspection of mounting.
• Inspection of electrical connections and components.
• Cleaning of housing and interior if necessary.
The inspection intervals depend on the location and the ambient conditions.
A device installed in an environment with very dusty ambient air requires more frequent
inspection and cleaning.
Installation Guide SBCBTLUS-IUS094510 31
Page 32

Technical Data SMA America, LLC
11 Technical Data
Specifications subject to change without notice.
Values at nominal conditions.
Connection data
Input voltage range 0V ... 600V DC
Maximum current per string 20A
Nominal DC output current 36A
Maximum DC output current 56.16A
Maximum number of strings 6
Maximum number of fuses 12
General data
Dimensons W x H x D 17.2in. x 12.1in. x 3.8in.
(437mm x 306mm x 96mm)
Weight 8.6lbs.
(3.9kg)
Ambient temperature range − 13°F ... +140°F
(‒25°C ... +60°C)
Mounting location indoor/outdoor
(NEMA 3R)
Rel. humidity < 95%, condensation possible
Maximum height above sea level (NHN) 9,840ft.
(3,000m)
Type of housing Aluminium
32 SBCBTLUS-IUS094510 Installation Guide
Page 33

SMA America, LLC Technical Data
11.1 Cable requirements
Use only 194°F (90°C) copper wire for all DC wiring connections to the screw terminals between
• PV modules and Sunny Boy Combiner Box
• Sunny Boy Combiner Box and Sunny Boy
Connection - Sunny Boy Combiner Box
The conductor cross-section must be adjusted to the maximum current.
Terminal Torque Wire Size
String Inputs* 15in-lbs. (1.7Nm) 14AWG… 6AWG (2.5mm² … 16mm²)
Combined Out* 40in-lbs. (4.5Nm) 6AWG … 2AWG (16mm² … 35mm²)
Equipment grounding* 40in-lbs. (4.5Nm) 8AWG … 2AWG (10mm² … 35mm²)
*The listed terminals are rated to a temperature of +221°F (+105°C).
Installation Guide SBCBTLUS-IUS094510 33
Page 34

Contact SMA America, LLC
12 Contact
If you have technical problems concerning our products, contact the SMA Serviceline. We requir e the
following information in order to provide you with the necessary assistance:
• Type of inverter, if applicable
• Type and number of modules connected, if applicable
• Communication method, where necessary
• Serial number of the Sunny Boy Combiner Box
• Sunny Boy failure or warning number
• Display message of the Sunny Boy
SMA Solar Technology America, LLC
4031 Alvis Court
Rocklin, CA 95677
Tel. +1 916 625 0870
Tel. +1 877-MY SMA TECH
Tel. +1 877 697 6283 (Toll free, available for USA, Canada and Puerto Rico)
Fax +1 916 625 0871
Service@SMA-America.com
www.SMA-America.com
34 SBCBTLUS-IUS094510 Installation Guide
Page 35

Page 36

4.""NFSJDB--$
XXX4.""NFSJDBDPN
 Loading...