

Page 1
0
Page 2

Please read this user manual very carefully before proceeding.
Please use the player properly to prevent any damage
1 Do not leave the player in a place subject to moisture or temperature higher than 35℃ or lower
than 5℃.
2 Do not repair the player by yourself.
3 Do not get the player wet or drop in water.
4 Please backup important data onto your personal computer, as repair or other causes may
result in data loss.
5 Tampering with the product will void warranty.
When using the player, please pay attention to your health and safety.
1 Do not use the earphones while driving or riding a bicycle.
2 It may cause traffic accident if you turn up the volume of the player while walking down the
street.
3 Do not turn up the volume too high; doctors warn against prolonged exposure to high volume.
4 Stop using the device or turn down the volume if ringing occurs in your ears.
5 Always use the accessories provided by or approved by our company; do not spray water on
the player.
**Warranty is void when you open the player**
Contents
Understand Your Product
Product Features ...............................................................................
Package Contents .............................................................................
Button Function and LCD Display ......................................................
3
4
5
1
Page 3

Charge Your Player ........................................................................... 6
Getting Started
Connect to Computer ……………………………...…………………..…
Disconnect from Computer ………...…………………..……………….
Power On / Power Off …....................................................................
Menu Selection ..................................................................................
Music …………...................................................................................
Record ……….....................................................................................
Voice ..................................................................................................
System Setup .....................................................................................
Tele Book ...........................................................................................
EBook .................................................................................................
Troubleshooting…………………………………………………………..……
A
APPENDIX::::User’s Guide of AMT……………………………………………..…… 21
Product Features
Clip on design for easy carry and use
Supports MP3, WMA & WAV audio/music file formats
Built-in flash memory allows you to store extra data via PC.
USB 2.0 high speed
8
8
10
10
11
15
16
16
17
19
19
2
Page 4
Record outside voice in WAV format
7 EQ mode (Natural, Rock, Pop, Classic, Soft, Jazz and DBB)
Multi play mode, Normal, Repeat One, Folder, Repeat Folder, Repeat All,
Random and Intro (introduction of each music)
Power off automatically after a preset time, you may setup sleep and power save
model for power manager and better using time.
Users can save different files in different folders (Folders should be set up in
computer first so one can play and manage files easily.). This player supports
nine one-grade submenus’ distinguishing.
Package Contents
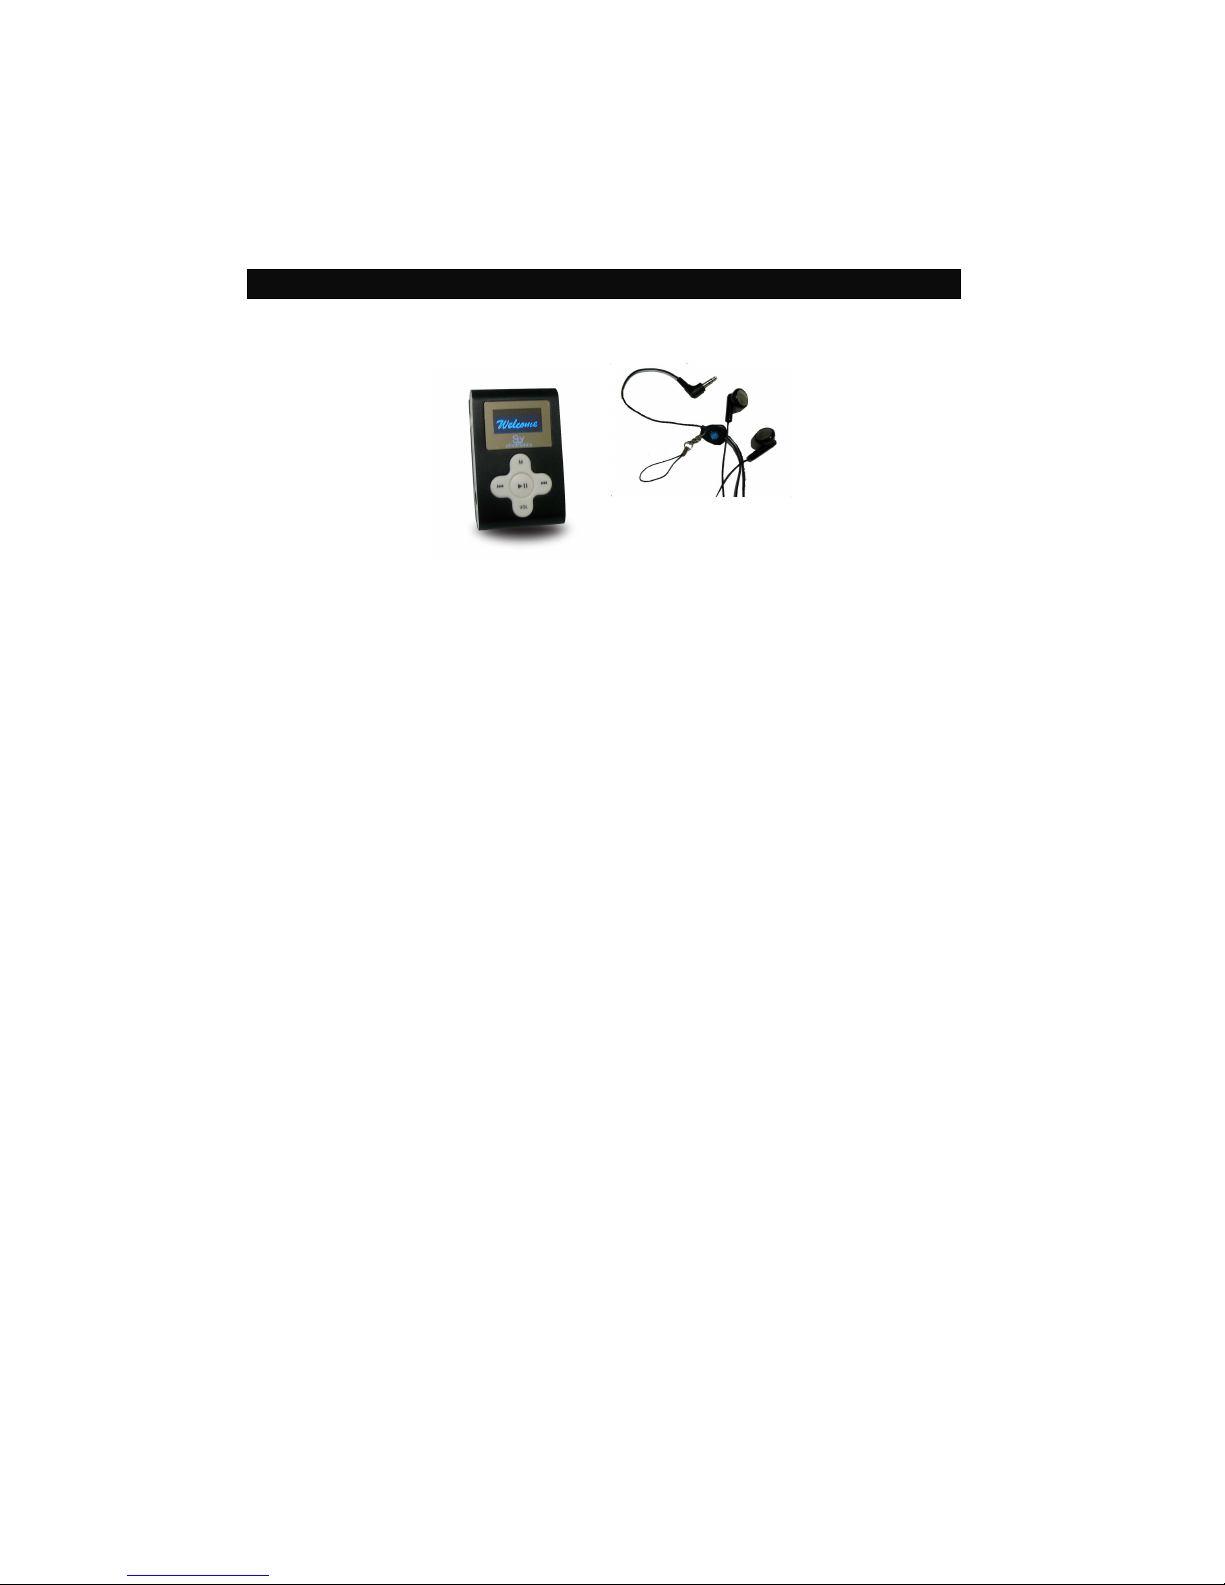
SL018G Clip On MP3 Player Earphone
3
Page 5
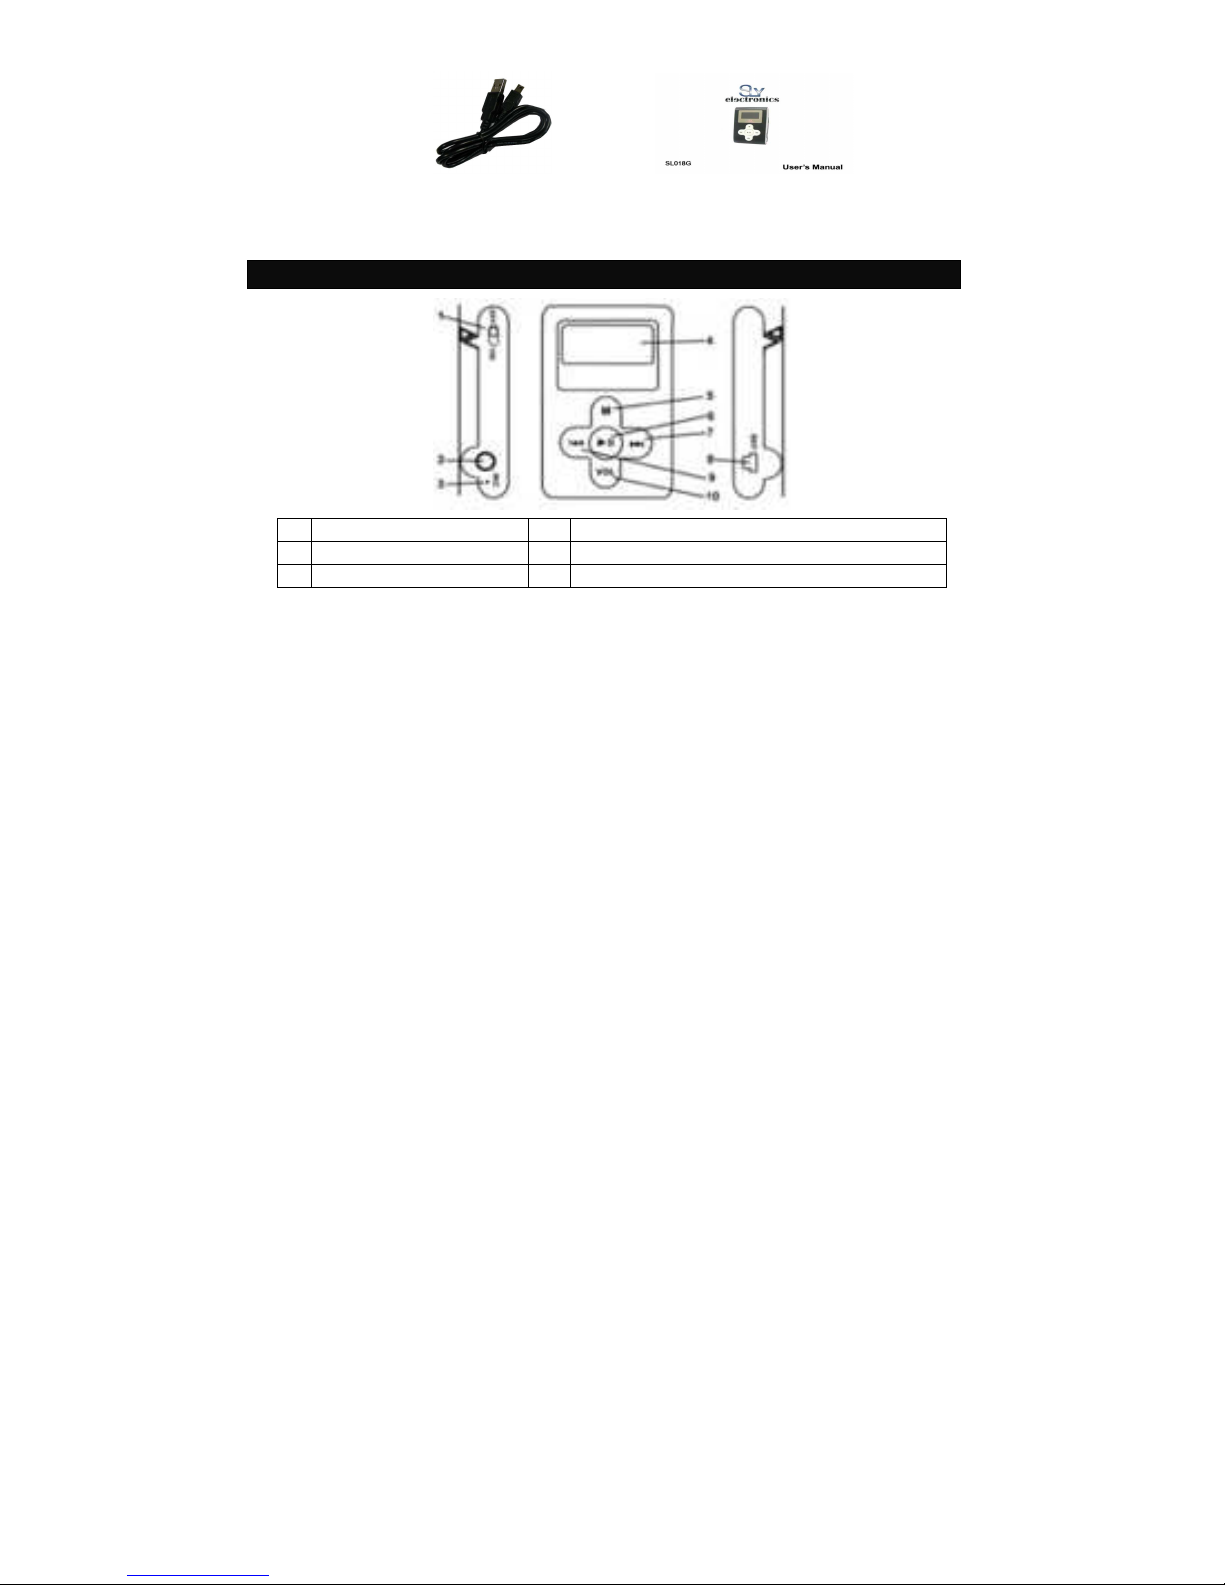
USB cable User manual
Button Function and LCD Display
1 Power On / Off 6 Play / Pause
2 Stereo Earphone Jack 7 Fast Forward / Next / Volume Up
3 Microphone 8 USB Port
4
Page 6
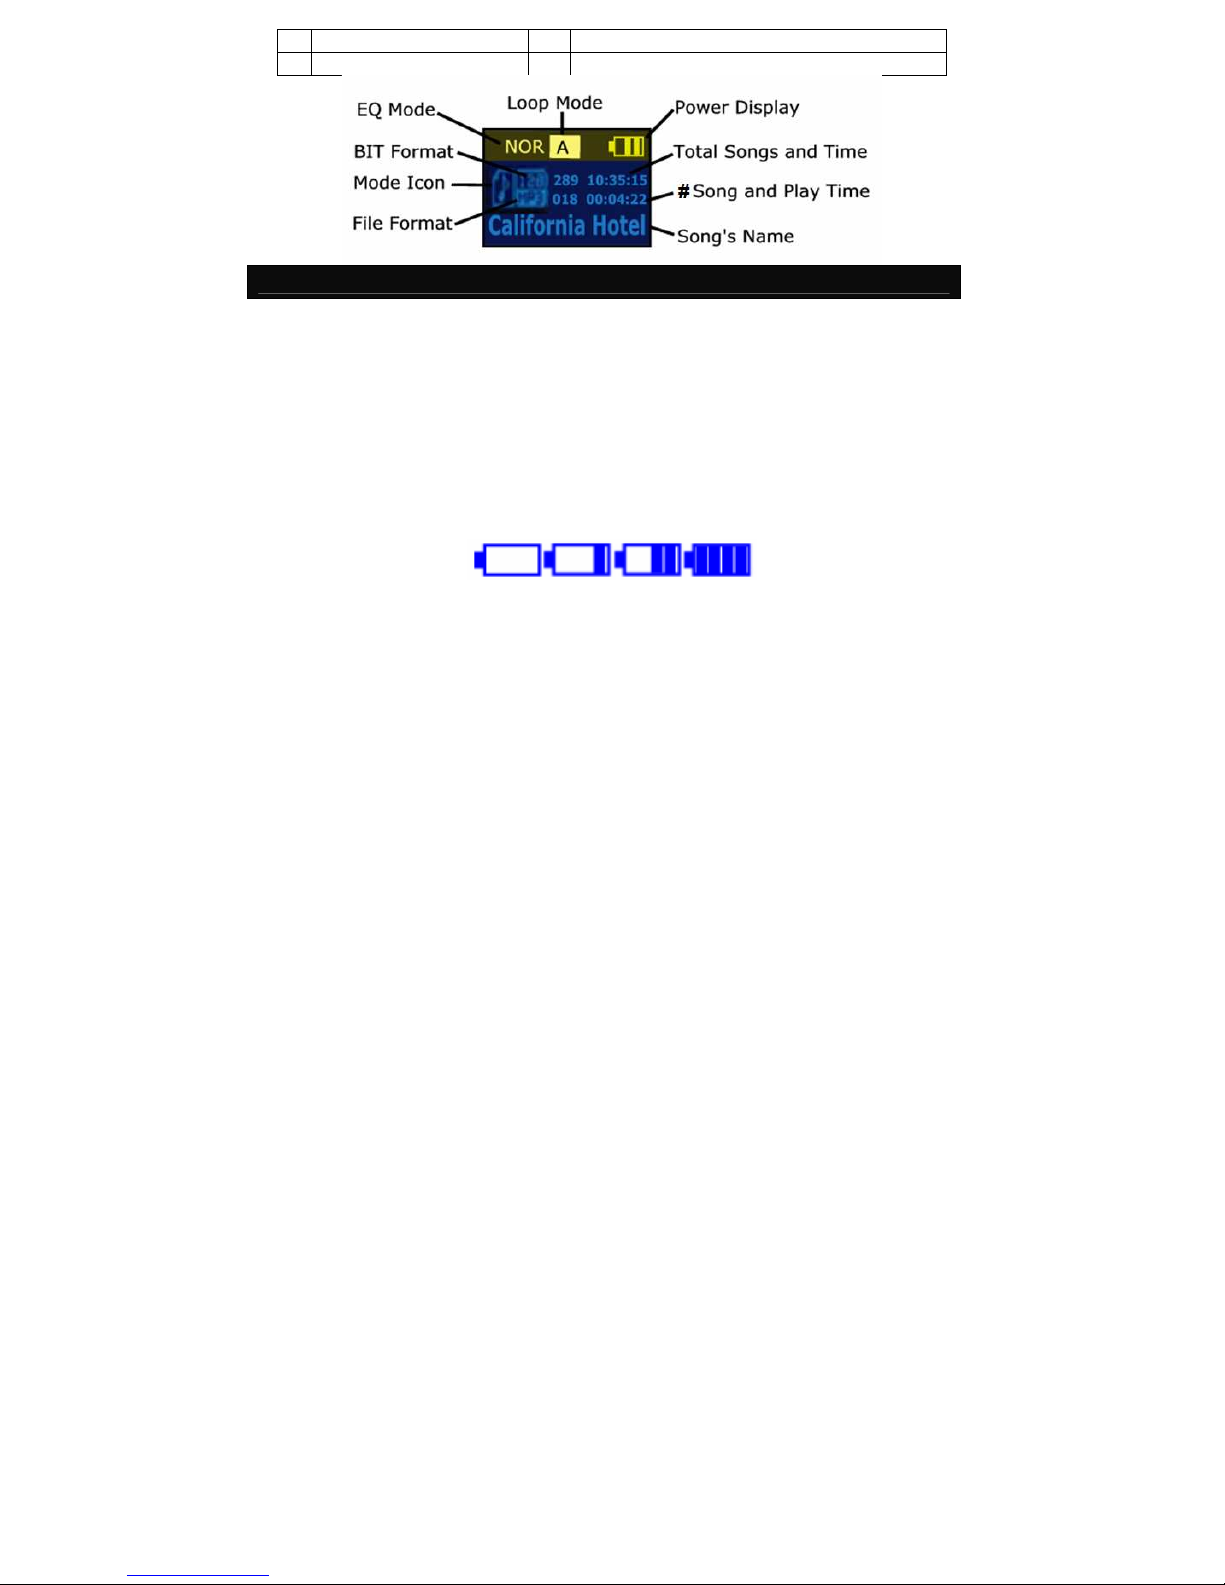
4 2 Colors LCD Display 9 Fast Backward / Previous / Volume Down
5 Menu 10 Volume
Charge Your Player
Notes:
Please turn Power ON/OFF switch to OFF position and fully charge the player
before 1st use. (Approximately 6 hours first time you charge it).
Always charge battery fully before initial use. (normally take 2~3 hours to fully
charger the player after the first time)
If the battery level is low, please charge it immediately. Otherwise, the player
will shut down automatically or will be unable to power on.
To charge the player, connect one end of the USB to the player and the other
end to the computer.
Charging process begins automatically when fully charged.
5
Page 7

When it is fully charged, the battery indicator turns green and charging stops
automatically. Before disconnecting, please “Safely Remove” it.
The battery life (play time) varies depending on the music volume level and
power save settings.
Please use ONLY the original USB cable supplied. DO NOT use any third-party
cable as it might cause severe damage to the player.
If the player is being used during charging, it will take longer to charge.
Do not tamper with the battery.
Do not disassemble, crush, short-circuit or incinerate your battery as it may
cause fire, injuries, burns, or other hazards.
Adding Songs to the Player
Connect your player using the USB cable to your computer.
Once your player has been detected, a window may pop-up (Autoplay) →
please select “Open Folder” and “Run start.exe (AMT)
If a window does not pop-up then simply go to My Computer and Select the
Removable Disk that correlates to your player.
In a new window, go to the folder where you keep your music on your computer
6
Page 8

(usually “My Music” in My Documents) and then copy the audio file(s) you
want.
Go back to the Removable Disk and right click “Paste”
Your songs are now on the player; simply safely remove the player and enjoy
your music
You can also use Windows Media Player to sync your music but make sure it
is in .mp3 format or else it will not sync (if it is in .wma simply follow the above
steps)
OR Follow the Step Below to add music to your MP3 player
To Transfer music
Windows XP
1) Connect your MP3 player to your computer
2) Wait for your computer to recognize the MP3 player as flash drive and let the
AMT program run, you should see something like this on your computer
monitor take note of the icon near the clock area, you should see the red note
7
Page 9
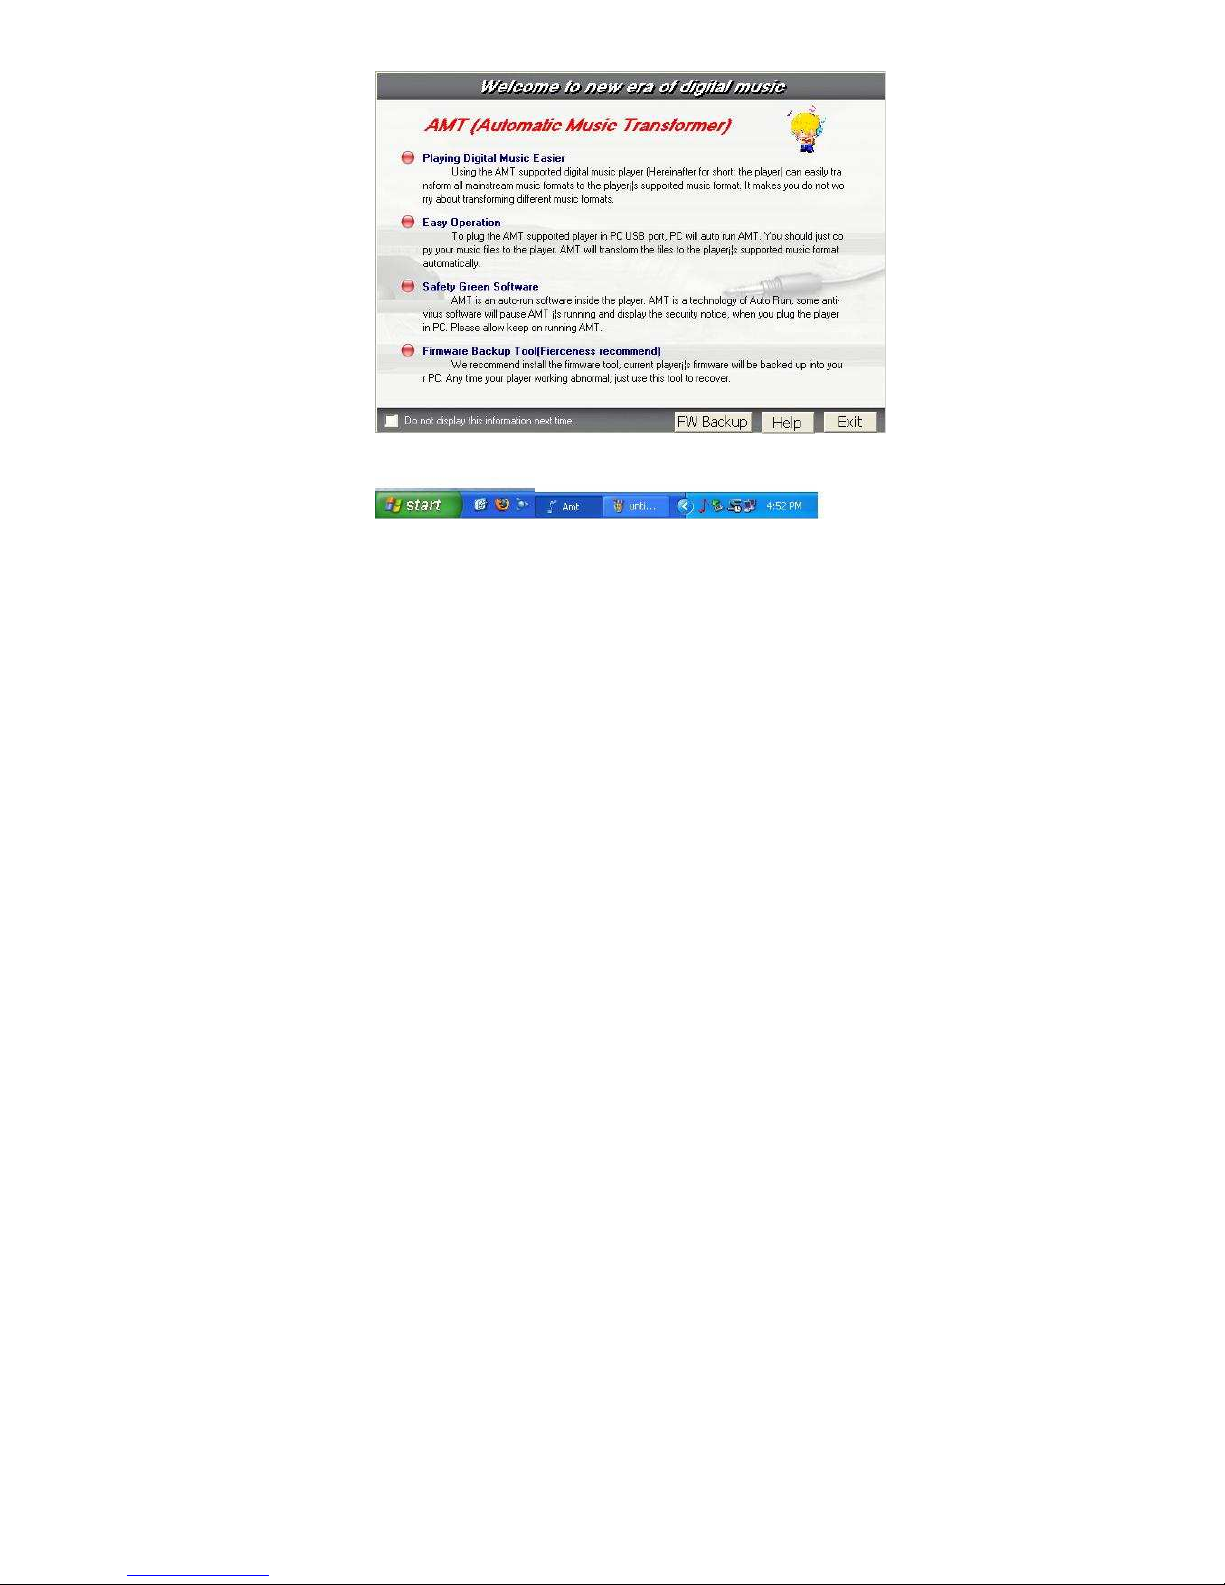
icon and the flash icon, see Figure 1
Figure 1
8
Page 10
3) Once your computer recognize the MP3 player as flash drive you can now
start copying music.
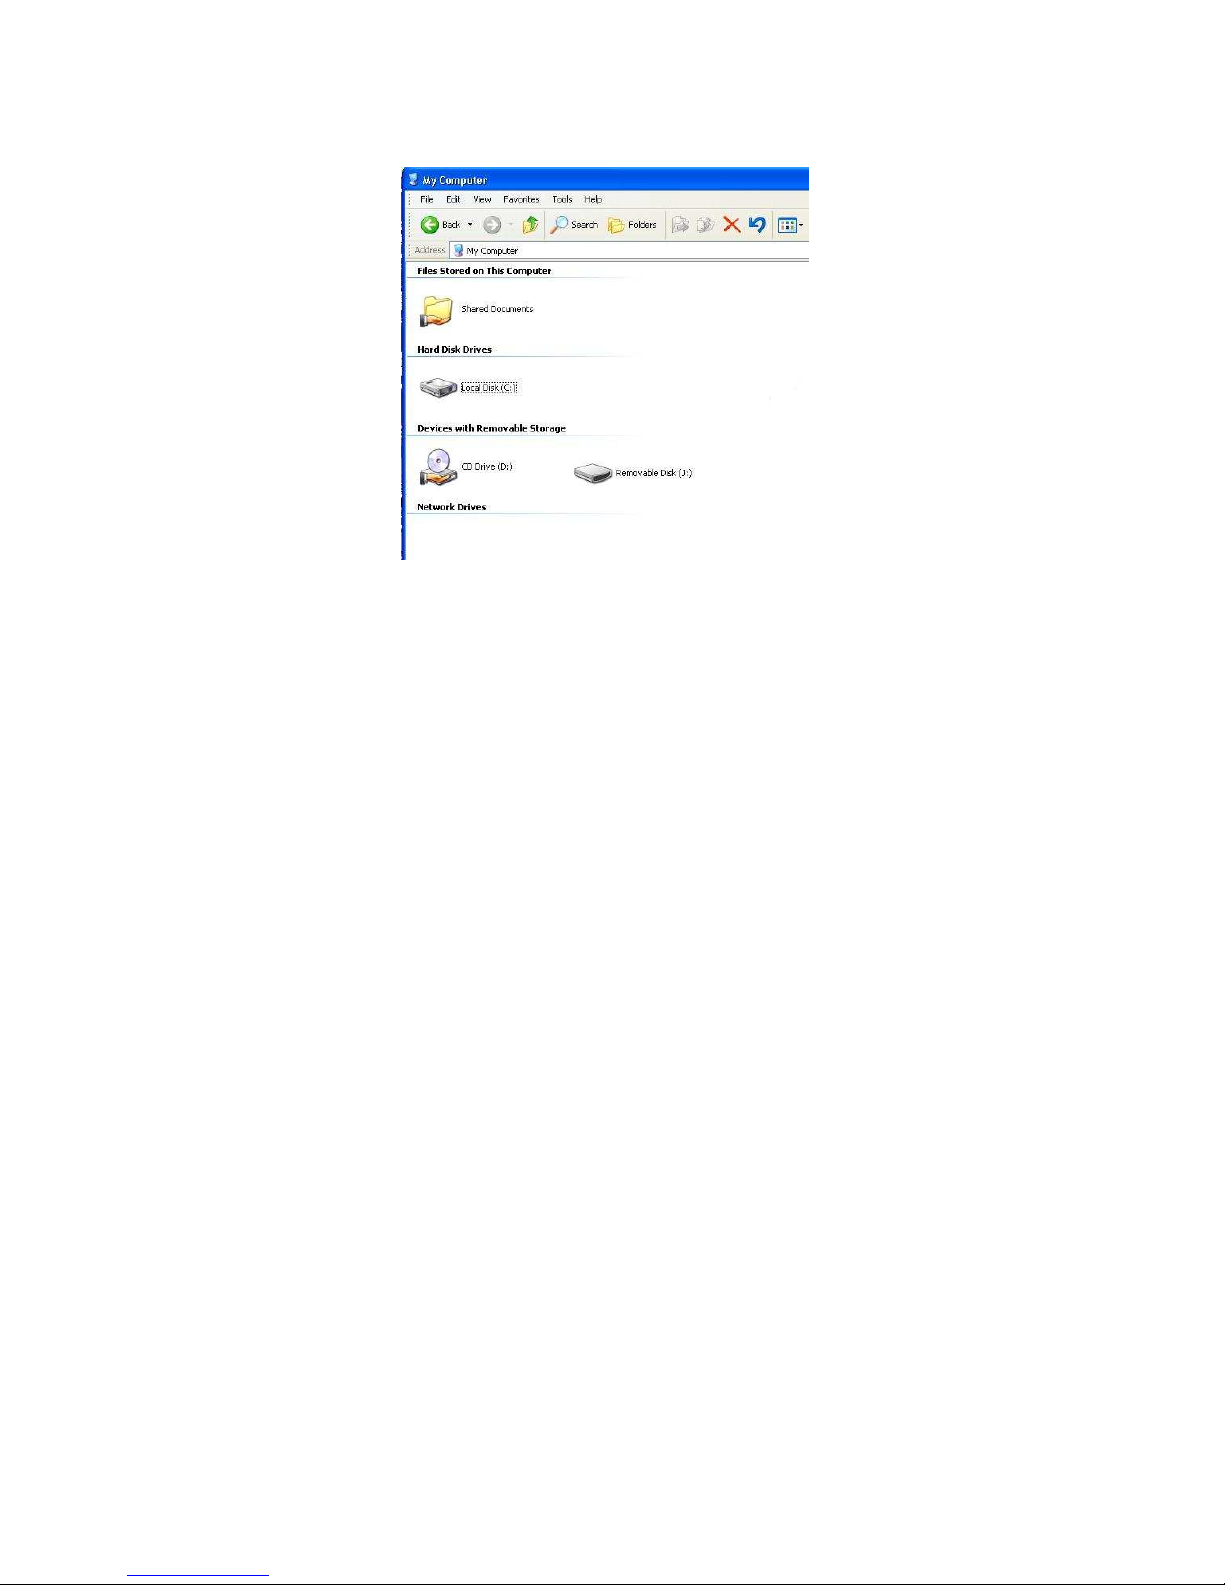
4) Go My Computer, look for the removable disk ( Your MP3 player ) you can
see something like this, see Figure 2
Figure 2
9
Page 11
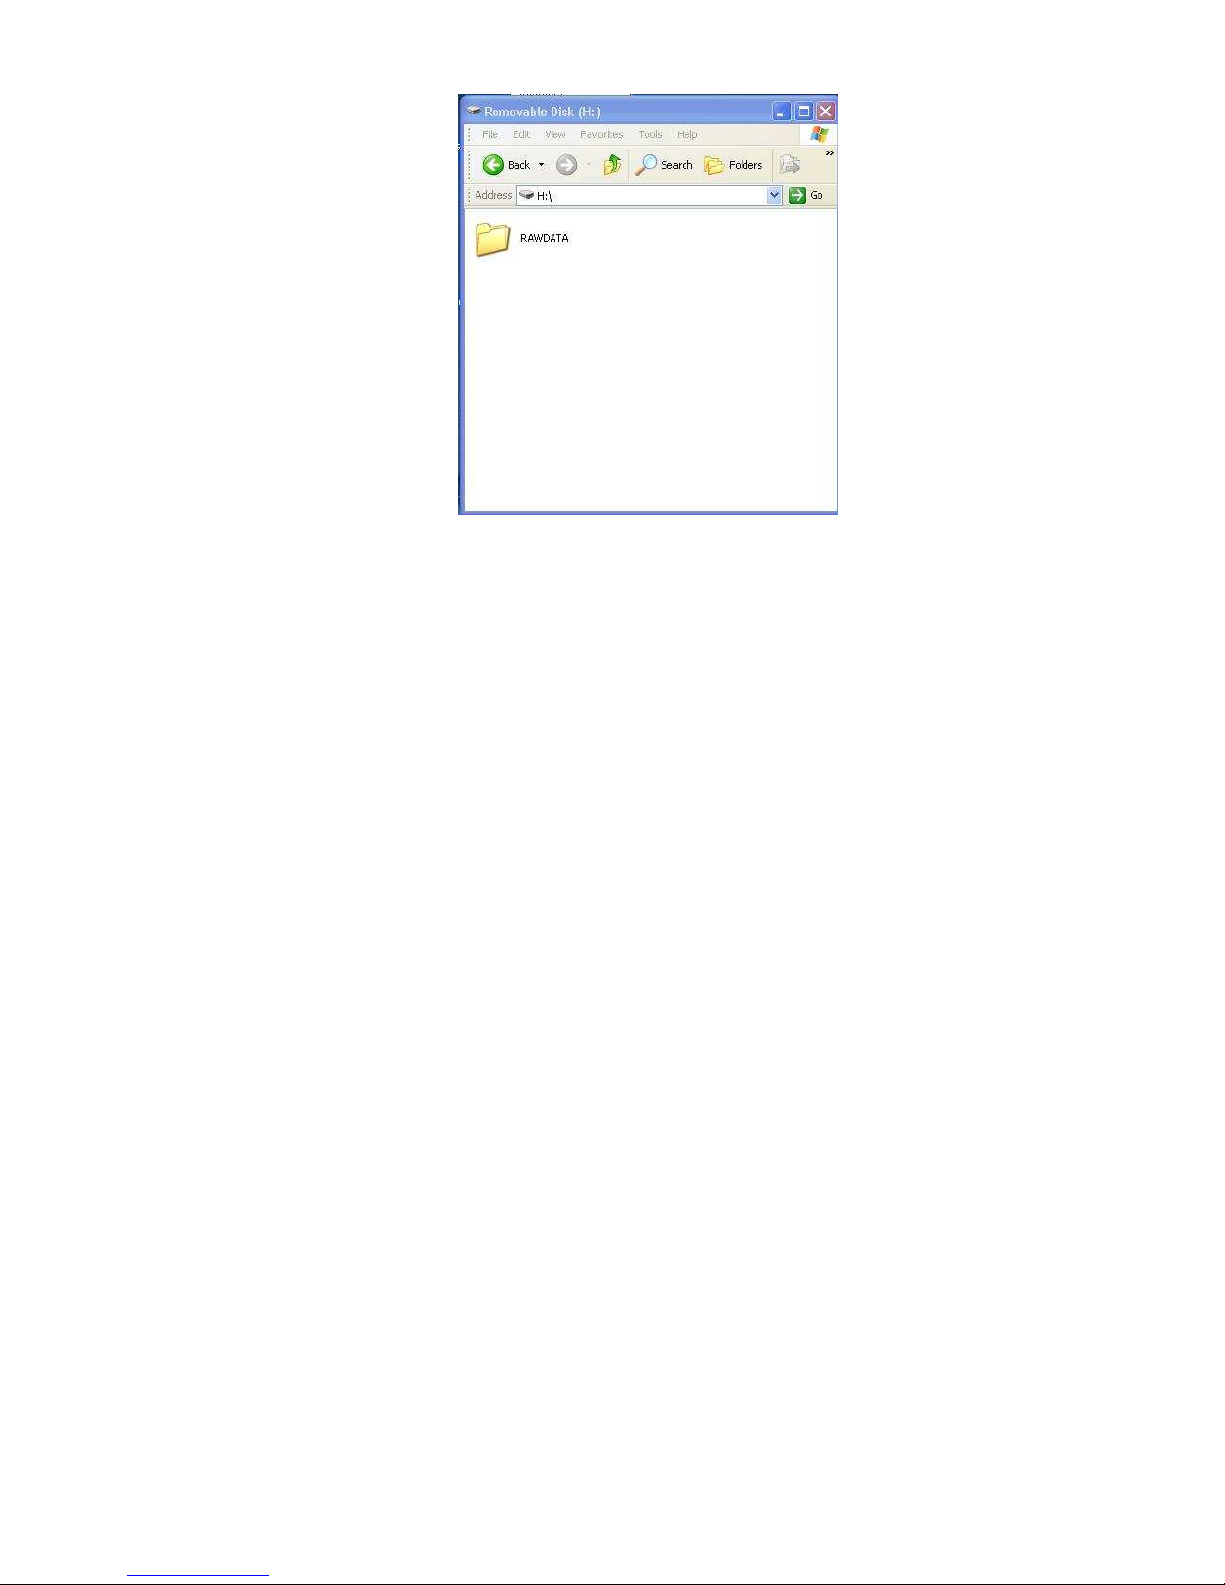
5) Now double left click on the Removable disk to open it, then you should
something like this, see Figure 3
Figure 3
10
Page 12
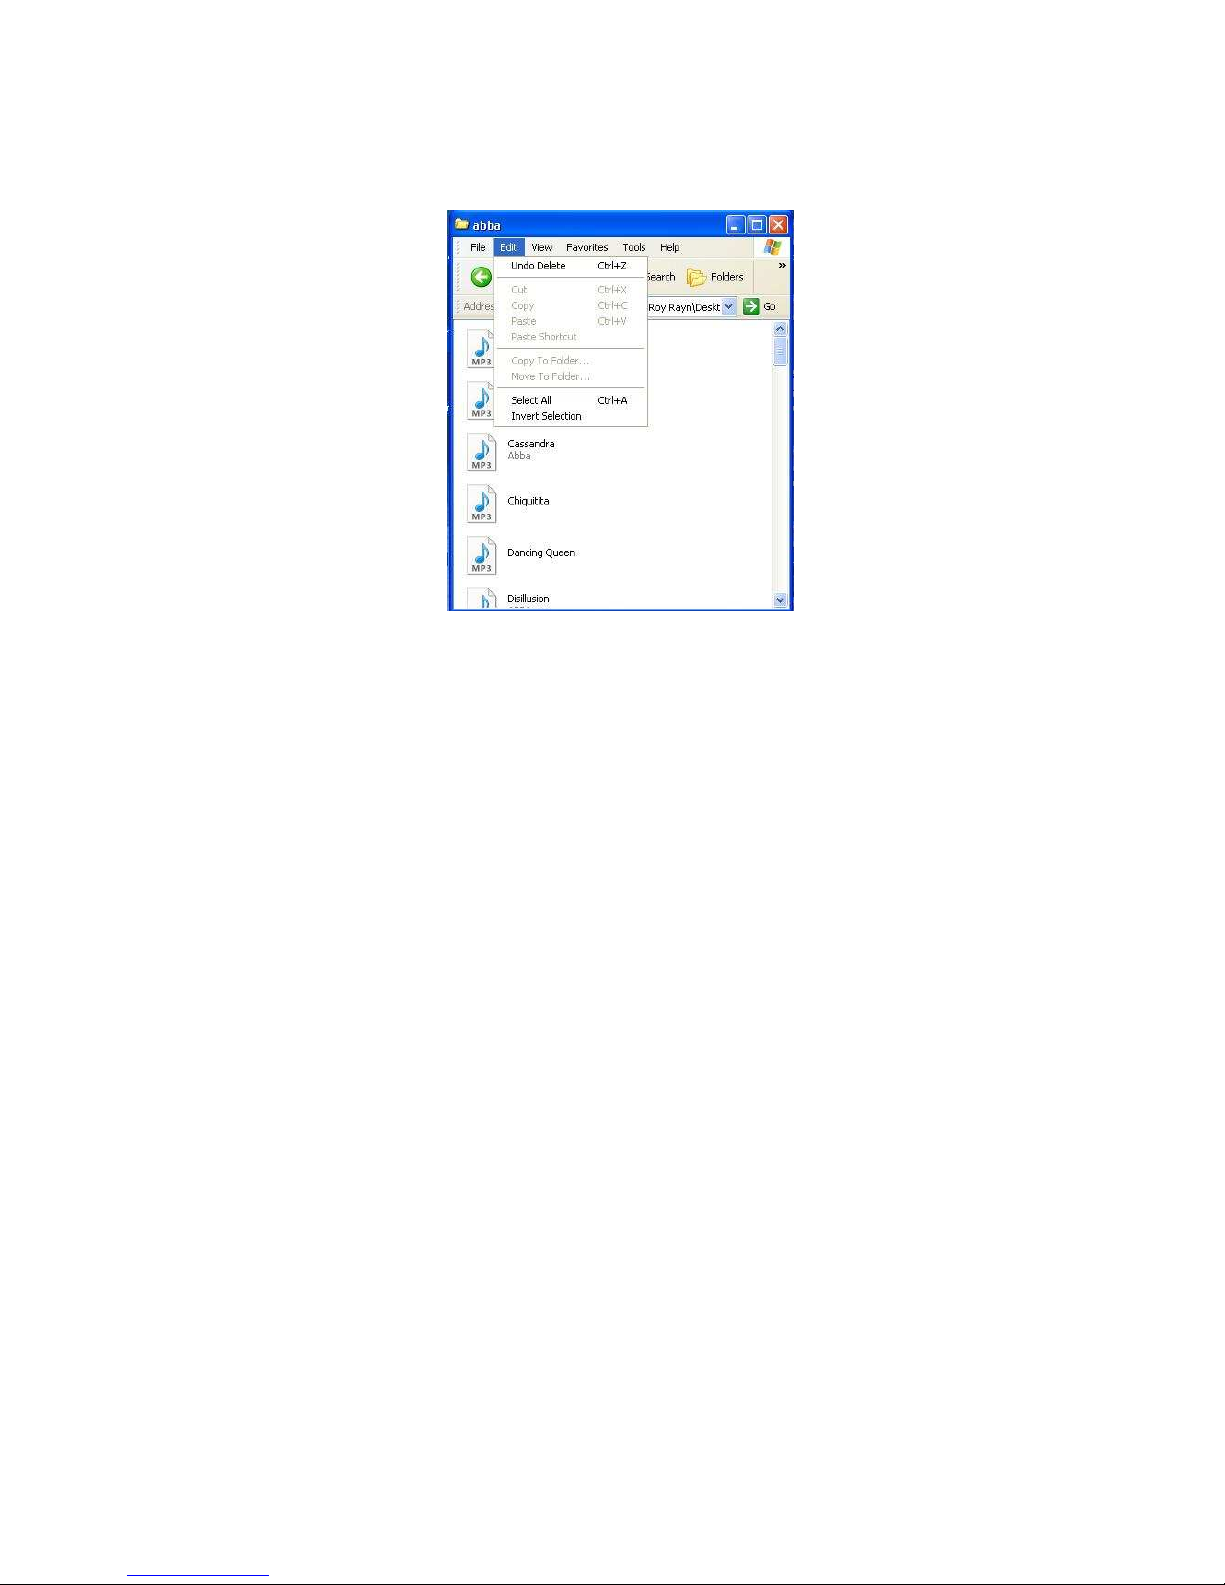
6) Just leave it open, that is where we transfer music from your computer to the
MP3 player, now go to where you save you music from your computer, once
you locate where you save your music, usually by default all your music are
save in My Documents then My Music, now open each folder that you have in
that My Music folder, in this example I open the abba folder, then you should
see something like this, see Figure 4
Figure 4
11
Page 13
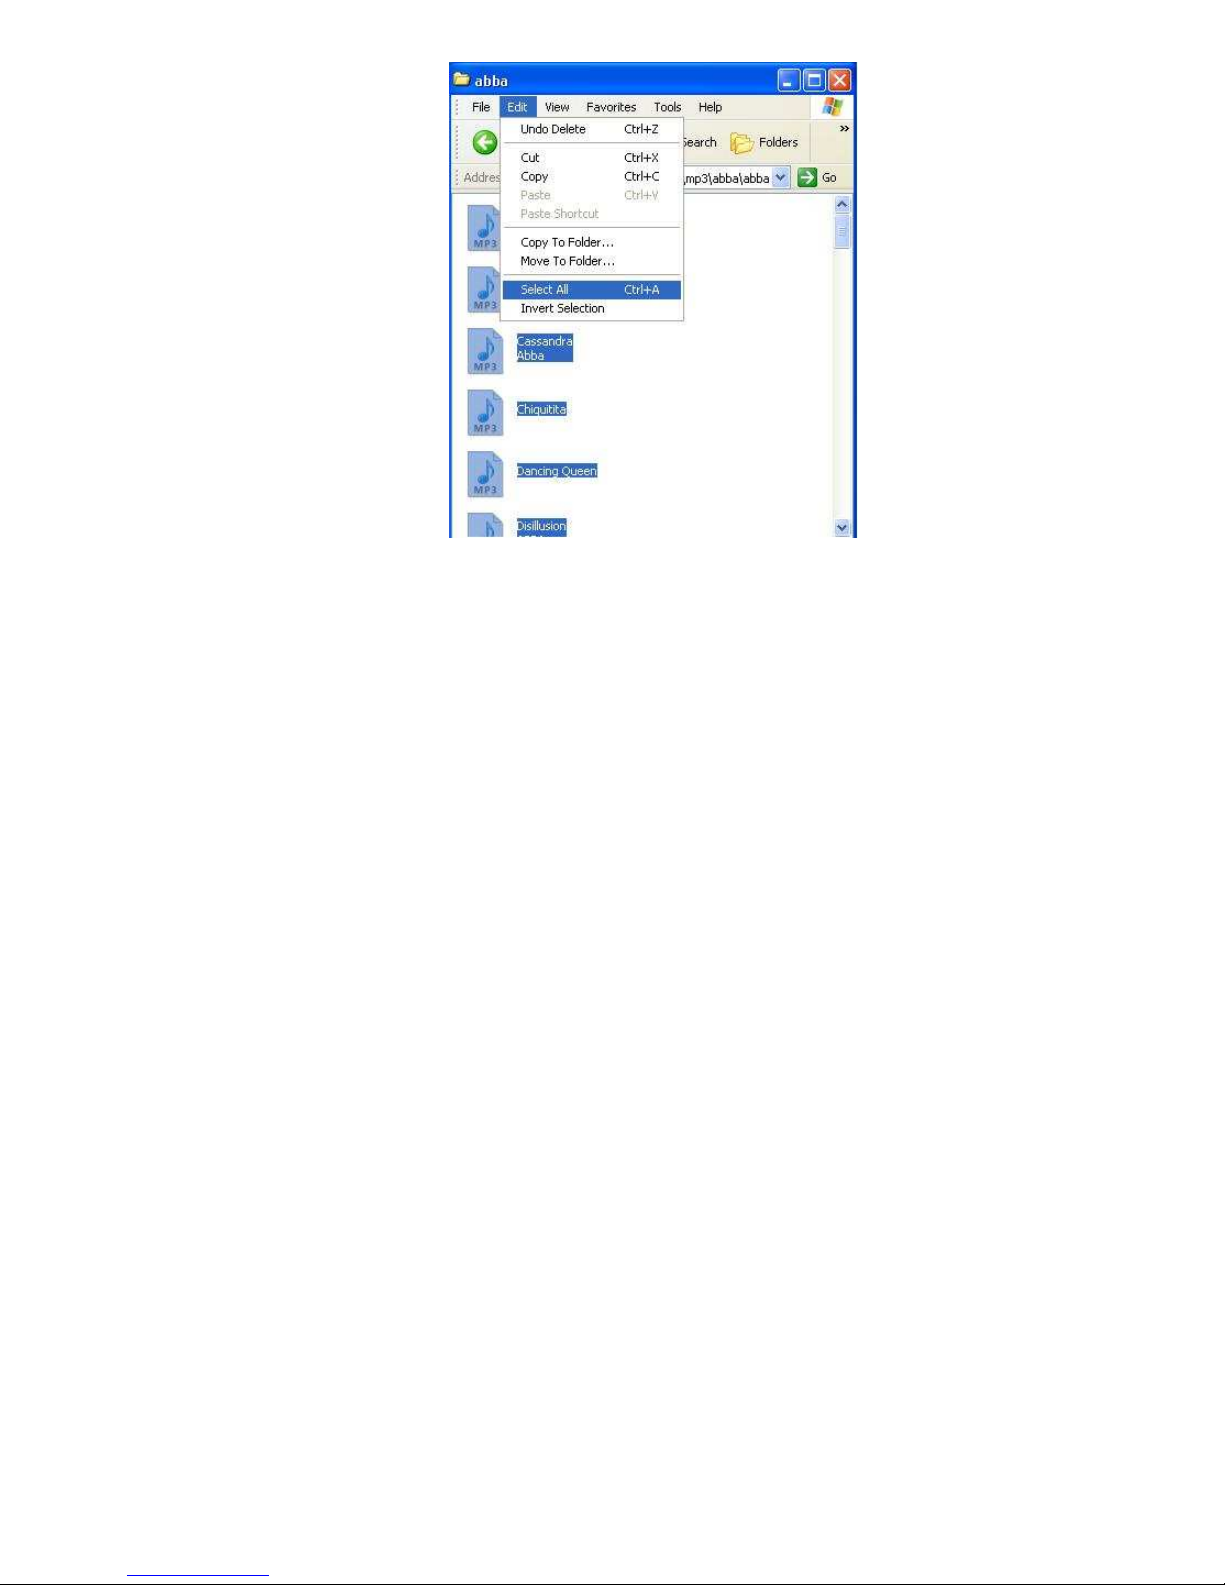
7) Now Click on Edit then click Select All, see Figure 5
Figure 5
12
Page 14
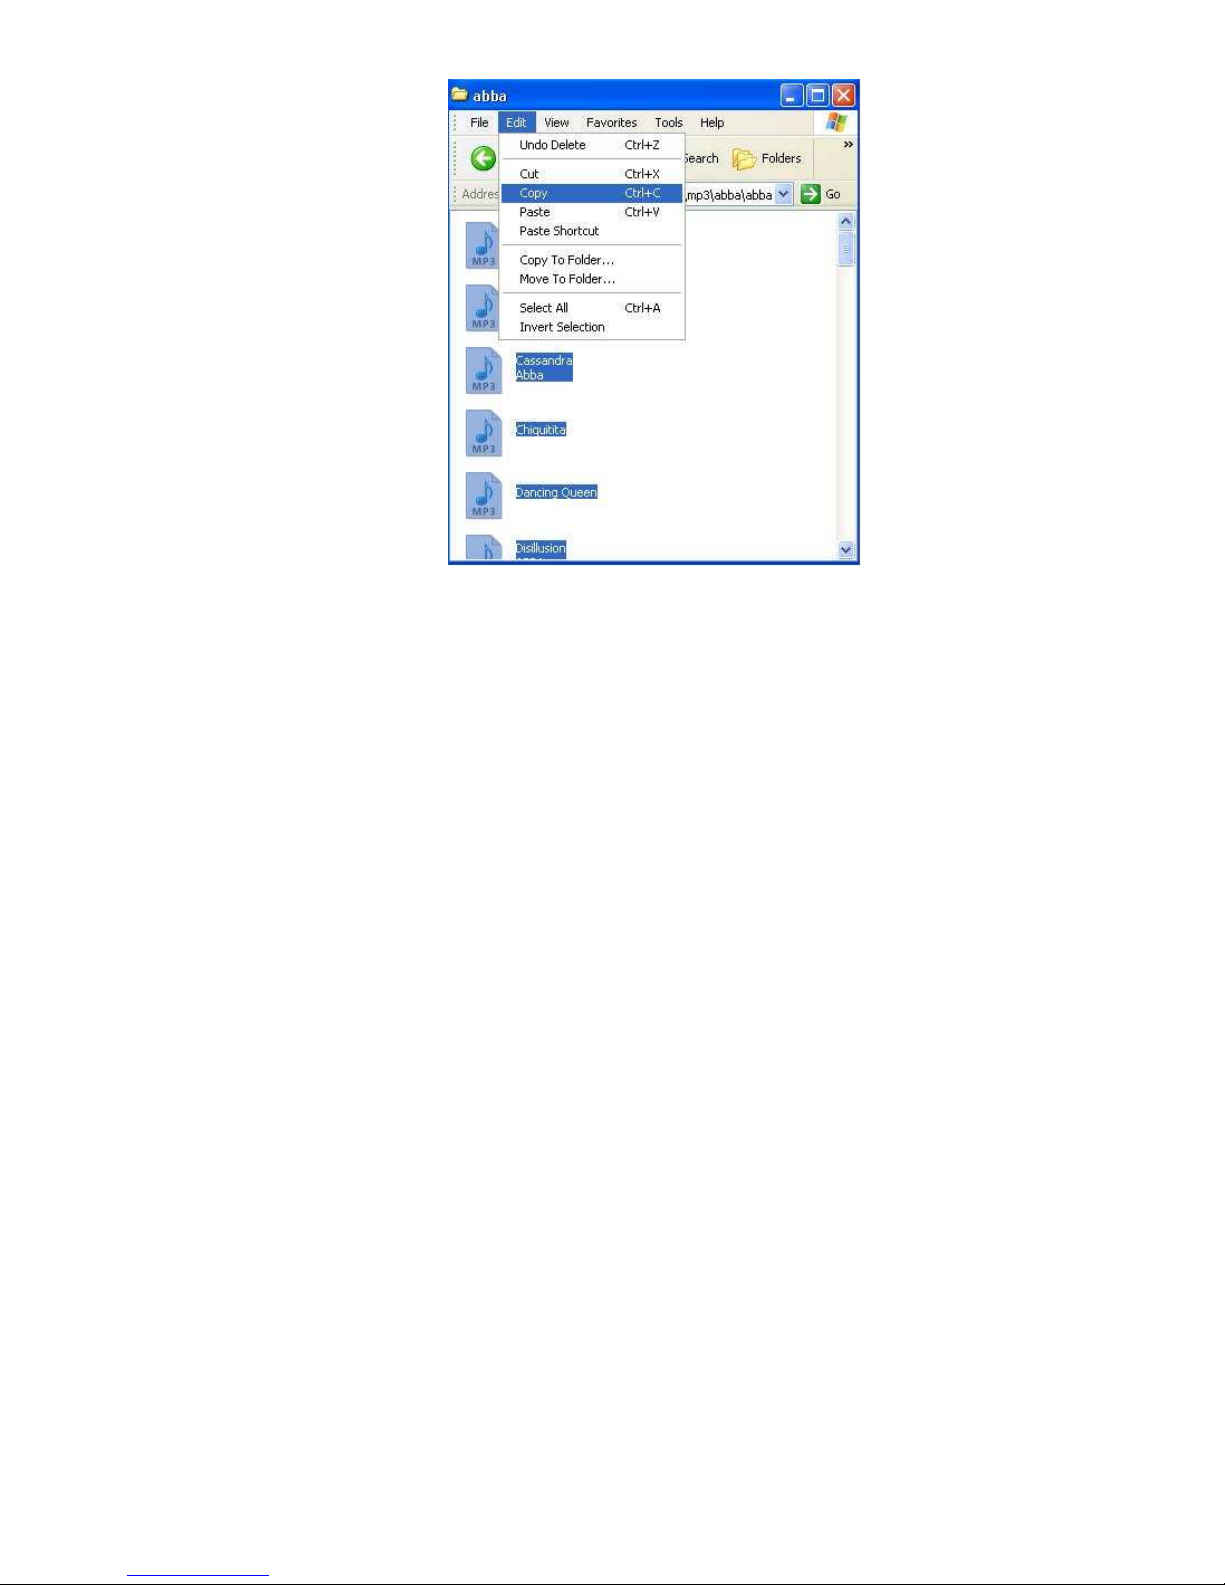
8) Now click copy, see Figure 6
Figure 6
13
Page 15
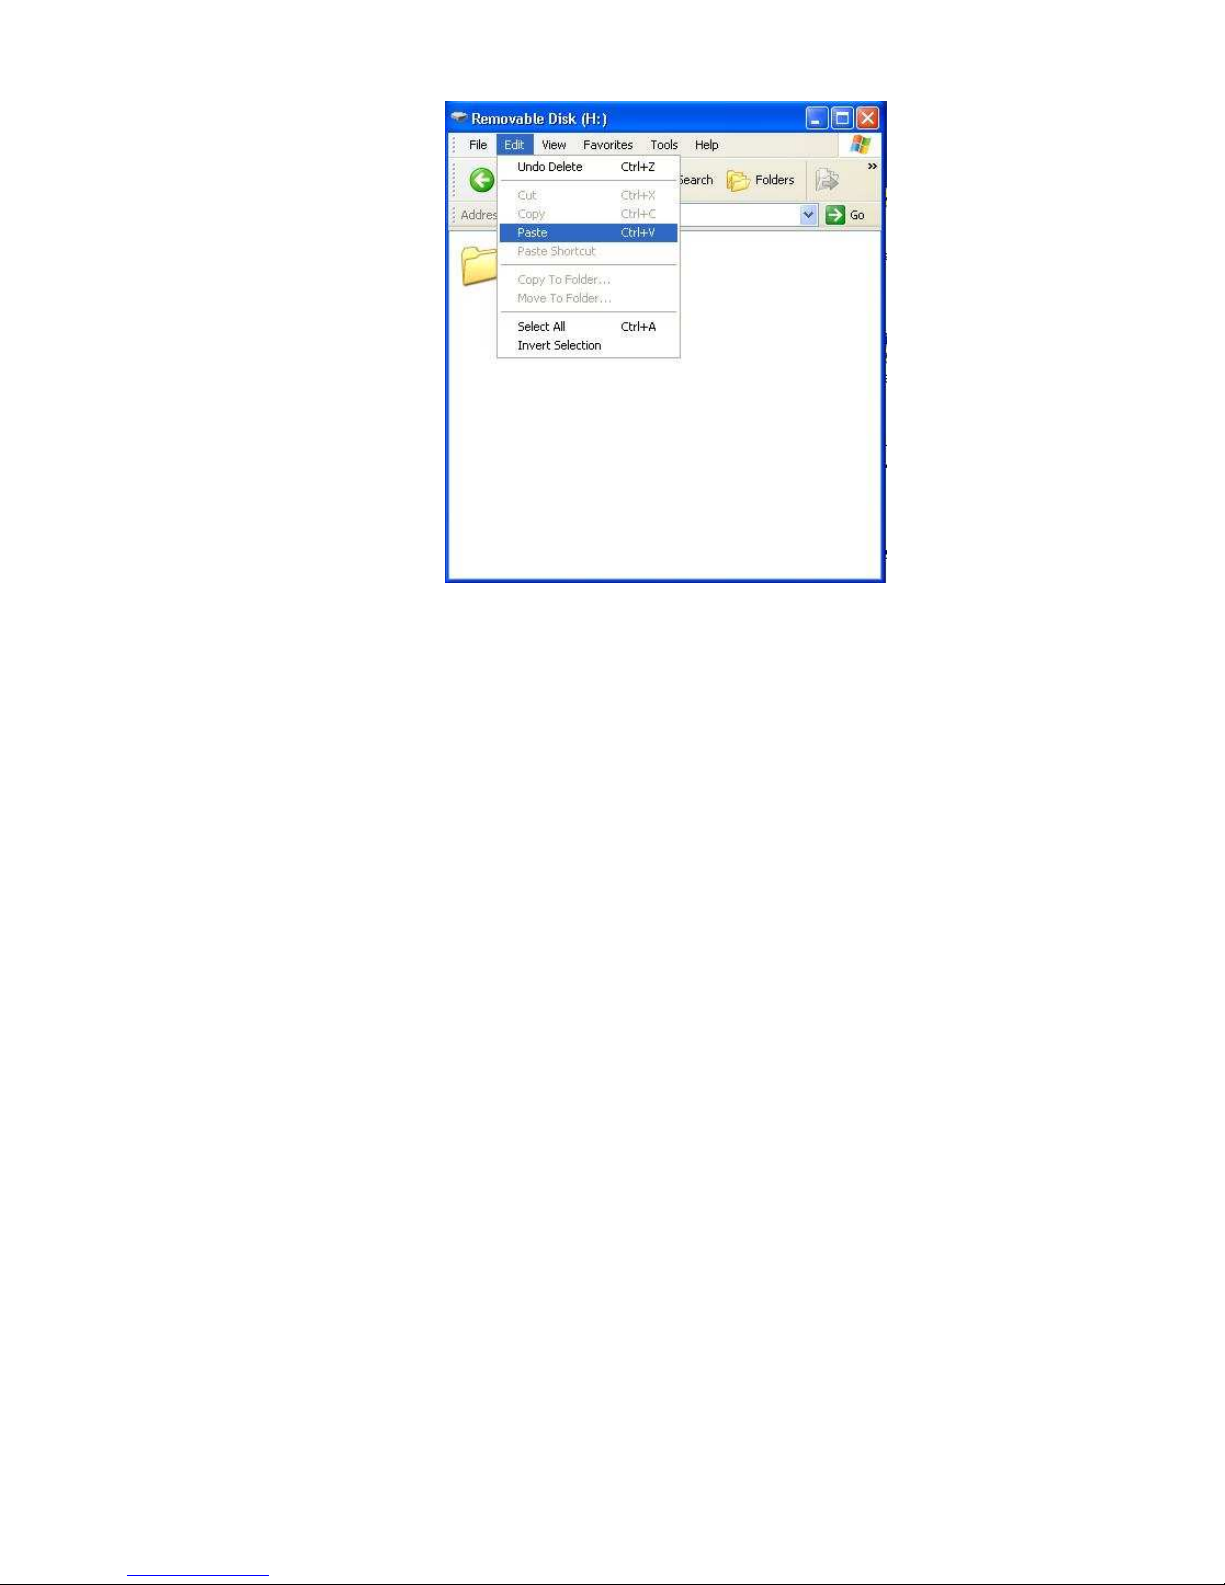
9) Now go to the removable disk then go to Edit then click paste, see Figure 7
14
Page 16
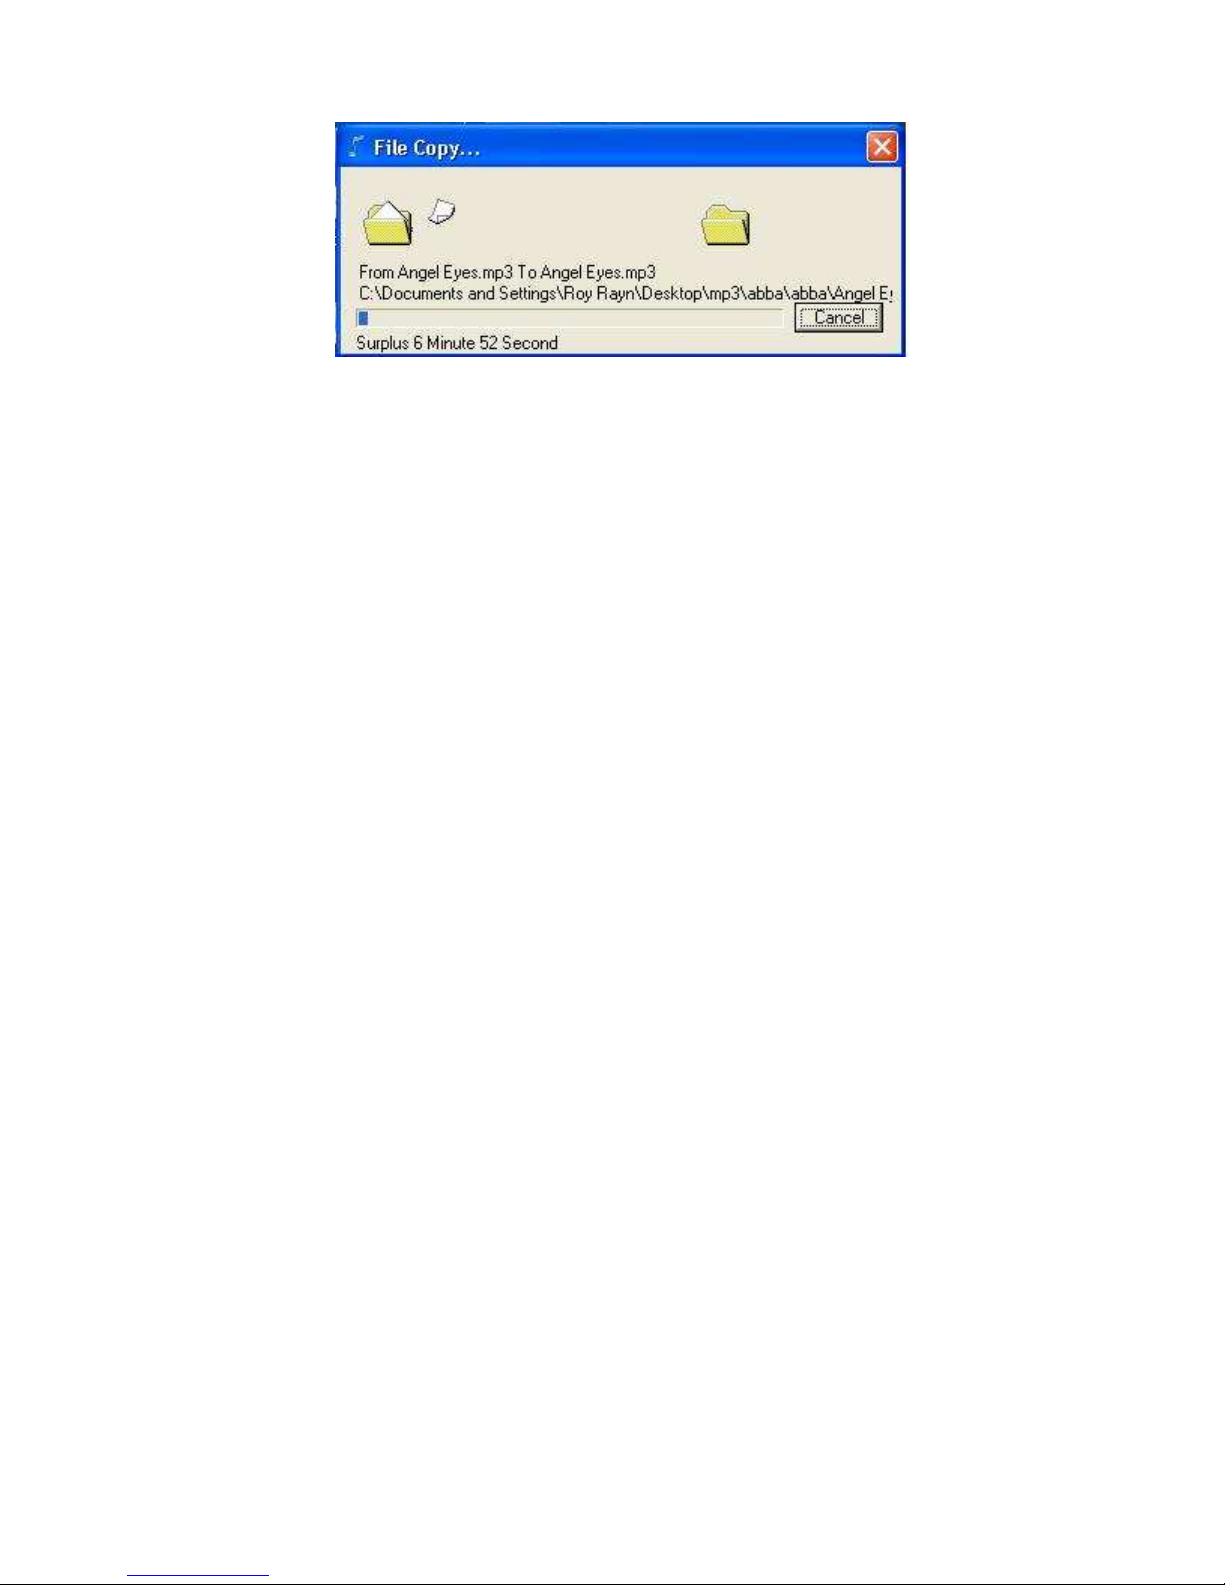
Figure 7
10) After you click paste it will start transferring music, see Figure 8
Figure 8
11) Just wait until it finish copying you music, the after copying close all the windows,
then safely remove the MP3 player from your computer, just like what you do on a
regular flash drive.
15
Page 17

Disconnect from Computer
For Windows 2000 or above, please follow “Safely Remove Hardware” procedure on
computer.
- A “Safely Remove Hardware” icon will be displayed on computer system’s tray as
below diagram.
- Move the mouse over the icon, “Safely Remove Hardware” prompt appears.
- Double click on “Safely Remove Hardware” icon then “Safely Remove Hardware”
windows will be displayed. Select the device to be disconnected and click on “Stop”
button to end the connection between the computer and the device.
16
Page 18
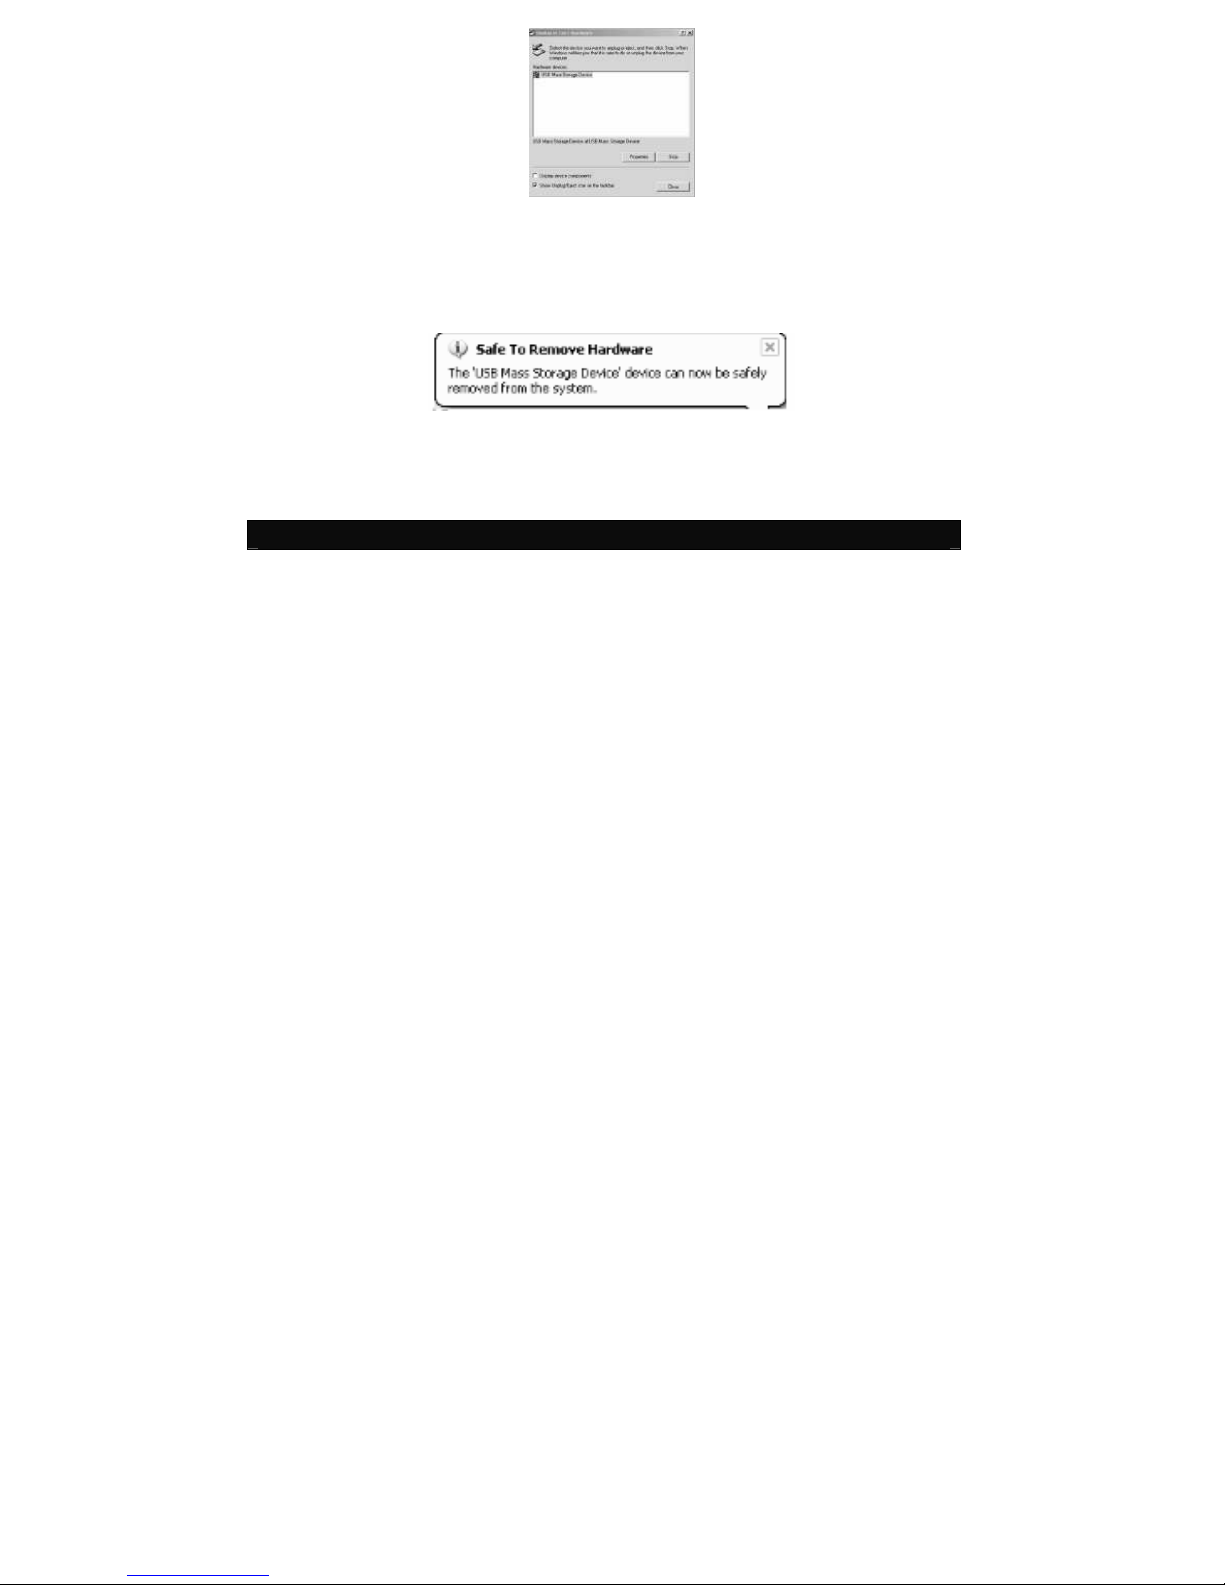
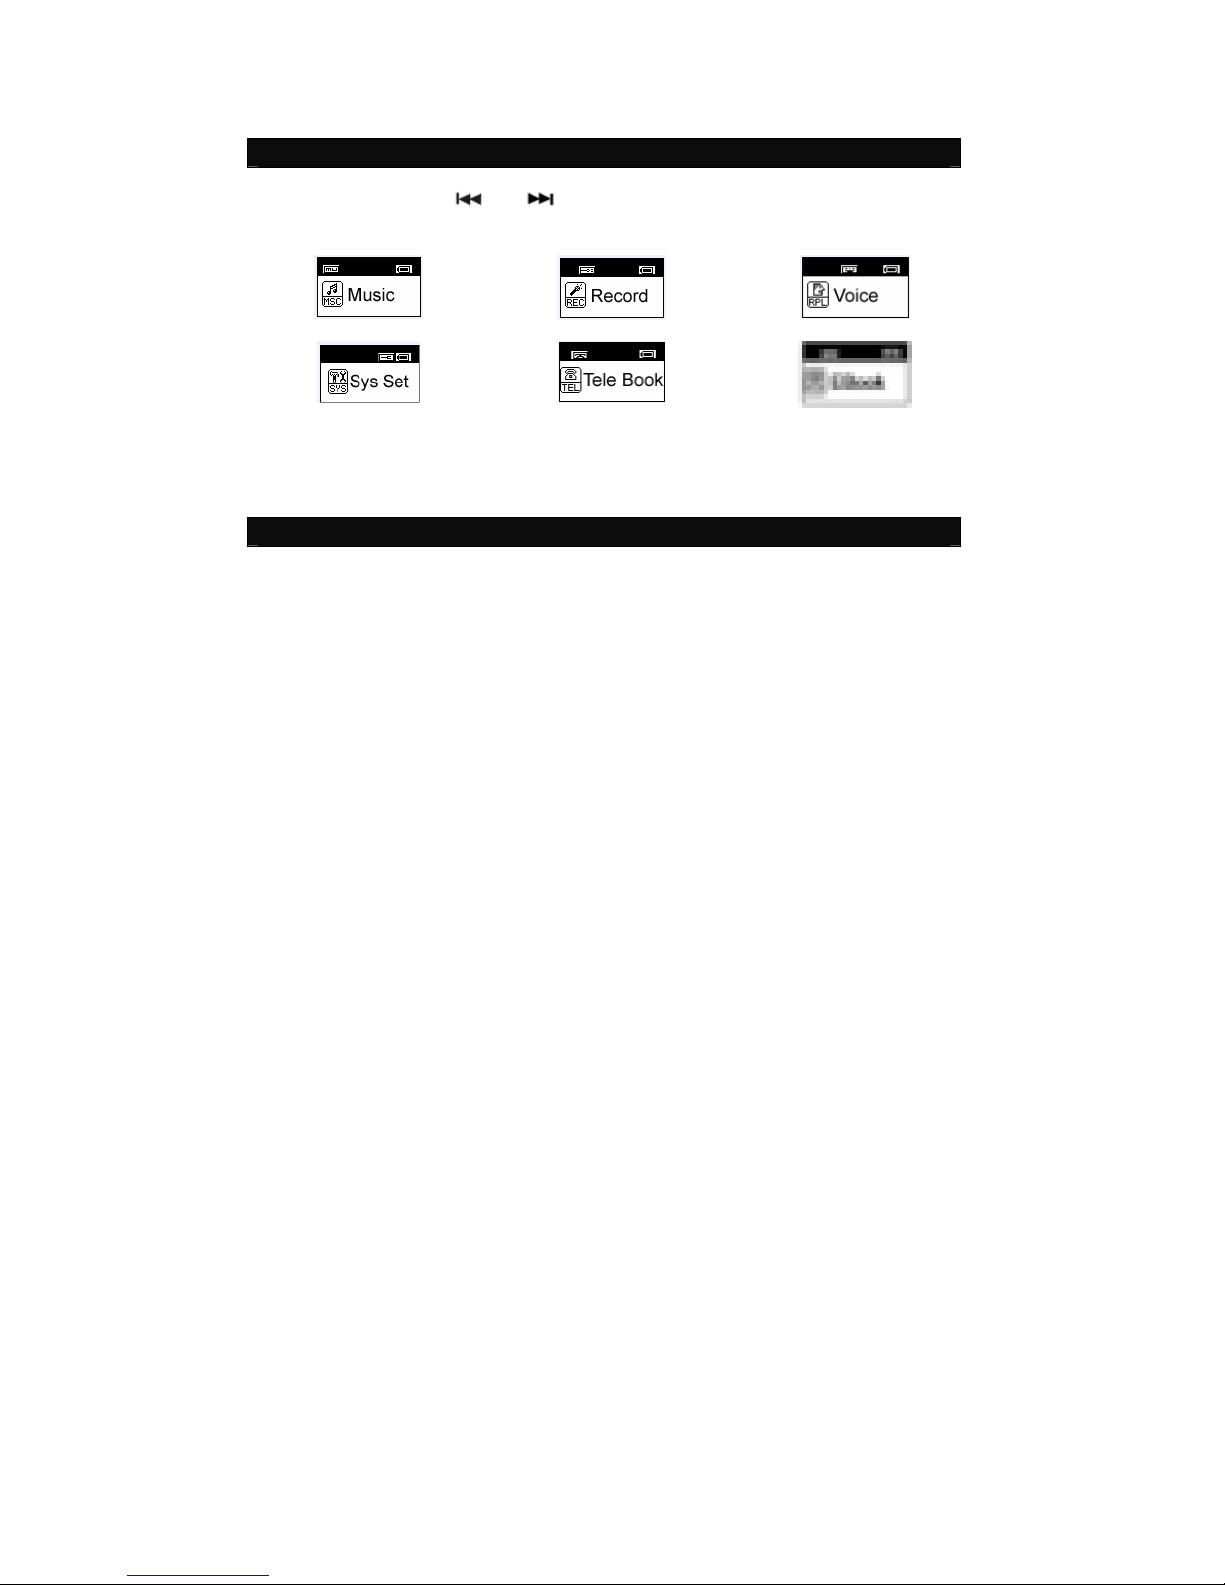
- Next, “The USB Mass Storage Device can now be safely removed from the system”
will be displayed.
- Finally, disconnect and safely unplug the device from the USB port on your
computer.
Power On / Power Off
- Turn Power ON/OFF switch to ON position, long press “►II” to power ON.
17
Page 19
- In any mode, long press “►II” to power OFF.
- Press “►II” to start or pause playback.
Menu Selection
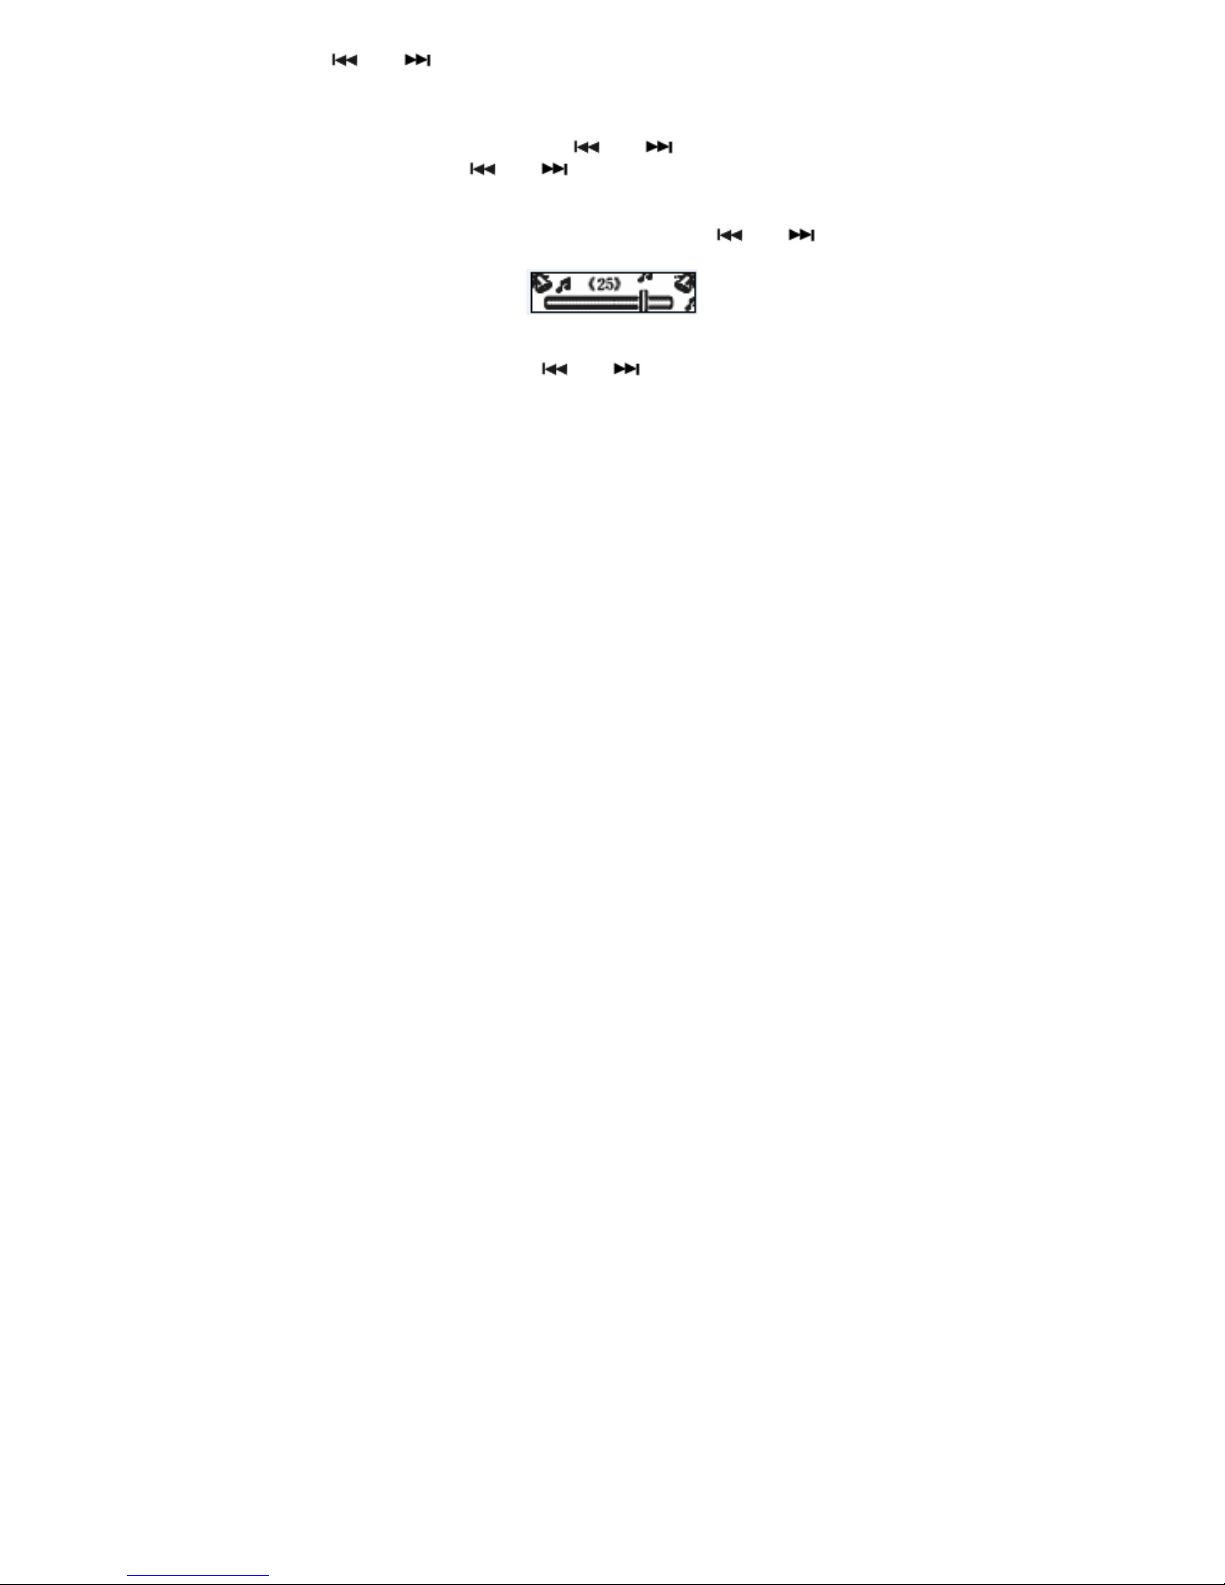
- In Main menu, press “ ” or “ ” to select a mode.
- There are 6 modes available in the main menu
Music Record Voice
System Setup Tele Book EBook
- Press “M” to enter.
Music
Music Playback
18
Page 20
- In Main menu, select Music menu and press “M” key to enter Music mode.
- Press “ ” or “ ” key to select a Music file.
- Music playback begins by pressing “►II”.
- During Music playback, press “►II” to pause.
- While in Pause mode, press “►II” again to resume playback.
Note: During Music playback, press “ ” or “ ” to skip to the previous or next
music file. Press & hold “ ” or “ ” to rewind or fast forward within the track.
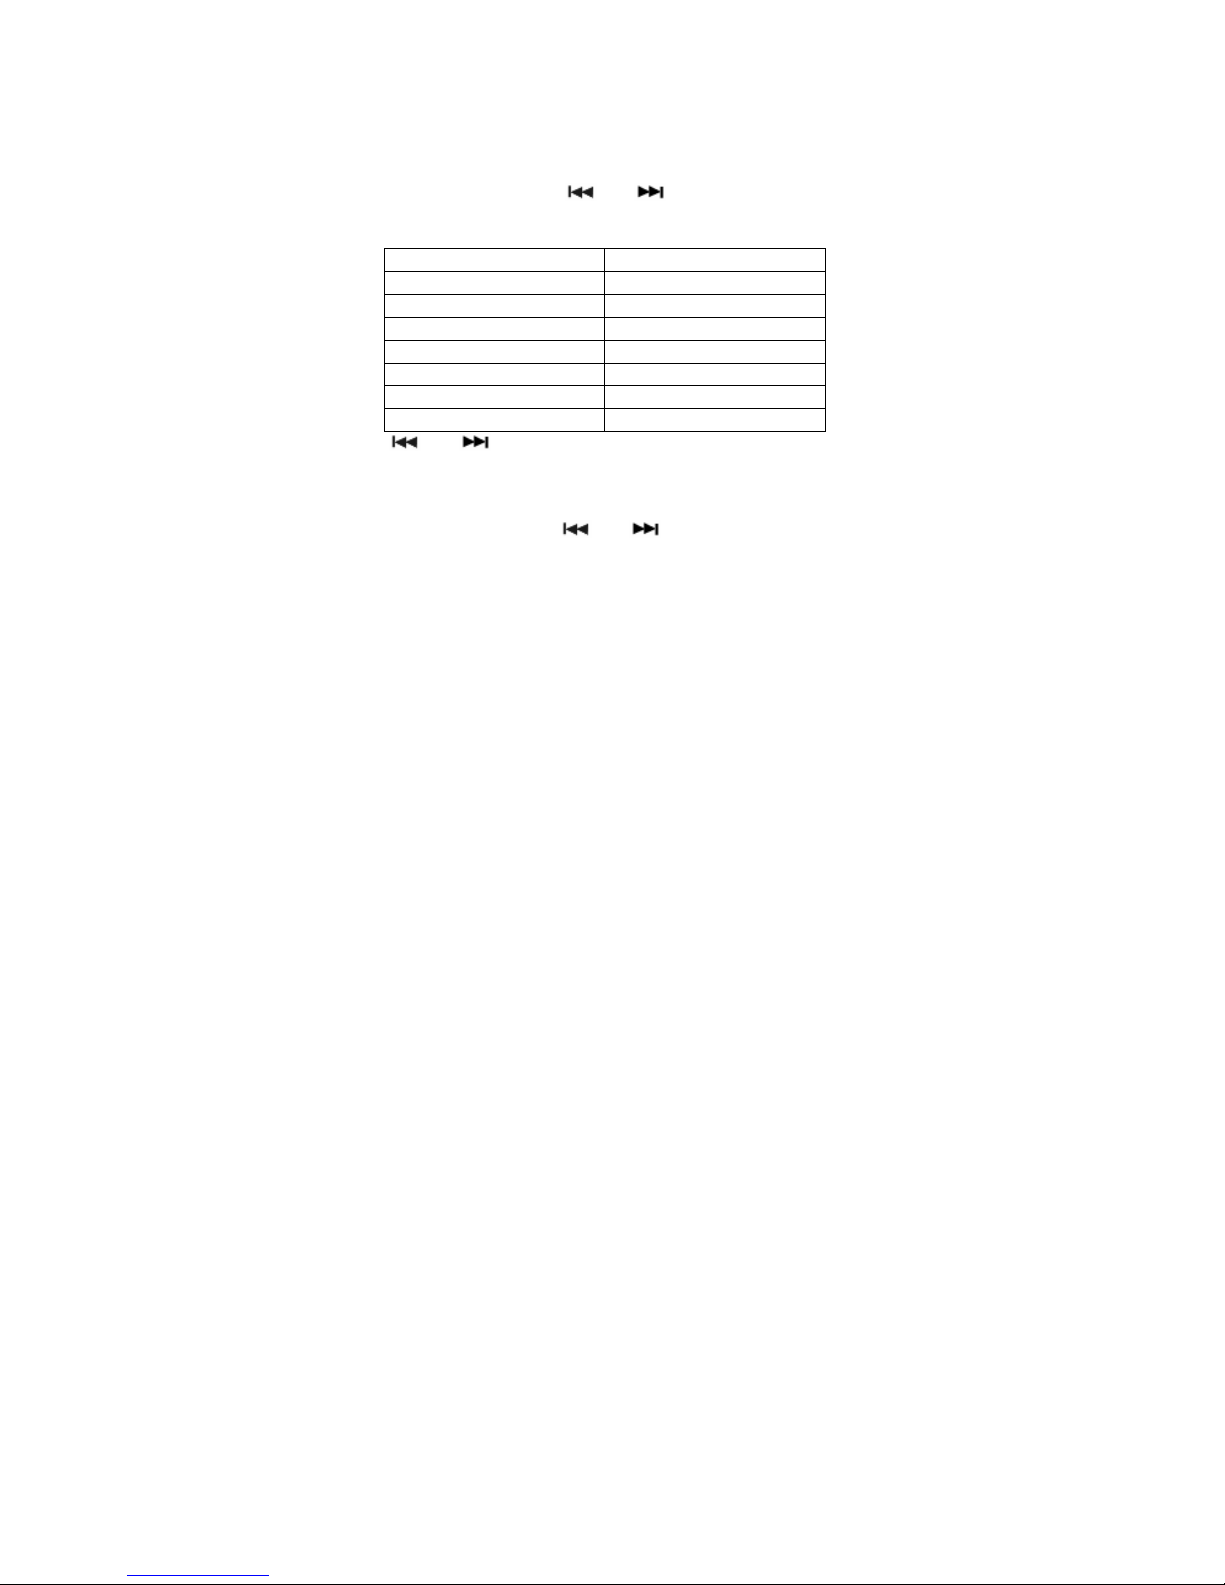
Adjusting Volume
- During Music playback, press “VOL” and then press “ ” or “ ” to adjust volume
level.
Skipping to Previous / Next Music File
- During Music playback, press “ ” or “ ” to skip to Previous or Next music file.
Synchronizing Song Lyrics Display
When a music file in the player has a song lyrics file with same file name, song lyrics
will be displayed automatically during Music playback.
Note: The player supports song lyrics file in .LRC format.
Both the Music file (MP3 or WMA) name and song Lyrics file (LRC) name must both
be identical. (Example: LoveSong.MP3 + LoveSong.LRC).
To Return to Main Menu
- During Music playback, press “M” to enter submenu.
19
Page 21
- Press & hold “M” key to return to Main menu.
Submenu under Music “Play” mode
During Music playback, short press “MENU” to enter submenu.
There are 6 modes to choose.
EQ
1. Under the submenu, press
“ ” or “ ”
button to select “Equalizer” mode,
and then press “MENU” to enter
2. Table of EQ to choose from:
Normal NOR
Pop POP
Rock ROCK
Classic CLAS
Jazz JAZZ
Headphone SOFT
Live LIVE
Bass DBB
3. Press
“ ” or “ ”
button to choose your desired equalizer, and short
press “M” button to confirm.
Repeat
1. Under the submenu, press
“ ” or “ ”
button to select “Repeat” mode,
and then press “M” to enter
2. Repeat options to choose from:
20
Page 22

Repeat All Repeat all the songs in order
Repeat One Repeat the current song only
Normal No repeat
Random Repeat all the songs in random order
Repeat Folder Repeat each folder
Preview Play the first 10 seconds of each song
A-B Repeat
1. Under the submenu, press
“ ” or “ ”
button to select “A-B Repeat”
mode, and then press “M” to enter
2. “A-B Repeat” indicator displays “A”
3. Press & hold “M” again, “A-B” is displayed
4. Music will now repeat “A-B” playback in a loop
5. To cancel “A-B” repeat playback, press & hold “M” to resume
Replay Time
1. Under the submenu, press
“ ” or “ ”
button to select “Replay Time”
mode, and then press “M” to enter
2. Press
“ ” or “ ”
button to select how many times to replay, and press
“M” to confirm.
Replay Gap
1. Under the submenu, press
“ ” or “ ”
button to select “Replay Gap”
mode, and then press “M” to enter
2. Press
“ ” or “ ”
button to select how much time for the replay gap,
21
Page 23

and press “M” to confirm.
Exit
Submenu under Music “Pause” mode
During Music pause, short press “M” to enter submenu.
There are 4 modes to choose.
Browse Folder
1. Under the submenu, press
“ ” or “ ”
button to select “Browse Folder”
mode, and then press “M” to enter
2. Press “ ” or “ ” to select different folder file.
3. When a folder is selected, press “M” again to enter folder.
4. When a Music file is selected, press “►II” to start playback.
Delete File
1. Under the submenu, press
“ ” or “ ”
button to select “Delete File” mode,
and then press “M” to enter
2.
The current music file will display
3.
At the “Delete File” prompt “YES / NO”, scroll to “YES” option and press
confirm deletion.
4.
When the file is deleted, the player returns to previous submenu options.
Note: Press & hold
“M”
to return to Main menu.
Delete All Files
1. Under the submenu, press
“ ” or “ ”
button to select “Delete all”
“M”
to
22
Page 24

mode, and then press “M” to enter
2.
At the “Delete File” prompt “YES / NO”, scroll to “YES” option and press
confirm deletion.
3.
When the file is deleted, the player returns to previous submenu options.
Note: Press & hold
“M”
to return to Main menu.
“M”
to
Exit
Record
- In Main menu, select Record menu and press “M” to enter Record mode.
- In Record mode, press “►II” and recording begins automatically.
- During recording, press “►II” to pause recording and press “►II” again to resume.
- To end recording, press & hold “M” to save the recording and return to Main menu.
Note: Recording files can be playback in Voice mode.
Voice
- In Main menu, select Voice menu and press “M” to enter Voice mode.
- When playlist is displayed, press “ ” or “ ” to select the recorded file.
- Press “►II” to play the recorded file.
- Press “►II” to pause and press “►II” again to resume.
- To end press & hold “M” to return to Main menu.
23
Page 25

System Setup
- In Main menu, select Setting menu and press “M” to enter System Setting
- There are 10 settings available in the Settings mode.
Record Quality:
- Normal: Normal record quality with smaller file size.
- Fine: Better record quality with larger file size.
Backlight Time: Time period to turn off backlight after no function operated.
Power Off:
- Off Time: Time period to turn off the player after no function operated.
- Sleep Mode: Time period to go to sleep mode after no function operated.
Replay Set:
- Manual Mode
- Auto Mode
Contrast: Setup LCD contrast level.
Language: English / T. Chinese / German / French / Italian / Spanish /
Portuguese / Japanese / Korean / Danish / Swedish / S. Chinese
Auto Msc Transfer: (AMT turn on/off) – make sure this is ON
Memory Info: Display memory usage.
Edition: Displays firmware version.
Default: Reset to default.
Exit: Exit this interface.
- In Settings mode, press “ ” or “ ” to scroll to any of the 10 settings and
24
Page 26

press “M” to enter individual submenu options.
- To move to left or right, press“ ” or “ ”.
Note: In submenu options, press “M” to return to previous menu
Tele Book
- In Main menu, press “M” to enter Tele Book mode.
- There are 4 settings available in the Settings mode.
Browse Tel: Browse the Telephone book
Import Tel: Import the Telephone book
Export Tel: Export to Telephone book
Exit: Exit this interface
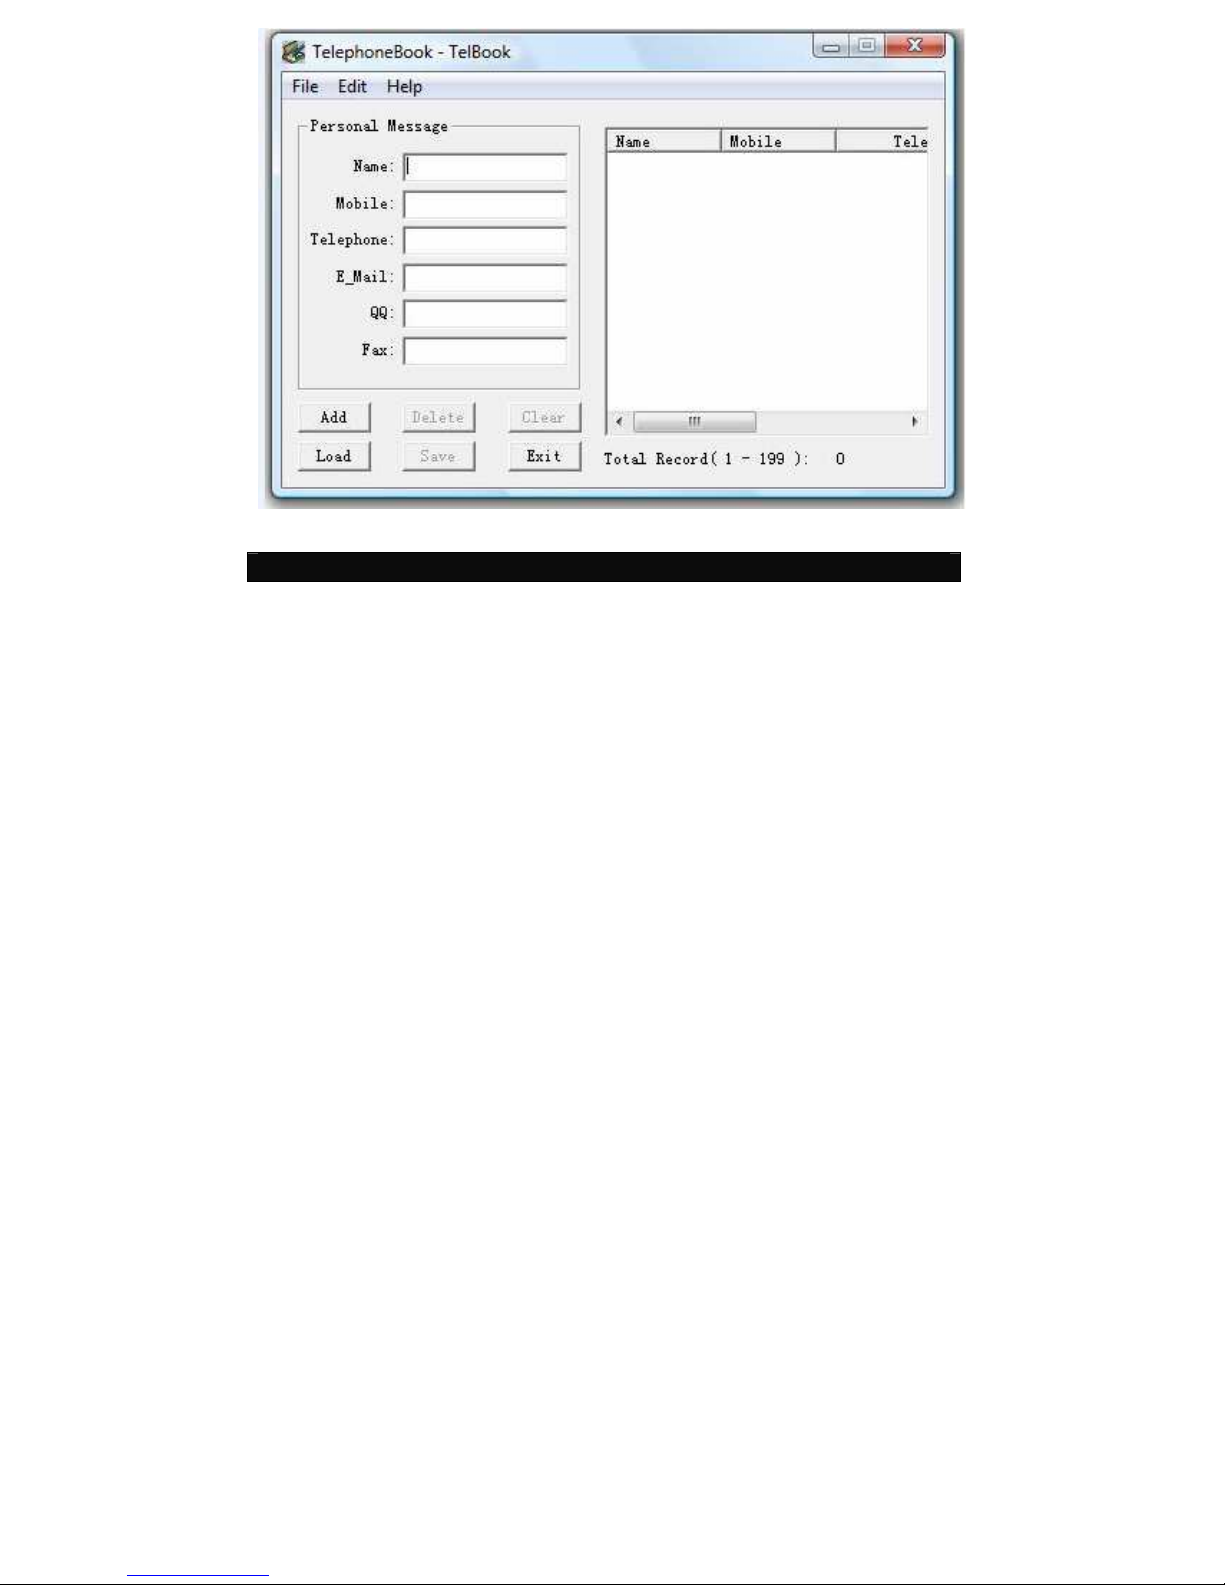
Setting Tel file
The player can set to Tel file by using tool program under “Grogram” folder in the
device.
Run “HKX-Telbook” program and then start to modify the file
25
Page 27
EBook
26
Page 28
- In Main menu, press “M” to enter EBook mode.
- When “EBook” textlist is displayed, press “ ” or “ ” to select Text file.
- When a folder is selected, press “M” to enter folder.
- When a Text file is selected, press “M” and playback begins automatically.
- Press “ ” or “ ” to scroll backward or forward to view text.
- During Text playback, press “M” to return to “EBook” textlist or press & hold “M” to
return to Main menu.
Deleting a Text File
- In “EBook” textlist, when a Text file is selected, press “►II” to delete.
- At the “Delete File” prompt, select “YES” option and press “M” to confirm deletion.
Troubleshooting
Problem Action
No power Please check if it is switched ON & Hold Play
button
No sound from the earphone 1. Make sure the volume level is not set to “0”.
2. Check if the earphone is properly connected
to the player.
3. Check if the music file is corrupted. Try again
with other music files. Try earphone with
other player.
27
Page 29
Error message: “Warning file
format error”
Please try the following:
- Turn the Power ON/OFF switch to ON.
- Connect the player to the PC and remove the
file that is corrupted or non-standard audio file
on the player.
- Disconnect the player from computer and try
again.
-Check if wma file is protected or license
What is the common file type
that is causing the “Warning File
When any file type is not supported by the
player, the error message will occur.
Format Error” error?
Display unidentified characters
Make sure the correct language is selected.
on LCD screen
Cannot transfer music 1. Check if the USB cable is working properly.
2. Make sure the product drivers has been
installed correctly (if required).
3. Check if the computer USB port is working
properly.
4. Restart the computer and try again.
*Specifications subject to change without prior notice.
* For answers to your frequently asked questions, please visit: www.slyelectronics.comYou can also
email us at: [email protected]
28
Page 30

Introduction
AMT is a green software, which can convert the audio files automatically to the player.
That is, AMT will transform the supported audio files to MP3 type files, and store the MP3 files
to the player automatically. All you need to do is drag and drop your songs or copy & paste.
Notice
1.
AMT can operate in Windows 2000/Windows XP/Vista OS (does not work in Windows 98);
2.
AMT works base on the technique of virtual CDROM, do not close the PC’s function of
CDROM Autorun before using AMT (the default of CDROM Autorun is opened in Windows).
3.
If CDROM Autorun does not enable before using AMT, a virtual CDROM disk will display in
“My Computer”. Double click the virtual CDROM icon and double click “Start.exe”, AMT
is ready to work.
4.
Disconnect the player from PC, AMT will terminate automatically. Some anti-virus software
may not allow to use AMT. Select permit for AMT in dialog box pop-up from anti-virus
software.
29
Page 31

Operation
4.1 System Startup and Functions
When the player connect to PC, AMT work automatically. A music icon will be shown up
in the right-bottom corner of the screen.
When files are copied, pasted or dragged to the player, ATM will convert pre-defined
supported music files to MP3 type music files and save to the player. If some music files
cannot be converted normally due to certain reason, AMT will copy the original music
files into MP3 player. This music files cannot be played.
4.2 Supported Music File Type
Music format in WMA, RM, OGG, AAC (m4a), CD, WAV, APE, WV, FLAC, will be
converted automatically into MP3 and be played on this device.
30
Page 32

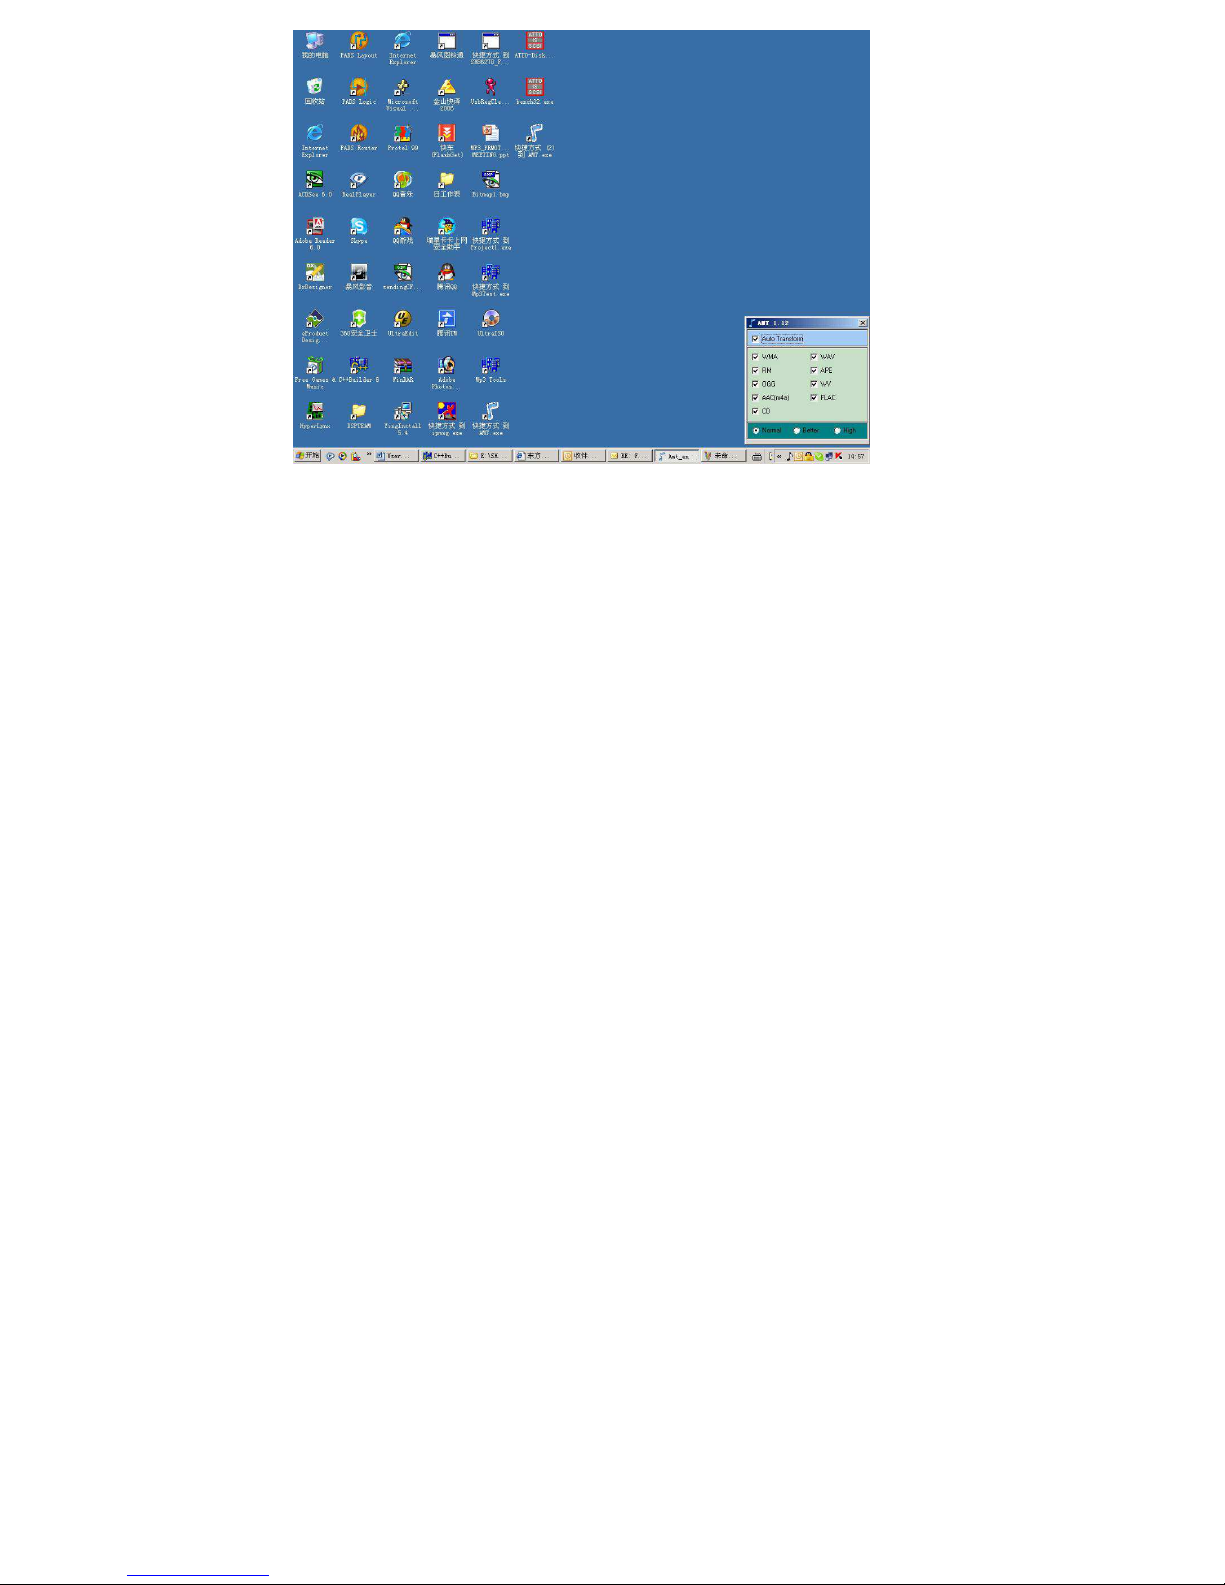
4.3 AMT Window and Dynamic Function Configuration
Click AMT icon, and AMT control window will be shown in the right-bottom corner of the
screen.
31
Page 33
32
Page 34
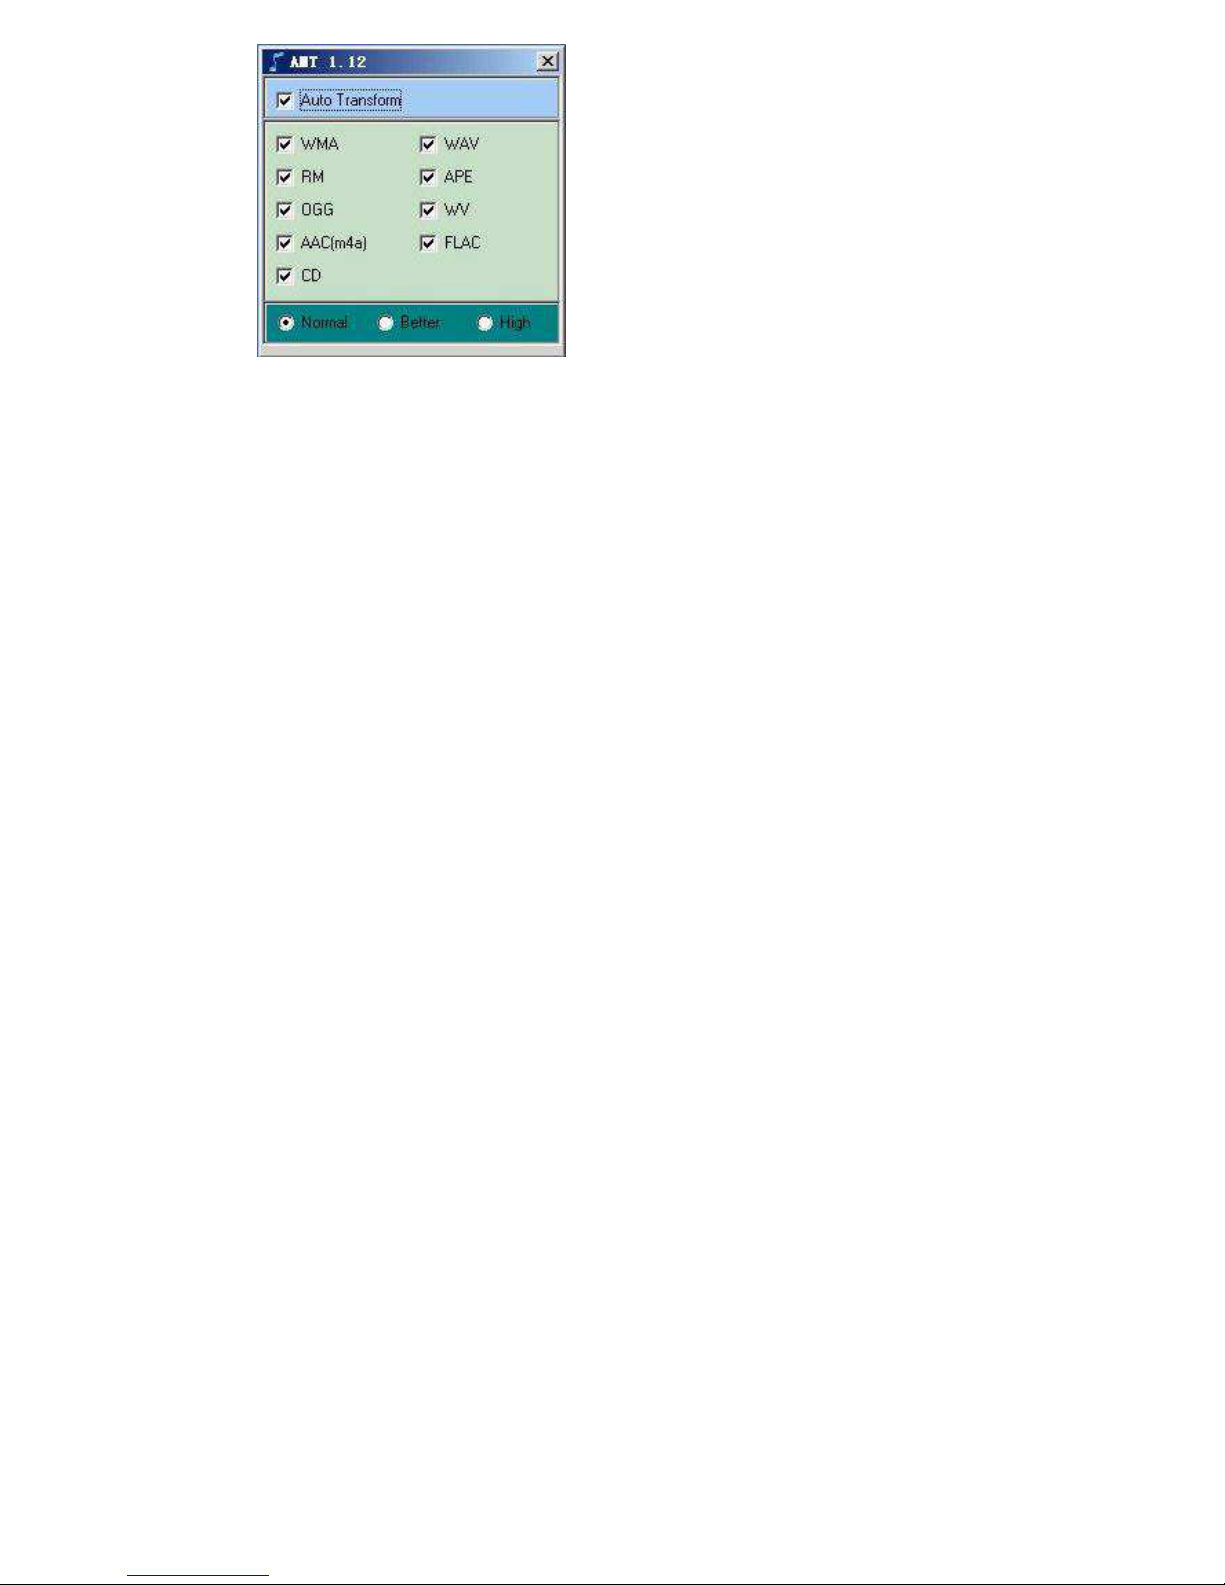
Select Auto Transform, or required Music to be converted.
Select Tone Quality Option: “Normal”, “Better” and “High”
Notice: RM file conversion required RealPlayer is installed. For other file formats, no extra
resources are needed.
33
Page 35

4.4 Menu
Right-click on AMT icon, and menu will be shown :
4.5 Safe File Folder (RAWDATA)
AMT generates default safe file folder “RAWDATA” automatically. If no file folder “RAWDATA”
in the player, AMT will generate file folder “RAWDATA” automatically after player and PC
connection. When files are copied or dragged into file folder “RAWDATA”, AMT will not perform
conversion and original music file can be stored.
34
Page 36

4.6 Uninstall AMT
Disconnect the player to PC, AMT system will terminate automatically and the icon will be
removed from the right-bottom of the screen.
Note: For MAC Users only: You will not be able to put .wma files onto this
player. Please convert these files to .mp3 and then put them on the player.
35
 Loading...