

SLX SLx, Megaboost Amplified Aerial User Manual
Introduction
The ultra compact Megaboost aerial with it’s built-in
signal booster oers a quick and economic method of
providing good digital signals to your TV/set top box.
Suitable for outdoor or loft installation, it can be
mounted on a 1”-1½” mast or on to masonry/brickwork
or wood using the bracket, pole and xings supplied.
This aerial is suitable for use in most areas of the UK, with
the exception of areas with very low or very high signal
strength.
This aerial is also 4G ready
- the booster has a built in lter
to prevent interference & channel loss
on your TV caused by signals from
4G transmitters.
For optimum reception of digital signals
the kit contains high quality RG6
digital cable.
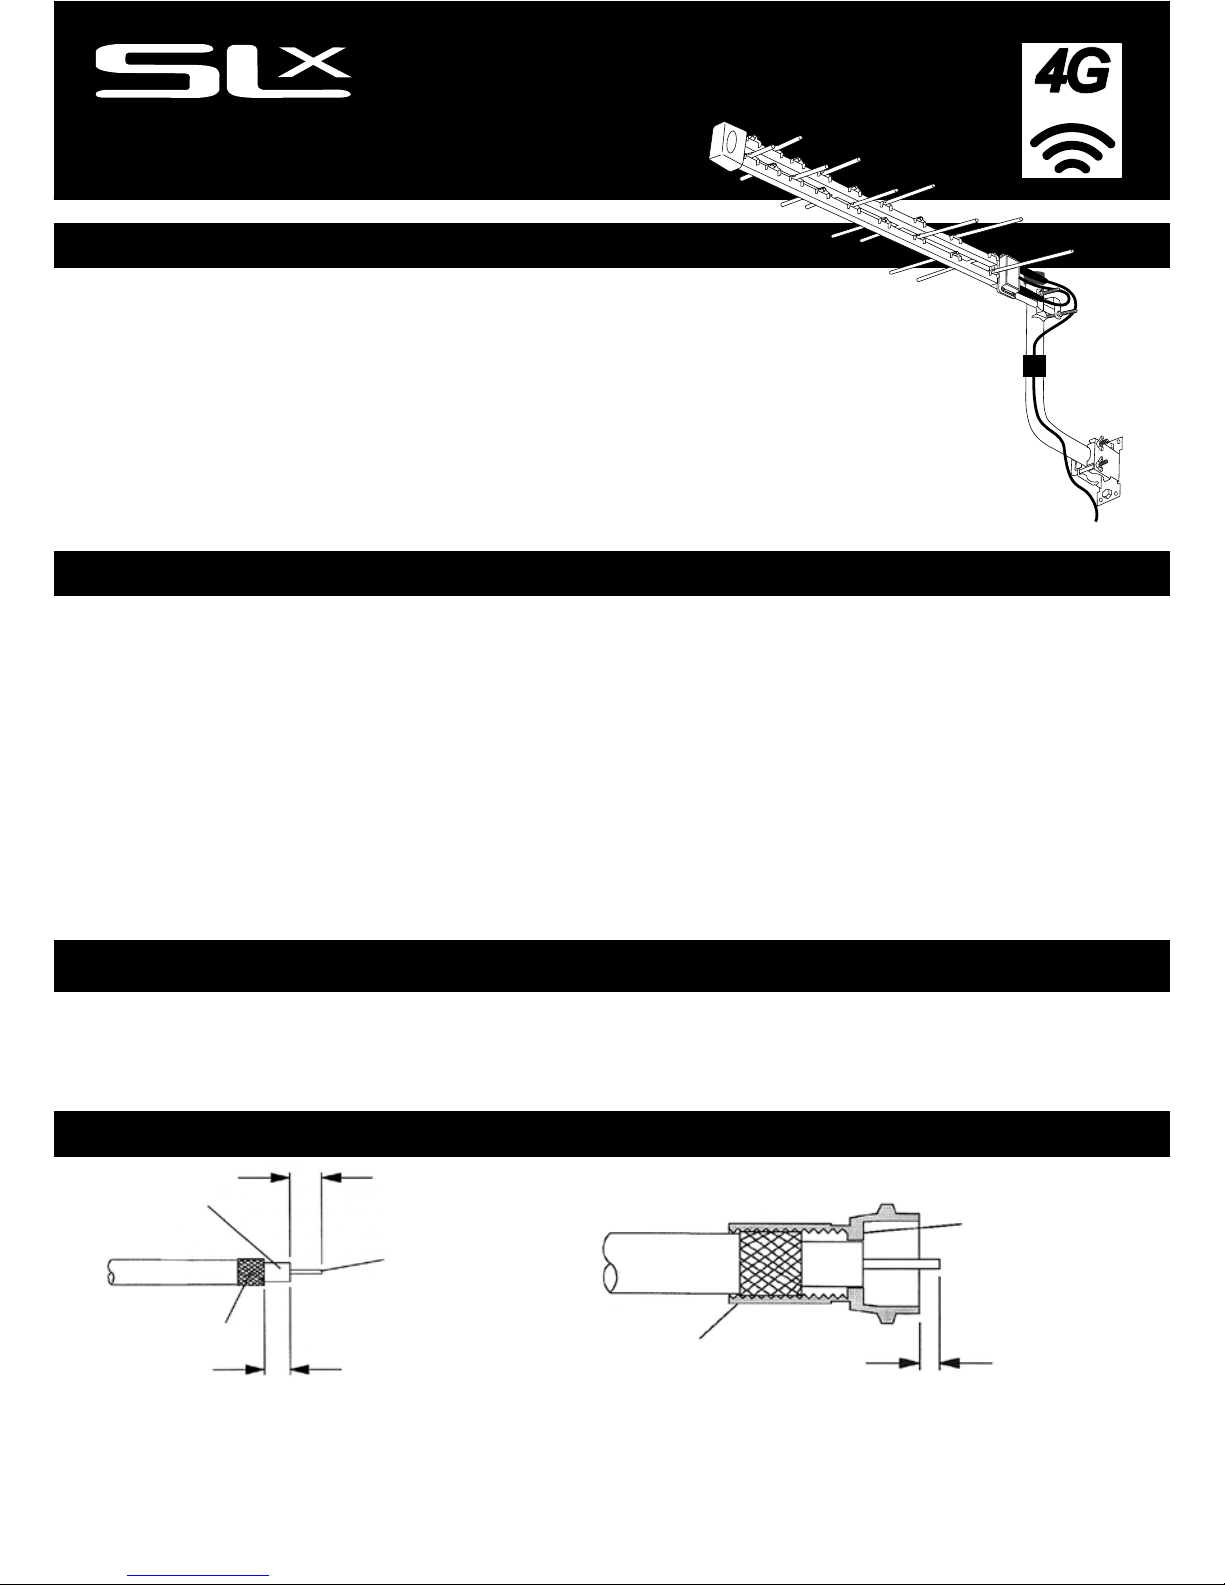
Preparing downlead cable
Measure cable run rst and cut cable to t with a bit to
spare. Slide one the weather boots provided over the
aerial end of the cable. Prepare both ends of the cable
as shown in Fig. 1. Fold the braid wires of the cable back
over the sheath and t one of the screw-on type-F plugs.
The inner wire of the cable should protrude about 2 mm
beyond the nut end of the plug.
WARNING: To avoid a short circuit you must make
absolutely sure that no braid or foil can come into
contact with the inner wire.
fold braid back
over sheath
8mm
inner
wire
cut or tear
away foil
6.5mm
screw connector
body onto cable
2mm approx.
end of
insulation
should be
ush with
this face
Selecting mounting position
Select a mounting position for the aerial. The position
should be as high as possible and chosen to give a clear
‘view’ towards the transmitter. Avoid alignments through
trees and or other buildings if possible.
Loft mounting will degrade reception performance
considerably and is only recommended for strong
signal areas.
Digital reception with a loft aerial may be
aected by electrical interference from mains wiring.
Fig. 1 Fig. 2
1
The risk of accidents can be greatly reduced by planning
before starting a project.
•
Before starting installation check structure is sound and
check for hidden wiring or plumbing.
•
When working on an installation outside, beware of over
head power lines.
•
Observe safe working practices, tread carefully on roofs
and ensure adequate lighting is available if working in
loft or roof space.
•
Before making any connections switch electricity o at
the mains.
•
Always follow manufacturer’s operating and safety
instructions before using tools and/or equipment.
General Safety
•
Only carry out work outdoors at height if competent
in the use of ladders and related access equipment.
•
Always read and follow the manufacturer’s instruction
label axed to the ladder.
•
To avoid injury always route cables or wiring carefully.
Ensure cable is correctly routed before xing into
position, taking care not to over tighten cable clips.
•
This product may contain small parts - keep out of reach
of children.
•
After installation make regular maintenance checks for
wear and tear.
Megaboost Amplied Aerial
27885R4
Ready
USER GUIDE
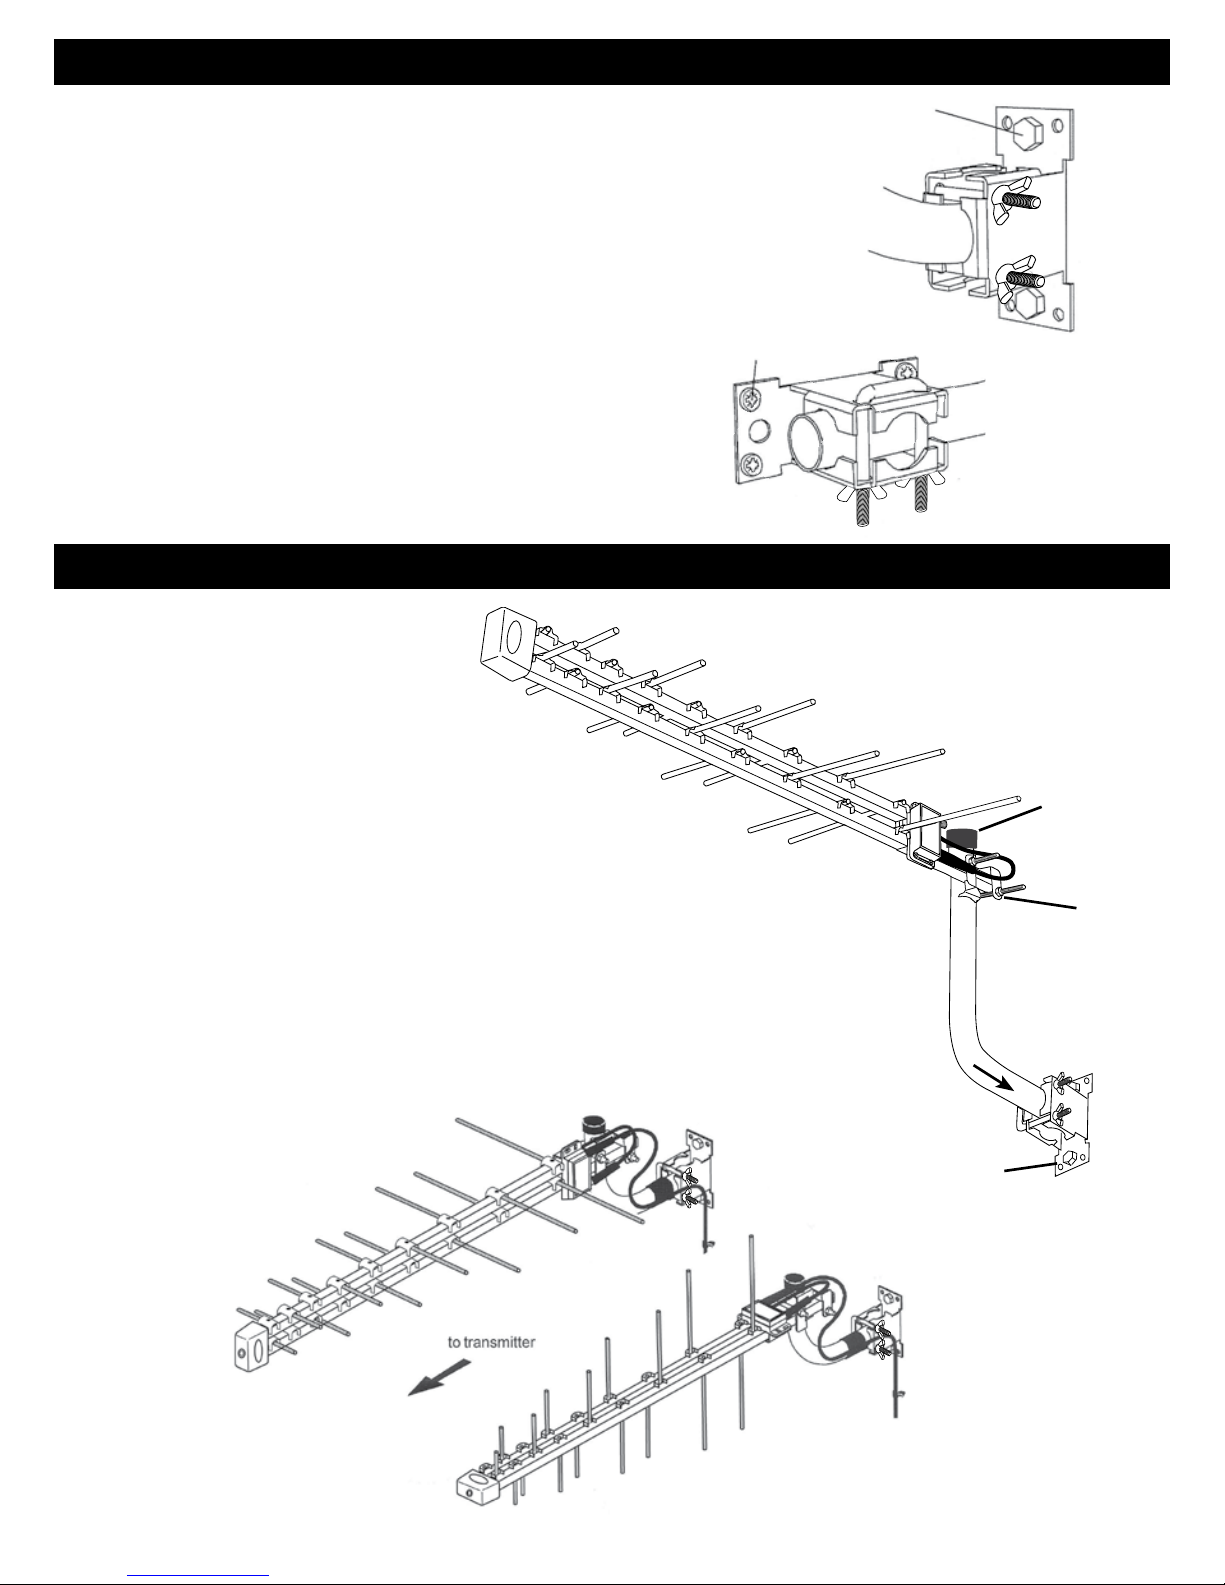
Fixing mounting bracket
Fix the mounting bracket to a suitable vertical surface such as a
masonry wall, fascia board or loft timber-Fig. 3.
For xing to masonry, use the wall plugs and coach screws
supplied (10 mm drill size required).
For xing to a timber surface use the four woodscrews supplied.
When xing to brickwork, do not x the bracket higher than
300mm below the top of a wall. With standard brickwork
this means xing on the 5th course of bricks down from the top of
the wall. Always drill and plug bricks, not the mortar courses.
Do not use the mounting bracket to t a pole or mast longer than
the one supplied. If a longer mast is required, wall brackets or a
chimney lashing kit (not supplied) should be used.
Mounting the aerial
Attach the aerial and mounting pole
to the mounting bracket.
Usually, it is easiest to x the aerial
to the pole at ground level,
and then attach the pole to the bracket.
The aerial is attached to the pole using the
mast clamp supplied - Fig 4.
The aerial elements must be aligned either horizontally or
vertically to suit the polarisation of the local transmitter - Fig 5.
(If in doubt look at aerials on neighboring roofs. The majority of
installations require horizontal polarisation).
Do not fully tighten the clamp nuts at this stage.
Push the pole into the mounting bracket as far as it will go
and tighten the U-bolt nuts (10 mm spanner).
Ensure that the pole is vertical and that the aerial is
pointing approximately in the direction of
the transmitter.
2
t raincap
make sure that
pole is seated
tightly over
locating ring
mounting
bracket
mast
clamp
Fig. 3
Vertical
Polarisation
Horizontal
Polarisation
Fig. 4
Fig. 5
use the wood screws
when xing to timber
use the plugs and
coach screws when
xing to masonry
 Loading...