

SLR Lighting COLORBLOOM User Manual
LED HOME
COLORBLOOM
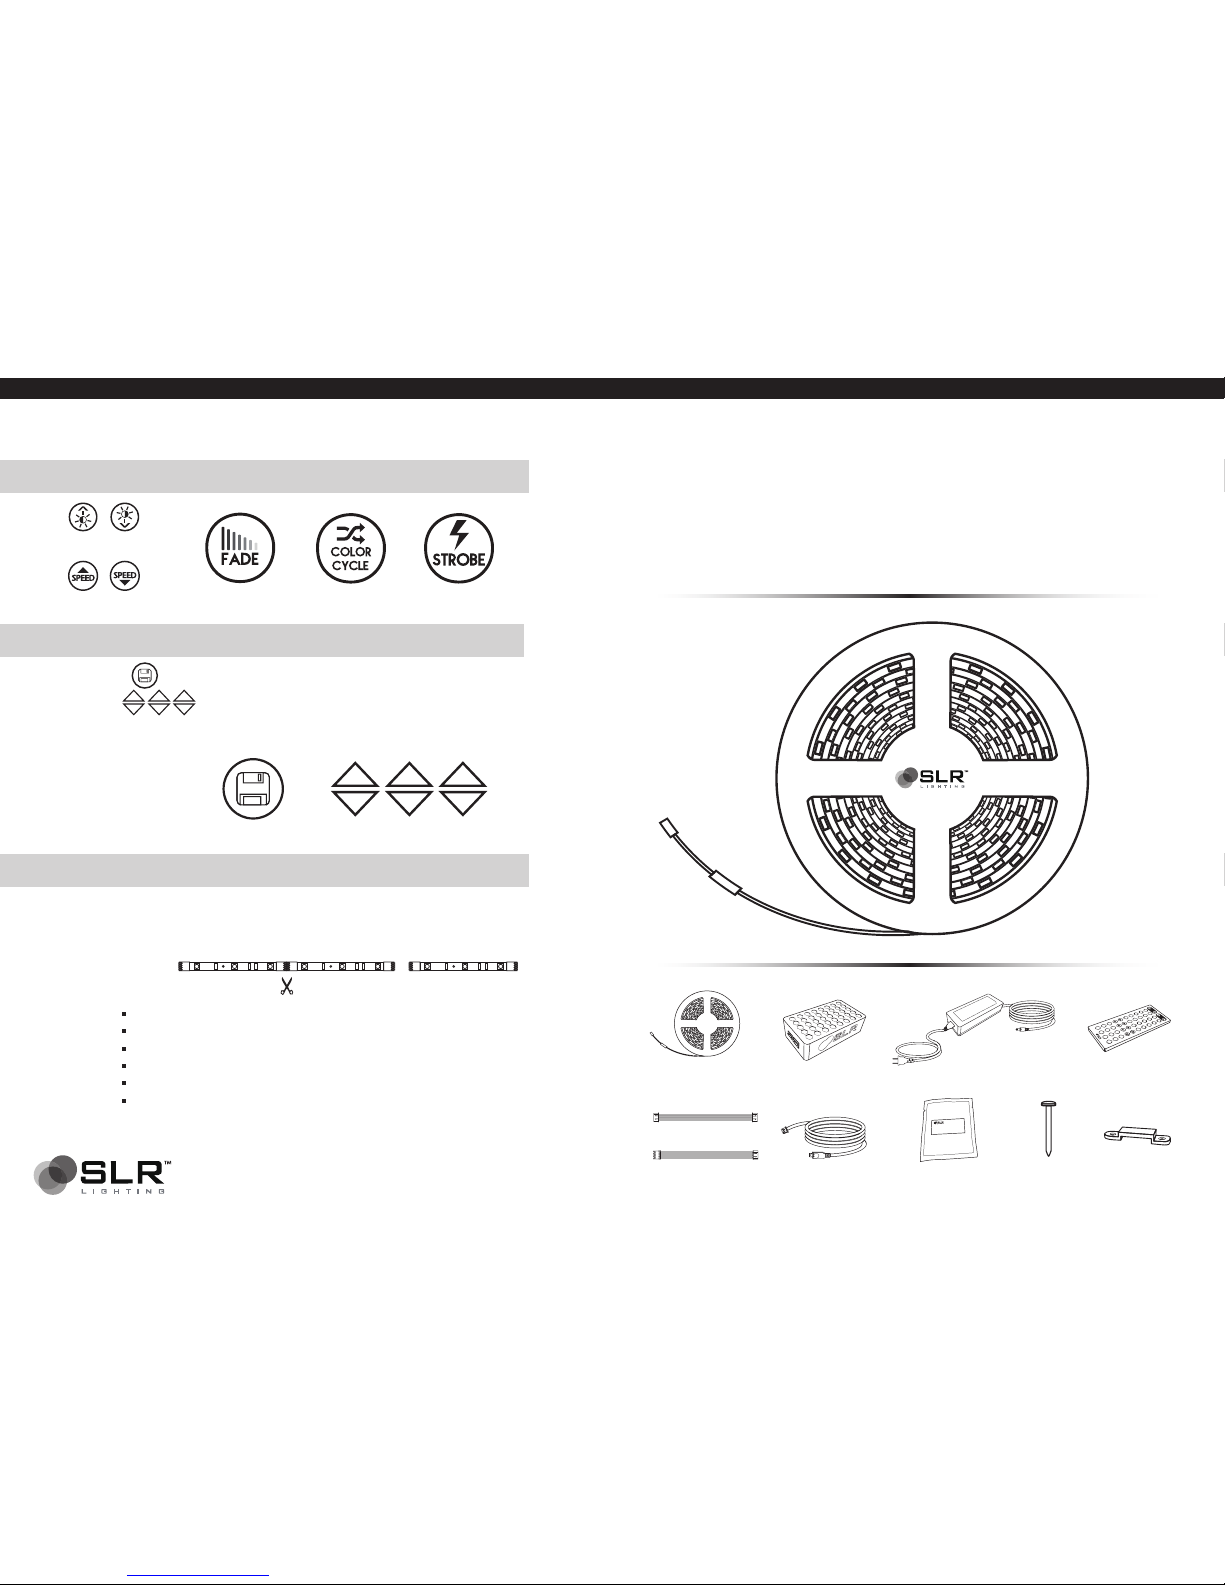
Press any Button.
Use the to adjust each primary
color.
Custom colors will automatically save.
1.
2.
3.
x1
Premium SLR-Strips
Strip Adapter x1
Strip Extension x1
IR Receiver Cable
x1
x1
SLR-Controller
nails
x1Pack
mounts
x1Pack
SLR-Box
x1 x1
Power Adapter
SLR-Adhesive Booster
x1
Create and save custom colors.
Adjust brightness buttons
Adjust speed Buttons
Red
Red
Green
Green
Blue
Blue
Red
Red
Green
Green
Blue
Blue
RGB Up/Down Arrows
Custom Color Button
Remote
SLR-Hue Mixer™
ProjectPak
™
Compatible
Each ColorBloom kit can be cut, extended, expanded and adapted for complete
customization. SLR ProjectPaks™ are project specific kits that include additional parts and
accessories to simplify each project. Detailed guides are included with each ProjectPak™.
Popular ProjectPaks:
Over/Under Cabinet ProjectPak with Motion Sensor
Inner-Cabinet ProjectPak with Motion Sensor
Bed-Frame ProjectPak with Motion Sensor
TV Backlight ProjectPak
Cube Organizer/Shelf ProjectPak
Bathroom ProjectPak
SLR-Adhesive Booster
Fades into the next color Cycles through colors Strobes white
www.slrlighting.comFor assistance, contact: support@slrlighting.com
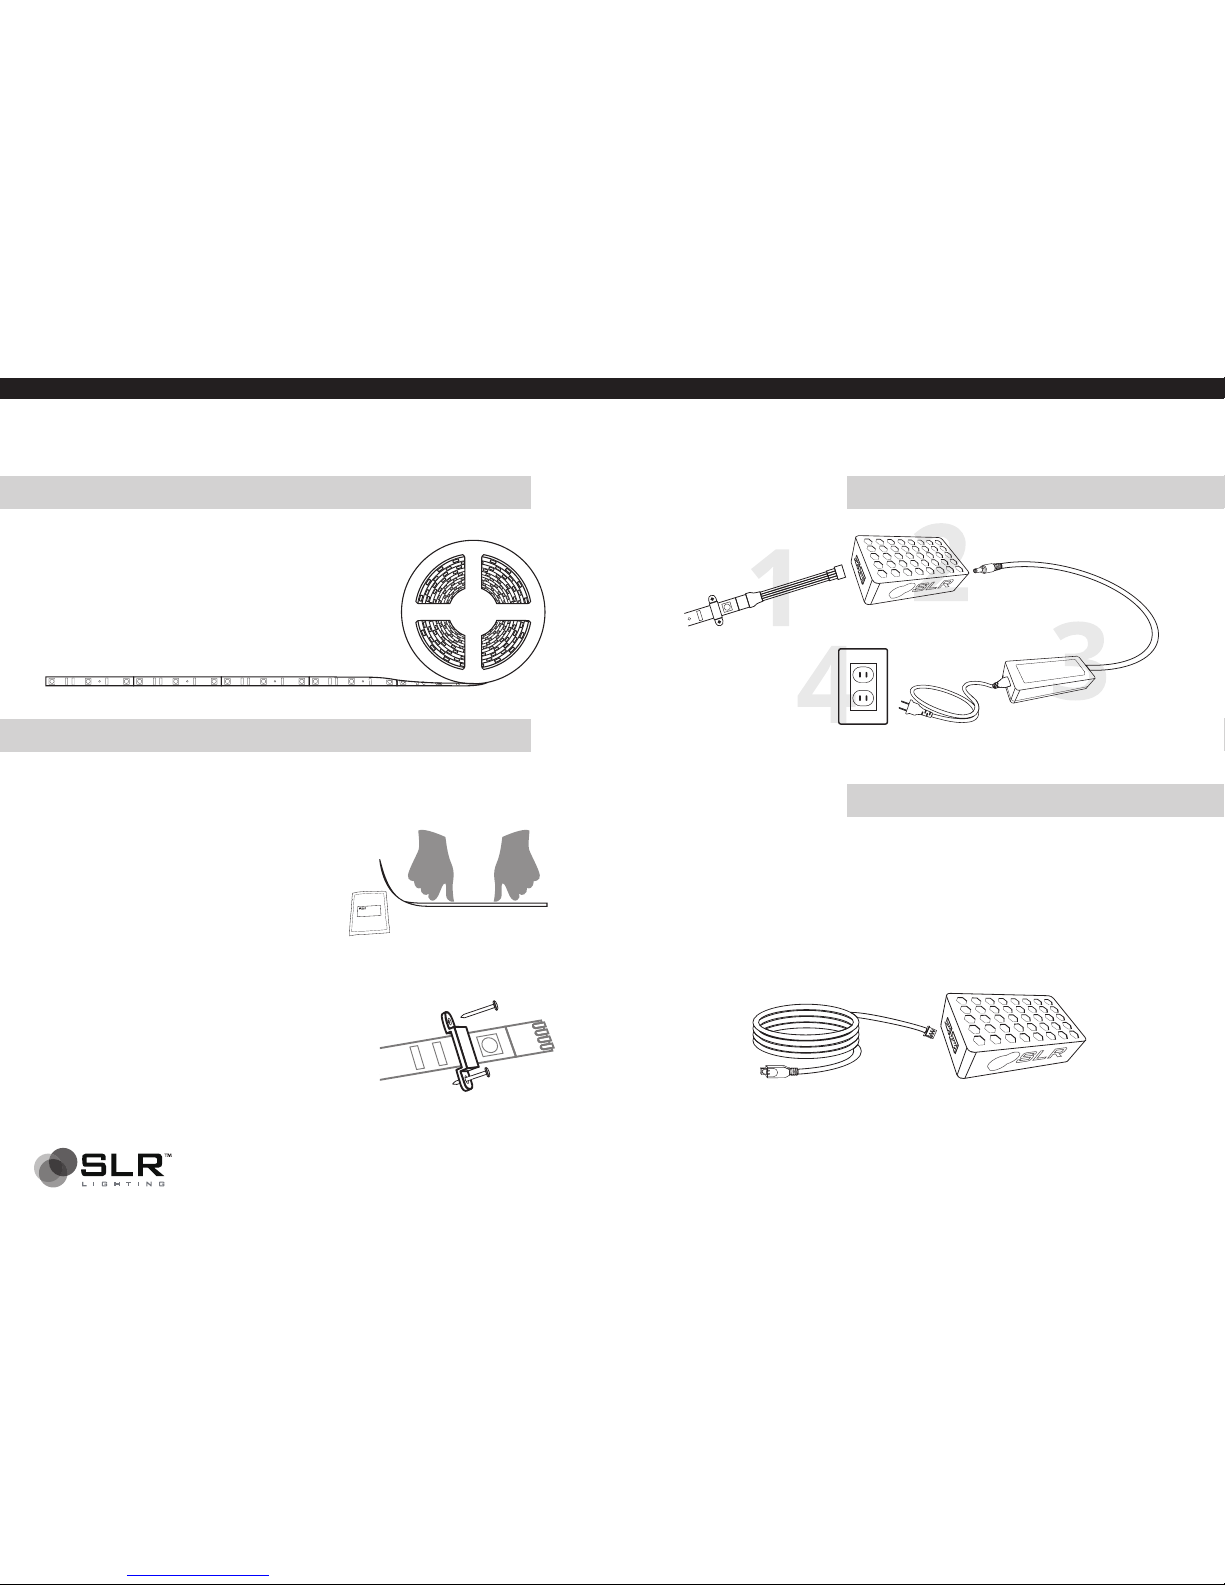
Connecting
IR Receiver Cable
IR Receiver Cable SLR-Box
Preparation
Mounting
Unroll SLR-Strips.
Test multiple lighting locations using masking
tape to hold SLR-Strips in place.
Clean surface for secure mounting and allow
time to dry.
Apply the SLR-Adhesive Booster onto the
mounting surface and allow time to fully dry.
1.
2.
3.
4.
1.
2.
3.
4.
1.
2.
3.
Peel off the tape backing to expose the
adhesive. Avoid touching the adhesive side of
the tape to ensure maximum bonding.
Lightly apply the SLR-Strips one section at a time
while carefully ensuring that there are no gaps
between the strip and the mounting surface.
Apply even pressure for about 10 seconds
complete the bonding between the strip and
mounting surface. Continue this process along
the full length of the SLR-Strip.
For mounting on wood or drywall surfaces, use
the SLR-Mounts to permanently secure the
SLR-Strips in place. This step is optional, but
recommended for cabinetry and outdoor usage.
Connect IR cable to the SLR-Box.
Run the IR cable to an open area that faces the
center of the room.
Use tape (not included) to secure the IR cable
receiver end so that it faces the center of the room.
The IR Receiver must have a direct line of sight of the
SLR-Controller to function properly.
SLR-Strip
SLR-Box
SLR-Power Adapter
Standard
Wall Outlet
SLR-Adhesive Booster
www.slrlighting.comFor assistance, contact: support@slrlighting.com
 Loading...