

Slope-dudes Midge Instruction Manual
Required Component to complete model:
1. 1mm or 1.5mm (1/16”) ply for wing sheer web
2. Ply wood or hard balsa to form wing joiner assembly
3. 6mm (¼”) Ply or hard Balsa for wing root
4. Wing joiner and tube for wing joiner
5. 3mm steel incident pegs for main wing or 3mm rear joiner and tube
6. 3mm (1/8”) ply for servo mount
7. 5mm (3/16”) balsa for Tail plane and Rudder and rudder post
8. Tail plane joiner and incident piano wire and tube
9. Control Horns / Clevises / 2mm threaded control rods / Push rod for Elevator/Tail plane / Small bore
snake and thin piano wire to suit for rudder control.
10. Diamond tape or similar for aileron hinge
11. Hinges for rudder (Mylar hinge used on prototype)
12. Optional 1.5mm Ply or plastic card for radio plate is required
13. Optional Epoxy + Micro balloons for facing wing trailing edge and aileron leading edge
14. RADIO:
Servos: Elevator / Rudder (HiTech 65MG)
Ailerons (Ripmax SD150)
Receiver
Battery (1500mAh) 2/3rd NiMH or similar
Battery Switch
(Above radio spec used on Prototypes)
Wing Preparation
When you receive your wings, they will be veneered either in wood veneer or glass cloth pressed directly
on to the foam panels. Aileron will have been cut out and the recess holes for the servos will have been
already cut.
To complete wing the following will need to be completed:
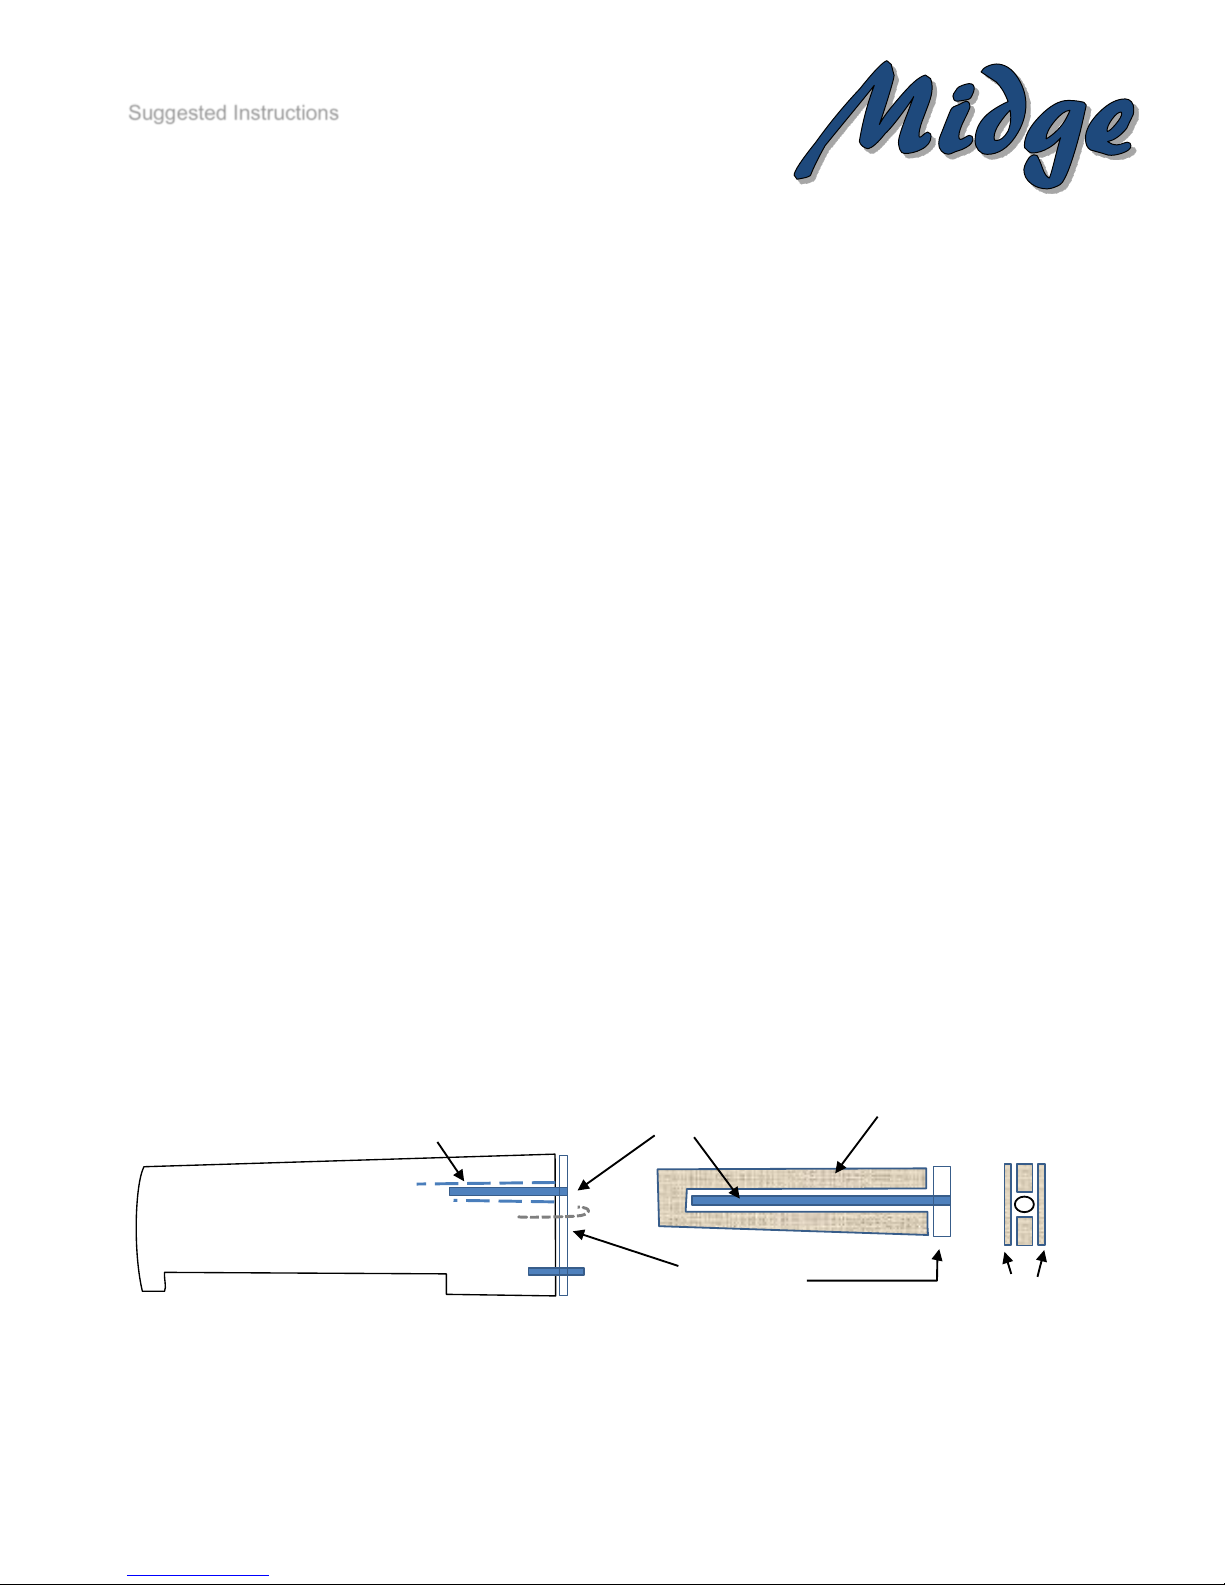
1. Install wing joiner.
2. Apply 1/4 ply reinforcement to wing root. – you will need to allow Main wing joiner and rear locating
joiner / peg to pass through. Additionally you will need to install a wire hook that passes through the
fuselage sides so a rubber bands can be used to keep wings together during use and allow for
dismantling.
Suggested Instructions
1/4” Ply or
Hard Balsa Wing Root
Brass tube to suite
wing joiner
Ply wood sheer web to reinforce
joiner assembly
Plywood / hard Balsa –
thickness to suit same thickness
of brass tube angle to achieve
5mm Dihedral under wingtip
Top
1mm or 1.5mm
ply shear web
3. Slightly hollow out the Face the mating surfaces of Trailing Edge of the wing and Leading Edge of
Aileron and fill with Epoxy and micro balloons. Alternatively, you could face with thin balsa, ply or
glass cloth.
4. Apply wood leading edge (Wood veneered wings only).
5. Cover wings (wood veneered) with chosen covering material.
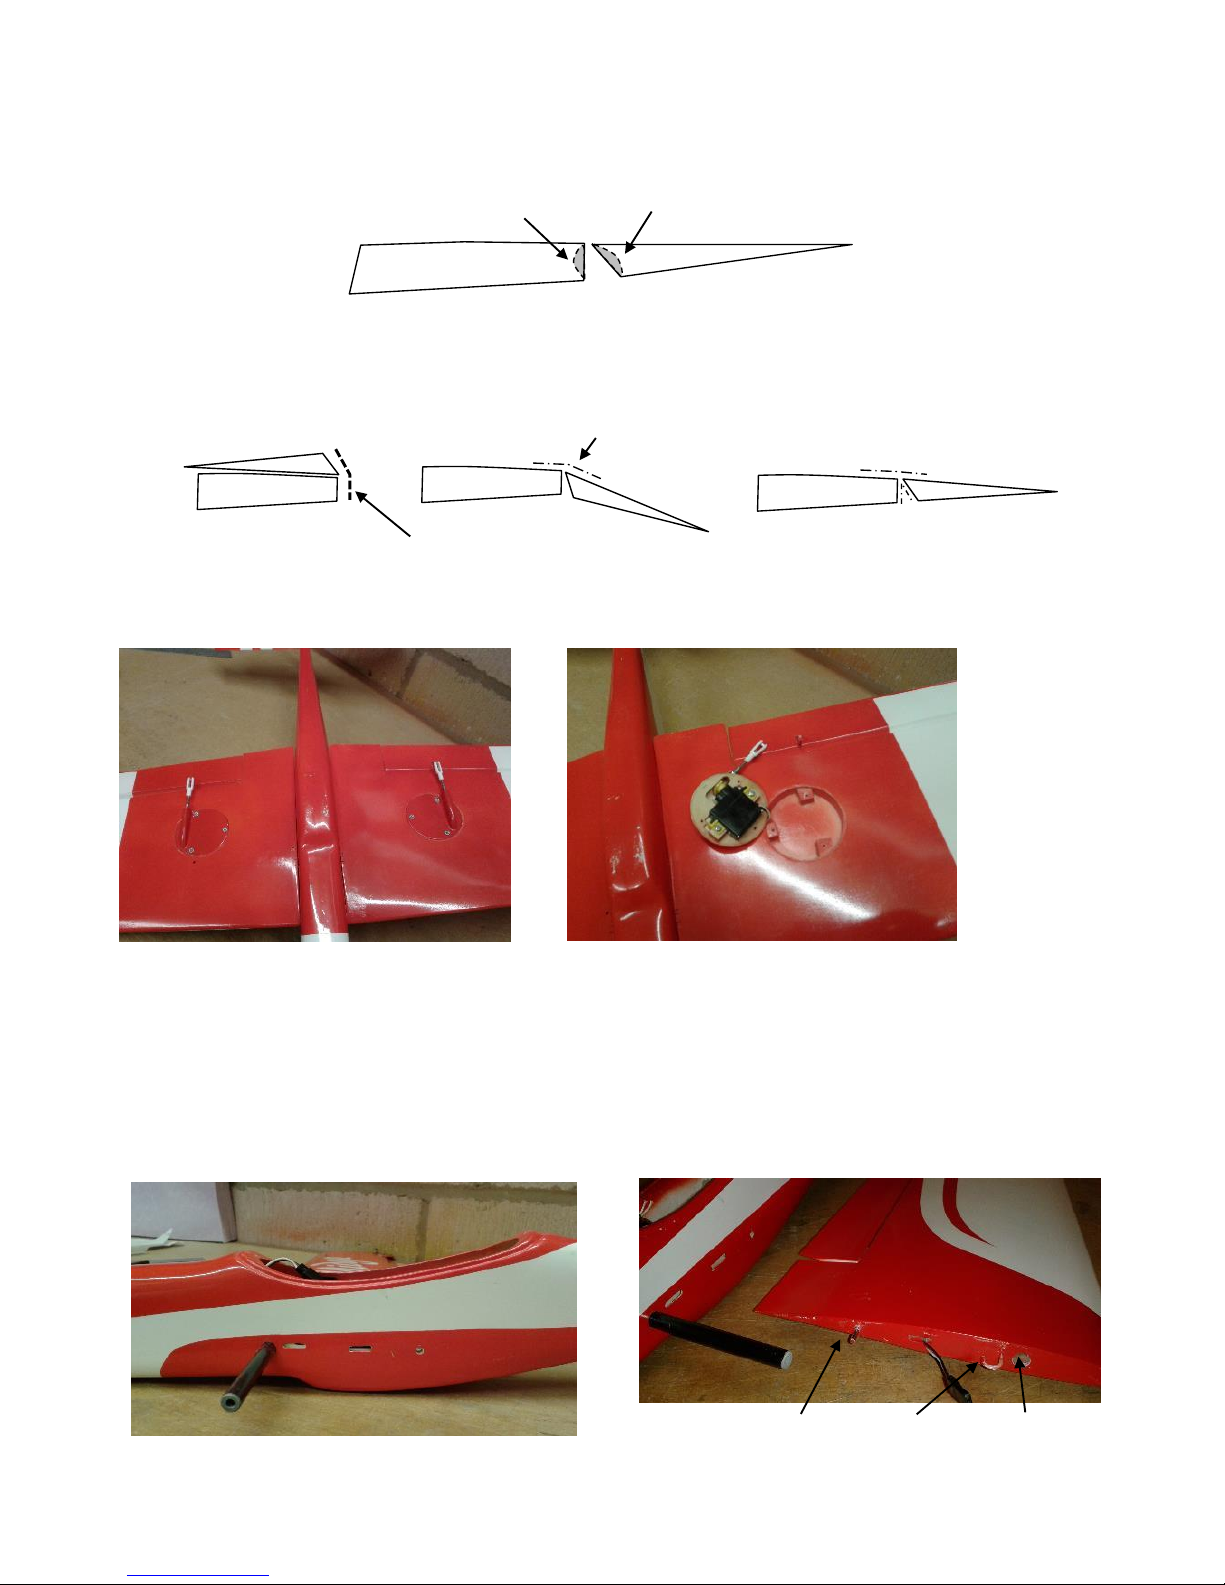
6. Attach aileron using Diamond tape or similar using top hinge technique.
7. Install Aileron Servos. And attach control horn to aileron.
8. Cover servo recess with suitable cover. Either epoxy sheet or plastic card or moulded fairing.
Fuselage
The Epoxy glass fuselage will need the following tasks to complete.
1. Some filling minor imperfections in the gel coat and fuselage join may be required and rubbing
down with 600 grade wet and dry paper in readiness for paint finish.
2. Drill Holes and install brass / aluminium joiner tube to match main wing joiners.
Diamond Tape Hinge
Diamond Tape Hinge
Epoxy & micro balloon.
Aileron
Wing
Rear incident pin Hook Joiner tube
 Loading...