

Page 1
e-Reader
ER701
Digital Editions
eBookstore
Page 2

Contents
Page
2. Contents
3. In the box
4. Location of controls
5. Basic operation
7. Installing the Kobo Desktop App
11. Purchasing & syncing eBooks
16. Reading eBooks
23. Home screen (Library)
25. Favorites
27. Bookmarks
29. Transferring media les
30. Video
32. Music
34. Photo
36. File explorer
38. Settings
39. Legal information
40. Limited Warranty
2/41
Page 3
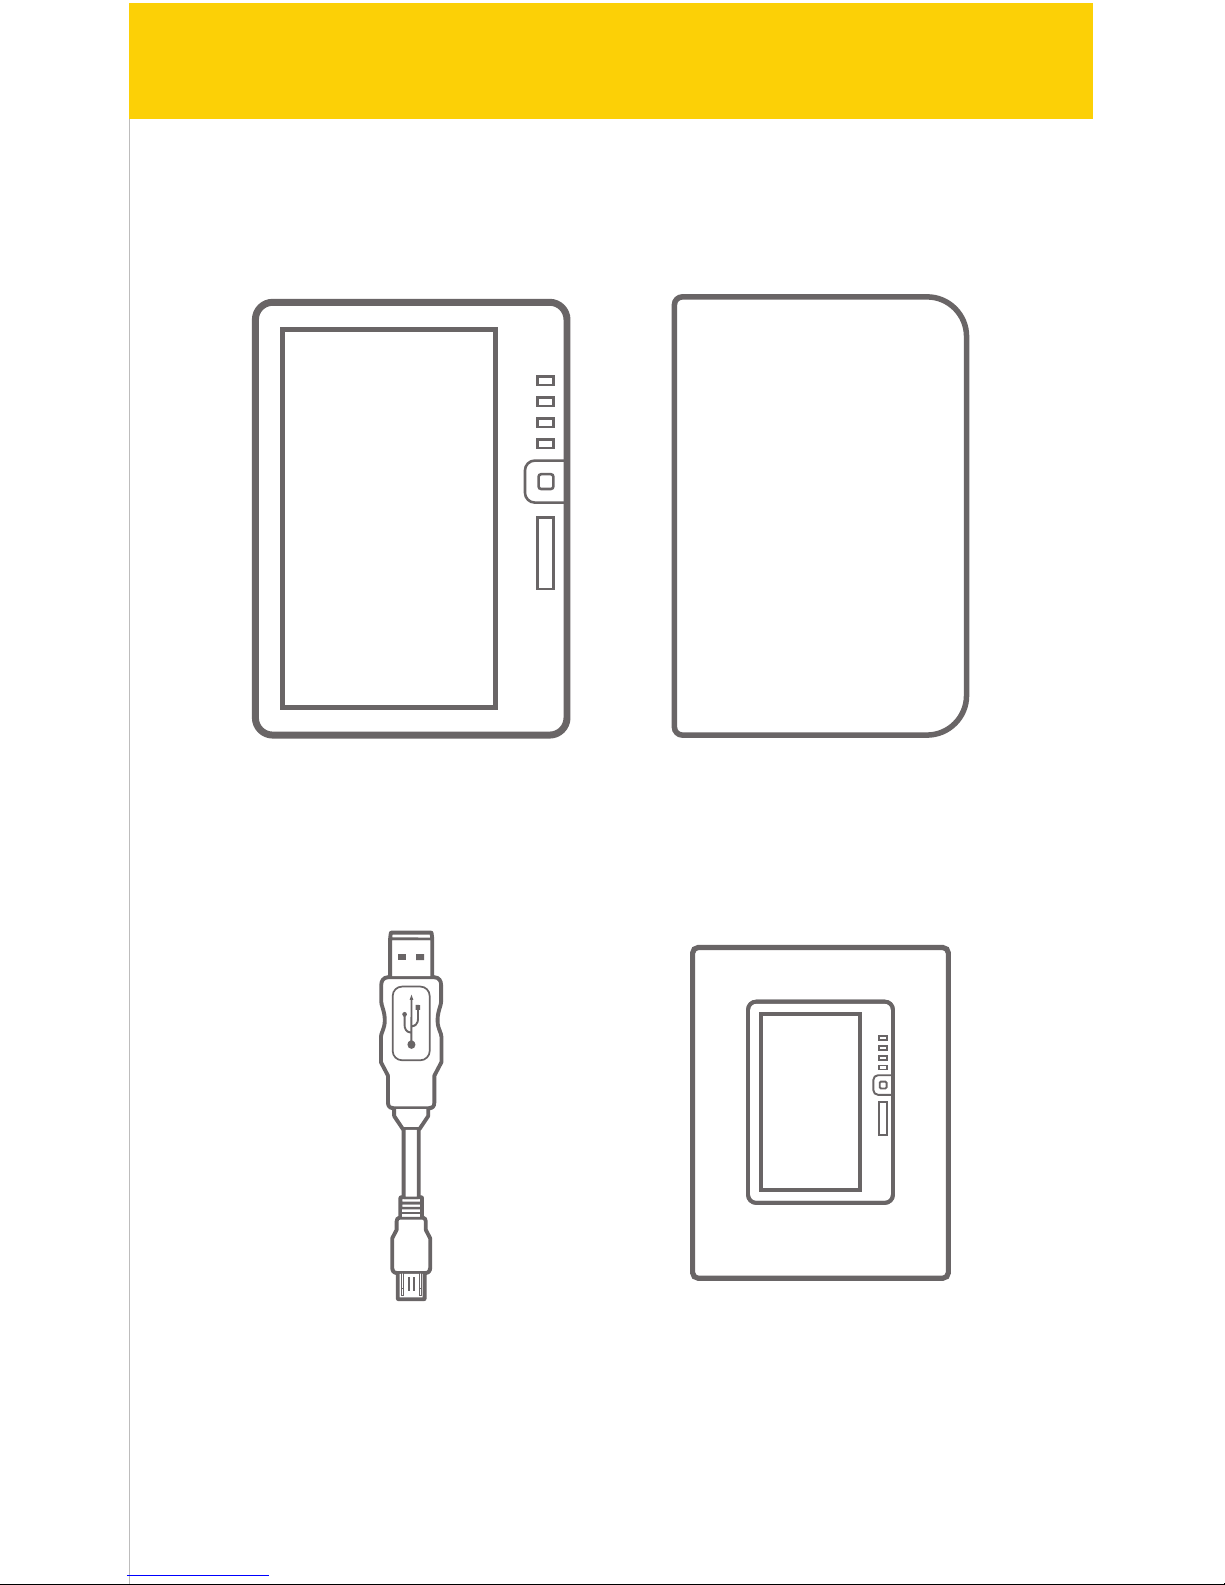
User Guide
Casee-Reader
USB Cable
User Guide
In the box
3/41
Page 4

1.
3.
2.
4.
12.
13.
5.
6.
7.
8.
11.9.10.
Location of controls
1. 7" color display
2. Headphone jack
3. [MENU] : Displays the function menu for each mode
4. [TEXT ZOOM] : Text zoom option
5. [PLAY/PAUSE] : Play/pause audio
6. [RETURN] : Return to previous screen
7. [OK] : Conrm the selection
8. [ARROW KEYS] : Multi-functional key
9. [PREVIOUS/NEXT PAGE] : Go to previous/next page
10. Charging indicator
11. [
�
] : Power on/o
12. Mini USB port
13. Micro SD card slot
Menu button:
The [MENU] button opens the menu options for the dierent modes of the
e-Reader. Library, Reading, Music, Video, Photos, etc. all have their own
unique menus that can be accessed by pressing the [MENU] button.
4/41
Page 5

PC
USB cable
e-Reader
Basic operation
Charging the battery:
Connect the e-Reader to the computer using the included USB cable ( mini
USB port of the e-Reader to USB port of the computer).
While charging, the indicator light is red, it will turn blue after it is fully charged
(6-8 hours).
Turning on or o:
Make sure the e-Reader is fully charged before turning it on.
Press and hold [�] until the Home screen appears or the e-Reader shuts down.
Briey press [�] for standby mode (the display will shut but the device will still
be powered on - this will conserve battery time).
5/41
Charging indicator
Note: For faster charging, use the optional AC adaptor (see included
accessories order form).
Page 6
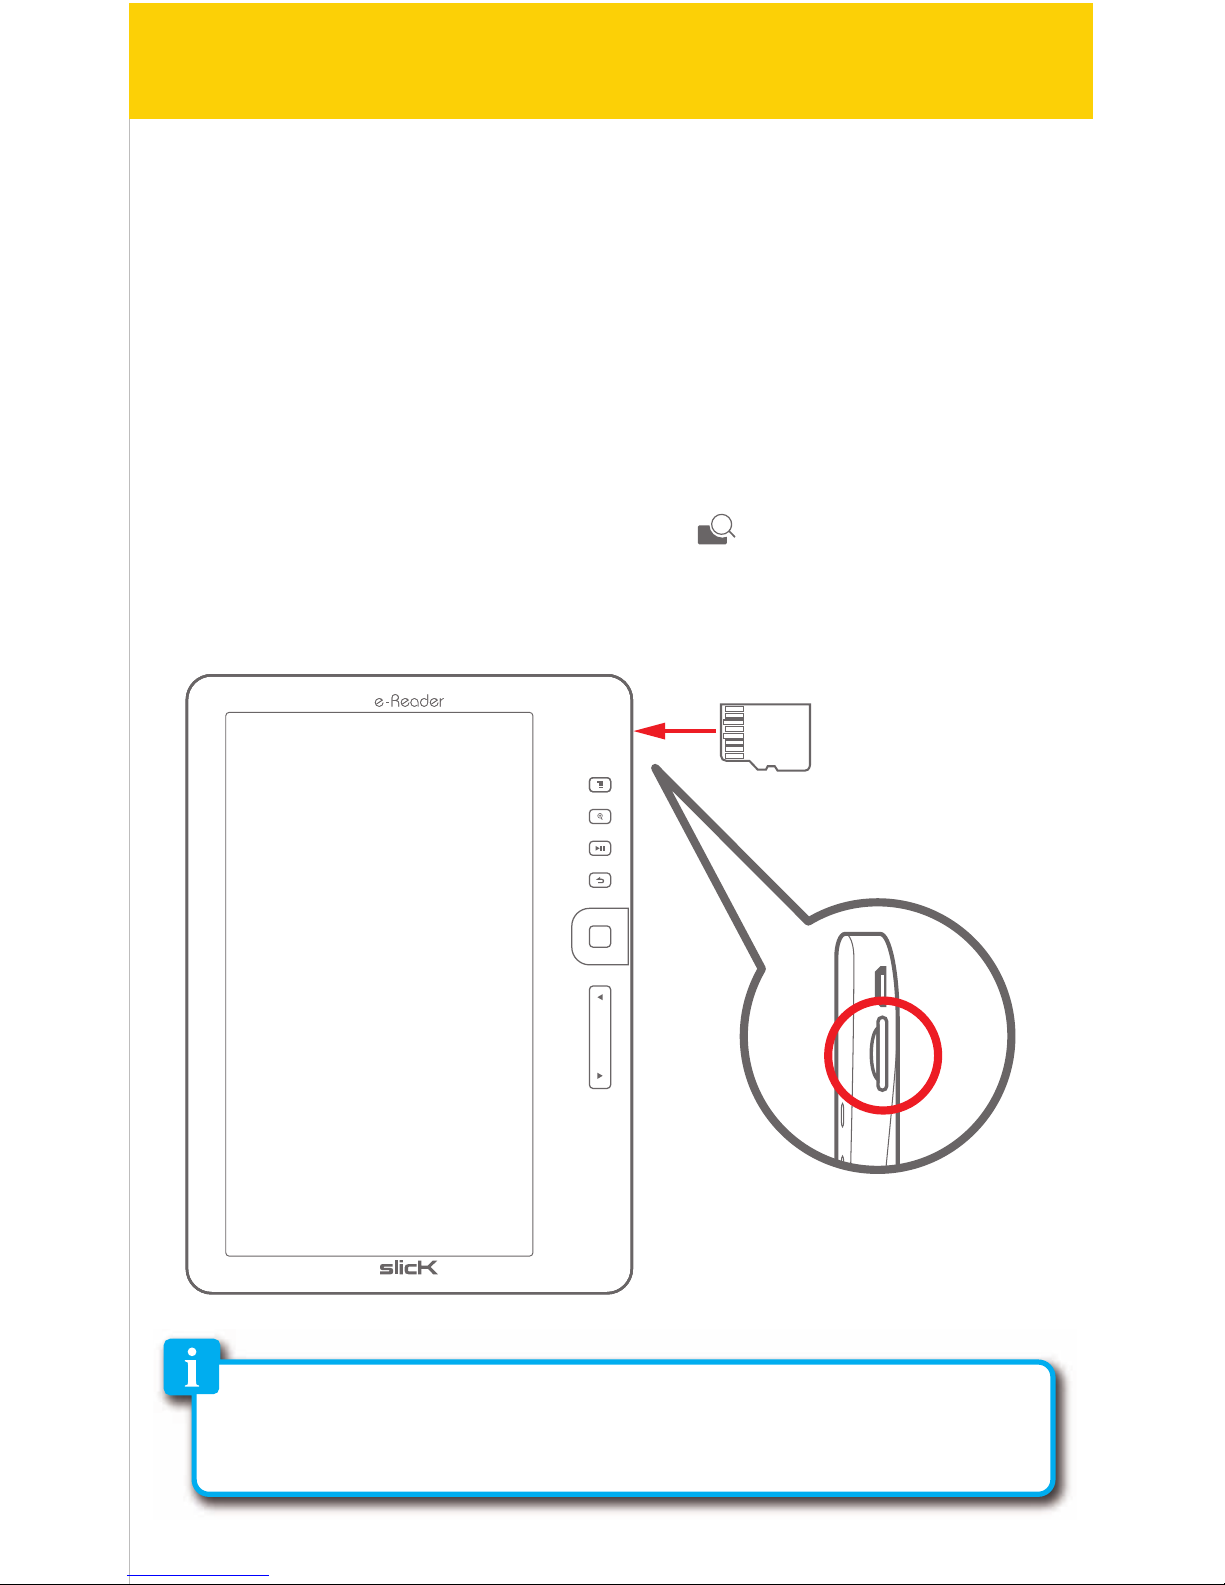
Inserting the Micro SD card (not included):
The e-Reader includes 2GB internal memory. To expand the memory capacity,
use Micro SD cards to save eBooks, audio, video and picture les.
To install the Micro SD card into the e-Reader, follow the steps below:
1. Turn o the e-Reader.
2. Insert the Micro SD card (metal contacts facing up as shown) into the card
slot until it clicks and locks into place.
3. To remove the card, gently push it in until it pops out.
To access the Micro SD card, select “File Explorer” in the Home screen menu.
Micro SD card
• A card can only be inserted one way; do not use force when inserting the card.
• Inserting or removing a card while the e-Reader is on may damage the card,
les stored on the card, or the e-Reader.
6/41
Page 7
PC
USB cable
e-Reader
Installing the Kobo Desktop App
The Kobo Desktop App is a great place to buy the latest books and bestsellers or
browse from over 1 million free titles. Once an account is created (setting up the
account is free), it is easy to purchase, download and sync books to the e-Reader.
Follow the instructions below to install the Kobo Desktop App on your computer.
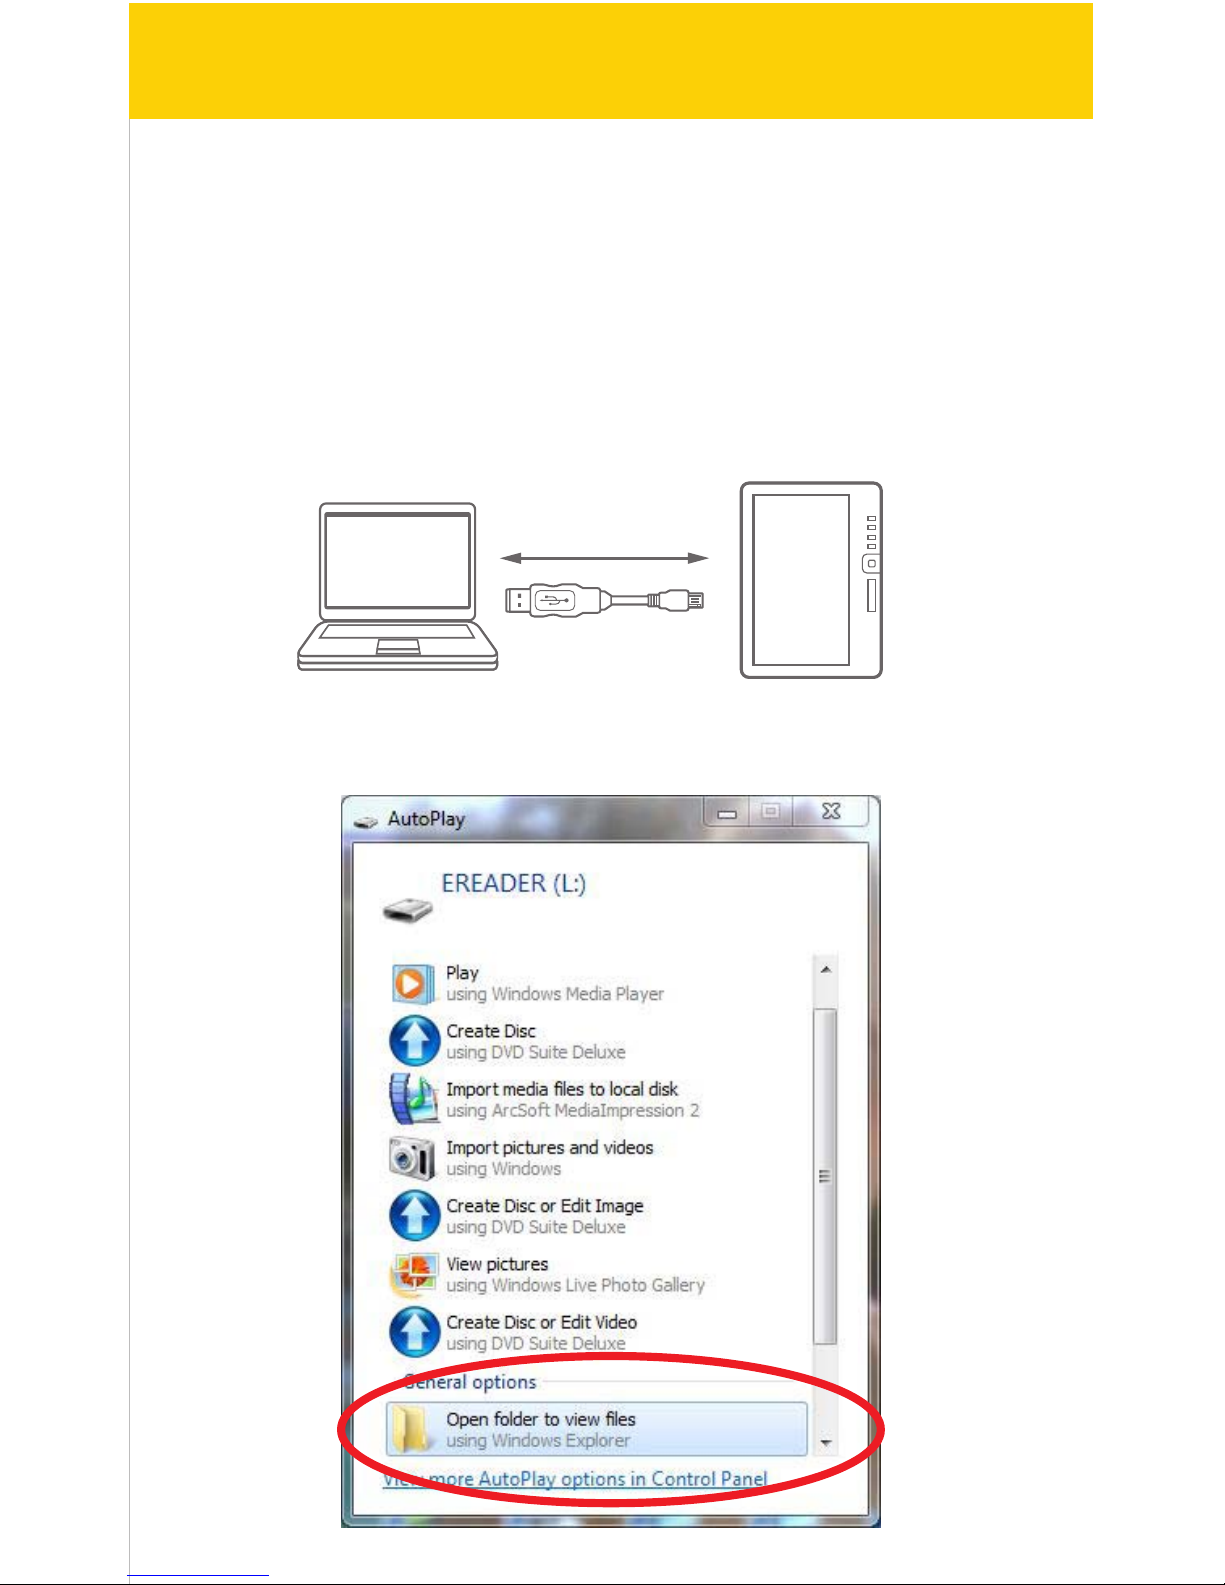
1. Make sure the computer is connected to the internet to download and use
the Kobo Desktop App.
2. Connect the e-Reader to the computer using the included USB cable.
3. In the window that pops up, click on “Open folder to view les”
7/41
Page 8
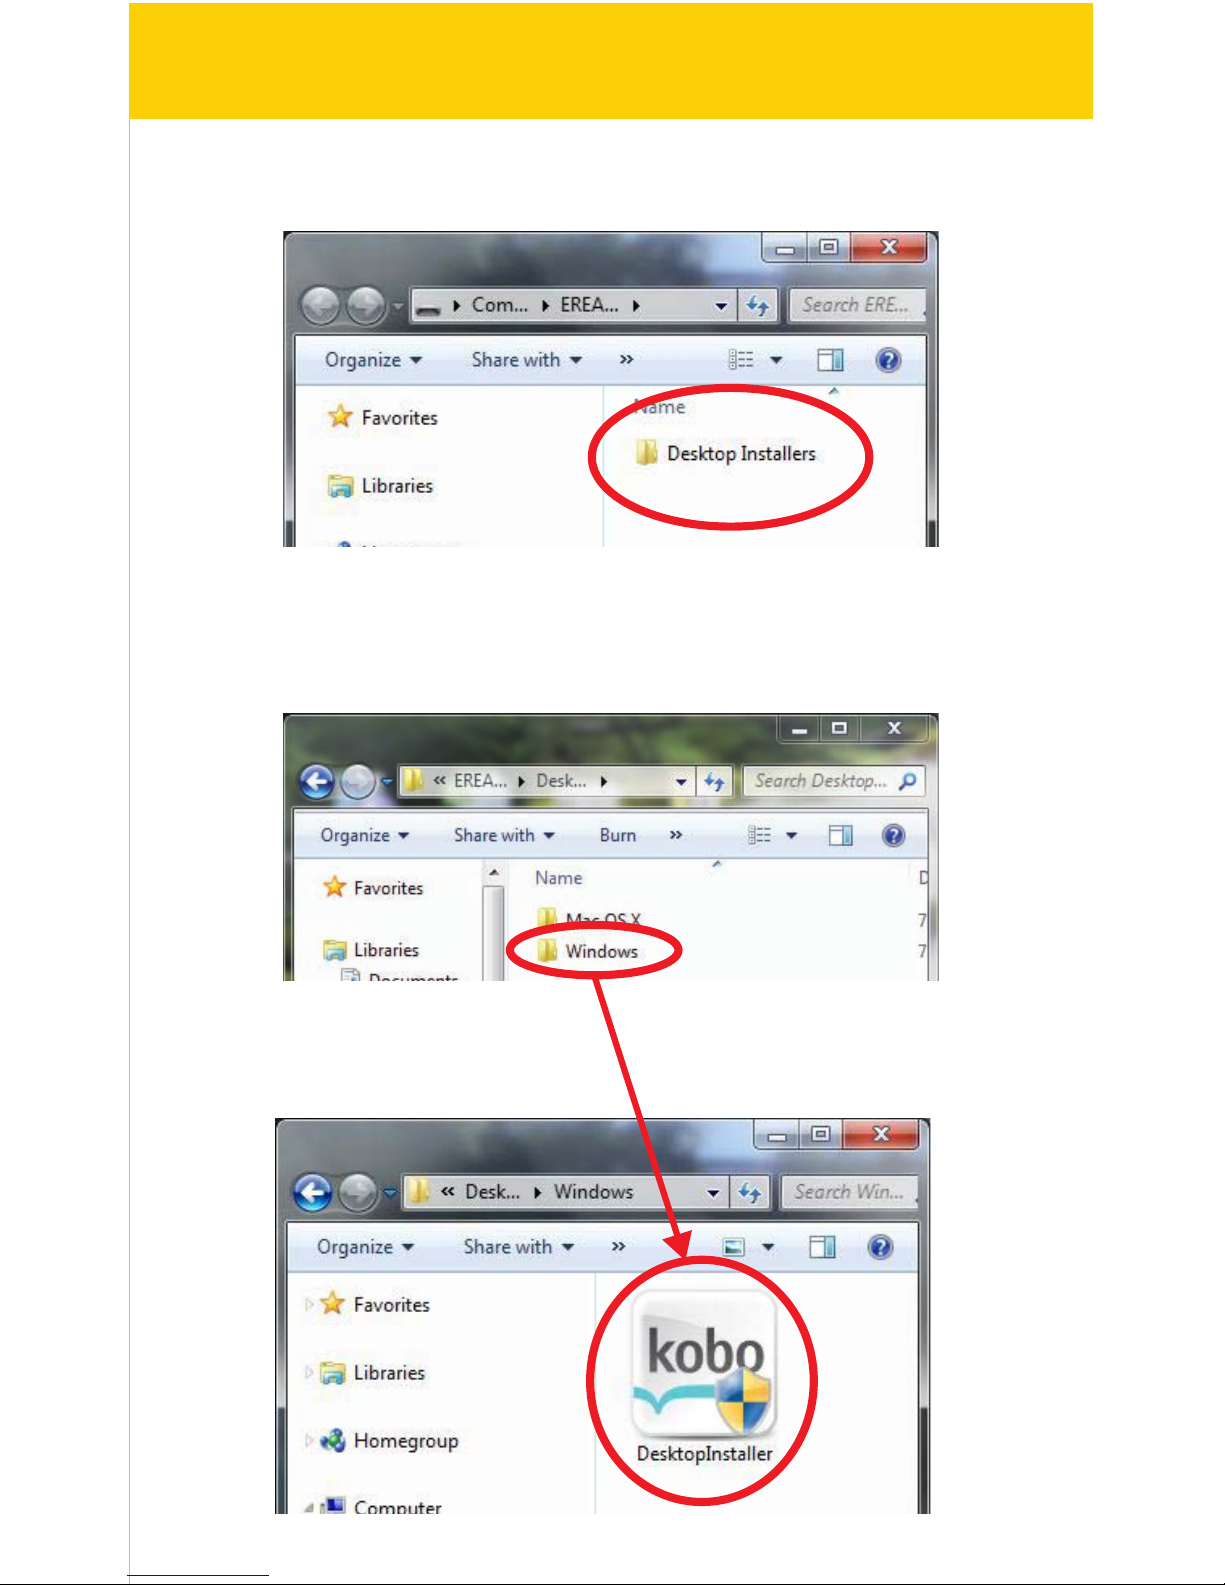
4. Click on “Desktop Installers”
5. Select either “Windows”, or “Mac OS X” depending on which computer you
are using, and double click the “DesktopInstaller” icon to launch the installer.
8/41
Page 9
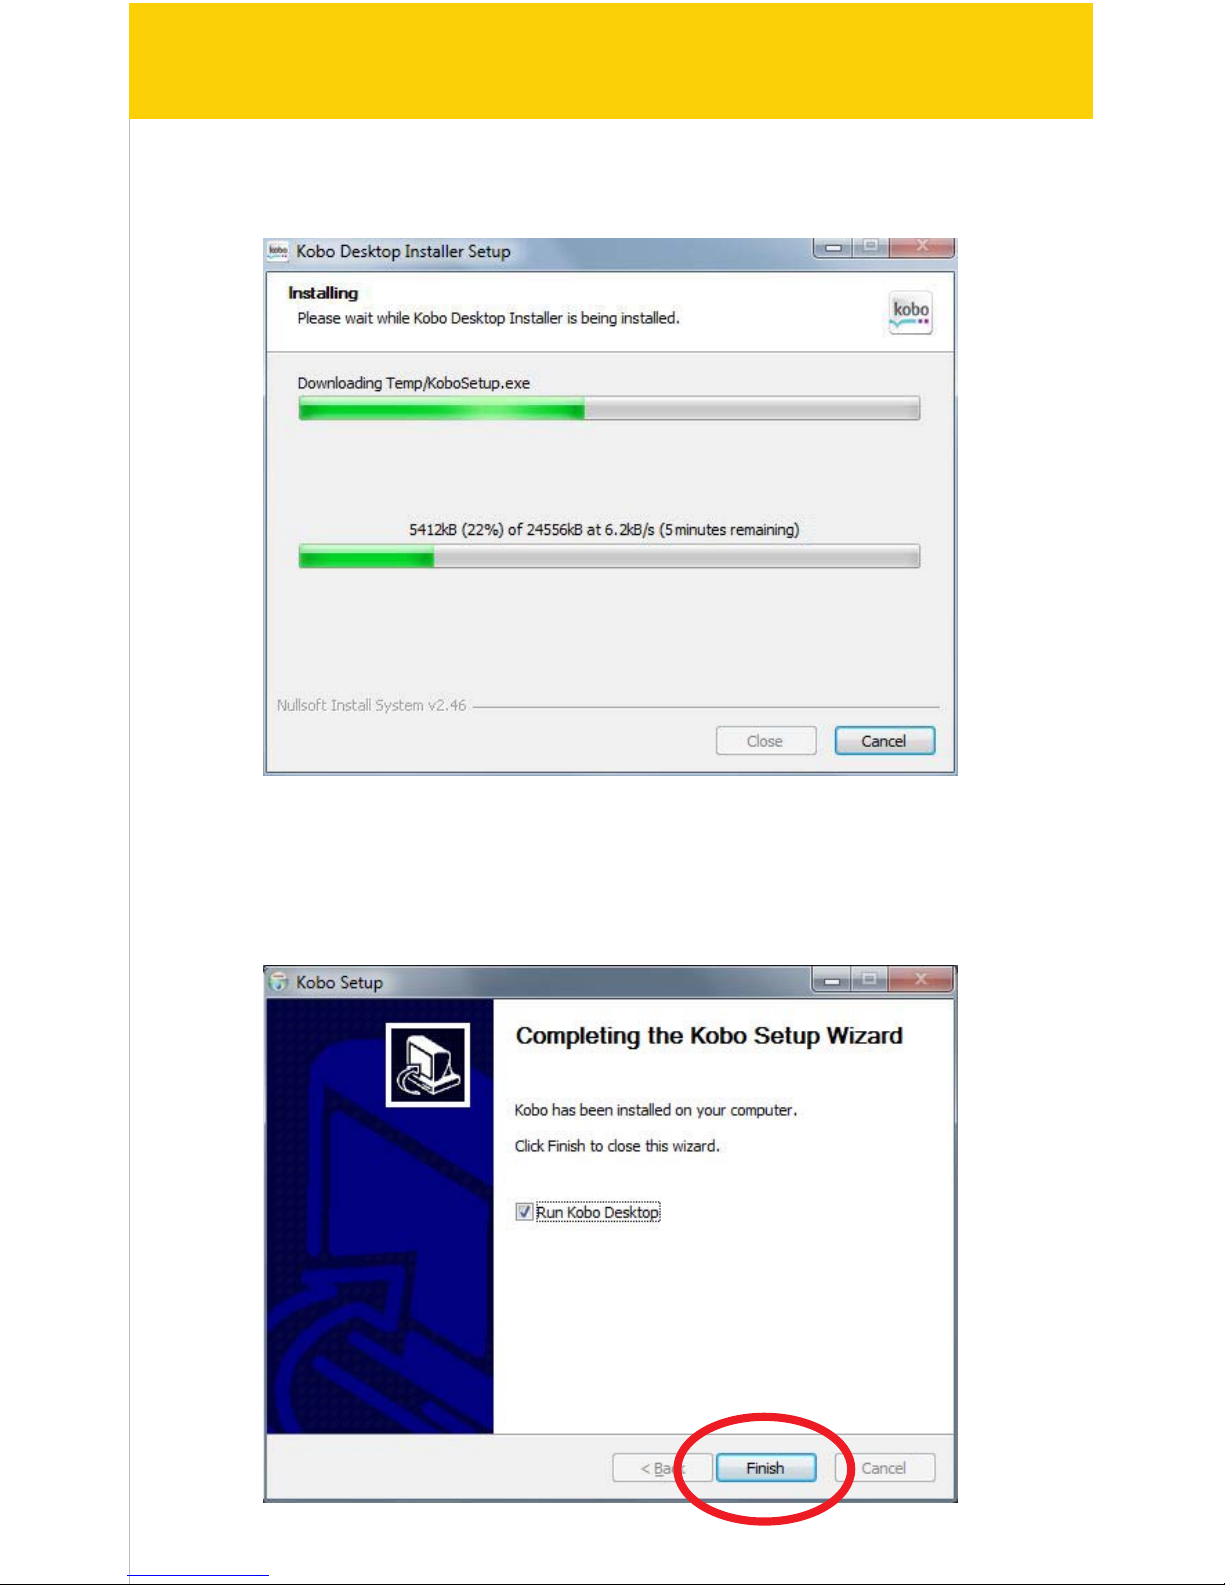
6. Follow the setup wizard to install the app.
7. Click “Finish” to complete the installation.
9/41
Page 10
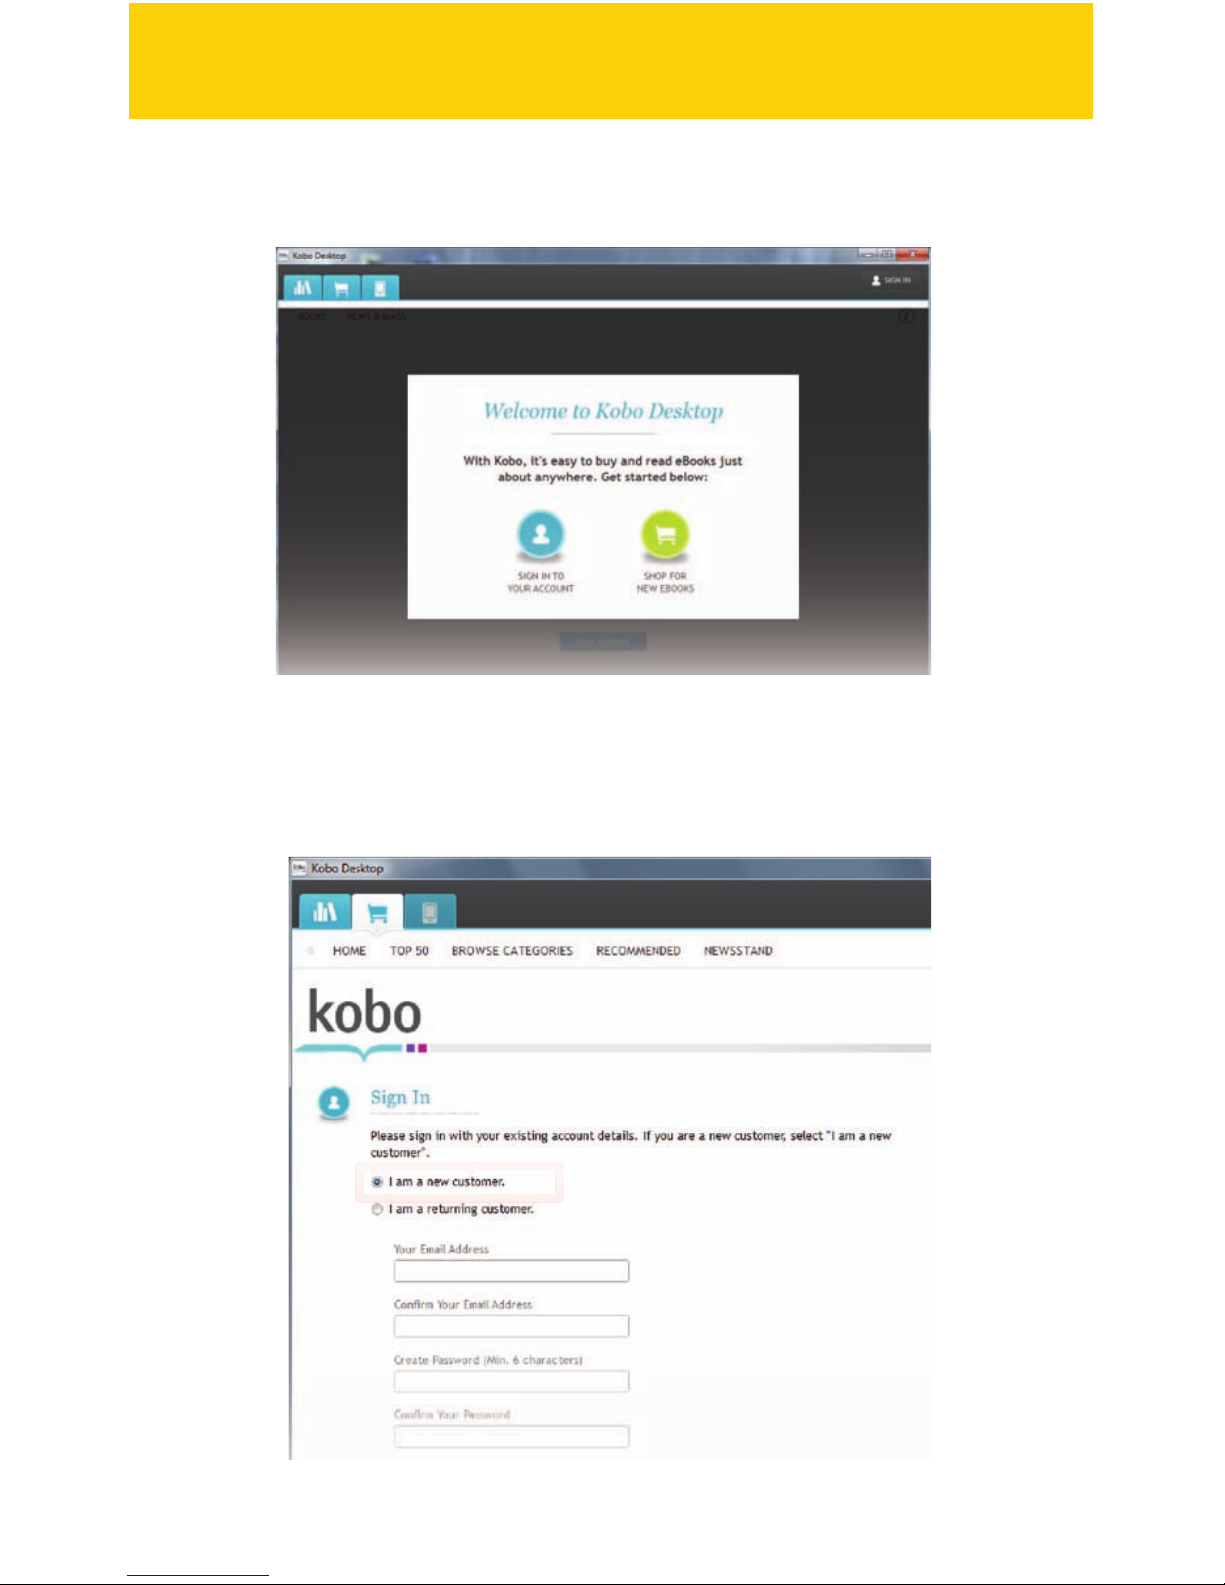
8. The screen below appears after the setup is completed, click “Sign in to your
account”.
9. If this is your rst time trying to connect to the Kobo store, select “I am a new
customer” and create an account (It’s free).
10/41
Page 11
Store
Purchasing & syncing eBooks
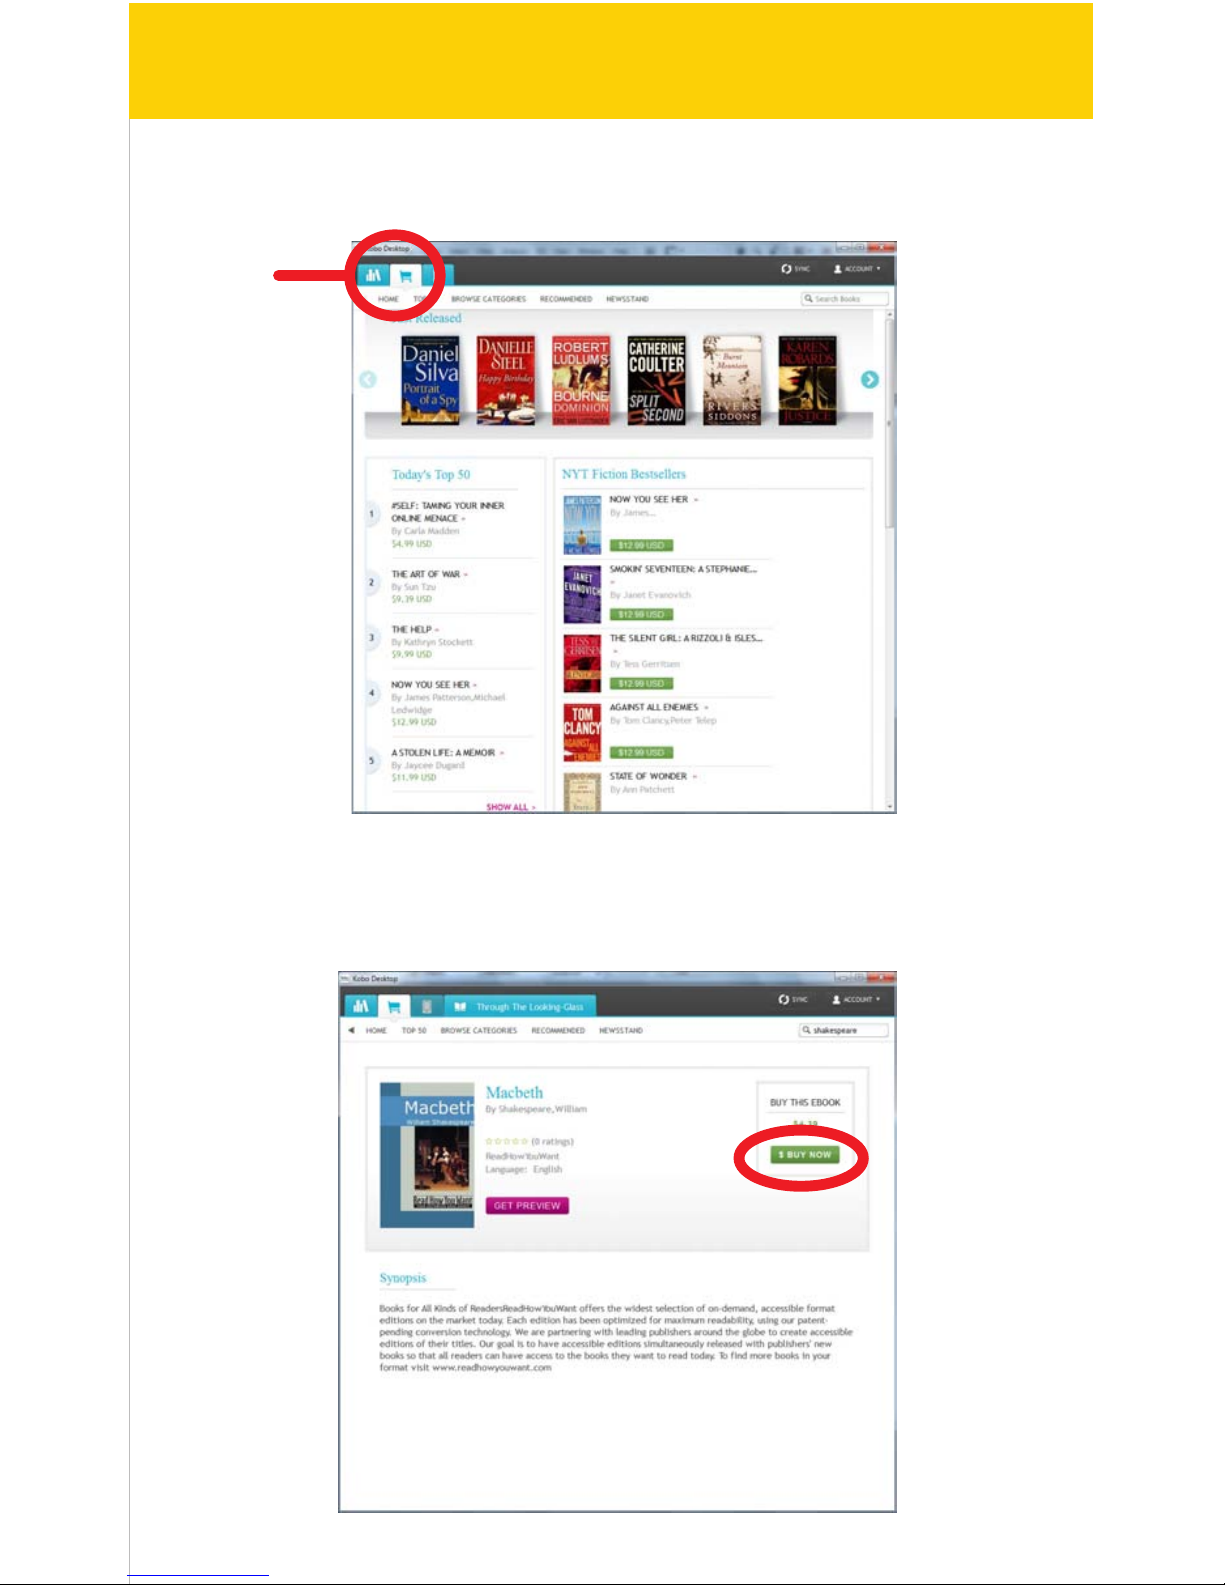
1. In the store, browse and select the eBook you are interested in.
2. Click the “Buy Now” button.
11/41
Page 12
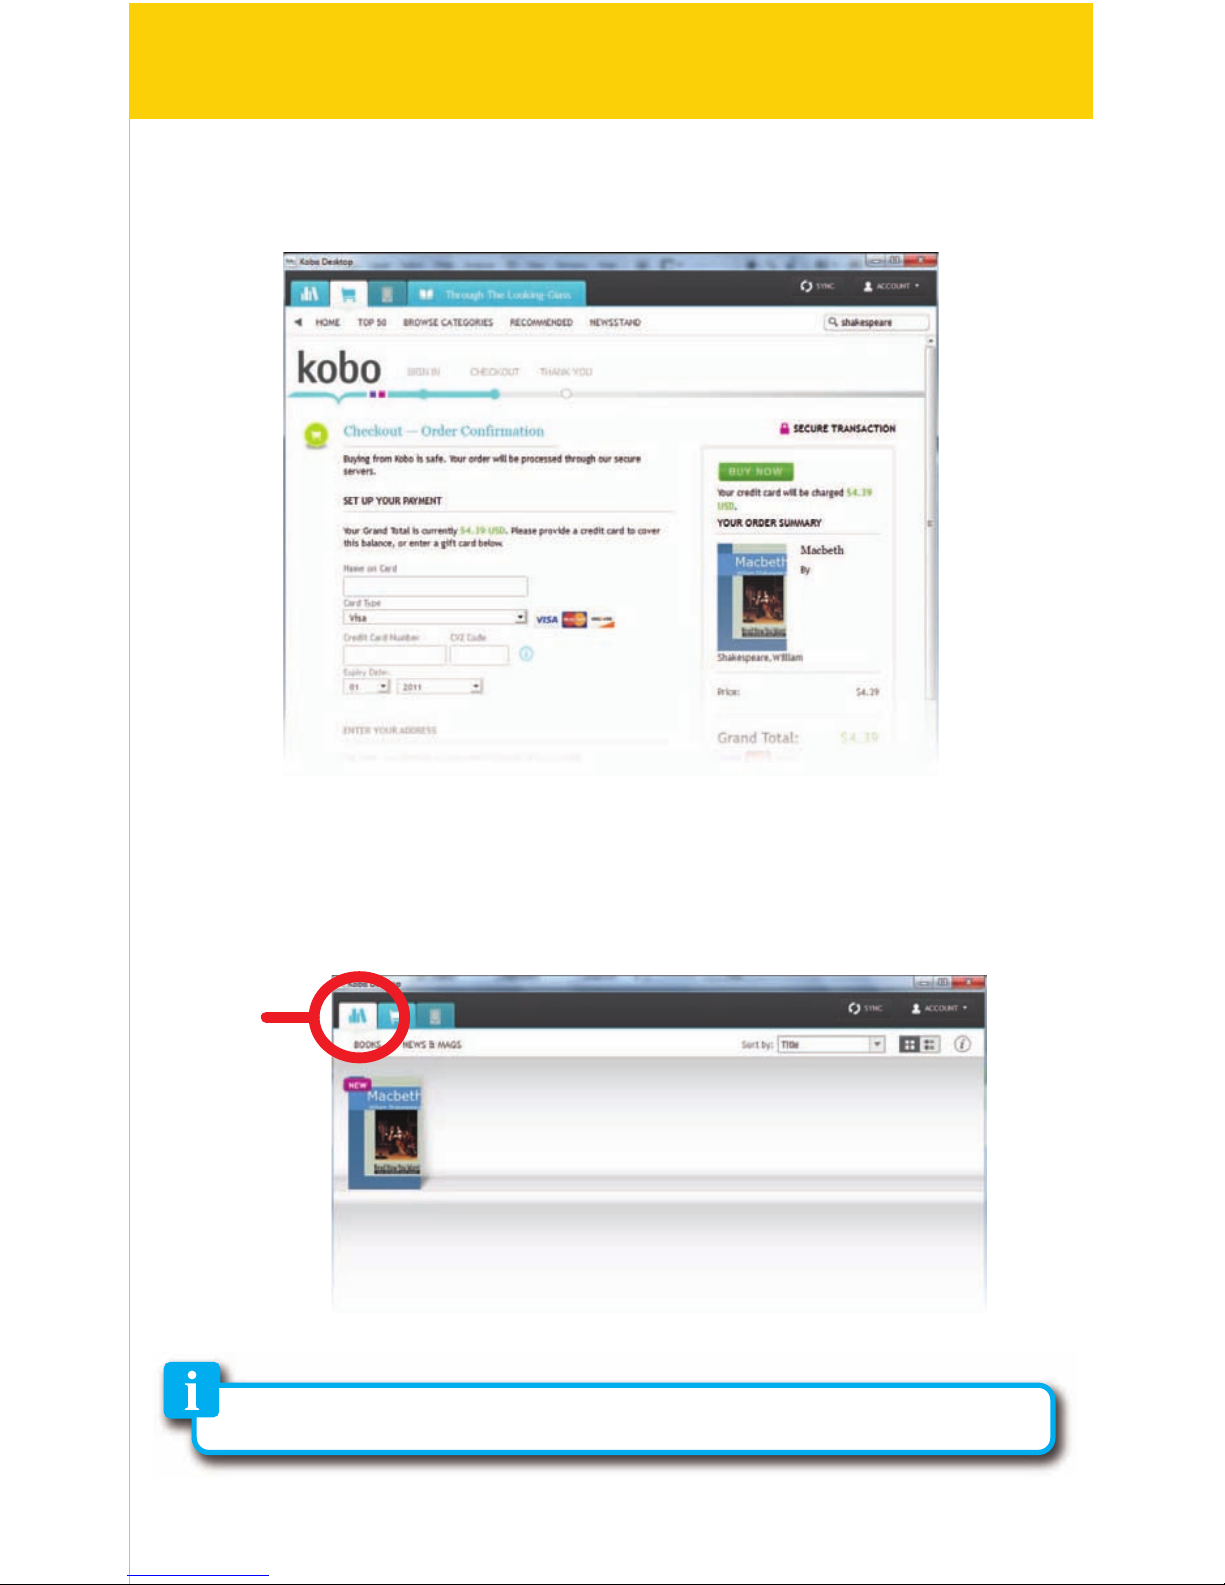
3. Fill out the billing information and check out.
4. The purchased item will be downloaded shortly and saved in your Library.
Click on the “Library” tab to access all the downloaded eBooks.
12/41
Library
Page 13
“Get online”
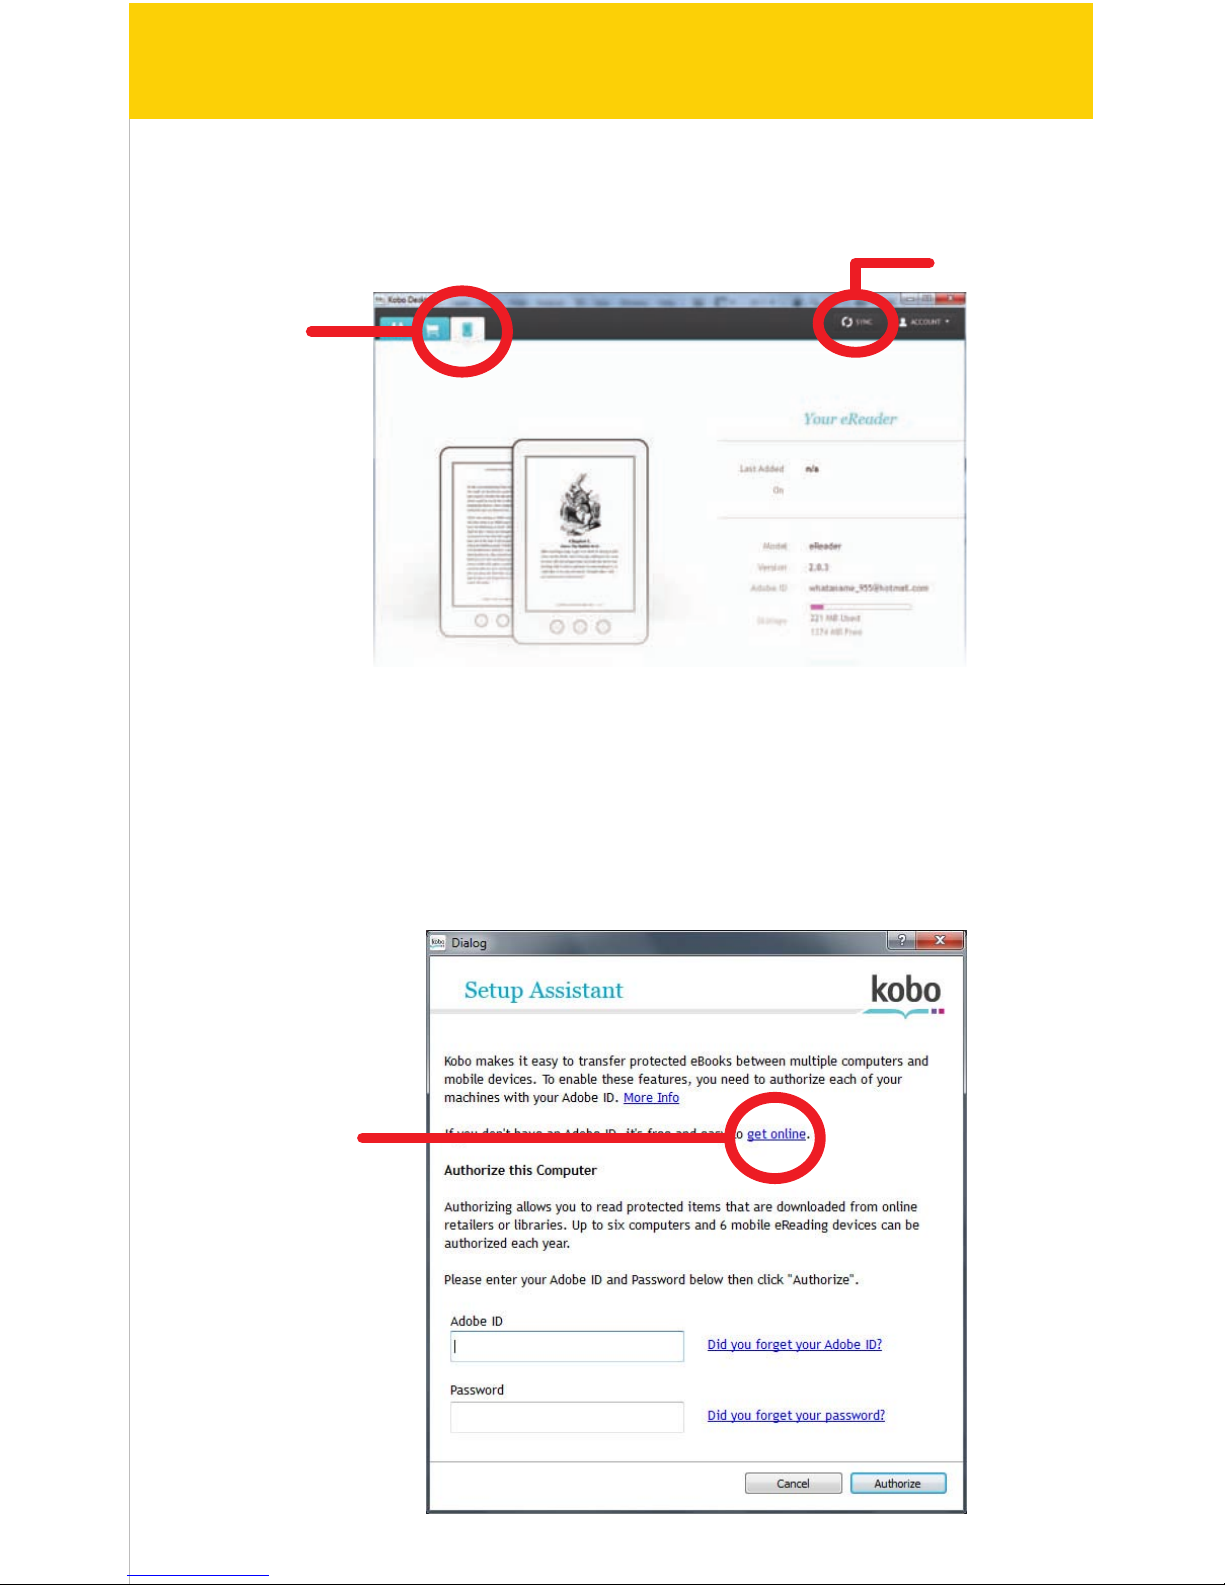
5. Connect the e-Reader to the computer, and click on the “e-Reader” tab. Click
the “Sync” button to copy the books in your Library to the e-Reader.
6. When syncing eBooks to the e-Reader for the rst time, the following screen
appears. You will be asked to enter your Adobe ID to transfer protected eBooks
between computers and mobile devices.
If you need to create a new Adobe ID account, click “Get online” on the
Setup Assistant page.
13/41
e-Reader
Sync
Page 14

7. Follow the instructions to create an Adobe ID which will authorize your
computer to transfer books to the e-Reader.
8. The eBooks in your Library will be copied to the e-Reader.
Certain eBooks (depending on the le type or format) may not be able to
transfer to the e-Reader, in this case a pop up window will appear while
syncing the e-Reader which will alert you regarding this issue (these eBooks
may still be downloaded, synced and read on the Kobo Desktop App).
14/41
Page 15

9. When the sync is completed, click eject before disconnecting the e-Reader
from the computer.
For more information regarding the Kobo Desktop App, please visit:
www.kobo.com/help
To avoid the syncing process, stay logged-in to your Kobo account.
15/41
Page 16

Continue Reading
Library
2/3
Grimms' Fairy Tales.epub
The Brothers Grimm
Last read
02:44 07/03/2011
Page
1
The Art of War.epub
Sun Tzu
EPUB
White Fang.txt
Jack London
INT
TXT
A Tale of Two Cities.pdf
Charles Dickens
INT
PDF
Adventures of Huckleberry.epub
Mark Twain
INT EPUB
The Scarlet Letter.txt
Nathaniel Hawthorne
INT
TXT
Twenty Thousand Leagues.pdf
Jules Verne
Dracula.epub
Bram Stoker
EPUB
[PREVIOUS/NEXT]
skip to previous/next
page of the Library
[ARROW KEYS]
Move the selector
[OK]
Select
Reading eBooks
Books stored on the e-Reader can be accessed from one of the below options
on the Home screen:
• Continue Reading: Book you are currently reading
• Library: All books stored on the e-Reader
[ARROW KEYS] [] or [] to move the selector.
[PREVIOUS/NEXT] [] or [] to skip to the previous or next page of the
Library.
Press [OK] to start reading the book.
OK
Home screen
Library page indicator
16/41
Page 17

Adventures of Huckleberry Finn.epub
2/3
Tom he made a sign to me--kind of a little
noise with his mouth--and we went creeping
away on our hands and knees. When we was
ten foot off Tom whispered to me, and
wanted to tie Jim to the tree for fun. But I said
no; he might wake and make a disturbance,
and then they’d find out I wasn't in. Then Tom
said he hadn’t got candles enough, and he
would slip in the kitchen and get some more. I
didn’t want him to try. I said Jim might wake
up and come. But Tom wanted to rest it; so we
slid in there and got three candles, and Tom
laid five cents on the table for pay. Then we
got out, and I was in a sweat to get away; but
nothing would do Tom but he must crawl to
where Jim was, on his hands and knees, and
play something on him. I waited, and it seemed
a good while, everything was so still and
lonesome.
As soon as Tom was back we cut along the
path, around the garden fence, and by and by
fetched up on the steep top of the hill the
other side of the house. Tom said he slipped
Jim’s hat off of his head and hung it on a limb
right over him, and Jim stirred a little, but
didn’t wake.
[ARROW KEYS]
Go to previous/next page
[RETURN KEY]
Return to previous screen
[MENU]
Displays Reading menu
[TEXT ZOOM]
Change text size
[PLAY/PAUSE]
Play/pause music while
reading
[PREVIOUS/NEXT PAGE]
Go to previous/next page
Use [ARROW KEYS] [], [], or [PREVIOUS/NEXT] [] to go to
the next page.
Use [ARROW KEYS] [], [], or [PREVIOUS/NEXT] [] to go to
the previous page.
To return to the Library, press the button.
Reading screen
17/41
Page 18

Add
bookmark
Bookmarks
Go to page
Music
Auto flip
Book
information
Rotate
Display
settings
Add to
favorites
Return
Add bookmark: Select to add a bookmark of the current
page.
Bookmarks: Displays all the stored bookmarks
Go to page: Jump to your desired page
Music: Play music while reading
Auto ip: Set up the time for the auto ip pages feature
Book information: Review the details of the current book
Rotate: Switch the orientation of the display
Display settings: Change the font color, background color
and brightness
Add to favorites: Add current book to the favorites list
Return: Exit the Reading menu
Reading menu
Reading menu:
Press while reading a book and the Reading menu opens.
[ARROW KEYS] [] or [] to select an option from the menu.
Press [OK] to enter the option.
OK
18/41
Page 19

Go to page
Apply Cancel
0 10000
Add bookmark: Press [OK] to add the current page to bookmarks
Bookmarks: Use [ARROW KEYS] [] or [] to select a bookmark,
and press [OK].
Go to page: Use [ARROW KEYS] [], [], [] or [] to input
the page number you want to jump to, then select “Apply”
and press [OK].
OK
OK
19/41
Bookmark ListBookmark List
BookmarksBookmarks
Grimms' Fairy Tales.epub
The Brothers Grimm
Last read
02:44 07/03/2011
Page
15
Page 4:
Only give exact copies of it. Among other thin
Page 5:
her feet, for it flashed across her mind that she had
Page 15:
Page 20

Adventures of Huckleberry Finn.epub
2/3
Tom he made a sign to me--kind of a little
noise with his mouth--and we went creeping
away on our hands and knees. When we was
ten foot off Tom whispered to me, and
wanted to tie Jim to the tree for fun. But I said
no; he might wake and make a disturbance,
and then they’d find out I wasn't in. Then Tom
said he hadn’t got candles enough, and he
would slip in the kitchen and get some more. I
didn’t want him to try. I said Jim might wake
up and come. But Tom wanted to rest it; so we
slid in there and got three candles, and Tom
laid five cents on the table for pay. Then we
got out, and I was in a sweat to get away; but
nothing would do Tom but he must crawl to
where Jim was, on his hands and knees, and
play something on him. I waited, and it seemed
a good while, everything was so still and
lonesome.
As soon as Tom was back we cut along the
path, around the garden fence, and by and by
feteched up on the steep top of the hill the
other side of the house. Tom said he slipped
Jim’s hat off of his head and hung it on a limb
right over him, and Jim stirred a little, but
didn’t wake.
00:00:36 00:01:28
Samba No Congo
30
Music: play/pause music while reading ( plug in headphones to the
headphone jack of the e-Reader).
Auto ip: Use [ARROW KEYS] [] or [] to select "Disabled" or
select from the auto ip time options and press [OK] - the pages
of the book will auto ip accordingly.
OK
20/41
Page 21

Favorite
Favorites
1/1
Grimms' Fairy Tales.epub
The Brothers Grimm
Grimms’ Fairy Tales.epub
The Brothers Grimm
INT EPUB
The Art of War.epub
Sun Tzu
INT
EPUB
The Scarlet Letter.txt
Nathaniel Hawthorne
INT TXT
A Tale of Two Cities.pdf
Charles Dickens
INT PDF
Adventures of Huckleberry.epub
Mark Twain
INT EPUB
Add to favorites: Press [OK] to add the current book to the favorites list.
Favorites screen
21/41
Page 22

Remove favorites: This option will appear when the current book is already
on the favorites list, select [OK] to delete the book
from Favorites.
To access all the books stored to Favorites, press while on the Home
screen and select "Favorites" from the Home screen menu.
It is recommended to add new books to “Favorites”!!
Books are stored and sorted by either: title,author,category, date and format.
To easily nd new books that have been downloaded, it is recommendedto
add them to the Favorites list where they can easily be found until you have
nished reading them.
22/41
Page 23

Continue Reading
Library
2/3
Grimms' Fairy Tales.epub
The Brothers Grimm
Last read
02:44 07/03/2011
Page
1
The Art of War.epub
Sun Tzu
INT
EPUB
White Fang.txt
Jack London
INT
TXT
A Tale of Two Cities.pdf
Charles Dickens
INT PDF
Adventures of Huckleberry.epub
Mark Twain
INT EPUB
The Scarlet Letter.txt
Nathaniel Hawthorne
INT
TXT
Twenty Thousand Leagues.pdf
Jules Verne
INT PDF
Dracula.epub
Bram Stoker
INT
EPUB
[MENU]
Displays Home screen
menu
[PREVIOUS/NEXT]
skip to previous/next
page of the Library
[ARROW KEYS]
Move the selector
[OK]
Select
Home screen (Library)
The Home screen is the Library where all the stored books are available to browse
from. In the Library, several books are displayed on the Library page (the current
book is shown on top).
[ARROW KEYS] [] or [] to move the selector.
[PREVIOUS/NEXT] [] or [] to skip to the previous or next page of
the Library.
To nd books stored on the e-Reader select the "Sort by" or "Favorites" options
on the Home screen menu (these features are explained in more detail in the
next section "Home screen menu").
OK
Home screen
Library page indicator
23/41
Page 24

Sort by
Favorites
Bookmarks
Brightness
Return
File Explorer
Photo
Settings
Music
Video
Sort by: Change the order of the Library by title,
author, category, date, or format
Favorites: Browse the stored favorite books
Bookmarks: Browse bookmarks you made
Brightness: Change the brightness of the screen
Video: Play video
Music: Play music
Photo: See photos/slideshow
File Explorer: Browse, copy & paste, delete stored les
Settings: Change the settings of the device
Return: Return to the previous screen
Home screen menu
Home screen menu:
Press while on the Home screen and the Home screen menu opens.
For more information regarding Video, Music, Photo, File Explorer, and
Settings see the reverse side of the user guide.
24/41
Page 25

Favorites
Press while on the Home screen, and select “Favorites”.
[ARROW KEYS] [] or [] to select a book from the Favorites list.
[PREVIOUS/NEXT] [] or [] to skip to the previous or next page of the
Favorites list.
Press [OK] to start reading the book.
OK
Sort by
Favorites
Bookmarks
Brightness
Return
File Explorer
Photo
Settings
Music
Video
Favorite
Favorites
1/1
Grimms' Fairy Tales.epub
The Brothers Grimm
Grimms’ Fairy Tales.epub
The Brothers Grimm
INT EPUB
The Art of War.epub
Sun Tzu
INT
EPUB
The Scarlet Letter.txt
Nathaniel Hawthorne
INT TXT
A Tale of Two Cities.pdf
Charles Dickens
INT PDF
Adventures of Huckleberry.epub
Mark Twain
INT EPUB
Favorites screen
25/41
Page 26

Favorite
Favorites
1/1
Grimms' Fairy Tales.epub
The Brothers Grimm
Grimms’ Fairy Tales.epub
The Brothers Grimm
INT EPUB
The Art of War.epub
Sun Tzu
INT
EPUB
The Scarlet Letter.txt
Nathaniel Hawthorne
INT TXT
A Tale of Two Cities.pdf
Charles Dickens
INT PDF
Adventures of Huckleberry.epub
Mark Twain
INT EPUB
The Brothers Grimm
The Brothers Grimm
The Art of War.epub
Sun Tzu
The Scarlet Letter.txt
TXT
A Tale of Two Cities.pdf
Adventures of Huckleberry.epub
Sort by title
Delete
Return
Favorites menu:
Press to open the Favorites menu.
Sort by title: Change the order of the Favorites list by alphabetical order
Delete: Delete books from the Favorites list
Press to exit the Favorites menu.
26/41
Page 27

Bookmark
Bookmarks
Grimms' Fairy Tales.epub
The Brothers Grimm
Last read
02:44 07/03/2011
Page
15
Grimms’ Fairy Tales.epub
The Brothers Grimm
INT EPUB
A Tale of Two Cities.pdf
Charles Dickens
INT PDF
Adventures of Huckleberry.epub
Mark Twain
INT EPUB
Bookmarks
Press while on the Home screen, and select “Bookmarks”.
[ARROW KEYS] [] or [] to select a bookmark.
[PREVIOUS/NEXT] [] or [] to skip to the previous or next page of the
Bookmarks list.
Press [OK] to start reading the book.
OK
Bookmarks screen
Sort by
Favorites
Bookmarks
Brightness
Return
File Explorer
Photo
Settings
Music
Video
27/41
Page 28

Bookmark
Bookmarks
Grimms' Fairy Tales.epub
The Brothers Grimm
Last read
02:44 07/03/2011
Page
15
Grimms’ Fairy Tales.epub
The Brothers Grimm
INT EPUB
A Tale of Two Cities.pdf
Charles Dickens
INT PDF
Adventures of Huckleberry.epub
Mark Twain
INT EPUB
The Brothers Grimm
The Brothers Grimm
A Tale of Two Cities.pdf
Adventures of Huckleberry.epub
Delete
Return
Bookmarks menu:
Press to open the Bookmarks menu.
Delete: Delete a bookmark
Press to exit the Bookmarks menu.
28/41
Page 29

PC
USB cable
e-Reader
2. Click “E-READER” on the computer.
3. Drag and drop to copy book, audio, video and picture les to the e-Reader as
shown above.
To transfer and store multimedia les to the e-Reader, connect it to the computer
using the included USB cable.
1. Find and select book, music, picture, or video les from multimedia folders
on the computer.
s
Page 30

Video
1/1
Iron Man 2 - Trailer 2.mov
INT MOV
Final Fantasy - Trailer.avi
INT
AVI
The Day After Tomorrow - Trailer.avi
INT AVI
Sort by
Favorites
Bookmarks
Brightness
Return
File Explorer
Photo
Settings
Music
Video
Video
Press while on the Home screen, and select “Video”.
[ARROW KEYS] [] or [] to select a video from the video list.
[PREVIOUS/NEXT] [] or [] to skip to the previous or next page of the
video list.
Press [OK] to play the video.
Press to return to the Home screen.
OK
Video list screen
30/41
Page 31

The Day After Tomorrow - Trailer.avi
00:00:49 00:02:48
30
Loop
Full screen
Brightness
Return
• Play/pause:
Press [OK] to play or pause a video.
• Rewind/forward:
Press & hold [ARROW KEYS] [] or [] to rewind or forward a video.
• Previous/next:
Press [ARROW KEYS] [] or [] to go to the previous or next video.
• Volume up/down:
Press [ARROW KEYS] [] or [] to adjust the volume.
Press to return to the previous screen.
Video menu:
Press to open the Video menu during playback.
Press to exit the Video menu.
Video playback screen
31/41
Page 32

Now Playing
1/23 Pop 30
00:00:36 00:01:28
Samba No Congo
Deodato
Sort by
Favorites
Bookmarks
Brightness
Return
File Explorer
Photo
Settings
Music
Video
Music
Press while on the Home screen, and select “Music”.
• Play/pause:
Press [OK] or to play or pause the track.
• Rewind/forward:
Press & hold [ARROW KEYS] [] or [] to rewind or forward the track.
• Previous/next:
Press [ARROW KEYS] [] or [] to go to the previous or next track.
• Volume up/down:
Press [ARROW KEYS] [] or [] to adjust the volume.
Press to return to the Home screen.
Music screen
32/41
Page 33

Now Playing
1/23 Pop 30
00:00:36 00:01:28
Samba No Congo
Deodato
Pop
Loop
All
A
Z
Return
Update
media
Genre
Album
Artist
Music menu:
Press to open the Music menu during playback.
Press to exit the Music menu.
Play/pause button:
Press the [PLAY/PAUSE] button while reading a book to listen to music.
33/41
Page 34

Sort by
Favorites
Bookmarks
Brightness
Return
File Explorer
Photo
Settings
Music
Video
Preview
Photo
1/2
audio
33685KB
Photo-color
93297KB
video
93297KB
book
3008KB
paris.jpg
209KB
flowers.jpg
209KB
ocean.jpg
209KB
INT
INT
INT
INT
INT
JPG
JPG
INT
JPG
INT
JPG
paris.jpg
720*480
209kb
Photo
Press while on the Home screen, and select “Photo”.
[ARROW KEYS] [] or [] to select a picture le, and press [OK].
Press to return to the Home screen.
OK
34/41
Page 35

station.jpg
sunset.jpg
Slideshow
Information
Thumbnail
Rotate
Return
Photo menu:
Press to open the Photo menu.
Thumbnail: Enable to switch the display to the thumbnail view.
Press to exit the Photo menu.
35/41
Page 36

File explorer
Press while on the Home screen, and select “File Explorer”.
1. Use [ARROW KEYS] [] or [] to select between the internal (INT)
and external (SD) memory, and press [OK].
2. Use [ARROW KEYS] [] or [] to select a le and press [OK].
OK
OK
File Explorer
1/2
audio
33685KB
Photo-color
93297KB
video
93297KB
book
3008KB
Track02.mp3
197KB
Track01.mp3
173KB
snowboarding.jpg
209KB
INT SD
Sort by
Favorites
Bookmarks
Brightness
Return
File Explorer
Photo
Settings
Music
Video
File Explorer screen
36/41
Page 37

File Explorer
1/2
audio
33685KB
Photo-color
93297KB
video
93297KB
book
3008KB
Track02.mp3
197KB
Track01.mp3
173KB
snowboarding.jpg
209KB
INT SD
Copy
Delete
Paste
Return
Press to open the File Explorer menu.
Copy and paste or delete les
In the File Explorer menu, it is possible to copy and paste les between the
internal memory and Micro SD card or delete les..
37/41
Page 38

Press while on the Home screen, and select “Settings”.
Settings
Continue Reading
Library
2/3
Grimms' Fairy Tales.epub
The Brothers Grimm
Last read
02:44 07/03/2011
Page
1
The Art of War.epub
Sun Tzu
INT
EPUB
White Fang.txt
Jack London
INT TXT
A Tale of Two Cities.pdf
Charles Dickens
INT
PDF
Adventures of Huckleberry.epub
Mark Twain
INT EPUB
The Scarlet Letter.txt
Nathaniel Hawthorne
INT TXT
Twenty Thousand Leagues.pdf
Jules Verne
INT PDF
Dracula.epub
Bram Stoker
INT EPUB
2/3
The Brothers Grimm
The Art of War.epub
Sun Tzu
White Fang.txt
TXT
A Tale of Two Cities.pdf
Adventures of Huckleberry.epub
The Scarlet Letter.txt
TXT
Twenty Thousand Leagues.pdf
Settings
Date/Time
Device Standby
Format Memory
About Product
Power Management
Restore Defaults
Language
User Manual
Sort by
Favorites
Bookmarks
Brightness
Return
File Explorer
Photo
Settings
Music
Video
Settings screen
38/41
Page 39

Legal information
FCC Part 15:
This device complies with Part 15 of the FCC Rules. Operation is subject to the
following two conditions:
(1) this device may not cause harmful interference, and
(2) this device must accept any interference received, including interference
that may cause undesired operation.
Warning: Changes or modications to this equipment not expressly approved
by the party responsible for compliance could void the user’s authority to
operate the equipment.
NOTE: This equipment has been tested and found to comply with the requirements for a Class B digital device under Part 15 of the Federal Communications
Commission (FCC) rules. These requirements are intended to provide reasonable protection against harmful interference in a residential installation. This
equipment generates, uses and can radiate radio frequency energy and, if not
installed and used in accordance with the instructions, may cause harmful interference to radio communications.
However, there is no guarantee that interference will not occur in a particular
installation. If this equipment does cause harmful interference to radio or television reception, which can be determined by turning the equipment o and on, the
user is encouraged to try to correct the interference by one or more of the
following measures:
● Reorient or relocate the receiving antenna.
● Increase the separation between the equipment and receiver.
● Connect the equipment into an outlet on a circuit dierent from that to
which the receiver is connected.
● Consult the dealer or an experienced radio/TV technician for help.
39/41
Page 40

Limited Warranty
90 Days Limited Warranty
In the unlikely event that this product is defective, or does not perform
properly, you may within ninety (90) days from your original date of
purchase return it to the authorized service center for repair or
exchange.
TO OBTAIN WARRANTY SERVICE:
● Provide proof of the date of purchase within the package (Dated bill
of sale).
● Prepay all shipping costs to the authorized service center, and
remember to insure your return.
● Include a return shipping address (no P.O. Boxes), a telephone
contact number, and the defective unit within the package.
● Describe the defect or reason you are returning the product.
Your product will be repaired or replaced, at our option, for the same or
similar model of equal value if examination by the service center
determines this product is defective. Products received damaged as a
result of shipping will require you to le a claim with the carrier.
The shipping address of the authorized service center is:
Southern Telecom, Inc.
Attention: Customer Service (2nd Floor)
14-C 53rd Street
Brooklyn, NY 11232
Should you have any questions or problems concerning this product,
please contact our customer service department at:
Customer Support:
1-877-768-8483 (Toll Free)
cs@southerntelecom.com
Monday - Thursday: 9AM - 5PM (EST)
Friday: 9AM - 3PM (EST)
www.southerntelecom.com
40/41
Page 41

Warranty service not provided
This warranty does not cover damage resulting from accident, misuse,
abuse, improper installation or operation, lack of reasonable care, and
unauthorized modication. This warranty is voided in the event any
unauthorized person opens, alters or repairs this product. All products
being returned to the authorized service center for repair must be
suitably packaged.
Limitation of Warranty:
• THE WARRANTY STATED ABOVE IS THE ONLY WARRANTY APPLICABLE
TO THIS PRODUCT. ALL OTHER WARRANTIES, EXPRESS OR IMPLIED
(INCLUDING ALL IMPLIED WARRANTIES OF MERCHANTABILITY OR
FITNESS FOR A PARTICULAR PURPOSE) ARE HEREBY DISCLAIMED. NO
VERBAL OR WRITTEN INFORMATION GIVEN BY SOUTHERN TELECOM,
INC. IT’S AGENTS, OR EMPLOYEES SHALL CREATE A GUARANTY OR IN
ANY WAY INCREASE THE SCOPE OF THIS WARRANTY.
• REPAIR OR REPLACEMENT AS PROVIDED UNDER THIS WARRANTY IS THE
EXCLUSIVE REMEDY OF THE CONSUMER. SOUTHERN TELECOM, INC.
SHALL NOT BE LIABLE FOR INCIDENTAL OR CONSEQUENTIAL DAMAGES
RESULTING FROM THE USE OF THIS PRODUCT OR ARISING OUT OF ANY
BREACH OF ANY EXPRESS OR IMPLIED WARRANTY ON THIS PRODUCT.
THIS DISCLAIMER OF WARRANTIES AND LIMITED WARRANTY ARE
GOVERNED BY THE LAWS OF THE STATE OF NEW YORK. EXCEPT TO
THE EXTENT PROHIBITED BY APPLICABLE LAW, ANY IMPLIED
WARRANTY OF MERCHANTABILITY OR FITNESS FOR A PARTICULAR
PURPOSE ON THIS PRODUCT IS LIMITED TO THE APPLICABLE
WARRANTY PERIOD SET FORTH ABOVE.
Some states do not allow the exclusion nor limitation of incidental or
consequential damages, or limitations on how long an implied warranty
lasts so the above limitations or exclusions may not apply to you. This
warranty gives you specic legal rights, and you also may have other
rights that vary from state to state.
© 2011 Southern Telecom, Inc. All rights reserved.
Slick is a registered trademark of Southern Telecom, Inc.
www.slickusa.com
41/41
 Loading...