

Skyworth LED-32E60 User Manual

Instruction Manual
Size:A5
LED-32E60LED-32E60
Description:
MANUAL(8M29H)
Job No.
10A011H
MODEL:
32E60
REV:0
Engineering Dept:
Artwork By:
Checked By:
Approved By:
Brand Name:
P/No.
Scale:
SKYWORTH
Date:
2010-10-13
Date:
Date:

CONTENT
CONTENT ....................................................................................................... 1
WARNING AND PRECAUTION ................................................................... 2-3
INTRODUCTION, FUNCTIONS AND FEATURES ......................................... 4
PREPARATION ............................................................................................... 5
Positioning The TV Set ............................................................................ 5
Antenna And Power Connections ............................................................ 5
Inserting Batteries In The Remote Control Handset ................................ 5
In The Box .............................................................................................................. 5
EXTERNAL SCHEMATIC AND INSTALLATION ........................................ 6-10
Front Panel .............................................................................................. 6
Back Panel ............................................................................................... 7
Antenna/Cable Connection ...................................................................... 8
Remote Control ....................................................................................9-10
Personal Video Recording(PVR).....................................................................11
EPG(Electronic Program Guide).....................................................................12
MENU CONTROL .....................................................................................13-17
Basic Operation ......................................................................................13
Picture Settings ......................................................................................13
Sound Settings .......................................................................................14
Channel Settings ....................................................................................15
Setup Settings ....................................................................................... 16
Advanced Settings ................................................................................ 17
TROUBLESHOOTING ................................................................................. 18
SPECIFICATIONS ....................................................................................... 19
~1~

WARNING AND PRECAUTION
Read all of the instructions before operating the set. Keep these instructions well
for later use.
PRODUCT
The ventilation should not be impeded by covering the ventilation
openings with items, such as newspaper, table-cloths, curtains, etc.
Do not push any objects of any kind into this unit through the cabinet slots
as they could touch the current carrying parts or short-circuit parts, resulting
in fire, electric shock, or damage to the unit.
Unplug the set when it is not used for a long period of time.
Do not dismantle this product by yourself as this may cause damage.
Do not touch the screen surface with fingers as this may scratch or mar the
LCD screen.
Do not impact the LCD screen with hard pressure as this may damage the
LCD screen severely.
The battery (battery or batteries or battery pack) shall not be exposed
to excessive heat such as sunshine, fire or the like.
POWER
Please use the core plug as required.
PLUG
Unplug the set under the following conditions:
If the set will not be used for a long period of time.
If the power cord or the power outlet/plug is damaged.
Follow the instructions to install and adjust the product. Adjust those
controls that are covered in this operating instructions as improper
adjustment of other controls may result in damage. If this happens, unplug
the set and refer to the service personnel.
If the set is subject to impact or has been dropped to have the cabinet
damaged.
POWER CORD & SIGNAL CABLE
Protect the power cord & signal cable from being trampled.
Do not overload the power cord or power outlet.
Do not expose the power cord & signal cable to moisture.
Please protect the power cord or signal cable and do not stomp, twist and
squeeze it. Careful inspect to the power cord and signal cable.
~2~

WARNING AND PRECAUTION
USE ENVIRONMENT
Do not install this equipment in a confined space such as a book
case or similar unit. To prevent injury, this apparatus must be securely
attached to the wall mount fastened on the wall.
Place the set on a place that allows good ventilation.
Do not use the set near damp, and cold areas, protect the set from
overheating.
Keep away from direct sunlight.
The apparatus shall not be exposed to dripping or splashing and
that no objects filled with liquids, such as vases, shall be placed
on the apparatus.
Do not use the set near dust place.
To reduce the risk of fire or electric shock, do not expose this appliance
to rain or moisture.
No naked flame sources, such as lighted candles, should be placed on
the apparatus.
CLEANING
Dust the set by wiping the screen and cabinet with a soft, clean cloth.
Do not apply excessive force to the screen when cleaning.
Do not use water or other chemical cleaner to clean the screen as this
may damage the surface of the LCD screen.
COMMENT
Time function of this TV set is only a reference. It is not an exact
real-time clock.
This manual is only a guide to operate the TV set. We may change
some items of the model. But the change will not affect your normal
use. If there are any differences between the Manual and the TV set,
please take the TV set as the standard.
~3~

INTRODUCTION, FUNCTIONS AND FEATURES
BRIEF INTRODUCTION:
Thanks for your purchase of our digital high-definition LED television! This product with
diverse functions is designed to fulfill the optimum requirements from commercial, industrial
and household uses. LED television possesses the display function of both TV and PC. It
features advanced picture performance, smaller in size and lighter in weight, meanwhile,
consumes less power and makes no radiation. The new generation LED provides you with
comfortable, safe and environmental protection feeling. Some description could be little
different base on different model.
BASIC FUNCTION
1. Auto and manual tuning.
2. AV and YPbPr inputs are available.
3. Full-function infrared remote control.
4. Sleep timer and program recall shortcut.
5. Narrow design of ultra-thin ultra-light.
6. A wealth of reception(TV / AV / YPbPr / PC / HDMI / Uplayer).
7. Digital Still Function.
8 . Personal video recorder(PVR) with time-shifting.
PC MONITOR FUNCTIONS
1. Auto resizing & centering, perfect geometric graphic.
2. Supports PC sound source input.
3. Supports 640x480,800x600,1024x768,1280x1024, PC formats, refresh rate is 60Hz.
FEATURES
1. Embedded digital color gain control circuit, provides better brightness and reality.
2. Embedded 5-line comb filter.
3. Black/white Level Stretch Circuit.
4. High class LCD screen features, high brightness, high contrast and wide viewing angle,
responding fast.
Component input supports 1080P high definition signal formats.
5.
. Support HDMI input.
6
7. This TV can be used as a high-performance PC monitor for it has a VGA interface.
Computer sound source can also be supported to realize the multimedia function.
8. Low power consumption in standby mode to save energy.
9. Latest high integrated digital processor chip.
~4~
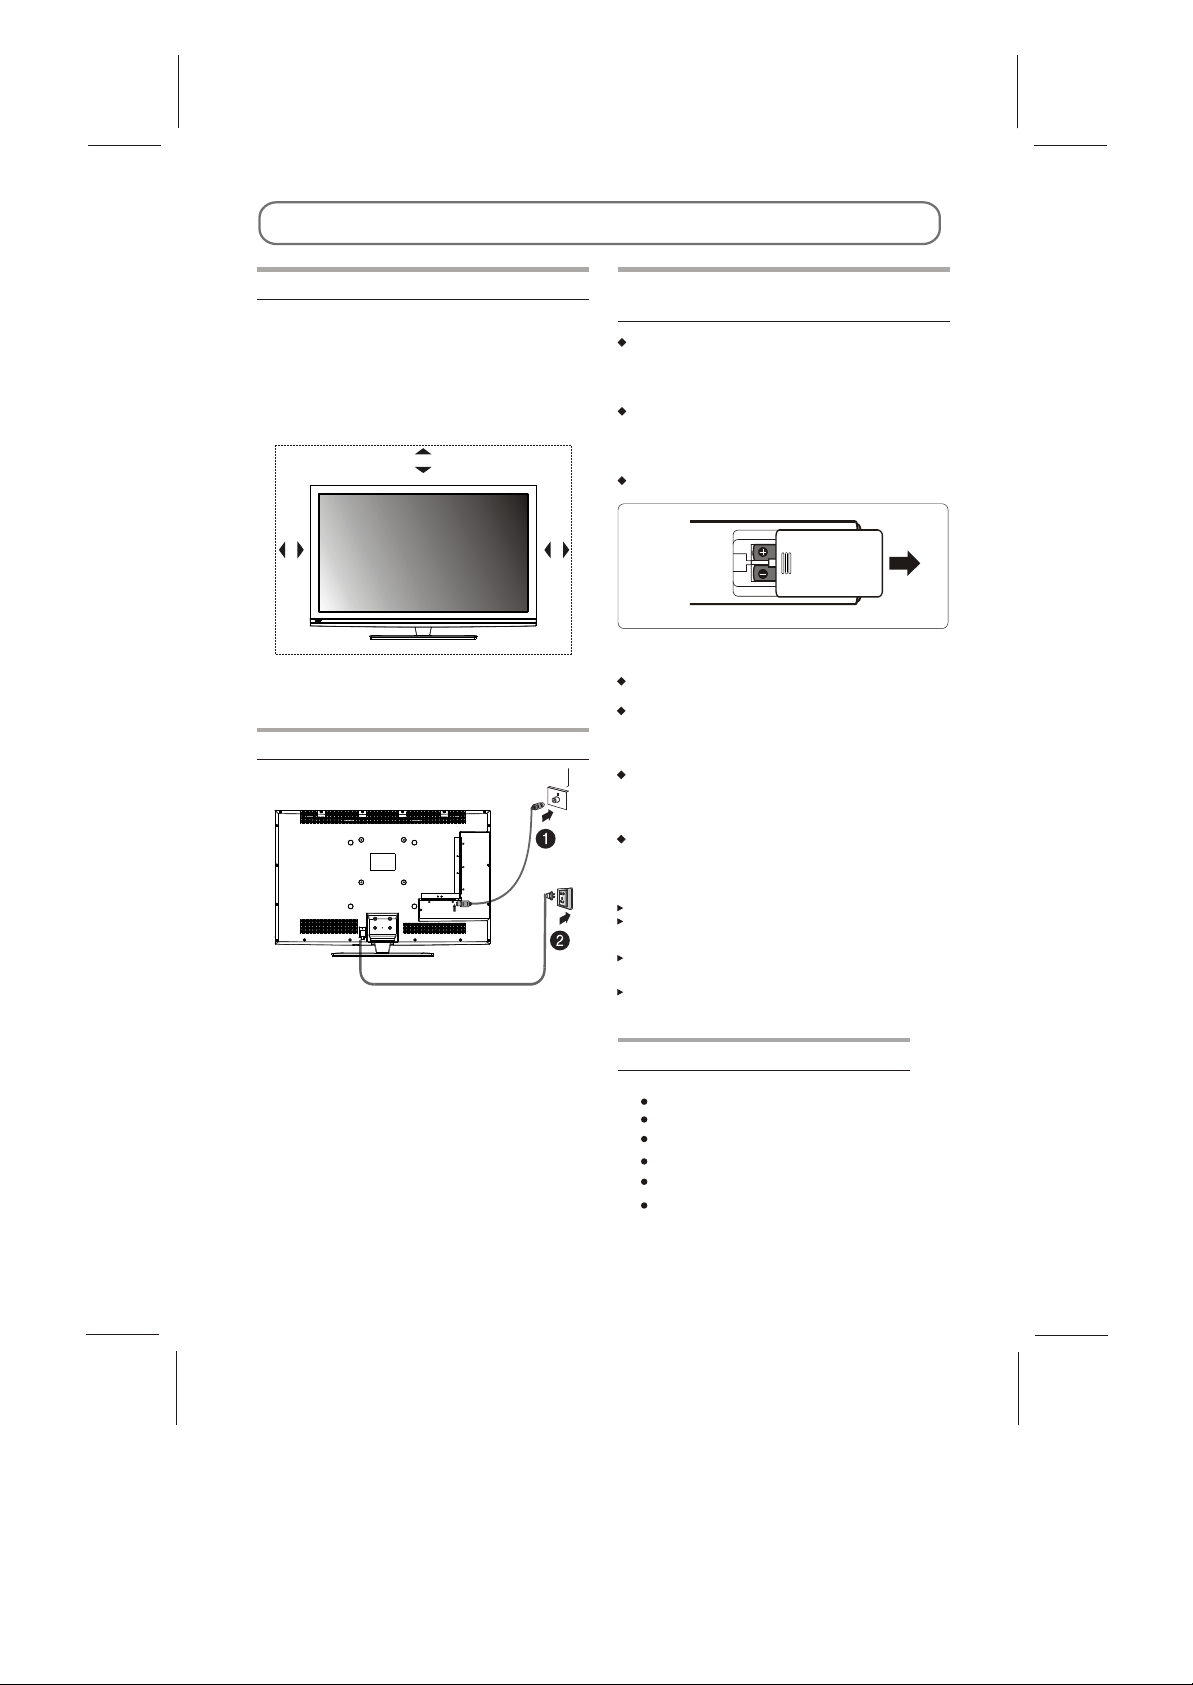
PREPARATION
Positioning The TV Set
Install Display on solid horizontal surface such
as a table or desk. For ventilation, leave a space
of at least 10cm free all around the set. To
prevent any fault and unsafe situations, please
do not place any objects on top of the set. This
apparatus can be used in tropical and/or
moderate climates.
10CM
10CM
10CM
Antenna And Power Connections
1.Connect the antenna cable into the antenna
input terminal at the rear panel and wall
antenna socket.
2.Connect the power plug into the wall outlet.
(The type of power plug provided may be
different from the above picture for some
countries.)
Insering Batteries In The
Remote Control Handset
Remove the battery cover located on the back
of the handset by gently pulling up-wards from
be indicated part.
Insert two AAA Alkaline or equivalent batteries.
Following the +/- marking in the battery
compartment.
Replace the battery cover.
Precautions when using batteries
Do not use old and new batteries together.
Do not use different types of batteries (for
example, Manganese and Alkaline batteries)
together.
Note that there are chargeable and non chargeable batteries. Do not attempt to charge
non-chargeable batteries.
Remove the batteries from the remote control
unit if you do not intend to use the unit for a
long time.
Note:
Do not drop the remote control unit.
Do not subject the remote control unit
to physical shocks.
Keep the remote control unit dry. Wetting
it may cause the unit to malfunction.
Replace the batteries with new ones when
operation of the unit deteriorates.
In The Box
You should have:
Tele vision
Remote control
User Guide
Warranty Card
2 x AAA battery
Stand
~5~
 Loading...