

Page 1
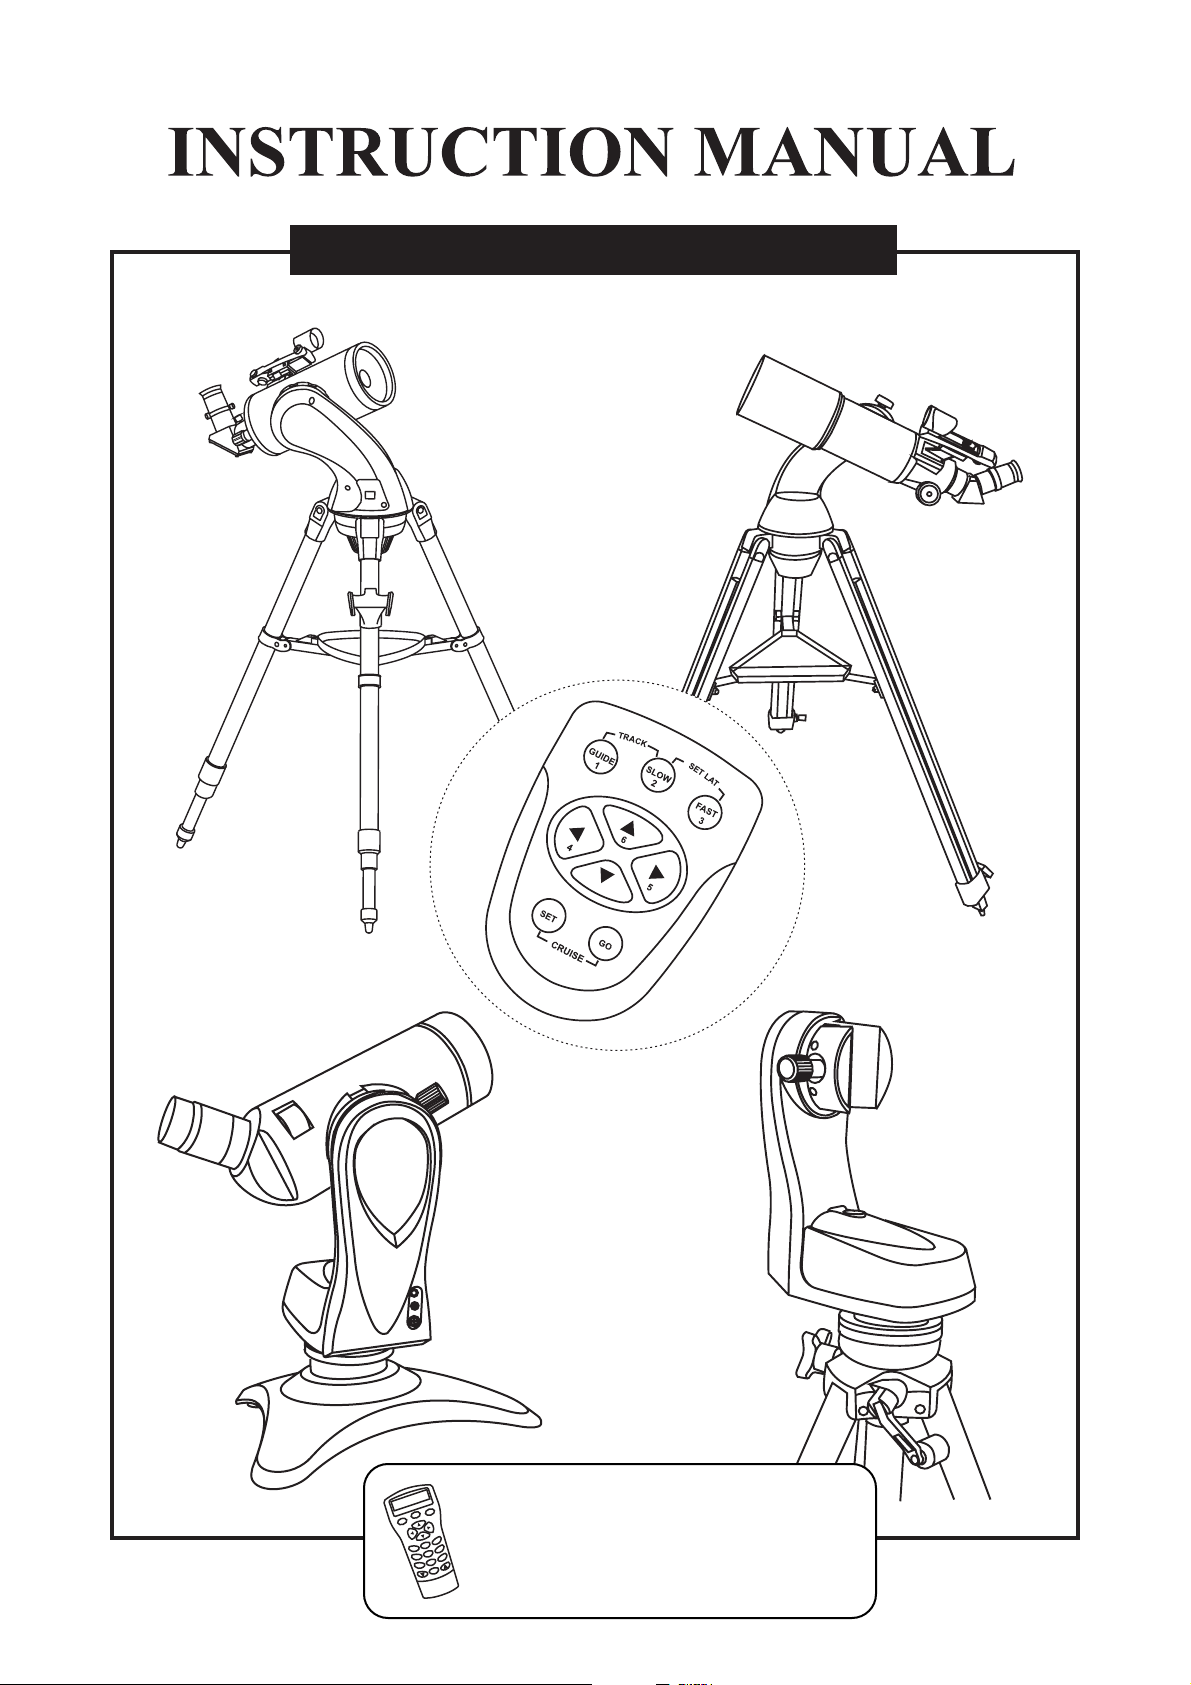
AZ TRACKING TELESCOPES
ENTER
SETUP
ESC
OUR
T
1
M
PLANET
Instruction manual for AZ GoTo telescopes
UTILITY
3
TE
A
R
2
IC
6
NGC
5
on reverse ip side
4
USER
9
OBJECT
8
7
ID
0
TR250808V1
Page 2

TABLE OF CONTENTS
TELESCOPE ASSEMBLY - AUTOTRACKING MOUNTS
TELESCOPE ASSEMBLY - MULTIFUNCTION MOUNTS
USING THE RED DOT FINDER
FOCUSING
CALCULATING THE MAGNIFICATION (POWER)
FOR ASTRONOMICAL USE
POWERING THE TELESCOPE
SETTING UP THE TELESCOPE
SETTING THE LOCAL LATITUDE FOR ACCURATE TRACKING
HAND CONTROL OPERATION
FOR TERRESTRIAL USE
SETTING UP THE TELESCOPE
HAND CONTROL OPERATION
BEFORE YOU BEGIN
This instruction manual is applicable to all the models listed on the cover. Follow the
instructions for your specific model in the manual. Flip the booklet over to the
reverse side if your telescope comes with a SynScan AZ GoTo hand control, instead
of a simple tracking SynTrek hand control. Read the entire instructions carefully
before beginning. Your telescope should be assembled during daylight hours.
Choose a large, open area to work to allow room for all parts to be unpacked.
3
4
5
5
5
6
6
6
7
7
8
8
8
NEVER LOOK AT THE SUN WITH THE NAKED EYE OR WITH A
TELESCOPE (UNLESS YOU HAVE THE PROPER SOLAR FILTER).
PERMANENT AND IRREVERSIBLE EYE DAMAGE MAY RESULT.
IF OBSERVING THE SUN (WHILE USING A PROPER SOLAR FILTER)
WITH YOUR TELESCOPE, MAKE SURE THAT THE FINDERSCOPE HAS A
DUST CAP OVER THE OBJECTIVE END OR REMOVE THE
FINDERSCOPE.
NEVER USE YOUR TELESCOPE TO PROJECT AN IMAGE OF THE SUN
ONTO ANY SURFACE. INTERNAL HEAT BUILD-UP CAN DAMAGE THE
TELESCOPE AND ANY ACCESSORIES ATTACHED TO IT.
NEVER USE AN EYEPIECE SOLAR FILTER OR A HERSCHEL WEDGE.
INTERNAL HEAT BUILD-UP INSIDE THE TELESCOPE CAN CAUSE
THESE DEVICES TO CRACK OR BREAK, ALLOWING UNFILTERED
SUNLIGHT TO PASS THROUGH TO THE EYE.
DO NOT LEAVE THE TELESCOPE UNSUPERVISED, EITHER WHEN
CHILDREN ARE PRESENT OR ADULTS WHO MAY NOT BE FAMILIAR
WITH THE CORRECT OPERATING PROCEDURES OF YOUR TELESCOPE.
Page 3

TELESCOPE ASSEMBLY - AUTOTRACKING MOUNTS
TRIPOD SET UP
Fig.1
ADJUSTING TRIPOD LEGS (Fig.1)
1)
Slowly loosen the height adjustment clamp and gently pull out the lower
section of each tripod leg. Tighten the clamps to hold the legs in place.
2)
Spread the tripod legs apart to stand the tripod upright.
3)
Adjust the height of each tripod leg until the tripod head is properly leveled.
Note that the tripod legs may not be at same length when the mount is level.
Fig.2
ATTACHING THE TRIANGLE
ACCESSORY TRAY (Fig. 2)
1)
Place the accessory tray on top of
the bracket, and secure with the
locking knob from underneath.
ATTACHING THE QUICK-RELEASE ACCESSORY TRAY (Fig. 3)
1)
Hold the accessory tray directly above the bracket. Rotate the tray until the
shape of the hole matches the locking mechanism in the center of the bracket.
Place the tray on top of the bracket and rotate to lock the tray in place.
TELESCOPE ASSEMBLY
Fig.3
ATTACHING THE MOUNT TO THE TRIPOD (Fig.4)
Place the single arm mount into the tripod head.
Fig.4
1)
Push the large cup underneath the tripod head upward and
2)
turn counter-clock wise to secure the mount to the tripod.
ATTACHING THE TELESCOPE TUBE TO THE MOUNT (Fig.5)
The dovetail type
1)
Loosen the black screw on the top of the mount until it is not
protruding from the dovetail accepter.
2)
Find the approximate balance point on the telescope tube.
3)
Slide in the telescope tube until the balance point of the telescope falls
in the center of the mount head. Tighten the screw until the dovetail
bar on the telescope tube is securely fastened on the mount.
The clamp type
1)
Remove the black screw on the top of the cradle ring and
place it at a safe place for later use.
2)
Carefully open the cradle ring just enough so the telescope
tube can be slided in.
3)
Slide in the telescope tube. Close the cradle ring and insert the
black screw from the opposite side of the arm as shown in
Fig.4. Tighten the screw until the telescope tube is securely
fastened inside the cradle ring.
(Diagram applicable to
all telescope designs.)
Fig.5
(Diagram applicable to all
telescope designs.)
3
Page 4

TELESCOPE ASSEMBLY - MULTIFUNCTION MOUNTS
TRIPOD & MOUNT SET UP
Fig.6
Fig.7
TRIPOD SET UP
Remove the tripod from the box and spread the
1.
legs apart until fully extended.
Adjust the desired height of the tripod before
2.
attaching the fork arm and your optical tube.
Minor adjustments can be made later. Loosen the
locking mechanisms on each leg and slide the
legs to the desired height and then retighten them.
MOUNT SET UP
Next you will attach your Multi-function mount to
1.
the tripod. Locate the 3/8" threaded bolt in the top
of the tripod platform. Then, find the mating 3/8"
threaded hole underneath the Fork Arm Base.
Thread the 3/8" bolt of the tripod platform into the
3/8" threaded hole in the fork arm base until it is
good and tight (Fig.6).
Locate the 1/4x20 Mounting Platform. Slide it down
2.
the slot on the Fork Arm as in dicated in Fig.7.
Secure by tightening the thumb screws.
TELESCOPE ASSEMBLY
ATTACHING THE TELESCOPE TUBE TO THE MOUNT
If you are using the telescope for tracking astronomical objects,
1.
attach the optical tube to the Mounting Platform so that the Fork
Arm is located on the right hand side (Fig.8). If the telescope is
installed incorrectly you will not be able to use the latitude scale
on the top of the Fork Arm. Thread the 1/4x20 Mounting Screw
into the 1/4x20 tripod adapter of the optical tube and make sure it
is tight. Do not overtighten the screw.
Telescopes with a dovetail bar attached can be installed
directly onto the Multi-function mount without using the
Mounting Platform.
ATTACHING A CAMERA TO THE MOUNT
For general terrestrial use, the camera can be secured on
1.
the Mounting Platform any way you wish. Thread the 1/4x20
Mounting Screw into the camera and make sure it is tight. Do
not overtighten the screw.
Do NOT overtighten the 1/4x20 Mounting Screw or it may
cause damage to the screw.
Fig.8
You must be careful not to use an optical tube that is too
heavy or too big as the motor assembly will not be able to
operate properly and you may damage the mount.
4
Page 5

sing the Red Dot Finder
U
The Red Dot Finder is a zero magnification pointing tool that uses
a coated glass window to superimpose the image of a small red
dot onto the night sky. The Red Dot Finder is equipped with a
variable brightness control, azimuth adjustment control, and
altitude adjustment control (Fig.a). The Red Dot Finder is
powered by a 3-volt lithium battery located underneath at the
front. To use the Finder, simply look through the sight tube and
move your telescope until the red dot merges with the object.
Make sure to keep both eyes open when sighting.
Aligning the Red Dot Finder
Like all finderscopes, the Red Dot Finder must be properly
aligned with the main telescope before use. This is a simple
process using the azimuth and altitude control knobs.
1.
Open the battery cover by pulling it down (you can gently pry at
the 2 small slots) and remove the plastic shipping cover over
the battery (Fig.b).
2.
Turn on the Red Dot Finder by rotating the variable brightness
control clockwise until you hear a "click". Continue rotating the
control knob to increase the brightness level.
Insert a low power eyepiece into the telescope's focuser.
3.
Locate a bright object and position the telescope so that the
object is in the centre of the field of view.
With both eyes open, look through the sight tube at the object.
4.
If the red dot overlaps the object, your Red Dot Finder is
perfectly aligned. If not, turn its azimuth and altitude adjustment
controls until the red dot is merged with the object.
Fig.a
ON/OFF
Brightness
Control
Altitude
Adjustment
Control
Fig.b
Fig.c
Azimuth
adjustment
control
Sight Tube
Battery cover
Plastic
shipping
cover
ocusing
F
Slowly turn the focus knobs (Fig.c), one way or the other, until the
image in the eyepiece is sharp. The image usually has to be finely
refocused over time, due to small variations caused by
temperature changes, flexures, etc. This often happens with short
focal ratio telescopes, particularly when they haven't yet reached
outside temperature. Refocusing is almost always necessary
when you change an eyepiece or add or remove a Barlow lens.
alculating the m
C
The magnification produced by a telescope is determined by the focal length of the eyepiece that is used with it.
To determine a magnification for your telescope, divide its focal length by the focal length of the eyepieces you
are going to use. For example, a 10mm focal length eyepiece will give 80X magnification with an 800mm focal
length telescope.
magnification =
When you are looking at astronomical objects, you are looking through a column of air that reaches to the edge of
space and that column seldom stays still. Similarly, when viewing over land you are often looking through heat
waves radiating from the ground, house, buildings, etc. Your telescope may be able to give very high magnification
but what you end up magnifying is all the turbulence between the telescope and the subject. A good rule of thumb
is that the usable magnification of a telescope is about 2X per mm of aperture under good conditions.
agnication (power)
Focal length of the telescope
Focal length of the eyepiece
800mm
=
10mm
= 80X
5
Page 6

FOR ASTRONOMICAL USE
owering the telescope
P
AUTOTRACKING TELESCOPES
The Auto-tracking Mount power requirement is 12-Volts DC
Nominal. The maximum voltage should not exceed 16-volts and
the minimum is 8-volts. The provided battery pack can hold eight
(8) AA alkaline batteries. It can be place in the tray on the tripod.
MULTIFUNCTION TELESCOPES
The Multi-Function Mount power requirement is 12-Volts DC
Nominal. The maximum voltage should not exceed 16-volts and
the minimum is 8-volts. The battery compartment holds eight (8)
AA alkaline batteries (user supplied). Open the battery
compartment by pressing down on the lever located in the front
of the fork arm base (Fig.d). Remove the battery holders inside
to install or replace batteries.
S
etting up the telescope
Fig.d Fig.e
to power
supply
Fig.f
0
10
2
0
3
0
4
0
5
0
S
E
T
L
C
A
A
T
R
T
SLOW
GUIDE
FAST
2
1
3
6
5
4
7
GO
SET
CRUISE
AUTOTRACKING TELESCOPES
Plug the cable (connector) from the Hand Control into the
telephone type jack at the side of the arm (Fig.e).
1.
Plug the power cord into the outlet on the the side of the
mount to turn on the power (Fig.e).
2.
You will nd a latitude scale near the top of the fork arm.
Using the directional keys, adjust the telescope tube until the
latitude scale reads 0. (Fig.f).
3.
Next, the telescope must be pointing North from the location
you are using (Fig.g).
4.
After the above is accomplished, the telescope is now
properly setup in the "Home" position.
5.
Turn o the power and turn it back on again.
MULTIFUNCTION TELESCOPES
Plug the cable (connector) from the Hand Control into the
telephone type jack marked HC at the side of the arm.
You will find a latitude scale with two index pointers near
1.
the top of the fork arm. If you are using a camera or a
telescope mounted on the Mounting Platform, use the
pointer on top as reference. If your telescope is mounted
directly on a dovetail bar, use the lower point as reference.
Manually adjust the telescope tube until the latitude scale
2.
reads 0 (Fig.h).
Next, the telescope must be pointing North from the
3.
location you are using.
After the above is accomplished, the Multi-Function Mount
4.
is now properly setup in the "Home" position.
Turn on the power.
5.
NORTH
Fig.g
For telescope on the Mounting
Platform or camera
Fig.h
For telescope with
a dovetail bar
0
10
20
30
40
50
60
70
80
90
6
Page 7

S
etting the local latitude for accurate tracking
Fig.i
Setting the local latitude is not required to track an astronomical object but it greatly
enhances the tracking accuracy. It requires that you know the latitude of the
observing site. To set the latitude for the Northern Hemisphere, use the directional
buttons to adjust the telescope tube until the latitude scale reads 0. Turn off the
power and turn it back on again. Now use the hand control to move the telescope
GUIDE
1
C
A
R
T
tube until the latitude scale reads your local latitude. Press the "Fast" and "Slow"
buttons simultaneously to store the local latitude into the system (Fig.i).
For Southern Hemisphere, use the direction buttons to adjust the telescope tube
4
until the latitude scale reads your local latitude. Turn off the power and turn it back
on again. Now use the directional buttons to move the telescope tube until the
latitude scale reads 0. Press "Fast" and "Slow" buttons simultaneously to store the
SET
local latitude into the system (Fig.i).
Setting the local latitude only needs to be done once. The information will be stored
in the hand control even when the power is turned off.
Use the same or key to end adjusting scale reading to 0 degree and setting your local
latitude. This will help eliminate the influence of mechanical backlash. For example, if key is
the last key that you used to set the scale to 0 degree, you should also use key as the last
key for setting the scale reading to your local latitude.
SLOW
2
6
CRUISE
S
E
T
L
A
T
FAST
3
5
GO
and Control Operation
H
The basic movements of the telescope mount are directional movement,
slewing, and tracking. The tracking rate is sidereal rate.
When a command is successfully entered, all the LEDs will light up. The
LEDs will not go off until all key buttons are released. If there is any type
of communication error between the hand control and the motor
Assembly, all the LEDs will flash.
THE DIRECTIONAL KEYS (Fig.j) allow for the movement direction that you
want the telescope to go. If two opposite buttons are pressed at the same time,
only the button first pressed will respond. AZ (azimuth) and ALT (altitude) axis
can be adjusted at the same time.
THE SLEWING SPEED (Fig.k) can be set from the three available options by
pressing the correspondent key on the hand control:
Guide (defult) -- slow speed used for centering objects in the eyepiece.
Slow -- medium speed used for finding and moving objects in the finderscope.
Fast -- fast speed used for quick movement in the sky.
The actual slewing speeds are different depending on whether tracking is "on"
or "off". See the chart below for details. (1x = Sidereal rate)
Slewing Speeds Guide Slow Fast
Tracking "on" 1x 4x 8x
Tracking "on" 32x 64x 800x
In standby mode, the LED will respectively indicate the current slewing speed.
Fig.j
Fig.k
GUIDE
1
GUIDE
1
S
E
T
C
A
R
T
SLOW
4
SET
CRUISE
C
A
R
T
SLOW
4
SET
CRUISE
L
A
T
FAST
2
6
2
6
3
5
GO
S
E
T
L
A
T
FAST
3
5
GO
7
Page 8

To activate the TRACKING FUNCTION, you must first find the astronomical
object you are seeking. The preferred method of finding objects is called
"star-hopping" and there is much written on this method. Remember, you must
used the Hand Control unit to move the telescope as you cannot move it
manually. When you are ready to track (when the object is in the center of the
field of view), press the "Guide" and "Slow" buttons in combination and tracking
will be activated (Fig.l). When you want to cancel "tracking" and slew in higher
speed, press the same button combination. Note that when tracking is
activated, one of the "Guide", "Slow" or "Fast" buttons will flash.
When the tracking is "on", use the Slow (4x) and Fast (8x) speeds to
center objects in the eyepiece for astronomical objects. With tracking
"off", use the Guide (32x) and Slow (64x) speeds to center astronomical
objects in the finderscope, and the Fast (800x) for general slewing to get
to objects quickly.
FOR TERRESTRIAL (LAND) USAGE
S
etting up the telescope
The telescope does not require setup for terrestrial use. The telescope can
start from any position. However, if the telescope is positioned in one spot and
the Cruise function is utilized, setting a Reference Point to start and end a
viewing session will save a lot of time for you --- you will not need to reset the 6
Cruising positions before every viewing session. The Reference Point is
defined as the point to which the optical tube is pointing when the power switch
is turned on. (See below for information on the Cruise function.)
Fig.l
Fig.m
GUIDE
1
GUIDE
S
E
T
2
6
SLOW
2
6
L
A
T
FAST
3
5
GO
S
E
T
L
A
T
FAST
3
5
C
A
R
T
SLOW
4
SET
CRUISE
C
A
R
T
1
4
Make sure to turn off "Tracking" when using the Auto-tracking mount for
terrestrial use.
H
and control operation
The Auto-Tracking Telescope can be set to automatically CRUISE between up
to 6 stored positions, or GOTO any stored position.
STORING POSITIONS
You can store up to 6 positions. After slewing to a desired position using the
directional keys, press "SET" and one of the 6 numeric keys (Fig.m). The
location of each selected position will be stored in the system memory of the
hand control until the data is overwrite by the user.
To ensure the best accuracy of your position choices, it is important that
before the actual setting you do the final direction adjustments using the
and keys.
"GOTO" A STORED POSITION
Once the stored positions are set you can GOTO them. Press "GO" and then
the corresponding numeric key for the position desired (Fig.n). The mount will
automatically slew to the stored position. Once the GOTO function is
activated, both "GO" and the corresponding numeric key will light up.
Fig.n
GUIDE
1
CRUISE
SLOW
2
6
CRUISE
GO
S
E
T
L
A
T
FAST
3
5
GO
SET
C
A
R
T
4
SET
8
Page 9

CRUISE
Fig.o
The CRUISE mode is usable if you want the mount to stop for several
seconds at each stored position during slewing. To activate the
CRUISE function, press "SET" and "GO" keys in combination (Fig.o).
The mount will cruise sequentially among the stored positions. The
GUIDE
1
C
A
R
T
SLOW
2
mount will stay in each position for 5 seconds and then move on to the
next position. After one cycle, the mount will stop at the last position
for 3 minutes and the cruising cycle will start over again. You can
bypass the waiting period of 3 minutes by pressing the "fast" key and
6
4
the cycle will then start right away.
SET
In the cruise mode, the "SET" and "GO" keys will remain lit
CRUISE
throughout the cycle and the numeric key the mount is moving to
will flash.
If the multifunction mount is connected to an Acuter digital spotting scope or Canon EOS digital
camera (see Auto Imaging below), in the cruise mode, the mount will automatically send a signal
for the digital imaging device to take a shot every time it reaches a stored position. If you do not
wish to activate this function, simply remove the connecting cable between the multifunction
mount and the digital imaging device.
S
E
T
L
A
T
FAST
3
5
GO
HC
AUX
Auto Imaging
AUX Power
DC Power
HC
AUX
Auto Imaging
Aux Power
DC Power
Power Switch
Electronic shutter interface. This controls software action from the
mount to devices such as digital spotting scope or Canon EOS
digital cameras.
Power supply socket for other devices. This is for auxiliary power
from the mount to devices such as digital spotting scope or digital
camera. The output voltage is the same as DC power.
For optional DC 12-volt source to power the mount.
For connection to the hand control.
Not in use.
9
Page 10

SCAN
Fig.p
The SCAN function allows for scaning among all the stored positions
one by one without a stop at each position. There is not waiting at the
end of each scan cycle. Hold the "GO" key and press the key to
activate the "SCAN" function (Fig.p).
ERASE A STORED POSITION
If you want to permanently erase a set position, return the mount to
the Reference Position. Turn the power off and then turn it back on
again. Hold down the "SET" button and press the numeric key
corresponding to the position you want to erase. This is to override the
previous stored information with 0. In the CRUISE and SCAN modes,
the mount will recognize this and bypass this position and go to the
next position instead.
The mount allows a total of 6 stored positions. If there is a vacant
one available, it is recommended that you store the Reference
Position for quick access in the future.
To stop the mount during "GOTO", "Cruise", and "Scan" functions,
press the and keys simultaneously (Fig.q). After a command
has been implemented, all keys have to be released before the
mount accepts the next command. During the "GOTO", "Cruise",
and "Scan", the mount only reacts to the stop key combination.
Fig.q
GUIDE
1
GUIDE
1
S
E
T
C
A
R
T
SLOW
4
SET
CRUISE
C
A
R
T
SLOW
4
L
A
T
FAST
2
6
2
6
3
5
GO
S
E
T
L
A
T
FAST
3
5
SET
GO
CRUISE
10
Page 11

 Loading...