

Page 1
Page 2

2
Contents
1.0 CMS FUNCTIONS.......................................................................................3
2.0 INSTALL CMS..............................................................................................3
3.0 START CMS.................................................................................................5
3.1. Top Toolbar..................................................................................................7
3.2 Top Menu Bar...............................................................................................7
3.3 Toolbar on Right Side...................................................................................7
3.4 Video Area ...................................................................................................8
3.5 Bottom Toolbar.............................................................................................9
4.0 MENU AND MOUSE OPERATION..............................................................9
4.1 File ............................................................................................................ 10
4.2 Tools.......................................................................................................... 10
4.3 Help........................................................................................................... 20
4.4 Mouse Operation ...................................................................................... 20
5.0 REAL-TIME VIDEO DISPLAY AND CONTROL ....................................... 21
5.1 Real-Time Video Frame Control............................................................... 21
5.1.1 Displaying Mode Switching................................................................. 21
5.1.2 Display Control ................................................................................... 22
5.2 Pan/Tilt/Zoom Controlling......................................................................... 22
5.3 Device Information.................................................................................... 23
Page 3

3
Center Management System (CMS) is an integrated network monitoring manage
software, which can run independently and manage several digital video recorder,
monitor video, capture, record, playback, download setup parameters and control
pan/tilt, etc. It is applicable management platform for medium and relatively large
network video monitoring.
1.0 CMS Functions
This CMS can mainly realize following functions:
Real-time video display: it can display real-time video images of 1-64 channels one
page within monitoring network. It can realize single frame, 4-f rame, 9-frame, 16-f rame
partition display, 64-frame partition display. Also it can support multiwindow full screen
and single window full screen display.
Pan/tilt controlling: within authorized range, the orientation, pitching angle and focus
of the camera can be changed by the control of front end pan/tilt and lens
Remote Video Recording: video file can be stored in build-in hard disk of DVRs by
setting recording time..
Local video recording: Videos can be record in CMS at any time you start up local
recording.
Real-time video image capture: it is auxiliary function for real-time monitoring. It will
save the single frame from dynamic images in BMP format, and it can capture images
during monitoring or playback.
Audio monitoring: CMS-side can monitor the audio of front-end device.
Local playback: video files of devices at any time in the recording can be retrieved and
replayed.
Remote playback: to retrieve, replay and download the recording files in front-end
device or other recording files in CMS.
Remote setting: Set up parameters at CMS-side.
2.0 Install CMS
★ Operating Environment:
Operating system: Windows XP,Win 7
Network protocol: TCP/IP
CPU: P4/3.0G
RAM Requirements: 2.0G (We recommend using 2.0 G and the RAM should be
above 1.0G for normally running)
Page 4
4
Network Card; 100/1000M
Graphics Card: It should support hard ware zoom (such as: ATI, TNT2 PRO). We
recommend you use graphic card above ATI9800 and video memory above 128M
★ Installation Guide:
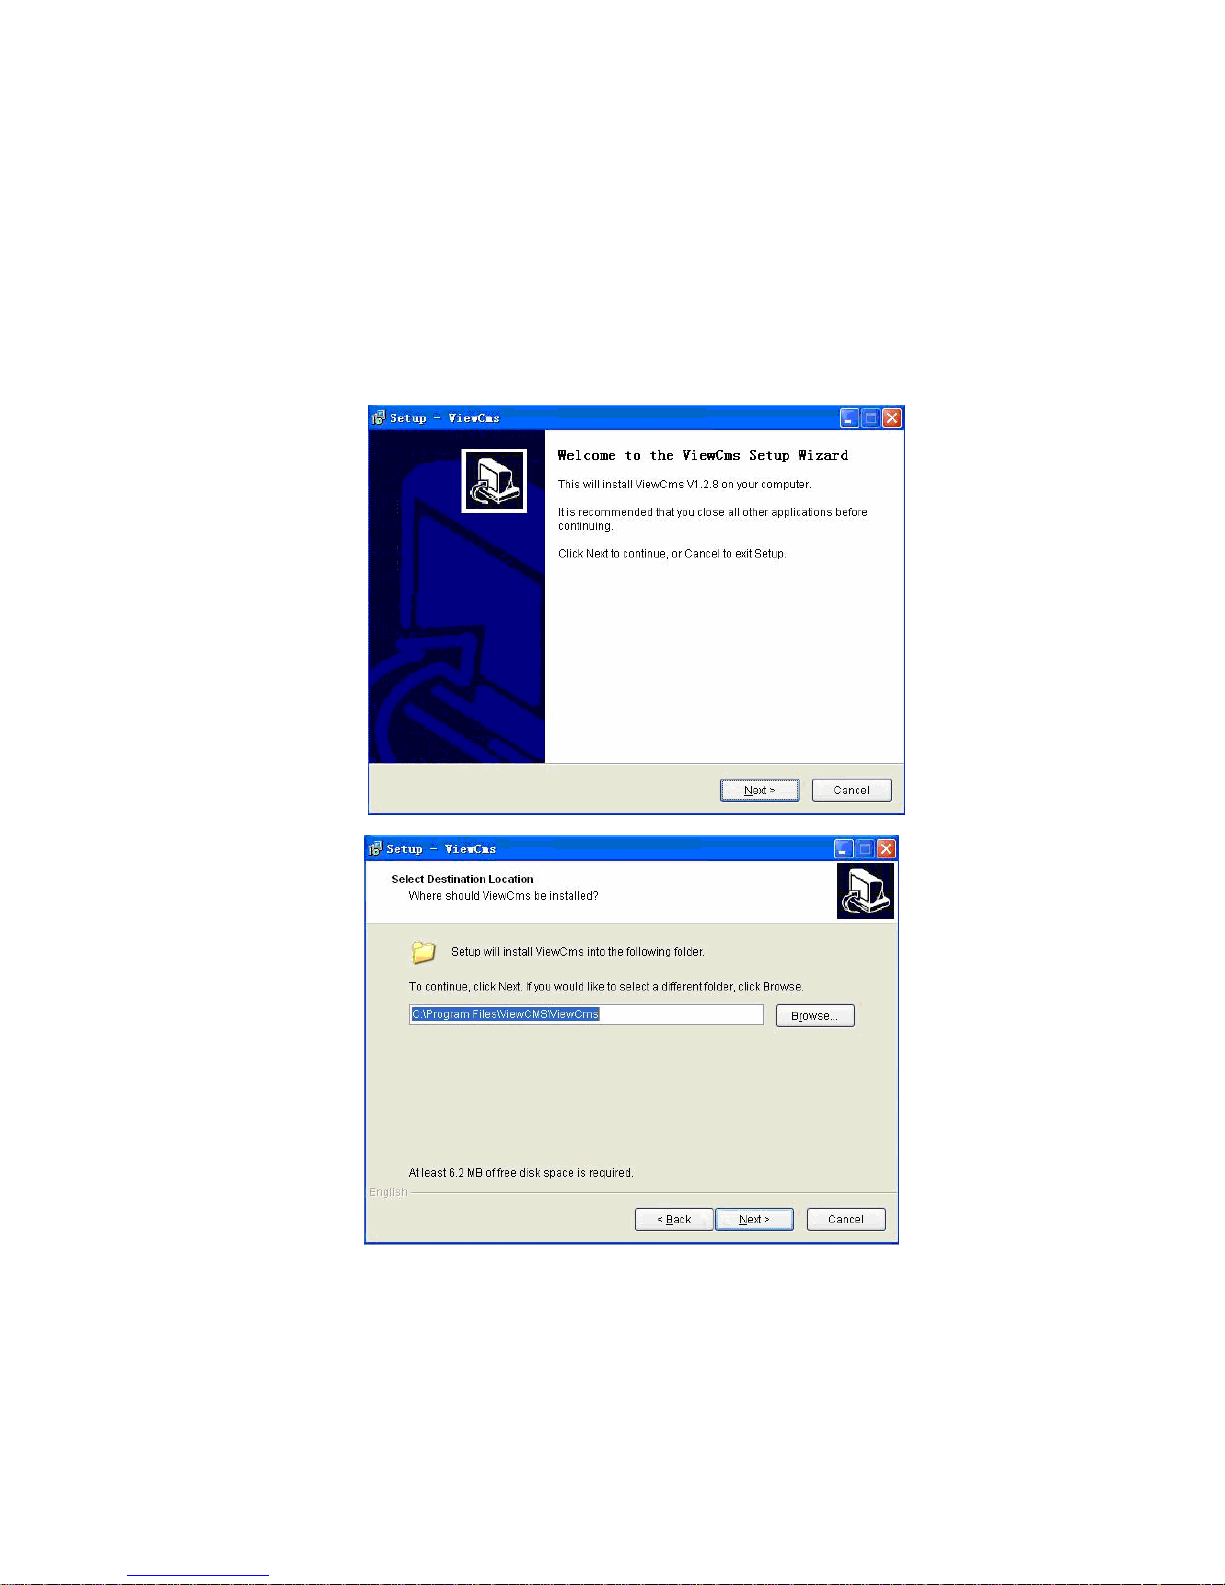
★ Open folders of management software and run (double click left button of the
mouse) “ViewCms.exe”, and then the following dialogue box will appear as first Fig
shows and click “Next” , there will be dialog show as second Fig.
Page 5
5
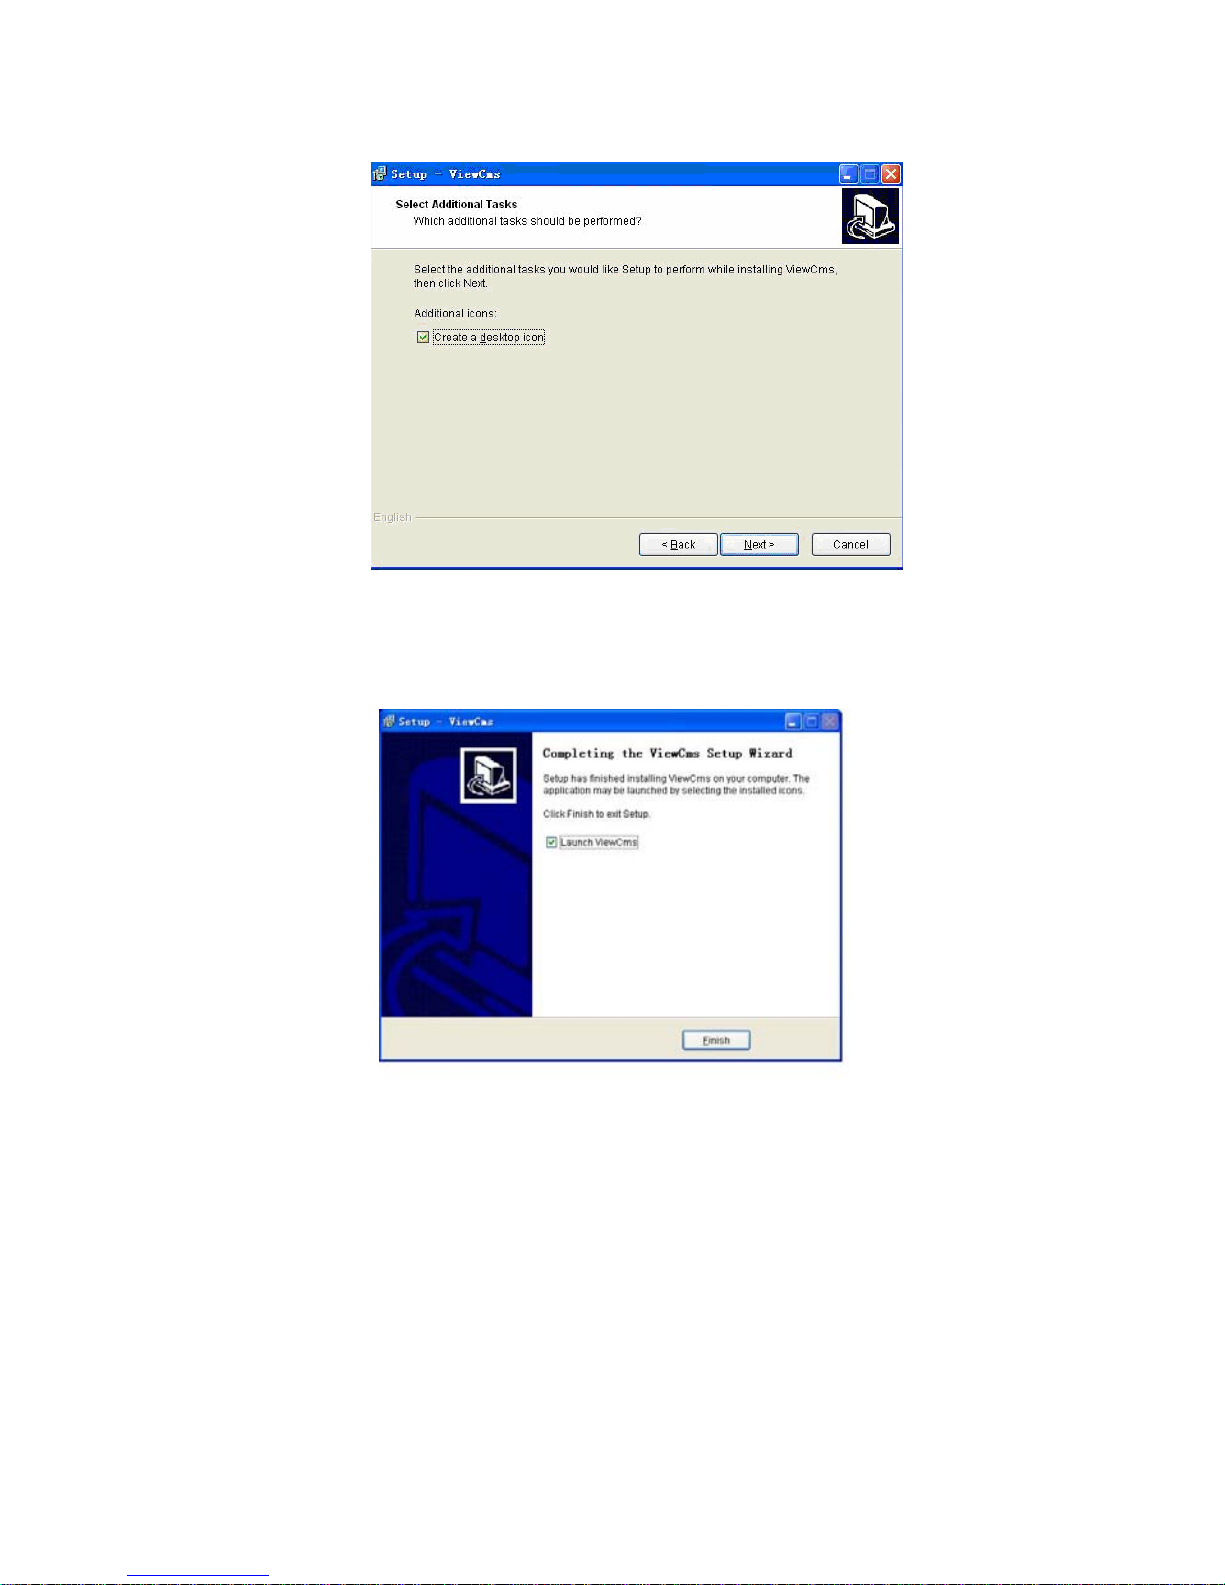
Next, select the destination folder to save the install file and follow the prompt of
installation tool until the appearance of the step displayed as following. Click [Finish] to
complete the installation.
3.0 Start CMS
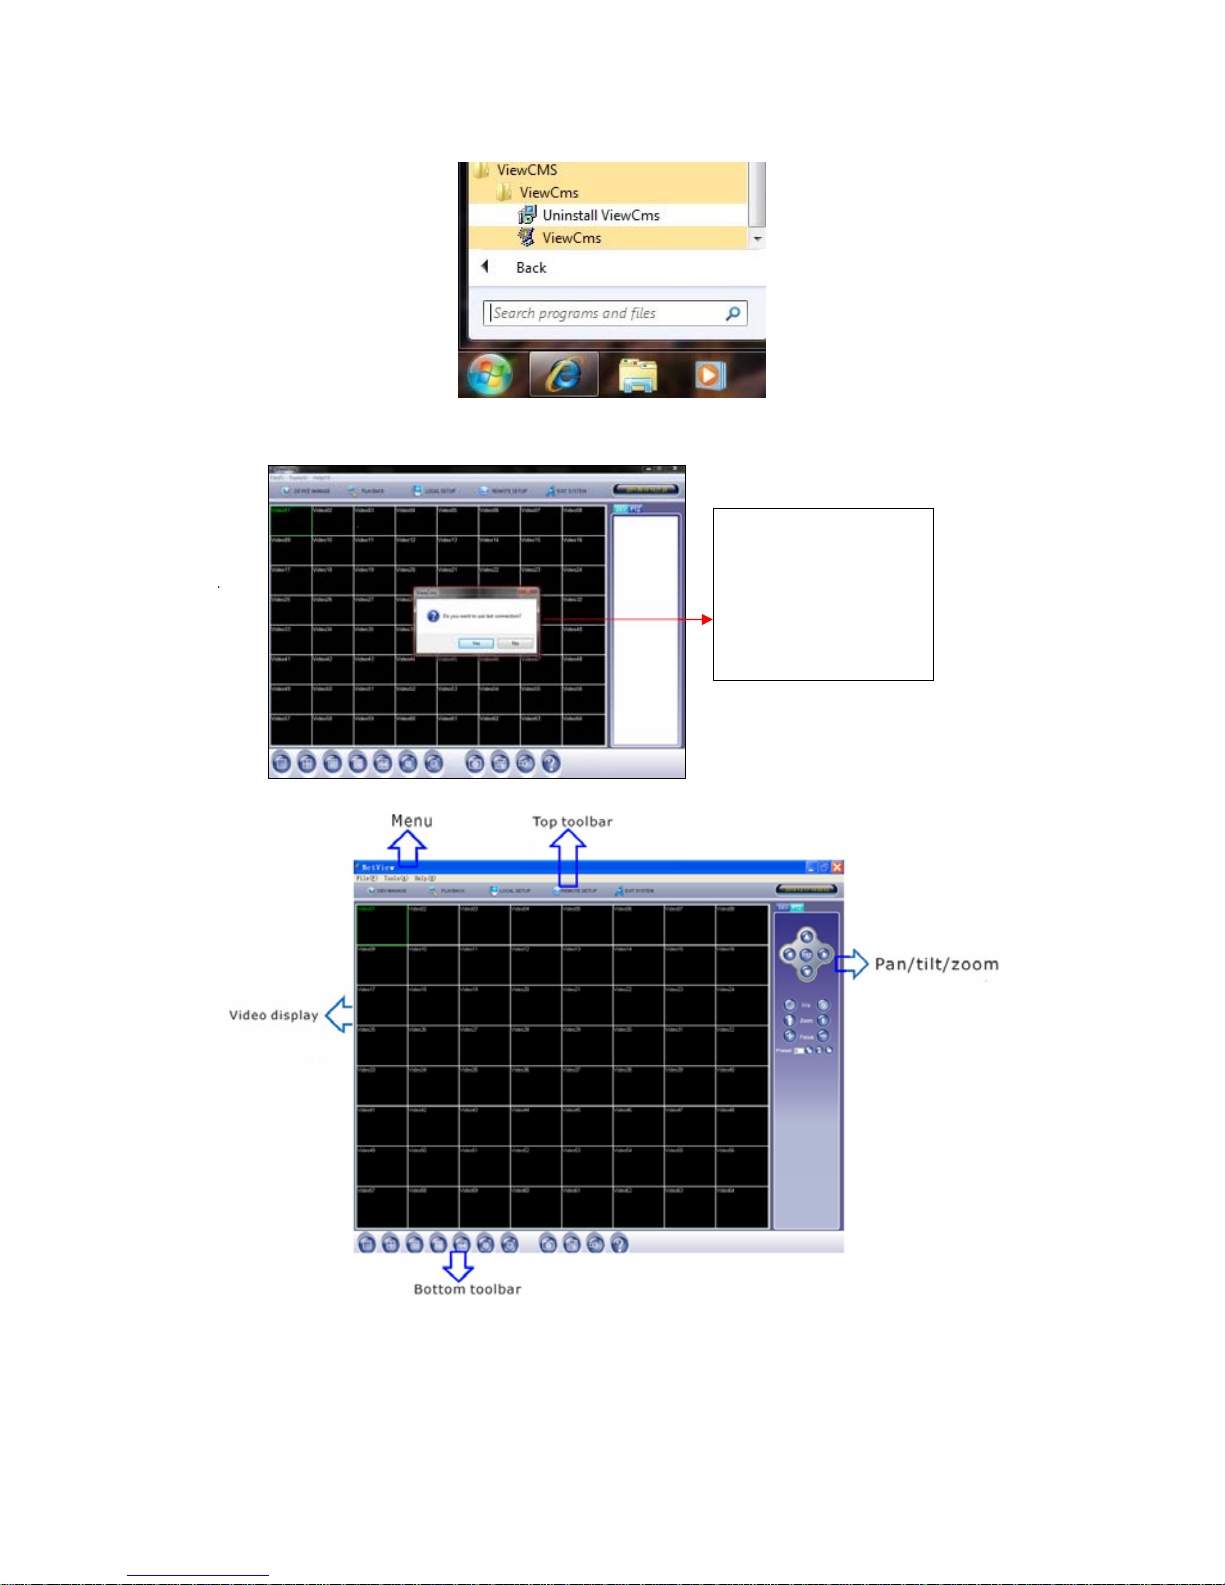
Choose the software in [Start] menu----program groups-----ViewCMS-----ViewCMS-----
ViewCMS, which is showed as following:
Page 6
6
When you open this
screen, it will show this
dialog box,choose “yes”
or “no”depends on your
need..
Run CMS by clicking the left button of the mouse, and interface as following will appear:
Page 7
7
3.1. Top Toolbar
Yo u can manually choose different icons as following picture:
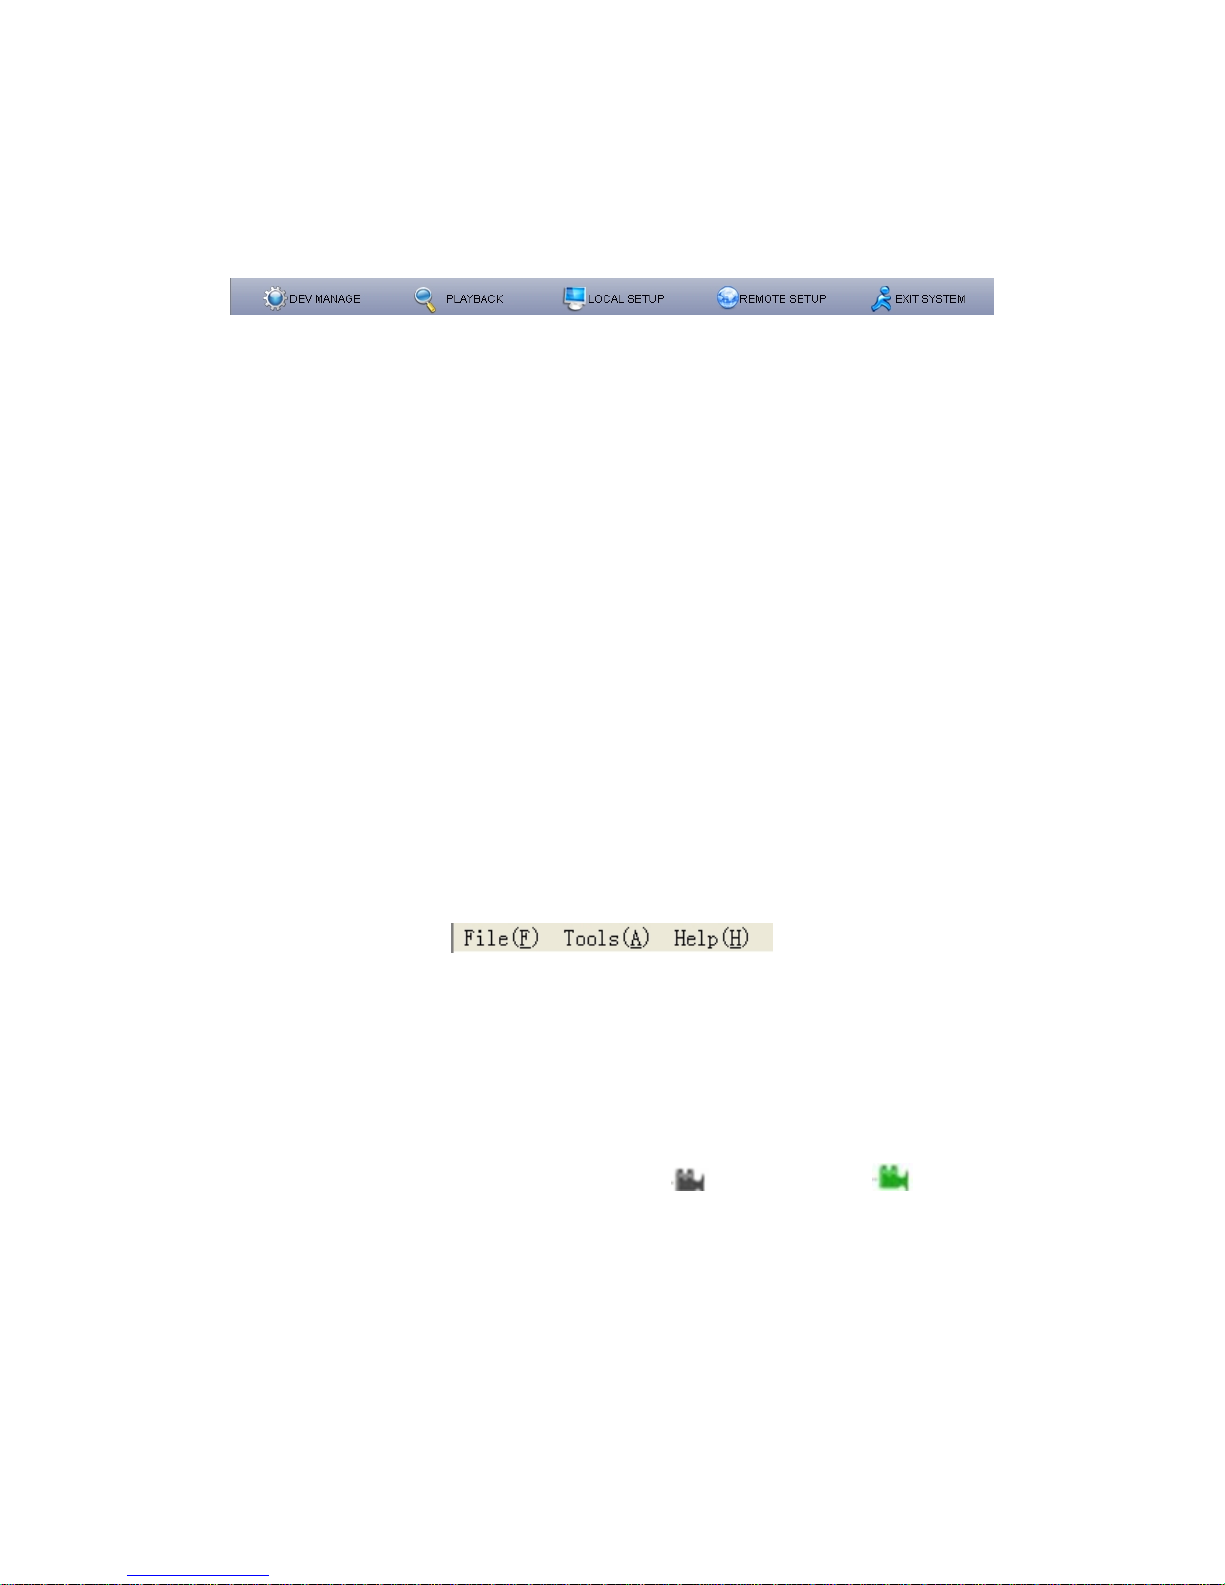
【DEV MANAGE】: After clicking this icon, you can add project, area and device.
When you add device, you should set device name, fill in IP address, port, username
and password.
【PLAYBACK】:After entering, you can select device and defined period to retrieve
recorder video files in remote and playback the files.
【LOCAL SETUP】: After entering, you can set your record path, capture path and file
path.
【REMOTE SETUP】:Click this icon to enter into setup interface, this interface include
encode, record, device alarm, channel alarm, PTZ setting, network, mobile, Email, user
management, system setting, HDD management and version information.
【EXIT SYSTEM】: Click this icon to exit system.
3.2 Top Menu Bar
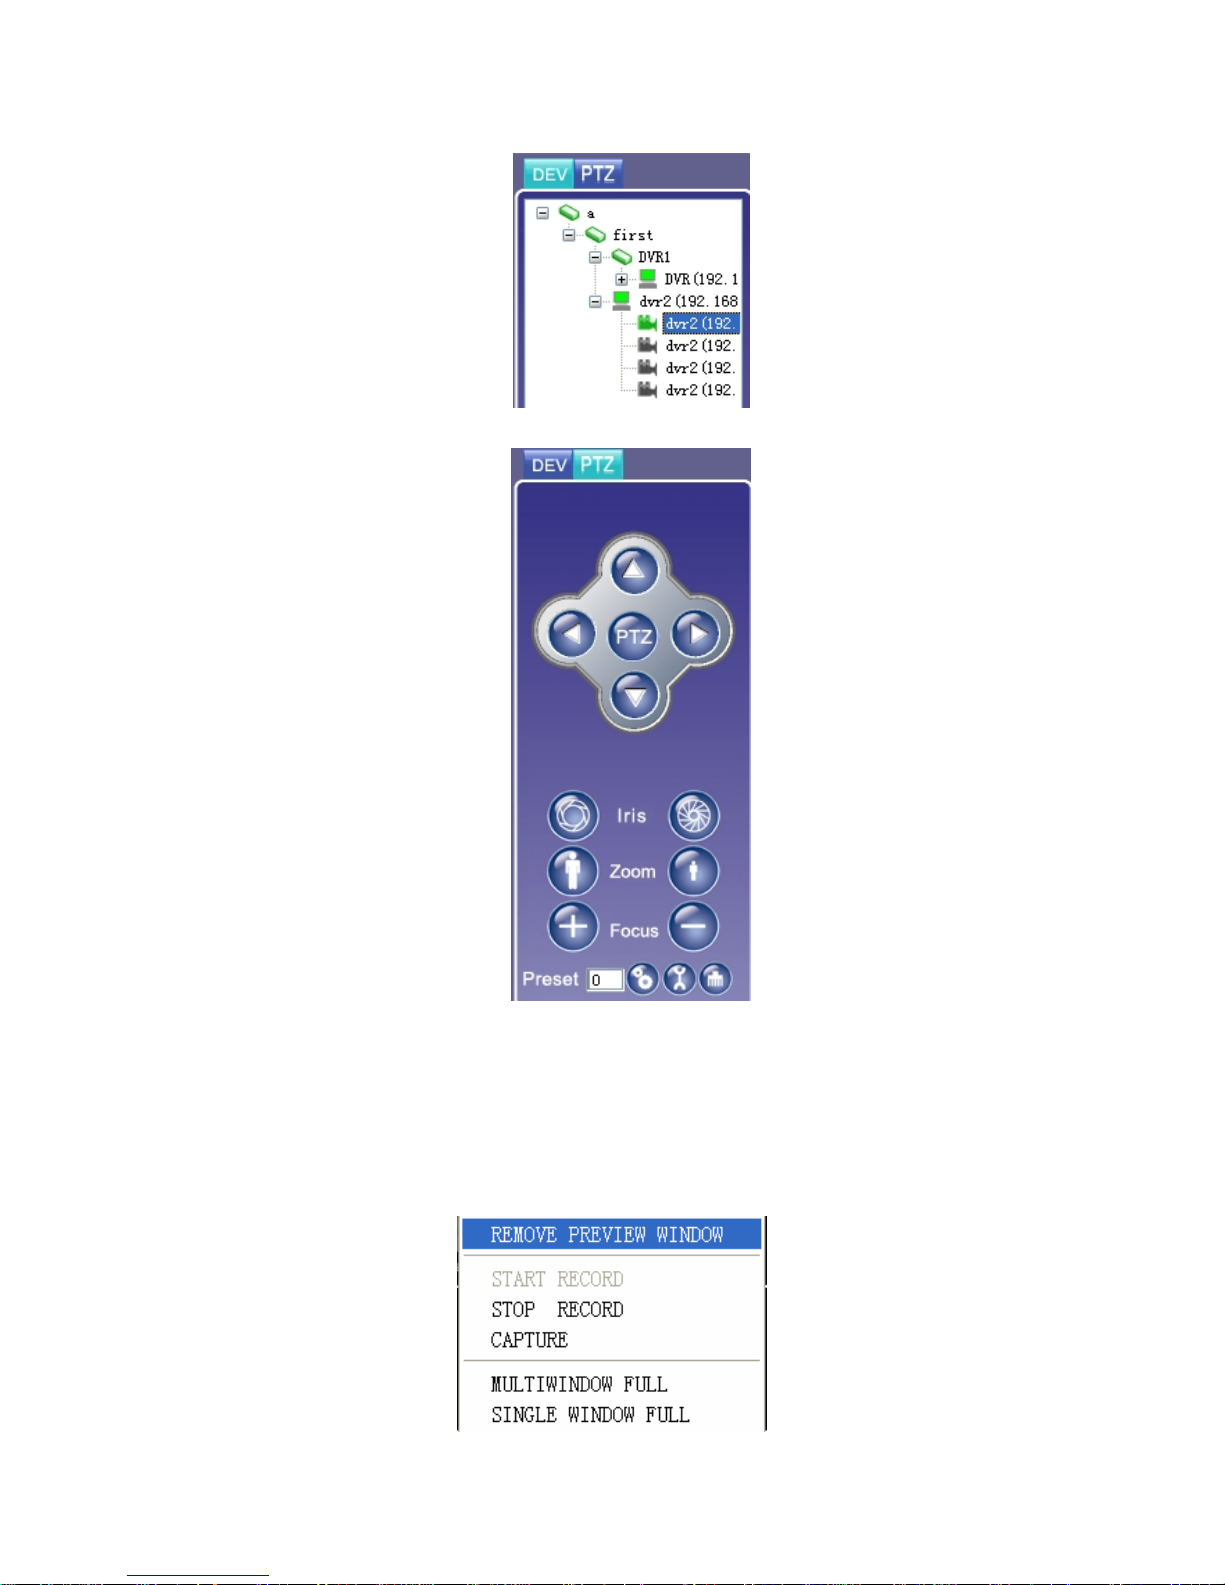
In top menu bar, there are three menu items such as File, Tools and Help. They
include the main functions of setting, playback and manipulation in this software. It’s
showed as follows:
3.3 Toolbar on Right Side
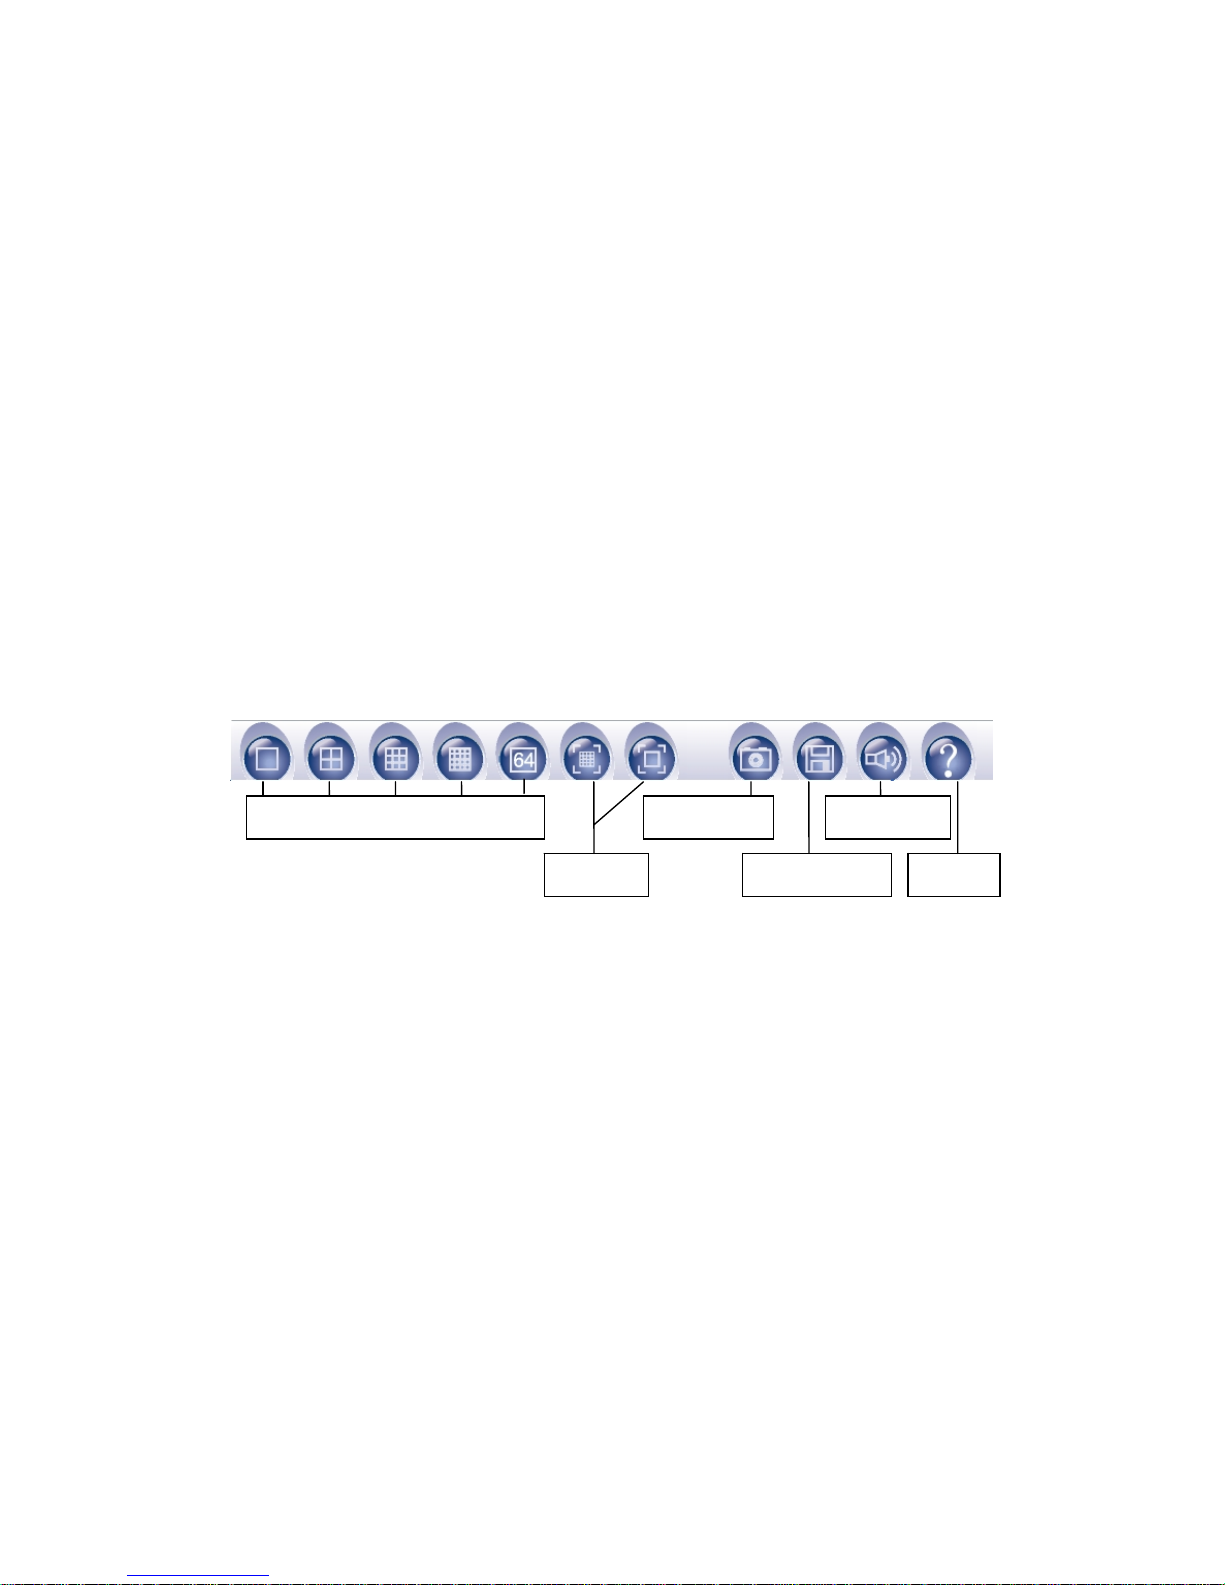
There are two tabs on right side. The first one displays device information. You can
get project, area and device information from this tab. You can spread out it by
left-clicking it, choose one channel and drag it to video area to monitor this channel. If
the channel is being monitoring, the icon
turn to green as . If it is
disconnected, the icon will be grey.
Page 8
8
The second tab is Pan/tilt control button. You can control high speed dome.
3.4 Video Area
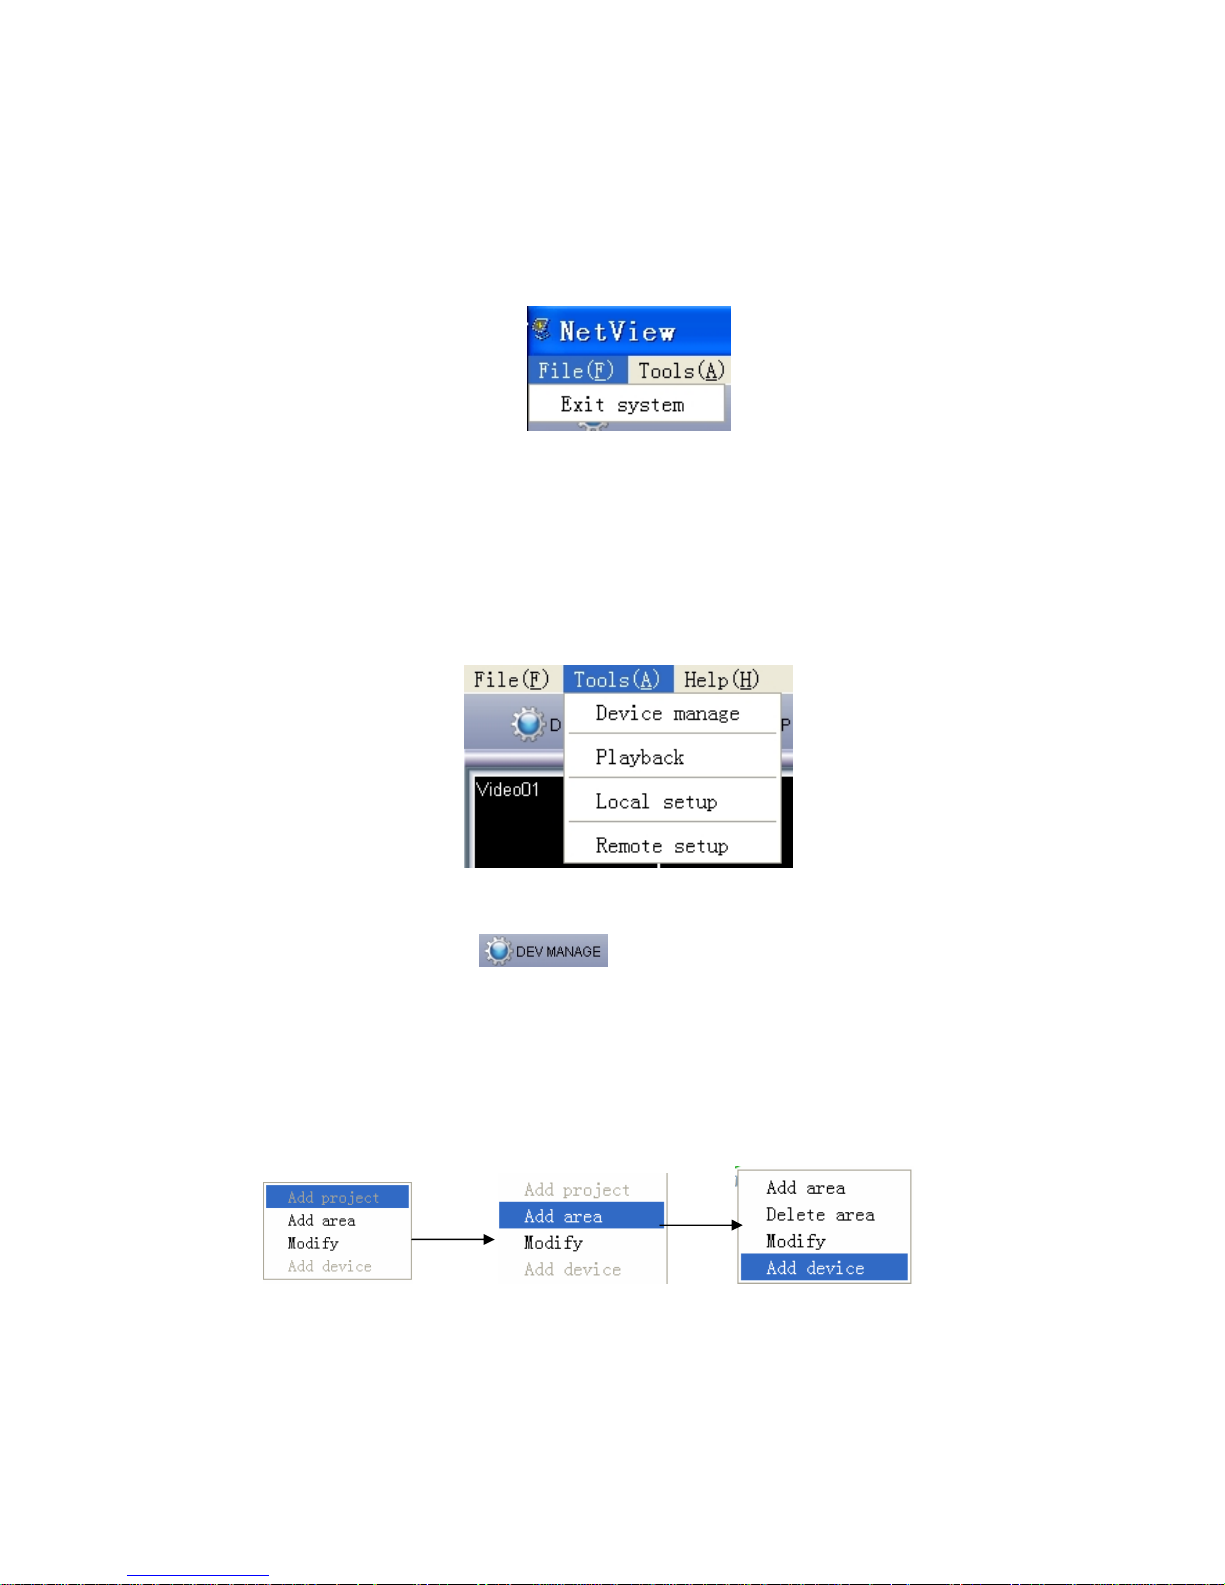
Choose the real-time video of one channel in video display area, and click right button
on selected video screen. System pops up a menu as follows:
Page 9
9
According to the menu, operations can be done such as remove preview, start or stop
record, image capture, multiwindow full and single window full.
REMOVE PREVIEW WINDOW: If you choose this button, the video you selected
won’t be displayed until you connect again.
START RECORD: Choose it to start local recording which is to save videos in AVI
format under appointed folder of local monitoring host. The path of save can be
modified in ‘Tools’ menu—‘local setup’.
STOP RECORD: Choose it to stop local recording.
CAPTURE: This is a real-time video capture function, which is to save single-frame
images from dynamic images in BMP format under appointed folder of local monitoring
host. The path of save can be modified in ‘Tools’ menu—‘local setup’.
MULTIWINDOW FULL: Display multiwindow in full screen
SINGLE WINDOW FULL: Display single window in full screen.
3.5 Bottom Toolbar
【Multi-frame controlling】: 1-frame, 4-frame, 9-frame, 16-frame, 64-frame
【Full screen】: Video image displayed on the screen will be maximized, it contains
multi-window in full screen and single window in full screen.
【Image Capture】Instant image of current channel can be captured
【Record Start/Stop】: Start or stop local record, which is to save videos in AVI format
under appointed folder of local monitoring host. The path of save can be modified in
‘Tools’ menu—‘local setup’.
【Mute On/Off】: Turn on or turn off sound.
【Version】: Version information.
4.0 Menu and Mouse Operation
CMS is composed of three parts: File, Tools and Help.
Multi-frame controlling
Full Screen
Image Capture
Record Start/Stop
Mute On/OFF
Version
Page 10
10
4.1 File
By “File” menu of CMS operations like “Exit system” can be carried out. Picture
showed as following:
Exit System: exit CMS program.
4.2 Tools
“Tools” menu is mainly used to manage device, playback files, setup local setting and
remote setting. Showing as following picture:
Device Manage: mainly used to manage device. It can be achieved by clicking
“Device manage” button
in the top toolbar and the function is the
same.
Click right button of the mouse in device management window, and choose “Add
Projects” in pop-up menu. Choose “Add Area” for newly built project by clicking right
button after entering the name, then click right button for newly built group and choose
‘add device’.
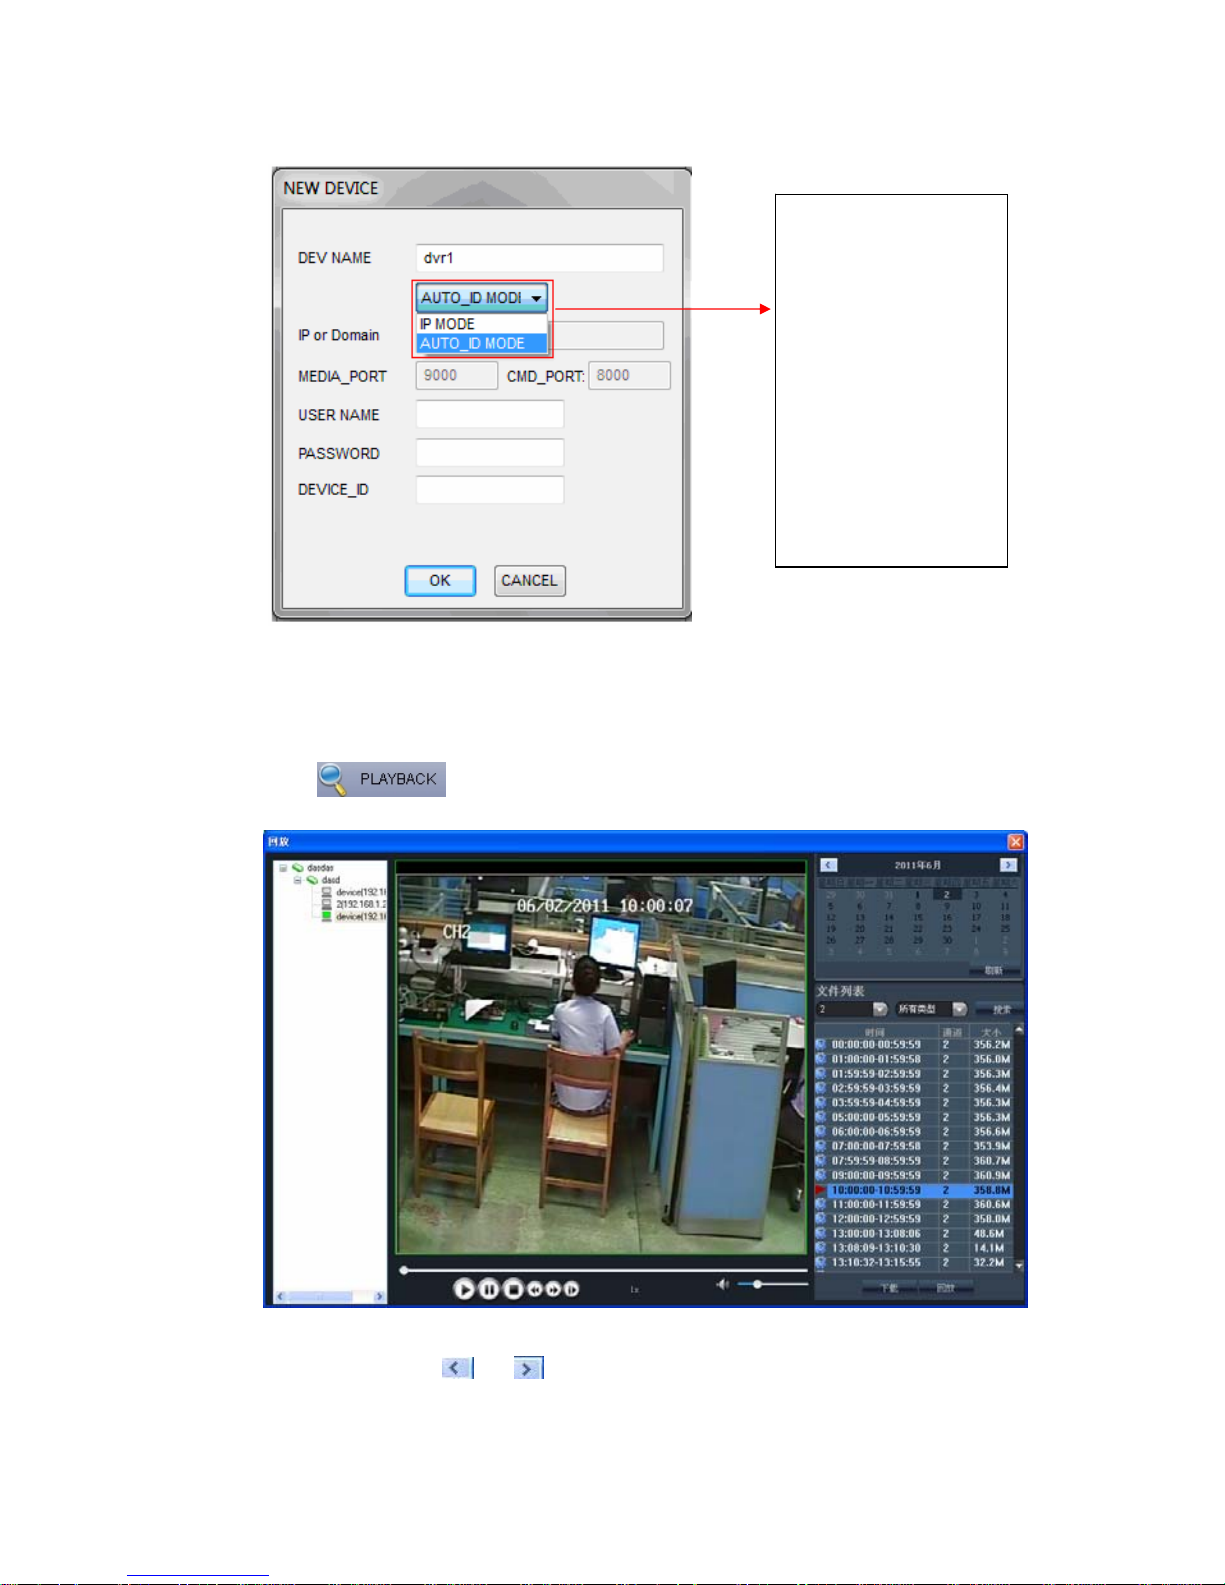
When you are adding new device, you should set a device name, fill in DVR’s IP, port,
username and correct password.
Page 11
11
NOTE: For the Auto ID number you can get it from the interface of login.
Playback: In this interface, you can select a device, search for its remote recording
files, playback it and download it. It can also be achieved by clicking “Playback”
button
in the top toolbar and the function is the same.
On the left hand of panel, you can select a device which you want to playback. Click right
up of calendar interface
and , to set the month for searching; click “REFRESH” at
the calendar interface to display the recording information of current month.
Between device name and IP or
domain there is a navigation bar,you
can switch between IP/Auto ID
mode by moving it.You need
manually input all the settings under
IP MODE except DEVICE-ID,while
PORT configurations are set to
default under Auto IP mode.
(Note:You still need to input the
USER NAME,PASSWORD and
DEVICE ID under Auto IP MODE.)
Page 12
12
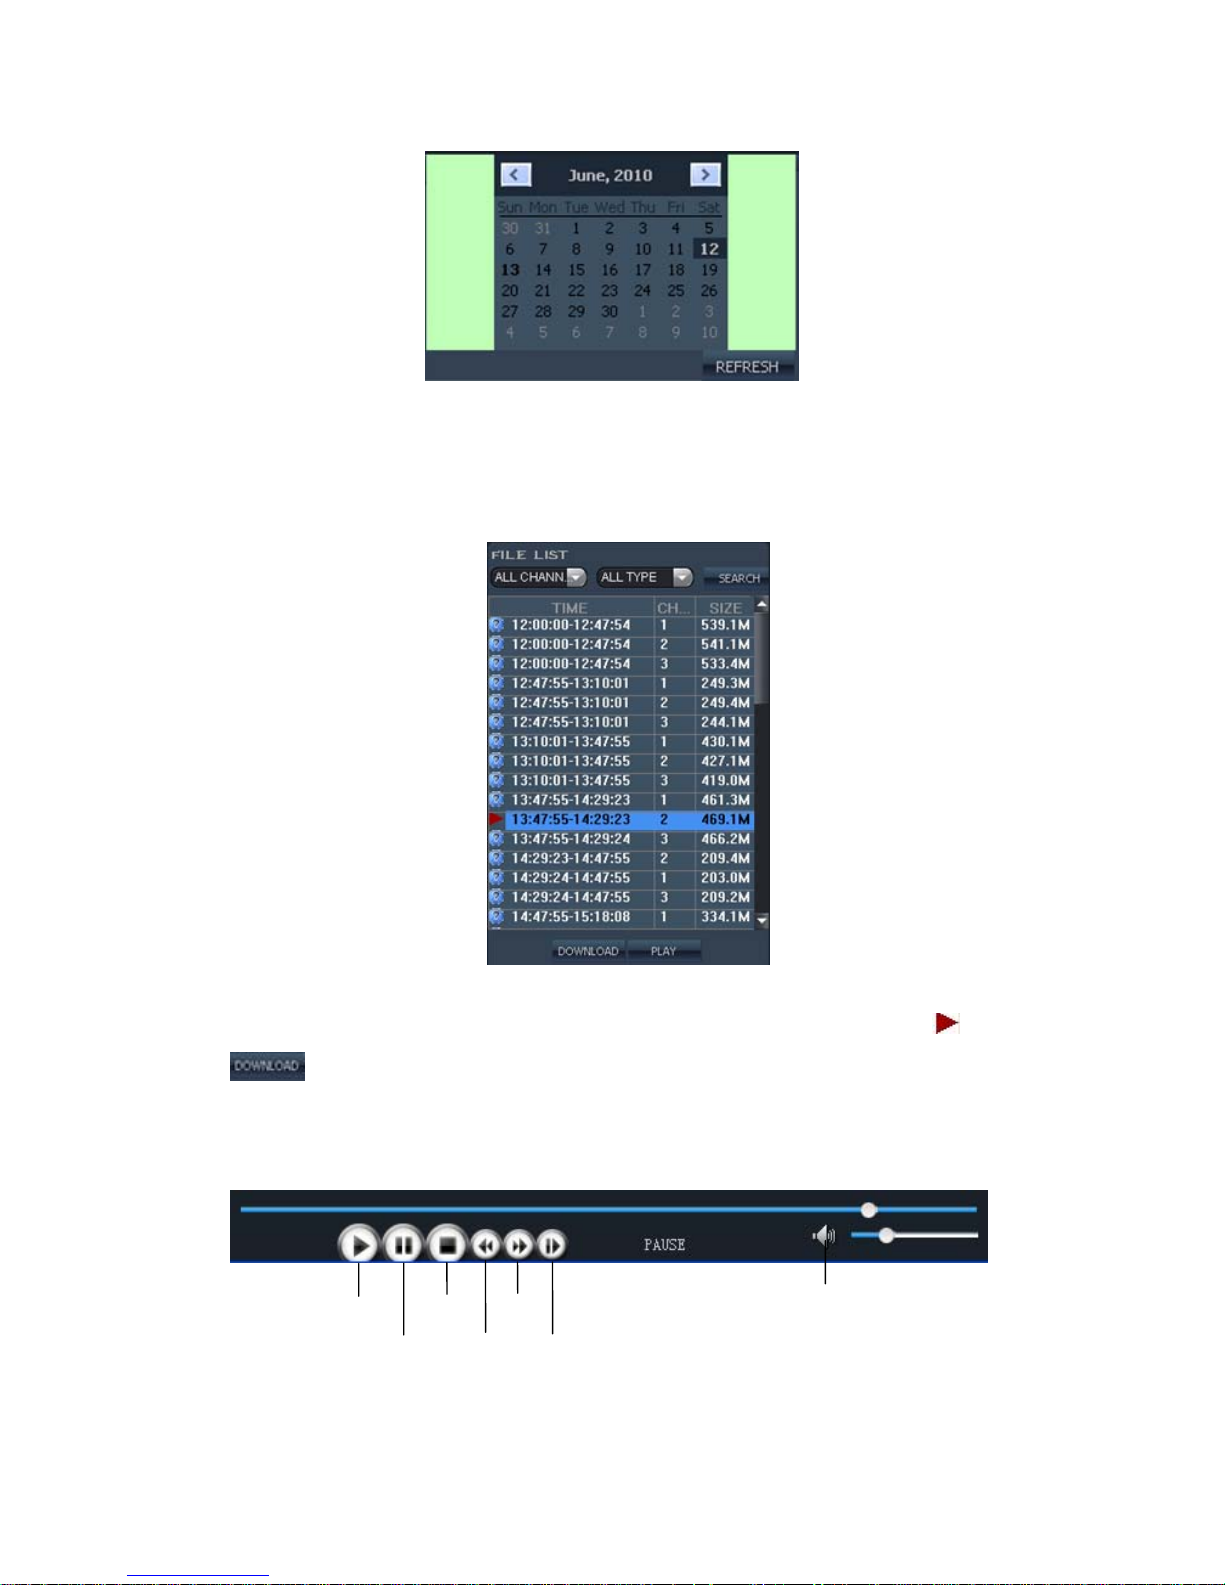
The highlighted date indicates that video was recorded on that day. Click on a date to
search the recording file list of that day. For example, the above fig shows that June, 12th,
13th have recorded video when it shows on bold, and current search date is June 12th.
Select channel and type at the bottom of the calendar. Click “SEARCH” and the result will
display as follows.
Double click one of the listed recorded video to playback. Or select one of the listed
recorded video and click the button [PLAY] to playback. The file icon will change to
.
The user can download files on PC, and save them to HDD for backup or pla y.
Download file format is AVI file.
Introduction of toolbar:
Play Stop Fast Play Volume Control
Pause Slow Play Single Frame
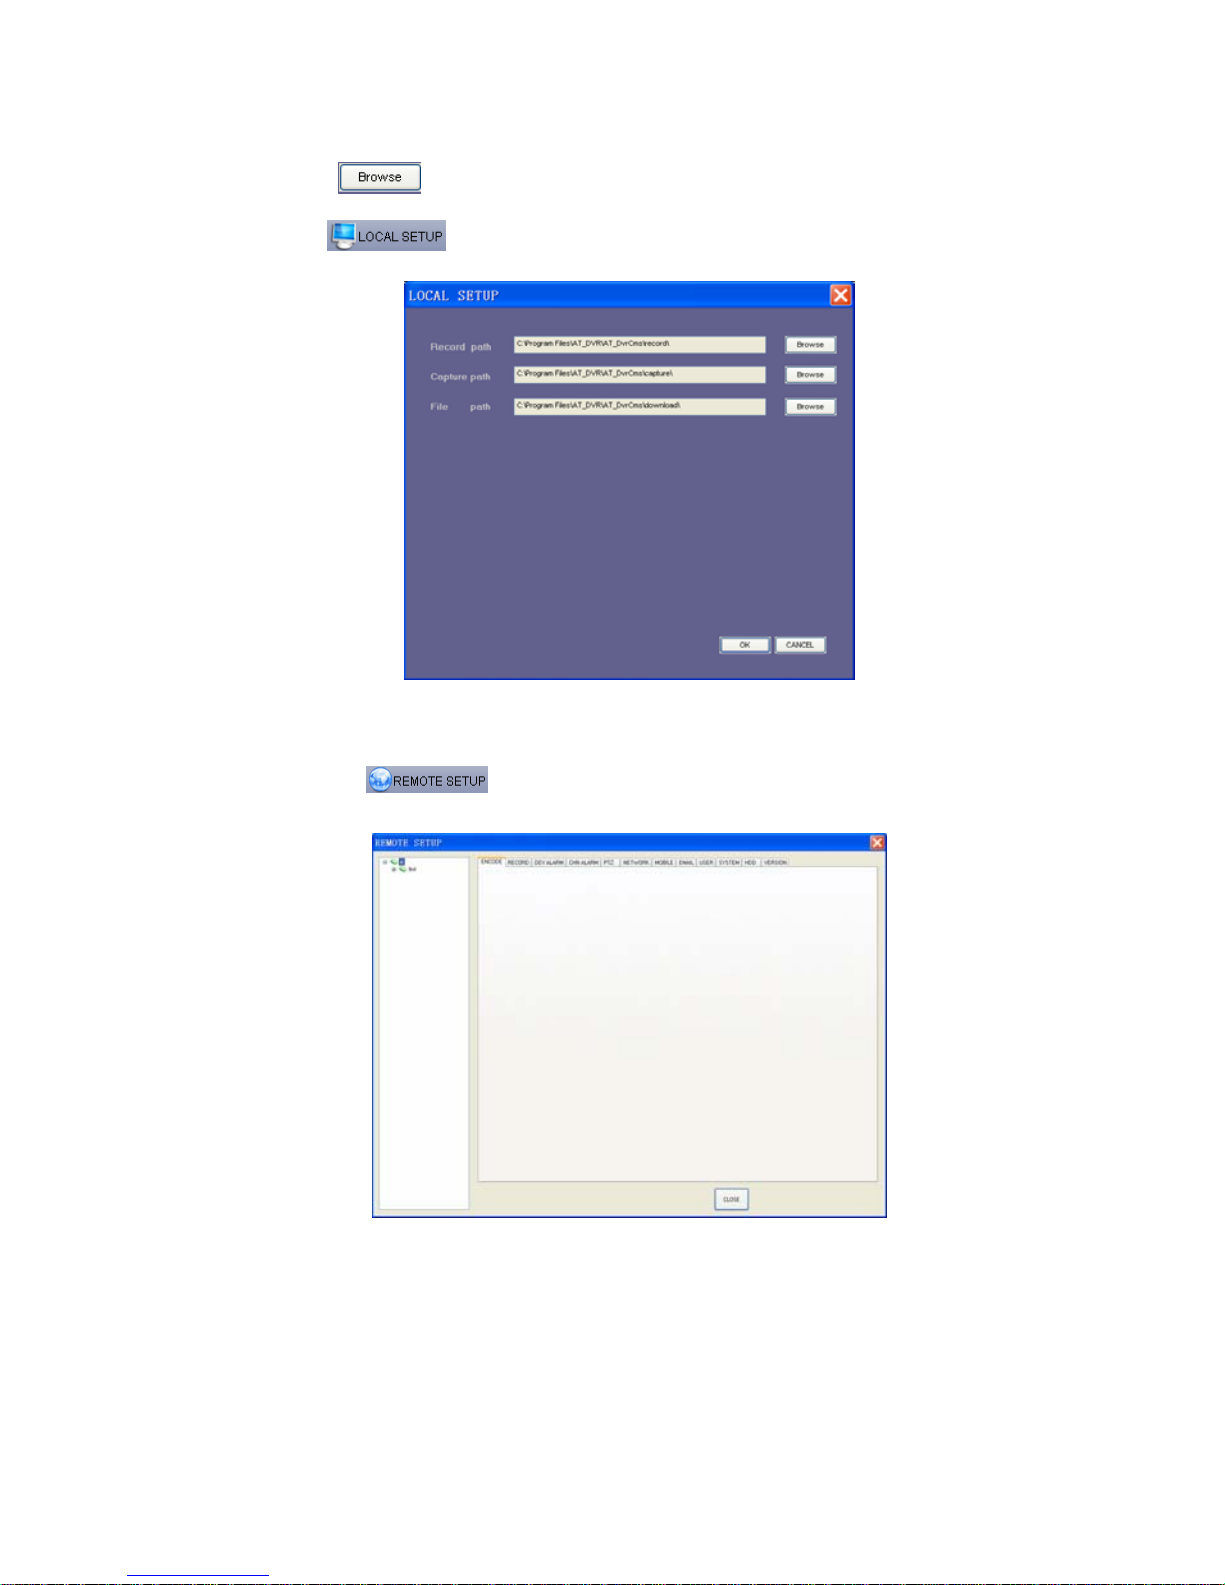
Local Setup: It is used to setup the save path for local setting. “Record save path” is
for recording, “Capture path” is for capture and “File path” is for download. C lick the
Page 13
13
button “ ” to setup save path. It is equal with the function of ‘LOCAL SETUP’
button
on top Toolbar.
Remote setup: It is used to setup remote settings, includes record, alarm, PTZ, network,
advanced and system information six menus. It is equal with the functi on of ‘REMOTE
SETUP’ button
on top Toolbar.
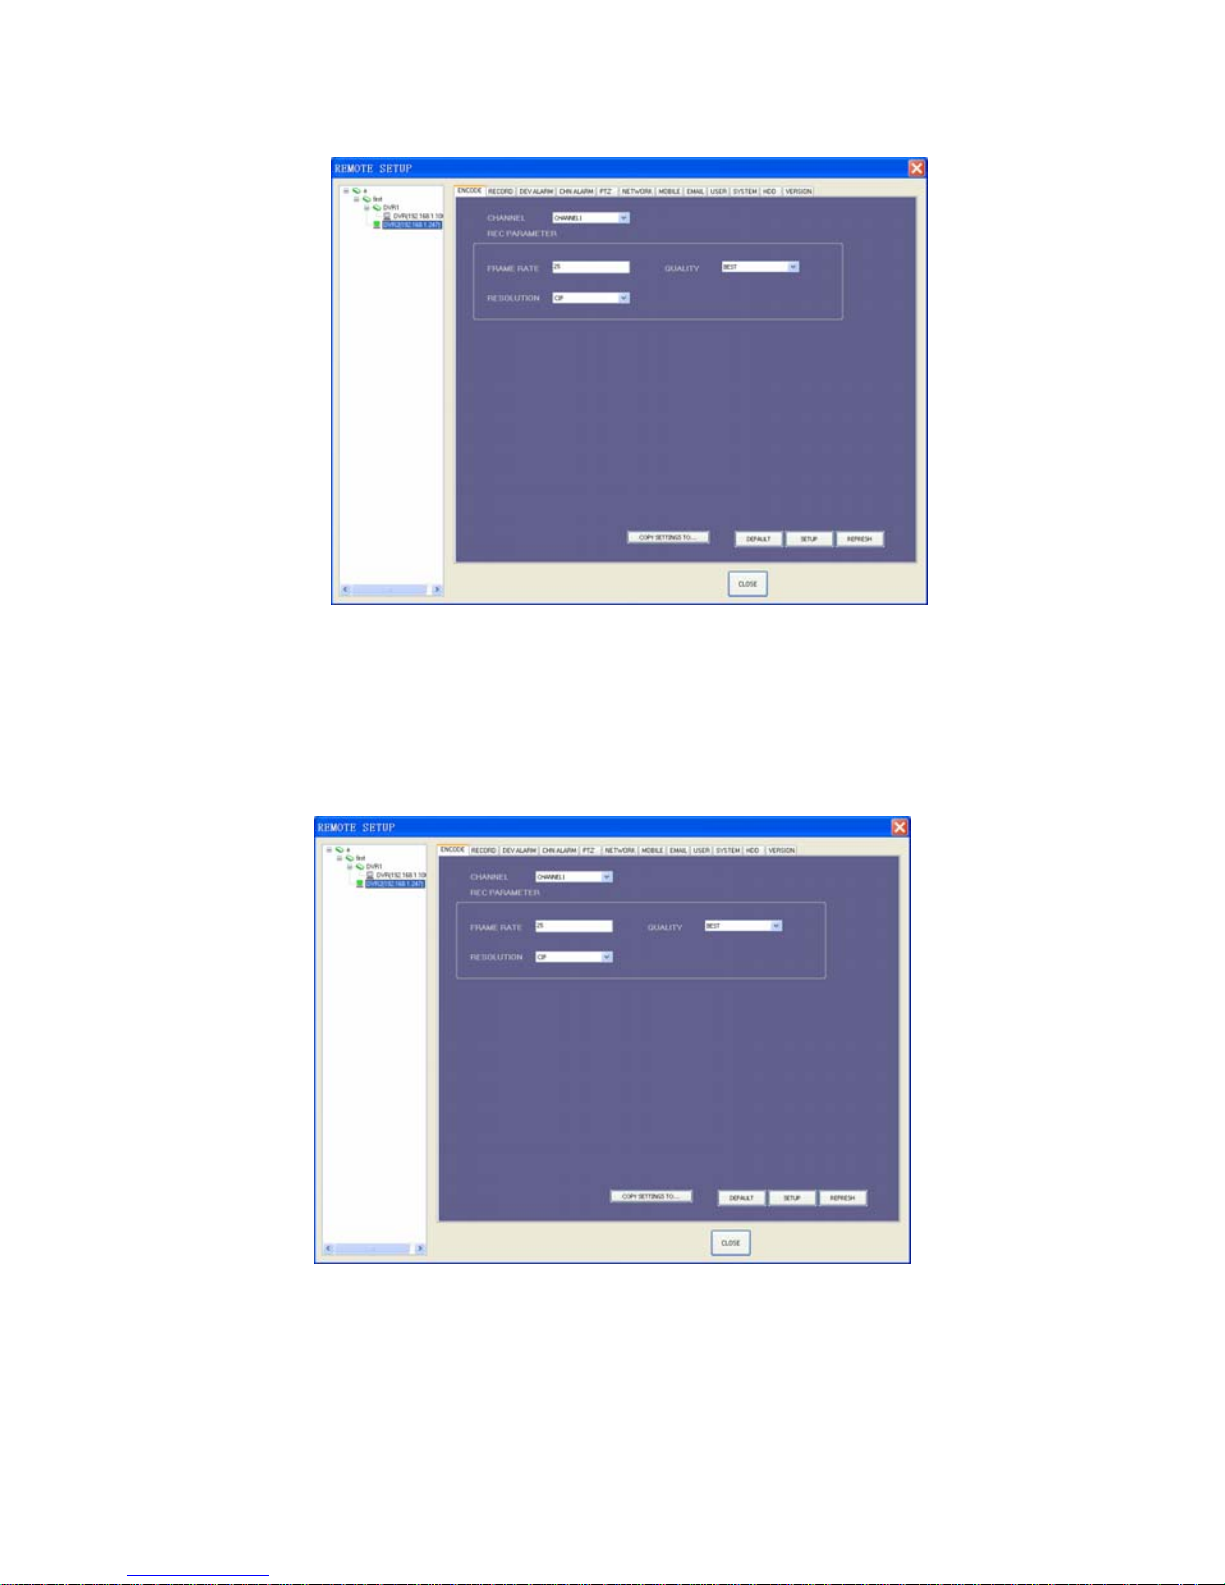
In this interface, you should select device you want to s etup on left hand at first, then
wait for several seconds until the blank area display the r emote parameters as below
picture.
Page 14
14
In above interface, you can set remote settings and detail introduction will be told
underside.
A. Encode Setting
Click [Encode] tab to enter into setup interface. User can adjust recording parameters
(resolution, quality and frame rate) for each channel remotely via CMS.
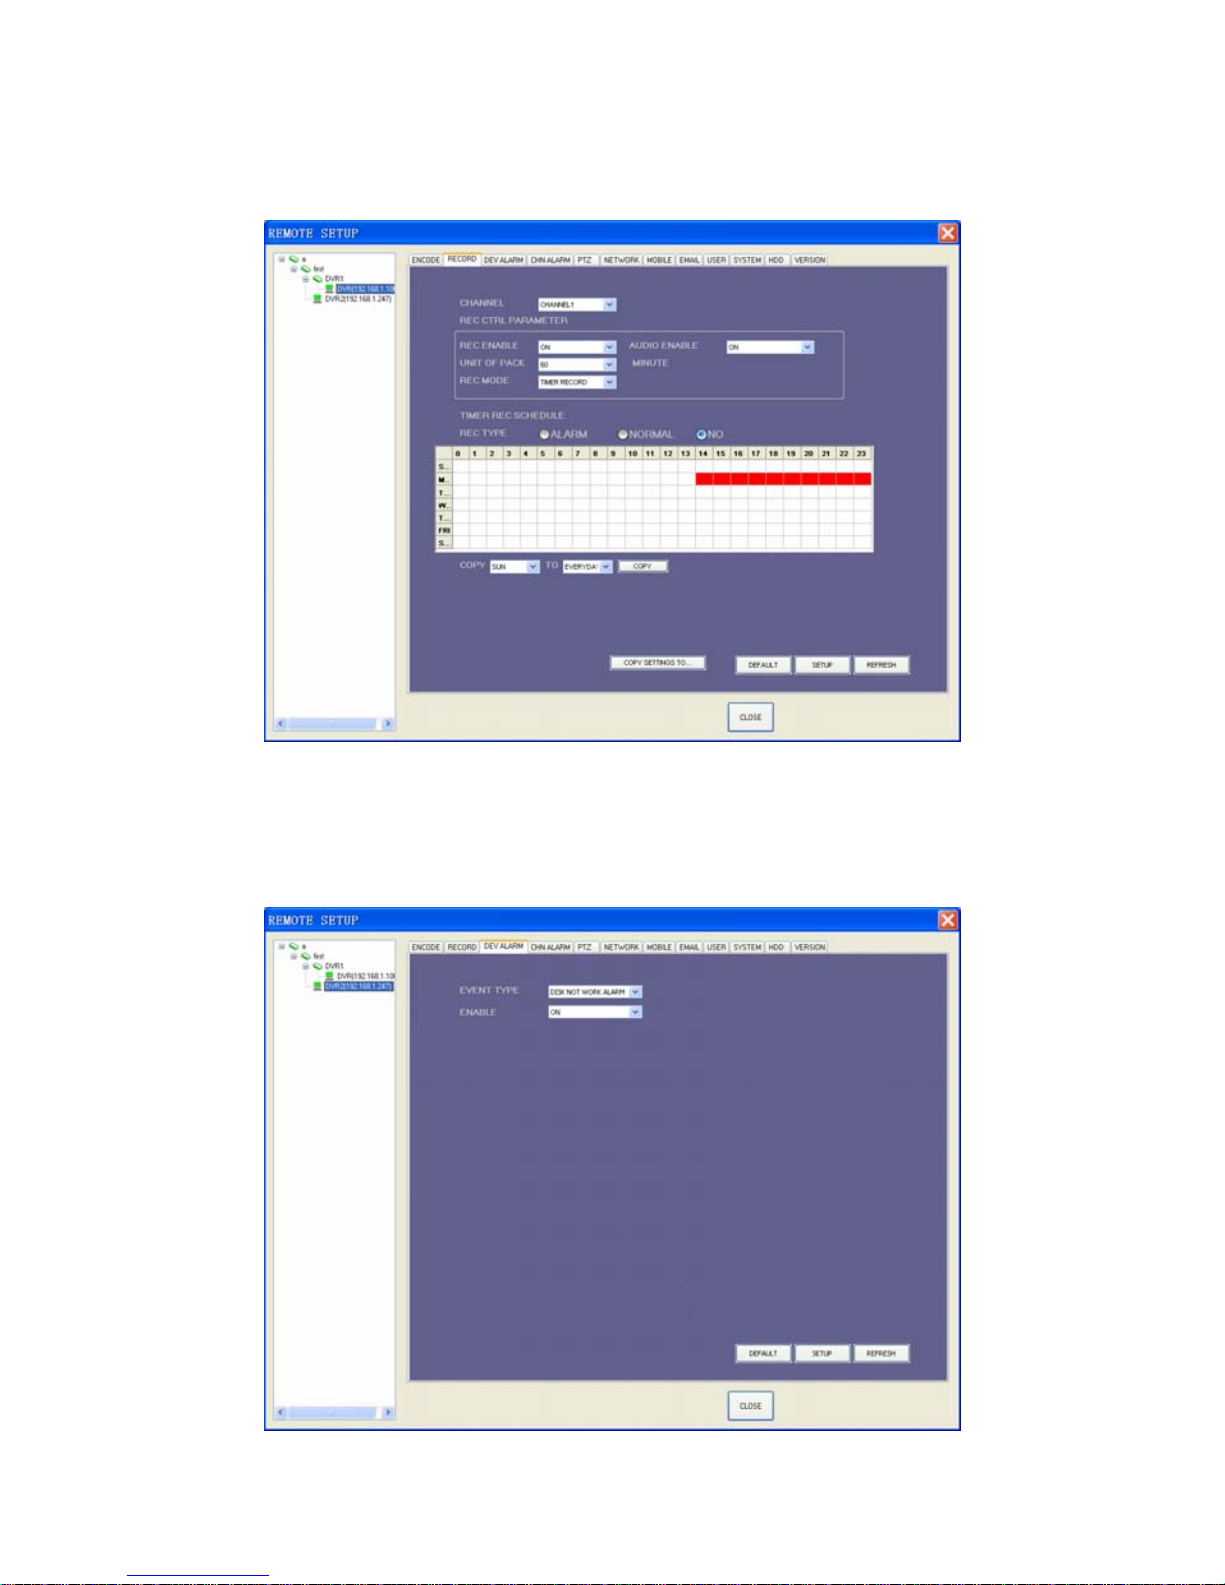
B. Record Setting
Click [Record] tab to enter into the menu interface, user can select “on/off” for each
channel, and adjust recording parameters (audio, pack time, REC mode and REC
Page 15
15
schedule) remotely via CMS.
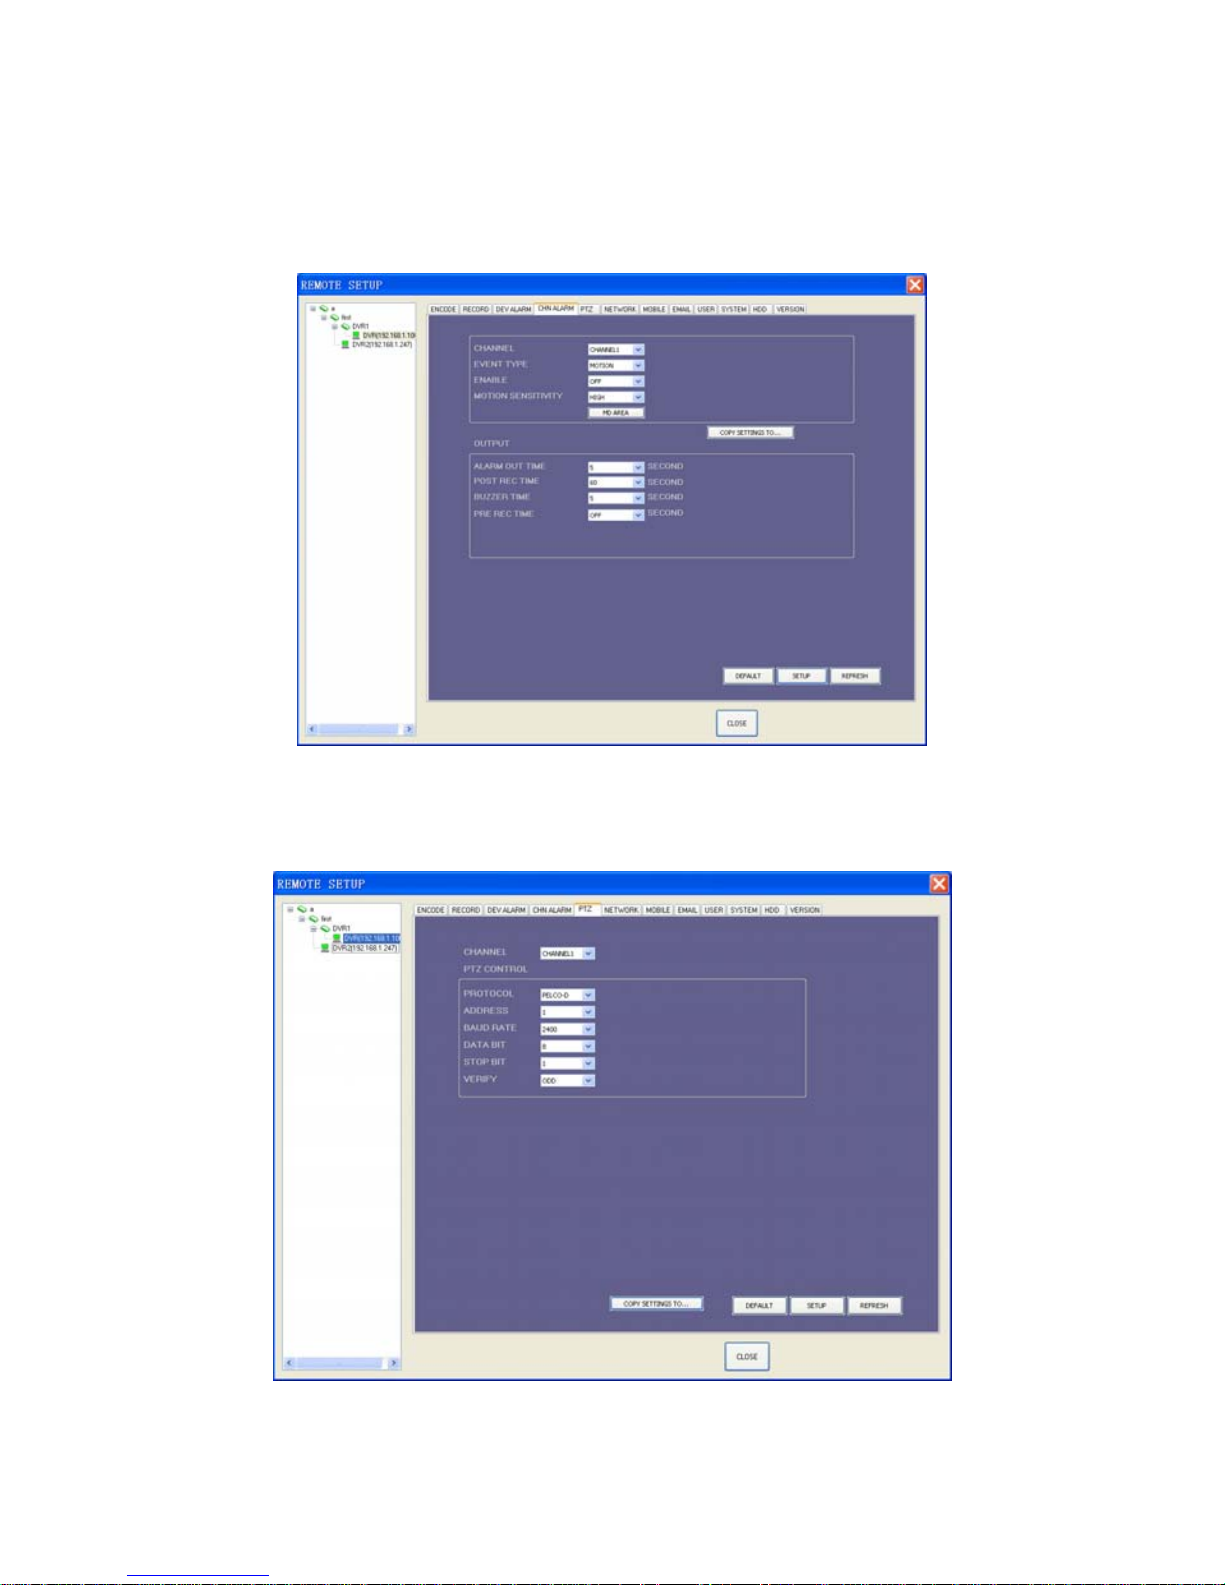
C. Device Alarm Setting
Click [DEV Alarm Setting] tab to enter into setup interface. You can set disk not work alarm,
low HD spare alarm and video lost alarm.
Page 16
16
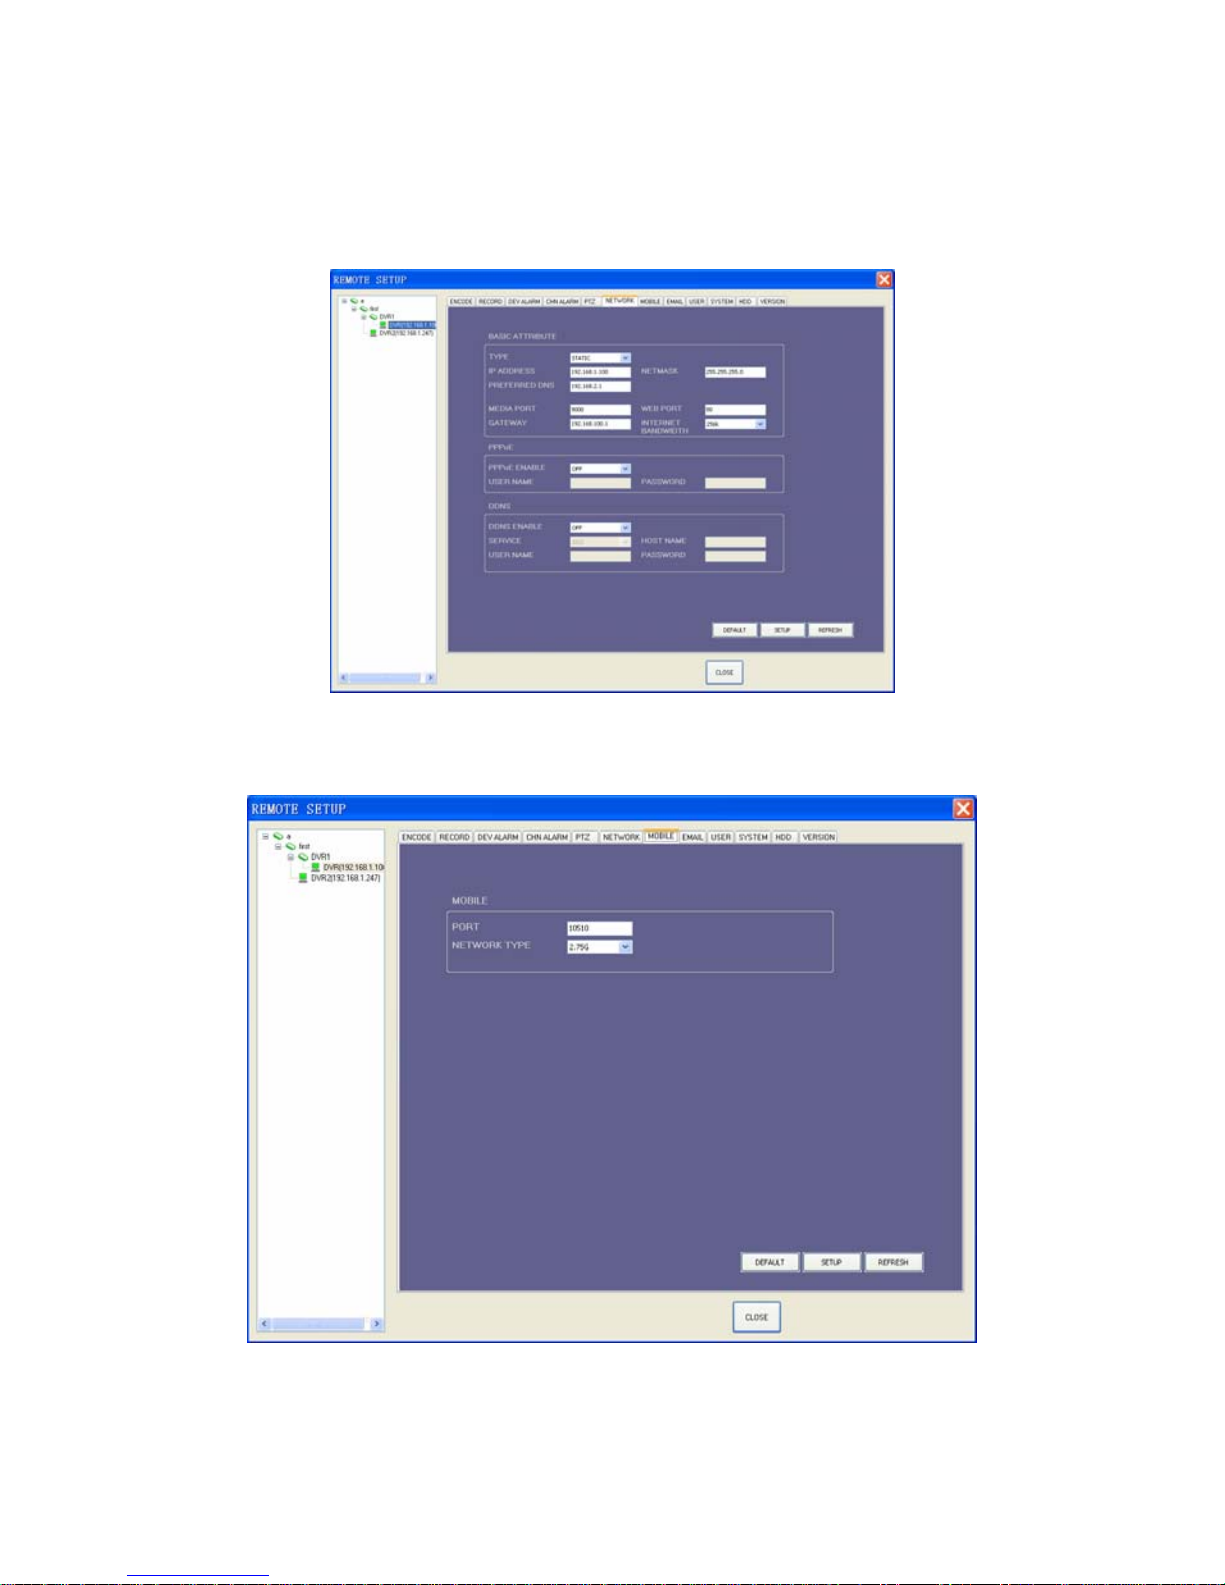
D. Channel Alarm Setting
Click [Channel Alarm Setting] tab to enter into setup interface. User can set up alarm
event types; also can set I/O alarm for each channel, motion detection alarm, motion area,
motion sensitivity, alarm out time, buzzer time, pre REC time and post REC time.
E. PTZ Setting
Click [PTZ Setting] tab to access setup interface. User can setup PTZ parameters
remotely using the same methods as in the local DVR setup.
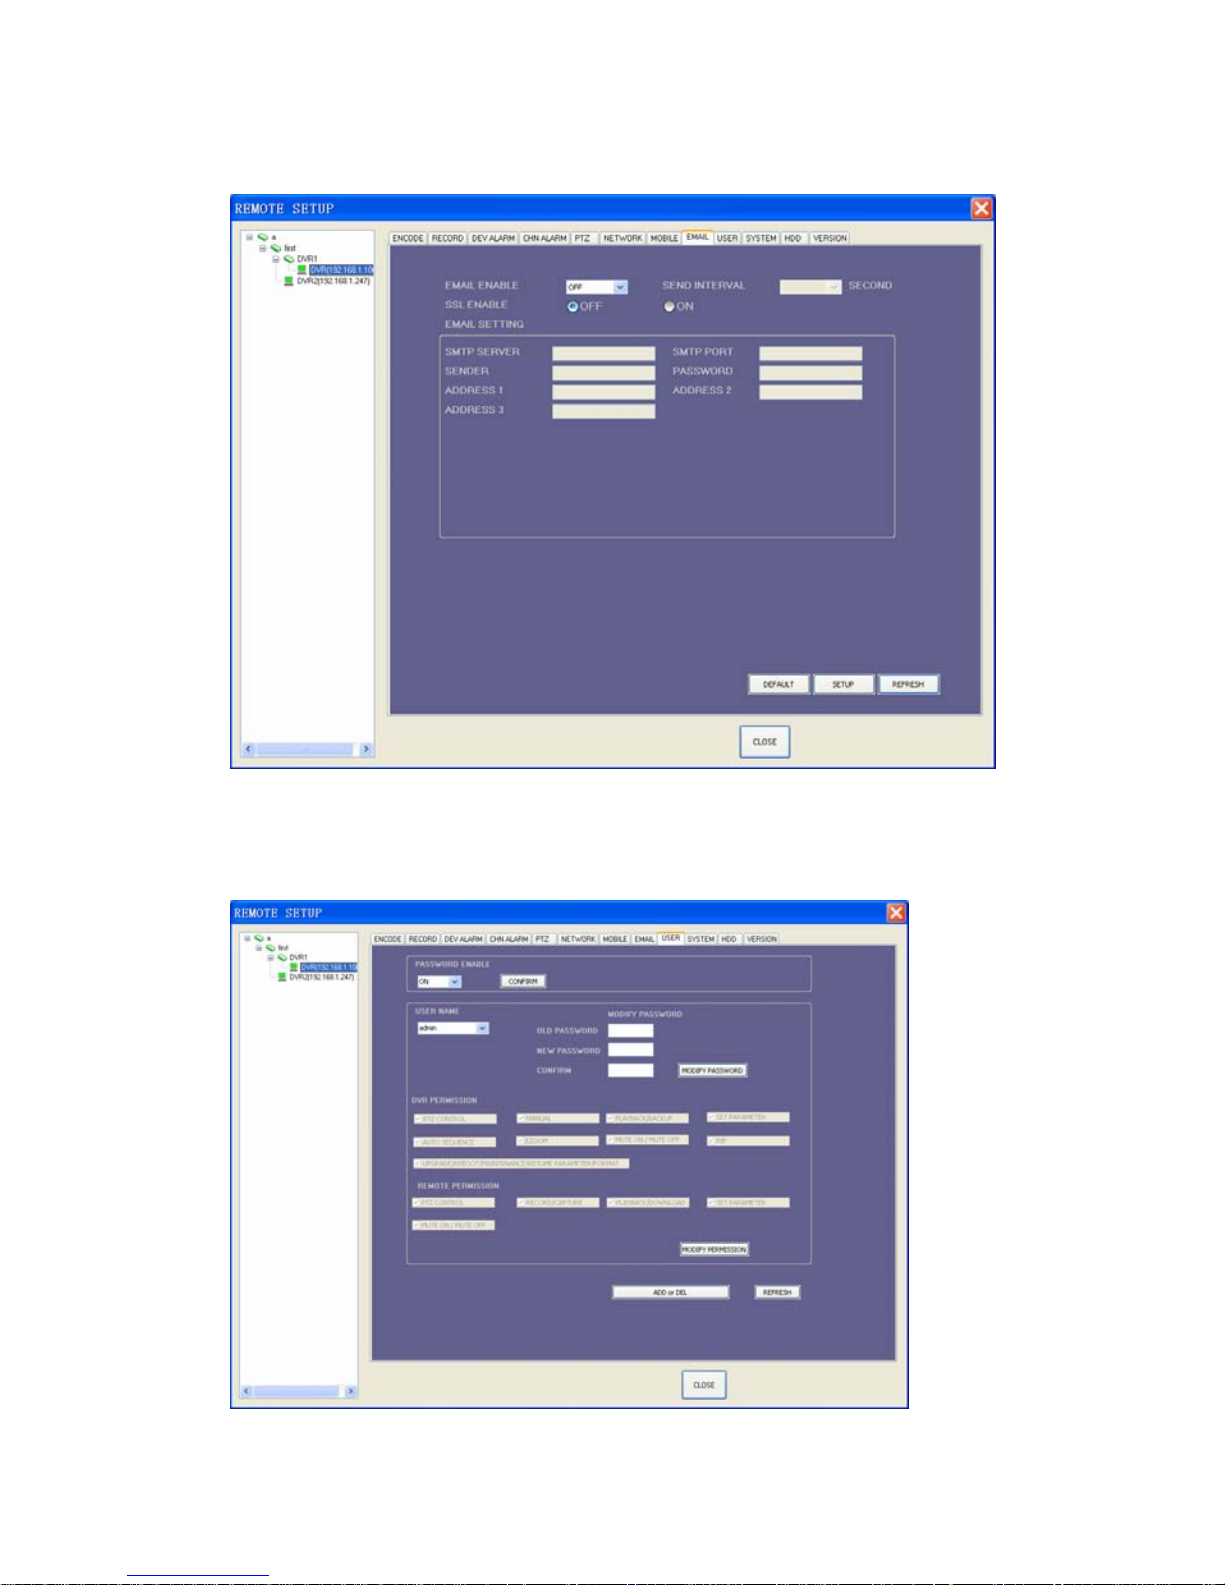
F. Network Setting
Page 17
17
Click [Network Setting] tab to enter setup interface. The menu a llows user to set a lower
bandwidth for Internet video transmission.
User can setup network parameters using the same methods as in the local DVR setup.
G. Mobile Setting
Click [Mobile Setting] tab to enter setup interface.
User can setup mobile parameters using the same methods as in the local DVR setup.
H. Email Setting
Click [Email Setting] tab to enter setup interface. User can s etup email parameters using
Page 18
18
the same methods as in the local DVR setup.
I. User Setting
Click [User Setting] tab to enter setup interface. User can enable password, change
password, set DVR permission and remote permission using the same methods as in the
local DVR setup.
Page 19
19
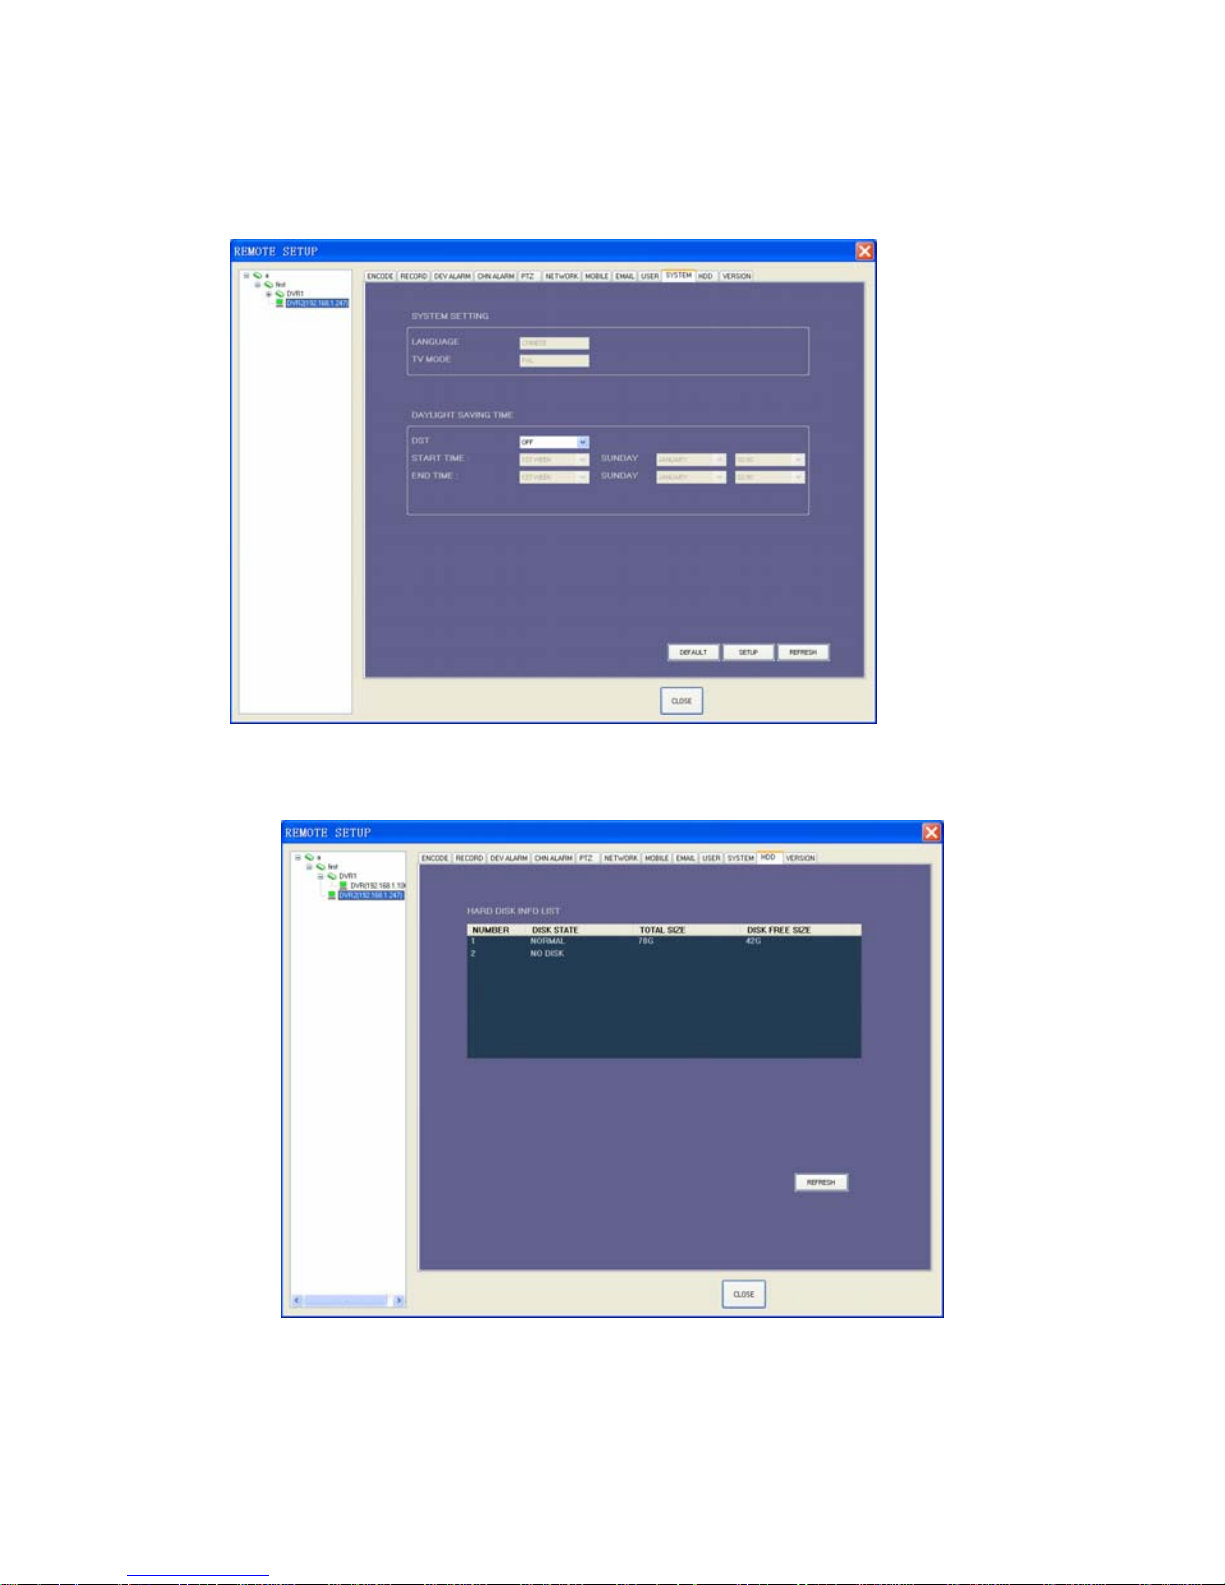
J. System Setting
Click [System Setting] tab to enter setup interface. The menu allows user to set daylight
saving time.
K. HDD
Click [HDD] to enter below interface. Here user can check HDD state, total size of HDD
and free size of HDD.
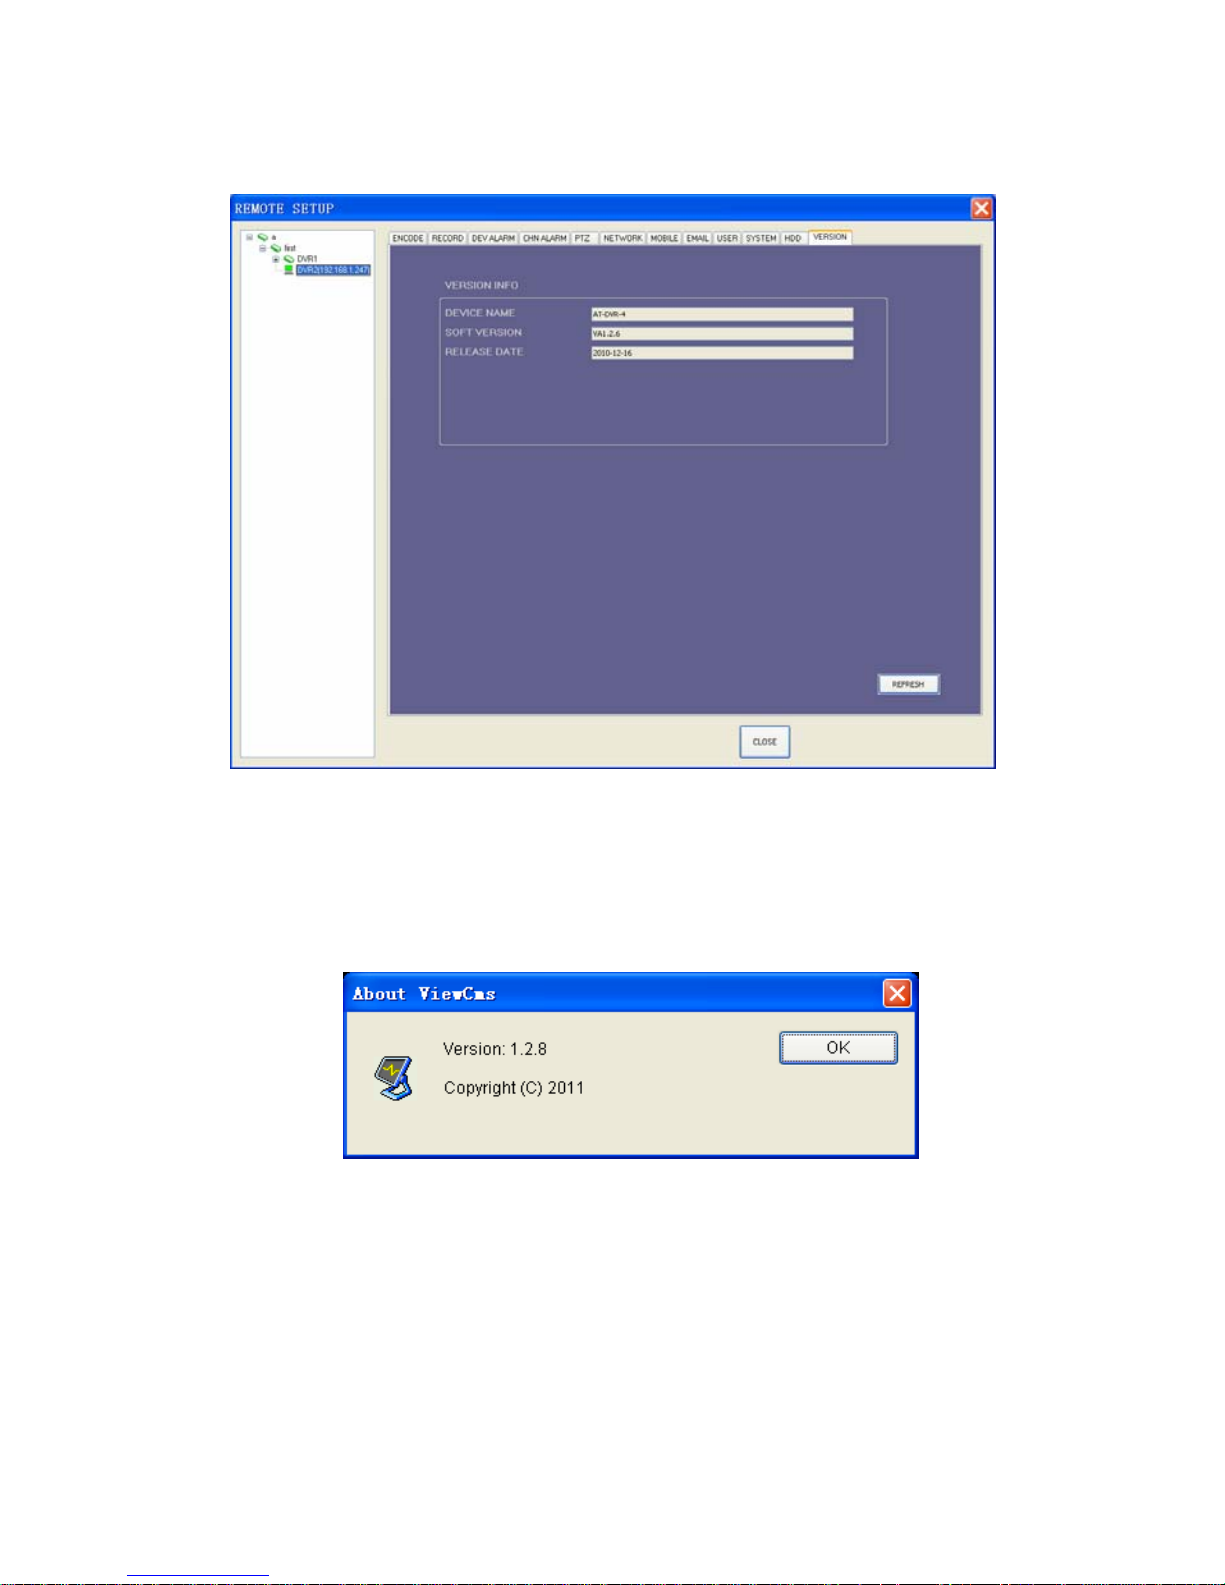
L. Version
Click [Version] tab to enter setup interface. Here user can check the device’s name and
software version.
Page 20
20
4.3 Help
Version and copyright information of CMS displayed by ‘help’ menu
4.4 Mouse Operation
Click left button of mouse on one video frame to choose the video. Double click left
button of mouse on one video frame, then the video will be displayed in full screen mode;
double click the screen again, it will return to previous displaying mode.
Page 21

21
5.0 Real-Time Video Display and Control
Real-time video controlling function of CMS can realize the control of displaying
images, PTZ and carry out some practical processing on video images.
5.1 Real-Time Video Frame Control
Real-time Video Frame Control contains multi-frame switching, full screen display,
local record, image capture and mute on/off.
5.1.1 Displaying Mode Switch ing
This CMS supports four displaying modes: single-frame, 4-frame, 9-frame, 16-frame,
and 64-frame. 64-frame displaying mode is system default mode. When starting CMS,
system will display the video of 64 channels in device list of this client-side in 64-frame
mode. Users can switch displaying modes by toolbar at the bottom.
1 2 3 4 5 6 7
1.
Single frame displaying: Click this icon to single display frame which you had selected. If
you click again, it will sin gle display next frame.
2.
4-frame displaying: Click this icon to display frames in the modes of four frames. If you
click again, it will display next group in the sam e mode.
3.
9-frame displaying: Click this icon to displa y frames in the modes of nine frames. If you
click again, it will display next group in the sam e mode.
4.
16-frame displaying: Click this icon to display frames in the modes of sixteen frames. If
you click again, it will display next group in the same mode.
5.
64-frame displaying: Click this icon to display frames in the modes of sixty frames.
6.
Multiwindow full display: Click this icon to display the real time videos in full screen. If
you want to exit this mode, you can press button “Esc” on your keyboard.
Page 22
22
7. Single window full display: Click this icon to single display frame in full screen. If you
want to exit this mode, you can press butt on “Esc ” on your keyboard.
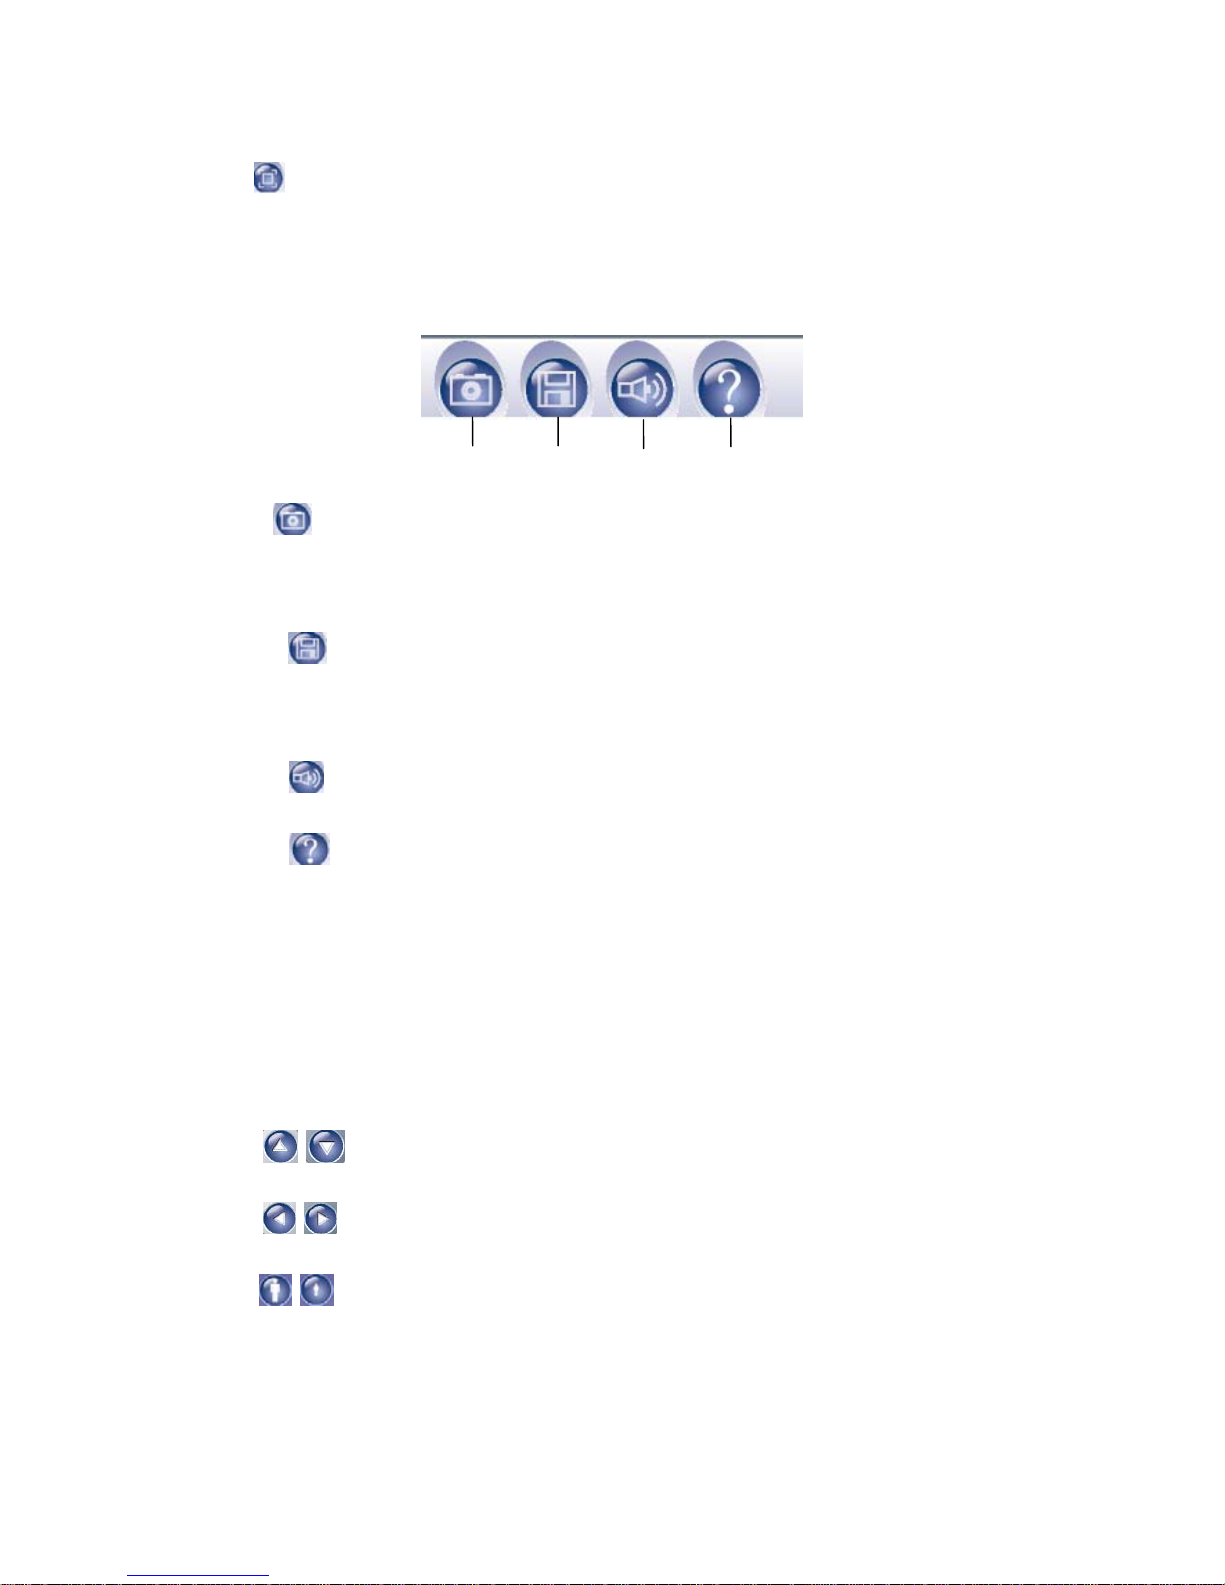
5.1.2 Display Control
1 2 3 4
1.
Capture: This is a real-time video ca pture func tion, which is to s ave singl e-frame
images from dynamic images in BMP format under appointed folder of local monitoring
host. The path of save can be modified in ‘Tools’ menu—‘local setup’.
2.
Record: Click it to start or stop local recording which is to save videos in AVI
format under appointed folder of local monitoring host. The path of save can be
modified in ‘Tools’ menu—‘local setup’.
3.
Mute on/mute off: Click this icon to turn on or turn off sound.
4.
Version: Click this icon to show version.
5.2 Pan/Tilt/Zoom Controlling
The CMS can control the pan/tilt and lens of the device at front-end only when users
group of this CMS is authorized with “PTZ Controlling”. Authority limits of this client-side
will be set in local DVR user management.
On CMS side, you can carry out following control of PTZ:
Lens UP/DOWN
Lens turn LEFT/RIGHT
Zooms the Lens in and out. Magnification can be changed by using the
mouse wheel under the current frame.
Page 23
23
Focus FAR/NEAR
Iris ZOOM UP/DOWN
Invoke PREASET POINT: Click this button to automatically switch the
camera to the corresponding location of presetting point.
Set PRESET POINT: Click this button to preset the point number of the menu,
Clear PRESET POINT: Click this button to clear the preset point number.
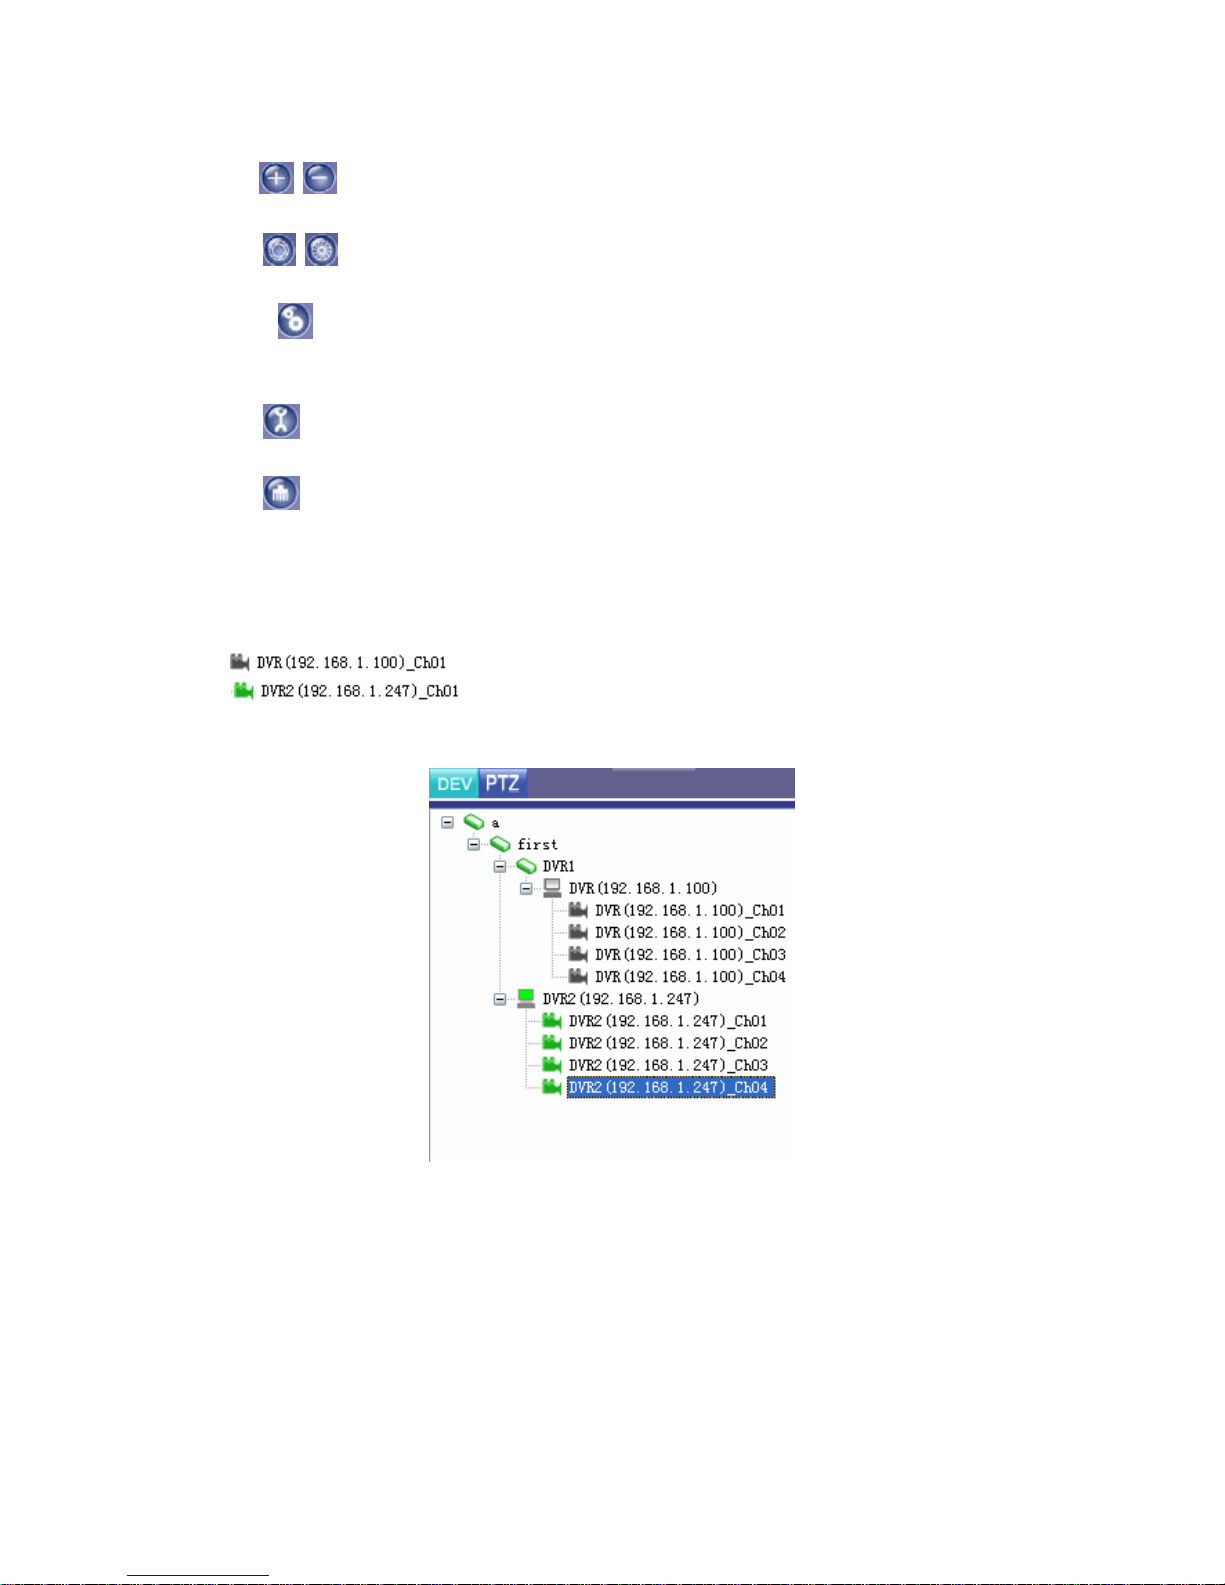
5.3 Device Information
In the right hand of live view, there is a panel which displays the device information.
indicates this channel does not connect to our CMS and
indicates this channel connect to CMS normally. If you want to
connect a channel to CMS, you can left-click it with your mouse and drag it to video
display area.
MC-636(A-2)
 Loading...