

DISCO SET III
151.725 / 151.727
Instruction Manual
Gebruiksaanwijzing
Mode d’Emploi
Gebrauchsanleitung
Brugsanvisning

GB
GENERAL SAFETY RECOMMENDATIONS
- Please read this manual prior to using the unit.
- Keep the manual for further reference.
- Keep the original packaging to ensure safe transport of the unit.
- For indoor use only in dry premises.
- Ensure that there is sufficient cooling around the unit.
- Do not use the unit near heat sources or in direct sunlight.
- If the plug or mains lead are damaged, they need to be repaired by a qualified technician.
- If the unit is damaged to an extent that you can see internal parts, do not plug the unit into a
- mains outlet.
- Make sure that no small objects or liquids enter the housing.
- Clean the unit only with a damp cloth. Do not use detergents or solvents!
- Other than those specified in the manual, the unit doesn’t contain any user serviceable parts.
- Repairs should only be carried out by an authorized SkyTronic repair service.
- FIRE HAZARD: install the mirror ball and motor at least 0.5m away from inflammable materials
(e.g. decoration objects, etc.)
- DANGER: Prior to first using the mirror ball – motor combination, the installation must be checked
by a specialist.
- The mounted units need to be checked regularly and at least once a year by a specialist.
- Regularly check the chain between the motor and the mirror ball including the anchorage points in
the motor and the ball.
- Use strong materials for the mounting of the motor.
General Description
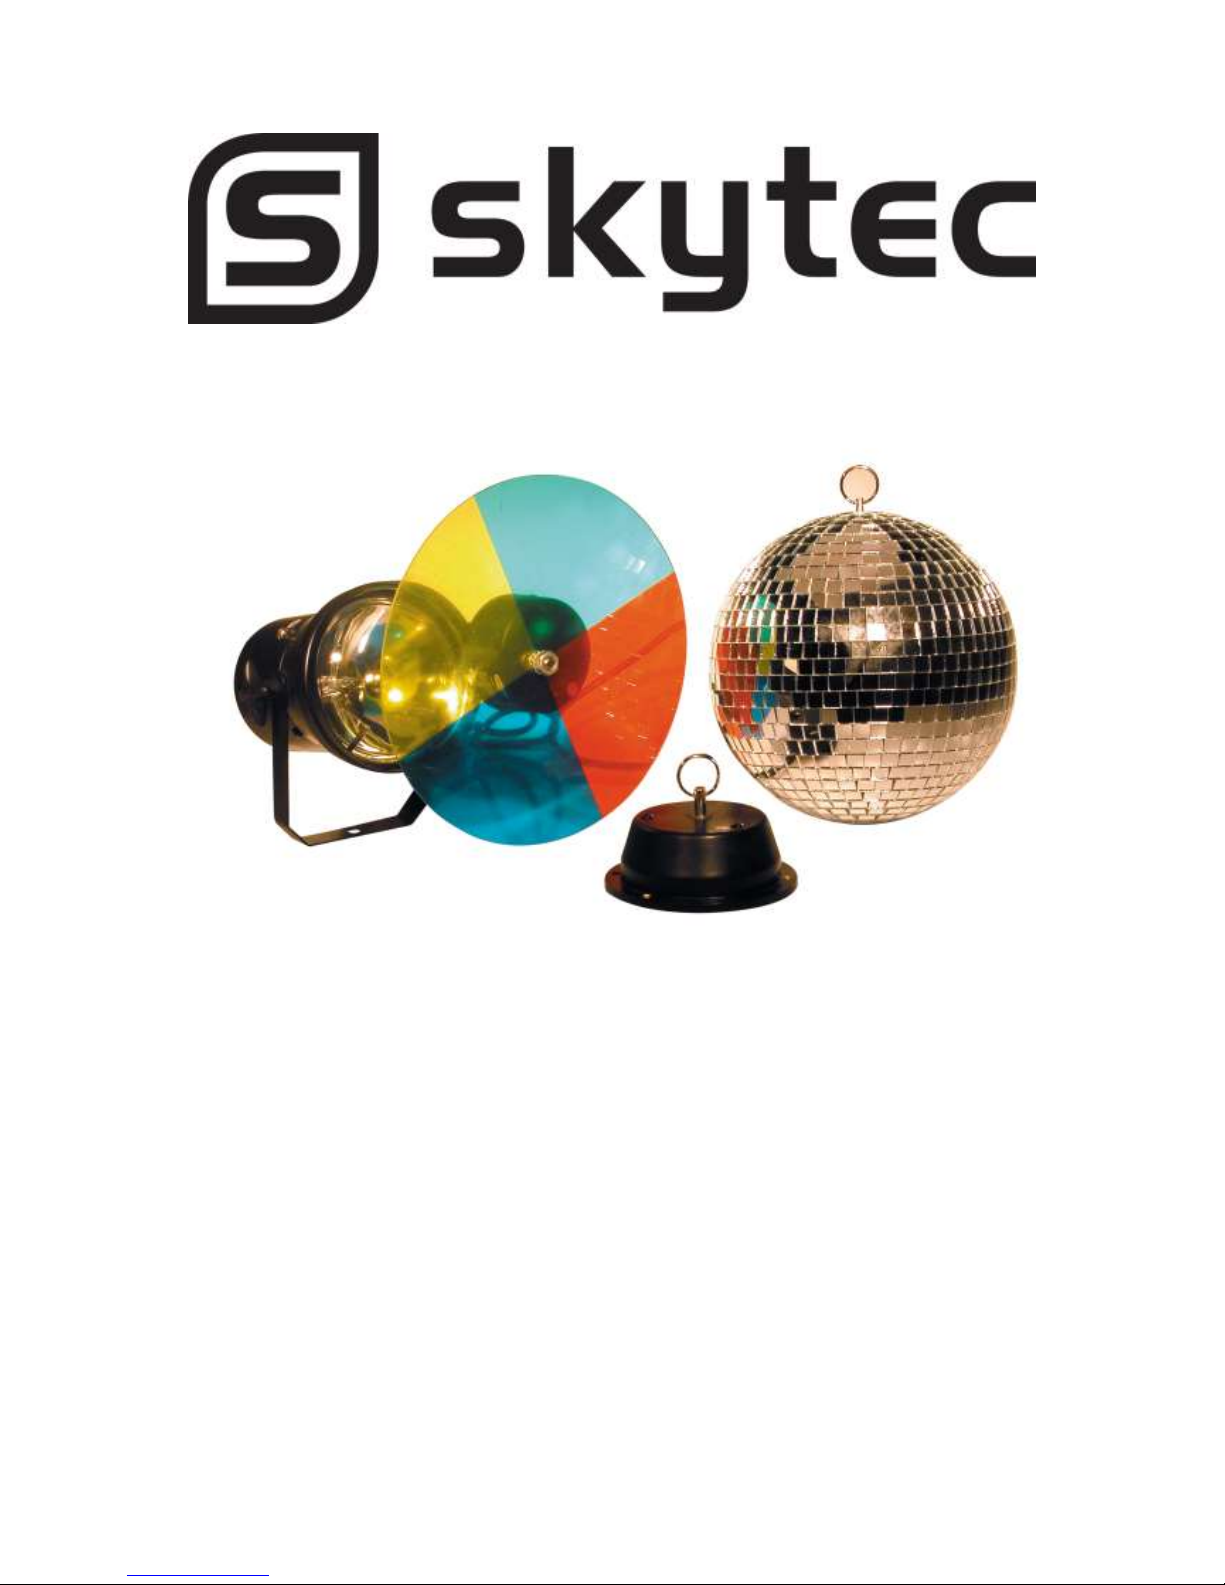
The complete Disco lighting set includes:
- Mirror ball (20cm for the set ref. no. 151.725, 30cm for the set ref. no.151.727)
- Mirror ball motor
- PAR36 spot light with colour wheel
MIRROR BALL MOTOR
INSTALLATION:
NOTE: Follow the instructions carefully and use your brains when mounting the motor and mirror ball.
A falling mirror ball can cause serious injuries!!
- The installation must be done in such a way that it can support 10 times the weight of the
mirror ball for at least 1 hour without showing any distortion.
- The motor needs to be installed perfectly horizontally. Check the position with a level. The
battery-powered version can be hung vertically.
- Motor and mirror ball must be installed out of the reach of persons.
- Use all screw openings in the housing.
- Use a chain of sufficient strength for the installation of the mirror ball below the motor. The
supplied chains are made to the load of the motor.
- Connect the assembly to an earthed wall outlet.

MIRROR BALL
INSTALLATION IN PRIVATE PREMISES
- WARNING: A falling mirror ball can cause serious injuries!
- A mirror ball is meant to create decorative light effects in combination with an appropriate light
source.
- ATTENTION!! Mirror balls need to be installed by a professional according to the European
standard EN60598.
- The installation that supports the mirror ball (including the motor) needs to be able to carry
during 1 hour 5 times the weight of the mirror ball without showing visible distortion.
- Use a chain of sufficient strength to link the motor to the mirror ball. Do not use steel cable
that might fray due to the torsion.
- Big mirror balls need to be secured by a safety net.
- The mounted motor and mirror ball assembly needs to be checked regularly, and at least once
a year by a professional.
- Check regularly the chain between the motor and the mirror ball, including the fixing points on
the motor and the ball.
INSTALLATION IN PUBLIC PREMISES
- WARNING: Mirror balls need to be installed according to the European standard EN60598-2-7
and the standards which are applicable in the different countries. The installation might only
be done by a professional installer!
- The installation that supports the mirror ball (including the motor) needs to be able to carry
during 1 hour 10 times the weight of the mirror ball without showing visible distortion.
- The installation needs to be secured by a safety net so that no parts can fall down.
- IMPORTANT! THE INSTALLATION OF LIGHT EFFECTS REQUIRES EXPERIENCE and
knowledge of load calculations, installation materials, periodic safety checks, etc. Leave the
installation to a professional if you don’t have the required knowledge and experience. A
wrong installation might cause serious injuries and material damages.
- Use a chain of sufficient strength for the link between the motor and the mirror ball. Do not use
steel cable that can fray under the torsion.
- DANGER: Prior to the first use of the motor and mirror ball assembly, the installation needs to
be checked by a professional.
- The motor and mirror ball assembly needs to be checked regularly by a professional.
- Check regularly the chain between the motor and the mirror ball, including the fixing points on
the motor and the mirror ball.
PAR36 SPOT WITH COLOUR WHEEL
Installing/replacing the lamps
Before replacing the lamp, unplug mains lead and let the lamp cool down. Please follow the lamp
manufacturer’s notes when installing.
- You need one 6V 30W Par 36 Lamp for installation.
- Please remove the fixation ring by pressing it together.
- If replacing the lamp, remove the old lamp from the pin spot and loosen the wires.
- Loosen the screws on the new 6V 30W Par 36 lamp with an appropriate screwdriver.
- Connect the wires with the lamp using an appropriate screwdriver.
- Tighten the screws.
- Insert the lamp in the housing.
- Fix the lamp with the fixation ring.

Mounting the Colour Wheel
- Unscrew the nut and the first tooth ring from the fixation axle of the colour wheel motor.
- Remove the foil of the colour wheel.
- Slip the colour wheel onto the fixation axle of the motor
- Slip the tooth ring first and then the nut onto the fixation axle.
- Fasten the nut without damaging the colour wheel.
- Fix the colour wheel with motor via the fixation on the motor to the pin spot housing and
tighten the screw.
Rigging
- Mount the Pin spot with the mounting-bracket to your trussing system using an appropriate
clamp. The hole in the mounting bracket has a diameter of 10mm.
- For overhead use, always install a safety-rope that can hold at least 10 times the weight of the
fixture. You must only use safety-ropes with screw-on carabines. Pull the safety-rope through
the hole in the mounting bracket and over the trussing system. Insert the end in the carabine
and tighten the fixation screw.
- Adjust the desired inclination-angle via the mounting bracket and fix the bracket screws tightly.
- Connect the fixture to the mains with the power plug.
Technical specifications:
MIRROR BALL MOTOR
Power supply: ..................................................................................... 230Vac / 50Hz
Power consumption: ............................................................................................ 4 W
Max Charge: ........................................................................................................ 3 kg
Max. Dia. of mirror ball: .................................................................................... 30 cm
Rotation speed: ................................................................................................ 5 rpm
Diameter of base plate: ................................................................................. 110 mm
Height: ............................................................................................................. 58 mm
Weight: .............................................................................................................. 0.3 kg
Pin spot Par 36
Power Supply:..................................................................................... 230Vac / 50Hz
Power consumption: .......................................................................................... 30 W
Weight: .................................................................................................................. 1 kg
Dimensions (LxWxH): ................................................................. 150 x 120 x 115 mm
Fitting Lamp: ...................................................................................... 6V 30W Par 36
Colour wheel with Motor
Power supply: .................................................................................... 230Vac / 50Hz
Rotation speed: ............................................................................................. 2.5 rpm
Colours: ............................................................................... Red, green, yellow, blue
Diameter: .......................................................................................................... 23 cm
Do not attempt to make any repairs yourself. This would invalid your warranty.
Do not make any changes to the unit. This would also invalid your warranty.
The warranty is not applicable in case of accidents or damages caused by inappropriate use or disrespect of the warnings
contained in this manual.
SkyTronic UK cannot be held responsible for personal injuries caused by a disrespect of the safety recommendations and
warnings. This is also applicable to all damages in whatever form.

NL
ALGEMENE VEILIGHEIDSVOORSCHRIFTEN:
- Lees altijd eerst de gebruiksaanwijzing voordat u een apparaat gaat gebruiken.
- Bewaar de handleiding zodat elke gebruiker hem eerst kan doorlezen.
- Bewaar de verpakking zodat u, indien het apparaat defect is, dit in de originele verpakking kunt
opsturen om beschadigingen te voorkomen.
- Apparaat alleen binnenhuis en in niet vochtige ruimtes gebruiken.
- Apparaat zodanig installeren dat er voldoende koeling mogelijk is.
- Toestel niet in de buurt van warmtebronnen en of in direct zonlicht gebruiken.
- Indien zowel stekker en/of netsnoer als snoeringang in het apparaat beschadigd zijn dient dit door
een vakman hersteld te worden.
- Indien het apparaat dermate beschadigd is dat inwendige (onder)delen zichtbaar zijn mag de
stekker NOOIT in het stopcontact worden geplaatst en het apparaat NOOIT worden ingeschakeld.
Neem in dit geval contact op met uw leverancier of Skytronic BV.
- Zorg ervoor dat er geen kleine objecten of vloeistof in het toestel kunnen binnendringen.
- Toestel alleen reinigen met een licht vochtige stofvrije doek, geen reinigingsmiddelen of
oplosmiddelen gebruiken!
- Het toestel bevat buiten de in de gebruiksaanwijzing genoemde onderdelen geen onderdelen die
door de gebruiker vervangen of gerepareerd kunnen worden.
- Indien het toestel defect is, moet dit hersteld worden door een door SkyTec voorgeschreven
reparatiebedrijf.
- BRANDGEVAAR: monteer een spiegelbol met motor op tenminste 0,5 m van ontvlambare
materialen (decoratiematerialen e.d.)
- GEVAAR: alvorens een combinatie van spiegelbol en motor voor de eerste maal in gebruik te
nemen, dient de montage te worden gecontroleerd door een deskundige.
- De gemonteerde motor en spiegelbol constructie dient regelmatig, minimaal een maal per jaar te
worden gecontroleerd door een deskundige.
- controleer regelmatig de ketting tussen motor en spiegelbol, inclusief de aansluitpunten aan motor
en spiegelbol
- Gebruik deugdelijke materialen voor de montage van de motor.
Algemene beschrijving
Deze complete disco lichtset bestaat uit:
- Spiegelbol (20cm bij de set met nummer 151.725, 30cm bij de set met nummer 151.727)
- Spiegelbolmotor
- PAR36 Spot met kleurenwiel
SPIEGELBOLMOTOR
INSTALLATIE:
LET OP: Volg de instructies nauwkeurig op en gebruik uw gezond verstand bij de montage van motor
en spiegelbol. Een naar beneden vallende spiegelbol kan ernstige verwondingen veroorzaken!
- De installatie moet zo uitgevoerd worden, dat deze 10x het gewicht van de spiegelbol kan dragen
zonder zichtbare vervorming voor tenminste 1 uur.
- De motor dient absoluut horizontaal te worden gemonteerd – controleer dit met een waterpas. De
batterij-uitvoering mag verticaal hangen.
- Motor en spiegelbol moeten buiten het bereik van het publiek hangen.
- Gebruik alle schroefgaten in de behuizing.
- Gebruik een ketting van voldoende sterkte voor de montage van de spiegelbol onder de motor. De
meegeleverde kettingen zijn afgestemd op het draaggewicht van de motor.
- Sluit de installatie aan op een geaard stopcontact.

SPIEGELBOL
INSTALLATIE BIJ GEBRUIK THUIS
- WAARSCHUWING: naar beneden vallende spiegelbollen kunnen ernstige verwondingen
veroorzaken!
- De spiegelbol is bedoeld voor het creëren van decoratieve lichteffecten, in combinatie met
daarvoor bedoelde verlichting.
- GEVAAR: Spiegelbollen dienen gemonteerd te worden volgens de Europese richtlijn EN60598.
Dit dient te gebeuren door gekwalificeerd personeel.
- De installatie waaraan de spiegelbol hangt (incl. de motor) moet zo zijn uitgevoerd, dat deze 1 uur
lang het 5-voudige gewicht van de bol kan dragen zonder zichtbare vervorming.
- Gebruik een ketting van voldoende sterkte voor de verbinding tussen motor en spiegelbol. Gebruik
nooit staalkabel, deze kunnen ontrafelen ten gevolge van de torsiekrachten.
- Grote spiegelbollen dienen te worden voorzien van een veiligheidsnet.
- De gemonteerde motor en spiegelbol constructie dient regelmatig, minimaal een maal per jaar te
worden gecontroleerd door een deskundige.
- controleer regelmatig de ketting tussen motor en spiegelbol, inclusief de aansluitpunten aan motor
en spiegelbol.
INSTALLATIE IN OPENBARE RUIMTEN
- GEVAAR: Spiegelbollen dienen gemonteerd te worden volgens de Europese richtlijn
EN60598-2-7, alsmede eventuele landelijk geldende normen. Installatie mag alleen uitgevoerd
worden door een gekwalificeerde monteur!
- De installatie waaraan de spiegelbol hangt (incl. de motor) moet zo zijn uitgevoerd, dat deze 1 uur
lang het 10-voudige gewicht van de bol kan dragen zonder zichtbare vervorming.
- De installatie dient te worden voorzien van een veiligheidsnet. Dit dient zo te worden gemonteerd
dat geen onderdelen naar beneden kunnen vallen.
- BELANGRIJK! DE INSTALLATIE VAN LICHTEFFECTEN VEREIST ERVARING, inclusief kennis
van draagkrachtberekeningen, installatiematerialen, periodieke veiligheidscontroles, etc. Laat de
installatie over aan een professional indien u niet over voldoende kennis en ervaring beschikt.
Onjuiste installatie kan leiden tot zware verwondingen en materiele schade.
- Gebruik een ketting van voldoende sterkte voor de verbinding tussen motor en spiegelbol. Gebruik
nooit staalkabel, deze kunnen ontrafelen ten gevolge van de torsiekrachten.
- GEVAAR: alvorens een combinatie van spiegelbol en motor voor de eerste maal in gebruik te
nemen, dient de montage te worden gecontroleerd door een deskundige.
- De gemonteerde motor en spiegelbol constructie dient regelmatig te worden gecontroleerd door
een deskundige.
- controleer regelmatig de ketting tussen motor en spiegelbol, inclusief de aansluitpunten aan motor
en spiegelbol.
PAR36 SPOT MET KLEURENWIEL
Installeren / vervangen van de lamp:
Schakel eerst het toestel uit door de netstekker uit het stopcontact te halen en laat het toestel
afkoelen. Volg de instructie die door de lampleverancier gegeven zijn op.
- Gebruik alleen een 6V 30W par 36 lamp
- Verwijder de klemring voor de lamp door deze aan de uiteinden samen te knijpen.
- Indien ere en defecte lamp in het toestel zit deze verwijderen door de twee schroeven aan
achterzijde lamp los te draaien.
- Draai met een schroevendraaier de schroeven aan de achterzijde van de nieuwe par36 lamp
los.
- Verbind de draden met de lamp en draai met de schroeven draaier de schroeven weer vast.
- Plaats de lamp terug in de behuizing.
- Zet de lamp weer vast met de klemring.

Monteren van de kleurenschijf:
- Draai de eerste moer los die op de motor gedraaid zit, verwijder deze samen met de eerste
ring.
- Verwijder de folie van de kleurenschijf.
- Schuif de kleurenschijf over de as van de motor.
- Plaats de ring samen met de moer terug op de as.
- Draai de moer dusdanig aan dat hij vastzit maar de kleurenschijf niet beschadigd.
- Zit de motor vast op de rand van de pinspot en draai deze vast met de schroef.
Ophanging:
- Monteer een trustklem aan de montagebeugel van de par-spot en klem deze vast aan de
trust. Het gat in de montagebeugel heeft een diameter van 10mm.
- Indien u de par-spot op hoogte gaat monteren gebruik dan altijd een veiligheidskabel de 10x
het gewicht van de par-spot kan houden. Monteer de veiligheidskabel aan zowel het trust
systeem als aan de par-spot.
- Stel de hoek van de par-spot in en draai daarna de bouten aan beide zijden van de beugel
vast.
- Plug de par-spot via het netsnoer in een 230Vac wandcontactdoos.
Technische specificaties:
Spiegelbolmotor
Voedingsspanning: ............................................................................ 230VAC / 50Hz
Verbruik: .............................................................................................................. 4 W
Maximaal draaggewicht: ...................................................................................... 3 kg
Maximale diameter spiegelbol: ......................................................................... 30 cm
Snelheid: ........................................................................................................ 1,5 rpm
Diameter bodemplaat: ................................................................................... 110 mm
Hoogte: ............................................................................................................ 58 mm
Gewicht: ............................................................................................................ 0,3 kg
Pinspot Par 36
Voedingsspanning: ............................................................................ 230Vac / 50Hz
Verbruik: ............................................................................................................ 30 W
Gewicht: ............................................................................................................... 1 kg
Afmeting (LxBxH): ......................................................................... 150x120x115 mm
Lamp: ................................................................................................. 6V 30W Par 36
Kleurenwiel met motor
Voedingsspanning: ............................................................................ 230Vac / 50Hz
Snelheid: ........................................................................................................ 2,5 rpm
Kleuren: ............................................................................. Rood, groen, geel, blauw
Diameter: .......................................................................................................... 23 cm
Voer zelf geen reparaties uit aan het apparaat; in elk geval vervalt de totale garantie.
Ook mag het apparaat niet eigenmachtig worden gemodificeerd, ook in dit geval vervalt de totale garantie.
Ook vervalt de garantie bij ongevallen en beschadigingen in elke vorm t.g.v. onoordeelkundig gebruik en het niet in acht nemen
van de waarschuwingen in het algemeen en gestelde in deze gebruiksaanwijzing.
Tevens aanvaardt Skytronic BV geen enkele aansprakelijkheid in geval van persoonlijke ongelukken als gevolg van het niet
naleven van veiligheidsinstructies en waarschuwingen. Dit geldt ook voor gevolgschade in wélke vorm dan ook.

F
CONSIGNES GENERALES DE SECURITE
- Lire attentivement la notice avant l’utilisation de l’appareil.
- Conservez le mode d’emploi pour référence ultérieure.
- Conservez l’emballage d’origine afin de pouvoir l’expédier en toute sécurité en cas de défaillance
de l’appareil.
- Uniquement pour utilisation à l’intérieur dans une pièce sèche.
- Installer l’appareil de façon à permettre un refroidissement suffisant.
- Ne pas utiliser l’appareil à proximité de sources de chaleur ou exposé au soleil.
- Si la fiche et/ou le cordon secteur sont endommagés, faites-les remplacer par un spécialiste.
- Si l’appareil est endommagé, ne le branchez pas sur une prise secteur et ne le mettez pas sous
tension.
- Ne pas laisser pénétrer de petits objets ou de liquides dans l’appareil.
- Nettoyer l’appareil uniquement avec un chiffon légèrement humide. Ne pas utiliser de détergents,
ni de solvants !
- A l’exception des pièces expressément mentionnées dans le mode d’emploi, l’appareil ne contient
aucune pièce remplaçable par l’utilisateur.
- En cas de défaillance, l’appareil doit être réparé uniquement par un service technique agréé par
SkyTronic.
- RISQUE D’INCENDIE: Respectez une distance de sécurité d’au moins 0,5m entre une boule à
facettes avec moteur et des matériaux inflammables (articles de décoration, etc.).
- ATTENTION: Avant la première mise en service d’une boule à facettes avec moteur, l’installation
doit être vérifiée par un spécialiste.
- La combinaison moteur + boule à facettes doit être vérifiée régulièrement et au moins une fois par
an par un spécialiste.
- Vérifiez régulièrement la chaîne entre le moteur et la boule à facettes et notamment les points
d’ancrage sur le moteur et la boule à facettes.
- Utilisez des matériaux solides pour le montage du moteur.
Description générale
L’ensemble de lumière Disco comprend:
- Boule à facettes (20cm pour l’ensemble réf. 151.725, 30cm pour l’ensemble réf. 151.727)
- Moteur pour boules à facettes
- Projecteur PAR36 avec disque de couleurs
MOTEUR DE LA BOULE A FACETTES
INSTALLATION
ATTENTION : Suivez scrupuleusement les instructions et utilisez votre bon sens lors du montage du
moteur et de la boule à facettes. Une boule à facettes qui tombe sur des personnes, peut provoquer
des blessures graves !!
- L’installation doit être faite de sorte qu’elle supporte 10x le poids de la boule à facettes pendant 1
heure sans montrer de déformations visibles.
- Le moteur doit être installé parfaitement à l’horizontale. Vérifiez l’installation avec un niveau. Le
moteur alimenté par pile peut être suspendu à la verticale.
- Le moteur et la boule à facettes doivent se trouver hors de la portée du public.
- Utilisez tous les trous à vis dans le boîtier.
- Utilisez une chaîne d’une force suffisante pour le montage de la boule à facettes en-dessous du
moteur. Les chaînes fournies sont adaptées à la charge admise du moteur.
- Branchez l’installation sur une prise avec terre.

LA BOULE A FACETTES
INSTALLATION DANS UN LIEU PRIVE
- AVERTISSEMENT: La chute d’une boule à facettes peut provoquer des blessures graves!!
- La boule à facettes est destinée à créer des effets de lumière décoratifs, en combinaison avec un
éclairage approprié.
- ATTENTION : Les boules à facettes doivent être montées conformément à la directive
européenne EN60598. L’installation doit être effectuée par une personne qualifiée.
- Le dispositif qui porte la boule à facettes (y compris le moteur) doit être fait de telle sorte, qu’IL
supporte pendant 1 heure 5 fois le poids de la boule sans montrer de déformations visibles.
- Utilisez une chaîne d’une force suffisante pour suspendre la boule au moteur.
- Ne pas utiliser de câbles d’acier qui peuvent s’effilocher suite à la torsion.
- Les grandes boules à facettes doivent être sécurisées par un filet.
- Le moteur et la boule à facettes doivent être contrôlés régulièrement, au moins annuellement, par
une personne qualifiée.
- Vérifiez régulièrement la chaîne entre le moteur et la boule à facettes y compris les points de
fixation du moteur et de la boule à facettes.
INSTALLATION DANS UN LIEU PUBLIC
- ATTENTION : Les boules à facettes doivent être montées conformément à la directive
européenne EN60598-2-7 ainsi que selon les normes en vigueur dans les pays individuels.
L’installation doit être effectuée par un professionnel !
- Le dispositif qui porte la boule à facettes (y compris le moteur) doit être fait de telle sorte, qu’il
supporte pendant 1 heure 10 fois le poids de la boule sans montrer de déformations visibles.
- L’installation doit être sécurisée par un filet qui doit être monté de telle façon qu’aucune pièce ne
peut tomber au sol.
- IMPORTANT ! L’INSTALLATION D’EFFETS DE LUMIERE EXIGE DE L’EXPERIENCE, y compris
la connaissance de calculs de charge, de matériaux d’installation, de contrôles de sécurité
périodiques, etc. Confiez l’installation à un professionnel si vous ne disposez pas des
connaissances et de l’expérience suffisantes. Une mauvaise installation peut entraîner des
blessures graves et des dégâts matériels.
- Utilisez une chaîne d’une force suffisante pour accrocher la boule à facettes au moteur. Ne pas
utiliser de câbles d’acier qui peuvent s’effilocher suite aux forces de torsion.
- ATTENTION : Avant la première mise en service d’une boule à facettes avec moteur, il faut faire
vérifier le montage par un expert.
- Le moteur et la boule à facettes doit être vérifié régulièrement par un expert.
- Contrôlez régulièrement la chaîne entre le moteur et la boule à facettes, y compris les points de
fixation du moteur et de la boule à facettes.
PROJECTEUR PAR36 AVEC DISQUE DE COULEURS
Installer/Remplacer la lampe
Avant le remplacement de l’ampoule, toujours laisser refroidir celle-ci et débrancher l’appareil.
- Veuillez respecter les instructions du fabricant.
- Pour l’installation, vous avez besoin d’une lampe 6V 30W Par 36.
- Rémovez l’anneau de fixation en le pressant.
- Quand vous remplacez une lampe, retirez la lampe deféctueuse avant.
- Connectez les câbles avec la lampe 6V 30W Par 36.
- Mettez la lampe dans le boitier.
- Fixez la lampe avec l’anneau de fixation
Montage de la roue de couleurs
- Fixez le moteur de la disque rotative au boîtier.
- Rémovez la feuille de la disque rotative.
- Fixez la disque au moteur.

Montage du Projecteur
- Fixez le projecteur par la lyre de fixation via un crochet approprié à votre système de traverse. Le
diamètre de perçage est 10mm.
- Toujours assurez le projecteur avec une élingue de sécurité, qui est dimensionnée au moins pour
10 fois le poids de l’appareil. Vous deviez seulement utiliser une élingue de sécurité avec
carabine à visser. Accrochez l’élingue de sécuritédans le trou prévu à cette fin dans la lyre de
fixation et le trussing. Accrochez le fin à la carabine et serrez bien le vis de fixation.
- Ajustez l’angle d’inclinaison grâce à la lyre de fixation et vissez bien les vis de la lyre.
- Branchez l’appareil avec la fiche au secteur.
Caractéristiques techniques:
Moteur de la boule à facettes
Alimentation: .............................................................................................. 230V/50Hz
Consommation: .................................................................................................... 4 W
Max. Charge: ........................................................................................................ 3 kg
Max. dia. De boule a facettes: ........................................................................... 30 cm
Vitesse de rotation: ......................................................................................... 1,5 rpm
Diamèter: ........................................................................................................ 110 mm
Haute: ............................................................................................................... 58 mm
Poids: ................................................................................................................. 0,3 kg
Pinspot Par 36
Alimentation: ............................................................................................. 230V/50Hz
Puissance de rendement: .................................................................................. 30 W
Poids: .................................................................................................................... 1 kg
Dimensions (LxWxH): ..................................................................... 150x120x115 mm
Lampe: ............................................................................................... 6V 30W Par 36
Roue de coulerus avec moteur
Alimentation: ............................................................................................. 230V/50Hz
Vitesse de rotation: ........................................................................................ 2,5 rpm
Couleurs: ............................................................................. Rouge, vert, jaune, bleu
Diamèter: .......................................................................................................... 23 cm
N’effectuez jamais de réparations vous-même et n’apportez jamais de modifications sous peine d’invalider la garantie.
La garantie ne s’applique pas dans le cas de dommages sous quelque forme que ce soit, qui ont été provoqués suite à une
mauvaise utilisation et le non-respect des avertissements et consignes de sécurité contenus dans ce manuel.
SkyTronic décline toute responsabilité en cas de dommages corporels suite au non-respect des consignes de sécurité et
des avertissements. Ceci s’applique aussi aux préjudices ultérieurs éventuels.

D
ALLGEMEINE SICHERHEITSVORSCHRIFTEN
- Vor der ersten Inbetriebnahme sorgfältig die Bedienungsanleitung durchlesen.
- Die Bedienungsanleitung für spätere Bezugnahme aufbewahren.
- Die Originalverpackung für eventuellen, späteren Transport des Geräts aufbewahren.
- Nur für Innengebrauch in trockenen Räumen.
- Gerät so installieren, dass für ausreichende Kühlung gesorgt ist.
- Gerät nicht in der Nähe von Wärmequellen oder im direkten Sonnenlicht benutzen.
- Sollten Stecker und/oder Netzschnur, sowie der Kabeleingang zum Gerät beschädigt sein,
müssen diese durch einen Fachmann ersetzt werden.
- Wenn das Gerät sichtbar beschädigt ist, darf es NICHT an eine Steckdose angeschlossen und
NICHT eingeschaltet werden. Benachrichtigen sie in diesem Fall Ihren Fachhändler oder
SkyTronic BV.
- Keine kleinen Gegenstände oder Flüssigkeiten ins Gerät dringen lassen.
- Gerät nur mit einem angefeuchteten, staubfreien Tuch abwischen. Keine Reinigungsmittel oder
Lösungsmittel benutzen!
- Außer der in der Anleitung ausdrücklich genannten Teile enthält das Gerät keine Teile, die vom
Bediener ausgewechselt werden können.
- Reparaturen dürfen nur von einem von SkyTronic anerkannten Fachbetrieb ausgeführt werden.
- FEUERGEFAHR: Die Spiegelkugel mit Motor in einem Sicherheitsabstand von mindestens 0,5m
von brennbaren Materialien (Dekorationen u.ä.) anbringen.
- ACHTUNG: Vor der ersten Inbetriebnahme einer Spiegelkugel-Motor-Kombination muss die
Anlage von einem Fachmann begutachtet werden.
- Die installierte Spiegelkugel-Motor-Kombination muss regelmäßig und mindestens ein Mal pro
Jahr von einem Fachmann überprüft werden.
- Überprüfen Sie regelmäßig die Kette zwischen Motor und Spiegelkugel und hauptsächlich die
Verankerungsstellen am Motor und an der Spiegelkugel.
- Für die Montage des Motors robuste Materialien verwenden.
Allgemeine Beschreibung
Das komplette Disco Light Set besteht aus:
- Spiegelkugel (20cm im Set. Nr 151.725, 30cm im Set Nr. 151.727)
- Spiegelkugelmotor
- PAR36 Lampe mit farbrades
SPIEGELKUGEL MOTOR
EINBAU
ACHTUNG: Befolgen Sie genau die Anweisungen und gebrauchen Sie Ihren gesunden
Menschenverstand bei der Montage von Motor und Spiegelkugel. Eine fallende Spiegelkugel kann
ernsthafte Verletzungen verursachen !!
- Der Einbau muss so ausgeführt werden, dass er mindestens 1 Stunde das 10-fache Gewicht der
Spiegelkugel tragen kann, ohne sichtbare Verformungen aufzuweisen.
- Der Motor muss genau waagerecht montiert werden. Überprüfen Sie dies mit einer Wasserwaage.
Der batteriegespeiste Motor kann vertikal aufgehängt werden.
- Motor und Spiegelkugel müssen außerhalb der Reichweite des Publikums aufgehängt werden.
- Benutzen Sie alle Schraublöcher im Gehäuse.
- Benutzen Sie eine Kette von ausreichender Stärke, um das Gewicht der Spiegelkugel unter dem
Motor zu tragen. Die mitgelieferten Ketten sind für die zulässige Belastbarkeit des Motors
ausgelegt.
- Schließen Sie den Motor an eine geerdete Wandsteckdose an.

SPIEGELKUGEL
EINBAU IN PRIVATEN RÄUMEN
- WARNUNG: Der Fall von Spiegelkugeln kann ernsthafte Verletzungen verursachen !!
- Spiegelkugeln dienen zum Schaffen von dekorativen Lichteffekten unter Einwirkung einer
geeigneten Lichtquelle.
- ACHTUNG: Spiegelkugeln müssen gemäss der europäischen Richtlinie EN60598 von einem
qualifiziertem Installateur angebracht werden.
- Die Vorrichtung, an der Motor und Spiegelkugel hängen, muss so ausgeführt sein, dass sie 1
Stunde lang das 5-fache Gewicht der Spiegelkugel ohne sichtbare Verformung tragen kann.
- Benutzen Sie Ketten von ausreichender Stärke zwischen dem Motor und der Spiegelkugel. Keine
Stahlkabel benutzen, die durch die Drehkraft aufribbeln können.
- Grosse Spiegelkugeln müssen durch ein Netz abgesichert werden.
- Die Spiegelkugel und der Motor müssen regelmäßig, jedoch mindestens einmal pro Jahr von
einem Sachkundigen überprüft werden.
- Überprüfen Sie regelmäßig die Kette zwischen Motor und Spiegelkugel, sowie der
Befestigungsstellen am Motor und an der Spiegelkugel.
EINBAU IN ÖFFENTLICHEN RÄUMLICHKEITEN
- ACHTUNG: Spiegelkugeln müssen gemäss der europäischen Richtlinie EN60598-2-7 und in den
jeweiligen Ländern gültigen Bestimmungen angebracht werden. Der Einbau muss von einem
qualifizierten Monteur vorgenommen werden.
- Die Vorrichtung, an der Spiegelkugel und Motor hängen, muss so ausgeführt sein, dass sie 1
Stunde lang das 10-fache Gewicht der Spiegelkugel ohne sichtbare Verformung tragen kann.
- Die Spiegelkugel muss durch ein Netz abgesichert sein, so dass keine Teile auf den Boden fallen
können.
- WICHTIG ! DIE MONTAGE VON LICHTEFFEKTEN ERFORDERT ERFAHRUNG, sowie eine
gute Kenntnis von Tragkraftberechnungen, Installationsmaterialien, periodische
Sicherheitskontrollen usw. Überlassen Sie den Einbau einem Installateur, wenn Sie nicht über die
notwendigen Kenntnisse und Erfahrungen verfügen. Falscher Einbau kann zu schweren
Verletzungen und materiellen Schäden führen.
- Benutzen Sie eine Kette von ausreichender Stärke zur Verbindung zwischen Motor und
Spiegelkugel. Kein Stahlkabel benutzen, dass durch die Drehkraft aufribbeln kann.
- ACHTUNG: Vor der ersten Inbetriebnahme einer Spiegelkugel/Motor Kombination muss die
Installation von einem Sachverständigen überprüft werden.
- Überprüfen Sie regelmäßig die Kette zwischen Motor und Spiegelkugel, sowie der
Befestigungsstellen an Motor und Spiegelkugel.
PAR36 LAMPE MIT FARBRADES
Lampeninstallation/Lampenwechsel
Vor dem Wechsein der lampe diese unbedingt erst abkühlen lassen und das Gerät allpolig von der
Netzspannung trennen (Netzstecker ziehen).
- Beachten Sie auch unbedingt die Hinweise des Lampenherstellers.
- Zur Installation benötigen Sie eine 6V 30W Par 36 Lampe.
- Drücken Sie den Lampenklemmring im Pinspot zusammen und entnehmen Sie ihn aus dem
Gehäuse.
- Wird eine defekte Lampe ausgetauscht, entfernen Sie zunächst die defekte Lampe aus dem
Pinspot und lösen Sie die Kabel.
- Lösen Sie die zwei Schrauben an der defekten 6V 30W Par 36 Lampe mit einem
Schraubendreher.
- Schliessen Sie die Kabel des Pinspots über die Befestigungsringe an die neue Lampe an.
- Ziehen Sie die Schrauben fest.
- Legen Sie die Lampe in den Pinspot ein, so dass die Lampe auf dem Wulst aufliegt.
- Fixieren Sie die Lampe mit dem Lampenklemmring.

Anbringen des Farbrades
- Lösen Sie die Mutter und den ersten Zahnring von der Befestigungsachse am Farbradmotor.
- Ziehen Sie die Schutzfolie des Farbrades ab.
- Legen Sie das Farbrad auf der Befestigungsachse des Motors auf.
- Legen Sie erst den Zahnring und dann die Mutter auf die Befestigungsachse auf.
- Ziehen Sie die Mutter gut fest ohne das Farbrad zu beschädigen.
- Bringen Sie das Farbrad mit motor über die vorgesehene Befestigung am Motor an dem
Gehäuserand des Pinspots an und ziehen Sie die Schraube gut fest.
Projektormontage
- Befestigen Sie den Projektor mit dem Hängebügel über einen geeigneten Haken an lhrem
Traversensystem. Die bohrung hat einen Durchmesser von 10mm.
- Sichern Sie den Projektor bei Überkopfmontage immer mit einem Sicherheitsfangseil, das
mindestens für das 10-fache Gewicht des Gerätes ausgelegt ist. Es dürfen nur Fangseile mit
Schraubkarabinern vewendet werden. Hängen Sie das Sicherheitsfangseil an dem dafür
vorgesehenen Loch im Hängebügel ein und führen Sie es über die Traverse etc. Hängen Sie
das Ende in dem Karabiner ein und ziehen Sie die Feststellmutter gut fest.
- Stellen Sie den Neigungswinkel über den Hängebügel ein und ziehen Sie die
Feststellschrauben gut fest.
- Schliessen Sie das Gerät über den Netzstecker ans Netz an.
Technische daten:
Spiegelkugel Motor
Spannungsversorgung: ....................................................................... 230Vac / 50Hz
Gesamtanschlusswert: ......................................................................................... 4 W
Max. Tragfähigkeit: ............................................................................................... 3 kg
Max. Spiegelkugeldurchmesser ........................................................................ 30 cm
Rotationsgeschwindigkeit: ............................................................................. 1,5 rpm
Grundplattendurchmesser: ............................................................................. 110 mm
Höhe: ................................................................................................................ 58 mm
Gewicht: ............................................................................................................. 0,3 kg
Pinspot Par 36
Spannungsversorgung: ...................................................................... 230Vac / 50Hz
Gesamtanschlusswert: ...................................................................................... 30 W
Gewicht: ............................................................................................................... 1 kg
Masse: ........................................................................................... 150x120x115 mm
Passende Lampe: .............................................................................. 6V 30W Par 36
Farbrad mit Motor
Spannungsversorgung: ...................................................................... 230Vac / 50Hz
Rotationsgeschwindigkeit: ............................................................................. 2,5 rpm
Farben: ...................................................................................... Rot, grün, gelb, blau
Durchmesser: ................................................................................................... 23 cm
Reparieren Sie das Gerät niemals selbst und nehmen Sie niemals eigenmächtig Veränderungen am Gerät vor. Sie verlieren
dadurch den Garantieanspruch.
Der Garantieanspruch verfällt ebenfalls bei Unfällen und Schäden in jeglicher Form, die durch unsachgemäßen Gebrauch
und Nichtbeachtung der Warnungen und Sicherheitshinweise in dieser Anleitung entstanden sind.
SkyTronic BV ist in keinem Fall verantwortlich für persönliche Schäden in Folge von Nichtbeachtung der
Sicherheitsvorschriften und Warnungen. Dies gilt auch für Folgeschäden jeglicher Form.

DK
VIGTIGT!
- Læs altid hele vejledningen før ibrugtagning og gem den for senere brug.
- Alle dele i sættet er kun beregnet til indendørs brug og må ikke udsættes for fugt.
- Ingen af delene bør placeres i direkte sollys eller tæt på anden varmekilde.
- Tilslut ikke et apparat til stikkontakten, hvis der er skader på netkabel eller stik.
- Ved rengøring brug kun en fnugfri (evt. let fugtet) klud og aldrig rengørings/opløsningsmidler.
- Af hensyn til varmeudvikling bør medfølgende spot (PAR36) altid placeres mindst 50 cm fra
letantændelige materialer.
- Ved ophængning af både spot-lampe og spejlkuglemotor skal man altid sikrer sig at de fæstnes
forsvarligt.
ALMEN BESKRIVELSE
Dette disco-sæt indeholder følgende dele :
- Spejlkugle (20cm i sættet med nummer 151.725, 30cm i sættet med nummer 151.727).
- Spejlkuglemotor
- Pinspot med farvehjul
SPEJLKUGLE MOTOR
INSTALLATION:
BEMÆRK: Følg instruktionen grundigt ved montering. En spejlkugle der falder ned pga forkert eller
unkyndig installation, kan medføre alvorlige skader på personer, samt risiko for erstatningskrav overfor
montøren!
- Installationen skal foretages således, at forankringen kan bære mindst 10 gange den samlede
vægt af motor + spejlkugle i mindst 1 time, uden at give indikationer på løse skruer el.lign.
- Motoren skal placeres fuldstændigt vandret. Check efter med et vaterpas.
- Motor + spejlkugle skal være i en højde, der umuliggør berøring under drift.
- Benyt ALLE skruehuller i motoren!
- Benyt en solid ophængskæde, der passer til den benyttede spejlkugle.
- Tilslut motoren til en lovlig 230Vac stikkontakt.
SPEJLKUGLE
INSTALLATION VED PRIVAT BRUG
- ADVARSEL: Uforsvarligt monterede spejlkugler kan falde ned, og medføre alvorlig personskade.
- Spejlkugler er designet til dekorations lyseffekter, i kombination med dertil anvendt belysning
(pinspot).
- BEMÆRK: Spejlkugler skal monteres efter de europæiske retningslinier EN60598. Installation skal
ske af kvalificerede personer.
- Installationen skal foretages således (motor + kæde + spejlkugle), at denne kan bære 5 gange
spejlkuglens vægt i minimum 1 time.
- Benyt en kraftig kæde til forbindelse mellem motor og spejlkugle. Brug ikke stålwire, da erfaring
viser at disse ofte knækker eller løsnes i enderne.
- Store spejlkugler skal derunder forsynes med et sikkerhedsnet.
- Hele konstruktionen, såvel motor, kæde som spejlkugle, skal minimum 1 gang om året
kontrolleres for defekter og brud. Motoren skal om nødvendigt efterspændes i loftkonstruktionen.
- Kontroler jævnligt ophængskædens styrke og kvalitet.

INSTALLATION I OFFENTLIGE LOKALER
- BEMÆRK: Spejlkugle monteringen skal følge de europæiske retningslinier EN60598-2-7, samt
evt. ekstra retninglinier for de enkelte land. I alle tilfælde må monteringen kun foretages af
kvalificeret personale.
- Installationen, dvs. motor + ophæng, skal foretages således, at denne kan bære 10 gange
spejlkuglens vægt i minimum 1 time.
- Under spejlkuglen skal monteres et sikkerhedsnet, der som minimum kan bære spejlkuglens vægt
hvis denne falder ned.
- VIGTIGT: Installation af lyseffekter, herunder spejlkugler, kræver erfaring og prof. kendskab til
installation, bæreevne, sikkerhed, periodiske eftersyn o.lign. Ukorrekt installation kan medføre
alvorlig personskade.
- Benyt en kraftig kæde til ophæng af spejlkuglen i motoren. Benyt ikke en stålwire, da erfaring viser
at disses holdbarhed og sikkerhed ikke er tilstrækkelig.
Såvel motor, ophængskæde som spejlkuglens forankring skal jævnligt efterses og kontrolleres af
sagkyndigt personale. Herunder hører også efterspænding af motoren i loftkonstruktionen, samt nøje
undersøgelse af kædens kvalitet og sikkerhed.
PINSPOT MED FARVEHJUL
Installering/udskiftning af lampen
Før montering eller udskiftning af lampen, skal netstikket frakobles 230Vac. Hvis effekten netop har
været anvendt, skal denne først nedkøle. Følg den anvisning som producenten af den indkøbte lampe
angiver.
- Lampen skal være af typen: PAR36 6V/30W (4515)
- Fjern låseringen
- Udtag den gamle defekte lampe, og afmonter ledningerne
- Skru ledningerne fast på den nye PAR36 lampe
- Indsæt lampen i pinspothuset
- Lås lampen fast ved hjælp af låseringen
Montering af farvehjul
- Først løsnes skrue/møtrik på motorens midteraksel.
- Fjern beskyttelsesfolien fra farvehjulet
- Spænd skrue/møtrik fast. Spænd ikke for hårdt, da farvehjulet kan revne
- Placer farvehjul/motor på pinspothuset, og fastspænd skruerne
Ophæng
- Pinspothuset kan ophænges i en lysbro/truss-system v.h.a. den medfølgende ophængsbøjle.
- Brug en special G-krog, hvis ophænget sker i en lysbro
- Det materiale hvori apparatet ophænges, skal kunne bære 10 gange dennes vægt.
- Juster pinspothuset mod det emne (f.eks. en spejlkugle) der skal belyses
- Tilslut 230V netspænding
- Finjuster lyskeglen, og efterspænd justeringsskruerne på ophængsbøjlen.

Tekniske data:
SPEJLKUGLE MOTOR
Strømforsyning: .................................................................................. 230Vac / 50Hz
Effektforbrug: ....................................................................................................... 4 W
Max belastning: ................................................................................................... 3 kg
Max diameter på spejlkugle: ............................................................................. 30 cm
Omdrejningshastighed: ............................................................................ .5 omdr/min
Diameter på monteringsplade: ...................................................................... 110 mm
Højde: .............................................................................................................. 58 mm
Vægt: ................................................................................................................ 0,3 kg
Pinspot PAR36
Strømforsyning: .................................................................................. 230Vac / 50Hz
Effektforbrug: ..................................................................................................... 30 W
Vægt: ................................................................................................................... 1 kg
Dimensioner (LxBxH): ............................................................... 150 x 120 x 115 mm
Lampe type: ..................................................................................... 6V 30W PAR 36
Farvehjul med motor
Strømforsyning: ............................................................................... 230V AC / 50Hz
Omdrejningshastighed: .......................................................................... 2.5 omdr/min
Farver: .......................................................................................... Rød, grøn, gul, blå
Diameter: .......................................................................................................... 23 cm
Vi henleder opmærksomheden på, at ved enhver form for åbning af apparatet, eget forsøg på reparation, modificering eller
ændring af konstruktion, bortfalder købers reklamationsret.
Det samme er gældende, hvis apparatet er blevet overbelastet eller misligholdt, fordi denne brugsanvisnings advarsler og
foreskrifter ikke er fulgt.
Hverken sælger eller producent er ansvarlig for skader på tilsluttet udstyr, ligesom hverken sælger eller producent kan drages til
ansvar for skader på udstyr eller personer der er opstået fordi denne brugsanvisning ikke er overholdt til mindste detalje.
 Loading...