

Page 1

Thank you for your choice of the SKYRC Quattro Micro Battery Charger. This unit is
simple to use but its operation does require some knowledge on the part of the user.
Please read this entire operating manual completely and attentively before using this
product, as it covers a wide range of information on operating and safety.
SKYRC Quattro Micro Battery Charger employs the circuit that features four totally
independent but identical power outputs which are powered 4W each. It is designed for
charging single cell LiPo. Insert the battery lead to the right connector in each port, the
charger will charge 4 batteries at the same time. And the charging current can be
adjusted from 0.1-1A by dial, the charging capacity and cell voltage can be displayed in
each 4-digital LED Indicators.
INSTRUCTION MANUAL
SK-100079
INTRODUCTION
QUATTRO MICRO BATTERY CHARGER
Micro
Micro Reverse
mCPX
MX
4-Digital LED
Indicator
Charging Status
LED Indicator
AC Input
Power Port
100-240V
Rotary Dial
for Setting
Charging Current
Start/Stop
Button
DC Input
Power Jack
11-15V
1
Page 2
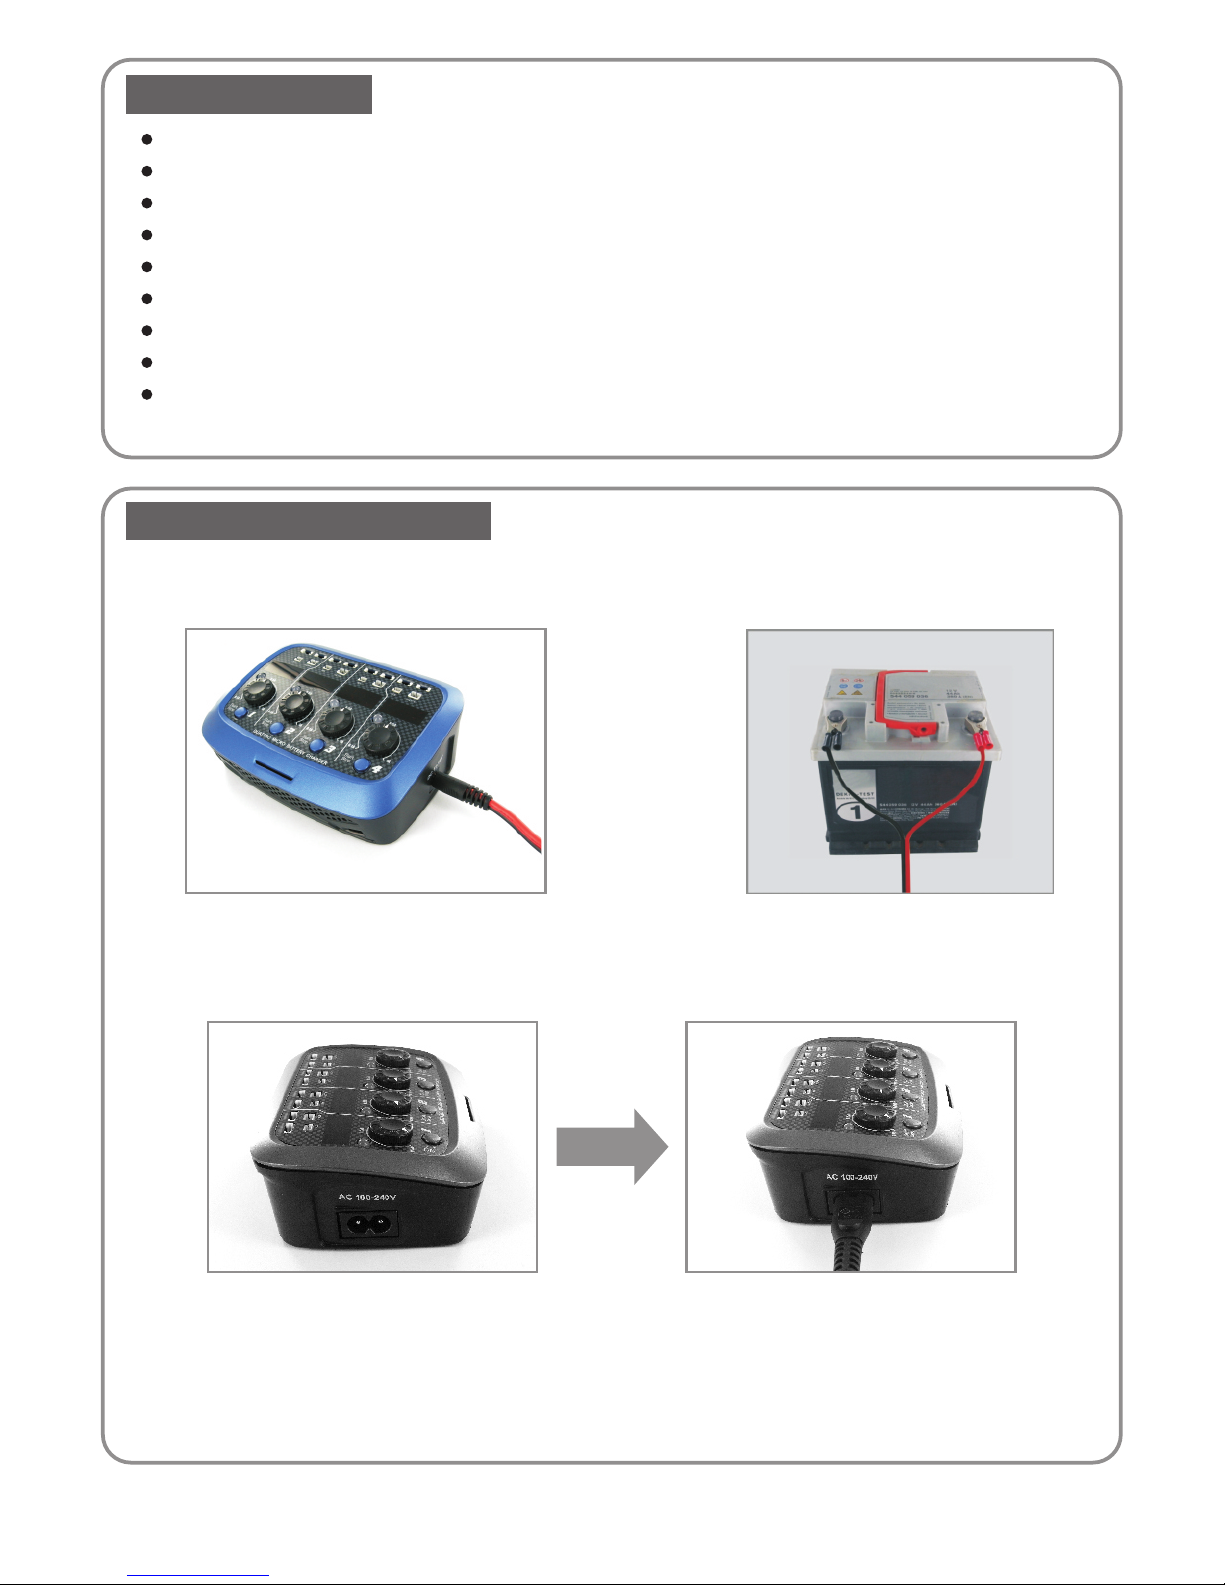
When using 12V lead acid battery,
When using AC power source
1. Insert the AC power cord into the charger.
2. Insert the AC power cord into a wall socket (100-240V).
3. When the charger is powered on, 4 status LEDs will blink once with one beep and all
4-digital LED Indicators will display 8888. After that, 4 LEDs will extinguish and all 4digital LED Indicators will display the charging current which indicates the charger is
ready to charge.
Caution: Each charging port can only charge one kind battery at same time.
Four independent ports can be used at the same time
Four different kinds of battery connectors in each port
Four independent functioning charging circuits
Four independent 4-digital LED displays current and capacity
LED and audible sound indicate charging status
Adjustable charging current from 0.1-1A
AC/DC Dual Power Input
Efficient ventilation
Maximum protection: short circuit protection; over current protection; battery reverse
polarity protection and DC input voltage protection
FEATURES
CHARGE PROCEDURES
Getting Started
2
Using DC cable
attaching to car
battery
Page 3

When the charging process is finished, the status LED turn green and blinks 5 times with audible
sound. And the status LED stays green and the 4-digital LED will display “FULL”.
Insert the battery lead to the right battery connector.
Note: Please make sure insert the battery polarities correctly.
Select the charging current (0.1-1A) by rotating the dial.
Press and hold START/STOP button for 3 seconds to start charging process. The related status
LED will turn red with long beep.
During the charging process, the 4 digital LED will display charging capacity, battery voltage and
charging current circularly.
The LED will stay red during the whole charging process.
Press and hold START/STOP button for 3 seconds during charging process to stop charging.
OPERATING
4 DIGITAL LED MESSAGE DISPLAY
Status: Charging process finish.
Charging Current(A)
(0.10-1.00A)
Charging Capacity(mAh)
3
1.
2.
3.
4.
5.
6.
Note: You are not able to adjust the charging current during charging process.
Charging Capacity(mAh) Battery Voltage(V) Charging Current(A)
At this time, if you press the “START/STOP” button once, the 4-digital LED will display “FULL”, battery voltage
and battery capacity circularly.
Note:
Battery Voltage(V)
7.
Battery Voltage(V) Charging Capacity(mAh)
Page 4

Manufactured by
SKYRC TECHNOLOGY CO., LTD.
www.skyrc.com
RoHS
When there is an error, the LED will blink red twice per second with audible sound. After ten
times of blink, the read LED will stay on and the 4-digital LED will display the error code,
ERROR MESSAGE
WARRANTY AND SERVICE
We guarantee this product to be free of manufacturing and assembly defects for a period
of one year from the time of purchase. The warranty only applies to material or
operational defects, which are present at the time of purchase. During that period, we will
repair or replace free of service charge for products deemed defective due to those
causes.
For any repair or replace service, please contact your dealer in the first instance, who is
responsible for processing guarantee claims. This warranty is not valid for any damage or
subsequent damage arising as a result of misuse, modification or as a result of failure to
observe the procedures outlined in this manual.
SPECIFICATION
AC Input
DC Input
Charge circuit power
Charge current range
Net weight
Dimension
100-240V
11-15V
4X4W ±10%
0.1-1.0A ±10%
280g
132x100x50mm
Battery connector type
Micro / Micro Reverse/
MX / mCPX
Battery type
4X1 cell LiPo
Working temperature
0-50℃
Dead cell or voltage of cell is too high or too low for safe charging.
The battery polarity is connected incorrectly.
The battery connection is wrong.
Short circuit or over current in the battery.
The DC input voltage is too high or too low.
-11-
-22-
-33-
-44-
-55-
Error Code Error Message
4
7504-0412-02
 Loading...