

Page 1
Printed in China 2014
All specifications and figures are subject to change without notice.
Manufactured by
SKYRC TECHNOLOGY CO., LTD.
www.skyrc.com
7504-0390-04
INSTRUCTION MANUAL
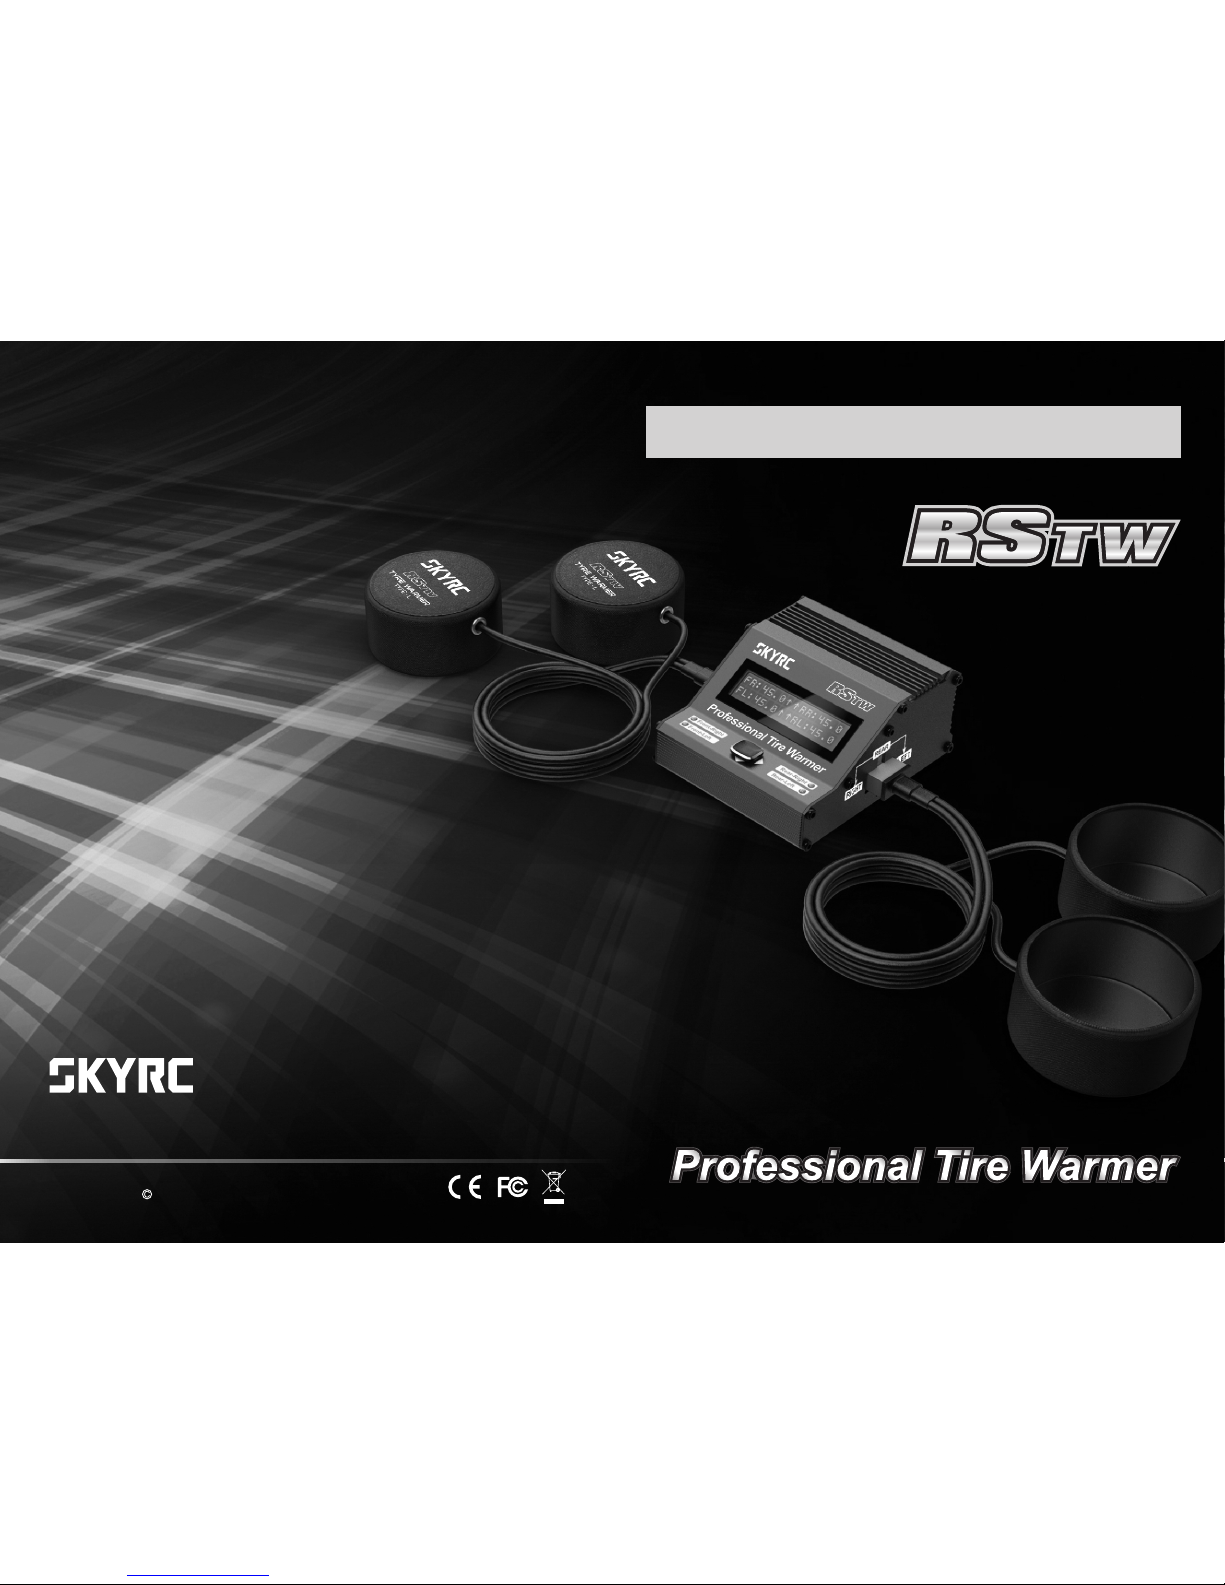
PPrrooffeessssiioonnaal l TTiirre e WWaarrmmeerr
Version 4.0
Page 2
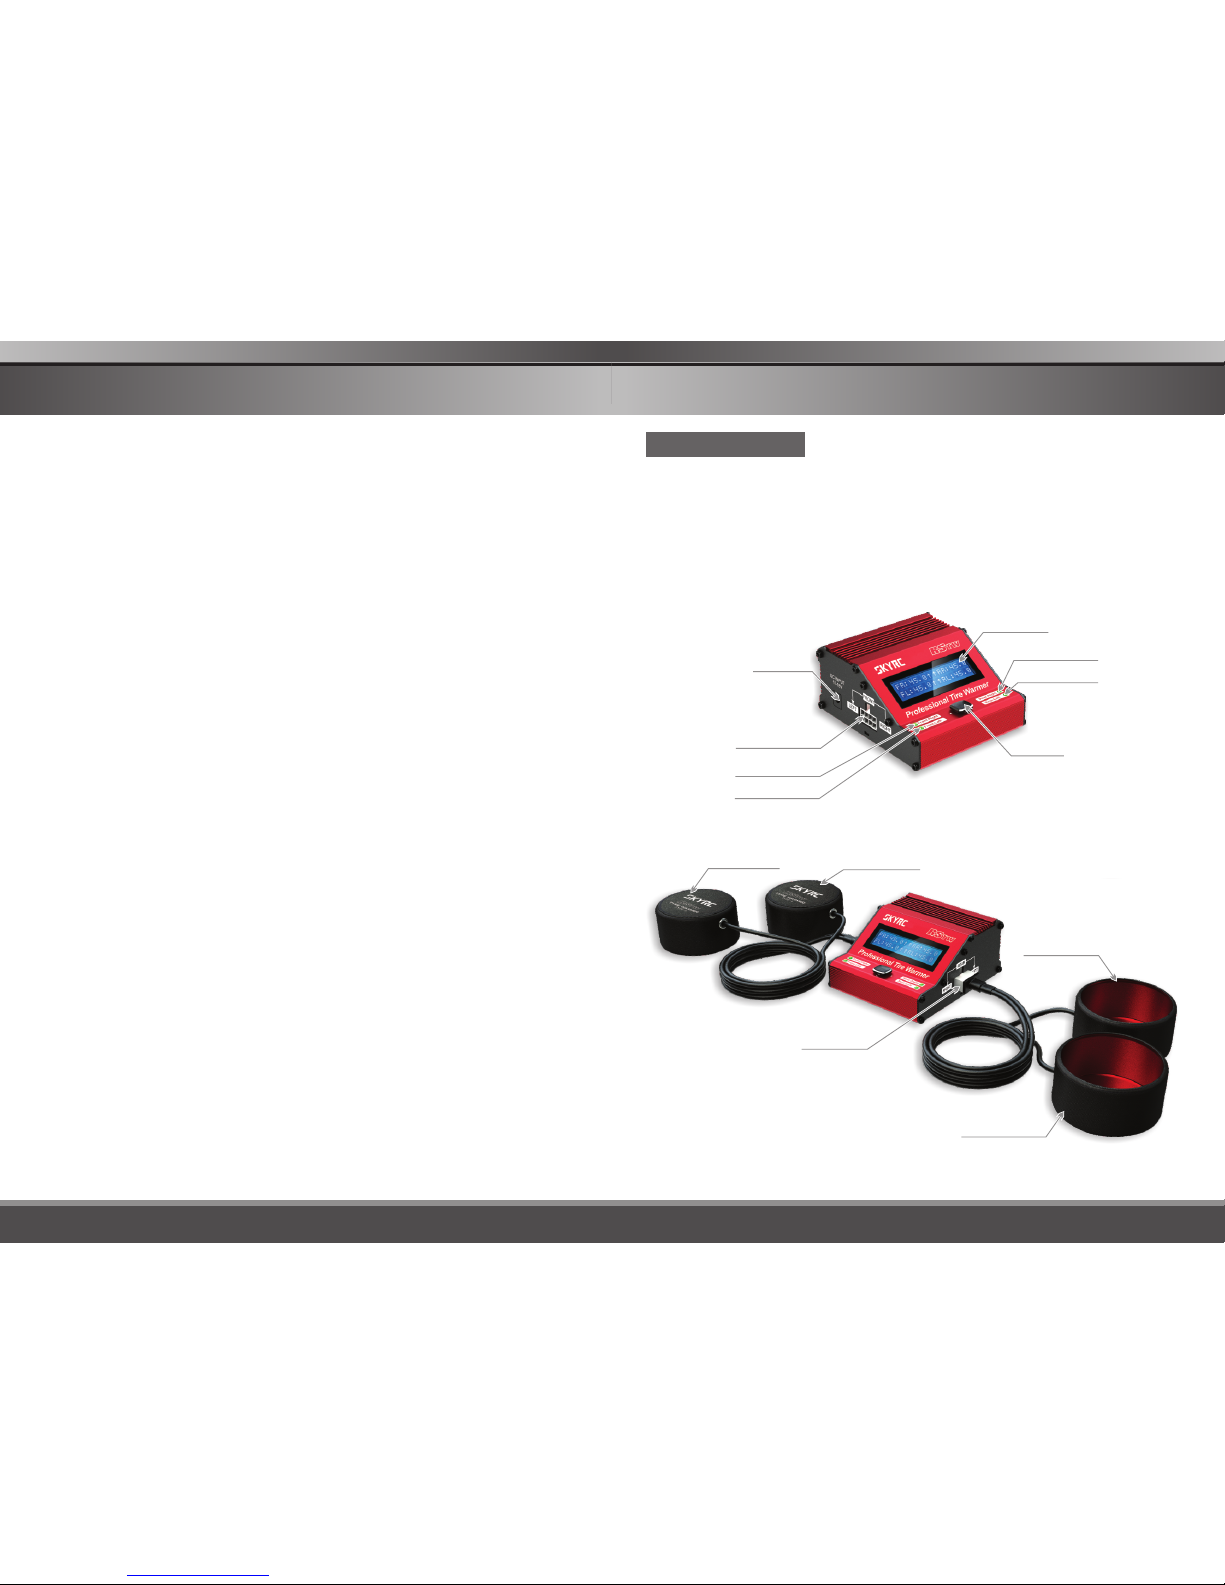
INTRODUCTION
01
RSTW
joystick
LCD display
Front-warmers
output
DC Input
Rear-Right LED
Rear-Left LED
Front-Left LED
Front-Right LED
Front-Left Tire
Warmer
Front-Right Tire
Warmer
Rear-Right Tire
Warmer
Rear-Left Tire
Warmer
Rear-warmers
output
SKYRC Professional Tire Warmers are designed to pre-heat rubber tires for 1/10 size
touring car. Using tire warmer can optimum temperature of tires before taking the car
onto a track or race circuit. Having the surface rubber hot increases the co-efficient of
friction of the rubber and adding to its ability to grip the track surface. Pre-heating the
rubber eliminates downtime of tires building up heat naturally to attain the full
performance of the tire.
Using SKYRC Tire Warmers gives you the advantage of tires being ready as soon as
you roll out onto the track.
INTRODUCTION
Page 3

03
RSTW
02
RSTW
FEATURES
Front & Rear temperature can be set independently
Temperature of 4 tires is controlled by MCU
Removable front & rear tire warmers
8 different beep tones
Minimum temperature
Celsius - Fahrenheit selectable display
Four LEDs indicator
Safety timer
FEATURES
SPECIFICATIONS
Input: 11-18V
Temperature Range : 20-80 , 100 / 68-176 , 212
Keys: Joystick - Up, Down, Left, Right
Dimensions: 92x111.4x50mm
Weight: 440g / 15.52oz
℃ ℃
℉ ℉
Atmospheric conditions may affect the final tire temperature
Fitted tire warmers must never come into contact with the ground – the car must
always be elevated clear of the ground using suitable stands.
Never use tire warmers unless they are fitted to a tire!
Do not fit, use or remove tire warmers when the car is still power on.
Always check the tire warmers before use, if any signs of wear or damage are
noticed then they must not be used
Never attempt to modify the warmers
Do not leave tire warmers in use unattended
Only for use with 1/10 scale rubber tires
NOTES
HOW TO CONNECT TIRE WARMER TO DC SOURCE
HOW TO CONNECT TIRE WARMER TO DC POWER SOURCE
Located on the left hand side of the tire warmer is a jack for the connection of the DC power cord.
To utilize the tire warmer’s absolute maximum capability, the DC power source must be capable
of delivering at least 8 amps while maintaining 12V DC.
Connect to
AC/DC Adaptor
or LiPo Battery 3S
1.
2.
Also located on the bottom of the tire warmer is secondary DC jack. This jack is designed for
docking in to the Efuel Power Supply 17A 230W(SK-200017). Always match polarities (red lead
to red + terminal, black lead to black - terminal).
SKYRC RSTW
Tire Warmer
eFUEL 13.8V/17A
Power Supply.*
(eFuel power supply can be
purchased separately, which is
not included in the package.)
1
2
3
THE SET CONTAINS
1. SKYRC Tire Warmer Controller
2. Front Tire Warmers
3. Rear Tire Warmers
4. DC Input Cable
4
Dual Banana
Plugs
*
Page 4

05
RSTW
04
RSTW
STEP WARMING
You can warm your tires by 2 step in this mode. It is convenient when you apply two
different kinds of tire additives on your tires.
Three steps has one more warming step, all other functions are exactly the same
as two steps warming.
2 T w o S t e p s
3 T h r e e S t e p s
LEFT
RIGHT
* 1 / 2 2 0 M i n u t e s *
F : 7 5 . 0 R : 7 5 . 0
* S t a r t D e l a y *
0 1 M i n u t e s
A u t o S t a r t T i m e r
0 0 : 5 5
RIGHT
F R 7 5 0 R R 7 5 0
F L 7 5 0 R L 7 5 0
* 1 / 2 2 / 2 D e l a y
0 1 M i n u t e s
0 0 : 2 7
F R 6 0 0 R R 6 0 0
F L 6 0 0 R L 6 0 0
T w o S t e p s
D o n e 0 0 : 3 0
RIGHT
RIGHT
* 2 / 2 1 0 M i n u t e s *
F : 6 5 . 0 R : 6 5 . 0
RIGHT
1
2
3
4
5
6
7
8
9
STEP WARMING
Operating Explanations
Determine first step warming time.
Set front and rear tires target temperature 20-80℃.
Change front or rear temperature.
Move to next set up
Back to former set up
If you need extra hot warming for certain track or weather conditions. You can set
100℃ by hit key once more when you reach to 80℃.
Determine delay time
Move to next set up
Back to former set up
1
2
QUICK WARMING
QUICK WARMING
1 Q u i c k W a r m
2 2 S t e p W a r m
This mode is easy to setup, good for standard use. You can change temperature during
warming.
* Q u i c k W a r m S e t *
F 6 0 0 R 6 0 0
Increse front or rear temperature.
Decrese front or rear temperature.
If you need extra hot warming for certain
track or weather conditions, You can set
100℃/212℉ by hit key once more
when you reach to 80℃/176℉.
* Q u i c k W a r m S e t *
F 6 0 0 R 6 0 0
1 Q u i c k W a r m
2 2 S t e p W a r m
F R 4 5 0 R R 4 5 0
F L 4 5 0 R L 4 5 0
Change rear temperature.
Start program
Return to main menu.
LEFT
Change front temperature.
RIGHT
RIGHT
You can see elapsed time during quick warming.
Q u i c k W a r m i n g
0 1 : 3 0
LEFT
F R 6 5 0 R R - - - -
F L 6 5 0 R L - - - -
If you see”----” on the display, check warmers connection.
On left display, rear warmers have bad connection or
disconnected.
F R 5 9 2 R R 6 0 0
F L 5 9 6 R L 5 9 . 9
Quit out of Quick warming.
or You can change temperature during Quick warming.
RIGHT
It is recommended that the warmers are left on the tires for
about 10 minutes, allowing the rubber to be heated
uniformly and fully. Do not use for any periods longer than
30 minutes as this can damage the tire.
How to setup temperature
During the warming process, upward arrow “ ” means the
temperature is going up.
It disappears when the temperature is reached to target
temperature and the LEDs will turn green.
Page 5

07
RSTW
06
RSTW
USER SET UP
1 Q u i c k W a r m
4 U s e r S e t U p
* T E M P D i s p l a y *
C e l s i u s
* T E M P D i s p l a y *
F a h r e n h e i t
* S a f e t y T i m e *
3 0 M i n u t e s
(10-120 Minutes)
* S u p p l y 1 2 . 0 V *
C u t o f f : 1 0 . 0 V
* B e e p T o n e *
- 1 -
* M i n i m u m T E M P *
2 0 . 0 C
RIGHT
DOWN
DOWN
DOWN
DOWN
DOWN
Select temperature display celsius - Fahrenheit
Set minimum warming temperature while not using quick
warm and step warm.
Select your favourate beep tone. (OFF, 1-8)
Set low voltage alarm. you can save your expensive
LiPo battery with this function.
We recommend to set at 10V for 3 cell LiPo battery.
Set safety time.
Tire warmer will stop working when reach safety time.
USER SET UP
STEP WARMING
3
Change front or rear temperature.
Move to next set up
Back to former set up
If you need extra hot warming for certain track or weather conditions. You can set
100℃ by hit key once more when you reach to 80℃.
Determine second step warming time.
Set front and rear tires target temperature 20-80℃
Set auto start timer
Skip count down.
1/ 2 Step Warming
You can check current step and elapsed time.
Quit from step warming.
1/ 2 -2/2 Delaying
You can check temperature or 1/2-2/2 delay time.
Skip delaying, move to 2/2 step warming
All LEDs will blinking in red during delay period.
2/2 Step Warming
You can check current step and elapsed time.
Quit from step warming.
2 Step warming done
4
5
6
7
8
9
Back to former page
All LEDs will blinking in green.
Page 6

09
RSTW
08
RSTW
CALIBRATION & FACTORY RESET
CALIBRATION
You can calibrate your tire warmers with you thermometer.
Calibration is required when the temperature of tire warmers are changed.
With push key and hold, input DC power.
h a n d o f f p l e a s e
T E M P a d j u s t m o d e
Stop pushing button.
Determine target temperature for calibration.
* T a r g e t T E M P *
O F F
F R 6 9 2 R R 6 5 6
F L 6 8 8 R L 7 1 0
FL will blink first.
Check the temperature of FL
with you're thermometer
Match the temperature to the value of thermometer
Move cursor to next step.
Calibrate FR-RL-RR warmers as same way.
If you push key on FL, step-W will save all calibration data and will restart itself.
LEFT
You can reset the setting when you want to return all values to the original values.
With push key and hold, input DC power.
h a n d o f f p l e a s e
F a c t o r y r e s e t
Stop pushing button.
Factory reset then goes to Main menu.
Exit and goes to Main menu.
FACTORY RESET
Will ask you if factory reset.
N O Y E S
F a c t o r y r e s e t
LIABILITY EXCLUSION & WARRANTY
We guarantee this product to be free of manufacturing and assembly defects for a period of one year from the
time of purchase. The warranty only applies to material or operational defects, which are present at the time of
purchase. During that period, we will repair or replace free of service charge for products deemed defective due to
those causes.
For any repair or replace service, please contact your dealer in the first instance, who is responsible for
processing guarantee claims. This warranty is not valid for any damage or subsequent damage arising as a result
of misuse, modification or as a result of failure to observe the procedures outlined in this manual.
This tire warmer is designed and approved exclusively for use with for 1/10 size touring car ’s rubber tires stated in
Instruction Manual. SKYRC accepts no liablility of any kind if the tire warmer is used for any purpose other than
that stated. We are unable to ensure that you follow the instructions supplied with the tire warmer, and we have no
control over the methods you employ for using, operating and maintaining the device. For this reason we are
obliged to deny all liability for loss, damage or costs which are incurred due to the incompetent or incorrect use
and operation of our products, or which are connected with such operation in any way. Unless otherwise
prescribed by law, our obligation to pay compensation, regardless of the legal argument employed, is limited to
the invoice value of those SKYRC products which were immediately and directly involved in the event in which the
damage occurred.
WARRANTY AND SERVICE
LIABILITY EXCLUSION
This symbol means that you must dispose of electrical from the General household waste when
it reaches the end of its useful life. Take your device to your local waste collection point or recycling
centre. This applies to all countries of the European Union, and to other European countries with a
separate waste collection system.
devices
CONFORMITY DECLARATION
SKYRC satisfies all relevant and mandatory CE directives and FCC Part 15 Subpart B: 2008.
The product has been tested to meet the following technical standards:
RSTW Tire Warmer
EN 61000-6-3: 2007
+A1:2011
Electromagnetic compatibility (EMC)—Part 6-3:Generic
Standards
-Emission standard for residential, commercial and lightindustrial environments
Electromagnetic compatibility(EMC)- Part 3-2:Limits-Limits
for harmonic current
emissions(equipment input current≤16A per phase)
Electromagnetic compatibility (EMC)- Part 3-3:LimitsLimitation of voltage
changes, Voltage fluctuations and flicker in public lowvoltage supply systems. For equipment with rated current
≤16A per phase and not subject to conditional connection
Electromagnetic compatibility (EMC)—Part 6-1:Generic
Standards
—Immunity standard for residential, commercial and lightindustrial environments
EN 61000-3-2: 2006
+A1:2009+A2:2009
EN 61000-3-3: 2008
EN 61000-6-1: 2007
 Loading...