

SKYPOINT Tiny Quick Start Manual
Quick start guide
WIRELESS BACKUP SYSTEM
v1.5
1-888-779-7646
support.spypoint.com
tech@spypoint.com
TINY
BLACKBOX
TM
(receiver included with
TINY-WBF)
BLACKBOXTM-D
(controller included
with TINY-W3)
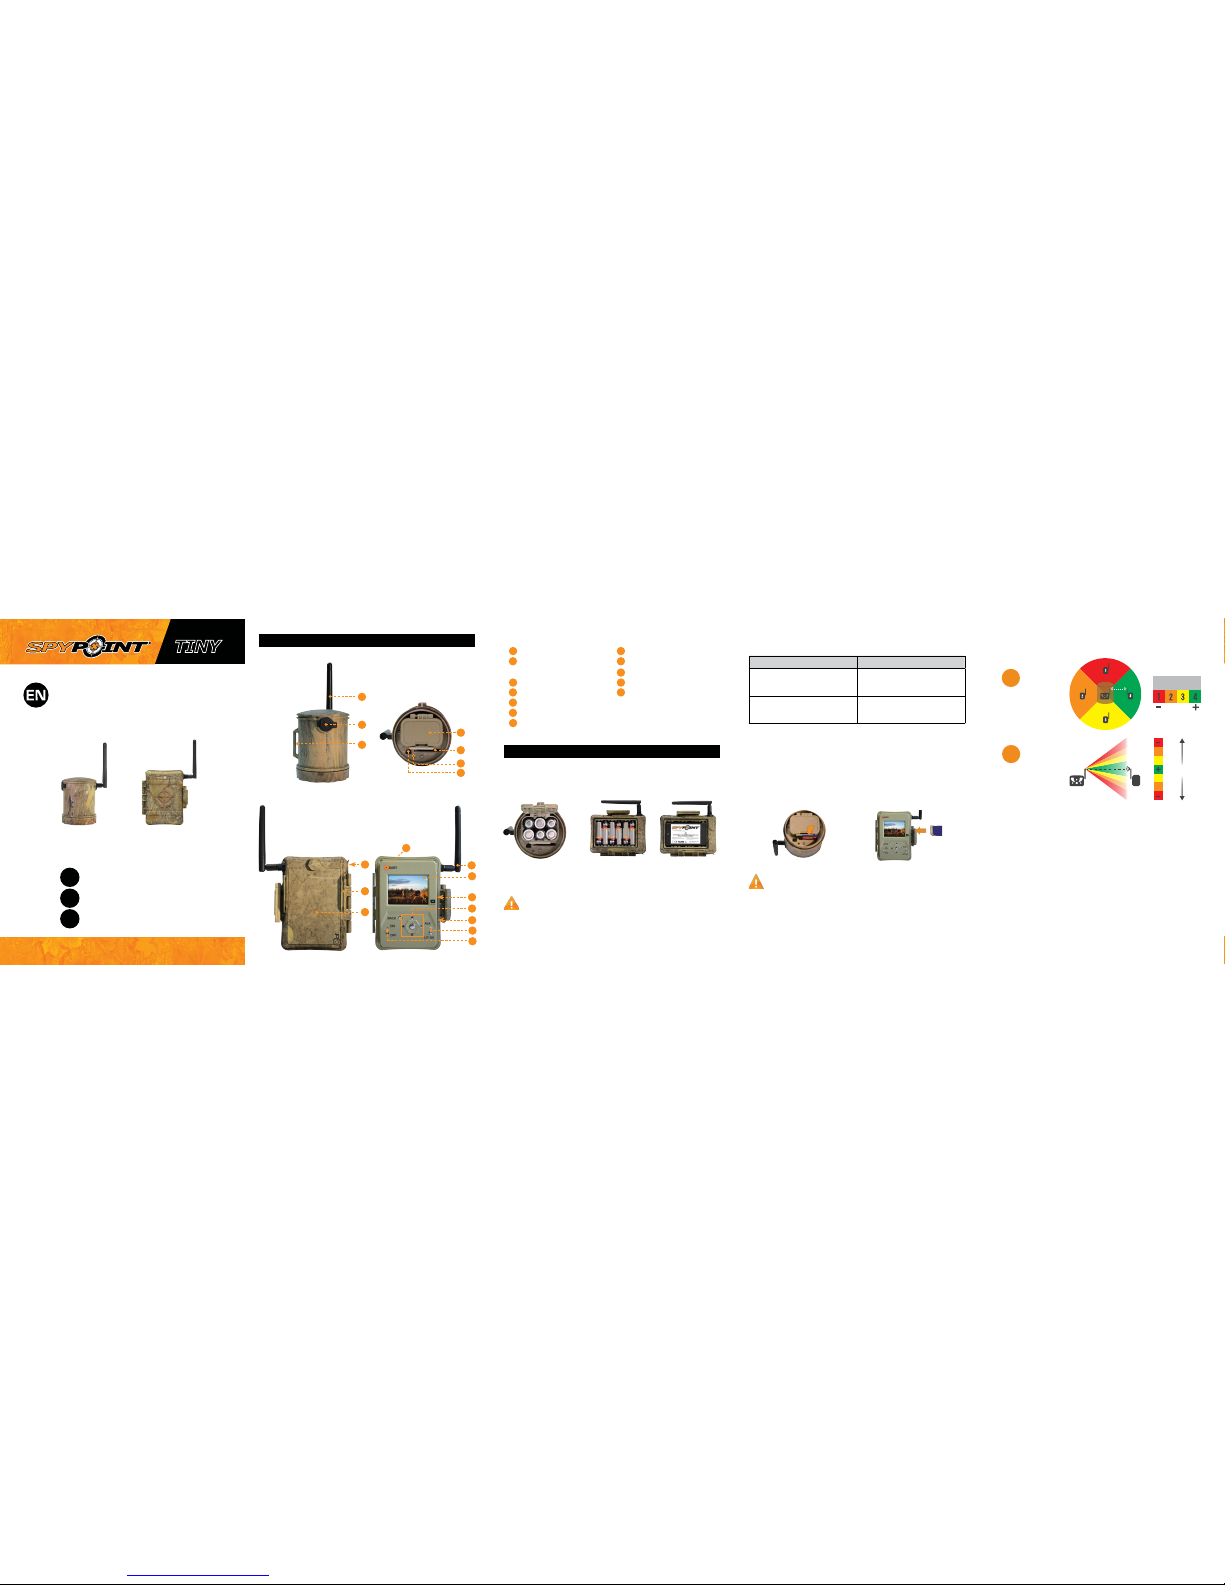
Components
BUSY LED
Viewing screen
Navigation buttons
TV OUT
Battery switch
Antenna
12V /
Solar panel jack
(BLACK
BOX-D only)
Slot for installation strap
Battery case
SD card slot
Test light
ON/OFF
1
2
3
4
5
6
7
8
9
10
11
12
3
1
2
4
5
6
7
2
4
3
11
12
10
5
1
7
8
9
BLACKBOX
Receiver
BLACKBOX-D
Controller
Getting started
1. CHOOSE A POWER SOURCE
We recommend the use of new batteries to ensure a maximum
performance of the camera. Rechargeable AA batteries are not
recommended.
6 alkaline
AA batteries
BLACKBOX
6 alkaline
AA batteries
Lithium battery pack
LIT-09/LIT-C-8
BLACKBOX-D
Battery switch position (depending on the power source)
BLACKBOX-D controller only
Power source Battery switch position
• 6 AA
• 12V
• 12V + 6 AA
ALK
• LIT-09*
• 12V + LIT-09*
• Solar panel + LIT-09*
LIT-09
* Rechargeable lithium battery pack, sold separately (LIT-09) or with
a charger (LIT-C-8).
2. INSERT A MEMORY CARD
Insert an SD/SDHC memory card in the card slot (up to 32 GB capacity).
The card is inserted correctly when a click is heard.
Before inserting or removing a memory card, always turn off the
device to prevent loss o r damage of the photos already recorded.
BLACKBOX BLACKBOX-D
3. SIGNAL STRENGHT BETWEEN CAMERA AND BLACKBOX
TREE
SIGNAL STRENGHT
A
ORIENTATION
OF THE BLACKBOX
UNIT
SIGNAL
STRENGHT
B
HEIGHT
OF THE TWO
DEVICES
BLACKBOX receiver setup
By default, the TINY-W
BF
camera is synchronized with its receiver on
channel 1 and the icon SYNC is green. (see SIGNAL mode in camera
menu)
TEST THE WIRELESS SIGNAL
Allows to verify the quality of the wireless signal between the TINY-WBF
camera and the BLACKBOX receiver. To see the wireless signal icon on
the main menu, the Wireless option in the Settings menu of the camera
should be ON.
1. Select the SIGNAL mode
2. Select the Range test option
Sync
Channel
1
+
SETTINGS OF THE BLACKBOX-D
The BLACKBOX-D allows the user to view photos and control the settings of the synchronized cameras. The camera supplied with the
BLACKBOX-D is already synchronized.
Use the and buttons to navigate in the interface and to modify the
selection. Use the OK button to select and the BACK button to return
to the previous menu.
SIGNAL
Allows the user to synchronize a camera to a controller. By
default the camera, supplied with the BLACKBOX-D, is already synchronized to it. Each additional camera (TINY-PLUS) must be synchronized
with the BLACKBOX-D.
START BLACKBOX-D
Select this option when the controller and camera(s) have been
congured and synchronized. The controller is now ready to receive
photos from the synchronized camera(s).
BLACKBOX-D controller setup
Start BLACKBOX
Settings
Remote
View
SETTINGS
Allows the user to congure the different parameters of the
synchronized cameras. If more than one camera is synchronized to the
controller, choose the one that is to be changed.(press OK to conrm
the modications and BACK button to send the new parameters to the
camera.)
REMOTE
Allows the user to see the camera status, to start/stop the
camera, to verify the quality of the wireless signal and to have an over-
view of the eld of view of the camera in real time.
Get camera status
Indicates the battery level and the percentage of used space in the
memory card of the camera.
Start/stop camera
Remotely stop or restart the camera operation (photo mode).
Range test
Allows the user to check the quality of the wireless signal between the
camera and the controller. If the icon of the wireless signal is red, the
signal is too weak. Move the controller or bring it closer. If the icon
of the wireless signal is green and stays green for more than 10
seconds, the signal is strong enough and stable to enable wireless
transmission of photos to the controller.
Live view
Allows a live preview of the eld of view of the camera in real time (1
photo per second is sent to the controller).
VIEW
Allows the user to view or delete the recorded photos on the
controller screen or on a television.
To SYNCHRONIZE an additional camera to the controller or to use
multiple controllers in the same area, refer to the user's manual.
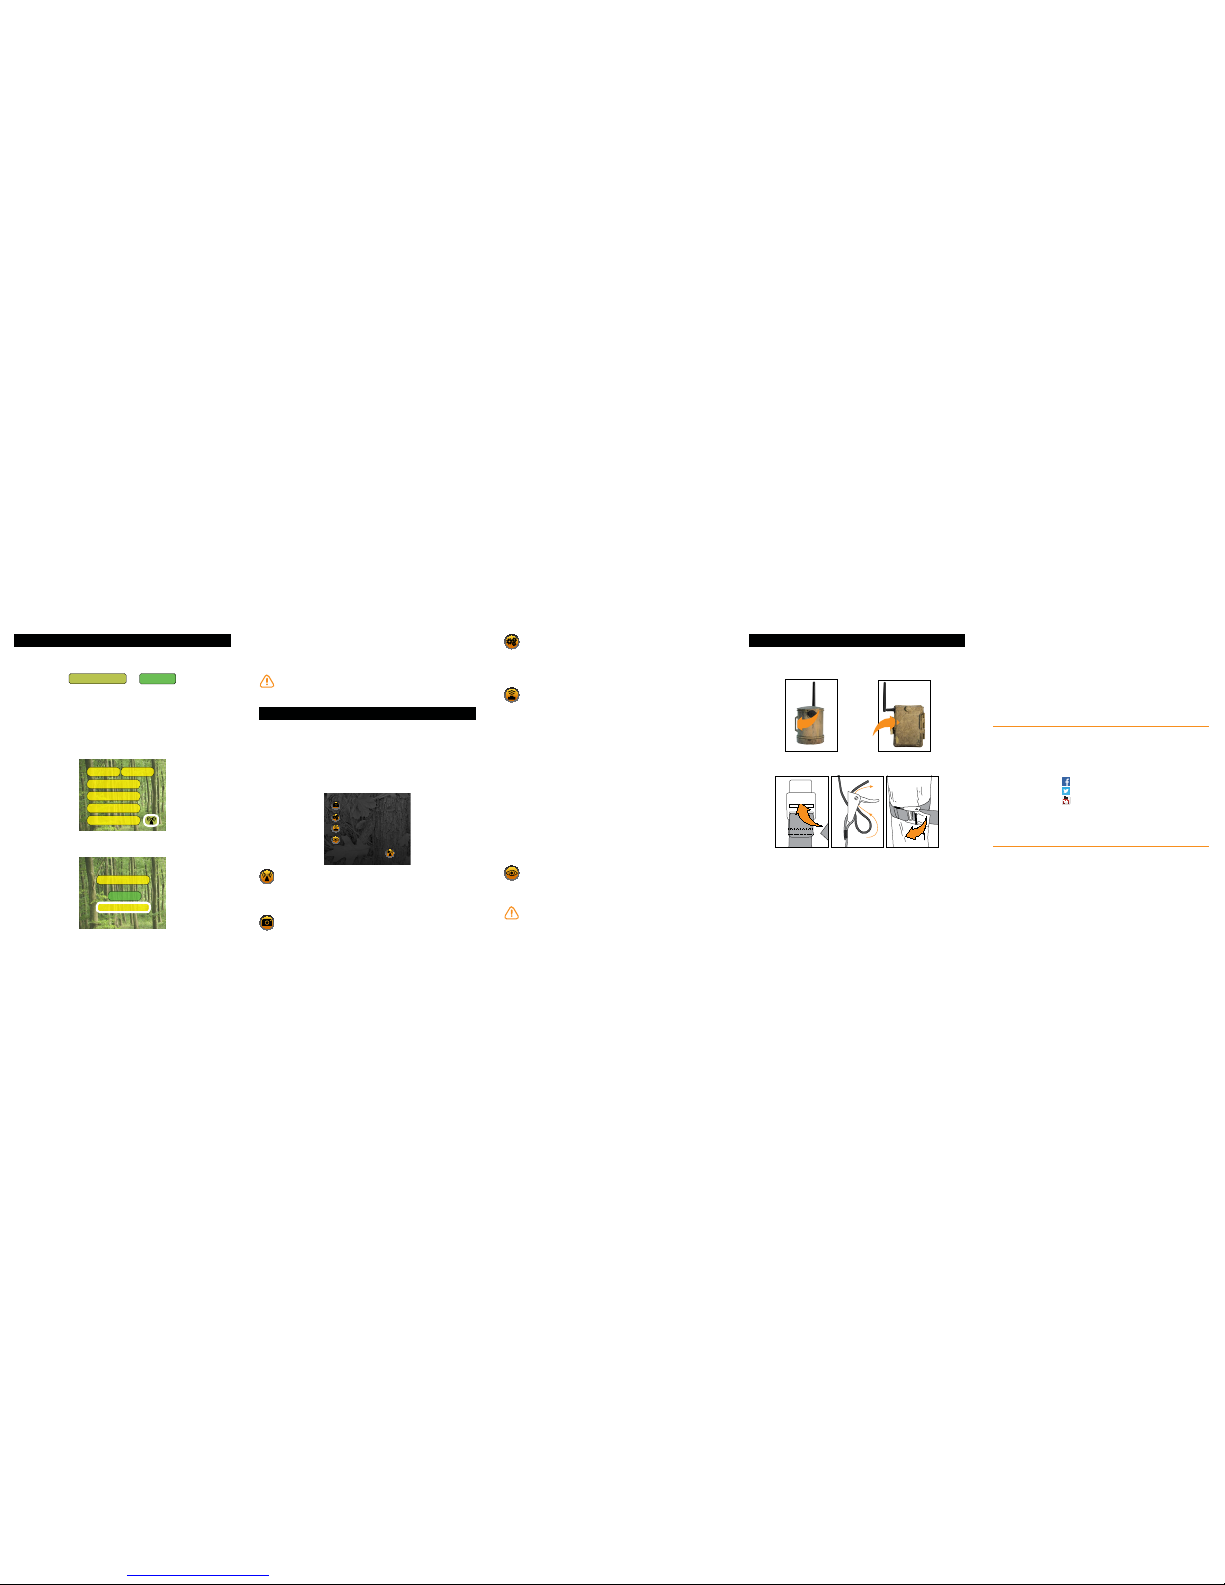
Final installation
INSTALLATION OF THE BLACKBOX WITH THE SUPPLIED
STRAP
BLACKBOX-D
BLACKBOX
FACEBOOK.COM/SPYPOINT
TWITTER.COM/SPYPOINTCAMERA
YOUTUBE.COM/SPYPOINTTRAILCAM
Join the SPYPOINT community
Photo
Video
Test
Report
View
Settings
Channel 1
Range Test
Sync
If the icon of the wireless signal is red, the signal is too weak. Move the
receiver or bring it closer. If the icon of the wireless signal is green and
stays green for at least 10 seconds, the signal is strong and stable
enough to enable wireless transmission of photo to the receiver.
To synchronize one or multiple sets (TINY-WBF CAMERA/BLACK-
BOX RECEIVER) in the same perimeter, refer to the user's manual.
 Loading...