

Page 1
Page 2

Page 3

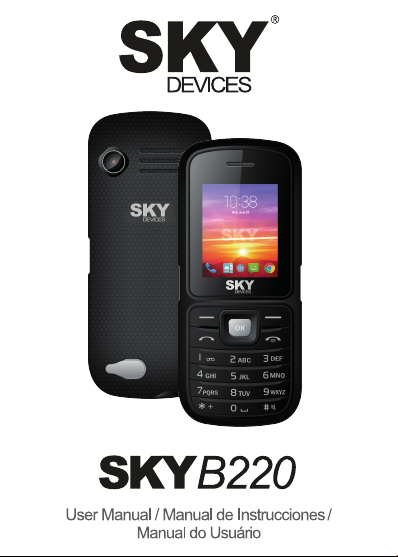
User Manual
Page 4

2
1. Messaging
You can receive and send message,and can also use
broadcast message.
Message make it possible for you to exchange message With
other wireless phone users. Select Message to perform operation.
1.1 Writing Message
You can write a new text message send to others, and also can
insert template in the message.
Select the Option after editing a text message:
Send: send the message only
Save and Send: send the message while sending
Save: save the message
Send to Many : send the message to many
Send By Group: send the message to all the link of the
selected group
Page 5

3
1.2 Message Setting
You can setup your MMS through the menu by your need as
following:
Server Profile: Start or edit the service, when you fail to
send the MMS,please change
online-pattern of the server to WAP.
Send: Include life, send return, read return,
priority etc.
Retrieve: Include main network, roaming network,
Send return, allow to sending reports etc.
Memory Status: View the storage of the MMS.
Note: If you fail to send MMS, please change the
online-pattern to WAP in the server setting.
1.3 SMS Setting
You can setup the message from the menu, as following:
SIM Setting: Offer you four profiles and you can edit
their names, set SC Address and Valid
Period etc.
Common Setting: Set delivery report on or off
Memory Status: Check the capacity of message storage
Preferred Storage: Set the default message storage location,
including phone storage and SIM card.
Note: you need support from the service provider
to receiver delivery reports.
Page 6

4
2. Call history
Enter the main menu Log, select SIM1 or SIM2 to view the dialed
calls and answered calls, can also examine the call time, cost and the
use of the message.
2.1 SIM 1 /2Call history
You phone keeps lists of incoming and outgoing calls, even for
calls that didn’t connect .The most recent calls are listed first.
Tip: the phone keeps the only latest call of the same
number .To view detail information or performs
other operation:
Find the lists of Dialed Calls, Received Calls,
Missed Calls .Press ok key to view the detail
information: times etc.
Press Option key to perform following operation:
Delete: Delete this record.
Save: Save the number of this record to phone book.
Call: Call t he number of this record.
Send SMS: Send message to the number of the item.
Edit : Enter the number edit screen, you can modify,
save or dial the number.
Page 7

5
3. Phonebook
Select contacts to open phone book.
The phone book is consisting of phone storage and SIM card
storage and you can use both of them.
Phone Storage: With a name, default number, family number,
company name, email address, company
number, fax number, birthday date and
group/individual ting i n each item
SIM card Storage: The capacity depends your SIM card type and
there is only a name and one business number
in each item .For details, please contact your
service provider.
Note: Delete the selected names one by one
3.1 Setting
You can perform bellowing operations on the phonebook:
Memory Status: Check the capacity of the phonebook,
Including SIM card memory and phone memory.
Preferred Storage: Select SIM card memory or phone Memory as
the default storage location when adding a new
name.
Tip: You can also choose another storage location
when you add a new name.
Page 8

6
4. Setting
You can set your favorite wallpaper, ring or some other function.
4.1 SIM S etting
Enter this menu; you can set the mode to be Dual SIM, only SIM1,
only SIM2, flight mode.
4.2 Network S etup
When dual SIM mode is activated, you can perform network setup
for SIM1 and SIM2 separately. Enter Network Settings, select Network
Setup and then you can perform following operations:
Network: New search, Select Network
Selection: Selection Mode.
Preferences: Set the preferred network during searching.
Band selection: Set the way how GPRS is connected.
4.3 Security S etup
Enter Security Settings, select Security Setup and then you can
perform foIIowing operation:
SIM Lock: Set a password for your Sl M card-open/close.
Phone Lock: Set a password for phone lock.
Keypad Lock: auto keypad lock on or off and a time after
which the keypad is Locked.
Change Password: Change the Pin Password, Pin2 Password and
Phone Lock Password.
Page 9

7
Note: For Pin Password, please contact your service
provider; Fixed Dial and Barred Dial must be
supported by your SIM card .For details, please
contact your service provider.
4.4 Call Setting
Enter call Setting form main menu, select Call Setup and t hen you
can perform some operations as following:
Call Waiting: Setup the call waiting function.
Call Divert: Setup the call diverts function.
Call Limit: Setup the call limit function.
Line Switch: Switch your current line and there are 2lines
Available.
Call time Set the call time reminder on or off and its
Reminder: type and period.
Call time
Display: Set if call time shows during calls or not.
Auto Redial: Set Auto Dial on or off. W hile it is on, the phone
automatically redials 10 times i n occasion that
the line is busy or cannot be answered and you
can press Abort to cancel redialing.
Backlist: Set 5 numbers, while it is on, the phone
automatically shields t he incoming calls from
the members in blacklist.
lP Dial: Set IP dial on or off, edit IP number.
Page 10

8
5. Multimedia
Your phone offers multimedia applications and you can select
Media from main menu to open it.
5.1 Camera
Your phone has a hi-Mega pixeI camera that you can take photos
whenever and wherever you like. After taking photos, store them in the
phone memory or memory card (if any).
Camera Setting: Press left soft key to open Option in viewfinder display
and make detail setting.
5.2 Audio player
You can use the audio player to broadcast music. Press OK key to
play the current music, and press it again to pause the current music
Press the Left direction key to switch to the before, and right direction
key to switch to the next. You can adjust the volume of the MP3 player
through the upper direction key and down direction key.
5.3 Video Player
Tap Video Player to open i t and view all video files. Press the
Options and perform following operations on the selected v ideo(play
forward, details, rename, delete, delete all fil es or sort.
During playing, press the 4-way navigation key up-'and down to
adjust the speed, press the left or right key to contrib. playing rate, press
“0” to full screen, press #"to control volume.
Page 11

9
5.4 Image vie wer
You can perform the following operations
View: View photos
Forward: Send the current photo to wallpaper list, screen
saver list and power on/off display l ist
Rename: Change name of the photo
Delete: Delete the photo
Delete All: Delete all photos
Files Sort: Arrange the photos by name, type, t ime,. size or
random
Storage: Choose photos in the phone memory or
memory card.
5.5 FM radio
Choose Radio menu to turn the radio function.
Note: W hile tuning the radio in, you can dial or hear
the call normally. When on the phone, the
volume of the radio will become silence
automatically
6. File manager
Tapf rom the mai n menu t o open it and you can find the storage
devices and the capacity of total space and free space. On different
objects, there are different operations.
Page 12

10
7. Organizer
7.1 Calendar
7.2 Alarm
7.3 Flashlight
7.4 Tasks
7.5 Bluetooth
®
7.6 Calculator
8. e-Book reader
You can use e-book. Select Option and enter:
Open eBook: You can open the e-book.
Clean up Bookshelf: Cleanup the e-book catalog.
Global Setting: You can set the style, font and page of the
e-book system before you read the e-book.
Book Info: There is e-book information, include the
name, size and format of e-book.
Delete: You can delete this e-book.
Delete All: You can delete all e-book.
Sort: You can sort e-book by name, f ormat, time
or size.
Apply global setting: You can restore default of e-book system.
Help: You can read manual of e-book
Page 13

11
9. Service
9.1 WAP
Your phone supports serv ice subject to WAP .You can access
the service provided by network service operator. You can acquire the
information about news, weather f orecast, flight, etc.
Notice: GPRS service needs the support of network.
You can enjoy it in the coverage areas of GPRS
network.
Homepage: Access t he Home page. Home page is your
preset website of WAP lf you do not set the
Home Page, your phone will access the default
website.
Favorites: View the bookmarks. You can select one of
them to access the website.
Recent Visits: the option will record the web addresses you
viewed before.
Offline page: the option will view the web addresses offline.
Input URL: This function for the input you want to connect
the web site
Settings: Some settings of surfing the Internet.
1. Active Profiles: Setting parameters of visit website.
2. Options: Select the service groups and some settings of
browsing websites.
Page 14

12
3. Clear Cache: Clear cache you viewed.
4. Clear Cookie: Cl ear cookie the web remembered.
5. Select SIM: Select SIM 1 or SlM 2.
Page 15

Manual do usuário
Page 16

2
1. Mensagens
Você pode receber e enviar mensagens, e mesmo usando
mensagens de difusão.
O recurso de mensagens permite trocar mensagens com outros
usuários de telefones sem fio. Selecione mensagens para executar a
operação.
1.1 Escrever uma mensagem
Você pode compor uma nova mensagem e enviá-la, e também
você pode inserir mensagens modelo.
Selecione uma das opções a seguir depois de editar uma
mensagem de texto:
Enviar: Basta enviar a mensagem
Salvar e enviar: Salve a mensagem a enviar
Salvar: Salvar a mensagem
Enviar a muitos : Envie a mensagem para vári os
destinatários
Enviar por grupo: enviar a mensagem para todo um grupo
selecionado
1.2 Configuração da mensagem
Através do menu você pode configurar o MMS conforme as suas
necessidades, como segue:
Perfil do servidor: Iniciar ou editar o serviço, quando você
não pode enviar uma MMS, alterar o
Page 17

3
servidor WAP para o modo online.
Enviar: Isto i nclui enviar, reenviar, reler, prioridade,
etc.
Recuperar: Incluir a rede principal, rede de roaming,
reenviar, permitir enviar relatórios, etc.
Estado da memória: Consulte o armazenamento MMS.
Nota: Se você não pode enviar um MMS, mude o
servidor WAP no modo de configuração de
linha.
1.3 Configuração de SMS
Você pode configurar a mensagem do menu, como segue:
Configurações do SIM: Oferece-lhe quatro perfis e você pode
editar seus nomes, colocar o endereço SC,
período válido, etc.
Configurações comuns: Configure o envio de relatório, habilitar ou
desabilitar.
Estado da memória: Verifique a capacidade de armazenamento
de mensagens.
Armazenamento preferido: Defina o padrão de localização de
armazenamento de mensagens, incluindo
o armazenamento de seu telefone e cartão
SIM.
Nota: O suporte do provedor de serviço é
necessário para receber notificações de
entrega.
Page 18

4
2. Histórico de c hamadas
Entrar no menu principal do registro de chamadas, selecione
SIM1 ou SIM2 para exibir o números discados e chamadas recebidas,
também pode verificar o tempo de chamada, o custo e a utilização da
mensagem.
2.1 Histórico de chamadas do cartão S IM1 e SIM2
O telefone mantém uma lista de chamadas recebidas e de saída,
mesmo daquelas que não conseguiram se conectar. Primeiro aparecem
as chamadas mais recentes.
Dica: O telefone guarda apenas a última chamada do
mesmo número. Para exibir informações detalhadas
ou executar outras operações:
Olhe para as listas de chamadas feitas, chamadas
recebidas e chamadas não atendidas. Pressione a
tecla OK para exibir informações detalhadas como
horas, etc. Pressione a opção chave para realizar
as seguintes operações:
Excluir: Excluir o registro.
Salvar: Salvar o número deste registro na lista tel efônica.
Ligar: Ligar para um número de registro.
Enviar SMS: Enviar uma mensagem para um número da lista.
Editar Digitar na tel a editar número, onde você pode editar,
salvar ou discar o número.
Page 19

5
3. Lista te lefônica
Selecione os contatos para abrir a lista telefônica
A lista telefônica consiste da memória do telefone e memória e do
cartão SIM e ambas as memórias podem ser usadas.
Memória do telefone: O uso de um nome, número padrão, número de
família, nome da empresa, endereço de e-mail,
número de fax número, data de aniversário e
tom para cada item individual ou de grupo.
Memória do cartão SIM: A capacidade da memória depende do tipo do
cartão SIM e há apenas um nome e número da
empresa para cada item. Para obter mais
informações, contate seu provedor de serviço.
Nota: Excluir os nomes selecionados um por um.
3.1 Configuração
Você pode executar as seguintes operações na lista telefônica:
Estado da memória: Verifica a capacidade de agenda, incluindo a
memória do cartão SIM e do telefone.
Armazenamento p referido: Quando você adiciona um novo nome,
selecione a memória do cartão SIM ou da memória do
telefone como local de armazenamento padrão.
Dica: Você também pode selecionar outro local de
armazenamento quando você adicionar um novo
nome.
Page 20

6
4. Configuração
Você pode configurar sua tela de fundo, tom preferido ou alguma
outra função.
4.1 Configuração do cartão SIM
Acesse este menu, onde você pode configurar o modo de SIM
Dual, apenas SIM1, apenas SIM2, modo av ião.
4.2. Configuração de rede
Quando o modo SIM dual está ativ ado, pode realizar a
configuração de rede para o cartão SI M1 e SIM2 separadamente. Vá
para as configurações de rede, selecione Configurações de Rede e em
seguida, você pode executar as seguintes operações:
Rede: Nova busca, selecione rede
Seleção: Modo de seleção.
Preferências: Configure a rede de sua escolha durante a
pesquisa.
Seleção de banda: Configure a maneira como se conecta a GPRS.
4.3. Configurações de segurança
Vá para as configurações de segurança, selecione as
Configurações de Segurança, em seguida, você pode executar as
seguintes operações:
Bloqueio do SIM: Defina uma senha para abrir/fechar o cartão
SIM.
Bloqueio do telefone: Defina uma senha para bloquear o telefone.
Page 21

7
Bloqueio do teclado: Bloqueio automático d teclado ligado ou
desligado após um período de tempo
Redefinição de senha: Redefinir a senha Pi n, senha Pin2 e senha de
bloqueio do telefone.
Nota: Para a senha de Pin, contate seu provedor de serviço.
A marcação fixa e discagem restrita devem ser
compatíveis com o seu cartão SIM. Para obter mais
detalhes, entre em contato com seu provedor de
serviço.
4.4. Configuração de chamadas
Digite a configuração de chamada desde o Menu Principal,
selecione Configuração de Chamada para realizar as seguintes
operações:
Chamada em espera: Defina a função de chamada em espera.
Encaminhamento de chamadas: Configure a função de
encaminhamento de chamada.
Limite de chamada: Configure a função limite de chamadas.
Mudança de linha: Mude a linha atual, se você t iver duas l inhas
disponíveis.
Lembrete de tempo de chamada: Defina o lembrete de tempo de
chamada on/off, tipo e quantidade de t empo.
Tela tempo de chamada: Configurar si se mostra ou não o tempo de
chamada durante a chamada.
Page 22

8
Discagem automática: Configure a discagem automática on/off.
Enquanto o tempo é ativado pelo telefone
automaticamente o número será discado
realçado até 10 vezes se a linha estiver
ocupada ou se a pessoa não responder. Se
você interrompe a rediscagem você pode
pressionar Cancelar.
Lista negra: Configure 5 números na l ista negra, enquanto a
função estiver ativada, o telefone irá
automaticamente bloquear chamadas
recebidas de pessoas na lista negra.
Discagem lP: Configure o discado IP on/off, editar n úmero IP.
5. Multimídia
O telefone oferece aplicações multimídia e para abri-los, você pode
selecionar mídia no menu principal.
5.1 Câmera
O telefone possui uma câmera Megapixel superior que permite
que você capture imagens, quando e onde quiser. Depois de tirar as
fotos salvá-las na memória do telefone ou cartão de memória (se
houver).
Configure a câmera: Pressione a tecla esquerda para abrir a opção na
tela do visor e ajustar as configurações para obter
detalhes.
Page 23

9
5.2 Player de áudio
Você pode usar o player de áudio para transmitir música.
Pressione o botão OK para tocar a música e pressione novamente para
parar. Pressione o botão para a esquerda para alternar ao anterior e
pressione para a direita para mudar à próxima. Você pode ajustar o
volume do MP3 player pressionando a tecla para ci ma e para baixo.
5.3 Player de vídeo
Pressione o player de vídeo para abri-lo e exibir todos os arquivos
de vídeo. Pressione Opções e realize as seguintes operações sobre o
vídeo selecionado (avanço, detalhes, renomear, excluir, excluir todos os
arquivos ou pela ordem).
Durante a reprodução, pressione a tecla de navegação de quatro
direções, para cima e para baixo para ajustar a velocidade, de direita
para a esquerda para ter uma taxa de reprodução, pressione "0" para
exibir a tela cheia, pressione "#" para controlar o volume.
5.4 Visualizador de imagem
Você pode executar as seguintes operações:
Exibição: Exibir as imagens
Reenviar: Envie a imagem atual para a lista de papéis de
parede, protetor de tela e exibir a lista de tela
on/off
Renomear: Alterar o nome da imagem
Excluir: Excluir a imagem
Page 24

10
Apagar tudo: Excluir todas as imagens
Ordenar arquivos: Organizar as imagens por nome, tipo, tempo,
tamanho, ou aleatoriamente.
Memória: Selecione imagens no cartão memória do telefone no
cartão de memória.
5.5. Rádio de FM
Selecione o menu Radio para ativar a função de rádio.
Nota: Enquanto você sintonizar o rádio, você pode discar ou
receber l igações normalmente e o volume de telefone
desligará automaticamente.
6. Gerenciador de arquivos
Clique no menu principal para abrir e encontrar dispositivos de
armazenamento, a capacidade do espaço total e espaço disponível. Em
objetos diferentes existem operações diferentes.
7. Organizador
7.1 Calendário
7.2 Alarme
7.3 Lanterna
7.4 Tarefas
7.5 Bluetooth
7.6 Calculadora
Page 25

11
8. e-Book reader
Você pode usar o e-book. Selecione a opção e digite:
Abrir eBook: Você pode abrir o e-book.
Limpar a prateleira: Limpe o catálogo de e-book.
Configurações gerais: Você pode definir o estilo, a fonte e a página do
sistema antes de ler o e-book.
Informações do livro: As informações do l ivro incluem o nome,
tamanho e formato do e-book.
Excluir: Você pode excluir o e-book.
Apagar tudo: Você pode excluir todos o e-book.
Classificar: Você pode classificar os e-book por nome,
formato, tempo e tamanho.
Aplicar configuração gerais: Você pode restaurar o sistema padrão
do e-book.
Apoio: Você pode ler o e-book.
9. Serviço
9.1-WAP
O telefone suporta o serviço WAP. Você pode acessar o serviço
prestado pelo operador de serviço de rede. Você pode obter
informações sobre notícias, previsão do tempo, voos, etc.
Aviso: O serviço GPRS requer suporte da rede. Você pode usá-lo em
áreas com cobertura da rede GPRS.
Page 26

12
Página inicial: Acesse a página inicial. A página inicial é seu atual site
WAP. Se não tiver configurado à página inicial, o
telefone terá acesso ao site da web por padrão.
Favoritos: Veja os marcadores. Você pode selecionar um para
entrar em uma página da web.
Visitas recentes: A opção registrará os endereços de web visitados
anteriormente.
Página fora da linha: A opção exi birá páginas da web off-line.
Digite a URL: Esta função requer uma conexão à página da web
para se conectar.
Configurações: Algumas configurações para navegar na Internet.
1. Perfis ativos: Configuração dos parâmetros da visita a sites da web.
2. Opções: Selecione grupos de serviço e algumas configurações
de digitalização de sites da web. .
3. Limpe o Cache: Limpe o cache que você está exibindo.
4. Exclua o Cookie: Exclua o cookie.
5. Selecione SIM: Selecione o cartão SIM 1 ou Sim 2.
Page 27

Manual del Usuario
Page 28

2
1. Mensajería
Puede recibir y enviar mensajes e i nclusive utilizar mensajes de
difusión.
La función mensajería le permite intercambiar mensajes con
otros usuarios de teléfonos inalámbricos. Seleccione Mensajería para
realizar la operación.
1.1 Redactar un mensaje
Puede redactar un mensaje nuevo y enviarlo, como también se
pueden insertar plantillas a los mensajes.
Seleccione una de las siguientes opciones después de editar un
mensaje de texto:
Enviar: solo enviar el mensaje
Guardar y enviar: guardar el mensaje al enviar
Guardar: guardar el mensaje
Enviar a varios : enviar el mensaje a varios destinatarios
Enviar por grupo: enviar el mensaje a todo el grupo
seleccionado
1.2 Configuración del mensaje
A través del menú puede configurar los MMS de acuerdo a sus
necesidades, como sigue:
Perfil del servidor: Iniciar o editar el servicio, cuando no se
puede enviar un MMS, cambie el servidor
WAP a l a modalidad en línea.
Page 29

3
Enviar: Incluye enviar, reenviar, volver a leer,
prioridad, etc.
Recuperar: Incluir red principal, red roaming, reenviar,
permitir enviar informes, etc.
Estado de la memoria: Ver el almacenamiento de los MMS.
Nota: Si no puede enviar un MMS, cambie el
modo de configuración del servidor WAP
en línea.
1.3 Configuración de SMS
Puede configurar el mensaje desde el menú, como sigue:
Configuración de SIM: Le ofrece cuatro perfiles y puede editar sus
nombres, establecer l a dirección SC,
periodo válido, etc.
Configuraciones comunes: Configure envío de informe, activar o
desactivar.
Estado de la memoria: Verificar la capacidad de almacenamiento de
mensajes.
Almacenamiento preferido: Establecer la ubicación de
almacenamiento de l os mensajes por
defecto, incluyendo el almacenamiento del
teléfono y de la tarjeta SIM.
Nota: Se requiere el soporte del proveedor de
servicio para recibir informes de entregas.
Page 30

4
2. Historial de llamada s
Ingresar al menú principal del registro de llamadas, seleccione
SIM1 o SIM2 para visualizar los números marcados y las llamadas
recibidas, también puede revisar la hora de la llamada, el costo y el uso
del mensaje.
2.1 Historial de llamadas de tarjeta SIM1 y SIM2
El teléfono mantiene una lista de llamadas entrantes y salientes,
inclusive de aquellas que no lograron conectarse. Primero aparecen las
llamadas más recientes.
Consejo: El teléfono solo guarda la úl tima llamada del mismo
número. Para visualizar información detallada o
realizar otra operación:
Busque las listas de llamadas realizadas, llamadas
recibidas, llamadas perdidas. Pulse la tecla O K para
visualizar la información detallada como horas, etc.
Pulse la tecla Opción para realizar las siguientes
operaciones:
Eliminar: Eliminar el registro.
Guardar: Guardar el número de este registro en el
directorio telefónico.
Llamar: Llamar a un número del registro.
Enviar SMS: Enviar un mensaje al número de la l ista.
Editar: Ingresar a la pantalla edit ar número, donde
puede modificar, guardar o marcar el número.
Page 31

5
3. Directorio telef ónico
Seleccione los contactos para abrir el directorio telefónico.
El directorio telefónico consiste en la memoria del teléfono y de la
tarjeta SIM y se pueden usar ambas memorias.
Memoria del teléfono:El uso de un nombre, número predeterminado,
número de familia, nombre de empresa,
dirección de correo electrónico, número de fax,
fecha de cumpleaños y tono para cada ítem
individual o grupal.
Memoria tarjeta SIM: La capacidad de memoria depende del tipo de
tarjeta SIM y solo hay un nombre y número de
empresa para cada ítem. Para mayor
información, contacte a su proveedor de
servicio.
Nota: Eliminar los nombres seleccionados uno por
uno.
3.1 Configuración
Puede realizar las siguientes operaciones en el directorio
telefónico:
Estado de la memoria: Compruebe la capacidad del directorio
telefónico, incluyendo la memoria de la tarjeta SIM y del teléfono.
Almacenamiento preferido: Cuando se añade un nuevo nombre
seleccione la memoria de la tarjeta SIM o la memoria
Page 32

6
del teléfono como ubicación de almacenamiento
predeterminado.
Consejo: También puede seleccionar otra ubicación de
almacenamiento cuando añade un nuevo nombre.
4. Configuración
Puede configurar su fondo de pantalla, t ono preferido o alguna
otra función.
4.1 Configuración de la tarjeta SIM
Ingrese a este menú, donde puede confi gurar el modo SIM Dual,
solo SIM1, solo SIM2, modo avión.
4.2 Configuración de red
Cuando se activa el modo SIM dual, puede realizar la
configuración de red para la tarjeta SIM1 y tarjeta SIM2 por separado.
Ingrese a la Configuración de Red, seleccione Configuración de Red y
luego se pueden realizar las siguientes operaciones:
Red: Nueva búsqueda, seleccionar red
Selección: Modo selección.
Preferencias: Configure la red de su preferencia durante la
búsqueda.
Selección de banda: Configure la manera como se conecta GPRS.
4.3 Configuración de seguridad
Ingrese a Configuración de Seguridad, seleccione Configuración
Page 33

7
de Seguridad y luego se pueden realizar las siguientes operaciones:
Bloqueo de SIM: Establecer una contraseña para abrir/cerrar la
tarjeta SIM.
Bloqueo del teléfono: Establecer una contraseña para bloquear el
teléfono.
Bloqueo del teclado: Auto bloqueo del teclado activado o
desactivado después de un periodo de t iempo
Cambio de contraseña: Cambio de contraseña Pin, contraseña Pin2 y
contraseña de Bloqueo del teléfono.
Nota: Para la contraseña Pin, contacte a su proveedor de
servicio. La marcación fija y la marcación restringida
debe ser compatible con su tarjeta SIM. Para mayores
detalles contáctese con su proveedor de servicios.
4.4 Configuración de llamada
Ingrese a la configuración de llamada desde el menú principal,
seleccione Configuración de Llamada y luego se puede realizar las
siguientes operaciones:
Llamada en espera: Configurar la función llamada en espera.
Desvío de llamadas: Configurar la función desvío de llamadas.
Límite de llamada: Configurar la función límite de llamadas.
Cambio de línea: Cambiar la línea actual, si tiene dos líneas
disponibles.
Recordatorio tiempo de llamada: Configurar el recordatorio de tiempo
de llamada on/off, tipo, y lapso de tiempo.
Page 34

8
Pantalla tiempo de llamada: Configurar si se muestra el tiempo de
llamada durante las llamadas o no.
Auto Marcado: Configurar el Auto marcado on/off. Mientras
esté activado el teléfono automáticamente
remarcará el número hasta 10 veces si la línea
está ocupada o si la persona no responde. Si
desea interrumpir el remarcado puede presionar
Cancelar.
Lista negra: Configure 5 números en la lista negra, mientras
la función esté activada, el t eléfono
automáticamente bloqueará las llamadas
entrantes de las personas de la lista negra.
Marcación lP: Configurar marcación IP on/off, editar número
IP.
5. Multimedia
El teléfono le ofrece aplicaciones multimedia y para abrirlas puede
seleccionar Media desde el menú principal.
5.1 Cámara
El teléfono cuenta con una cámara megapíxeles superior que le
permite captar imágenes cuándo y dónde l o desee. Después de tomar
las fotos guárdelas en la memoria del teléfono o en la tarjeta memoria
(si la hubiera).
Configurar la Cámara: Pulse la tecla izquierda para abrir Opción en la
pantalla del visor y hacer los ajustes de detalles.
Page 35

9
5.2 Reproductor de Audio
Puede utilizar el reproductor de audio para transmitir música.
Pulse la tecla OK para reproducir la música y pulse otra vez para
detener. Pulse la tecla hacia la izquierda para cambiar a la anterior y
pulse hacia la derecha para cambiar a la siguiente. Se puede ajustar el
volumen del reproductor MP3 apretando la tecla hacia arriba y hacia
abajo.
5.3 Reproductor de Vídeo
Pulse reproductor de video para abrirlo y visualizar todos los
archivos de vídeo. Pulse Opciones y realice las siguientes operaciones
en el vídeo seleccionado (avanzar, detalles, renombrar, eliminar,
eliminar todos los archivos o por orden).
Durante la reproducción, pulse la tecla de navegación de cuatro
direcciones, hacia arriba y hacia abajo para ajustar l a velocidad, de
derecha a izquierda para tener un índice de reproducción, pulse “0”
para visualizar l a pantalla completa, pulse “#” para controlar el volumen.
5.4 Visor de imágenes
Puede realizar las siguientes operaciones:
Vista: Visualizar las imágenes
Reenviar: Enviar la imagen actual a la lista de f ondos de
pantalla, de protector de pantalla y a la lista de
pantalla on/off
Renombrar: Cambiar el nombre de la imagen
Page 36

10
Borrar: Borrar la imagen
Borrar todos: Borrar todas las imágenes
Ordenar archivos: Organizar las imágenes por nombre, tipo, hora,
tamaño o al azar.
Memoria: Seleccione imágenes en la tarjeta memoria del
teléfono o de la tarjeta memoria.
5.5 Radio FM
Seleccione el menú Radio para encender la función radio.
Nota: Mientras sintoniza la radio, puede marcar o recibir
llamadas de manera normal y el volumen del teléfono
se pondrá en silencio automáticamente.
6. Administrador de archivos
Pulse en el menú principal para abrir y encontrar los dispositivos
de almacenamiento, la capacidad de espacio total y el espacio
disponible. En diferentes objetos hay operaciones distintas.
7. Organizador
7.1 Calendario
7.2 Alarma
7.3 Linterna
7.4 Tareas
7.5 Bluetooth
®
7.6 Calculadora
Page 37

11
8. e-Book reader
Puede utilizar el e-book. Seleccione la opción e ingrese:
Abrir eBook: Puede abrir el e-book.
Limpiar la estantería: Limpiar el catálogo de e-book.
Configuración general: Puede configurar el estilo, la fuente y página
del sistema antes de leer el e-book.
Info del libro: La información del e-book incluye el nombre, tamaño y
formato del e-book.
Borrar: Puede borrar el e-book.
Borrar todo: Puede borrar todos los e-book.
Clasificar: Puede clasificar los e-book por nombre,
formato, hora y tamaño.
Aplicar configuración general: Puede restaurar por defecto el
sistema del e-book.
Ayuda: Puede leer el manual del e-book.
9. Servicio
9.1 WAP
El teléfono admite el servicio WAP. Puede acceder al servicio
prestado por el operador de serv icio de red. Puede obtener información
sobre noticias, pronóstico del t iempo, vuelos, etc.
Aviso: El servicio GPRS necesita el soporte de la red. Puede utilizarla
en áreas con cobertura de red GPRS.
Página de inicio: Ingrese a la página Inicio. La página Inicio es su sitio
web actual de WAP. Si no ha configurado l a página
Page 38

12
inicio, el teléfono tendrá acceso al sitio web por
defecto.
Favoritos: Ver los marcadores. Puede seleccionar uno de ellos
para ingresar a una página web.
Visitas recientes: La opción registrará las direcciones web visitadas
anteriormente.
Página fuera de línea: La opción visualizará las páginas web fuera de
línea.
Ingresar URL: Esta función requiere una conexión a l a página web
para conectar.
Configuraciones: Algunas configuraciones para navegar por Internet.
1. Perfiles activos: Configuración de l os parámetros de visita a
sitios web.
2. Opciones: Seleccione los grupos de servicio y algunas
configuraciones de ex ploración de sitios web. .
3. Borrar Caché: Borrar el caché que está visualizando.
4. Borrar Cookie: Borrar cookie.
5. Seleccionar SIM: Seleccionar SIM 1 o SlM 2.
Page 39

Page 40

Page 41

FCC Statement
1. This device complies with Part 15 of the FCC Rules. Operation is subject to the following two
conditions:
(1) This device may not cause harmful interference.
(2) This device must accept any interference received, including interference that may cause
undesired operation.
2. Changes or modifications not expressly approved by the party responsible for compliance could
void the user's authority to operate the equipment.
NOTE:
This equipment has been tested and found to comply with the limits for a Class B digital device,
pursuant to Part 15 of the FCC Rules. These limits are designed to provide reasonable protection
against harmful interference in a residential installation.
This equipment generates uses and can radiate radio frequency energy and, if not installed and used
in accordance with the instructions, may cause harmful interference to radio communications.
However, there is no guarantee that interference will not occur in a particular installation. If this
equipment does cause harmful interference to radio or television reception, which can be determined
by turning the equipment off and on, the user is encouraged to try to correct the interference by one
or more of the following measures:
Reorient or relocate the receiving antenna.
Increase the separation between the equipment and receiver.
Connect the equipment into an outlet on a circuit different from that to which the receiver is
connected.
Consult the dealer or an experienced radio/TV technician for help.
SAR Information Statement
Your wireless phone is a radio transmitter and receiver. It is designed and manufactured not to
exceed the emission limits for exposure to radiofrequency (RF) energy set by the Federal
Communications Commission of the U.S. Government. These limits are part of comprehensive
guidelines and establish permitted levels of RF energy for the general population. The guidelines
are based on standards that were developed by independent scientific organizations through
periodic and thorough evaluation of scientific studies. The standards include a substantial safety
margin designed to assure the safety of all persons, regardless of age and health. The exposure
standard for wireless mobile phones employs a unit of measurement known as the Specific
Absorption Rate, or SAR. The SAR limit set by the FCC is 1.6 W/kg. * Tests for SAR are
conducted with the phone transmitting at its highest certified power level in all tested frequency
bands. Although the SAR is determined at the highest certified power level, the actual SAR level
of the phone while operating can be well below the maximum value. This is because the phone is
designed to operate at multiple power levels so as to use only the power required to reach the
network. In general, the closer you are to a wireless base station antenna, the lower the power
output. Before a phone model is available for sale to the public, it must be tested and certified to
the FCC that it does not exceed the limit established by the government adopted requirement for
safe exposure. The tests are performed in positions and locations (e.g., at the ear and worn on the
body) as required by the FCC for each model. The highest SAR value for this model phone when
tested for use at the ear is 0.591W/Kg and when worn on the body, as described in this user guide,
is 0.233W/Kg(Body-worn measurements differ among phone models, depending upon available
accessories and FCC requirements)..While there may be differences between the SAR levels of
various phones and at various positions, they all meet the government requirement for safe
exposure. The FCC has granted an Equipment Authorization for this model phone with all
reported SAR levels evaluated as in compliance with the FCC RFexposure guidelines. SAR
information on this model phone is on file with the FCC and can be found under the Display Grant
section of http://www.fcc.gov/ oet/fccid after searching on
FCC ID:
2ABOSSKYB220 Additional information on Specific Absorption Rates (SAR) can be
Page 42

found on the Cellular Telecommunications Industry Asso-ciation (CTIA) web-site at
http://www.wow-com.com. * In the United States and Canada, the SAR limit for mobile phones
used by the public is 1.6 watts/kg (W/kg) averaged over one gram of tissue. The standard
incorporates a sub-stantial margin of safety to give additional protection for the public and to
account for any variations in measurements.
Body-worn Operation
This device was tested for typical body-worn operations. To comply with RF exposure requirements,
a minimum separation distance of 10mm must be maintained between the user’s body and the
handset, including the antenna. Third-party belt-clips, holsters, and similar accessories used by this
device should not contain any metallic components. Body-worn accessories that do not meet these
requirements may not comply with RF exposure requirements and should be avoided. Use only the
supplied or an approved antenna
 Loading...