

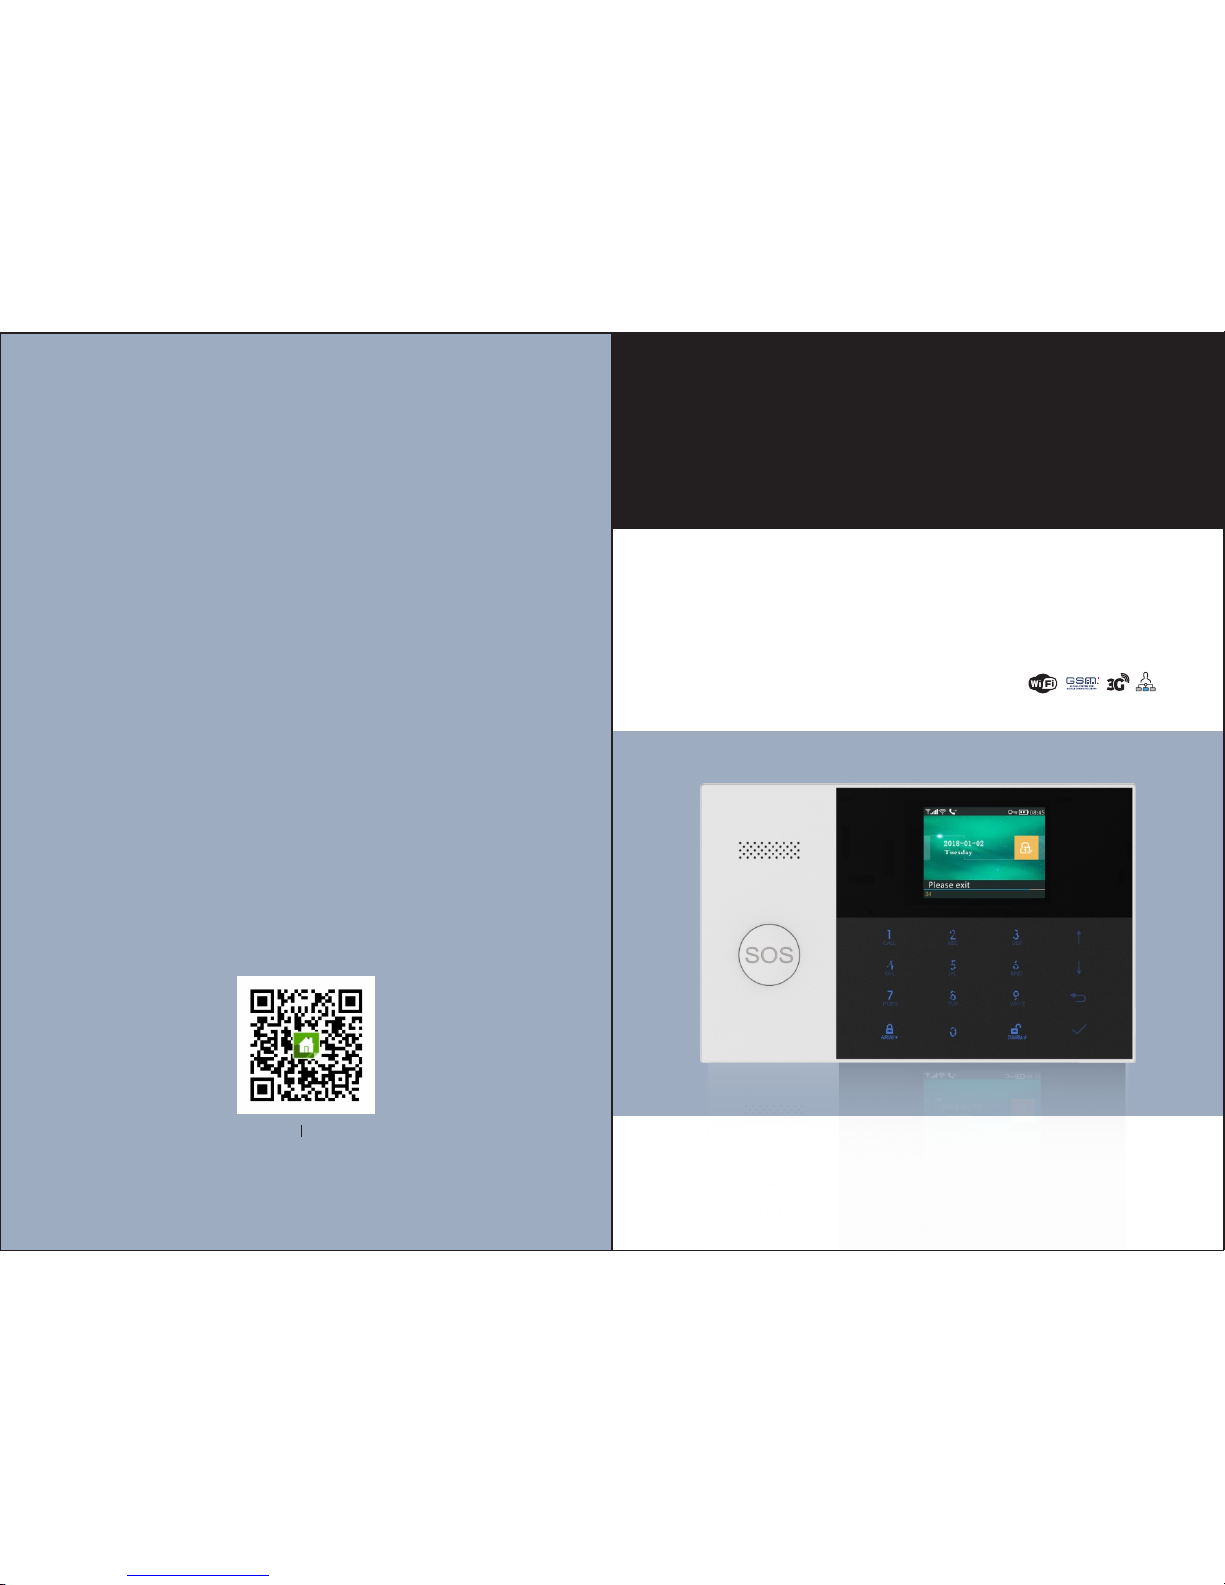
Smart Security System
User Guide
WIF I+G SM/3 G+G PRS
Sca n the QR co des to do wnlo ad APP
App Store
Android
T3200 GSM

Table of content
About You r Sec uri ty System
General
Features
General Information
SYSTEM OVERVIEW
The First Usage
Set up
Setting Phone Numbers
Wireless Keys
Wireless Sensors
RFID Tags
Pairing with Wireless Siren
Alarm Syncing with Wireless Switch
Home Automation
Meassage Recording
Arm/Disarm Automatically
Mobile APP
How to set the pa ram ete rs vi a SMS
The alarm SMS notification prefi x
How to set the custo miz ed Zo ne Na me
Get the settings via remot e SMS
Query the syste m set tin gs
Query the second pag e of system settings
1~2
1
1
2
3~8
3
4
4
5
5
6
7 8~
9~13
9
9
10
10
11
12
12
12
13
13
14~16
14
15
15
15
15
15
About the Pan el
About the Backlight Indicators of Panic Key
Wiring Overvi ew
Hardwired Z one C onn ect ion s
Home Screen
About the Home Screen Disp lay
Quick View of M enu F unc tio ns
Rem ote S MS
14

1
General
This system offe rs yo u three forms of prot ect ion : burglary, fire , and
emergency, depending on the configu rat ion o f your system. The system
co nsists of a touch p anel cont rol for syste m op erati on , vario us sensors
th at p rovid e pe rimet er a nd i nteri or b urgla ry pro tecti on , and opt io nal
smoke ,c omb ust ion o r car bon m ono xide detectors to prov ide e arl y fir e
or dangerous environment warning. In addition, wireless keys or optional
RFID ta gs al lo w you t o control t he sy stem awa y f ro m the t ou ch panel
control.
About Your Security System
Abo ut Your Sec urity S ystem
Table o f conte nt
Query the Phone Number Se tti ngs
How to make a call via the pa nel
Multi-Mode Alarm Feature
SYSTEM TROU BLE S
SMS Notification Feature
Two-Way Voice Feature
Voice Dialog
The Phone Programmed Cal l the Panel
16
16
18
18
18
18
18
18
SECURING THE PREMISES
16
Arming the Sy ste m
Arming in Sta y Mod e
Disarming the Sy ste m
SOS
17
17
18
Specifications
19
Features
2.4-inch Co lor G rap hic Screen
V o ice A nnounce men t
M ulti-lang uag e
B uilt-in Sou nde r and E xternal Soun der
3 Har dwi re Zones( EOL R)
Up to 90 Wirele ss Zo nes a nd Keys
U p to 10 RFID tags
E xit Alarm
S ensors Low Ba tte ry Al arm
E vent Log Stor age
Phone Numbe r
B uilt-in Cas e Tampe r
G SM/3G Cellu lar a nd Wi -Fi C ommunic ati ons
S upport Up to 8 Sm art S ock ets

General Information
Burglary P rot ect ion
Your system provides two modes of burglar y protection: STAY and
AWAY. STAY mode protects the perimeter only, allowing you to freely
move inside the premi ses . AWAY mode pro tects the entire system.
Both modes provide an e ntr y delay time that allows you to reenter th e
premises without setti ng off an alarm.。
Zone
Your system's sensing devices have been assigned to various "zones."
For example, the sensing device on your entry/exit door may have
been assigned to zone 01, sensing devices on windows in the m aster
bedroom to zone 02, and so on. These number s appear on the display
when an alarm or tro ubl e con dit ion o ccu rs.
Exit/Entry Delays
Your security system has been programmed with delay times that
allow you to exit the premises af ter a rming, and to disarm the system
upon entry, before an alarm occurs. If you leave the premises too late
when exiting, or disarm too late when arriving home, it will cause a
false alarm. If an alarm occurs, you should disarm the system
immediately.
Exit Alarms:
The security system will generate a Doo r/W ind ow Open alarm, and
display “Door/Window Open”when you leave the p remises and
forget to close the door or window after th e exi t del ay expires.
Alarms
When an alarm occurs,both the built-in and external sounders will
sound until the system is disarmed or until alarm b ell t ime out o ccu rs,
and a message on the display will identify the zone(s) causing the
alarm. Your system may also have been programmed to automatically
send alarm messages and voice via the cellular/GSM/GPRS/3G
network, and push alarm notification to your mobile app. In
addition,if your system is co nne cted to a central monitoring
station,an alarm message will be sent.To stop the alarm soundi ng, you
simply disarm the system.
SYS TEM OVE RVIEW
Abo ut Your Sec urity S ystem
SYSTEM OVERVIEW
About the Pan el
32
1
4
3
6
7
8
9
5
2
Ind ex
1
2
3
4
5
6
7
8
9
Ite m
Dis play Wi ndow
Spe aker
Pan ic Key
Awa y/St ay Arm
But ton
Dis arm But ton
Men u
But tons
Scr oll Up /Func tion/
Scr oll Dow n/Bac kspace /
Page D own But ton
Can cel/B ack
But ton
Ent er But ton
Des cript ion
2.4"T FT Display screen. Display s syst em status
ico ns and in forma tion, time, zon e(s) a larm
inf ormat ion and u ser men us.
Ala rms and c onfir mation sounds .
Pre ss to ge nera te a Panic Alarm in cas e
of fi re or pe rson al emer genc y.
Pre ss to ar m the en tire bu rgla ry sy stem ,
per imete r and in terio r.
Pre ss twi ce to arm p erim eter po rti on pro gram med
for “Stay Ar m Acti ve” of b urgl ary syste m only .
Int erior prot ectio n is not armed,which al lows
mov ement within premis es wit hout c ausin g alarm .
Pre ss to di sarm the sy stem a nd to cl ear alarm .
Pre ss twice to clear t roub le display of accesso ries.
Scr oll up to the desired fun ction or menu.
Scr oll down to the des ired f unction or menu .
Return to t he pre vious screen.
Sel ect opt ion or enter to the n ext screen.
Pag e Up But ton

Hardwired Zo ne Conn ections
SYS TEM OVE RVIEWSYS TEM OVE RVIEW
54
About the Backlight Indicators of Pani c Key
Wiring Overview
Zone 1、Zone 2 and Zone 3 are the EO LR supervised zones that supports bo th open circuit
and closed circuit devices and has a response time of 30 0msec . Maximum zone resistance:
110 00 ohms ,plus EOL R
Con nect cl osed ci rcuit devices i n seri es in the h igh (+) s ide of th e loop . The EOL resistor
mus t be conn ected i n series with the d evices, follo wing the last dev ice.
Con nect op en circ uit devices in parall el across the loop. The 1 0000-ohm EOLR m ust be
con necte d acro ss the loop at the la st device.
Refer to th e Hard wire d Zones Connect ions diagram.
the H ardwi red Zo nes Conne ctio ns Diagra m
EOL R(End o f Line R esis tor) : If the E OLR is not at t he end of the lo op, th e
zon e will no t be prop erly s uper vise d, and the sy stem m ay not r espo nd
to an o pen ci rcuit o n the zo ne.
!
Home Screen
Ind ex
1
2
3
4
5
Des cript ion
Power Sup ply Recept acle
Bac kup Bat tery S witc h
SIM c ard Recepta cle
EOL R Hardw ired Z ones C onnec tions , ref er
to se ctio n 2.3 and t he Hard wire d Zone s
Con necti ons dia gram
Tamper Switch
WHAT YOU SEE WH AT IT MEANS
Bli nking a ltern atel y
Pul se
Ste ady
Sys tem is i n Alar m
Sys tem is A rmed
Sys tem is D isar med
1
2
3
4
5

About the Home Screen Display
SYS TEM OV ERVIE W
4
7
11
10
9
8
6
5
3
2
1
08:45
76
SYS TEM OVE RVIEW
08:45
Sys tem Sta tus Dis play Ar ea
Cou ntdow n
“Ple ase exi t”
Cou ntdow n Bar
“Syn chroni zing”
Cou ntdow n Bar
“Ala rm” is di splay ed uppe r the red ba r, and th e Zone
“Ala rm” is di splay ed in a red s tatus ba r along t he red
bar. An alarm (bell) icon along with “Alarm ”is displayed
alt ernat ely wit h the Zon e that ha s cause d the ala rm.
Sni ffer Mo de
You mus t activ e the wir eless t ransm itter
bef ore the s niffe r delay e xpires .
Exi t Delay
You now h ave xx se conds t o leave t he prem ises
bef ore the e xit del ay expi res. Whe n the exi t
del ay is com plete d, the al arm sys tem is ar med.
Quick View of Me nu Func tions
Del ay Tick
Doo r/Win dow
Ope n Warnin g
Ena ble/D isabl e opera tion
chi me
Ena ble/D isabl e entr y and
exi t chime
Ena ble/D isabl e Exit Al arm
Warn ing
Ico n and Cap tion
Des cript ion
Fac tory
40 se conds
30 se conds
3 min utes
РУС СКИЙ
Esp añol
Pol ski
Ita liano
Fra nçais
Por tuguês
GSM
Sta tus
No SI M card pr esen t or SIM c ard fau lty
Con necte d to ser ver
RSS I level s ignal strengt h
Sig nal str engt h is disp layed b y a seri es of 1
to 5 bars ( weak to strong) ,and bar s are gray if
not r egis tered w ith ce ll net work
Wi- Fi
Sta tus
Ind icate s that t he syst em is conne cted t o a
WiF i sourc e and th e signa l stren gth.
Ind icate s that t he syst em is conne cted t o the
ser ver if d ot is di spla yed.
SMS S endin g
Cal ling
Key pad Lo cked
AC Pow ered
Dis playe d when the sy stem h as los t AC pow er.
The i con is re d when t he syst em’s ba ckup
bat ter y powe r is low.
Power
Sta tus
Clo ck Rea l-ti me Clo ck
Dat e, tim e and wee k
Stat us Area
Arm /Disa rm
Arm /Disa rm
Stat us
Sys tem is Arm ed Away
Sys tem is Arm ed Stay .
Sys tem is Dis armed .
Read y
Clo ck
Ala rming
Top Sta tus Ba r
Def aults
Del ay
Exi t Delay
Ent ry Del ay
Use d to set En try De lay
0~6 5535, u nit: se cond
Use d to set Ex it Dela y
0~6 5535, u nit: se cond
Sir en Dura tion
Use d to set Si ren Dur ation
0~6 5535, u nit: mi nute
Arm B eep
Ena ble/D isabl e Arm and
Dis arm Bee p
Sir en
Ena ble/D isabl e Alarm
Con tinuo us Sire n when
an al arm occ urs
Ena ble
Ena ble
Swi tch
Arm S MS
Ena ble/D isabl e SMS
not ifica tion wh en arm
or di sarm
Dis able
Key pad Lock
Ena ble/D isabl e Keypad
Loc k
Dis able
Bac kligh t
Ena ble/D isabl e Keypad
Bac kligh t
Ena ble
Ena ble
Key pad Tone
Ena ble
Ena ble
Set tings
Mai n Menu
Pas swor d
Sys tem
Cha nge Sys tem Code
4 dig its
Use r
Cha nge Use r Code
4 dig its
Lan guage
Lan guage S elect ion Eng lish
Ini tiali zatio n
Res et
Res et
Loa ding F acto ry De faul ts
“Ple ase dis arm”
Cou ntdow n Bar
Ent ry Del ay
You mus t disar m the sys tem bef ore the e ntry
del ay expi res, or a n alarm w ill occ ur.
(7)
(6)
(5)
(4)
(2)
(3)
(1)
(8)

SYS TEM OV ERVIE W
98
SYS TEM OV ERVIE W
1. :Whe n enabl ed, the s ystem w ill an nounc e the sys tem sta tus wh en arme d or Arm B eep
dis armed .
2. :The s ystem w ill lock th e keypad if no o pera tion duri ng 30 se conds onKey pad Lo ck
Hom e Sreen . To enable the keypad, you m ust en ter th e valid U ser Pa sswo rd.
3. :If disab led, d ispl ay bac klig ht turn o ff after 30 secon ds if no o pera tion on H omeBac kligh t
Sre en.
4. :If en abled , the sys tem wil l gene rate a Ex it Alarm War ning Doo r/Win dow Ope n Warnings
not ifica tion wh en you le avin g a door or w indow o pen af ter th e exit d elay e xpires.
5. :use d for key pad un lock ing an d SMS rem ote se tting s.Sys tem Pas sword
6. :use r for key pad un lock ing, S MS Remo te Con trol a nd Ala rm tex t Use r Passw ord
not ifica tion pr efix S ettin g.
7. :Vo ice An noun cemen t, Disp layin g and SMS n otifi catio n will be in th e sele cted Lan guage
lan guage . After sele ctin g the de sire d lang uage, t he pane l will r eset .
8. :I f the factory de faul t conf igu rati on is lo aded , any dat a tha t has al read y Ini tiali zatio n
bee n progr ammed int o the sy stem w ill be chan ged in to the Facto ry De faul t
Con figur ation !
Description
Set up
The First Usage
Wit h the bui lt-in W iFi Commu nica tion s modu le, if yo ur syst em is eq uippe d to
rep ort a larm s and Re mote A cces s via Mo bile AP P over th e inte rnet, you r router mus t
rem ain po wered -on at a ll times, a nd a WiF i inte rnet c onne ction i s requi red.
Wit h the bui lt-in G SM/3G C ommun ication s modu le, if y our sy stem is e quip ped to
rep ort a larm s and Re mote c ontr ol via S MS or Voi ce Dia lling , to ensu re the S IM car d is
ins talle d (refe r to the d iagr am belo w ) and the p anel m ust be co nnect ed to th e
GSM /3G Cel lular o r to the In tern et.
AC Pow er Conn ectio ns - Conn ect the Power S uppl y to the D C 5V rec epta cle, and pu sh
the b acku p batte ry sw itch t o “ON”.
Setting Phone Numbers
Up to 5 U ser Ph one Num bers used to re ceive t he Alarm SM S noti fica tion a nd Audi o Alarm
Veri ficatio n.
RFI D
Pair ing, De lete or D elete A ll the RF ID tags
Pair ing a new W irele ss Key, S ensor o r RFID ta g
Del ete/E dit
Del ete a Wir eless Ke y or RFID t ag from t he list
Edi t/Del ete a wir eless s ensor f rom the li st
Del ete All
Del ete all t he Wire less Key , Senso rs or RFI D tags
Dur ation
Use d to set Rec ord Dur ation
( uni t: seco nd, 1-2 0 is avai lable )
Use d to disp lay the f irmwa re and MAC a ddres s of the Wi Fi modu le,
the f irmwa re and IM EI of the GS M modul e and Ser ial Num ber of pa nel
Ena ble/D isabl e using t he WiFi
net work- prov ided ti me
Ena ble/D isabl e using t he cell ular
net work- prov ided ti me
Add
Wi- Fi Sync
2G/ 3G Sync
Pair ing, Ed it, Del ete or De lete Al l
the w irele ss sens ors
MAC /IP
Use d to disp lay the M AC and IP
add resse s of the WiF i modul e
res erv ed
Dat e&Time
Set t he time a nd date
Ena ble
Ena ble
+08 :00
20s econd s
Nul l
Eol Z one
Soc ket
Use d to set th e Zone( EOLR) N ame, Typ e
Pair ing wit h the wir eless s witch
Pair ing wit h the wir eless s witch
!
Pho ne
1 Pho ne
2 Pho ne
3 Pho ne
Use d to set th e first P hone Nu mber, E nable
/Di sable D ialli ng and En able/ Disab le SMS
Use d to set th e secon d Phone N umber , Enabl e
/Di sable D ialli ng and En able/ Disab le SMS
Use d to set th e third P hone Nu mber, E nable
/Di sable D ialli ng and En able/ Disab le SMS
Use d to set th e fouth P hone Nu mber, E nable
/Di sable D ialli ng and En able/ Disab le SMS
4 Pho ne
Use d to set th e fifth P hone Nu mber, E nable
/Di sable D ialli ng and En able/ Disab le SMS
5 Pho ne
Log
Ala rm Log
Use d to view s ystem a larm ev ents.
Arm L og
Use d to view s ystem a rm/di sarm eve nts.
Rem ote
Pair ing, De lete or D elete A ll the wi reles s keys
Det ecto r
Use d to send s a trans missi on sign al
to th e wirel ess sire n be pair ed.
Sir en Learn
Wi- Fi
Ala rm Sock et
Air link
WiF i confi gurat ion (Req uires t he mobi le APP) .
Unb ind
Unb ind the Pa nel lin k from th e serv er
Rec ord
Mes sage Rec ordin g and Pla yback
Pla y
Use d to list en to the re corde d messa ge
Del ete
Use d to dele te the rec orded m essag e
Arm T imer
Use d to set a da ily tim e to arm au tomati cally ,
and E nable /Disa ble aut omati on
Dis arm Tim er
Use d to set a da ily tim e to disa rm autom atica lly,
and E nable /Disa ble aut omati on
Dis arm Tim er
Tim er
Rec ord
Par ts
Mai n Menu
st
nd
rd
th
th
Vers ion

Sel ect: “Ma in Menu P hone 1 Ph one, 2 Ph one, 3 Phon e, 4 Pho ne or 5
Pho ne”, th e syste m disp lays th e Phone p rogra mmin g scree n.
Wireless Key s
Use t o scro ll to , th en use digi ts keypad to en ter the P hone Numb er (up t o
18 di gits) .
Use t o scro ll to , th en use to togg le betw een “of f”a nd “on”.
Whe n “on” is s elect ed, th e Voice Dia ling A larm w ill be a ctive .
Use t o scro ll to , th en use to togg le betw een “of f”a nd “on”.
Whe n “on” is s elect ed, th e SMS Text Notif icat ion Al arm wi ll be act ive.
Pre ss to sa ve you r new se tting s.
Pre ss one b utton o f wire less k ey to se nd a tra nsmi ssion s ignal to the panel.
As th e seria l numbe r of wire less k ey is ad ded to p anel , “Lean ing OK ”will b e displ ayed.
The s ystem w ill di splay “Devi ce code h as been l earnt ”if ser ial num ber of wi rele ss key
hav e been lear ned.
Pai rin g a New W ireless Key
Sel ect ”Mai n Menu Pa rts Re mote D elet e”.
Use t he butt ons to s crol l to the s erial n umber be de lete d.
Pre ss to de lete t he sele cted se rial n umber .
Delete
Wireless Sensors
Sel ect ”Mai n Menu Pa rts Ad d”.Det ecto r
Pai rin g a New S ens or
1110
The F irst Usage The F irst Usage
Sel ect ”Mai n Menu Pa rts Re mote D elet e All”.
A tot al num ber of se rial n umber s learn ed is dis playe d.
To delete all the se rial n umbe rs, pre ss .
Delete All
Use t o scro ll to , th en use t o scrol l to the d esir ed Zon e Name.
Use t o scro ll to , th en use t o scrol l to the d esir ed Zon e Mode( Type).
You mu st ass ign a Zo ne Type t o each zo ne(sens or), w hich d efin es the wa y in whic h the
sys tem res pond s to fau lts in that z one.
“ ” usu ally as signe d to sens ors or cont acts o n entr y and ex it doo rs, Sta y Arm Ac tive
ext erior doo rs and w indo ws, perim eter. Ac tive w hen arm ed in AWAY or STAY mod e.
Use t o scro ll to , th en use d igits k eypa d to ent er the Z one Numbe r (0-8 9 are
ava ilab le). The Zo ne Num ber sh ould b e uniqu e.
Pre ss Syn chro nizi ng” is d ispla yed, th e system goes int o the sn iffe r mode a nd ,“
cou nt down t he pair ing ti me rema inin g .
Act ive wir eles s sensor to send a tr ansm issi on signal to the panel.
As th e seria l numbe r of wire less s enso r is added to pa nel, “Le aning OK” will b e
dis playe d.
The s ystem w ill di splay “Devi ce code h as been l earnt ”if ser ial num ber of wi rele ss
sen sor hav e been lear ned, a nd the Z one Na me/Mo de/Nu mber wi ll be ref resh ed.
Sel ect ”Mai n Menu Pa rts Ed it”.Det ecto r
Use t he but tons to s crol l to the s eria l numbe r be edit ed.
To edit the Na me/M ode/ Numb er of dis play ed zon e, pres s .
To delete the sele cted s eria l numb er, pre ss .
Edit/Delete
Sel ect ”Mai n Menu Pa rts ”.Det ecto r Dele te All
A tot al num ber of se rial n umber s learn ed is dis playe d.
To delete all the se rial n umbe rs, pre ss .
Delete All
RFID Tags
Sel ect ”Mai n Menu Pa rts RFID Ad d”.
Pai rin g a New R FID Tag
Sel ect ”Mai n Menu Pa rts RFID De lete ”.
Use t he butt ons to s crol l to the s erial n umber b e deleted.
Pre ss to de lete t he selected ser ial nu mber .
Delete
Sel ect ”Mai n Menu Pa rts Re mote A dd”.
“Syn chro nizi ng” is d ispla yed, th e system goes int o the sn iffe r mode a nd coun t down
the p airi ng time r emai ning .
“ ” usu ally as signe d to a inte rior a rea (i .e.: foye r, lob by,o r room ). O ut Arm A ctive
Byp asse d autom atic ally wh en arme d in STAY mode.
“ ” usu ally a ssig ned to a zo ne con taini ng an Eme rgenc y Butt on, Smoke 24 Ho urs Act ive
Sen sor, CO , Water Leak age an d Gas Se nsor s.
To used as doo rbel l, sel ect “ ”.Doo rbell
To disable t he zon e, sel ect “ ”.Clo se
“Syn chro nizi ng” is d ispla yed, th e system goes int o the sn iffe r mode a nd coun t down th e
pai ring t ime rem aini ng .
Put t he tag cl ose to th e RFID a rea of panel.
As th e seria l numbe r of tag is a dded t o pane l, “Lea ning OK”w ill be d ispl ayed .
The s ystem w ill di splay “Devi ce code h as been l earnt ”if ser ial num ber of ta g have b een
lea rned. .
Sel ect ”Mai n Menu Pa rts RFID De lete A ll”.
A tot al num ber of se rial n umber s learn ed is dis playe d.。
To delete all the se rial n umbe rs, pre ss
Delete All
st
nd rd th th

Sel ect “Mai n Menu Ti mer Arm T imer ”, the sy stem di spla ys the Ar m Timer
pro gram ming sc reen.
Meassage Recording
Messag e Recordi ng an d Playbac k
Your s yste m can Record/Pla ybac k/De lete a b rief m essag e(up to 2 0 seco nds)
tha t can be pl ayed ba ck lat er. Th e message w ill be p laye d to the r emot e when
a ala rm call i s conne cted .
Sel ect “Mai n Menu Re cord Re cord”,t he sys tem di splay s the Rec ord sc reen .
Rea dy to re cord w hen “Rec ordin g”is d ispla yed in th e titl e box and t he sys tem
dis play wi ll coun t down th e reco rdin g time remainin g.
Spe ak into t he mic ropho ne and t he reco rdin g auto mati cally s tops af ter the t ime
exp ires.
The s ystem p lays b ack th e messa ge auto mati cally .
Pre ss but ton to sa ve the m essa ge.
Arm/Disarm Automatically
The f eatur e can be u sed to pr ogra m the sy stem to a rm or di sarm t he syst em automatica lly
at a da ily tim e.
Arm Schedule
Use t o scro ll to , th en use digi ts keypad to en ter the D aily A rm time ( in 24-h r).
Use t o scro ll to , th en use to select“ on”.
Pre ss to sa ve you r new se tting s.
Disarm Schedule
The F irst Usage The F irst Usage
Ope ratin g the Wir eles s Strobe Siren to go into the Sniff er mod e( ref er to us er gui de of
str obe si ren ) .
Sel ect “Mai n Menu Pa rts Siren Learn ”.The p anel d ispl ays ” Learn S igna l Sent ”
and s ends a tr ansmi ssion s ignal t o the St robe S iren .
The S trob e Sire n give s a succ essf ul indi catio n.
Pairing with Wireless Siren
13
12
Alarm Syncing with Wireless Swi tch
Sel ect “Mai n Menu Pa rts Alarm S ocket”, th e syst em dis play s the Ala rm Socket
pai ring s creen .
Ope ratin g the Wir eles s Switc h to go in to the S niff er mod e( refe r to use r guide of
wir eles s switc h ) .
Pre ss the “o n” butt on and t he “off ”but ton in t urn , Th e pane l disp lays
” Lea rn Sign al Sent ” and sen ds a tran smissio n sign al twi ce to th e Wire less Switc h.
The W irele ss Swi tch gi ves a su cces sful in dicat ion.
To test i f pairi ng ok, p ress “o n”and “off ”to ch eck if t he wire less c an be ope ned and
clo sed.
Whe n a sound a larm oc curs, the W irel ess Sw itch w ill be o pene d until the s yste m is
dis armed o r alarm s ounder ti meou t occu rs.
Pai rin g wit h Wireless Switch
Home Automation (If equipped)
!
You ca n open o r clos e the wi reles s swit ch via M obile A PP.
Pai rin g wit h Wireless Switch
To pair w ith th e wirel ess sw itch (u p to 8 swi tche s), re fer to t he pre vious sec tion
"Pa irin g with W irel ess Sw itch ”.To tes t if pair ing ok , press “o n”an d “off” to che ck if
the w irele ss can b e opene d and clo sed.
Sel ect “Mai n Menu Ti mer Dis arm Tim er”, the s yste m disp lays t he Disa rm Time r
pro gram ming sc reen.
!
!
Use t o scro ll to , th en use digi ts keypad to en ter the D aily D isarm t ime (in 2 4-hr) .
Use t o scro ll to , th en use to select“ on”.
Pre ss to sa ve you r new se tting s.

How to set the parameters via SM S
Mobile APP
Sca n the QR co des via a s mar t phon e to dow nload t he app .
15
14
Mob ile APP Rem ote SM S
!
The Smart Se cur ity System app will guide you to con nec t the p ane l to
the WiFi network and the intern et.
To set the parameter s via SMS, editing the setting te xt me ssa ge as b elo w,
then sends it to the SIM number installed in the pane l. Your mobile will
received an a ckn owl edg eme nt SM S if se tti ng ok .
Sys tem
Com mand1
Par amet er1
Com mand2
Par amet er2
Note: The command must be 2 digits( e.g.,01, 90, etc . ), an d the h ead er,
separator a nd en din g cha rac ter m ust b e‘* ’.。
Not e:
The e xmple s uses th e defau lt syst em pas swor d 6666 .
1、T he P hone N umber set ting f orma t of rem ote te xt mes sage : xxxx xxxxx x,A,B
In th is stin g, “xxxx xxxxxxx ” is the p hone n umbe r( up to 18 d igits ), “A” use d to
Ena ble(1 ) or Disa ble(0 ) the Alarm Voice Di alli ng and “B ” used to Enable(1) or
Dis able( 0)the A larm SM S notific atio n.
For e xampl e:
To set th e 1st Pho ne Numb er as “139 12345 678” an d enable th e SMS no tifi cati on only ,
and t o set 2n d Phone N umber a s “07551 23456 78” and ena ble th e Voice D iall ing only,
the n the rem ote SM S is *66 66*51 13912 34567 8,0,1*5 2075 5123 4567 8,1,0 *.
2、 The s erve r IP add ress a nd Por t used for co nnec tion t o the al arm mo nitor ing company.
The s erve r IP and Port se tting for mat of re mote te xt mes sage : aaa,b bb,cc c,ddd ,xxxx x
In th is stri ng, “aaa ,bbb,cc c,dd d” is th e IP and “x xxxx” i s Port.
For e xampl e:
To set the IP an d Port a s “116. 62.4 2.22 3:200 1”, the n the re mote S MS is
*66 66*90 116,6 2,42,22 3,20 01*.
The alarm SMS notification prefix
The p anel c an be nam ed after a cus tomi zed te xt via r emot e SMS. T he nam e is used f or the
ala rm SMS no tific ation p refi x.
The a larm no tific ation p refi x setting f orma t: 123 4@XX X build ing.
How to set the customiz ed Zone Name
You ca n set a cu stom ized n ame for eac h zone v ia rem ote SM S. The n ame is used to inde ntif y
whi ch zone a larm oc curs in the S MS not ific ation .
Rem ote SM S form at: 12 34@XX @Down S tair s
In th is stri ng, “123 4”is th e User Passw ord , tw o ”@”are co mman d flag s, “XX”i s the
Zon e Numbe r(fro m 00 to 89 ) and “Do wn Stai rs” is t he cus tomiz ed tex t.。
Get the settings via remote SM S
Query the syste m set tin gs
Format is *6666*62*, and the panel e choes as follow.
SYSTEM set:
SN: Seria l Num ber of the pa nel
LA NGUAGE: Langu age
ENGINEER PAS SWO RD: System Passwor d
USER PASS WOR D: Us er Pas swo rd
GSM CSQ: GSM RSSI
WIFI RSSI: Wifi RSSI
Query the second pag e of system settings
For mat is *6 666*9 0*, and the pa nel ech oes as fo llow.
SYSTEM set2:
APN: GPRS Access Point Name
GPRS IP: Serv er IP a ddress and Por t
NTP: res er ved
TIME ZONE: re ser ved
SERVER: reserv ed
*
*
* *
Com mand
Fun ction
Des cript ion
Fac tory
Def aults
the s erve r IP add ress a nd
Por t
the G PRS APN
ref er to no te 1
ref er to no te 1
ref er to no te 1
ref er to no te 1
ref er to no te 1
Onl y used fo r conne ction t o
ser ver, r efer t o note 2
Onl y used fo r GPRS ne twork ,
ref er to no te 3
51
52
53
54
55
90
92
Nul l
Nul l
Nul l
Nul l
Nul l
Nul l
CMN ET
Remote SMS
Pas swor d
3、S et ting t he operator Acc ess Poi nt Name
For e xampl e:
To set the APN a s “inte rnet .bee line.kz ”, the n the re mote S MS is
*66 66*92 i ntern et.b eelin e.kz* .
In th is stri ng, “123 4”is th e User Passw ord ,”@”is a com mand f lag and “X XX buil ding ”
is th e custo mize d text.
1 Pho ne Numb er
st
2 Pho ne Numb er
nd
3 Pho ne Numb er
rd
4 Pho ne Numb er
th
5 Pho ne Numb er
th

17
16
Rem ote SM S SEC URING T HE PREM ISES
Query the Pho ne Numb er Sett ings
For mat is *6 666*5 1*, and the pa nel ech oes as fo llow.
1: The 1st P hone N umbe r, Voic e Dial ling an d SMS swi tches
2: The 2nd P hone N umbe r, Voic e Diallin g and SM S swit ches
3: The 3rd Ph one Num ber, Voi ce Dialli ng and S MS swi tche s
4: The 4th P hone N umbe r, Voic e Dial ling an d SMS swi tches
5: The 5th P hone N umbe r, Voic e Dial ling an d SMS swi tches
REDIAL COUNTER: Redia l Counter for Voic e Dial ling
How to make a call via the panel
On th e home sc reen, y ou can m ake a ca ll via t he digi t keyp ad.
Pre ss to vi ew the l ist of di alle d numbe r, then p ress t o redi al it.
The c all wil l be canc elled i f GSM net work is n ot reg iste red, t he system is arme d or in
voi ce alarmi ng.
!
SECURING THE PREMISES
Arming the System
Arming in Stay Mode
Thi s mode is u sed whe n you are s tayi ng home.
To arm th e syste m in stay mode, you can ope rate a s belo w:
Disarming the System
PHONE set:
To arm th e syste m, you c an oper ate as be low:
By Wi reles s Key: P ress k ey.
By Pa nel: P ress . butt on whe n home sc reen i s display ed.
By RF ID tag: P ut the RF ID tag cl ose to t he RFID a rea whe n syst em is di sarme d.
: Pre ss the A rm icon , then sele ct the E xit De lay.By AP P
By re mote S MS: Se nd a message 1 234#1 (“12 34”i s User Pa sswo rd) to t he pan el, th en an
ack nowle dgeme nt SMS wi ll be ret urne d if armed.
The s ystem w ill an nounc e “Syste m Arme d”. Ho me Scre en wil l display s the “Ar med”
ico n and the c ountd own ba r. You mu st lea ve the p remi ses be fore t he Exi t Delay e xpire s.
If th e“Arm SMS ” is enab led, yo u will r ecei ve a SMS no tific ation .
All b urgla ry zo nes, i nteri or & per imete r, are a rmed .
By Wi reles s Key: P ress k ey.
By Pa nel: P ress b utto n twic e when home s cree n is dis play ed.
By AP P: Pres s the St ay Arm i con.
By re mote S MS: Se nd a mess age 123 4#3 (“1 234”i s User Pa sswo rd) to t he pan el, th en an
ack nowle dgeme nt SMS wi ll be ret urne d if armed.
The s ystem w ill an nounc e “Syste m Arme d”. Ho me Screen will di spla ys the “S tay
Arm ed”ic on. If th e “Arm SMS” is e nabl ed, yo u will r ecei ve a SMS no tifi catio n.
Per imet er bur glar y zone s ( Zone Ty pe pro gram med as S tay Ar m Acti ve ), su ch as
win dows an d doors a re arme d.
!
To disarm th e syst em ,to s ilen ce ala rm ,to cl ear tr oubl e displ ays and t o canc el the al arm
tha t is in pro gres s , you ca n oper ate as be low:
By Wi reles s Key: P ress key.
By Panel: P ress b utto n when h ome scr een is d isplayed.
By RF ID tag: P ut the RF ID tag cl ose to t he RFID a rea whe n syst em is ar med.
: Pre ss the D isarm i con.By AP P
By re mote S MS: Send a message 1234 #2 (“1 234”i s User Password) to the panel,
the n an ackn owled gemen t SMS wil l be retu rned i f arme d.
The s ystem w ill an nounc e “System Disa rmed ”. Home S creen w ill di splays the
“Dis armed ”icon . If the “Ar m SMS” is enabled , you wi ll rec eive a S MS
not ifica tion.
!
SOS
To manuall y acti ve pan ic fun ctio n, you c an oper ate as be low:
By Wi reles s Key: P ress S OS key .
By Pa nel: P ress S OS key o n the pa nel.
: Pre ss the S OS icon .By AP P
Hom e scree n disp lays “Pa nic Al arm” . An Pan ic Ala rm wil l be gen erate d.
An Pa nic Al arm se nd an te xt noti ficatio n to you r mobi le ,an d soun ds a loud ,stea dy ala rm
at yo ur pan el.

Specifications
19
18
SEC URING T HE PREM ISES Spe cific ation s
Multi-Mode Alarm Feature
: If th e build ing and /or nei ghbou rhood has l ost el ectr ical p ower, t he Los s of AC Powe r
sys tem wil l cont inue to o perate on ba tter y fors ever al hour s.
SYSTE M TROUBLES:
SMS Notification Feature
Whe n an alar m or syst em tro uble o ccurs, a SMS n otif icat ion wi ll be sen t to the Ph one
Num ber tha t have be en pro gram med in yo ur syst em.
Two-Way Voice Feature
Whe n an alar m occur s, the sy stem wi ll dia l to your P hone N umber t hat hav e been
pro gram med in yo ur system. Afte r the ca ll is co nnect ed, yo u can hea r the voi ce
mes sage th at have b een re cord ed and w hat the a larm oc cur s, the n syst em wil l
ann ounce “P ress 1 to a rm, pr ess 2 to d isar m, pre ss 3 to mo nito r, pre ss 4 to ta lk”.
Pre ss 3 or 4 to l iste n the viola ted premis es and v oice d ialo g betwe en an opera tor
and a n indiv idual a t the pre mise s. If a fal se alarm is e nsur ed, pr ess 1 to c ance l the
ala rm that i s in pro gres s.
Voice Di alog
The Phone Programmed Call the Panel
Whe n the pho ne that h ave be en prog ramm ed in the s ystem c all th e panel , two- way voi ce
is co nnect ed aut omatically. A llow s oper ator to l iste n, tal k to or con duct t wo-wa y
con versa tions w ith ind ividu als on th e prem ises.
: Plug-in Power Supply, micro USB 1 10/ 220 VAC to 5VDC, Primary Power
1A output
: 3.7V/500mAh Rech argeable Lithium Pol yme r Bat ter y Backup batter y
: <150mA@normalConsumption
: <300mASiren Output
: 315/433/868/915Mhz (optional)Radio Frequency
: eV 152 7RF code
: 850/900/1800/1900MHzGSM
: IEEE802.11b/g/nWi-Fi
: 0~55℃Operation Temperature
: “Low Battery” is dis play ed whe n the sy stem’s b acku p batt ery Syste m Low Battery
pow er is low.
: Eac h wirel ess se nsor in y our sy stem ha s an internal battery . Sen sor Lo w Batt ery
The s ystem d etec ts low ba tter y cond itio ns in wi rele ss sensor s, and d ispl ays a
“Sen sor Low B atter y” mes sage o n the ho me scre en, me ans tha t bat ter y repl acem ent
in th e indic ated se nsor (s) is du e withi n 7 days.
.AC Po wer No rmal
: w hen a co ver ta mper h as been d etect ed to ge nera te a Tamp er Alar m.Tampe r
 Loading...