


TABLE OF
CONTENTS
Operating Instructions ........................................ 01
How the SkyHydrant Works ................................ 04
How to Maintain Water Quality ........................... 06
Ultrafiltration Removal Criteria ............................ 08
Data Sheet ........................................................ 11
Operating Log ................................................... 15

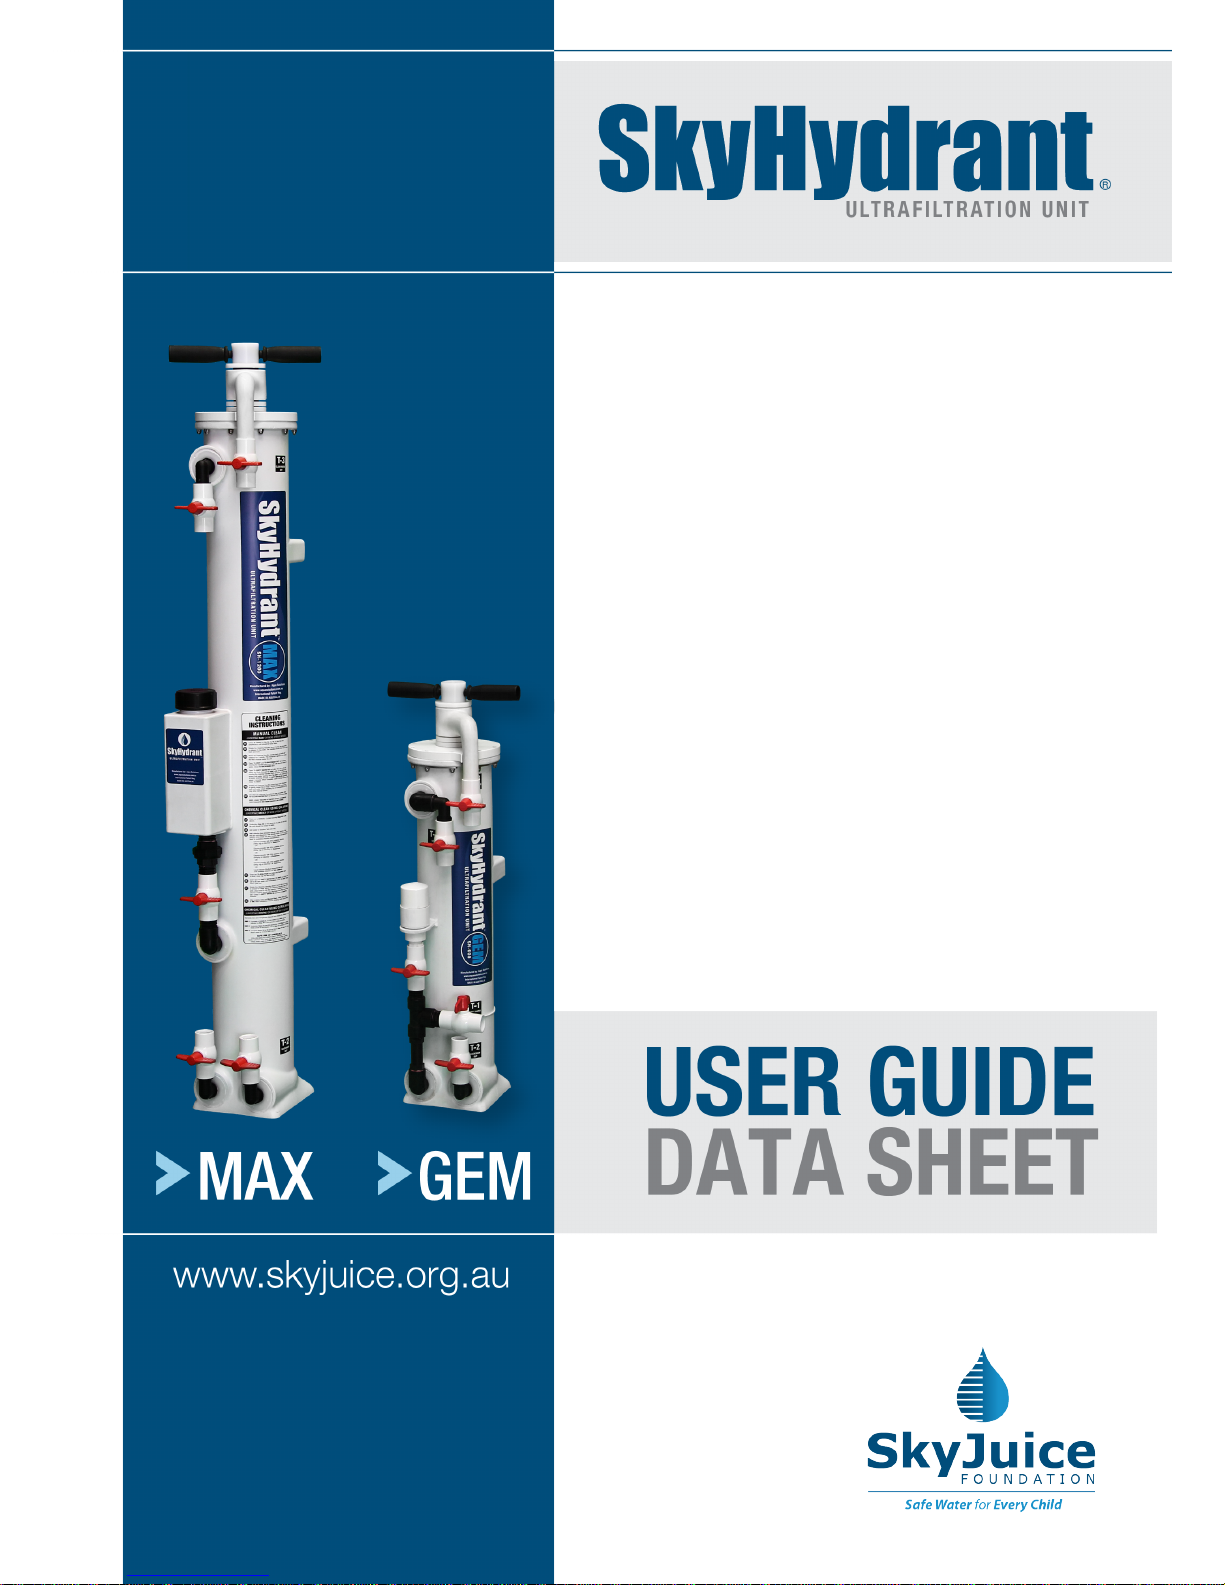
SkyHydrant-GEM
Nominal 6,000 litres per day
SkyHydrant-MAX
Nominal 12,000 litres per day
Height - 143 cm
Depth - 18 cm
Width - 25 cm
Mass (dry) - 13 kg
Mass (wet) - 32 kg
Height - 82 cm
Depth - 18 cm
Width - 25 cm
Mass (dry) - 9 kg
Mass (wet) - 21 kg

1
SKYHYDRANT - USER GUIDE & DATA SHEET
OPERATING INSTRUCTIONS
SkyHydrant ultrafiltration units are ideal for supplying drinking water in remote
locations from both surface and ground water supplies. SkyHydrants can be setup
and operated by non-technical persons and require no power or replacement filters.
SKYHYDRANT SETTING UP
Select a secure undercover location for the SkyHydrant
sheltered from sun and rain and install in an upright position.
The site should be located in a well-drained position with access
to a disposal area for the discharge of backwash water.
A maintenance person should undertake daily cleaning and
servicing of the unit to ensure it’s continuous operation. Log
sheets should also be completed to record water production
and to schedule servicing of the unit.
SKYHYDRANT ASSEMBLY
Connect the Cleaning Handles
Unwind the head shaft a few turns anticlockwise to release
pressure and remove the two temporary bolts used during
shipping. Next, screw the two cleaning handles into the top
of the SkyHydrant making sure they are firmly seated into
position.
Attach Legs and/or Wall Brackets
Use fasteners provided to screw the legs onto the base of
the unit and/or attach the wall mounting brackets to the back
of the SkyHydrant which in turn can be secured to a wall or
upright (see Fittings & Accessory Sheet for details).
Connect Plumbing Fittings
All outlets use 20mm (3/4”) BSP connectors and quick
connect fittings. The taps numbers T1 “Dirty Water In” and T2
“Backwash Out” can be folded down level for use.
Setup Ancillary Connections
Connect hoses and fittings to allow the SkyHydrant to function
i.e. Taps, pipes, tanks, pumps or other equipment (see How
the Ultrafiltration Unit Works for details).
• Connect “dirty water in” hose to T1 “Dirty Wash In”.
• Connect “backwash out” hose to T2 “Backwash Out”.
• Connect drinking water “clean water out” hose to T3
“Clean Water Out”.

2
SKYHYDRANT - USER GUIDE & DATA SHEET
COMMENCE USING THE SKYHYDRANT
Before start up, read section “Water Pipes and
Containers - Keep Free Of Contamination”.
1. Fill the Unit with Water
Open T1 “Dirty Water In” and T4 “Vent”. Wait
until water flushes out T4 and Close T4 “Vent”.
2. Removing Trapped Air
Rotate cleaning handles anticlockwise until
water leaks from the head. This releases
any trapped air, gently turn the cleaning handles
clockwise with just enough pressure to reseal
the “O” rings (do not over tighten).
3. Produce Drinking Water
Open T3 “Clean Water Out” to commence the
flow of drinking water.
INTERNAL FILTER MODULE
The SkyHydrant does not need to be opened or
accessed internally for cleaning or maintenance.
Regular cleaning is however essential to prevent the
filter module becoming clogged. This is undertaken
by moving handles on the top of the SkyHydrant
back and forth as part of the cleaning process
which only takes a couple of minutes to complete.
The SkyHydrant should function for many years
without replacement of the internal filter module
providing correct maintenance is undertaken. Also
raw water entering the unit should be pre-filtered to
remove suspended solid material and be free of any
damaging chemicals.
SKYHYDRANT MANUAL CLEANING
(UNDERTAKE DAILY OR MORE OFTEN IF NEEDED)
Mechanical cleaning of the SkyHydrant is essential to remove day-to-day accumulations of
contaminate.
Do this by moving the cleaning handles on top of the unit back & forth at least daily and throughout the
day. This is necessary to maintain the correct flow of drinking water and prevent the filtration module from
clogging. Follow the process below:
Close all valves T1,2,3,4,5. At this time the ultrafiltration unit should
be full of water.
Rotate the Cleaning Handle about 3 turns anti-clockwise to release the
internal “O” rings seals. The handles should now move freely back &
forth.
Agitate the Cleaning Handles quickly back and forth (90° rotation) for
about 1 minute. This movement cleans the filter module inside the unit.
Open T4 VENT and T2 BACKWASH OUT and continue moving the
cleaning handles back and forth until the unit drains of water Close T2
BACKWASH OUT.
Open T1 DIRTY WATER IN and allow the unit to fill with water and
flush through T4 VENT. Continue moving the cleaning handles back
and forth.
Continue this action until water flushing from T4 VENT is the same
colour as water entering through T1 DIRTY WATER IN (generally
about 1 minute).
When complete, cease moving handles and close T4 VENT.
Rotate the Cleaning Handles about three turns clockwise to gently
reseal the “O” rings. Use just enough pressure to seal until water stops
dripping. Do not over-tighten as this may strip the internal thread.
The Manual Cleaning Procedure is now complete. Open T3 CLEAN
WATER OUT to resume the flow of drinking water.
M1
M2
M3
M4
M5
M6
M7
Note: Water pipes and equipment should be flushed with a chlorine solution before use to eliminate contamination.

3
SKYHYDRANT - USER GUIDE & DATA SHEET
SKYHYDRANT SOLUTION CLEANING PROCEDURE
(Undertake weekly/monthly)
Solution cleaning removes accumulated organic matter and other contaminates from the
SkyHydrant not removed by the regular manual cleaning. To do this, follow the process below:
Undertake Steps M1 to M6 of the MANUAL CLEAN PROCEDURE (listed on previous page)
REPEAT Step M4 of the MANUAL CLEAN PROCEDURE (this will leave the unit empty of water).
Fill the Solution Tank with water (3/4 full).
Add chlorine (see amount below) to the solution tank and stir until dissolved. This should create
a 0.2% chlorine solution inside the filter housing. The chlorine manufacturer will state the chlorine
concentration on the label, this will determine how much chlorine to add using the information below.
Open tap T5 SOLUTION and allow the solution tank to drain, close tap T5-SOLUTION.
Open taps T1 DIRTY WATER IN & T4 VENT and allow the unit to fill with water and immediately
close T4 VENT when water spills out.
Rotate the Cleaning Handles about 3 turns anti-clockwise to unseal the internal “O” rings then move
the Cleaning Handles quickly back and forth a few times, this mixes the chlorine inside the unit. A
small amount of chlorine solution should also discharge from the top. Close T1 DIRTY WATER IN
and leave to soak for 4 hours or longer
After soaking carry out Manual Clean, follow Steps M1 to M8. After completion the unit can be
returned back to producing drinking water again.
C1
C2
C3
C4
C5
C6
C7
C8
Solution Cleaning Using Citric Acid – Undertake Monthly
Citric acid is used to remove iron and manganese deposits from inside the filtration unit.
STEP 1 Complete a SOLUTION CLEAN USING CHLORINE (as above) followed by step M4
of the MANUAL CLEAN procedure (to make sure the unit is empty of water).
STEP 2 Undertake steps C3 and C4 (as above) and follow the table below for the amount of Citric
Acid powder to add to the chemical tank in step C4 (instead of chlorine).
STEP 3 Complete steps C5 to C8 (as above), however in step C4 leave the citric acid to soak
for 12 hours (not 4 hours). This procedure is now complete.
Safe Use of Chemicals:
Follow manufacturer’s safety instructions. Avoid contact with skin and wear protective gloves, eyeglasses
and clothing. Do not inhale fumes.
Chlorine is used to remove deposits of organic matter form inside the filtration unit.
Follow steps C1 to C8 below and see step C4 for the amount of chlorine to use:
4
6
8
10
200 ml
Chlorine powder with 65% available chlorine (700g/kg of chlorine)
Chlorine powder with 55% available chlorine (550g/kg of chlorine)
Chlorine powder with 35% available chlorine (350g/kg of chlorine)
Chlorine powder with 25% available chlorine (250g/kg of chlorine)
Liquid chlorine (Sodium Hypochlorite) with 12% available chlorine
teaspoons
CHLORINE
MAX
2
3
4
5
100 ml
teaspoons
SH1200
GEM
SH600
CITRIC ACID SOLUTION
500 gms
Fine Granular Citric Acid
250 gms
GEM
SH600
MAX
SH1200

4
SKYHYDRANT - USER GUIDE & DATA SHEET
HOW THE SKYHYDRANT WORKS
The SkyHydrant requires no power to operate; instead it relies on the flow of water from gravity pressure.
Raw water flows through the unit with a water head pressure of between 2 metres and maximum 4 metres
(20kPa to 40kPa or 3psi to 6psi).
The SkyHydrant can be set up in a number of different ways to best accommodate site needs. A popular
method is to pump raw water (using mechanical or hand pump) to a 1,000 litre header tank located on a
3 meter high tank-stand and allow the water to gravity feed through the ultrafiltration unit and collect in a
1,000 litre drinking water tank located on a 1 meter high tank stand.
The drinking tank can be connected with taps or be fitted with pipes for supplying water directly to houses
through a distribution network.
Never pump or connect mains water pressure directly to the ultrafiltration unit without using a suitable
water pressure regulating or control device as excessive water pressure may damage the filter fibres.
SKYHYDRANT SITE EQUIPMENT
For the SkyHydrant to function it requires additional operating equipment. This may include hoses, pipes,
pumps, taps, tap stands, float valves, water bladders, tanks and tank stands.
The amount of additional equipment depends on the installation being undertaken and individual sites
requirements.
Installations where existing roof top water tanks are available allows the ultrafiltration unit to become an “in
line filter”. Simply connect to the existing water supply system. Other types of installations will require more
extensive site work and equipment.
It is important when setting up the ultrafiltration unit to ensure correct sizing of pipes, pumps and other
equipment.

5
SKYHYDRANT - USER GUIDE & DATA SHEET
MULTIPLE SKYHYDRANT UNITS
Multiple SkyHydrant can be connected together
(2 or more) to increase water production when
required.
Multiple connection kits are available or alternatively
obtain local plumbing fittings to manifold multiple
SkyHydrants together.
Water production will vary significantly depending
on the quality of the raw water available. Turbid and
highly contaminated water will reduce output as
well as increasing the frequency needed of cleaning
cycles.
SKYHYDRANT UNIT SETUP
The SkyHydrant can be set up to operate as single stand-alone
unit (picture to the left) or manifolded together into multiple units
for high flow production (above).
The supply of raw water to SkyHydrant can be sourced from
gravity feed overhead tanks or by using pressure reducing
devices when supplied directly from pumps or pressure supply
pipes.
Operating pressure should be limited to (20kPa to 40kPa or
3psi to 6psi) or about 2 to 4 meters head pressure to produce
a typical flow rate of about 500 to 700 litres per hour per unit.
Drinking water produced from the SkyHydrant can be stored in
tanks and connected to taps or be piped to household supplies.
PERFORMANCE MONITORING
At start up it is recommended the flow rate of the SkyHydrant be measured and recorded. This will
determine if the flow rate decreases in the future.
To undertake this procedure, allow water to flow into T1 (dirty water in) from a measured height (say 2
metres) and use a stopwatch to time how long it takes to fill a measured bucket of water (say 10 litres) out
of T3 (clean water out).
On a regular basis repeat this procedure. If the flow rate decreases it may indicate more frequent cleaning
of the ultrafiltration unit be undertaken.
Over the lifetime of the ultrafiltration unit there will be a natural loss of flow due to ageing of the filter fibres.
OPERATION LOG SHEETS
It is good practice to keep a daily operational log-sheet (see Log Sheet on the last page) to record drinking
water production flow rates and when cleaning procedures were undertaken.
This is useful to identify a pattern of use when monitoring on-going performance trends or to determine if
operational problems may be occurring. It is also useful as a convenient reminder of when the next cleaning
cycle is due to be undertaken, particularly when a cleaning roster is being used.

6
SKYHYDRANT - USER GUIDE & DATA SHEET
HOW TO MAINTAIN WATER QUALITY
FEED WATER SUITABILITY FOR ULTRAFILTRATION
Not all water is suitable for filtering through the SkyHydrant ultrafiltration unit (UF) and testing for unsuitable
contaminates should be undertaken before use.
• YES – Diseases Removed
The SkyHydrant will significantly remove biological contaminates and pathogens including bacteria,
viruses, protozoa, cysts, parasites etc. making water safe to drink.
• YES – Turbidity Removed
The SkyHydrant will remove turbidity and dirt from water. Dirty water can however damage the filter fibres
and it is recommended to install a pre-filter.
• NO – Chemicals NOT Removed
The SkyHydrant will not remove salt or dissolved chemicals and minerals from water.
WATER PIPES AND CONTAINERS KEEP FREE OF CONTAMINATION
Use a chlorine solution to sanitise and eliminate any residual post contamination, which may spread disease
in water pipes, drinking containers, hoses, taps, and other equipment.
Use a 0.1% (1,000 parts per million) chlorine solution (add approximately 1 teaspoon of chlorine powder to
5 litres of water) and flush through pipes or wash drinking water containers.
It is also recommended to regularly flush a chlorinated solution through the SkyHydrant together with
drinking water hoses and pipes to eliminate any post contamination.
PRE-FILTRATION TREATMENT
It is recommended that a pre-filter be installed to reduce solids from fouling the internal filter module when
using a highly turbid water source.
A pre-filter (300-micron) will provide good protection, pre-filters will also require regular cleaning to maintain
a good water flow.
SKYHYDRANT LONG TERM STORAGE
When the SkyHydrant is placed into storage for use again in the future, the filter fibres must remain wet at
all time to prevent permanent damage.
When placing the ultrafiltration unit into storage:
• Undertake a chemical clean and leave at least 1 litre of clean water inside the unit (or preferably
leave the unit full of clean water with 5 to 10ppm chlorine) to maintain a wet environment.
• Turn all valves off before placing the unit into storage. Do not store in conditions below freezing.
After storage undertake a chemical clean to restore the filter module back to normal operation condition.

7
SKYHYDRANT - USER GUIDE & DATA SHEET
PREVENTING POST CONTAMINATION OF DRINKING WATER
Water produced from the SkyHydrant is free of biological contaminates and safe to drink. Over time
however, water quality can deteriorate - in hot climates water can remain safe for a few days while in colder
climates it may stay safe for weeks.
To maintain water quality it is good practice to regularly disinfect drinking water tanks and water pipes by
adding a small amount of chlorine to prevent the growth of unwanted organisms and pathogens in the
stored water.
To achieve this, as a guide add about 3/4 teaspoon of chlorine powder (at 65% available chlorine) or 1½
teaspoons of chlorine powder (at 35% available chlorine) for every 1,000-litres of tank water. First, mix the
chlorine in a small bucket of water to make a solution before adding the chlorine solution to the tank.
It is recommended to use a water testing kit to maintain a free residual chlorine level of between 0.2 to 0.5
milligrams per litre (mg/l) which is equivalent to 2 to 5 parts per million (PPM). Water should be tested every
few days to maintain the chlorine levels and make adjustments as necessary.

8
SKYHYDRANT - USER GUIDE & DATA SHEET
ULTRAFILTATION REMOVAL CRITERIA
A patented low-pressure ultrafiltration technology meeting and exceeding World Health
Organisation requirements for safe drinking water.
Proprietary and patented low-pressure ultrafiltration membrane technology is highly effective in removing all
non-dissolved species in feed waters. Ultrafiltration is classified by the World Health Organisation (WHO) as
effective removal of disease causing pathogens and exceeds requirements for key criteria to produce safe
drinking water. However, it is important to test the water and validate the composition of the feed water.
Please refer to the Technical Bulletins and Specifications to obtain specific information on performance.
Ultrafiltration (to 0.04um nominal) WILL REMOVE
Pathogens (disease causing organisms) and Turbidity (dirt):
1. PATHOGENS removed (to log reduction value >4) by ultrafiltration include:
2. TURBIDITY
NTU (Nephelometric Turbidity Units) is removed by ultra-filtration to levels below <0.1 NTU. Turbid
water contains suspended matter such as clay, slit, fine fragments of organic matter, and similar
material. TURBIDITY levels of up to 1000 NTU can be removed however levels below 500 NTU are
preferred.
3. TOTAL SUSPENDED SOLIDS (TSS) will be removed. TSS is similar to turbidity.
4. IRON AND MANGANESE if first oxidised or if colloidal can be removed by ultrafiltration.
5. ARSENIC MANGANESE if first oxidised can be removed by ultra iltration.
The World Health Organisation (WHO) reports that ultrafiltration provides complete removal of bacteria and viruses
(disease causing pathogens) as outlined in WHO document “GUIDELINES FOR DRINKG WATER
QUALITY” under “Treatment Process” as referenced in the WHO website.
• Total Coliform TC
• Total Coliform FC
• Ecoli
• Virus (significantly reduces virus levels)
• Bacteria
• Protozoa
• Cysts
• Helminths
Note: mg/L (milligrams per litre) also equals ppm (parts per million); WHO (World Health Organisation)
1. Chemicals not removed by ultrafiltration include:
• Arsenic (unless first oxidised) (WHO safe drinking standard - Max 0.01 mg/L)
• Cadmium (WHO safe drinking standard - Max 0.003 mg/L)
• Chromium (WHO safe drinking standard - Max 0.05 mg/L)
• Copper (WHO safe drinking standard - Max 2.0 mg/L)
• Cyanide (WHO safe drinking standard - Max 0.07 mg/L)
• Fluoride (WHO safe drinking standard - 1.5 mg/L)
• Lead (WHO safe drinking standard - Max 0.01 mg/L)
• Mercury (WHO safe drinking standard - Max 0.006 mg/L)
• Nickel (WHO safe drinking standard - Max 0.07 mg/L)
• Nitrate (WHO safe drinking standard - Max 50 ml/L as NO3)
• Nitrite (WHO safe drinking standard - 3 mg/L as NO2)
• Sulphate (Safe Drinking Levels: 250 mg/L but up to 500mg/L can be tolerated
Ultrafiltration (to 0.04um nominal) WILL NOT REMOVE
Chemicals or Minerals or Salinity (salt) from water:

9
SKYHYDRANT - USER GUIDE & DATA SHEET
2. Minerals (hardness) is not removed by ultrafiltration, this includes:
• Total Hardness, hard water is mainly calcium and magnesium and is not considered a health
risk but can be unpleasant to taste and cause a build up of scale in pipes (WHO safe drinking
standard-Max 500 mg/L)
• Calcium, Carbonate (WHO safe drinking standard- Max 250 mg/L)
• Iron and Manganese (unless first oxidised) (WHO safe drinking standard- 0.4 mg/L;
Note: exceeding this level is not unsafe but is unpleasant to taste - max 1.0 mg/L)
• Magnesium (WHO safe drinking standard- Max 150 mg/L)
3. Salinity and salts are not removed by ultrafiltration include:
• Salinity (WHO safe drinking standard - Max 250 mg/L)
• Chloride and Sodium (WHO safe drinking standard - Max 600 mg/L)
• Conductivity (WHO safe drinking standard - Max 2000 uS/cm)
4. Total dissolved solids (TDS) cannot be successfully removed by ultrafiltration:
• TDS (WHO safe drinking standard - Max 1000 mg/L)
• TDS contain a wide range of substances including organic and inorganic (chemicals)
5. Unpleasant tastes are not successfully removed in most cases using ultrafiltration.
Ultrafiltration will have NO effect on ph levels:
• pH Scale (WHO safe drinking standard 6.5 – 9.0)
• Total Alkalinity (WHO safe drinking standard max 500)
• pH levels are not considered a health issue but may cause corrosion or encrustation of plumbing
fittings and pipes.

10
SKYHYDRANT - USER GUIDE & DATA SHEET
T4
T1
T2
S
T
E
P
O
N
E
S
T
E
P
T
W
O
CONNECT
CONNECT
HANDLES
CONNECT
LEGS
WALL BRACKETS
(OPTIONAL)
ULTRAFILTRATION UNIT
ACCESSORY KIT
ULTRAFILTRATION UNIT

11
SKYHYDRANT - USER GUIDE & DATA SHEET
DATA SHEET
Turbidity will also be removed and as turbidity rise the
SkyHydrants will require more frequent cleaning cycles
to remove accumulated contaminates. A pre-filter to 200
microns is highly recommended to reduce module fouling in
areas where high levels of solids are found.
The backwash cleaning cycle is easily undertaken requiring
no tools or the need to access internal components of the
SkyHydrant. Handles on top of the unit are simply moved
back and forth for the mechanical agitation cleaning process
which takes about one minute to complete before the back
flush valve is opened to release contaminates.
BACKGROUND
Small communities require robust, reliable water treatment
solutions often from difficult water sources. The treatment
systems must provide pathogen free water economically and
with minimal operator attendance.
SkyHydrant Water Filtration Units require no power or replacement filters and can be operated by nontechnical persons. SkyHydrants are lightweight and portable making them ideal for supplying drinking
water in most remote locations from both surface and ground water supplies.
They can operate as single standalone units or be manifolded together to increase water flow to create
large-scale water production plants.
SkyHydrants will significantly remove pathogens from feed water including bacteria, viruses, protozoa,
cysts and parasites to a level as classified by the World Health Organisation (WHO) as suitable for drinking
water.
TYPICAL APPLICATIONS
• Decentralised water treatment systems
• Community small-scale systems
• Remote and rural
• Communities
• Point-of-entry filtration
• Emergency and temporary water supplies
• RO (reverse osmosis) pre-treatment

12
SKYHYDRANT - USER GUIDE & DATA SHEET
THE SOLUTION
The SkyHydrant is a patented low cost, low maintenance ultra water filtration solution.
It affords practical, small-scale potable water treatment using proven ultrafiltration (UF) membrane
technology.
The hollow fibre membrane filtration module is mounted inside a potable rated moulded plastic pressure
housing which is compact, robust, easy to transport and simple to install.
The UF barrier filtration process provides primary disinfection by removing pathogens and particulates to
supply safe drinking water from the majority of non-saline surface and ground waters.
Additional post filtration treatment including ultra violet (UV) or chlorine disinfection can be utilised if desired.
OPERATING DESCRIPTION
Raw water flows into the SkyHydrant housing under low pressure. As it passes through the porous walls of
the hollow fibre membranes inside the unit, solids are retained on the membrane surface. The SkyHydrant
is suitable for use in either pumped feed or gravity feed applications.
The secret to the successful operation of the SkyHydrant is the effectiveness of its patented backwash
system, which uses a mechanical agitation process to clean membrane surfaces.
Backwashing is initiated manually by an operator, on a frequency as determined by site conditions and at
least once a day.
Periodically the SkyHydrant also requires a chemical clean to remove residual fouling that cannot be
removed by the daily backwash process alone and helps to limit biological growth in the system.
Typically chlorine and occasionally citric acid is used for the chemical cleaning process, which requires an
operator to attend. Chemical cleaning frequency is application specific but generally between weekly and
monthly.
MEMCOR® MEMBRANE MODULES
The membrane filtration modules use high permeability, low fouling PVDF hollow fibre membranes for
optimum performance and long life. The modules are simple in design and easy to install and maintain.
MEMBRANE CLEANING
A simple low pressure patented mechanically agitated backwash sequence together with periodic chemical
cleaning for quality performance at low differential pressure, even with turbid feed waters.
Note: Design, data and dimensions are subject to modification without notice.

13
SKYHYDRANT - USER GUIDE & DATA SHEET
TECHNICAL DATA
Filtration of potable non-saline surface water or groundwater for small
communities. Not suitable for use with seawater or brackish water or other water
sources containing contaminants such as heavy metals.
Typical filtrate production capacity treating clear surface water¹
3 metres to 4 metres head pressure
Pressurised outside to inside filtration
500µm or finer
50 NTU
< 0.1 NTU
> 4 LRV (for particles 2 to 5µm)
> 0 to 35˚C ( > 32 to 95oF)
> 0 to 35˚C (> 32 to 95oF)
Note: The unit must not be allowed to freeze
6.0 to 9.0pH Note: Exposure to chlorine or chloramines is not recommended
in feeds below 6.5pH
100kPa
MEMCOR® membrane filtration module polyvinylidene fluoride (PVDF) hollow
fibre ultrafiltration membrane with nominal pore size 0.04µm. Filter direction
outside to inside.
Food grade polyethylene (PE)
Various including PVC and PP
EPDM typical
Various including PE, ABS, Nylon and PVC
Typical Application
Typical Feed Inlet Pressure Range
for Gravity Feed
“Filter” Mode Operation
Feed Pre-Screen Mesh Size
Recommended
Max. Recommended Feed Turbidity
Filtered Water Turbidity
Typical Log Reduction Value
Operating Feed Temperature Range
Temperature Range for
Tansportation and Storage
Feed pH Range
Maximum Housing Operating
Pressure
Membrane Module Details
Materials of Construction:
Module Housing Assembly
Valves
Seals and Gaskets
Pipe and Fittings
Model Number
SkyHydrant MAX (SH1200)
SkyHydrant GEM (SH600)
Nominal litres per day using low turbidity feed water
Nominal 12,000 litres per day
Nominal 6,000 litres per day
2 to 10pH typical
Note: Occasional brief exposure during chlorine cleans to 10.5pH is acceptable
Approximately 15 litres
Gravity drain waste outlet to be provided adjacent to unit
300 to 500mg/L / 300 to 500ppm
Typically about 300 grams of citric acid powder will be used
Mechanical Agitation
Allowable pH Range for Cleaning
Waste Water Volume Per Backwash
Typical Target Chlorine
Concentration During a Chlorine
Clean
Cleaning Concentrate and Volume
Required for an Acid Cleaning Cycle
Backwash
2.0 to 2.2pH
(not less than 2.0pH)
Not Required
Installed under cover with protection from direct sunlight and rainfall
Typical Target Acid Concentration
During an Acid Clean
Electricity Supply
Recommended Installation Location
¹ Feed water quality will affect production capacity.
² Unscreened or coarsely screened raw water may reduce membrane operating life.
³ Capacity and backwashing/cleaning frequency will typically vary with feed turbidity.

14
SKYHYDRANT - USER GUIDE & DATA SHEET
WEIGHT & DIMENSIONS
UNIT DIMENSIONS & MASS (Approximate)
SHIPPING DIMENSIONS & MASS (Approximate – Shrink Wrapped
Model Number
SkyHydrantMAX (SH1200)
SkyHydrantGEM (SH600)
Model Number
SkyHydrantMAX (SH1200)
SkyHydrantGEM (SH600)
Height (cm)
143
82
Depth (cm)
18
18
Width (cm)
25
25
Mass (kg-dry)
13
9
Mass (kg-wet)
32
21
Height (cm)
150
90
Depth (cm)
20
20
Width (cm)
28
28
Mass(kg-dry)
18
12
FILTRATE QUALITY
TERMINOLOGY
IMPORTANT OPERATING INFORMATION
Ppm = Parts per Million
NTU = Nephelometric Turbidity Units (a measurement of turbidity)
Um = Micron
M = Metre
• The filter sub-modules located inside the SkyHydrant is to remain in a wet environment to avoid the
membrane drying which would result in total and permanent loss of performance. If long-term storage is
necessary after operation, the unit is to be rinsed with a solution of sodium hypochlorite (100ppm) and stored
at a temperature not above 40˚C, out of direct sunlight.
• When SkyHydrants are being used for the first time it is recommended that a chlorinated backwash be carried
out before the filtrate is used.
• The filter sub-module is resistant to oxidising agents such as chlorine, chloramines, bromine, bromamine,
and potassium permanganate. Maximum exposure of sub-modules to bromine, bromamine, potassium
permanganate, and other oxidants should be checked prior to starting operation.
• The SkyHydrant comprises a single MEMCOR® membrane sub-module located inside in a low-pressure
housing. The unit is suitable for operation under low positive or negative head pressure. Raw water flows
along the length of the hollow fibres before being forced through the walls of the fibre to produce a filtrate
virtually free of suspended solids. The unit removes virtually all solids and bacteria and significantly
reduces virus levels. Filtrate flow rate is controlled manually.
Parameter
Bacteria
Virus
Coliform
Cryptosporidium
Parameter
Giardia
Algae
Turbidity
Log Reduction Value
>6 99.9999%
>3 99.9%
>6 99.9999%
>6 99.9999%
Log Reduction Value
>6 99.9999%
>6 99.9999%
<0.02

15
SKYHYDRANT - USER GUIDE & DATA SHEET
TIME DATE DRINKING
WATER
PRODUCTION (L)
MANUAL
CLEANING
UNDERTAKEN
CHEMICAL
CLEANING
UNDERTAKEN
AMOUNT
CHLORINE
USED
OTHER
INFORMATION
OR NOTES
OPERATING LOG

16
SKYHYDRANT - USER GUIDE & DATA SHEET

 Loading...