

Page 1
#TS950 Front Triple Shock Kit
99 & UP FORD SUPERDUTY
INSTALLATION INSTRUCTIONS
NOTE: This kit must be installed using all 3 shocks per
side. Each shock is critical in securing the upper brackets
in place.
1. Make sure vehicle is parked on a level concrete or asphalt
surface. Properly block the rear tires of vehicle. Jack up front
of vehicle and install jack stands under frame behind the leaf
spring mounts.
2. Remove tires and shocks from the front of vehicle.
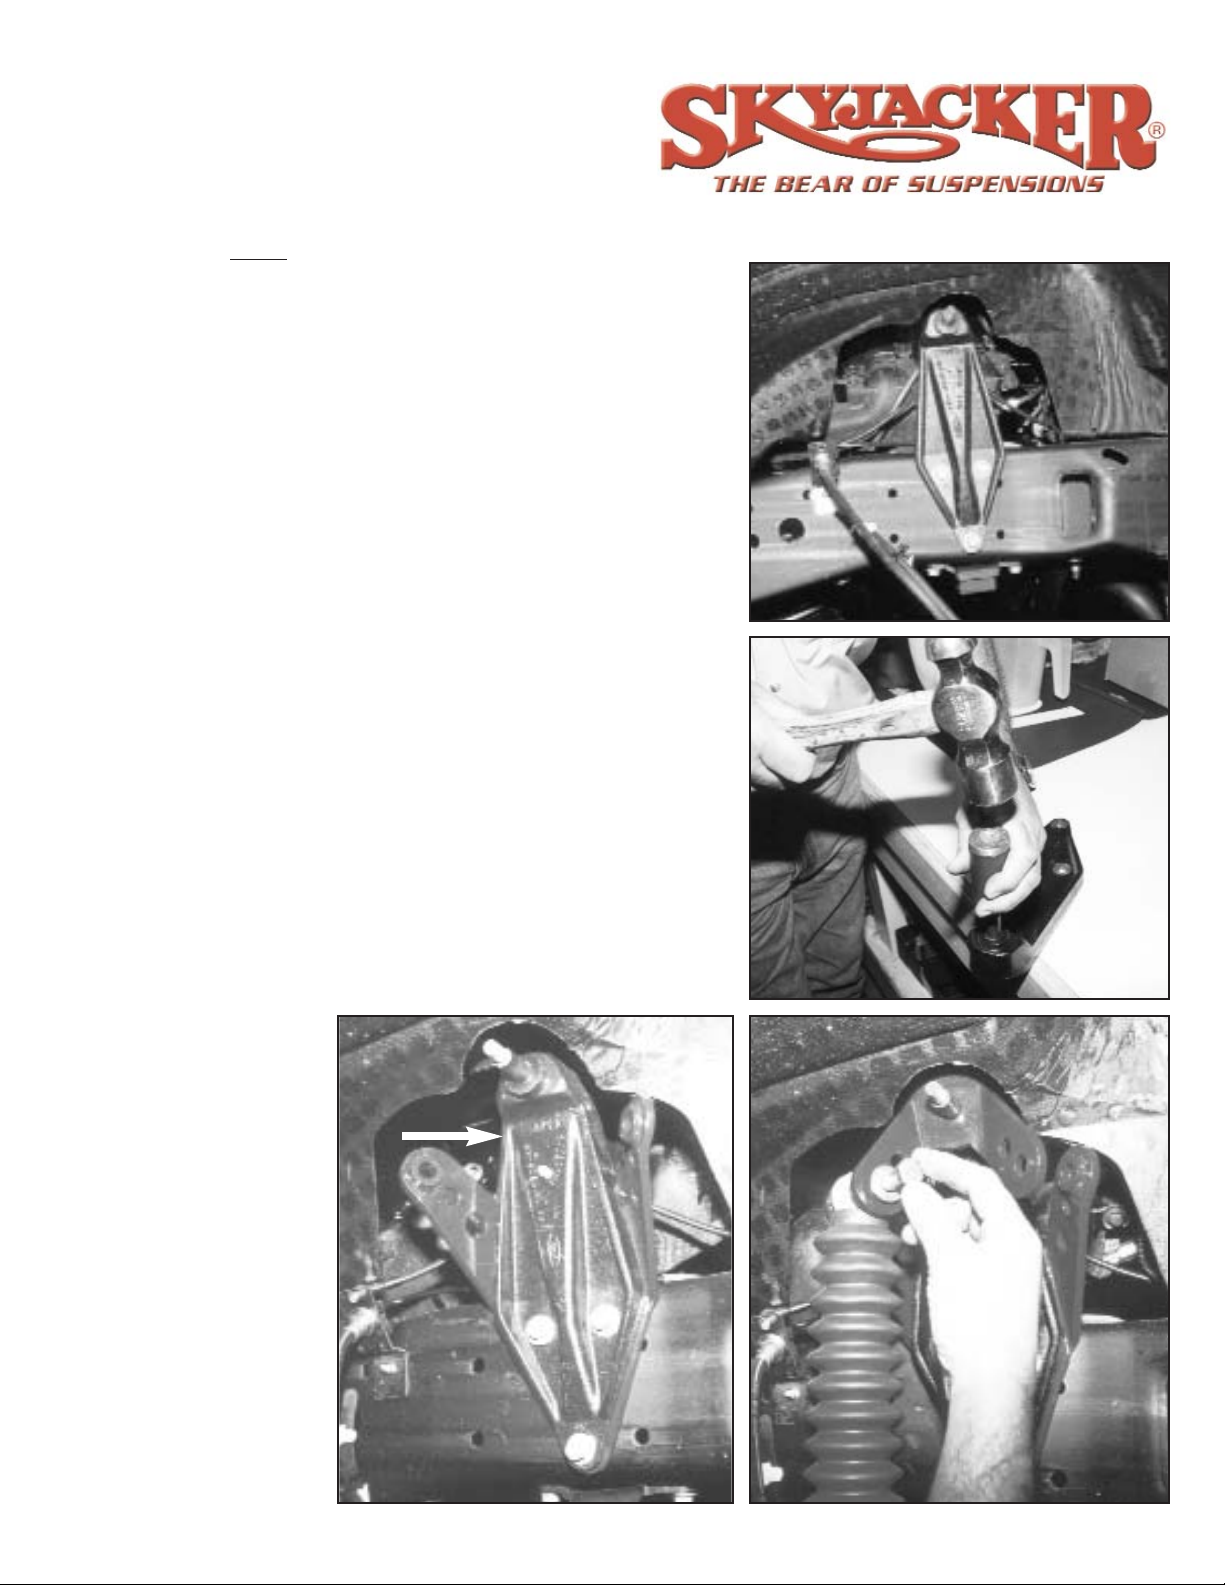
3. Unbolt the 3 bolts holding the original shock bracket to the
frame (see photo #1). Note: hardware will be reused when
reinstalling.
4. Remove the center stud in bracket (place bracket in a vise or
securely hold down on a work table). See photo #2. Insert
new 16mm shoulder bolt through bracket .
5. Place new large bracket behind original mounting bracket
and bolt into original 3 holes in frame using the original hardware (see photo #3).
NOTE: The OEM upper brackets (see arrow in photo #3)
MUST be reinstalled and have a shock mounted on the stud
(shoulder bolt). If not failure will occur and waaranty will be
void!
6. Position new small bracket onto new center stud as shown
in photo 4. Next install the dual shocks by inserting a new
1/2 x 3 1/2" bolt and
small washer, from
the front, through front
small bracket, shock
eye and back large
bracket using a small
washer and lock nut
on the back. Do not
tighten until all shocks
are mounted. (Note:
the dual shock mounting code requires 5/8"
polyurethane bushing
and metal sleeve
#54314 in each eye).
#I-TS950 (Rev. 2/03)
1.
Photo #1
Photo #2
Photo #3 Photo #4
Page 2
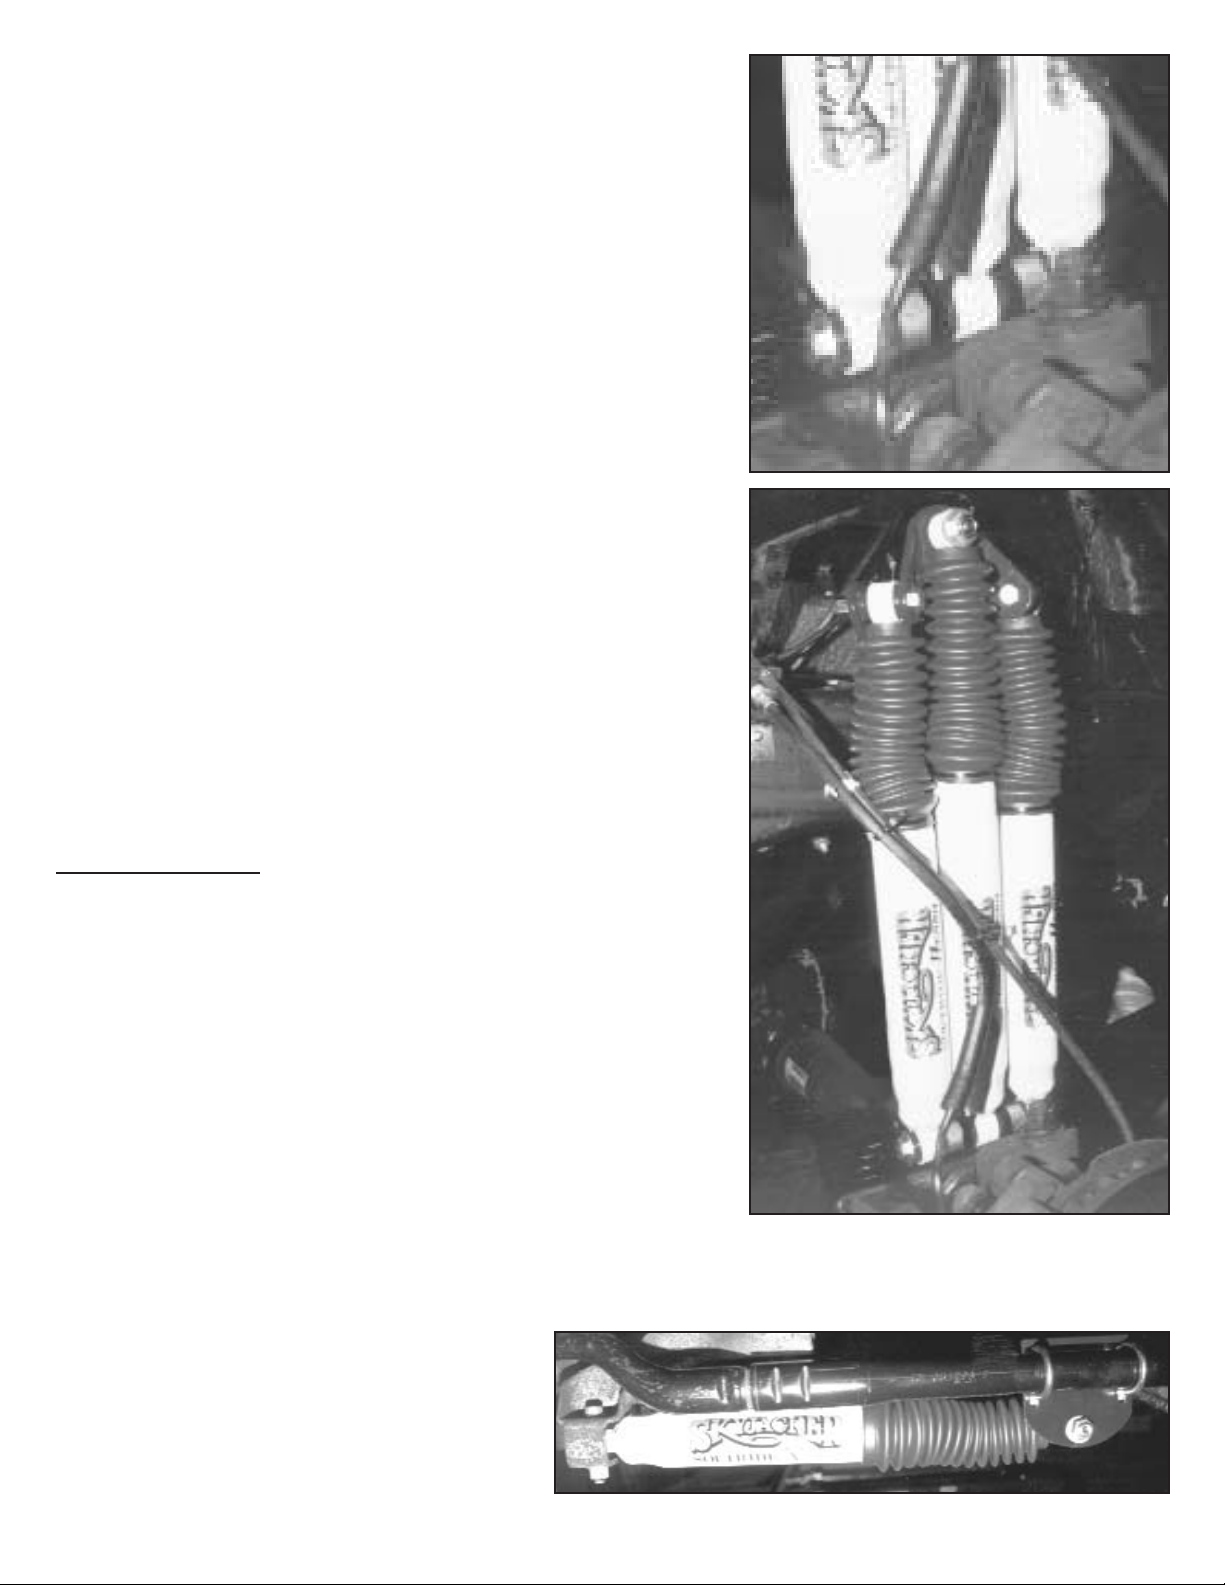
7. Now install new center shock (OEM position) onto new
longer mounting stud and tighten only till polyurethane
begins to bulge.
8. Install the lower eyes of shocks by inserting new
1
/2 x 71/2"
bolt with large washer, from the rear, through rear shock eye,
5/8" aluminum spacer, original shock tab, center shock eye,
original shock tab, 5/8" aluminum spacer, front shock eye,
then using a large washer and lock nut. See photo #5.
9. Now tighten all bolts upper and lower. (Do not overtighten
bolts.)
10.Repeat steps on other side.
11. Reinstall tires and lower vehicle to the ground.
NOTICE: Retorque ALL nuts, bolts and especially the
u-bolts after the first 100 miles, again after another 100
miles, and then check periodically thereafter.
ACCESSORIES
:
• SOFTRIDE®Hydro and Nitro Shocks
• SOFTRIDE
®
rear springs are also available separately.
• HD OEM Replacement Steering Stabilizer #7099
• Single Steering Stabilizer (Shown below) #7199
• Dual Steering Stabilizer #7299
• Extended Stainless Steel Brake Lines - DOT Approved
• Polyurethane components such as: Sway Bar, Shackle, and Cab Bushings Kits.
• Body Lifts
• Extended Rear Sway Bar End Links
• Carrier/Swing Bearing Lowering Kit
Photo #5
COMPLETED INSTALLATION
7199W
 Loading...