

Page 1
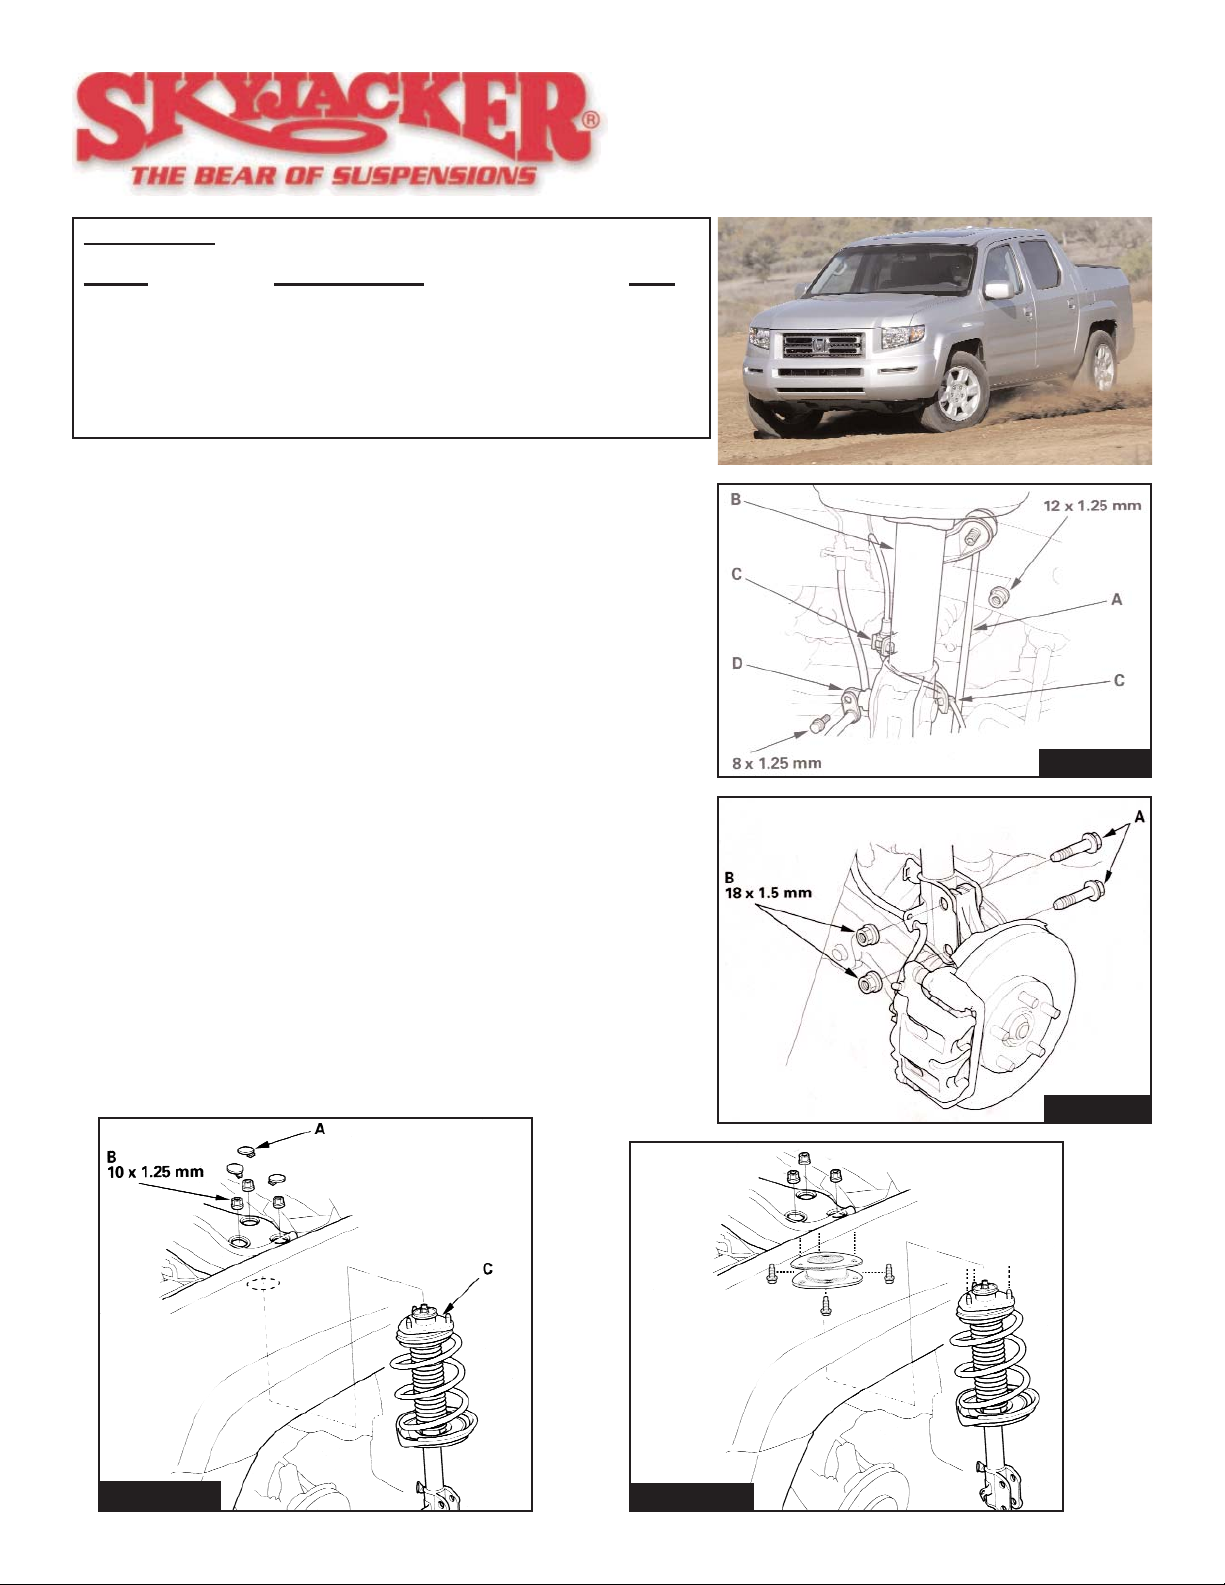
2006 Honda Ridgeline
2” Suspension Lift
Instruction Sheet
PARTS LIST:
ITEM# DESCRIPTION QTY
FRCS2-S . . . . . . . . .FRONT COIL SPACER,2" . . . . . . . . . . . . . 2
RRCS2-S . . . . . . . . .REAR COIL SPACER,2" . . . . . . . . . . . . . . 2
10MMX30MMB . . . .10 X 30 METRIC BOLT/ 10.9. . . . . . . . . . 12
10MMN . . . . . . . . . .10 MM N/I LOCKNUT . . . . . . . . . . . . . . . 12
38SAEW . . . . . . . . .3/8 SAE WASHER . . . . . . . . . . . . . . . . . . 18
10X30x1.25MMB . . .10 X 30 MET. BOLT 1.25 THRD PTCH . . . 6
FRONT INSTALLATION:
1. Set the emergency brake and block the rear tires. Raise the
front of the vehicle and properly support using jack stands.
Remove front tires.
2. Disconnect stabilizer link (A) from damper (B). Remove the
wheel sensor harness clips (C) and the brake line bracket
(D) from the damper. Do not disconnect the wheel sensor
connector. (See Image# 1)
3. Remove the damper pinch bolts (A) and flange nuts (B) from
the damper. (See Image #2)
4. From under the hood, remove the service caps (A), and
remove the three flange nuts (B) from the top of the damper,
then remove the damper assembly. (See Image #3)
NOTE: Damper Assembly’s are different left to right. Be sure
to mark as L and R before you continue.
5. Locate the new front spacer. NOTE: The front spacers are
not notched on the front side, the rear spacers are notched.
Spacer will install, long end towards the front.
6. Attach the new front spacer to the factory frame mount using
the 10mm x 30mm bolts (Grade 10.9) and nuts supplied.
Bolts will install from the center of the bracket up into factory
mount. One washer. Leave loose. (See Image #4) With
bracket installed, attach damper to the new bracket using the
factory hardware.
Image #3
Image #4
Page 1 of 3
Image #1
Image #2
I-HR20
Page 2
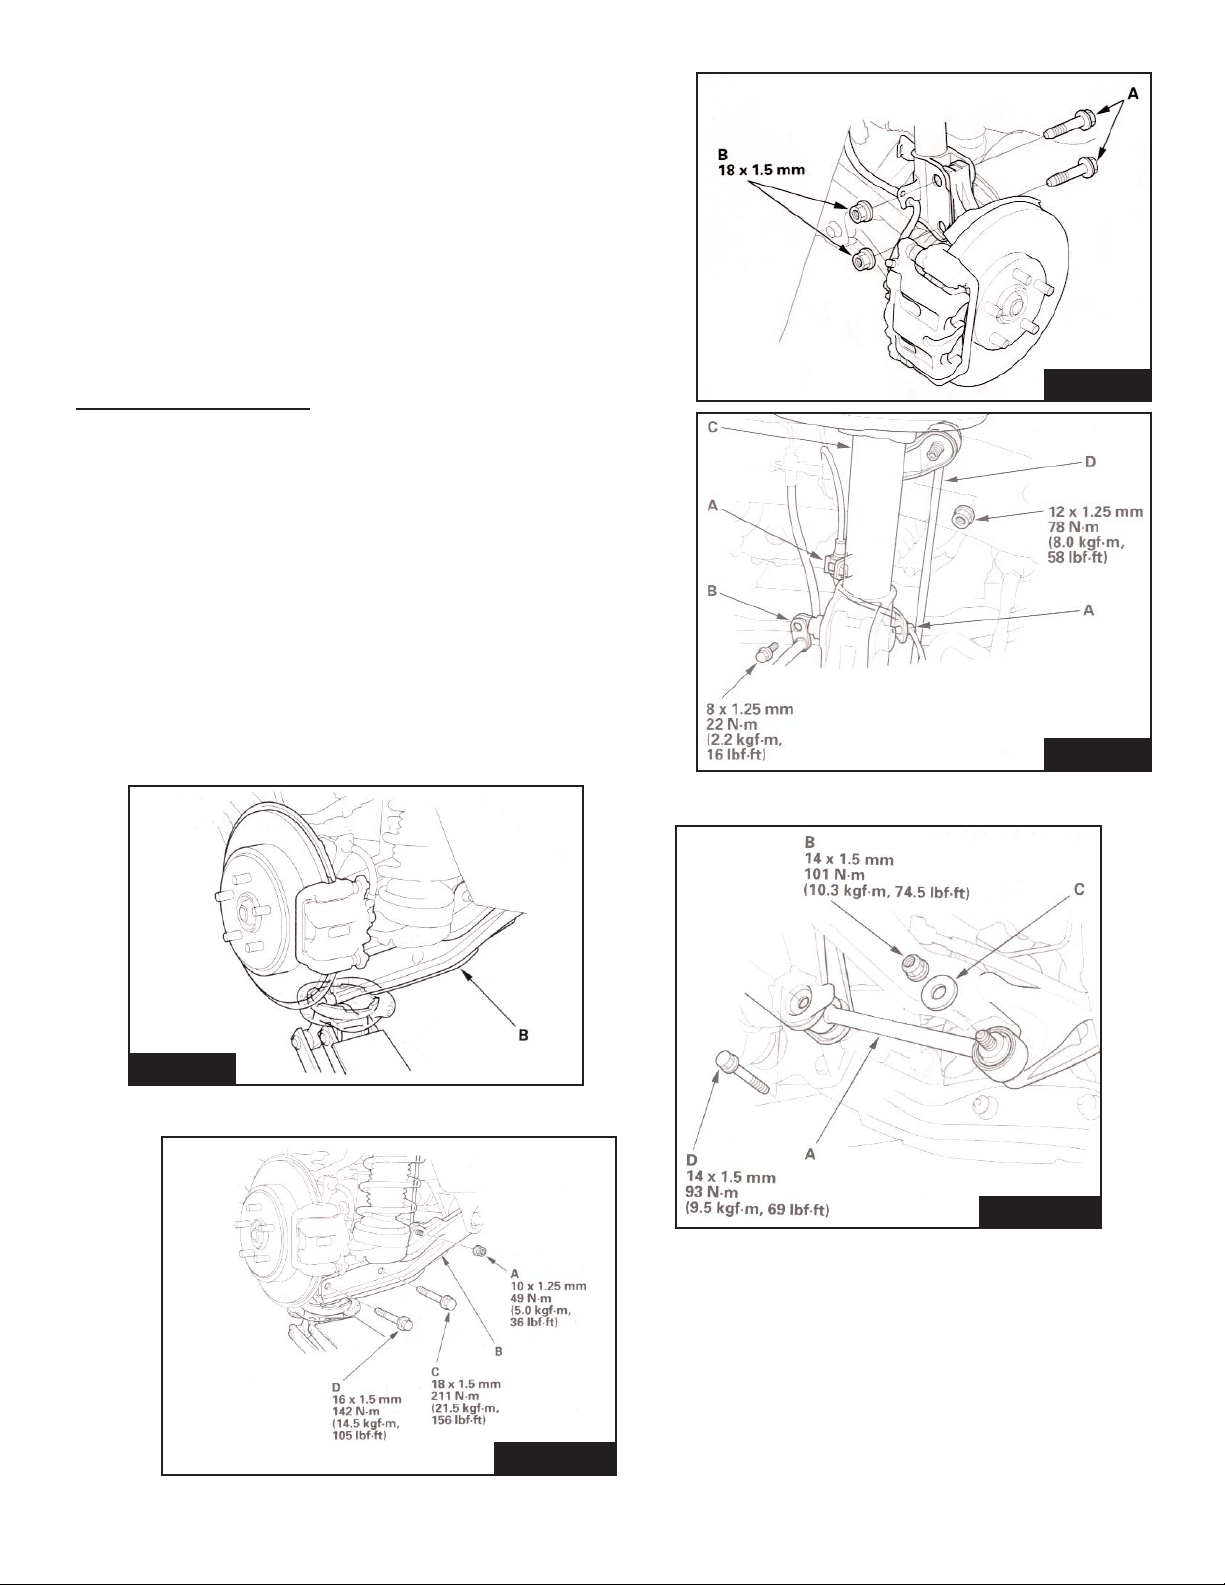
7. Attach damper assembly to the knuckle using the factory
pinch bolts. Do not tighten at this time. (See Image #5)
8. Install the wheel sensor harness clips (A) and the brake line
bracket (B) to the damper (C). (See Image #6)
9. Loosely attach the stabilizer link (D) to the damper. Raise
the front suspension with a floor jack to load the suspension
with the vehicles weight. Tighten the damper pinch bolts
and flange nuts. Torque to 156 Ft. Lbs. Torque upper bolts
in top of upper bracket to 45 Ft. Lbs.
10. Torque the stabilizer link nuts to 58 Ft. Lbs.
11. Install factory service caps and front wheels.
REAR INST
ALLATION:
12. Raise the rear of the vehicle and properly support using
jack stands. Remove the rear wheels.
13. Position a floor jack at the connecting point of the lower
arm (B) and the knuckle. (See Image #7)
14. Remove the locknut (B), washer (C) and flange bolt (D).
(See Image #8).
15. On lower A-Arm, Remove locknut (A), then remove flange
bolt (C). Remove flange bolt (D), and lower the floor jack
gradually. (See Image #9)
Image #5
Image #6
Image #8
Image #7
Image #9
Page 2 of 3
Page 3
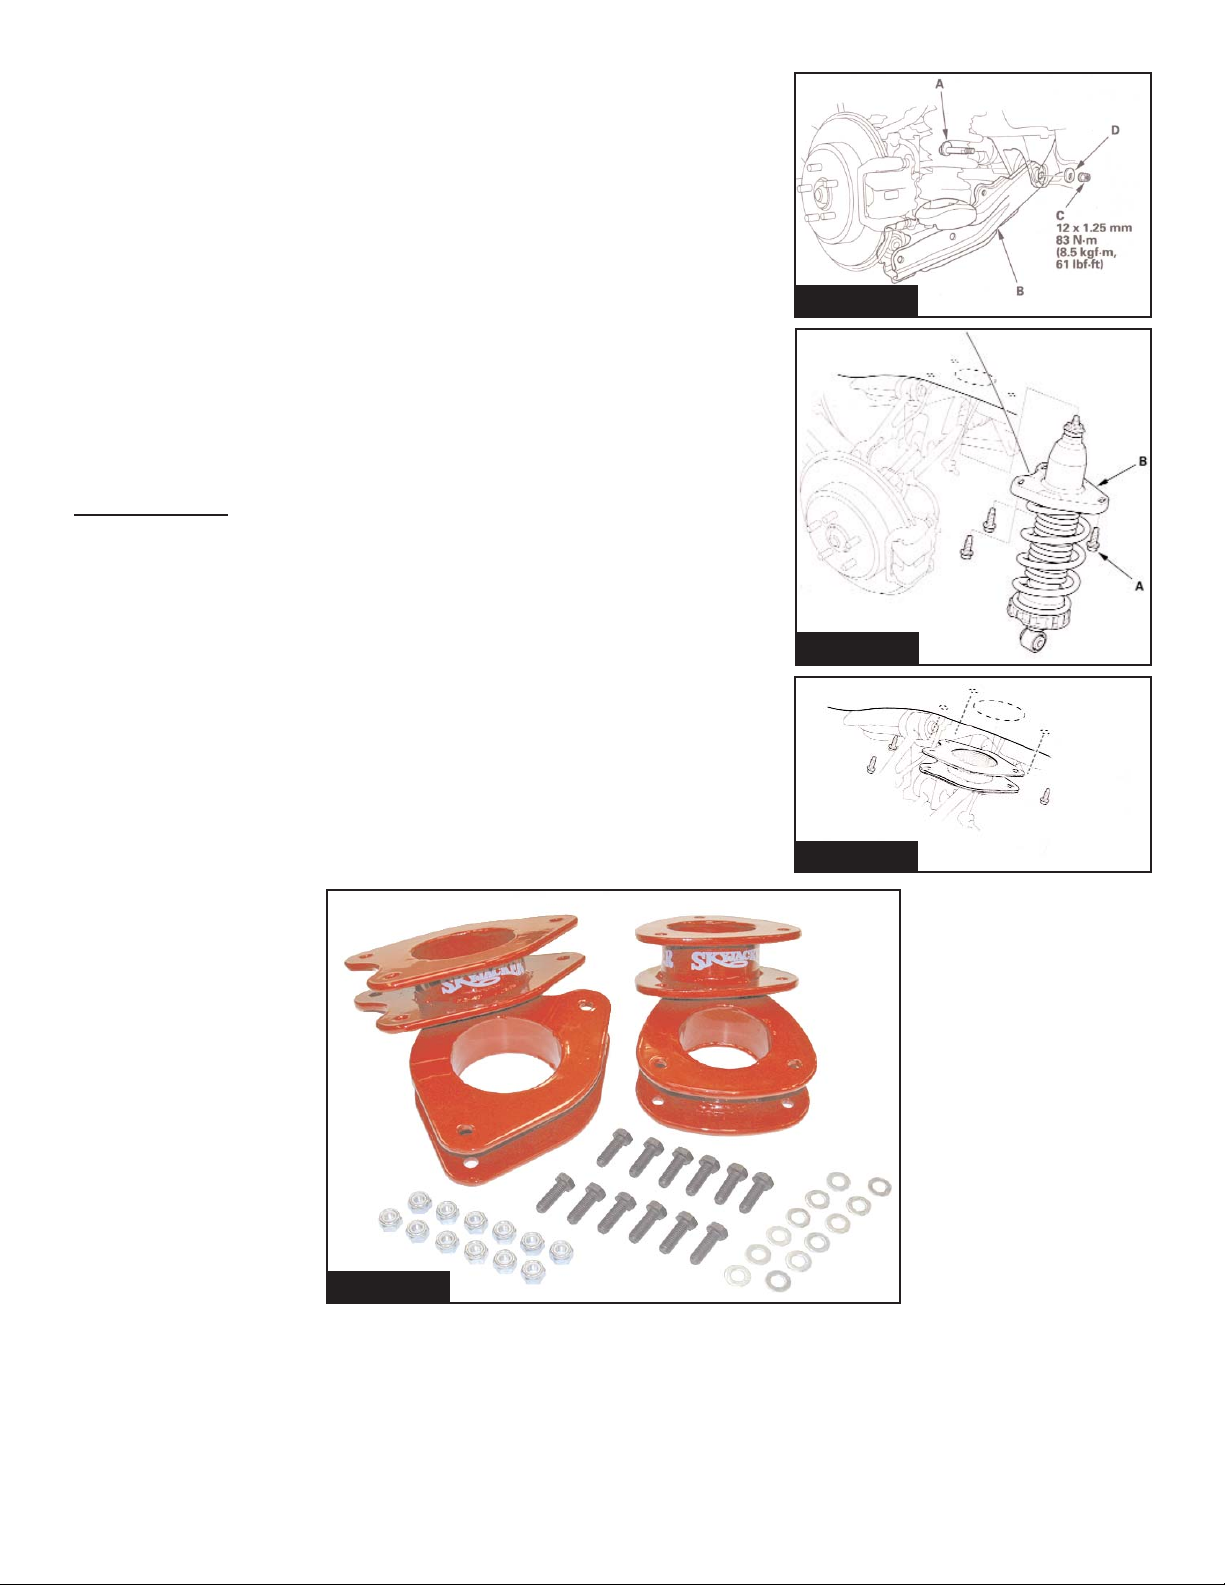
16. Hold adjusting bolt (A) on the lower A-Arm, and remove the self-
locking nut (C) and adjusting cam (D). (See Image #10)
18. Remove adjusting bolt and lower A-Arm down.
19. Remove the three flange bolts (A) from top of the damper, remove
damper assembly (B). (See Image #11)
20. Attach new rear spacer to the factory frame mount using the
10x30mm bolts with a 1.25 thread pitch provided. (See Image #12)
With upper bracket installed, attach damper using the 10x30mm
bolts and nuts supplied. One washer will be used under the nut.
21. Re-Install lower A-Arm assembly in reverse order of removal. Torque
all hardware to factory specs shown in previous images. With all
parts installed, raise lower A-Arm so that vehicles weight is on
damper assembly. Torque the 3 upper damper bolts to 45 Ft. Lbs.
22. With all parts installed and properly tightened, reinstall wheels and
lower vehicle to the ground.
FINAL
NOTES:
• After installation, a qualified alignment center is required to properly
align the vehicle.
• Have Headlights adjusted to proper setting.
• With vehicle on the ground check clearances on all moving parts,
wheels, tires, etc. Be sure to check brake lines for proper length and
any damage.
• Re-Torque all bolts after the first 100 miles and periodically there after.
Seat Belts Save Lives, Please Wear Your Seat Belt!
Image #10
Image #11
Image #12
Page 3 of 3
HR20
 Loading...