

Page 1
99-02 GM K1500 4x4
Multiple Shock Kit
Part # MS966
MS966-UD1 MS966-UPPER DRIVER'S HOOP 1
MS966-UP2 MS966-UPPER PASSENGER HOOP 1
MS966-UB3L UPPER BOTTOM, LEFT, MS966 1
MS966-UB4R UPPER BOTTOM, RIGHT, MS966 1
MS966-LBB2 MS966-LOWER BOTTOM BRACKET 2
38X1TCFB 3/8 X 1 THRD-CUTTER FLG BLT 12
12X3FTB 1/2 X 3 FINE THREAD BOLT 1
142121 ES24 SLEEVE/402087 1.38" 4
12X312FTB 1/2 X 3 1/2 FINE THREAD BLT 9
38X212CTB 3/8 X 2 1/2 CTB 4
12FTN 1/2-20 FINE N/I LOCK NUT 12
38CTN 3/ 8-16 COARSE N/I LOCK NUT 4
12SAEW 1/2 SAE WASHER 22
38SAEW 3/8 SAE WASHER 8
STEM BUSH-SHK STEM BUSHING-SHOCK 4
1. Park the vehicle on flat level ground. Set the emergency brake
and properly block the tires.
2. Raise the front of the vehicle and support the frame rails using
jack stands. Remove the front tires. Remove the front shock
using 9/16 wrench and 21mm socket.
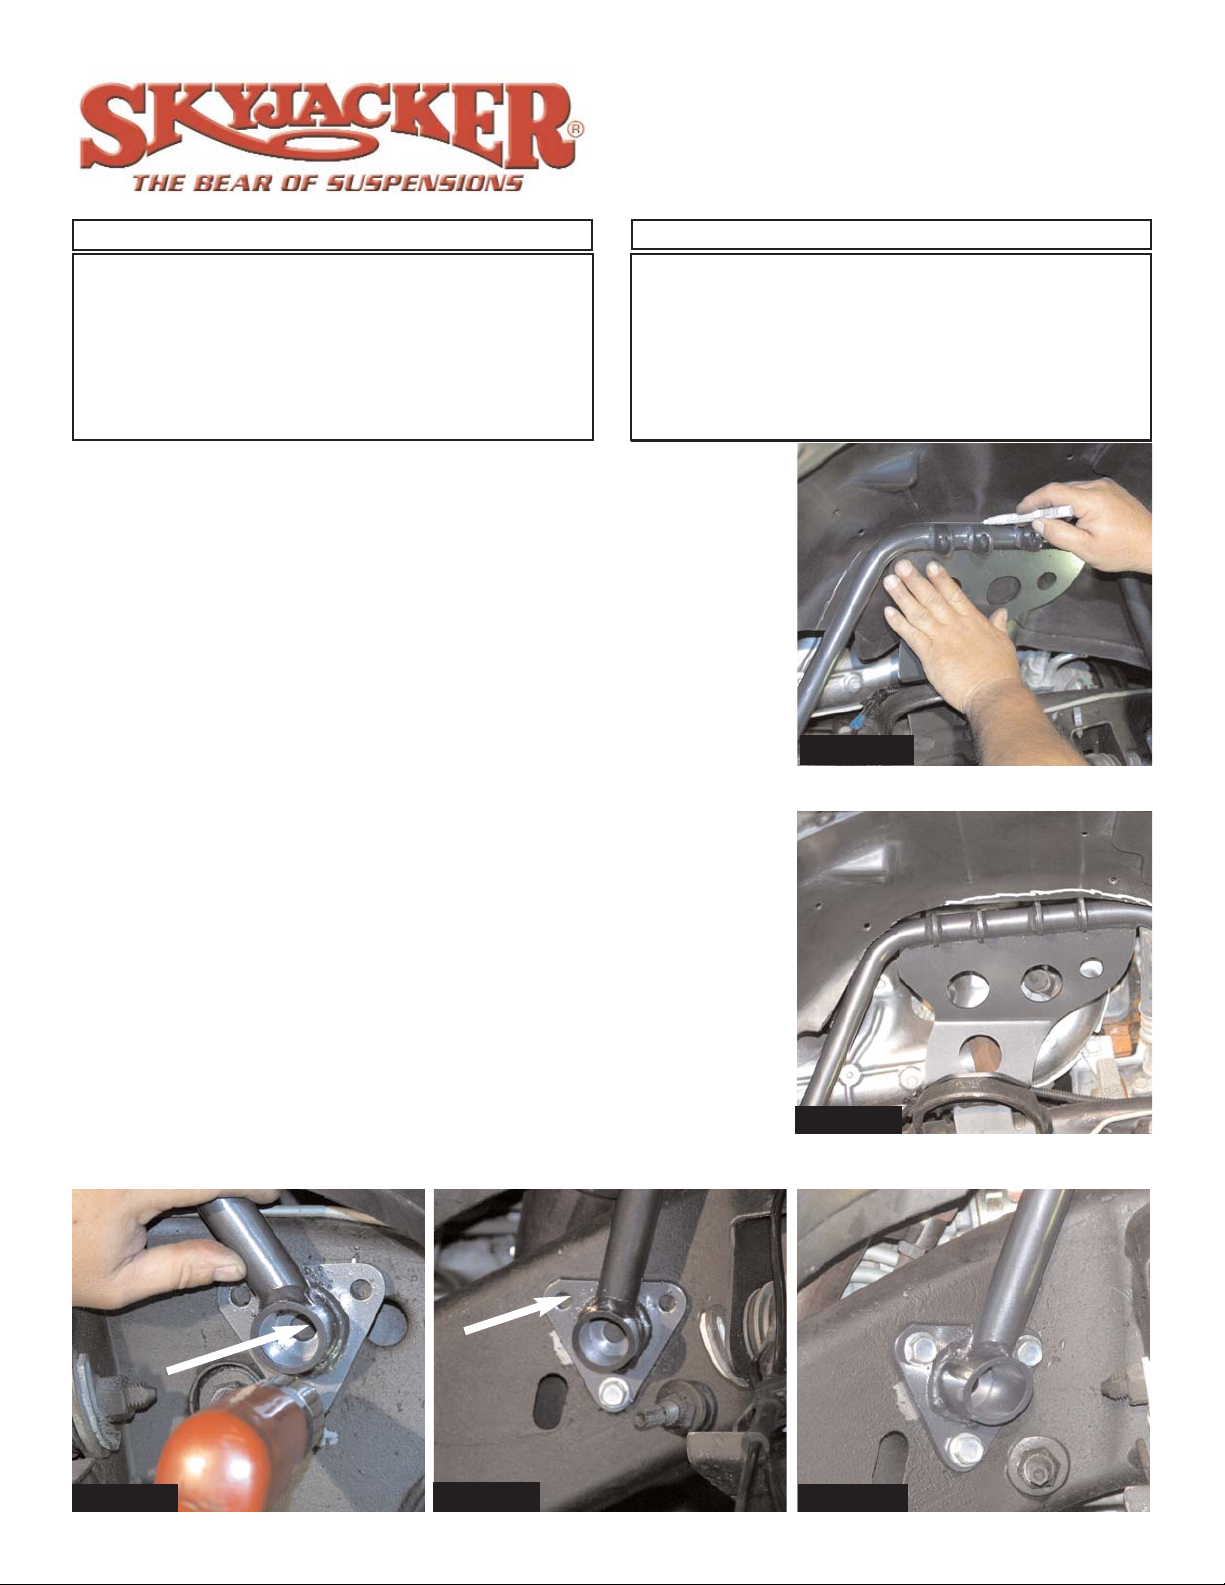
3. Hold the new Skyjacker Multiple shock bracket up and rest it
on top of factory bracket. Using a marker, draw around the
new bracket so that inner fender well can be cut. Remove the
bracket and trim along the line. Be careful not to damage any
wiring or lines located behind the fender well. (See Photo #1
and #2).
On the front bottom bracket, the center hole will line up with
existing hole in the frame (Photo #3). On the rear bottom
bracket, the upper rear hole will line up with existing hole
in the frame. (See Photo #4).
4.Hold the bracket back up on top of the factory bracket. Line the
center hole on the bracket up with the factory shock hole in the
factory bracket. Hold the bottom of the bracket up against the
frame and line up with factory holes in the frame. Mark the bottom hole that is to be drilled. Remove bracket and drill using
5/16 drill bit. Once drilled, install bracket using the 3/8 thread
cutter bolt. Repeat this process in the lower hole on the other
side of bracket. (See Photo #3 and #4).
5. With one bolt installed per side, drill and install the other four
bolts on the lower mounts. (See Photo #5).
Photo #1
Photo #2
Photo #3
Photo #4
Photo #5
I-MS966 8-03 Pg 1
Part # Description Qty.
Part # Description Qty.
Page 2
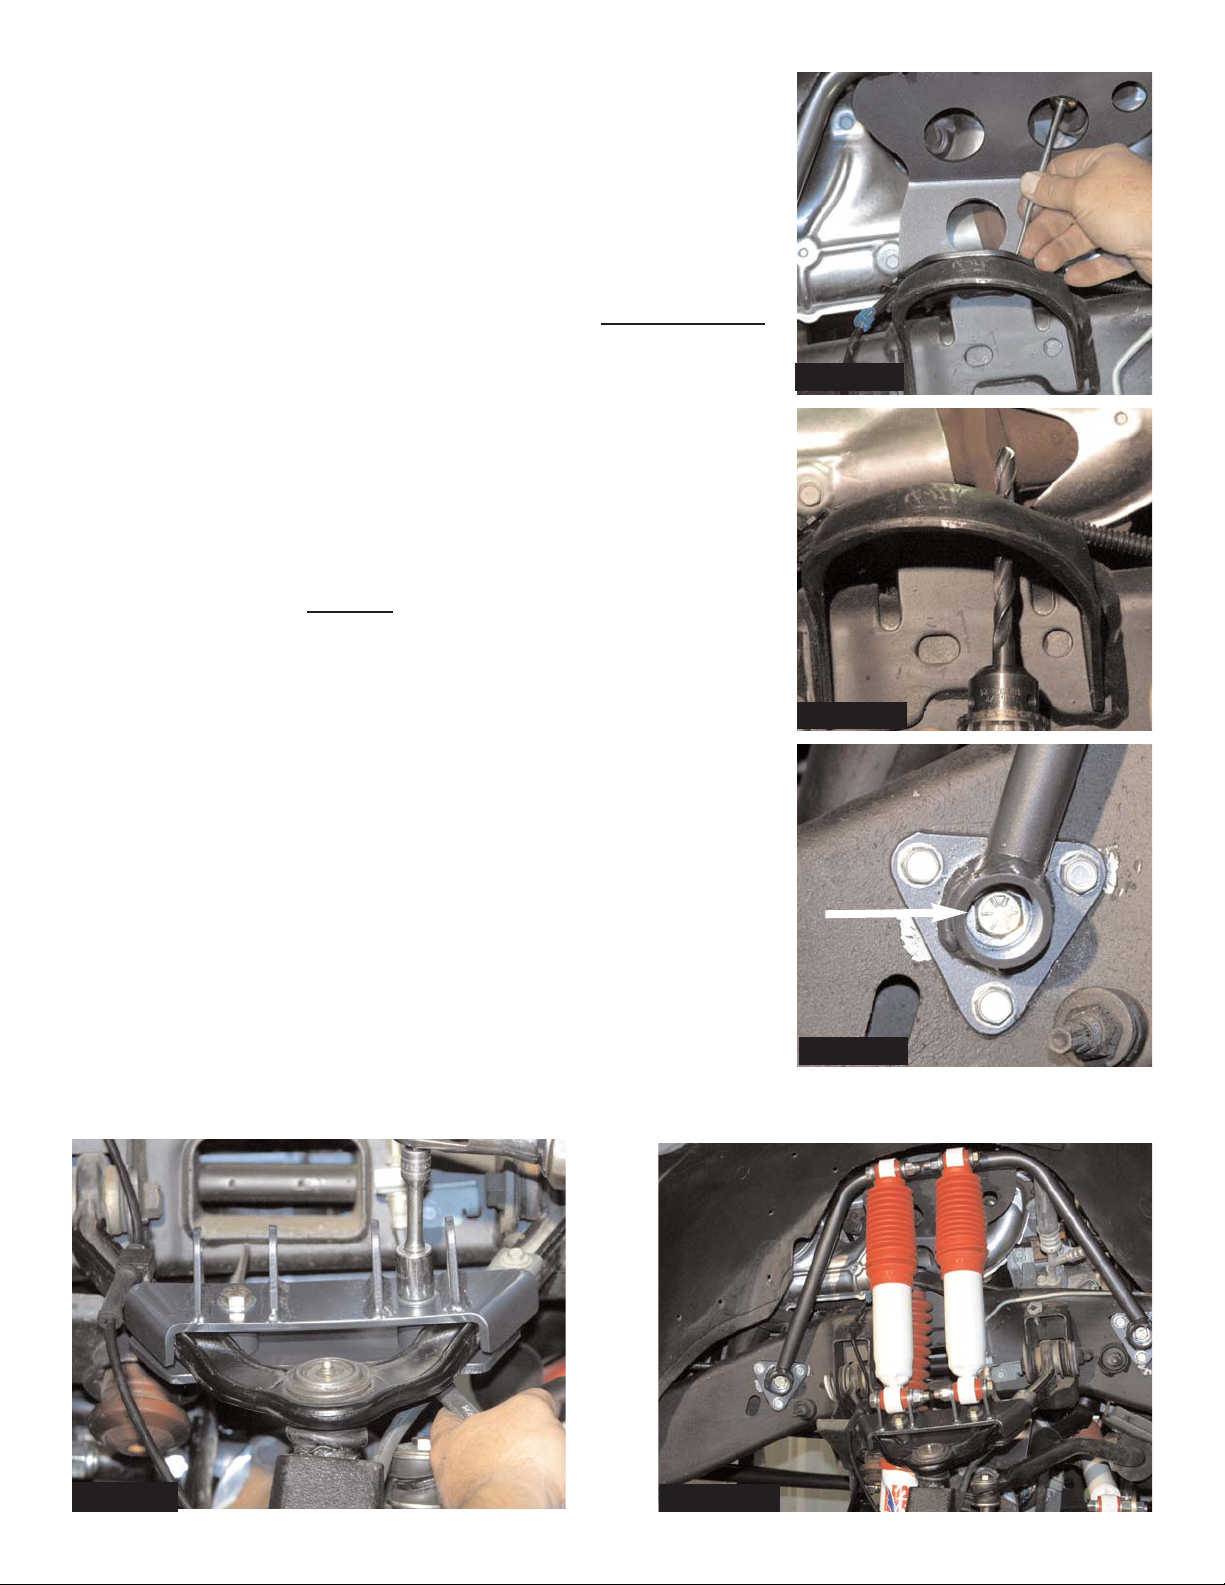
Photo #6
6. With the six outer bottom bolts installed, mark and drill the
upper outside hole to 13/32. It may be easier to drill first with a
1/8 drill bit, then drill with 13/32 from the bottom. (See Photo
#6 and #7).
7. Reinstall the bracket. Install the 3/8 x 1 fine thread bolt in the
upper hole that was just drilled.
8. At this time install the 1/2” bolts into the center of the frame
brackets. Drill the frame hole to accept the 1/2” bolts. Driver
Side: Install the 1/2 x 3” bolts in the front with NO W
ASHERS,
“due to clearance”. Install the 1/2 x 3 1/2” bolts into the rear
with a washer behind the bolts and one behind the nut. (See
Photo #8). Passenger Side: Install 1/2 x 3 1/2” bolts into both
front and back mounts using washers on both sides.
9. Install the lower bracket onto the upper a-arm. Slide the brack-
et up as far as possible. Secure the bottom backing plate to
the bracket using the 7/16 x 2 1/2 fine thread bolts, washers
and self locking nuts. (See Photo #9).
10. If running a triple shock set up, install the factory position
shock at this time, be sure
to install shock using the new
polyurethane stem bushings in the upper mount.
11. Install the new Skyjacker shocks, part # H7080 onto the new
brackets. Attach the shocks to the new brackets using the 1/2
x 3 fine thread bolts, washers, and nuts. (See Photo #10).
• After installation is complete, double check that all nuts
and bolts are tight.
• Check all wiring and hoses for proper clearance.
• Retorque all bolts after the first 100 miles.
Seat Belts Save Lives, Please Wear Your Seat Belt.
Photo #7
Photo #8
Photo #9
Photo #10
Pg 2
 Loading...