

Page 1
D.O.T. BRAKELINE INSTALLATION
-Brakelines may be used on or off-road-
Brake hose installation should be done by a professional mechanic. Read instructions before starting and
follow each step completely. Bleeding the brake system should be done by two professional mechanics.
1. The new hose may or may not be an exact replica
of the factory line, but the fittings are the same unless
other wise stated. (See Below)
2. Remove the stock hose by using a line wrench to
avoid rounding the corners. Be sure all crush
washers are removed fro their mating surfaces and
cleaned. Inspect crush washers and replace if needed.
3. Clean all surfaces on which the brake lines will be
attached to assure a clean fit.
4. Be sure brake line fittings are tight before installing.
We recommend using loc-tite on all fittings for a
secure leak free connection.
5. The amount of lift on the vehicle will determine if the
line is too short or long. The hoses may require
"tiewrapping" to a shock absorber, coil spring, vent
hose or other suitable place, to prevent contact from
moving objects such as tires, wheels, etc. Use the tie
strap included to secure each line as necessary.
BLEEDING THE BRAKE SYSTEM:
A) Fill master cylinder with D.O.T. approved brake
fluid.
B) Pump the brake pedal and hold down. While the
pedal is down, open the bleeder nut to release air out
of the system. Close or tighten nut, then let pedal up
and re-pump. Continue the pumping/bleeding process
until fluid is being excreted out of the bleeder nut
and/or until no air is being expelled.
C) Bleed each line and make sure your master cylinder is full of brake fluid after each bleeding process.
D) The brake pedal will not "pump up" or have excessive down-travel if all the air is out of the system.
F) It is the customer's responsibility to check brake line
for any leaks, abrasion, proper clearances, and brake
line fittings after the first 100 miles and after every
offroad activity.
D.O.T. BRAKELINE INSTALLATION
-Brakelines may be used on or off-road-
Brake hose installation should be done by a professional mechanic. Read instructions before starting and
follow each step completely. Bleeding the brake system should be done by two professional mechanics.
1. The new hose may or may not be an exact replica
of the factory line, but the fittings are the same unless
other wise stated. (See Below)
2. Remove the stock hose by using a line wrench to
avoid rounding the corners. Be sure all crush
washers are removed fro their mating surfaces and
cleaned. Inspect crush washers and replace if needed.
3. Clean all surfaces on which the brake lines will be
attached to assure a clean fit.
4. Be sure brake line fittings are tight before installing.
We recommend using loc-tite on all fittings for a
secure leak free connection.
5. The amount of lift on the vehicle will determine if the
line is too short or long. The hoses may require
"tiewrapping" to a shock absorber, coil spring, vent
hose or other suitable place, to prevent contact from
moving objects such as tires, wheels, etc. Use the tie
strap included to secure each line as necessary.
BLEEDING THE BRAKE SYSTEM:
A) Fill master cylinder with D.O.T. approved brake
fluid.
B) Pump the brake pedal and hold down. While the
pedal is down, open the bleeder nut to release air out
of the system. Close or tighten nut, then let pedal up
and re-pump. Continue the pumping/bleeding process
until fluid is being excreted out of the bleeder nut
and/or until no air is being expelled.
C) Bleed each line and make sure your master cylinder is full of brake fluid after each bleeding process.
D) The brake pedal will not "pump up" or have excessive down-travel if all the air is out of the system.
F) It is the customer's responsibility to check brake line
for any leaks, abrasion, proper clearances, and brake
line fittings after the first 100 miles and after every
offroad activity.
I-FBL/RBL 3-03 I-FBL/RBL 3-03
Page 2
NOTES:
GMC/CHEVY - FRONT: Stock nuts may be re-used on
some models straight axle models. '88-98 Models Use line clamps & self-tapping screws (See Below) &
mount to upper A-arm.
GMC / CHEVY - REAR: Hose is furnished with a 1/4"
bolt and flat washers to accept smaller upper hole.
Use a flat washer on each side of bolt.
EXPLORER/RANGER / BRONCO II - FRONT: The
appropriate place to tie brake line will be to the coil
springs. On 1989-97 models, screw the brass T-Block
into the top of the driver's side line before installing.
Models with Front & Rear ABS brakes do not use the
T-Block on the driver's side.
F150 / BRONCO - FRONT: The appropriate place to
tie brake line is the coil springs.
'78-'79 FORD - FRONT: Remove the front axle mounting bracket from the stock hose and drill out the bracket to accept the bolt and attach the bracket to the new
line.
JEEP YJ / 66-77 BRONCO - FRONT: Included are 2
line clamps (1 per side) to secure the hose to the
upper frame.
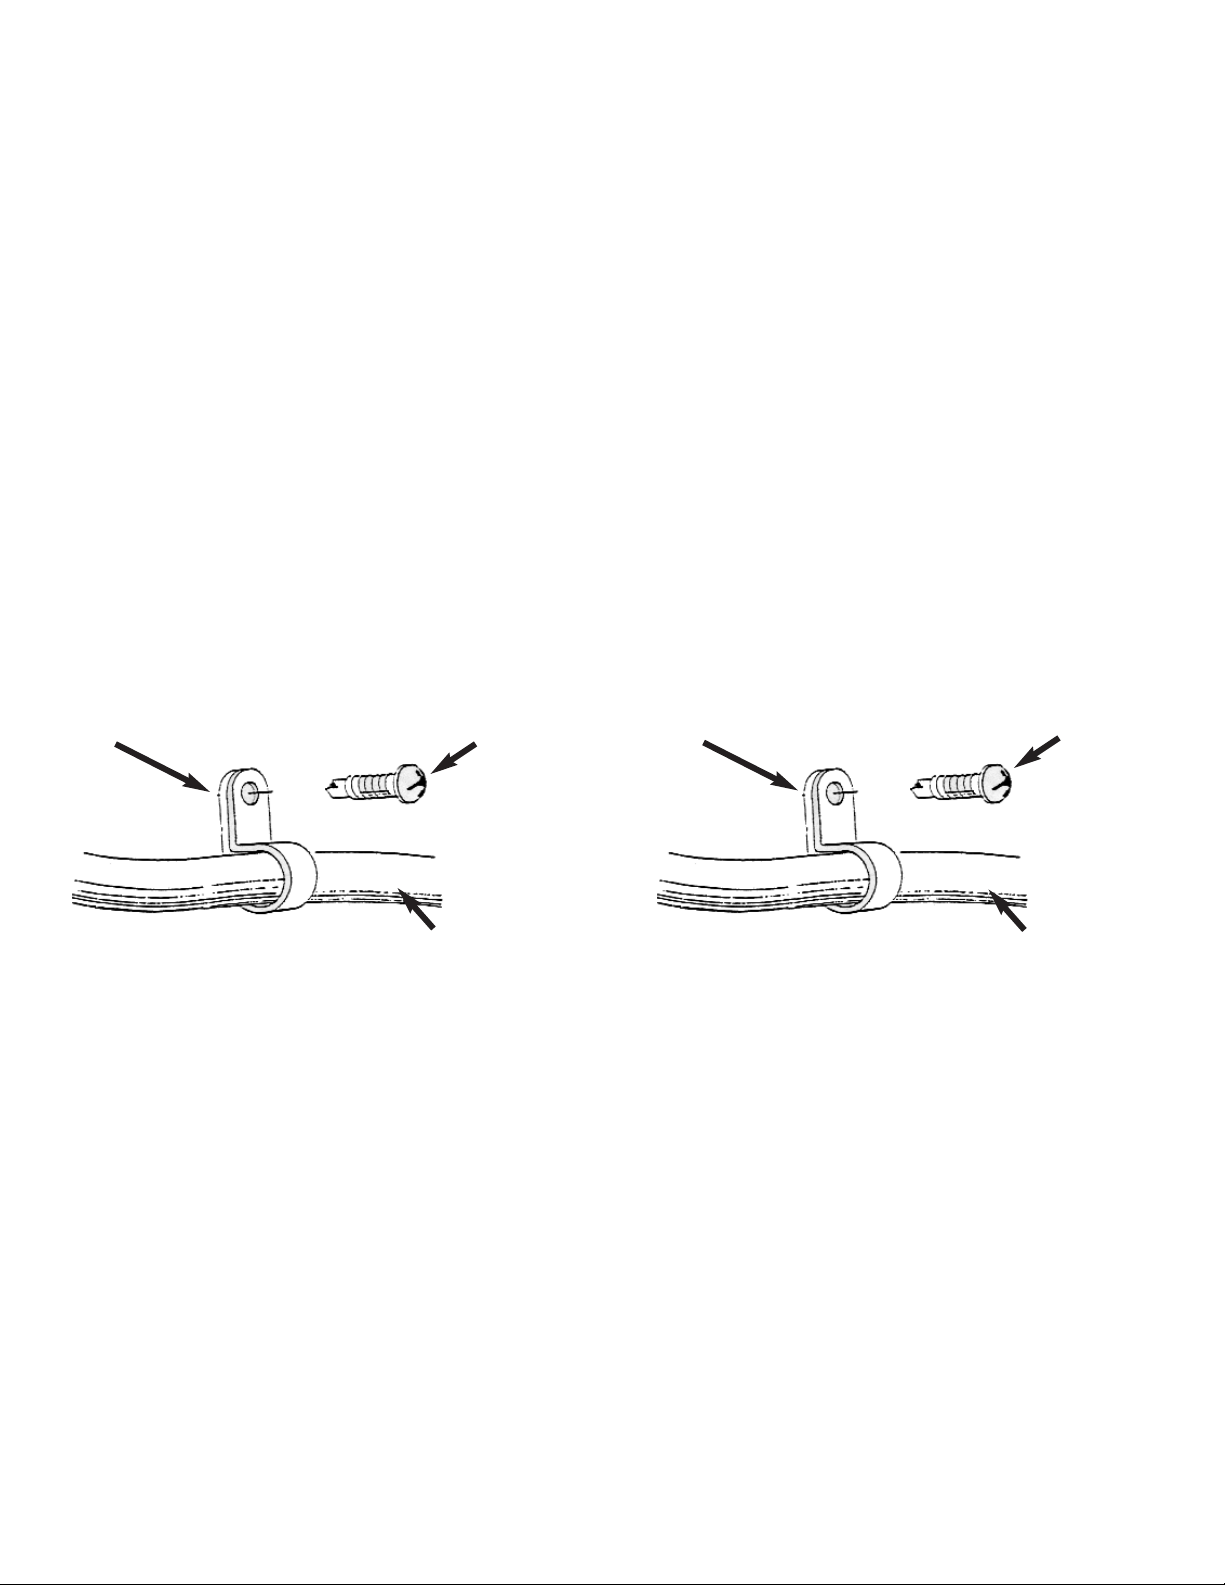
Affix line clamp around new brake line and secure with
the self tapping screw supplied as shown in illustration
below.
NOTES:
GMC/CHEVY - FRONT: Stock nuts may be re-used on
some models straight axle models. '88-98 Models Use line clamps & self-tapping screws (See Below) &
mount to upper A-arm.
GMC / CHEVY - REAR: Hose is furnished with a 1/4"
bolt and flat washers to accept smaller upper hole.
Use a flat washer on each side of bolt.
EXPLORER/RANGER / BRONCO II - FRONT: The
appropriate place to tie brake line will be to the coil
springs. On 1989-97 models, screw the brass T-Block
into the top of the driver's side line before installing.
Models with Front & Rear ABS brakes do not use the
T-Block on the driver's side.
F150 / BRONCO - FRONT: The appropriate place to
tie brake line is the coil springs.
'78-'79 FORD - FRONT: Remove the front axle mounting bracket from the stock hose and drill out the bracket to accept the bolt and attach the bracket to the new
line.
JEEP YJ / 66-77 BRONCO - FRONT: Included are 2
line clamps (1 per side) to secure the hose to the
upper frame.
Affix line clamp around new brake line and secure with
the self tapping screw supplied as shown in illustration
below.
Self Tapping Screw
Self Tapping Screw
Line Clamp
Line Clamp
Brake Line
Brake Line
PRODUCT USE INFORMATION:
Check any nut and/or bolt in the area for tightness.
It is the customers' responsibility to check brake lines
for abrasion, leaks and/or brake line fittings for tightness after the first 100 miles and after every off-road
activity.
Inspection should be done periodically by a professional mechanic to be sure everything is in workable,
functionable order.
Skyjacker will not be responsible for any altered product or any improper installation or use of the product.
Skyjacker does have the option to inspect any and all
lines before any warranty consideration is approved.
If you have any questions concerning the product, call
our main office at (318) 388-0816
PRODUCT USE INFORMATION:
Check any nut and/or bolt in the area for tightness.
It is the customers' responsibility to check brake lines
for abrasion, leaks and/or brake line fittings for tightness after the first 100 miles and after every off-road
activity.
Inspection should be done periodically by a professional mechanic to be sure everything is in workable,
functionable order.
Skyjacker will not be responsible for any altered product or any improper installation or use of the product.
Skyjacker does have the option to inspect any and all
lines before any warranty consideration is approved.
If you have any questions concerning the product, call
our main office at (318) 388-0816
 Loading...