

Page 1
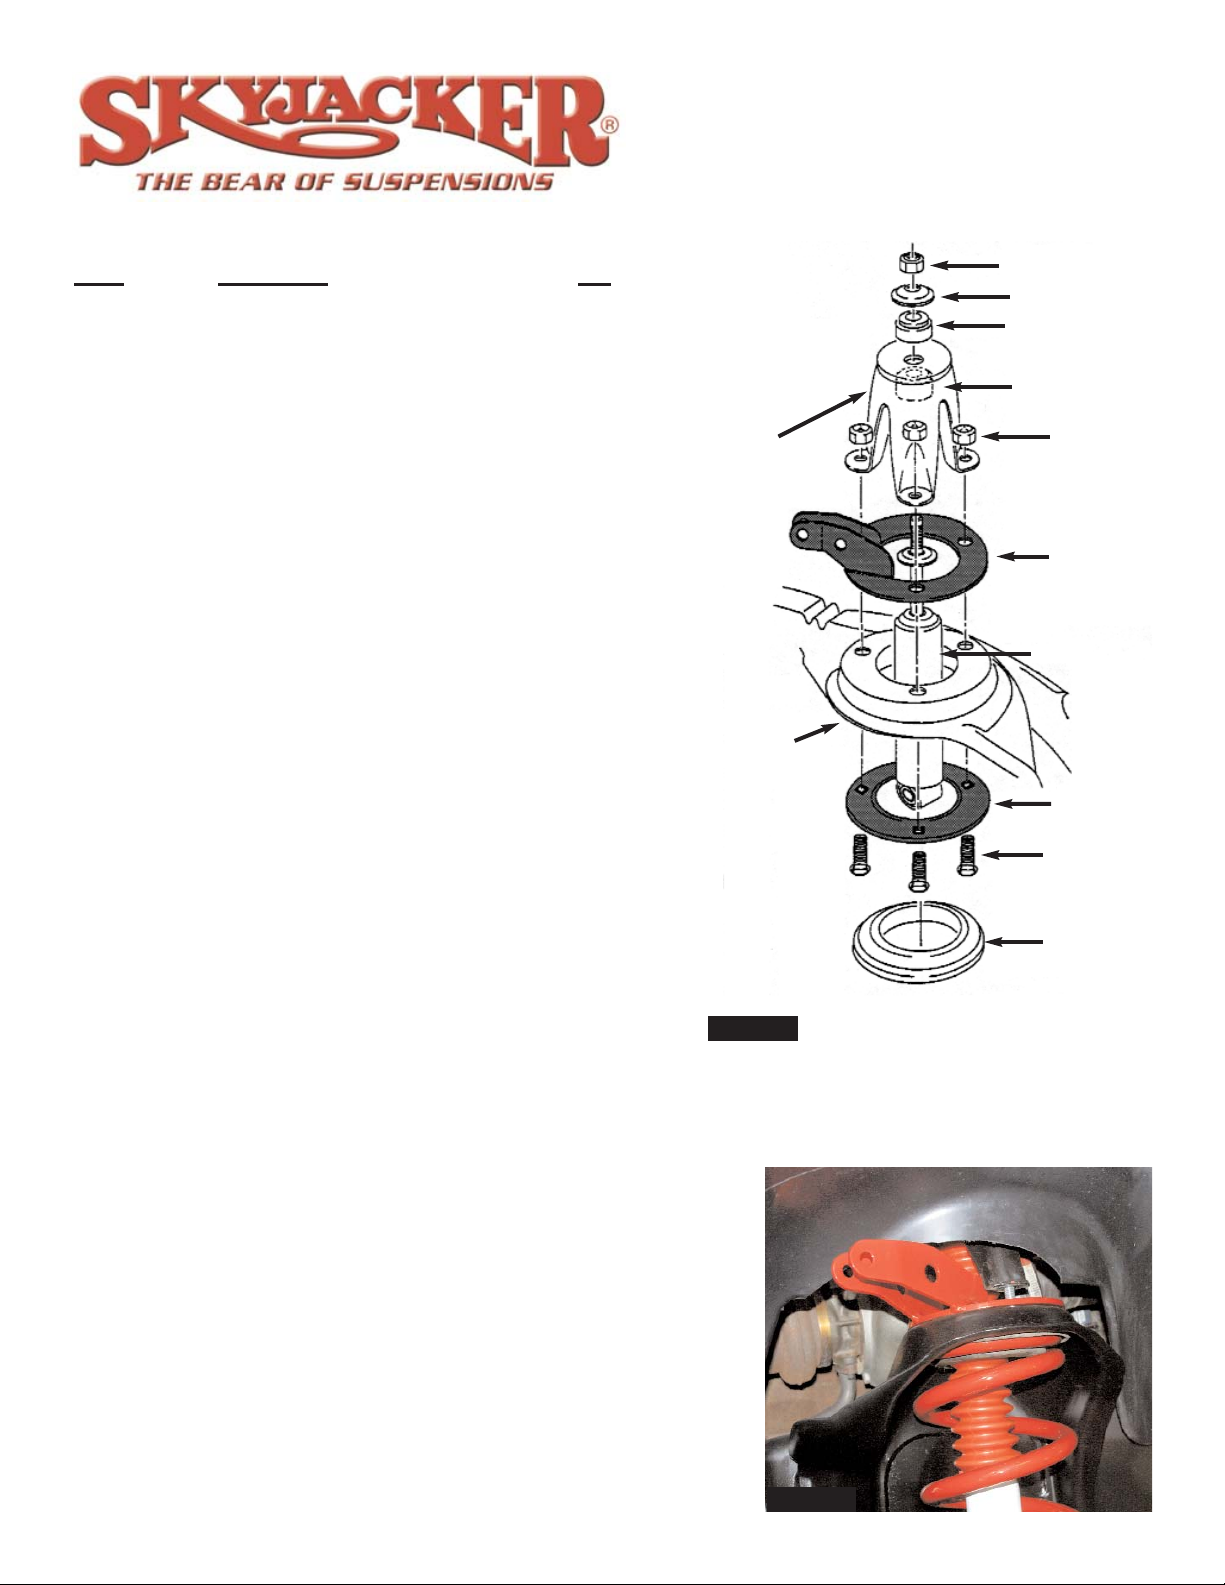
1. Secure and properly block the tires of vehicle on a level concrete or asphalt surface. Open hood, remove the upper
shock nuts and retainers, remove the 3 nuts on the upper
shock tower brackets and remove brackets.
2. Jack up front of vehicle and install jack stands under frame
behind the lower link rear brackets. Remove tires. Lower
front axle down until coil springs become loose. Remove
coils, rubber insulator and 3-bolt tower ring.
3. Start new 3-bolt tower ring (with square holes using 7/16" carriage head bolts supplied) up into position. Start bolts one at
a time (you must be sure the bolt heads are aligned in the
square holes) using 7/16 "standard" nuts to hold in place (do
not use self locking nuts, they will be used later). Note:
There will be a 4th mounting hole (located betwwen the shock mounts) that must be drilled. With
tower ring installed, mark and drill the additional hole using a 7/16” drill bit. Install suppled 7/16 x 1
1/2” carriage bolt, washers, and nut. Tighten nuts and repeat on other side. (See Photo #1)
4. Start coil springs at bottom first, place rubber isolator on top of coil and then start coil into position in the
upper tower, on both sides. Align coil springs so that the bottom
end of the coils are turned to the inside - center of the axle. Lift up
on jack under differential until coil springs are securely in place,
and keep a load on them to hold in place.
5. Install new OEM position shock located inside coil spring. Install
shock down through center of coil spring tower and tighten lower
shock bolt. Now remove 7/16" standard nuts that were installed on
3-bolt tower ring in step 3. Install new upper dual shock bracket
over 3 bolts of tower ring, then the original upper shock bracket
(See Photo #2) There is a left and a right bracket - the attached
shock mounts should curve rearward on each side. Install the 7/16"
self locking nuts and tighten. Install shock grommets, retainer
washers, nuts and tighten.
2003 - 2004 Dodge 3/4, and 1 Ton
Dual Shock Kit
Installation Instructions
Part# DS393
Bill Of Material
Part# Description Qty
DS393-UL UPPER LEFT SHOCK BRACKET 1
DS393-UR UPPER RIGHT SHOCK BRACKET 1
DS393-BL BOTTOM LEFT SHOCK BRACKET 1
DS393-BR BOTTOM RIGHT SHOCK BRACKET 1
DS390-TR UPPER TOWER RING 2
916X5FTB 9/16 X 5 FINE THREAD BOLT 2
716X112FTB 7/16 X 1 1/2 FINE THREAD BOLT 4
12X212CTB 1/2 X 2 1/2 COARSE THREAD BOLT 4
716X112CARB 7/16 X 1 1/2 CARRIAGE BOLT 8
716CTN 7/16 COARSE THREAD LOCK NUT 8
716CTSN 7/16 COARSE THREAD NUT 6
916FTN 9/16-18 NYLON INSERT LOCKNUT 2
716FTN 7/16-20 FINE N/I LOCK NUT 4
916SAEW 9/16 SAE WASHERS 4
12SAEW 1/2 SAE WASHER 8
716SAEW 7/16 SAE WASHER 10
LS20DU ANTI-CRUSH SLEEVE 2
Shock Nut
Grommet
Grommet
7/16 nuts
7/16 Carriage
Bolts
Spring Tower
Original
Rubber
Isolator
Original
Upper Shock
Bracket
Upper dual
shock bracket
3-Bolt
Tower Ring
Retainer
Shock
Photo #1
I-DS393 1-05 Pg 1
Photo #2
Page 2
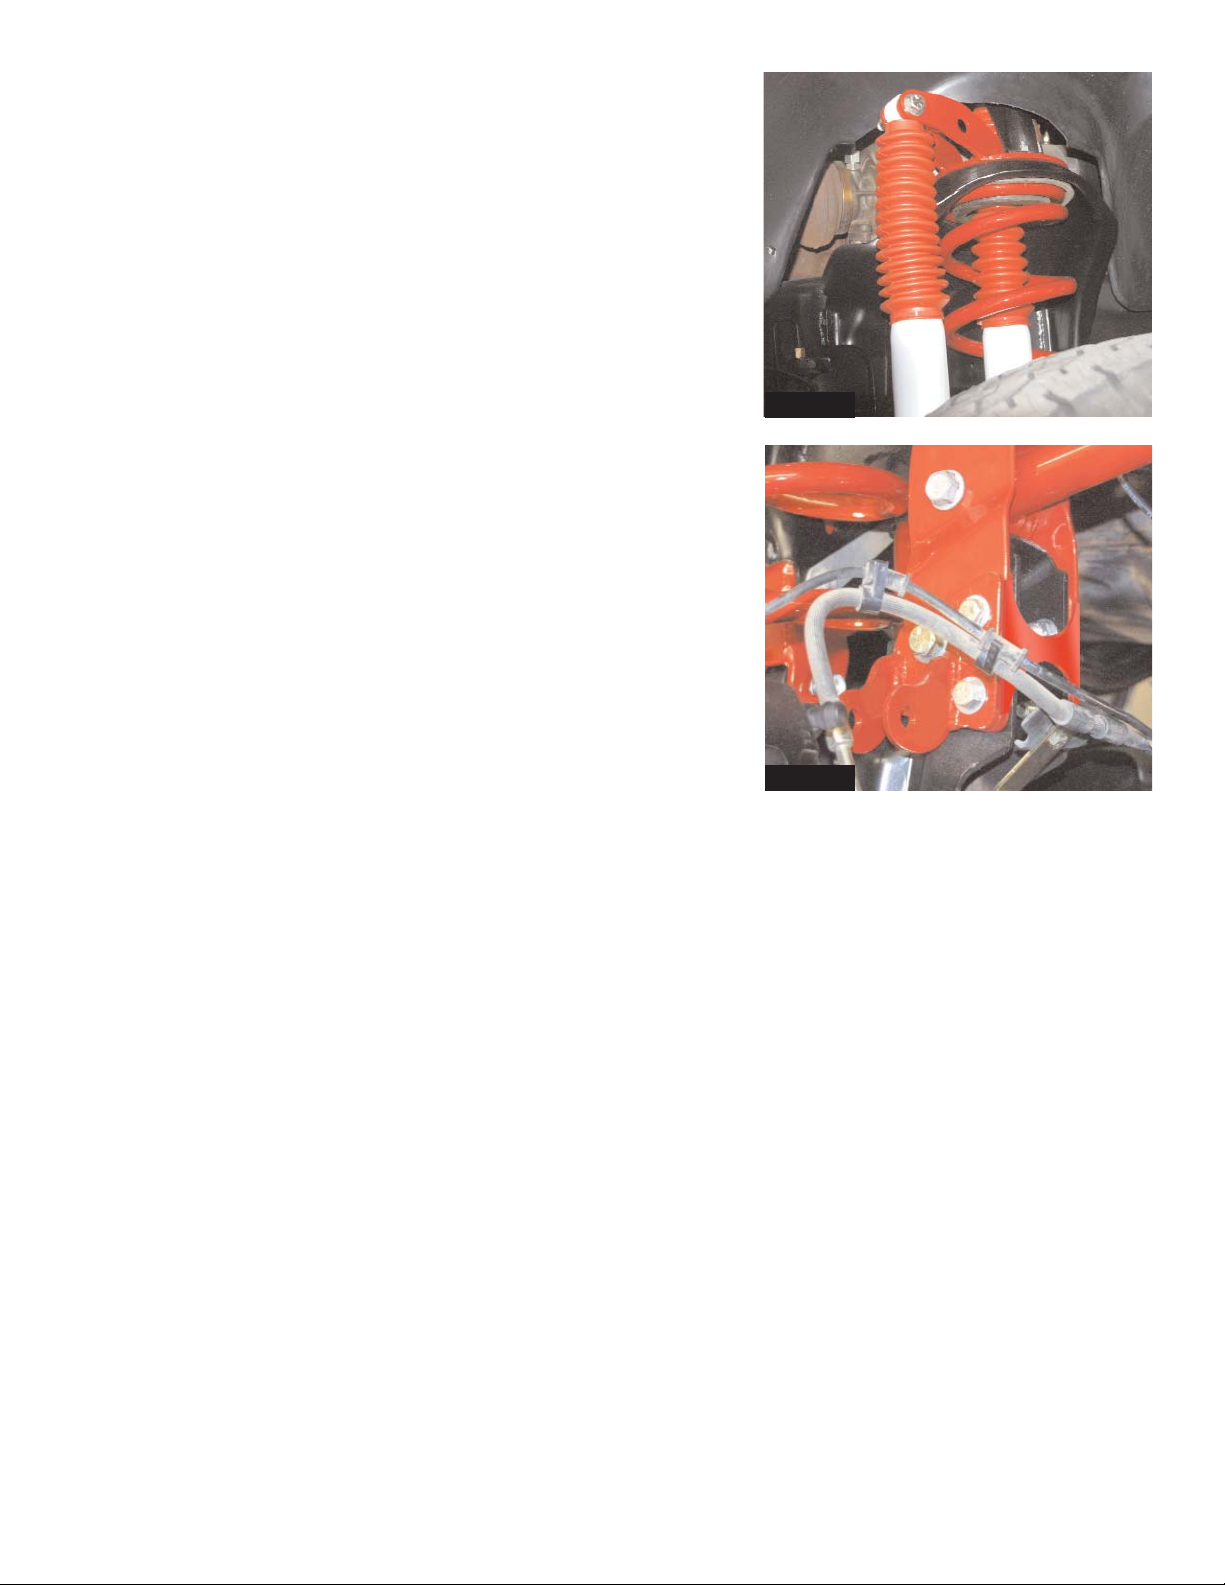
6. Attach new add on shock to upper bracket using 1/2 x 2 1/2”
coarse thread bolts, washers, and nut. (See Photo #3)
Vehicles with Skyjacker 5” Suspension lift continue onto step #7.
All others Skip to step #8.
7. If installing a Skyjacker 5” suspension lift, lower bracket will attach
to original upper control arm position, and the two 7/16 x 1 1/2”
mounting bolts that were installed when installing the lift kit. (See
Photo #4). Be sure to use the anti-crush sleeve with the bolt at the
OEM control arm position. The anti-crush sleeve mounts inside the
factory bracket. (Skip to Step #10)
8. If installing the dual shock kit on a vehicle with less than 5” lift,
remove the upper control arm bolt from the factory mount on the
axle. Only do one side at a time so that the axle does not move.
Attach the new lower bracket to that position using the 9/16 x 5”
fine thread bolts washers and nuts. Once bracket is installed, now
attach shock using the 1/2 x 2 1/2” coarse thread bolts, washers,
and nut. With shock attached, now mark the two rearward holes
that are to be drilled. Once marked, remove the bracket and shock.
Drill the new mounting locations using a 15/32” drill bit. Note:
Bracket will mount as shown in Photo #4 with the exception of the
upper arm relocation bracket.
9. Once drilled, reinstall bracket. Mount the bracket through the upper
control arm mount and through upper control arm using the 9/16 x
5” fine thread bolts washers and nuts. At the two rearward holes
install the 7/16 x 1 1/2” fine thread bolts washers and nuts.
Important Note: On Vehicles without a Skyjacker 5” Suspension Lift, the 7/16” bolts will have to
be installed so that they point toward the outside of the vehicle to allow for clearance of the factory control arm.
10. Once bracket has been mounted and securely tightened, attach the bottom of the add on shock to the
new lower bracket using 1/2 x 2 1/2” coarse thread bolts, washers, and nut.
FINAL NOTES:
• After installation is complete, double check that all nuts and bolts are tight.
• With the vehicle on the floor, cycle steering lock to lock and inspect suspension, tires and brakeline systems
for proper operation, tightness and adequate clearance.
• Retighten all bolts after the first 100 miles.
Pg 2
Photo #3
Photo #4
 Loading...