

Page 1
Instructions f
or PITMAN ARM:
1. Remove cotter pin and loosen nut on drag link at the end by the pitman. Now remove the nut
and lower drag link down out of the way.
2. Unbolt the nut holding the pitman arm on the output shaft of the steering sector. Using a pitman
arm puller, remove the original arm and replace with the new drop pitman arm. Install the original lock washer and nut, then tighten.
3. Reinstall the drag link in the end of pitman arm. Put the nut back in the drag link stud end, then
tighten securely and be sure to reinstall the cotter pin.
4. Recheck installation and tighten the nuts after driving approximately 50 miles, again after the
next 100 miles. Continue to periodically check the nuts on the pitman arm and drag link.
NOTE: Before driving, double check all nuts that have been loosened to be sure that they are tight
and that the cotter pins are installed.
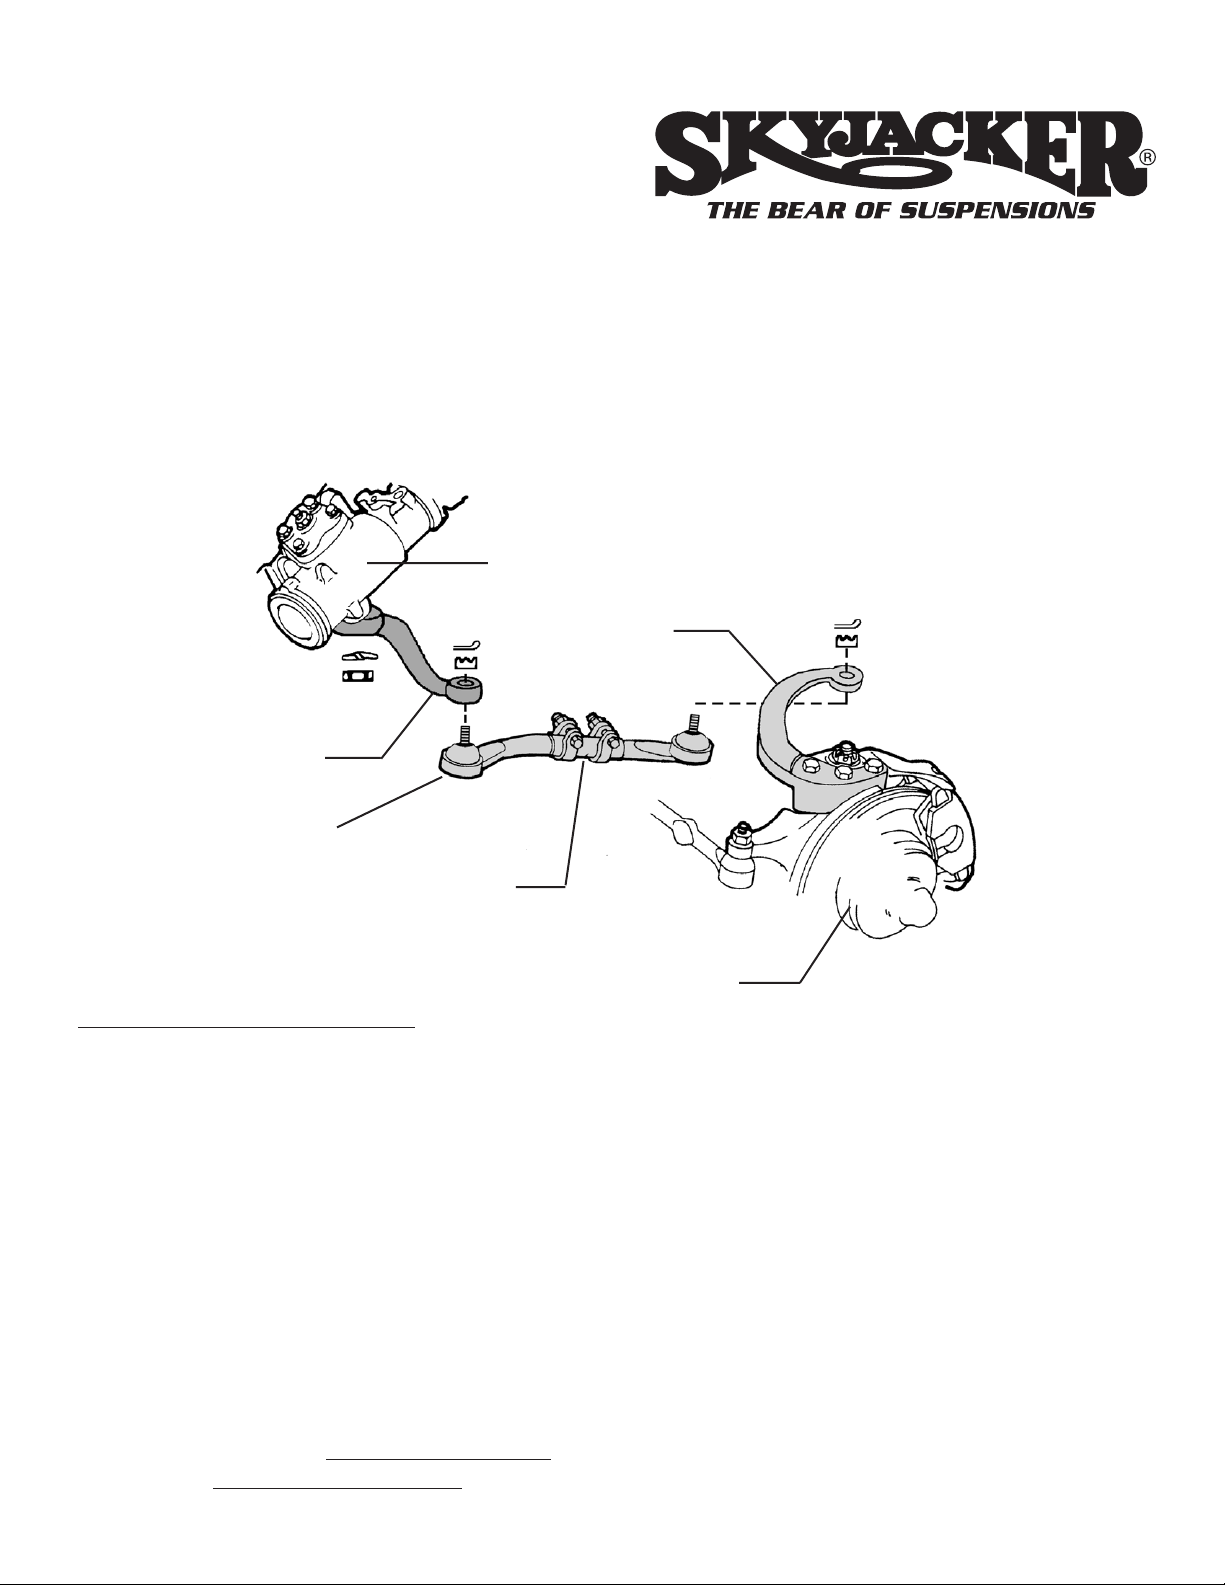
Read these instructions thoroughly and completely before beginning the installation process. Refer
to the diagram below to aid in the removal and installation of these products. If you are unsure of
which product is needed or recommended for your vehicle or you have any questions, call
SKYJACKER’s technical assistance line at 318-388-0816.
INSTALLATION INSTRUCTIONS
FOR
Pitman Arms: DA20,DA25,DA40,DA45
Steering Arms: DA60,DA65
Adjustable Drag Link: DL10
Steering Sector
Drop Pitman Arm
Adjustable Drag Link
Steering Knuckle
Steering Arm
Turn Buckle
NOTE: The original factory drag
link does not have a turn buckle.
Page 2

Instructions for STEERING ARM:
1. Remove the cotter pin and loosen nut on drag link at the end by the steering arm. Now remove
nut and swing drag link out of the way. (It may be more helpful to place a jack stand under the driver’s side frame rail and remove the driver’s side tire.)
2. Loosen and remove the three nuts that hold the steering arm down onto the steering knuckle. To
loosen the split-locks (cone washers) around the three studs, use a hammer and strike the steering arm at the end where the drag link was connected. Now unscrew and remove the split-locks.
3. Remove the stock steering arm and replace with the new arm. Place the split-locks into the holes
in arm, and install new bolts (furnished with arm). Tighten the bolts to 129 ft.lbs.
4. Reattach the drag link in the end of steering arm. (On arm #DA60, the drag link connects to the
steering arm from the bottom of hole as original factory. On arm #DA65, an adjustable drag link is
required, and it connects to steering arm from the top of hole.) Tighten nut securely, and be sure
to install cotter pin.
5. Recheck installation and tighten all nuts and bolts after driving approximately 50 miles, again
after the next 100 miles. Continue to periodically check the nuts on the pitman arm, drag link and
steering arm.
NOTE: Before driving, double check all nuts that have been loosened to be sure that they are tight
and that the cotter pins are installed.
Instructions f
or ADJUSTABLE DRAG LINK:
1. Block the rear wheels, and raise front of vehicle with jack then placing jack stands underneath
each end of front axle. Ease vehicle down on the jack stands.
2. Remove the cotter pin and loosen nut on each end of the drag link where it connects to the pitman arm and the steering arm. Now remove the nuts and remove original drag link.
3. While counting the number of rotations or revolutions each way, turn the steering wheel all the
way to the left then turn all the way back to the right. Now turn the steering wheel back to the left
and stop halfway so that the wheel is centered. Now the left and right turning radius should be
even and the steering wheel cross bars should be in their correct positions.
4. Be sure that the tires are pointed straight ahead. Everything is properly positioned to determine
the needed the drag link length or adjustment. Loosen the clamps on the drag link’s turnbuckle
and adjust each end to acquire the needed length. Now retighten the turnbuckle clamps, attach
drag link to the pitman arm and steering arm, tighten the nuts, and install cotter pins.
5. Recheck installation and tighten all nuts and bolts after driving approximately 50 miles, and then
check periodically.
NOTE: Before driving, double check all nuts that have been loosened to be sure that they are tight
and that the cotter pins are installed.
 Loading...