

Page 1
#7217 Steering Stabilizer
INSTALLATION INSTRUCTIONS
#I-7217 (Rev. 1/02)
ITEM PART # DESCRIPTION QTY.
7000WS STEERING DAMPER, WHITE 2
B10R RED BOOT 2
BTIE BOOT TIE STRAP 2
7217-MB MAIN BRACKET FOR FRAME 1
7217-FP FLAT PLATE BRACKET FOR DRAG LINK 1
HB-7217W HARDWARE BAG: 1
CONSISTING OF:
12X212FTB 1/2 X 2
1
⁄2” FINE THREAD BOLT 1
12X3FTB 1/2 X 3” FINE THREAD BOLT 2
12X4FTB 1/2 X 4” FINE THREAD BOLT 1
12FTN 1/2” FINE THREAD NUT 4
12SAEW 1/2” SAE WASHER (SMALL WASHER) 6
12USSW 1/2” USS WASHER (LARGE WASHER) 4
516X114X134 5/16 X 1
1
⁄4 X 1 3⁄4” U-BOLT, ROUND 1
516SAEW 5/16” SAE WASHER 2
516FTN 5/16” FINE THREAD NUT 2
54314 141509 STEEL SLEEVE 2
81004 TAPERED SLEEVE 1
P932 140629 STABILIZER STUD PAK 2
HOURGLASS 5/8 SHOCK EVE BUSHING 4
PARTS BREAKDOWN
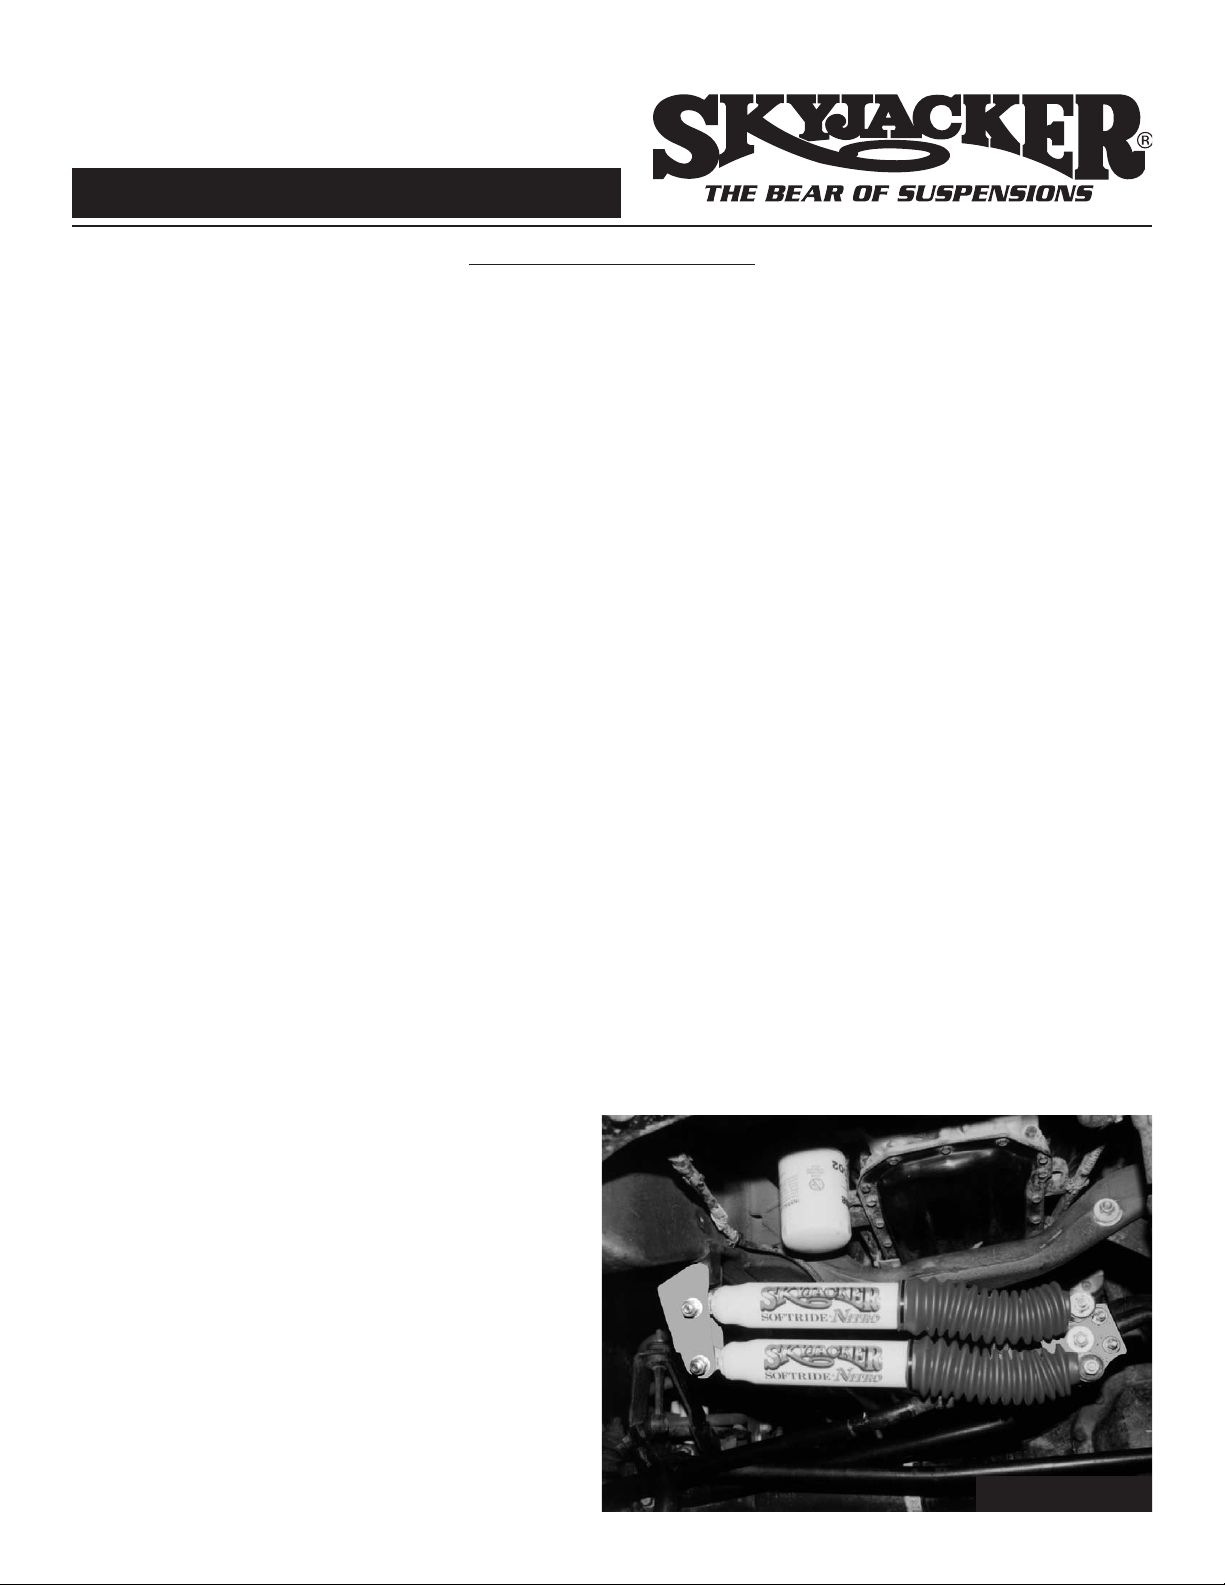
NOTES: Refer to PHOTO #1 during installation. The photo shows an application
with SKYJACKER’s
®
5” suspension system using a drop pitman arm (drag link is
installed to the bottom of pitman arm); however, this dual steering stabilizer kit will also
work with the original pitman arm, and a lift kit is not required.
1. To install new dual steering stabilizer insert
a poly bushing into each eye of both
stabilizers, and insert a steel sleeve only in
the eyes connected to the body (not on the
end of the shaft). Position poly boot onto
stabilizers and secure with tie straps
provided.
2. Remove original steering damper from
vehicle. Install main bracket to original frame
mount on passenger side by inserting a
1
⁄2” X 3” bolt with a small 1⁄2” washer through
original mount, new bracket and stabilizer
using another small
1
⁄2” washer with self-
locking nut and tighten.
Application: 94-97 4WD Dodge Ram
PHOTO #1
1.
Page 2
3. Be sure bracket is perpendicular to the ground with tab flush
against side of frame. Now drill a
1
⁄2” hole through frame and
insert
1
⁄2” X 4” bolt with a large 1⁄2” washer with self-locking nut
and tighten.
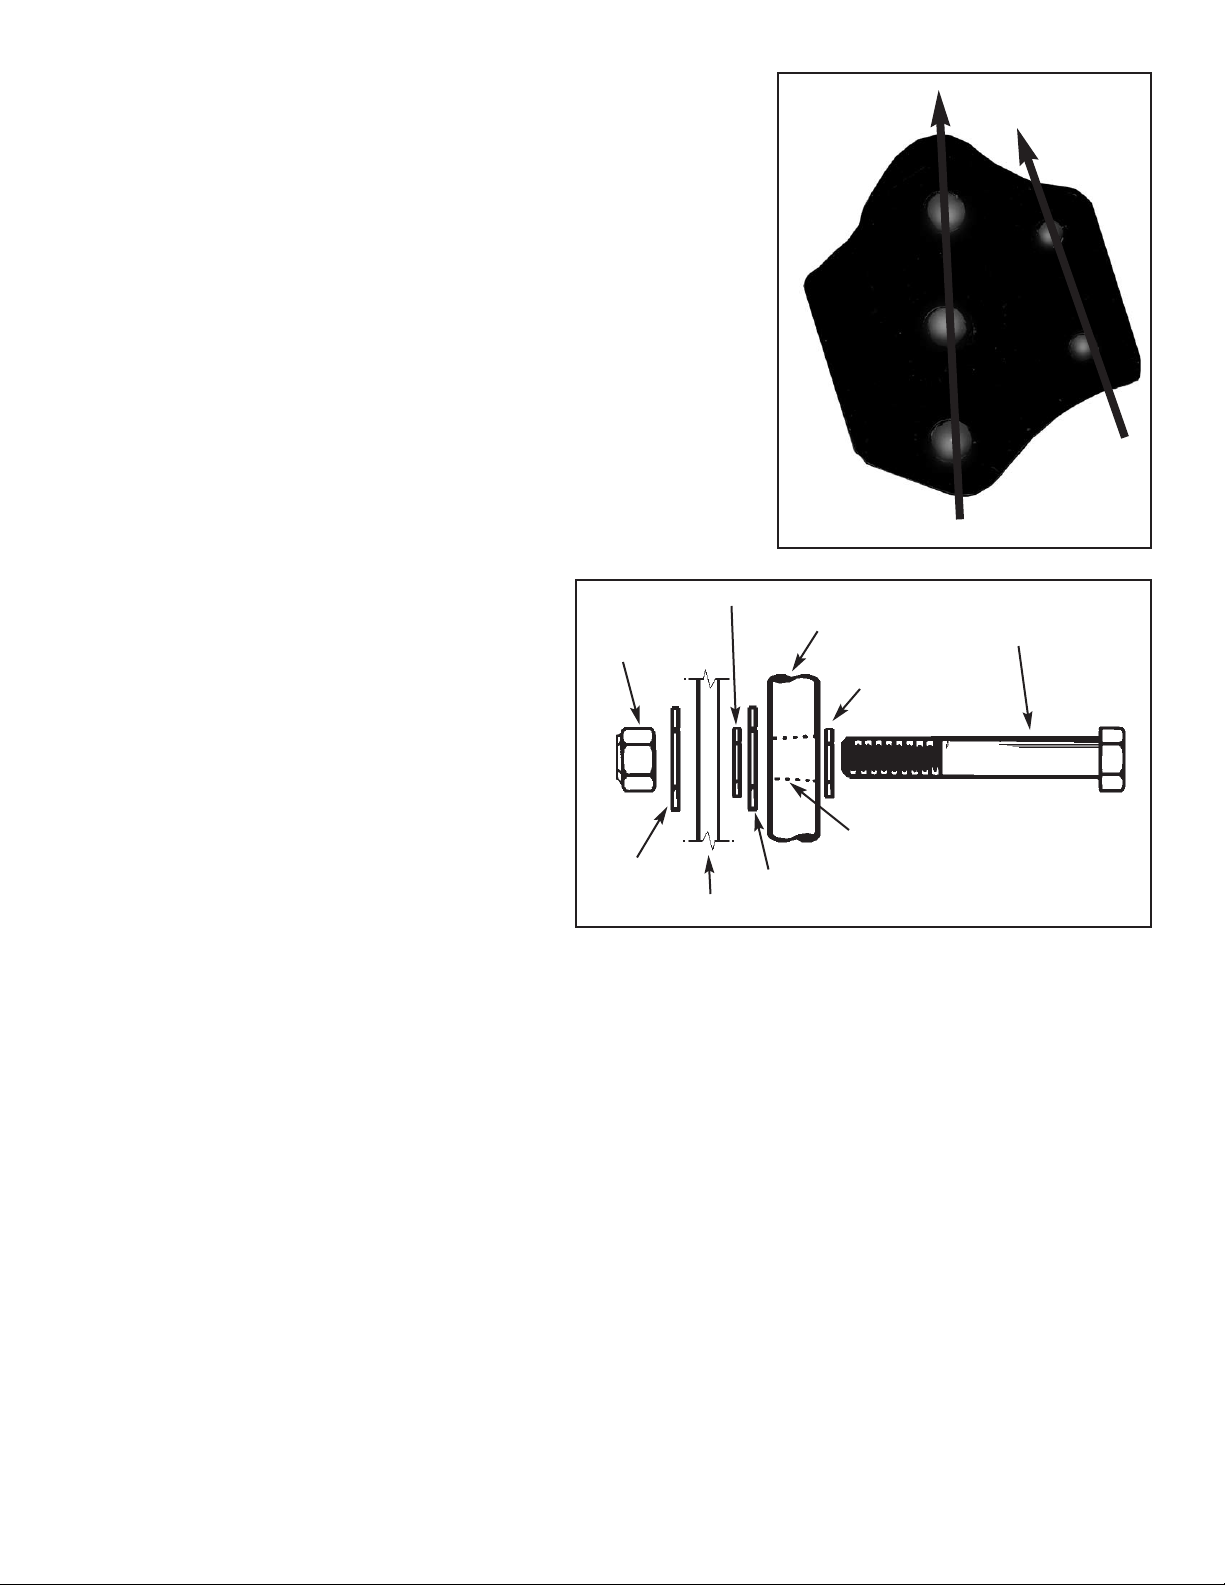
4. To install the flat bracket on the drag link, position bracket so
that when the three large holes from a straight vertical line “I”
the two small holes are on the driver side (with upper hole of
the two small holes angling in toward the center of the
bracket “\”). See photo #2.
5. Insert tapered sleeve in tapered hole of drag link; insert a
1
⁄2” X 3” bolt from behind drag link, with a small 1⁄2” washer
through drag link, next place both a large
1
⁄2” washer onto
bolt and a small
1
⁄2” washer, then the new bracket with a large
1
⁄2” washer and self-locking nut. Do not tighten this time.
See illustration #3.
6. Insert new U-bolt around drag link and
through new bracket. Install washers and
self-locking nuts and tighten.
Now tighten
bolt installed in Step 5 above.
7. To install shaft eye of stablilizer onto drag
link bracket, swing stabilizer up, align with
the upper hole on drag link bracket, and
install using one of the hardware paks
furnished (#P932).
8. Now install the second stabilizer to the
main frame bracket by inserting a
1
⁄2” X
2
1
⁄2” with a small 1⁄2” washer through new bracket and stabilizer using another small 1⁄2” washer
with self-locking nut and tighten. Install shaft eye of second stabilizer into lower hole of drag link
bracket using another hardware pak furnished (#P932).
9. Now check and re-tighten all nuts and bolts. After first 100 miles check and re-tighten all nuts
and bolts.
ILLUSTRATION #3
PHOTO #2
1
⁄/2 x 3” bolt
tapered sleeve
small
1
⁄2” washer
drag link
small
1
⁄2” washer
large
1
⁄2” washer
self locking nut
New bracket
large
1
⁄2”
washer
2.
 Loading...