

Page 1
MODELS SJ 46A SJ 46AJ
Operating Manual
Articulating Boom Series (ANSI/CSA)
143896AC-A June 2011
Page 2

Skyjack Service Center 3451 Swenson Ave. St. Charles, Illinois, 60174 USA
Phone: 630-262-0005
Toll Free: 1-800-275-9522
Fax: 630-262-0006
Email: [email protected]
Parts (North America)
Toll Free: 1-800-965-4626
Toll Free Fax: 1-888-782-4825
Email: [email protected]
Parts & Service (Europe) Unit 1 Maes Y Clawdd, Maesbury Road Industrial Estate
Oswestry, Shropshire SY10 8NN UK
Phone: +44-1691-676-235
Fax: +44-1691-676-238
Email: [email protected]
Skyjack Asia Pacific
Singapore
Phone: +65-6449-3710
Fax: +65-6449-7690
Email: [email protected]
Page 3
TM
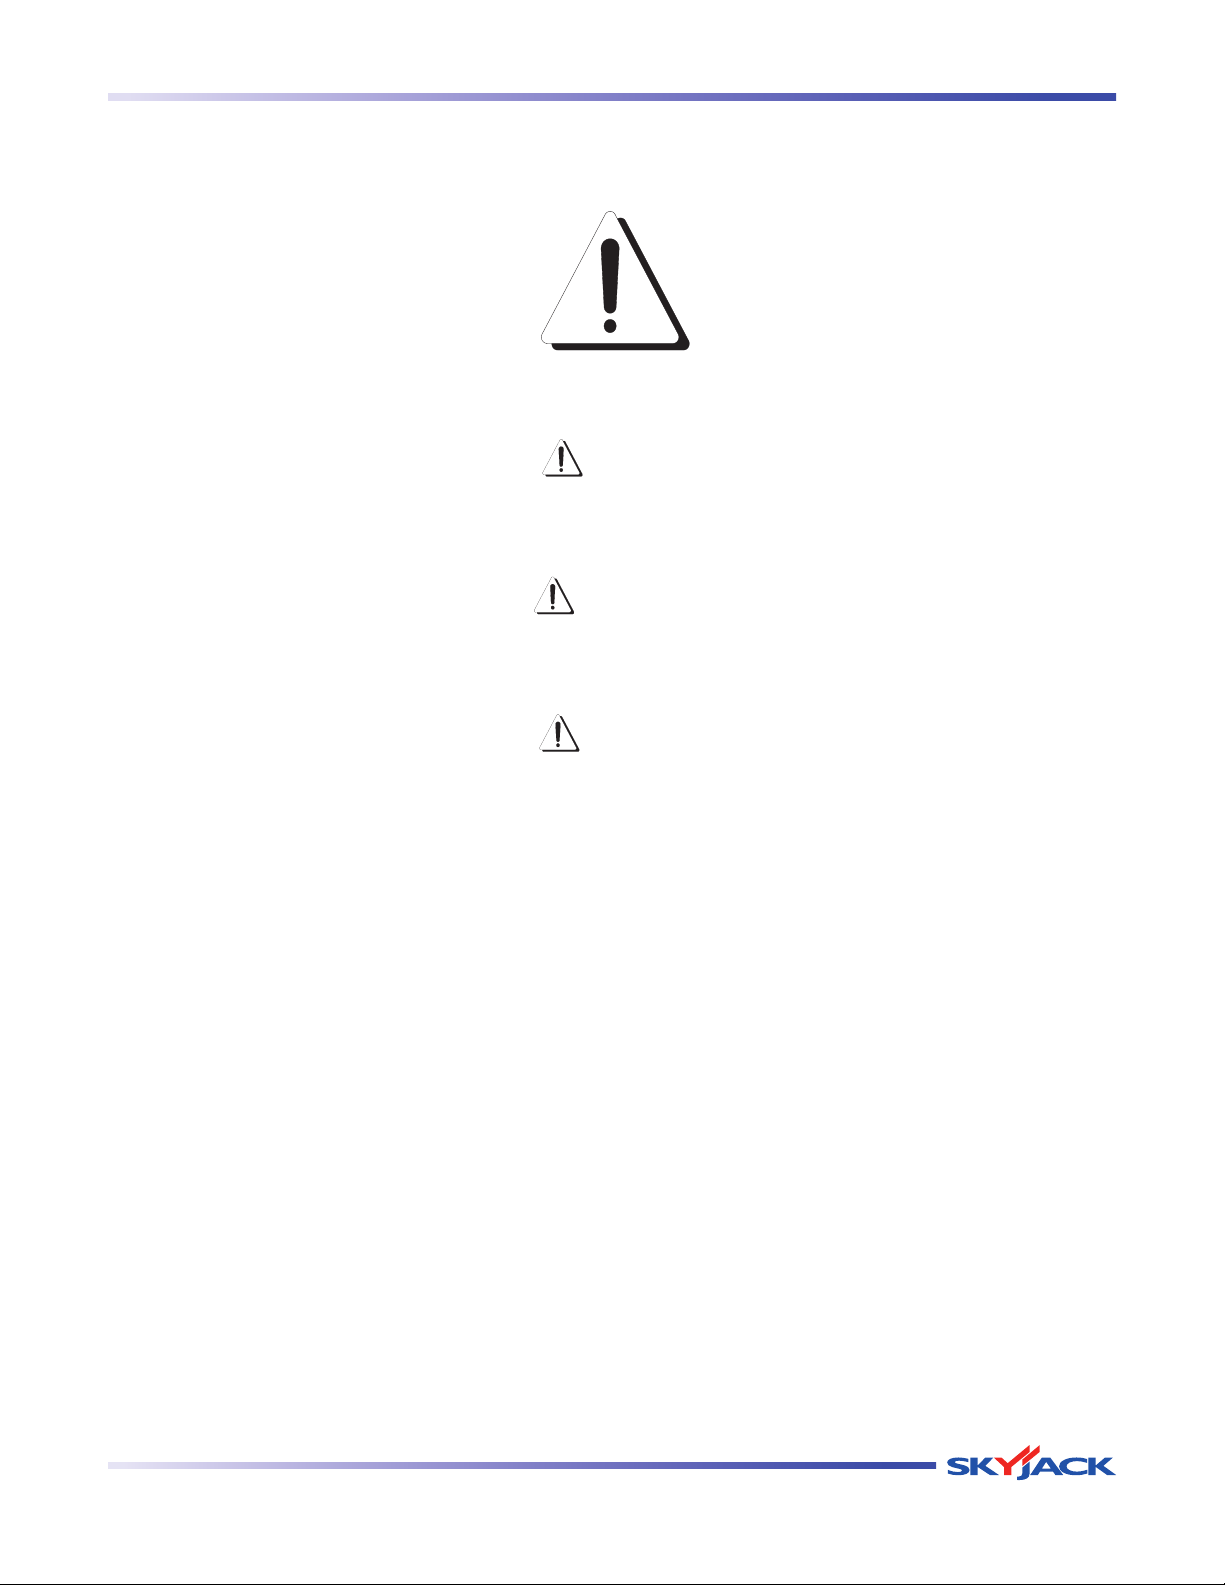
The Safety Alert Symbol identifies important
safety messages on aerial platform, safety signs
in manuals or elsewhere. When you see this
symbol, be alert to the possibility of personal
injury or death. Follow the instructions in the
safety message.
DANGER indicates an imminently hazardous situation which, if not avoided,
will result in death or serious injury.
WARNING indicates a potentially hazardous situation which, if not avoided,
could result in death or serious injury.
CAUTION indicates a potentially hazardous situation which, if not avoided,
may result in minor or moderate injury. It may also be used to alert against
This Safety Alert Symbol means attention!
Become alert! Your safety is involved.
DANGER
WARNING
CAUTION
unsafe practices.
IMPORTANT
IMPORTANT indicates a procedure essential for safe operation and which,
if not followed, may result in a malfunction or damage to the aerial platform.
SJ 46A & SJ 46AJ
December 2007 Page 3
Page 4

TM
Table of Contents
Section 1 - About Your Aerial Platform
Read and Heed
Aerial Platform Definition ..............................................................................................................................................7
Purpose of Equipment .................................................................................................................................................7
Use of Equipment ........................................................................................................................................................7
Manual ..........................................................................................................................................................................7
Operator .......................................................................................................................................................................7
Service Policy and Warranty ........................................................................................................................................7
Optional Accessories ...................................................................................................................................................7
Scope of this Manual ...................................................................................................................................................7
Safety Rules
Operator Safety Reminders .........................................................................................................................................8
Electrocution Hazard ...................................................................................................................................................8
Safety Precautions .......................................................................................................................................................9
Section 2 - Operation
2.1 General ............................................................................................................................................................13
2.1-1 Operator Qualifications .....................................................................................................................13
2.1-2 Operator’s Responsibility for Maintenance ......................................................................................13
2.1-3 Maintenance and Inspection Schedule ............................................................................................13
2.1-4 Owner’s Inspections .........................................................................................................................13
2.2 Major Components ..........................................................................................................................................14
2.3 Major Assemblies ............................................................................................................................................15
2.3-1 Base ..................................................................................................................................................15
2.3-2 Turret .................................................................................................................................................15
2.3-3 Boom Assembly ................................................................................................................................15
2.3-4 Platform .............................................................................................................................................15
2.4 Serial Number Nameplate ...............................................................................................................................15
2.5 Component Identification ................................................................................................................................16
2.5-1 Main Power Disconnect Switch .......................................................................................................16
2.5-2 Tilt Sensor .........................................................................................................................................16
2.5-3 Drive Bypass Valve ...........................................................................................................................16
2.5-4 Brake System ...................................................................................................................................16
2.5-5 Differential Lock Switch .....................................................................................................................17
2.5-6 All Motion Alarm ................................................................................................................................17
2.5-7 AC Outlet on Platform (If Equipped) .................................................................................................17
2.5-8 Turret Transportation Lock ................................................................................................................17
2.5-9 Footswitch .........................................................................................................................................17
2.5-10 Manual Storage Box .........................................................................................................................17
2.5-11 Base Control Console .......................................................................................................................18
2.5-12 Platform Control Console .................................................................................................................20
2.6 Special Options ...............................................................................................................................................22
2.6-1 Cold Weather Start (If Equipped) .....................................................................................................22
2.6-2 Work Light (If Equipped) ...................................................................................................................22
2.6-3 Flashing Amber Light (If Equipped) ..................................................................................................22
2.6-4 Tire Sealant Light (If Equipped) ........................................................................................................23
2.6-5 Hydraulic Generator (If Equipped) ...................................................................................................23
2.7 Operator’s Responsibility ................................................................................................................................24
2.8 Visual & Daily Maintenance Inspections .........................................................................................................25
Page 4 December 2007
SJ 46A & SJ 46AJ
Page 5

TM
Table of Contents
Section 2 - Operation (Continued)
2.9 Function Tests..................................................................................................................................................33
2.10 Start Operation ................................................................................................................................................44
2.10-1 To Activate Base Control Console ....................................................................................................44
2.10-2 To Rotate Platform Using Base Control Console .............................................................................44
2.10-3 To Rotate Turret Using Base Control Console ..................................................................................45
2.10-4 To Move Jib Up and Down Using Base Control Console ................................................................45
2.10-5 To Move Riser Up and Down Using Base Control Console .............................................................45
2.10-6 To Raise or Lower Main Boom Using Base Control Console ...........................................................45
2.10-7 To Extend or Retract Fly Boom Using Base Control Console ..........................................................45
2.10-8 To Level Platform Manually Using Base Control Console ................................................................45
2.10-9 To Operate Using Emergency Power Switch at Base Control Console ..........................................46
2.10-10 To Activate Platform Control Console ...............................................................................................46
2.10-11 To Drive Forward or Reverse ............................................................................................................46
2.10-12 To Steer .............................................................................................................................................47
2.10-13 To Move Jib Up and Down Using Platform Control Console ...........................................................47
2.10-14 To Move Riser Up and Down Using Platform Control Console ........................................................47
2.10-15 To Extend or Retract Fly Boom Using Platform Control Console ....................................................47
2.10-16 To Rotate Platform Using Platform Control Console ........................................................................47
2.10-17 To Level Platform Manually Using Platform Control Console ..........................................................47
2.10-18 To Raise or Lower Main Boom Using Platform Control Console .....................................................48
2.10-19 To Sound Horn ..................................................................................................................................48
2.10-20 To Rotate Turret Using Platform Control Console ............................................................................48
2.10-21 To Operate Using Emergency Power Switch at Platform Control Console ....................................48
2.10-22 Shutdown Procedure ........................................................................................................................48
2.11 Refueling Procedures ......................................................................................................................................49
2.11-1 Regular Fuel ......................................................................................................................................49
2.11-2 Propane .............................................................................................................................................50
2.12 Loading/Unloading ..........................................................................................................................................51
2.12-1 Loading and Tie-down ......................................................................................................................51
2.12-2 Locking the Turret .............................................................................................................................52
2.12-3 Lifting .................................................................................................................................................52
2.13 Winching and Towing Procedure ....................................................................................................................53
2.13-1 To Release Brakes Manually .............................................................................................................54
2.14 Emergency Lowering Procedures ..................................................................................................................55
2.15 Chassis Tilt ......................................................................................................................................................56
2.16 Diagrams .........................................................................................................................................................57
2.17 Tables...............................................................................................................................................................60
2.18 Labels ..............................................................................................................................................................68
List of Tables
2.1 Standard and Optional Features .....................................................................................................................60
2.2 Specifications and Features ............................................................................................................................61
2.3 Owner’s Annual Inspection Record ................................................................................................................63
2.4 Tire/Wheel Specifications ................................................................................................................................64
2.5 Maximum Platform Capacities ........................................................................................................................64
2.6 Floor Loading Pressure ...................................................................................................................................65
2.7 Maintenance and Inspection Schedule ..........................................................................................................66
2.8 Operator’s Checklist ........................................................................................................................................67
SJ 46A & SJ 46AJ
December 2007 Page 5
Page 6

TM
Section 1 - About Your Aerial Platform Read and Heed
SKYJACK is continuously improving and expanding product features on its equipment, therefore, specifications
and dimensions are subject to change without notice.
Aerial Platform Definition
A mobile device that has an adjustable position platform supported from ground level by a structure.
Purpose of Equipment
The SKYJACK Articulating Boom Series (Models SJ 46A & SJ 46AJ) aerial platform is designed to transport and
raise personnel, tools and materials to overhead work areas.
Use of Equipment
The aerial platform is a highly maneuverable, mobile work station. Lifting and driving must be on a flat, level,
compacted surface. It can be driven over uneven terrain only when the platform is fully lowered.
Manual
The operating manual is considered a fundamental part of the aerial platform. It is a very important way to
communicate necessary safety information to users and operators. A complete and legible copy of this manual
must be kept in the provided weather-resistant storage compartment on the aerial platform at all times.
Operator
The operator must read and completely understand both this operating manual and the safety panel label located on
the platform and all other warnings in this manual and on the aerial platform. Compare the labels on the aerial platform
with the labels found within this manual. If any labels are damaged or missing, replace them immediately.
1
Service Policy and Warranty
SKYJACK warrants each new articulating series work platform to be free of defective parts and workmanship for
the first 24 months. Any defective part will be replaced or repaired by your local SKYJACK dealer at no charge for
parts or labor. Contact the SKYJACK Service Department for warranty statement extensions or exclusions.
Optional Accessories
The SKYJACK aerial platform is designed to accept a variety of optional accessories. These are listed under
“Standard and Optional Features” in Table 2.1. Operating instructions for these options (if equipped) are located
in Section 2 of this manual.
For non-standard components or systems, contact the SKYJACK Service Department at
( : 800 275-9522
7 : 630 262-0006
Include the model and serial number for each applicable aerial platform.
Scope of this Manual
a. This manual applies to the ANSI/SIA and CSA versions of the Articulating Boom aerial platform models listed
on Table 2.1.
- Equipment identified with “ANSI” meets the ANSI/SIA A92.5-2006 standard.
- Equipment identified with “CSA” meets the CSA B354.4-02 standard.
b. CSA (Canada)
Operators are required to conform to national, territorial/provincial and local health and safety regulations
applicable to the operation of this aerial platform.
c. ANSI/SIA (United States)
Operators are required by the current ANSI/SIA A92.5 standards to read and understand their responsibilities
in the manual of responsibilities before they use or operate this aerial platform.
SJ 46A & SJ 46AJ
December 2007 Page 7
Page 7

TM
Safety Rules Section 1 - About Your Aerial Platform
WARNING
Failure to comply with your required responsibilities in the use and operation of the aerial platform
could result in death or serious injury!
Operator Safety Reminders
A study conducted by St. Paul Travelers showed that most accidents are caused by the failure of the operator to
follow simple and fundamental safety rules and precautions.
You, as a careful operator, are the best insurance against an accident. Therefore, proper usage of this aerial
platform is mandatory. The following pages of this manual should be read and understood completely before
operating the aerial platform.
Common sense dictates the use of protective clothing when working on or near machinery. Use appropriate safety
devices to protect your eyes, ears, hands, feet and body.
Any modifications from the original design are strictly forbidden without written permission from SKYJACK.
Page 8 December 2007
SJ 46A & SJ 46AJ
Page 8
TM
Section 1 - About Your Aerial Platform Safety Rules
Electrocution Hazard
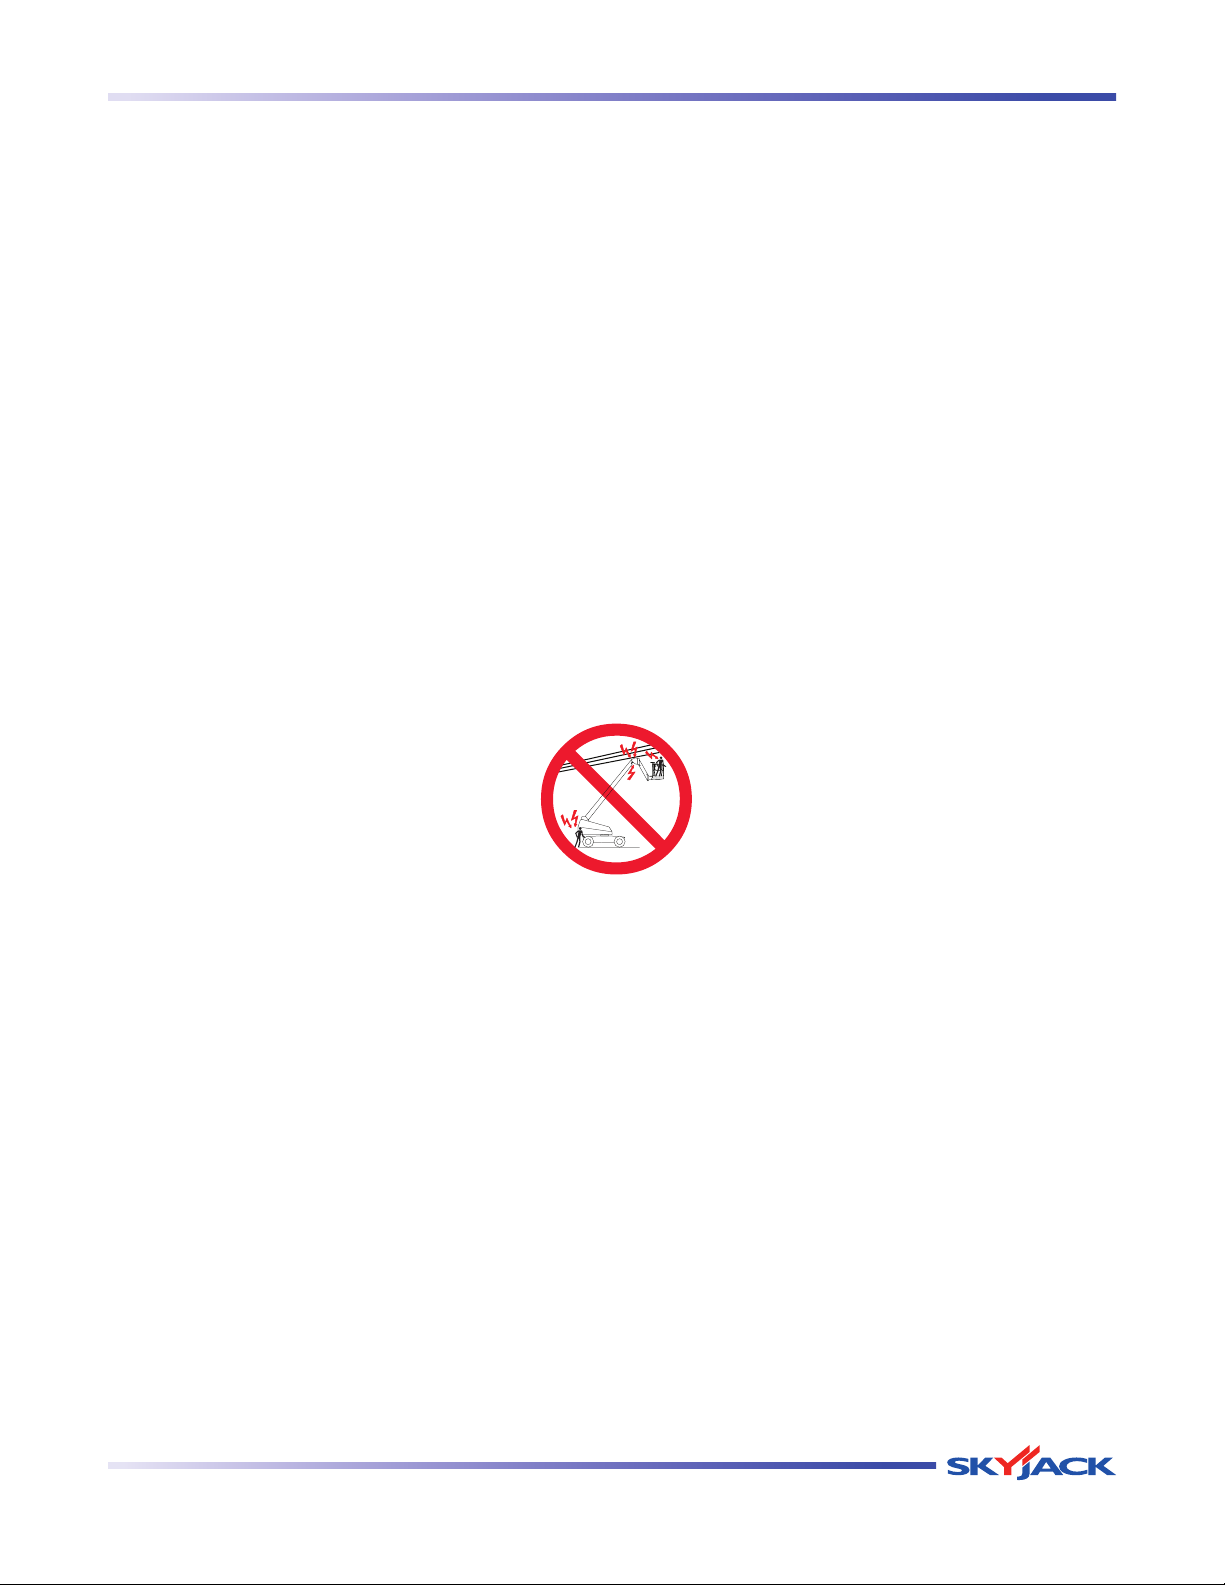
This aerial platform is not electrically insulated. Maintain a Minimum Safe Approach Distance (MSAD) from energized
power lines and parts as listed below. The operator must allow for the platform to sway, rock or sag. This aerial
platform does not provide protection from contact with or proximity to an electrically charged conductor.
Per ANSI A92.5-2006 8.10(7)
“The operator shall perform only the work for which he or she is qualified, in compliance with all applicable safety
related work practices intended to prevent electric shock covered by the Code of Federal Regulations (CFR) 1910.333.
The operator’s level of competence shall be established only by persons qualified to do so. Operators shall
maintain the appropriate minimum approach distance (MAD) from energized power lines and parts covered by
CFR 1910.333 (c).”
Unqualified persons must maintain a minimum approach distance of 10 feet from any energized power line up to
50 kV. Energized power lines over 50 kV require a greater minimum approach distance to be maintained. Refer to
CFR 1910.333.
As per CSA B354.4-02
“The operator shall maintain the minimum safe approach distance (MSAD) from energized conductors at all times
in accordance with the authority having jurisdiction.”
Refer to CFR 1910.333 or the authority having jurisdiction.
DO NOT USE AERIAL PLATFORM AS A GROUND FOR WELDING.
DO NOT OPERATE AERIAL PLATFORM DURING LIGHTNING OR STORMS.
SJ 46A & SJ 46AJ
December 2007 Page 9
Page 9
TM
Safety Rules Section 1 - About Your Aerial Platform
Safety Precautions
Know and understand the safety precautions before going on to next section.
WARNING
Failure to heed the following safety
precautions could result in tip over,
falling, crushing, or other hazards leading
to death or serious injury.
• KNOW all national, state or territorial/provincial
and local rules which apply to your aerial platform
and jobsite.
• TURN main power disconnect switch “
” off when
leaving the aerial platform unattended. Remove
the key to prevent unauthorized use of the aerial
platform.
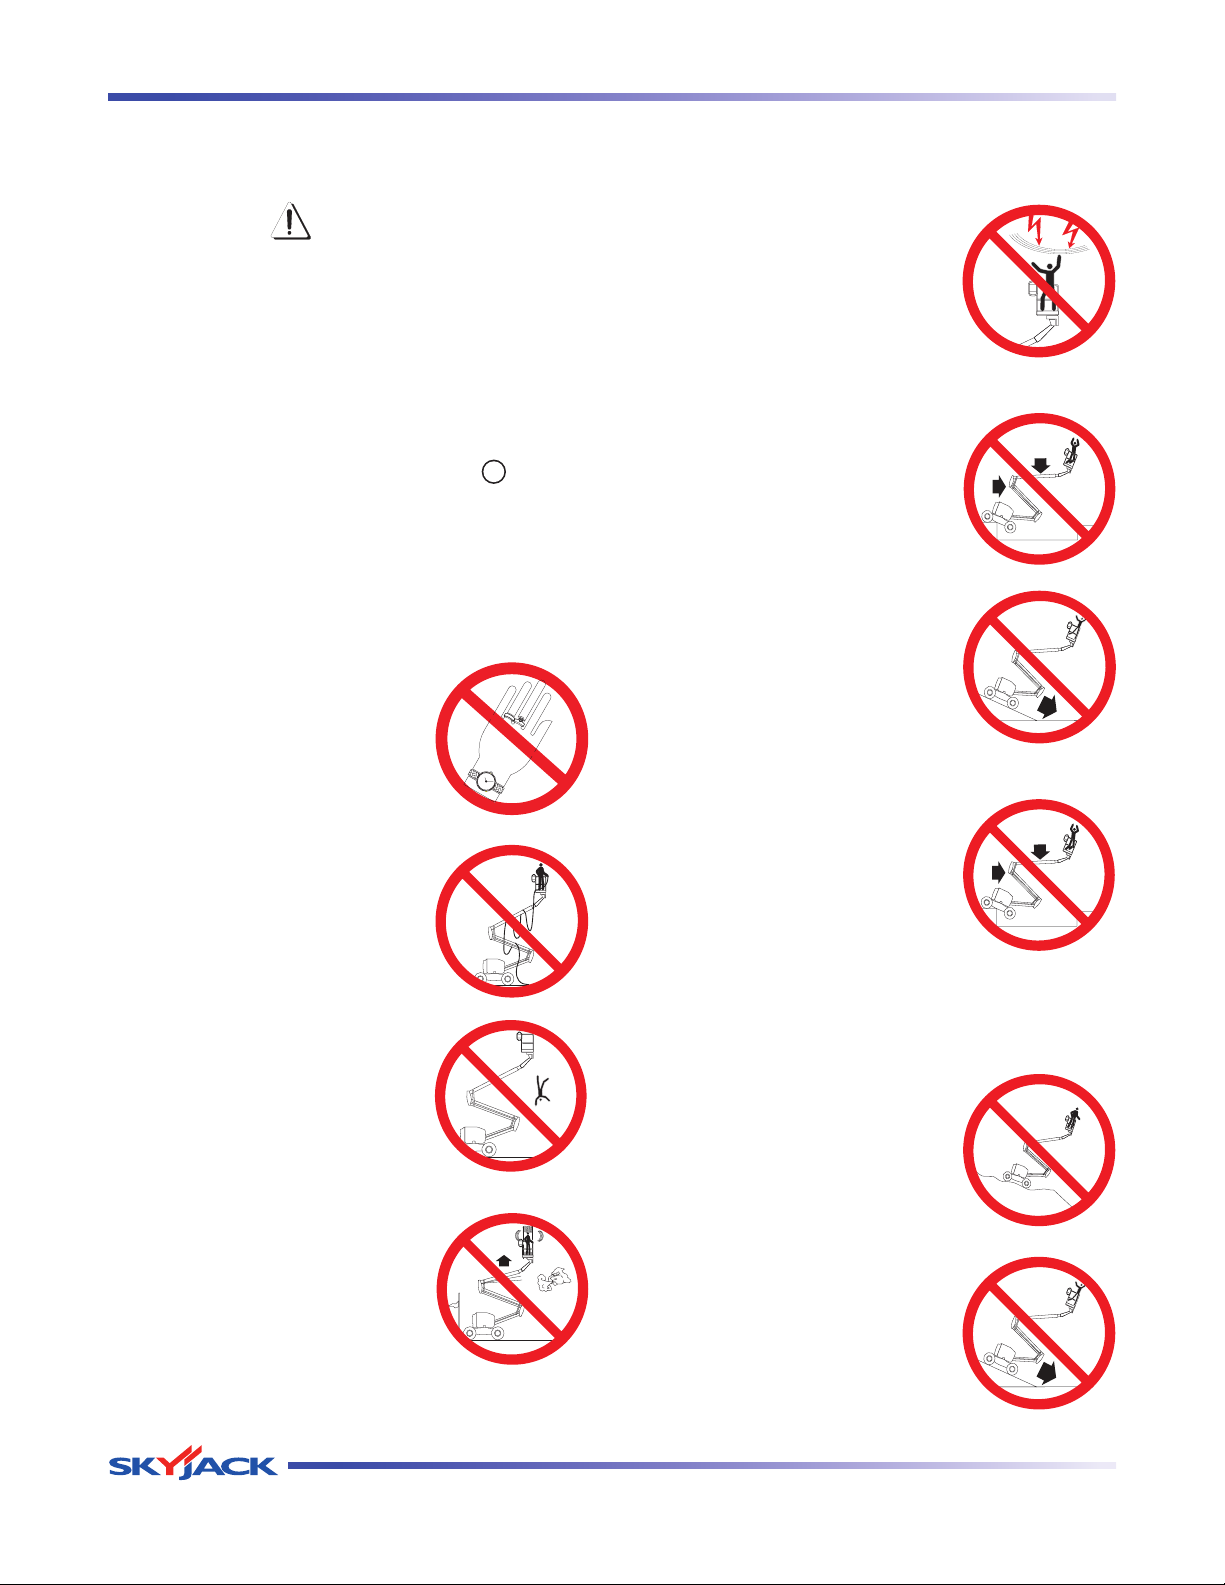
• DO NOT operate aerial
platform during lightning or
storms.
• DO NOT drive elevated near
depressions or holes of any
type, loading docks, debris,
drop-offs and surfaces that
may affect the stability of the
aerial platform.
• WEAR all the protective clothing and personal
safety devices issued to you or called for by job
conditions.
• DO NOT wear loose clothing,
dangling neckties, scarves,
rings, wristwatches or other
jewelry while operating this
aerial platform .
• AVOID entanglement with
ropes, cords or hoses.
• AVOID falling. Stay within the
boundaries of the guardrails.
• DO NOT drive or elevate the
aerial platform if it is not on a
firm level surface.
• Elevated driving must
only be done on a firm level
surface.
• If operation in areas
with holes or drop-offs
is absolutely necessary,
elevated driving shall not be
allowed. Position the aerial
platform horizontally only with
the platform fully lowered. After
ensuring that all 4 wheels or
outriggers (if equipped) have contact with level
firm surface, the aerial platform can be elevated.
After elevation, the drive function must not be
activated.
• AVOID soft, uneven surfaces.
• DO NOT raise the platform in
windy or gusty conditions. Do
not increase the lateral surface
area of the platform. Increasing
the area exposed to the wind
will decrease aerial platform
stability.
• DO NOT ascend or descend a
grade steeper than 45% (2WD
& 4WD). Boom elevated driving
must only be done on firm level
surfaces.
SJ 46A & SJ 46AJ
Page 10 December 2007
Page 10
TM
Section 1 - About Your Aerial Platform Safety Rules
Safety Precautions (Continued)
Know and understand the safety precautions before going on to next section.
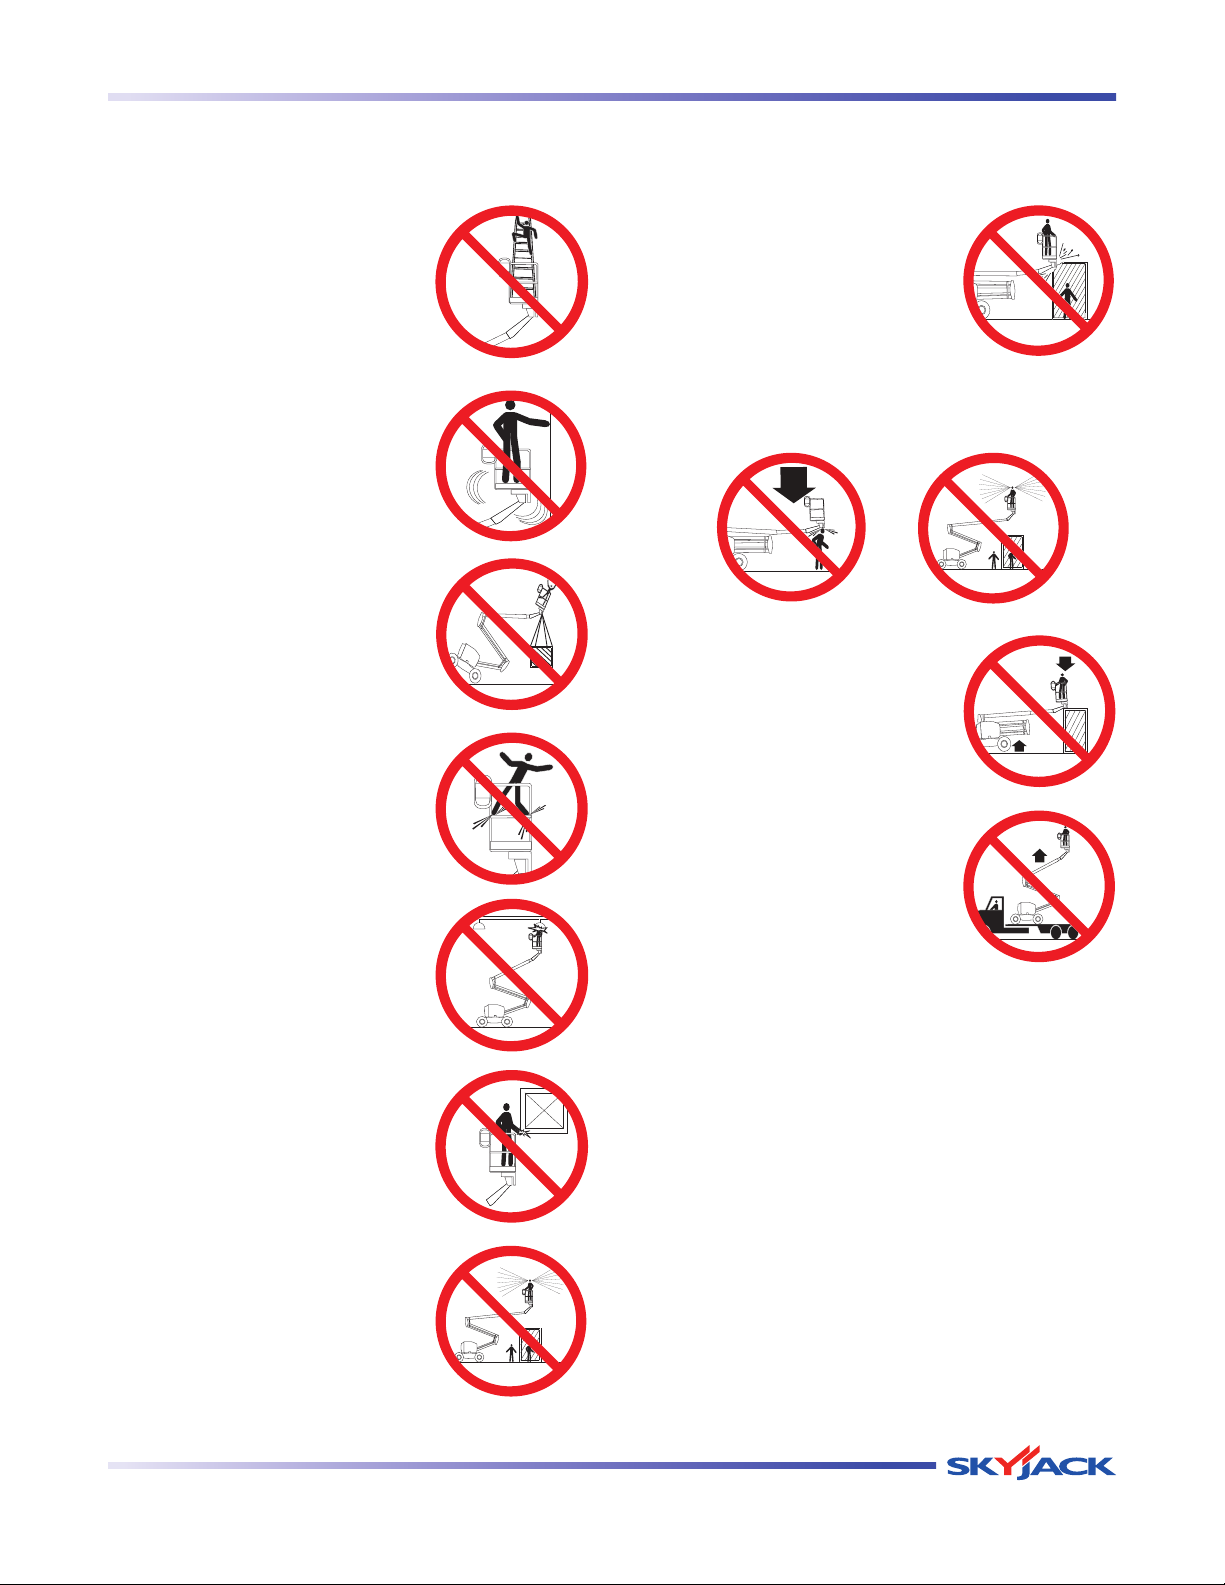
• DO NOT operate an aerial
platform that has ladders,
scaffolding or other devices
mounted on it to increase its
size or work height.
• DO NOT exert side forces on
aerial platform while elevated.
• DO NOT use the aerial platform
as a crane. It is prohibited.
• DO NOT sit, stand or climb on
the guardrails. It is prohibited.
• ENSURE that there are no
personnel or obstructions in
the path of travel, including
blind spots.
• DO NOT lower the platform
unless the area below is clear of personnel and
obstructions.
• DO NOT use boom to push,
pull other objects or to lift the
chassis.
• BE AWARE of overhead
obstructions or other possible
hazards around the aerial
platform when driving or
lifting.
• BE AWARE of crushing
hazards. Keep all body parts
inside platform guardrail.
• BE AWARE of blind spots when
operating the aerial platform.
• DO NOT raise the aerial
platform while it is on a truck,
forklift or other device or
vehicle.
• STUNT driving and horseplay are prohibited.
• ENSURE ALL tires are in good condition and lug
nuts are properly tightened.
• DO NOT alter or disable limit switches or other
safety devices.
• DO NOT use the aerial platform without guardrails,
locking pins and the entry gate in place.
• DO NOT exceed the rated capacity of the
aerial platform. Do make sure the load is evenly
distributed on the platform.
SJ 46A & SJ 46AJ
December 2007 Page 11
Page 11

TM
Safety Rules Section 1 - About Your Aerial Platform
Safety Precautions (Continued)
Know and understand the safety precautions before going on to next section.
• DO NOT attempt to free a snagged platform with
lower controls until personnel are removed from
the platform.
• DO NOT position the aerial platform against
another object to steady the platform.
• DO NOT place materials on the guardrails or
materials that exceed the confines of the guardrails
unless approved by Skyjack.
Fall Protection
All occupants of this aerial platform must wear
personal fall protection equipment.
As per the ANSI A92.5-2006 standard, “Principal
fall protection is provided by the guardrail system.
The user shall direct and monitor the operator to
ensure that all components of the guardrail system
are in place. The user shall direct and monitor
the occupants of the work platform to ensure that
they wear a personal fall arrest system to protect
against the potential effects of ejection or a fall
restraint system to prevent a free fall.”
Fall restraint and fall arrest systems are defined
within the ANSI A92.5 Manual of Responsibilities
shipped with this aerial platform.
Skyjack recommends the use of a fall restraint
system to keep an occupant within the confines
of the platform, and thus not expose the occupant
to any fall hazard requiring a fall arrest.
CSA B354.4-02 requires the use of a fall arrest
system, therefore Canadian users must use
personal fall arrest protection as opposed to fall
restraint.
WARNING
Entering and exiting the aerial platform
should only be done using the three
points of contact.
• Useonlyequippedaccessopenings.
• Enter and exit only when the aerial
platf orm is in the fu lly retracte d
position.
• Do use three points of contact to enter and exit
the platform. Enter and exit the platform from
the ground only. Face the aerial platform when
entering or exiting the platform.
• Three points of contact means that two hands
and one foot or one hand and two feet are in
contact with the aerial platform or the ground at
all times during entering and exiting.
WARNING
An operator should not use any aerial platform
that:
does not appear to be working properly.•
has been damaged or appears to have worn •
or missing parts.
has alterations or modifications not approved •
by the manufacturer.
has safety devices which have been altered •
or disabled.
has been tagged or locked out for non-use or •
repair.
Failure to avoid these hazards could result in death
or serious injury.
All personal fall protection equipment must comply
Jobsite Inspection
with applicable governmental regulations and must
be inspected and used in accordance with the
manufacturer’s recommendations.
All personal fall protection equipment must be
attached only to approved anchorage points within
the platform of the aerial platform.
Page 12 December 2007
Do not use in hazardous locations.•
Perform a thorough jobsite inspection prior to •
operating the aerial platform, to identify potential
hazards in your work area.
Be aware of moving equipment in the area. Take •
appropriate actions to avoid collision.
SJ 46A & SJ 46AJ
Page 12
TM
Section 2 - Operation
2.0 Operation
This section provides the necessary information needed
to operate the aerial platform. It is important that the user
reads and understands this section before operating
the aerial platform.
2.1 General
In order for this aerial platform to be in good working
condition, it is important that the operator meets the
necessary qualifications and follow the maintenance
and inspection schedule referred to in this section.
2.1-1 Operator Qualifications
Only trained and authorized personnel shall• be
permitted to operate an aerial platform.
Safe use of this aerial platform requires the •
operator to understand the limitations and
warnings, operating procedures and operator’s
responsibility for maintenance. Accordingly, the
operator must understand and be familiar with this
operating manual, its warnings and instructions,
and all warnings and instructions on the aerial
platform.
The operator must be sure that the aerial platform •
has been properly maintained and inspected
before using it.
The operator must perform all the daily inspections •
and function tests found in Table 2.7, even if
the operator is not directly responsible for the
maintenance of this aerial platform.
2.1-3 Maintenance and Inspection Schedule
The inspection points covered in • Table 2.7 indicate
the areas of the aerial platform to be maintained or
inspected and at what intervals the maintenance
and inspections are to be performed.
The actual operating environment of the aerial •
platform may affect the maintenance schedule.
WARNING
Use original or manufacturer-approved
parts and components for the aerial
platform.
2
The operator must be familiar with employer’s work •
rules and related government regulations and be
able to demonstrate the ability to understand and
operate this make and model of aerial platform in
the presence of a qualified person.
2.1-2 Operator’s Responsibility for
Maintenance
WARNING
Maintenance must be performed by
trained and competent personnel who are
familiar with mechanical procedures.
Death or serious injury could result from
the use of an aerial platform that is not
properly maintained or kept in good
working condition.
2.1-4 Owner’s Inspections
It is the responsibility of the owner to arrange daily,
quarterly (or 150 hours) and annual inspections of the
aerial platform. Refer to Table 2.7 for recommended
maintenance and inspection areas and intervals. A
record of annual inspection is kept on a label located
close to the base control console on the cowling. Refer
to Table 2.3 in this manual.
NOTE
Inspection scheduling requirements may
vary. Owners must comply with local
standards and regulations.
SJ 46A & SJ 46AJ
December 2007 Page 13
Page 13
TM
Major Components Section 2 - Operation
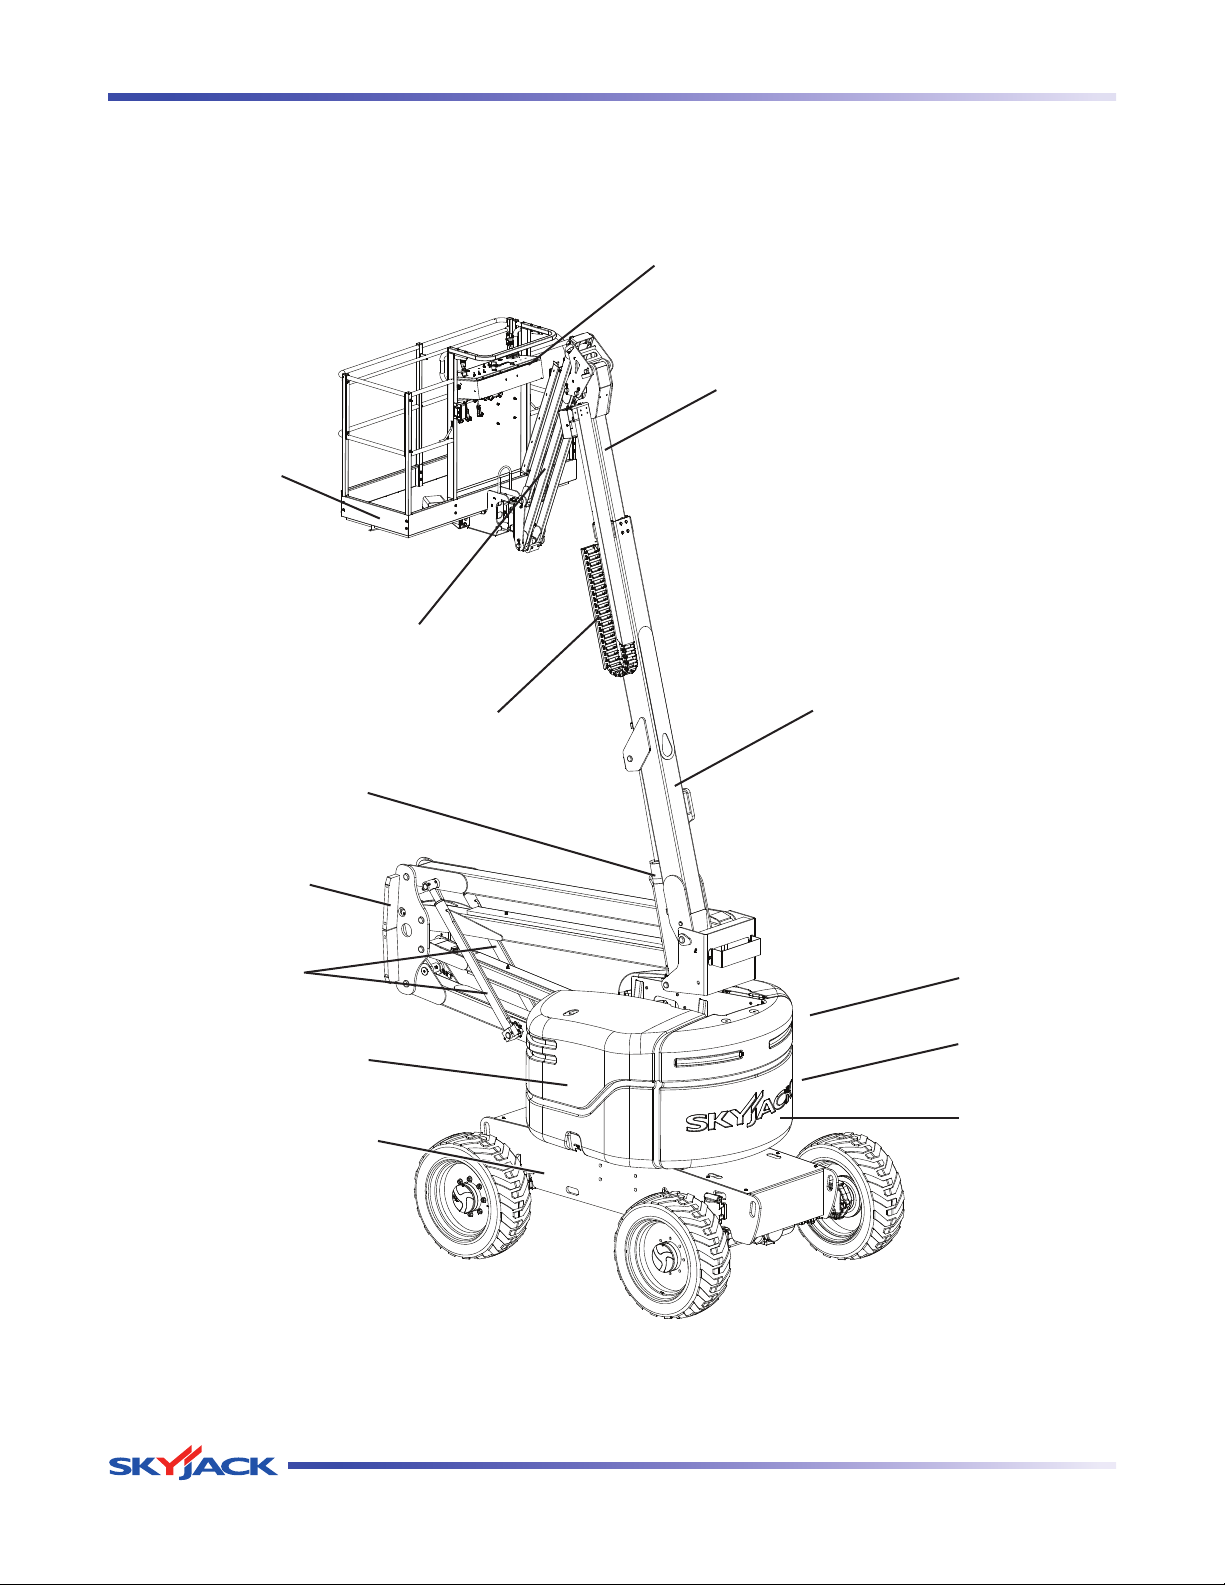
2.2 Major Components
Platform Control Console
Fly Boom
Platform
Jib
Lift Cylinder
Riser
Riser
Cylinders
Compartment
Engine
Base
Power Track
Main Boom
Control
Compartment
Base Control
Console
Turret
SKYJACK Articulating Boom
Page 14 December 2007
SJ 46A & SJ 46AJ
Page 14

TM
Section 2 - Operation Major Assemblies
2.3 Major Assemblies
The aerial platform consists of four major assemblies:
the base, turret, boom assembly and platform.
2.3-1 Base
The base is a rigid one-piece weldment. Models
equipped with dual-fuel engine have mounting straps
for propane tank on each side. The rear axle is hydraulic
motor-driven and has a spring-applied, hydraulically
released brakes. The front axle is steerable by a
hydraulic cylinder. The rear axle is coupled to the front
axle by a drive shaft.
2.3-2 Turret
The turret rotates 360 degrees continuously. Upon
the turret are two compartments. One compartment
contains the engine, hydraulic pumps and battery. The
swing drive is in the center of the turret underneath
the main boom. The other compartment contains the
base control console, main hydraulic manifold, function
valves, the hydraulic and fuel tanks.
2.3-3 Boom Assembly
The boom assembly consists of the riser, telescoping fly
and main boom assembly. The riser is mounted on the
turret with the main boom attached to the riser. The riser
mechanism uses two double-acting hydraulic cylinders
with holding valves to control vertical movement.
AJ models are equipped with a 60 in. (152 cm) jib,
controlled by a double-acting hydraulic cylinder.
2.4 Serial Number Nameplate
The serial number nameplate, located at the rear of the
aerial platform, lists the following:
Model number
Serial number
Maximum capacities
Maximum number of persons permissible on the
platform
Maximum manual force
Aerial platform weight
Maximum drivable height
Maximum platform height
System pressure
Lift pressure
Maximum wheel load
Model year
Voltage
2.3-4 Platform
The platform is constructed of a skid-resistant deck
surface allowing visibility through the deck and a 43 in.
(110 cm) high tubular steel railing system with mid
rails and 6 in. (15 cm) toe boards. The platform can be
entered through a swing gate at the side of the railing
system. The platform can be rotated in either direction.
An optional AC outlet is also located on the platform.
SJ 46A & SJ 46AJ
December 2007 Page 15
Page 15
TM
Component Identification Section 2 - Operation
2.5 Component Identification
The following descriptions are for identification,
explanation and locating purposes only.
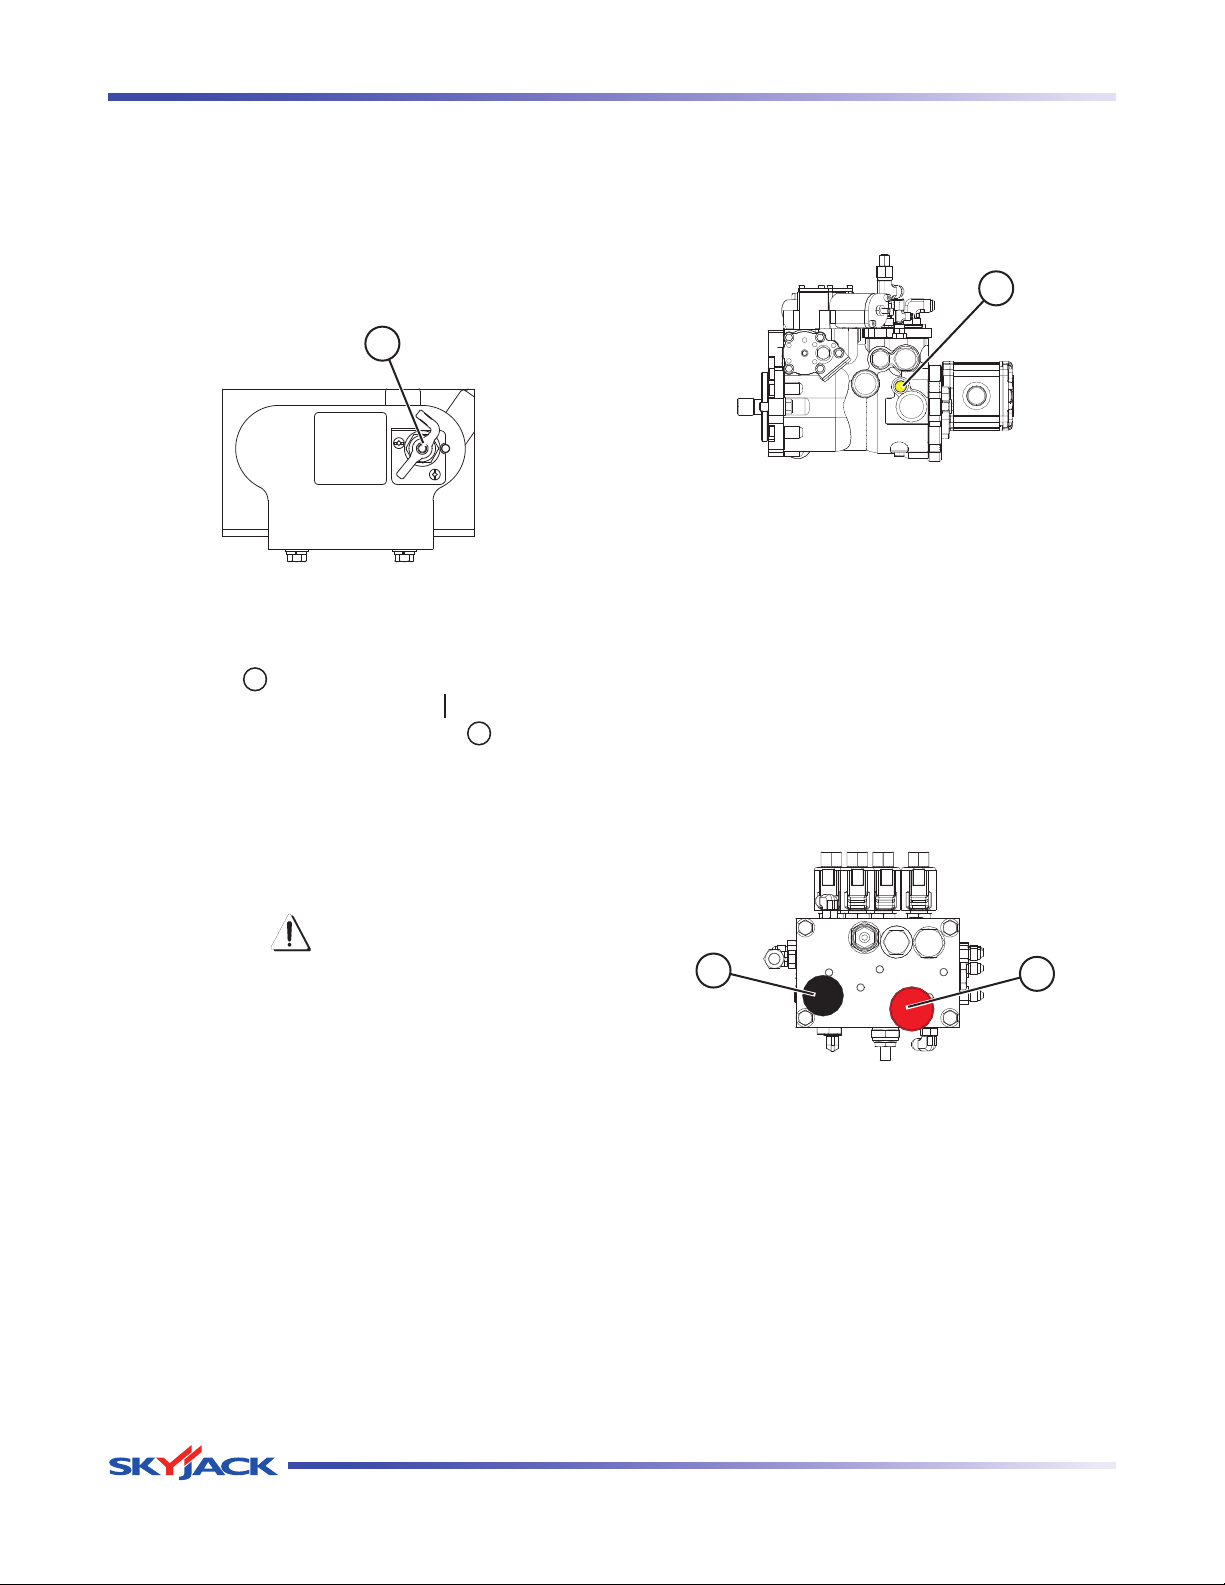
2.5-1 Main Power Disconnect Switch
This main power disconnect switch is located in the
engine compartment near the battery.
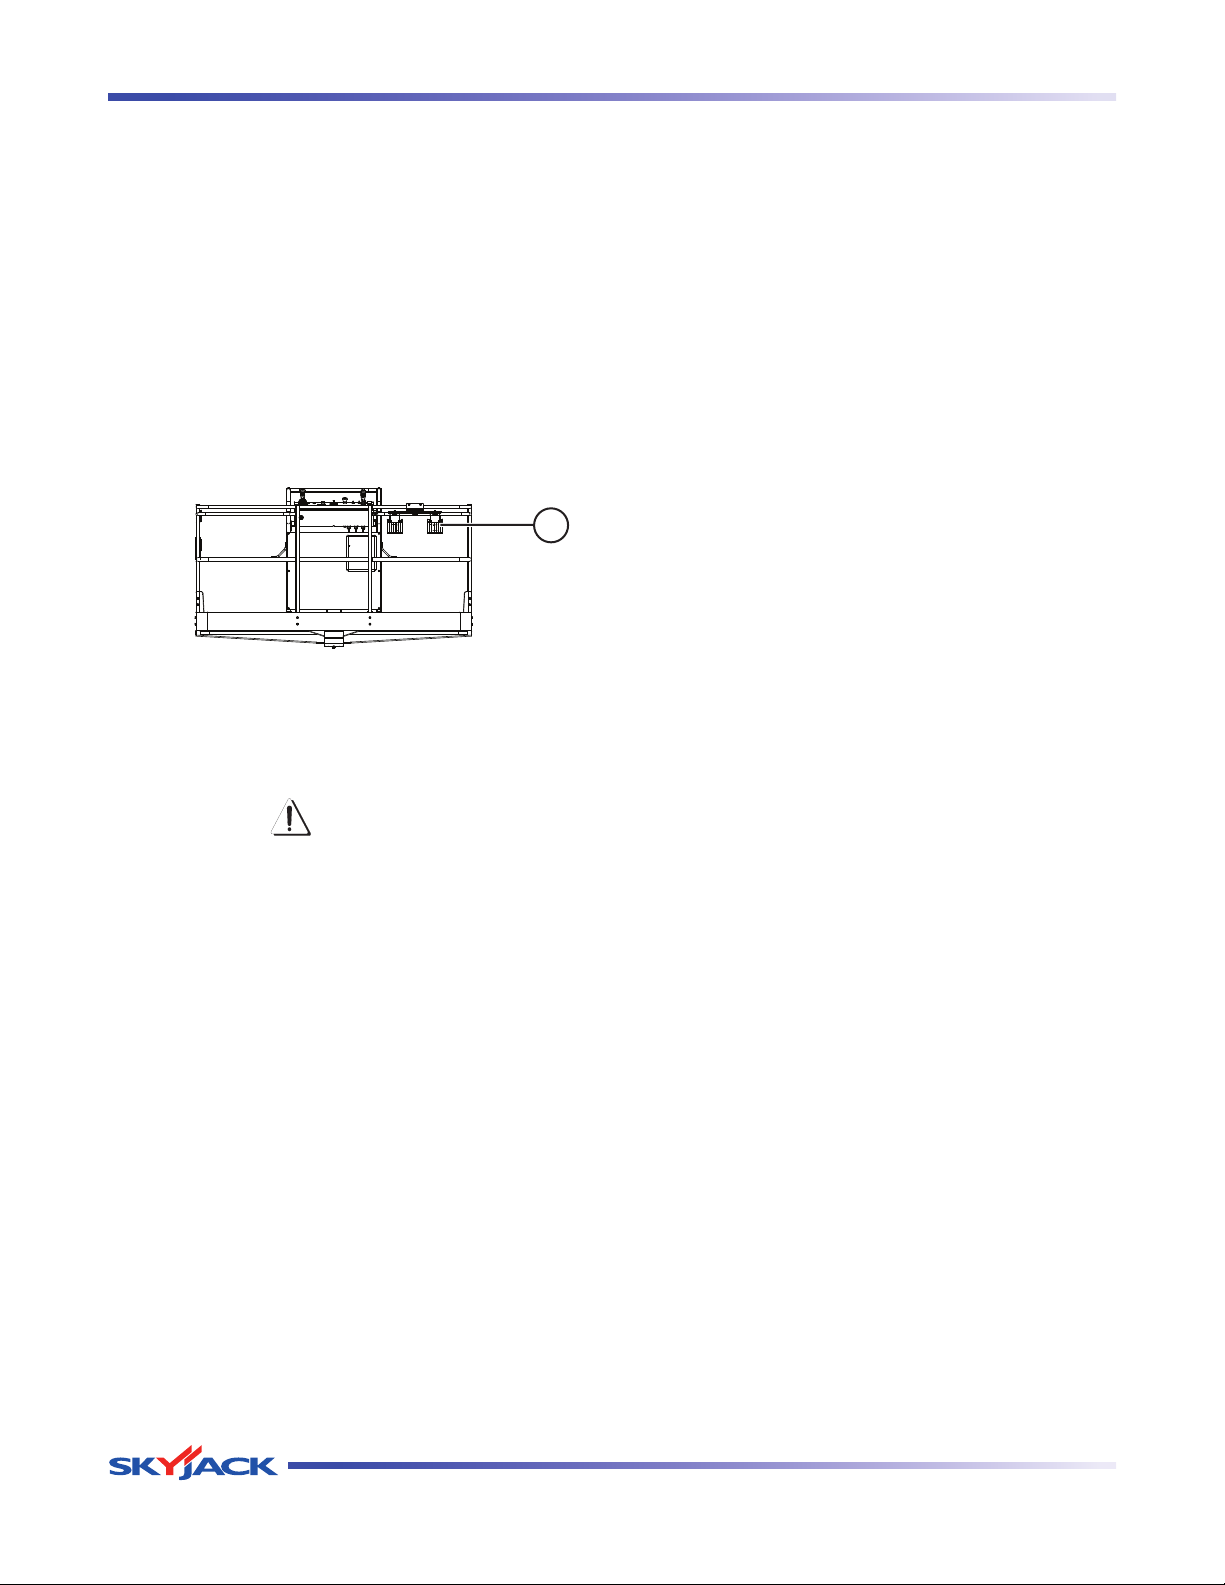
1
Figure 2-1. Main Power Disconnect Switch
1. Main Power Disconnect Switch - This switch,
when in “
all circuits. Switch must be in “ ” on position to
operate any circuit. Turn switch “ ” off when
transporting aerial platform.
2.5-2 Tilt Sensor
The tilt sensor is located inside the base control console.
It is designed to prevent driving when aerial platform is
on a slope greater than a predetermined limit.
” off position, disconnects power to
2.5-3 Drive Bypass Valve
This valve is located on the inboard side of the drive
pump and can be identified with a yellow paint mark
on it.
1
Figure 2-2. Drive Bypass Valve
Drive Bypass Valve with Override Stems 1.
- This valve, when loosened two revolutions
counterclockwise, is used to override drive relief
valves so that the aerial platform can be loaded or
unloaded from a trailer using a winch line.
2.5-4 Brake System
The brake system is located in the control compartment.
The brakes must be manually disengaged before
pushing, winching or towing. Refer to Section 2.13-1
for procedure on how to release brakes manually. The
system contains the following controls:
WARNING
If aerial platform becomes tilted causing
alarm to sound, the platform must be fully
lowered immediately. Ensure that aerial
platform is on a firm level surface before
operating the aerial platform. Refer to
Section 2.15 for instructions regarding
recovery from an inclined position.
1. Brake Auto Reset Valve Plunger
2. Brake Hand Pump
Page 16 December 2007
1
Figure 2-3. Brake System
2
SJ 46A & SJ 46AJ
Page 16
TM
Section 2 - Operation Component Identification
2.5-5 Differential Lock Switch
This switch is located on the platform control console.
The differential locking system provides more traction
by providing equal drive to each wheel regardless of
traction. Differential locks are used to prevent from
getting stuck when driving on loose, muddy, or rocky
terrrain. Refer to Section 2.9-3 for instruction regarding
testing differential lock switch.
WARNING
Bef ore eng agin g diffe ren tial lo ck,
ensure drive/steer controller is in neutral
position.
2.5-6 All Motion Alarm
This alarm produces an audible sound when any aerial
platform function is activated. On aerial platforms with
certain options, a flashing amber light will accompany
this alarm.
2.5-7 AC Outlet on Platform (If Equipped)
This outlet is a source of AC power on the platform. The
outlet is located on the right side of platform control
console and the plug is located at the middle rear
section of the turret.
2.5-8 Turret Transportation Lock
This locking device is located in the turret.
2 1
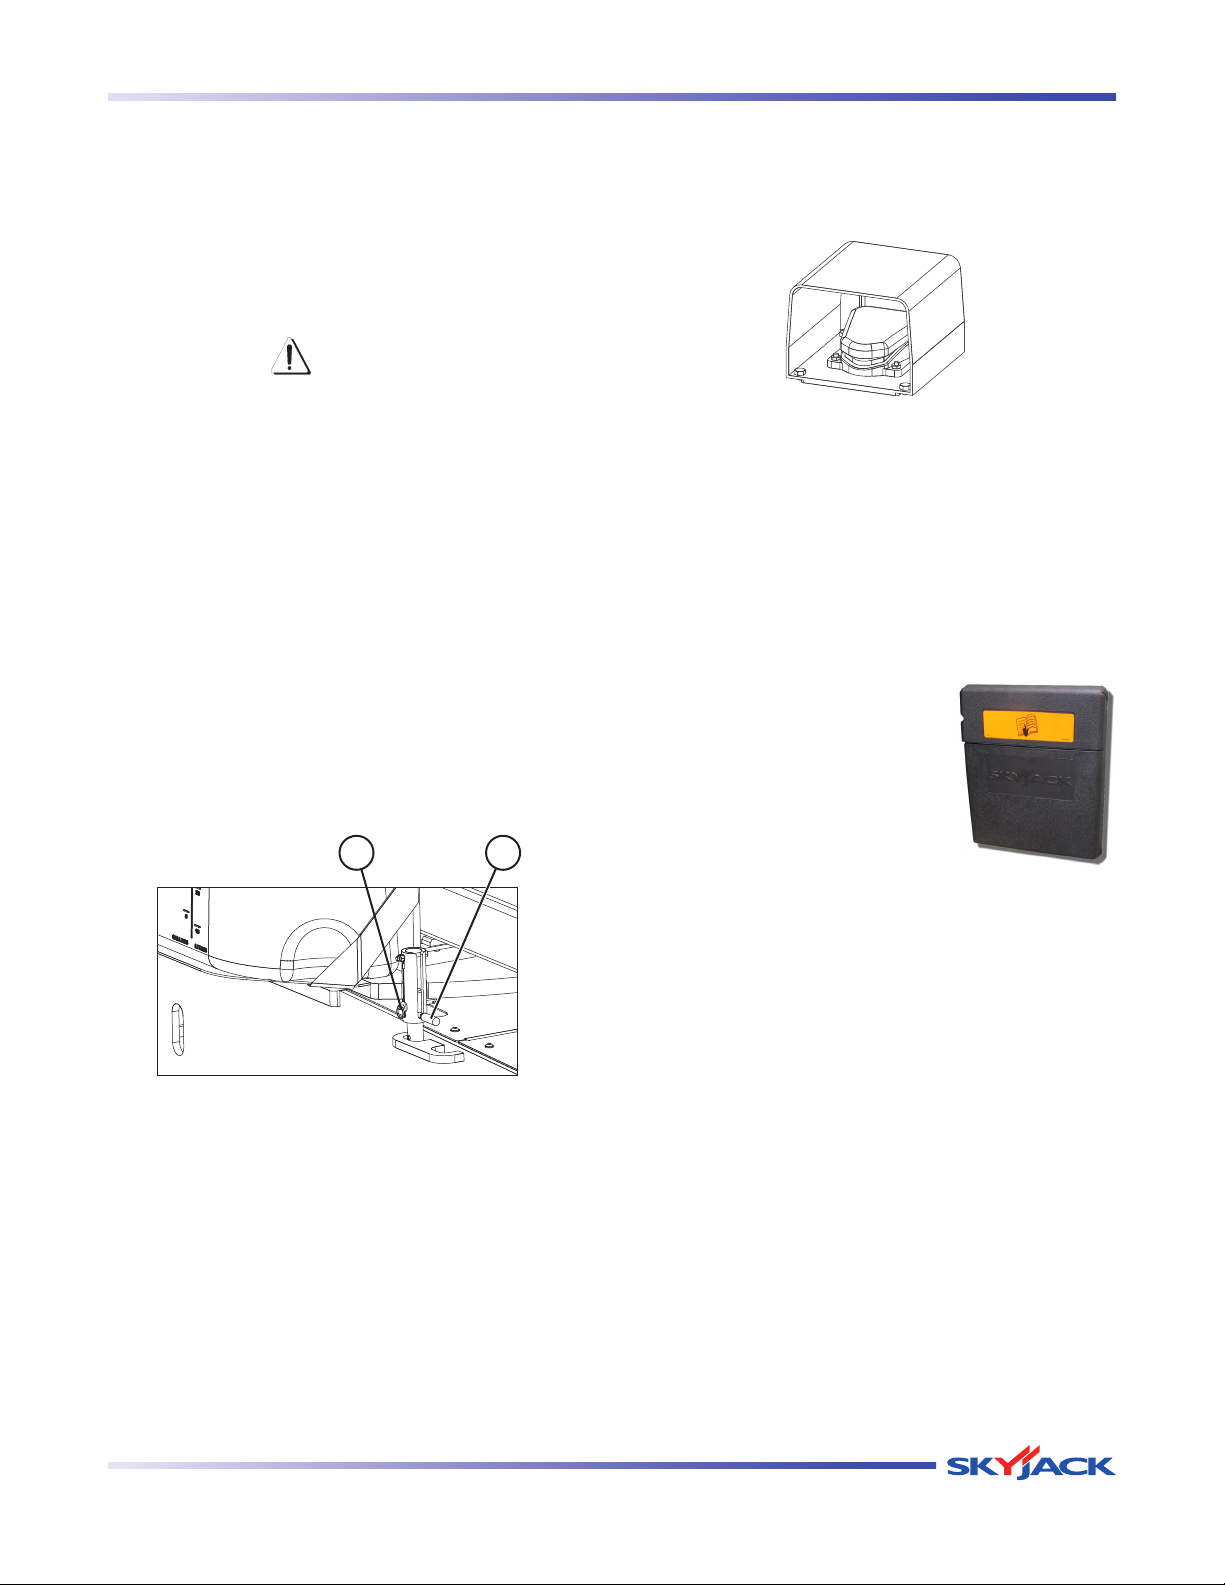
2.5-9 Footswitch
The footswitch is located on the floor of the platform.
When depressed and held, it enables controls on
platform control console.
Figure 2-5. Footswitch
NOTE
The footswitch is equipped with a 15-second
anti-tiedown feature that deactivates
footswitch when operator depresses it
for 15 seconds without activating any
function.
2.5-10 Manual Storage Box
Thi s wea ther-re s ista nt bo x is
mounted under the control console
on the platform. It contains operating
manual and other importa n t
documents. The operating manual
for this make and model of aerial
platform must remain with the aerial
platform and should be stored in
this box.
Figure 2-4. Turret Transportation Lock
Turret Transportation Lock 1. - This locking device
is used to lock turret in place during shipping
only.
Turret Transportation Lock Retaining Pin 2. - This
retaining pin is used to hold transportation lock
in either locked or unlocked position.
Refer to Section 2.12-2 for procedure on how to lock
the turret.
SJ 46A & SJ 46AJ
December 2007 Page 17
Page 17
TM
Component Identification Section 2 - Operation
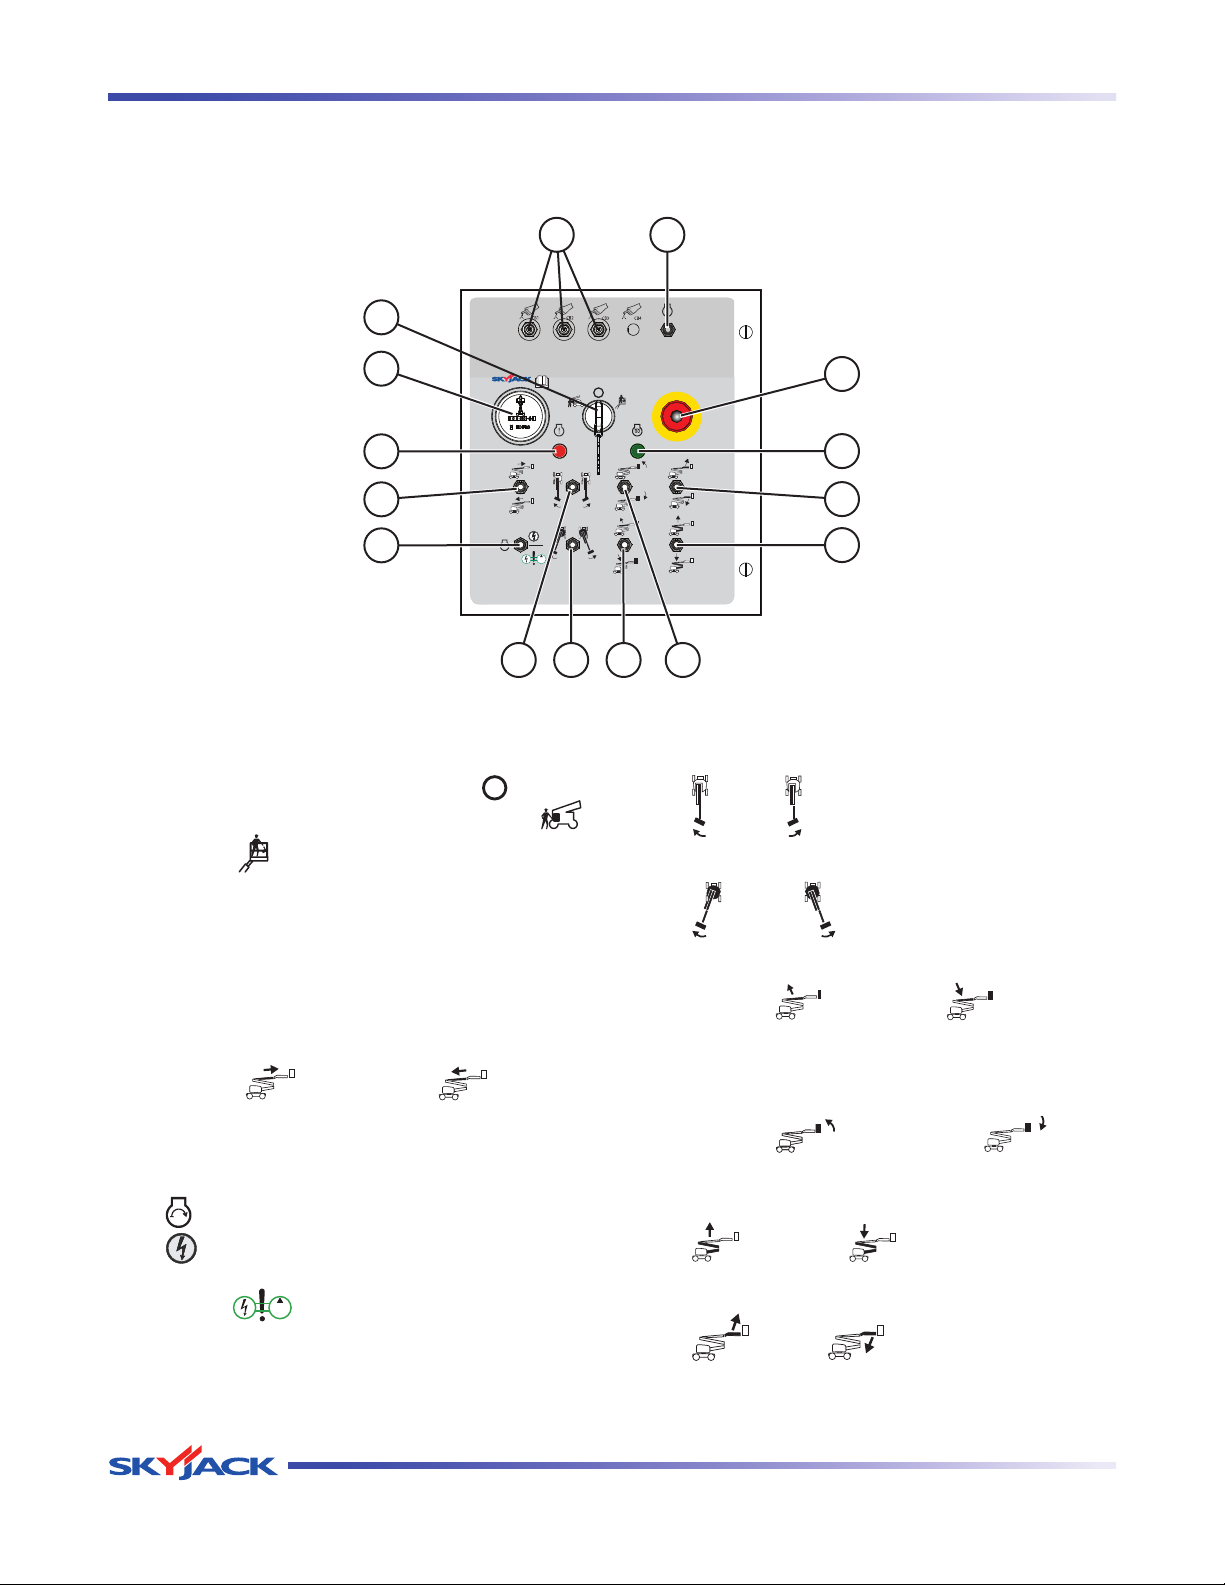
2.5-11 Base Control Console
This control console is located in the panel mounted in the control compartment.
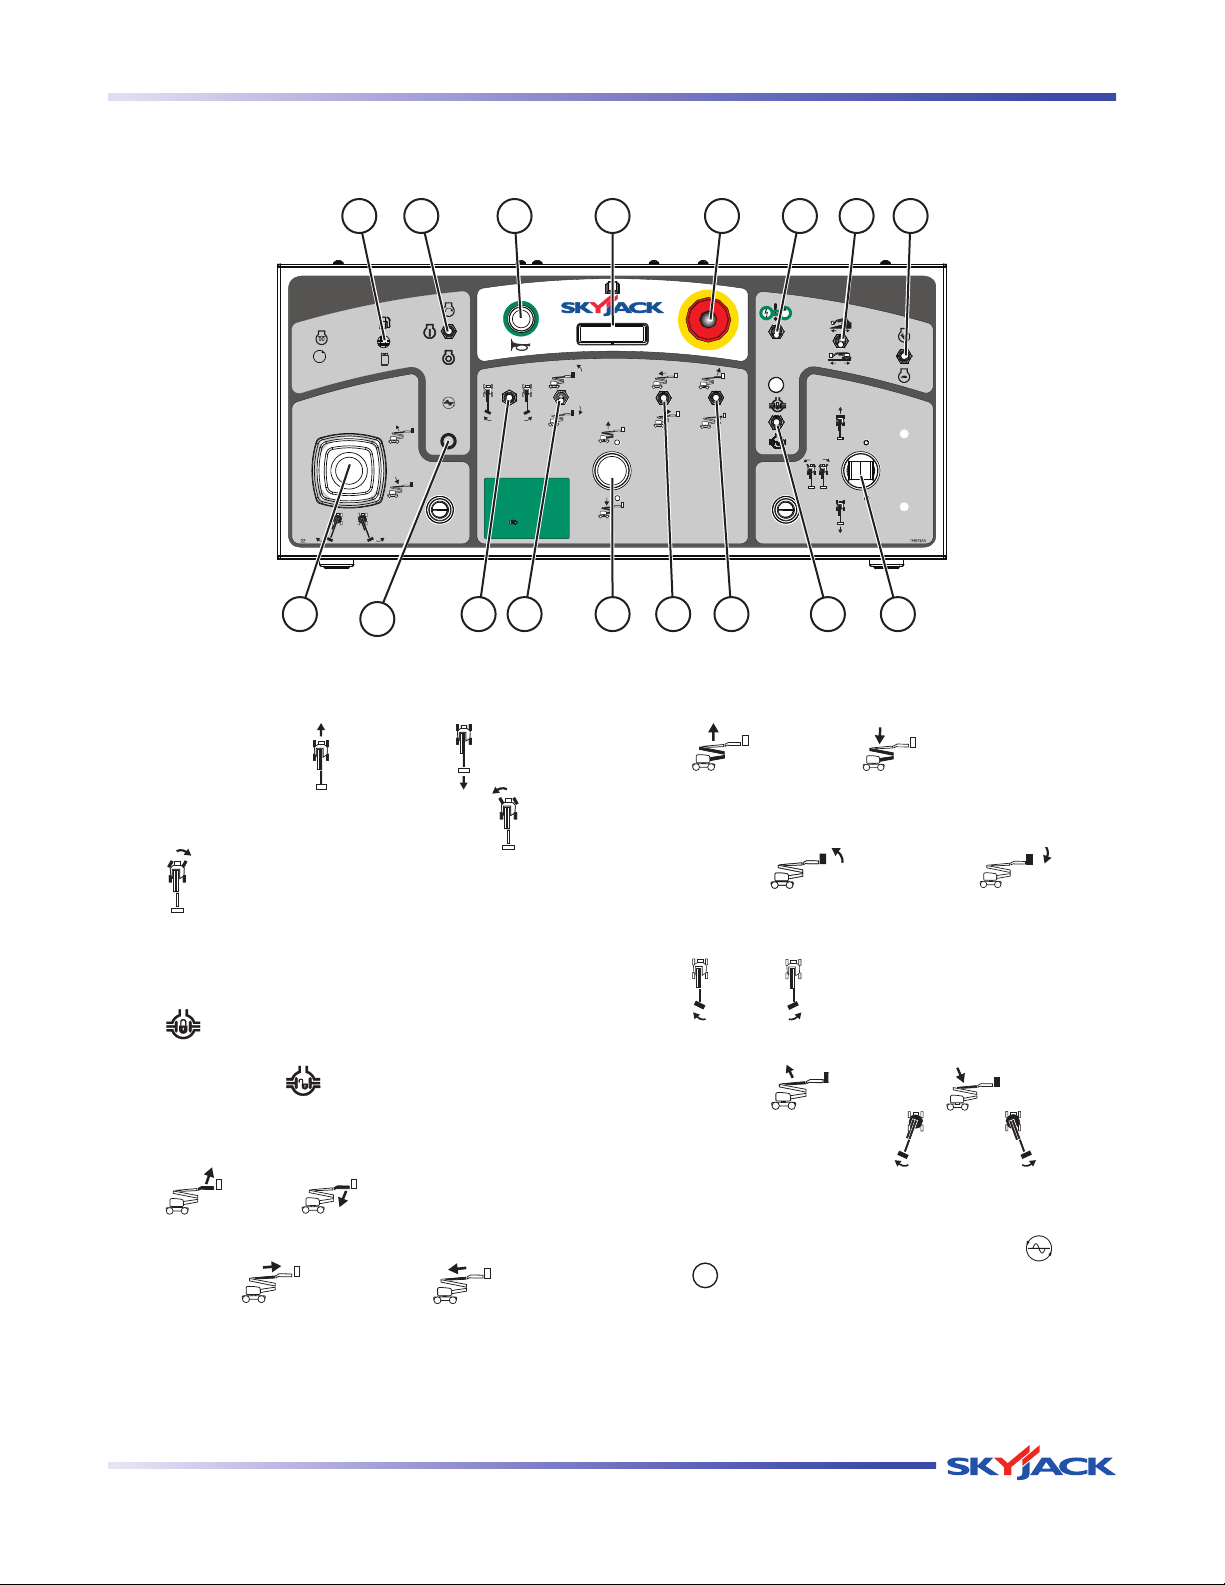
15
1
2
3
4
5
7
6
Figure 2-6. Base Control Console
1. Base/Off/Platform Key Switch - This three-way
selector switch allows operator to “
” turn off
power to aerial platform or to activate either “ ”
14
13
12
11
10
8 9
6. Platform Rotation Switch - This switch controls
“
” left or “ ” right rotation of platform.
base or “
” platform control console.
2. Hourmeter - This gauge records accumulated
operating time of engine.
3. Engine Fault - This light indicates failure in engine
control system.
4. Fly Boom Extend/Retract Switch - This switch
controls “
” extension or “ ” retraction
of fly boom.
5. Star t/ Function En able/Emergency Pow er
Switch - This momentary switch, when held in
“
” start position, starts engine. When held in
” function enable position, allows base control
“
functions to operate. With engine off, and when
held in “
” emergency power unit position,
allows base control functions to operate using
emergency power unit.
7. Turret Rotation Switch - This switch controls
” left or “ ” right rotation of turret.
“
8. Main Boom Raise/Lower Switch - This switch
controls “
” raising or “ ” lowering of
main boom.
9. Platform Leveling Override Switch - This switch
overrides automatic leveling of platform and
controls “
” tilting up or “ ” tilting
down of platform.
10. Riser Raise/Lower Switch - This switch controls
“
” raising or “ ” lowering of riser.
11. Jib Up/Down Switch - This switch controls
“
” up or “ ” down movement of jib.
Page 18 December 2007
SJ 46A & SJ 46AJ
Page 18
TM
Section 2 - Operation Component Identification
2.5-11 Base Control Console (Continued)
15
1
2
3
4
5
7
6
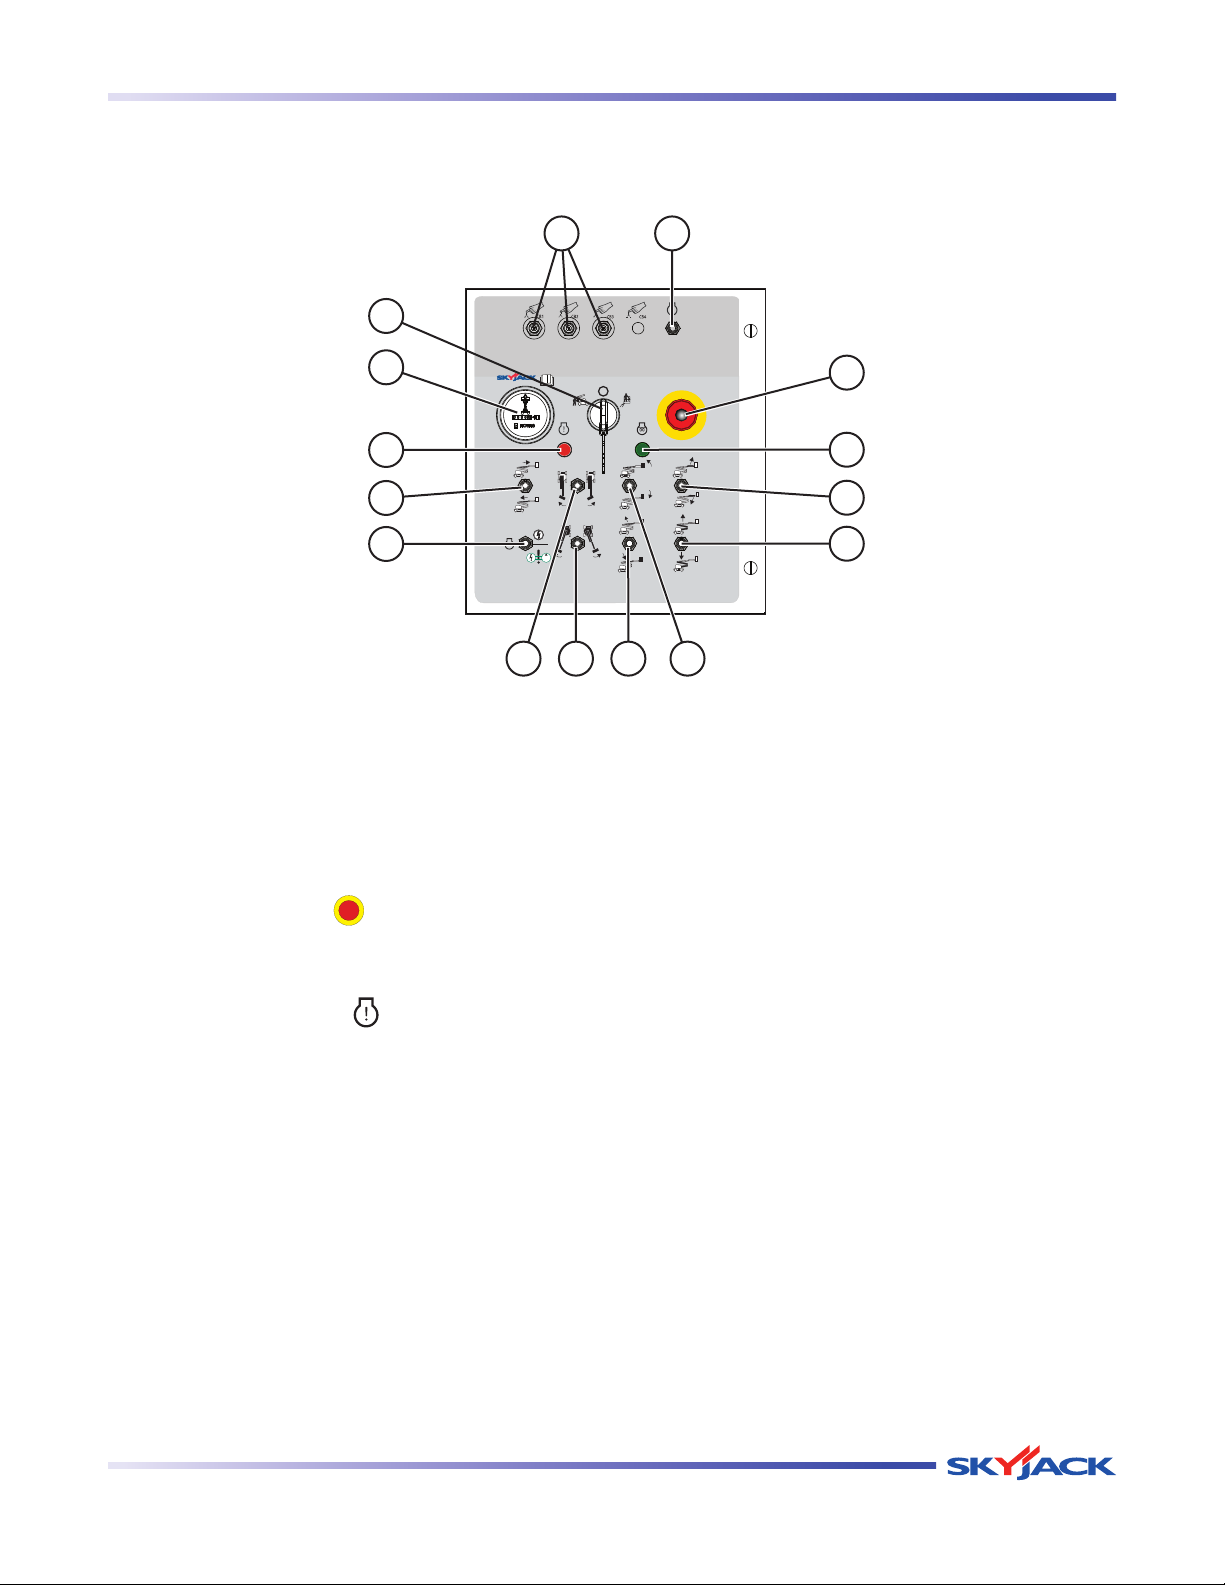
Figure 2-6. Base Control Console
12. Glow Plug (Diesel) - This light illuminates until
glow plugs have completed their timed cycle.
When the lamp goes out, the engine is ready to
be started..
14
13
12
11
10
8 9
13. E m e r g e n c y S t o p B u t t o n - T h i s r e d
“mushroom-head” “
” pushbutton disconnects
power to control circuit and shuts engine off.
14. Engine Diagnosis Switch - When held in either
direction, this switch “
” enables an error blink
code for engine control unit (ECU).
15. Circuit Breakers - In the event of a power overload
or positive circuit grounding, the circuit breaker
pops out. Push breaker back in to reset.
SJ 46A & SJ 46AJ
December 2007 Page 19
Page 19
TM
Component Identification Section 2 - Operation
149432AA
At Platform Controls:
1. Pull out emergency stop button.
2. Depress and hold foot switch.
3. Activate emergency pump switch.
4. Activate desired boom function.
EMERGENCY LOWERING
PROCEDURE
149432AA
At Platform Controls:
1. Pull out emergency stop button.
2. Depress and hold foot switch.
3. Activate emergency pump switch.
4. Activate desired boom function.
EMERGENCY LOWERING
PROCEDURE
148979AA
At Platform Controls:
1. Pull out emergency stop button.
2. Depress and hold foot switch.
3. Activate emergency pump switch.
4. Activate desired boom function.
EMERGENCY LOWERING
PROCEDURE
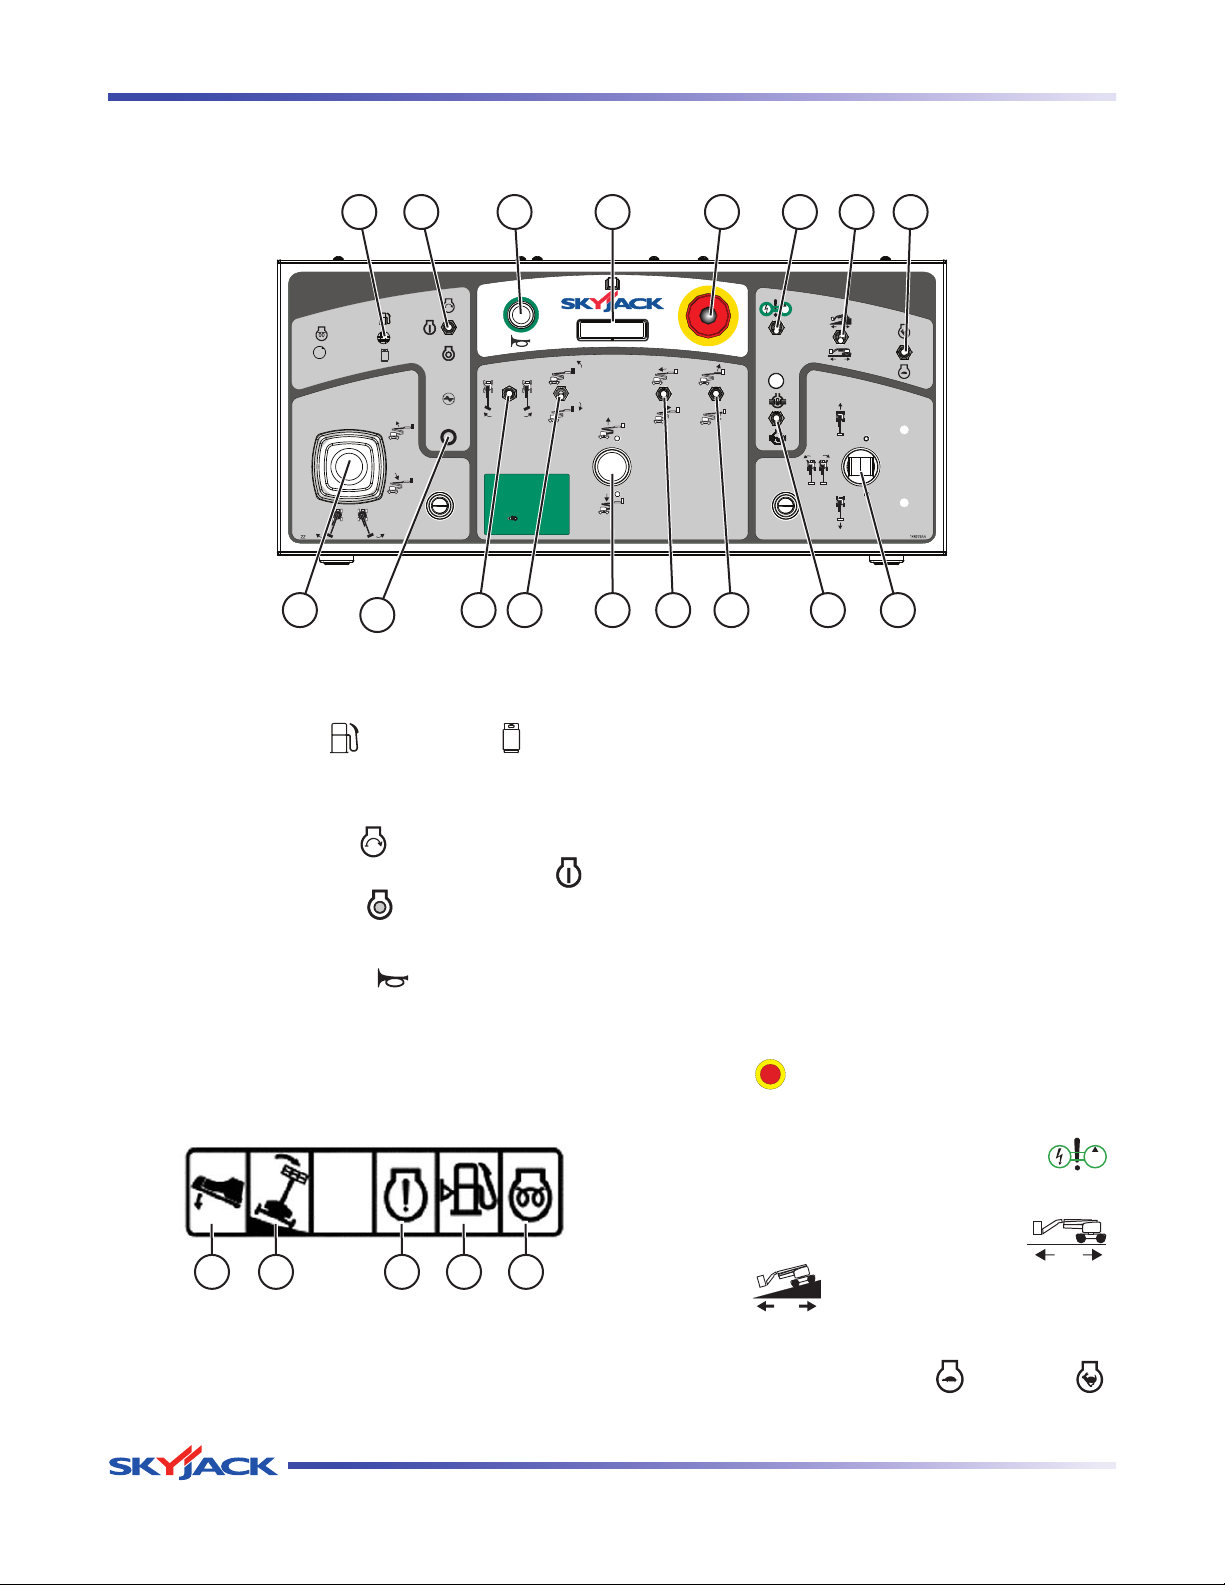
2.5-12 Platform Control Console
This metal control console is mounted at front guardrail of the platform. It has the following controls:
3 5 6 7
17
Figure 2-7. Platform Control Console
1. Dual Fuel Switch (If Equipped) - This switch
selects between “
” gasoline or “ ” liquid
propane gas.
2. Engine Start/On/Off Switch - This switch, when
held momentarily in “
” start position, starts
engine. Once started, the switch returns to “
on position. When in “
” off position, it turns
engine off.
3. Horn Pushbutton - This “
” pushbutton sounds
an automotive-type horn.
41
1112 915
10131416
82
B. Chassis Tilt - This light illuminates when the
aerial platform chassis is at an inclination that
activates the tilt sensor. At this inclination, an
audible alarm will sound at the platform. Refer
to Section 2.15 for instructions regarding
recovery from an inclined position.
C. Engine - This light indicates failure in engine
”
control system.
D. Fuel - This light indicates low fuel level.
E. Glow Plug (Diesel) - This light illuminates
until glow plugs have completed their timed
cycle. When the lamp goes out, the engine is
ready to be started.
4. Status Indicator Pilot Lights - These lights
5. Emergency Stop Button - This red “mushroom-
indicate operational status and errors in any
function in the controls/engine.
6. Emergency Power Unit - This switch “
7. Torque Switch - This switch selects “
A B C D E
A. Footswitch - This light illuminates when
footswitch is depressed. A 15-second anti-
8. Low/High Throttle Switch - This rotary switch
tiedown feature deactivates footswitch when
operator depresses it for 15 seconds without
activating any function.
Page 20 December 2007
head” “
” pushbutton disconnects power to
control circuit and shuts engine off.
enables emergency power unit.
low or “
allows selection between “
” high torque.
” low and “ ”
high engine throttle speeds.
SJ 46A & SJ 46AJ
”
”
Page 20
TM
Section 2 - Operation Component Identification
149432AA
At Platform Controls:
1. Pull out emergency stop button.
2. Depress and hold foot switch.
3. Activate emergency pump switch.
4. Activate desired boom function.
EMERGENCY LOWERING
PROCEDURE
149432AA
At Platform Controls:
1. Pull out emergency stop button.
2. Depress and hold foot switch.
3. Activate emergency pump switch.
4. Activate desired boom function.
EMERGENCY LOWERING
PROCEDURE
148979AA
At Platform Controls:
1. Pull out emergency stop button.
2. Depress and hold foot switch.
3. Activate emergency pump switch.
4. Activate desired boom function.
EMERGENCY LOWERING
PROCEDURE
2.5-12 Platform Control Console (Continued)
3 5 6 7
17
Figure 2-7. Platform Control Console
9. Drive/Steer Controller - This one-hand lever
controls driving “ ” forward or “ ” backward.
41
1112 915
10131416
82
13. Riser Raise/Lower Switch - This switch controls
“
” raising or “ ” lowering of riser.
The rocker switch controls steering “
” right. Internal springs return it to neutral when
“
” left or
stick is released.
10. Differential Lock Switch - This momentary switch,
when pushed forward and then released, engages
“
” differential lock and turns differential light
on. When pulled backward and then released,
disengages “
” differential lock and turns
differential light off.
11. Jib Up/Down Switch - This switch controls
“
” up or “ ” down movement of jib.
12. Fly Boom Extend/Retract Switch - This switch
controls “
” extension or “ ” retraction
of fly boom.
14. Platform Leveling Override Switch - This switch
overrides automatic leveling of platform and
controls “
” tilting up or “ ” tilting
down of platform.
15. Platform Rotation Switch - This switch controls
“
” left or “ ” right rotation of platform.
16 Boom/Turret Controller - This dual-axis lever
controls “
main boom or rotating “
” raising or “ ” lowering of
” left or “ ” right of
turret.
17. Generator On/Off Switch (If Equipped) - This
switch turns the hydraulic generator “ ” on or
“ ” off.
SJ 46A & SJ 46AJ
December 2007 Page 21
Page 21
TM
Special Options Section 2 - Operation
2.6 Special Options
The following descriptions are for identification,
explanation and locating purposes only.
2.6-1 Cold Weather Start (If Equipped)
The battery warmer/hydraulic oil heater cord is located
on the engine compartment near the battery. This cord
is plugged into the AC outlet at least 4 hours before
starting engine when temperature gets below -11°C
(+11°F).
2.6-2 Work Light (If Equipped)
The work light assembly is mounted on the railings of
the platform.
1
Figure 2-8. Work Light
2.6-3 Flashing Amber Light (If Equipped)
The flashing amber light is located on top of the turret
of the aerial platform. This light flashes when boom
function is activated. This works in conjunction with all
motion alarm.
NOTE
The combined weight of attachment,
panels, occupants and tools should not
exceed platform rated capacity.
Work Light 1. - This light turns on when plugged
into the AC outlet on the platform.
WARNING
Work lights are not intended to replace
the ambient lighting required to navigate
and operate this aerial platform.
Page 22 December 2007
SJ 46A & SJ 46AJ
Page 22
TM
Section 2 - Operation Special Options
2.6-4 Tire Sealant (If Equipped)
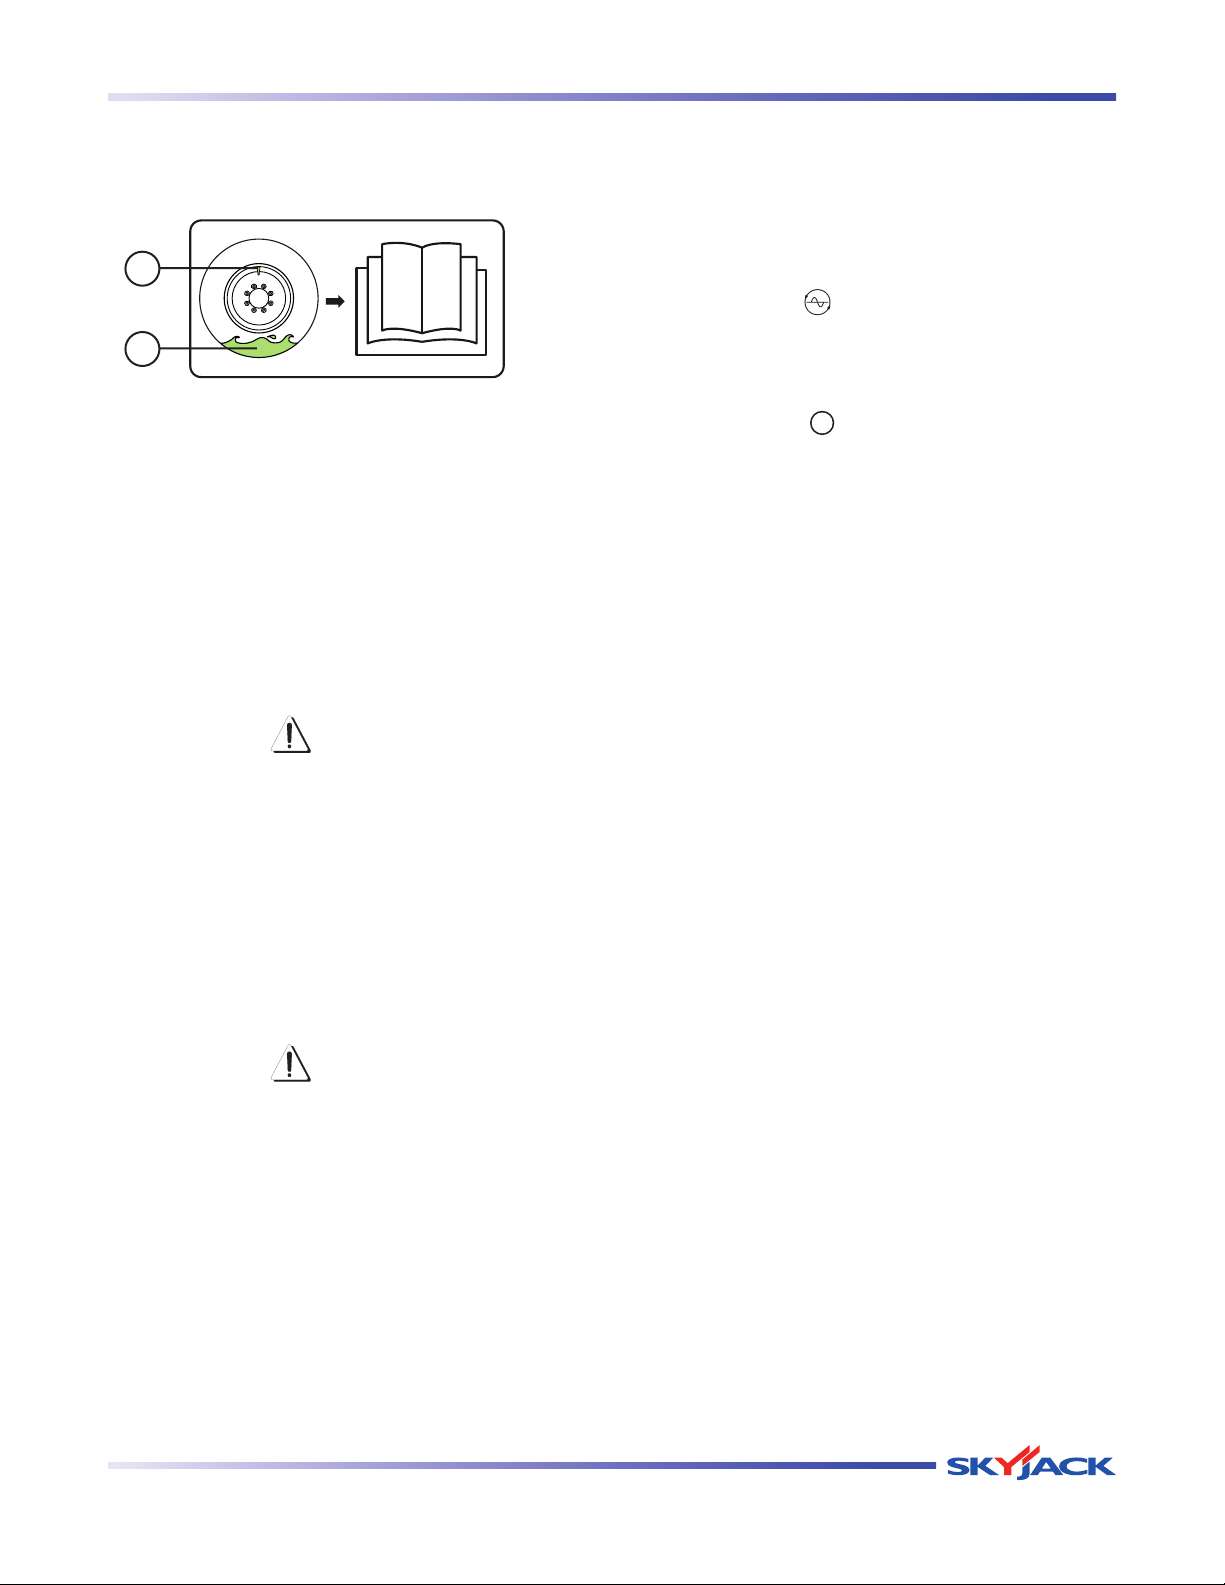
This option is identified with a tire sealant label located
at the rim of the wheel.
1
2
Figure 2-9. Tire Sealant Label
Tire Sealant Label - This label indicates that tire sealant
is present inside the tires.
Tire Valve Stem Cap1. - This green valve stem cap
is substituted onto air tires to indicate sealant has
been installed.
Sealant2. - This symbol signifies that the tire is
equipped with sealant.
3.6-5 Hydraulic Generator (If Equipped)
To start the hydraulic generator:
1. Ensure that engine is running.
2. On platform control console, turn generator on/
off switch to “
” on position.
To restore normal operation:
1. On platform control console, turn generator on/
off switch to “
” off position.
NOTE
An engine shut down will turn the generator
off. Normal boom functions are disabled
while the generator is on.
WARNING
The operator MUST properly handle tires
with sealant.
When depressurizing, inflating or •
checking tire pressure, ensure that
the valve stem is at the top to prevent
sealant from entering the stem (refer
to Figure 2-9).
If the tire no longer holds pressure, •
replace the tire.
WARNING
The sealant contains propylene glycol.
Do not ingest, inhale or get into eyes. If
it gets into your eyes, flush with water for
15 minutes. Consult physician.
SJ 46A & SJ 46AJ
December 2007 Page 23
Page 23

TM
Operator’s Responsibility Section 2 - Operation
2.7 Operator’s Responsibility
It is the responsibility of the operator, prior to each work
shift, to perform the following:
1. Visual and Daily Maintenance Inspections
are designed to di scover any damage of •
components before the aerial platform is put into
service.
are done before the operator performs the function •
tests.
WARNING
Failure to locate and repair damage, and
discover loose or missing parts may
result in an unsafe operating condition.
2. Function Tests
are designed to discover any malfunctions before •
the aerial platform is put into service.
IMPORTANT
The operator must understand and follow
the step-by-step instructions to test all
aerial platform functions.
The operator should make a copy of the Operator’s
Checklist (see Table 2.8) and fill out the visual and daily
maintenance inspections and the function tests sections
while performing the items outlined in Section 2.8 and
Section 2.9.
3. Cold Weather Hydraulic System Warm Up
WARNING
Caution must be exercised when operating
aerial platform in cold temperature. Cold
temperature can affect the performance
of the aerial platform. Braking response
and other functions may delay.
CAUTION
Ensure hydraulic oil throughout system
is warmed before op erating aerial
platform in low temperatures. Failure to
heed this warning can lead to unexpected
movements, product damage, death or
serious injury.
Boom Functions:
WARNING
Be aware of overhead obstructions or
other possible hazards around the aerial
platform when lifting.
Run engine at low throttle. -
Raise, lower, extend and retract boom slowly -
several times until boom functions are at
acceptable operating performance.
Drive Functions:
IMPORTANT
If aerial platform is damaged or any
unauthorized variation from factorydelivered condition is discovered, aerial
platform must be tagged and removed
from service.
Repairs to the aerial platform may only be made by a
qualified service technician. After repairs are completed,
the operator must perform visual and daily maintenance
inspections & function tests again.
Sc heduled maintenanc e ins pection s sha ll only
be performed by qualified service technician (see
Table 2.7).
Page 24 December 2007
WARNING
Ensure that there are no personnel
or obstructions in the path of travel,
including blind spots.
Run engine (if applicable) in low throttle. -
Drive aerial platform forward and backward -
slowly several times until braking response
is in safe operating performance.
SJ 46A & SJ 46AJ
Page 24
TM
Section 2 - Operation Visual and Daily Maintenance Inspections
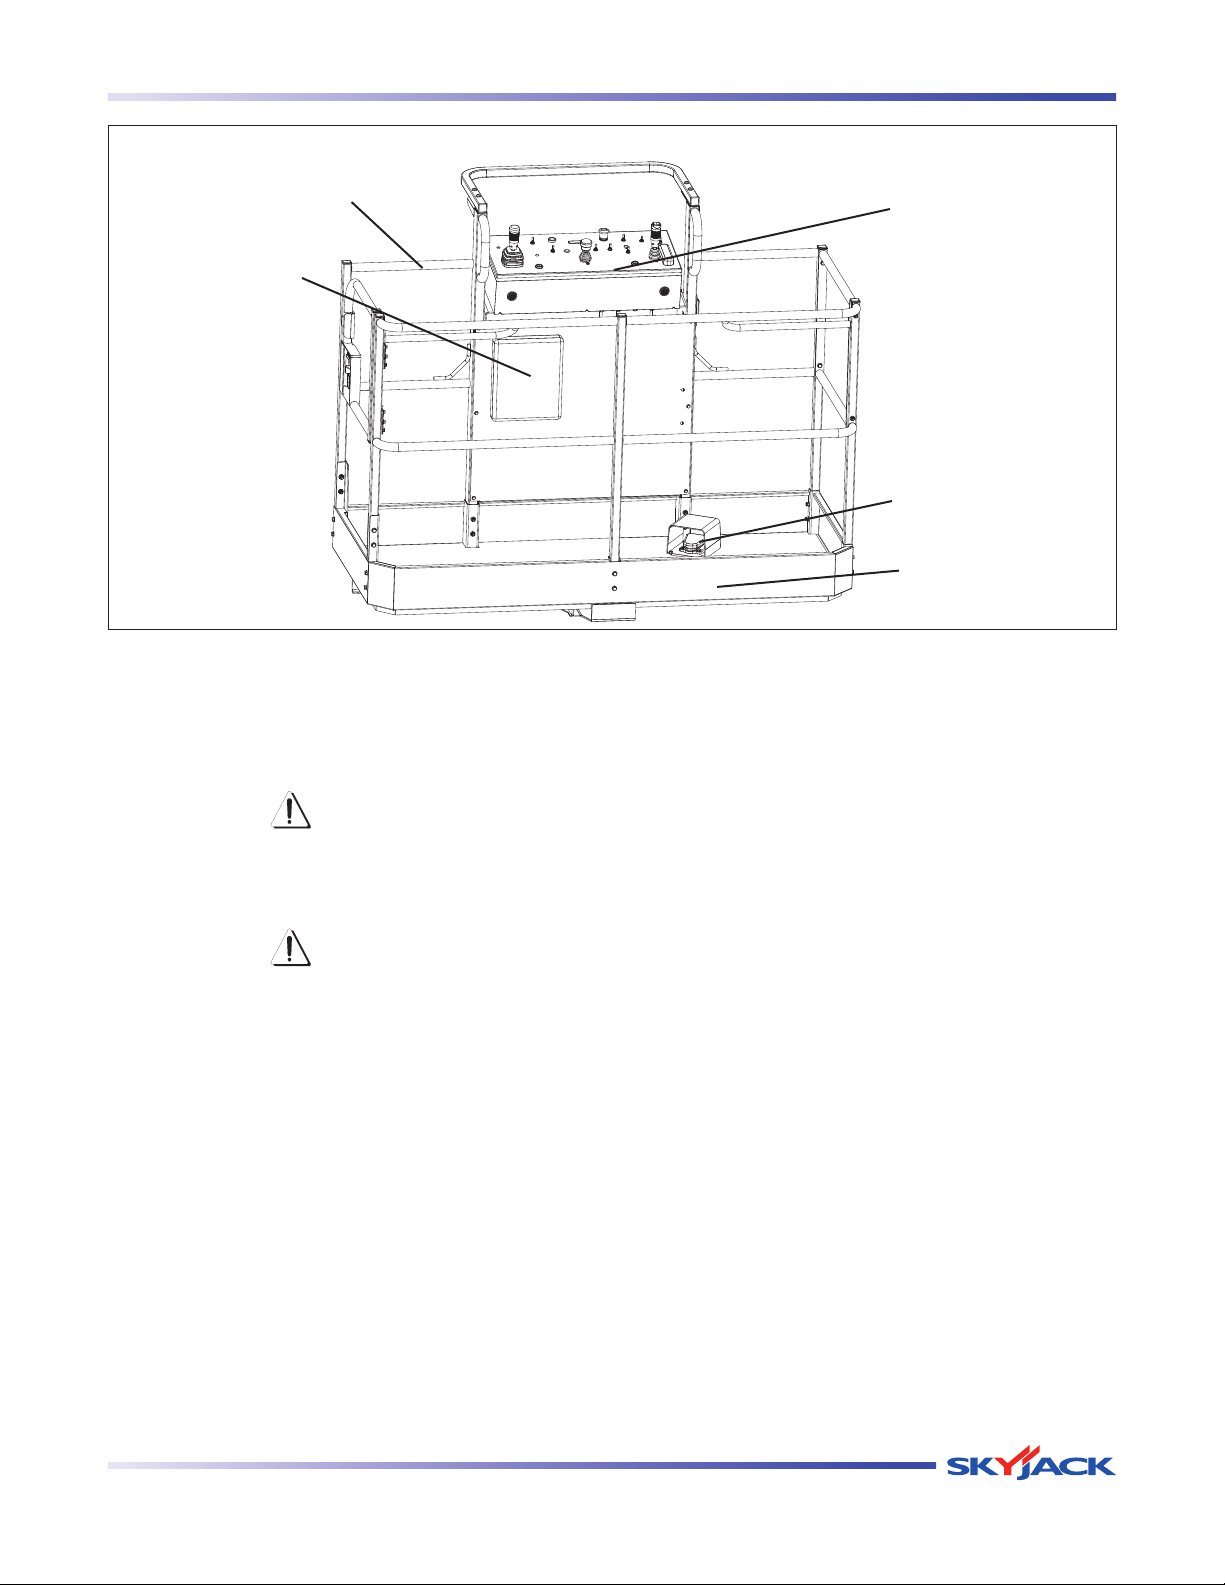
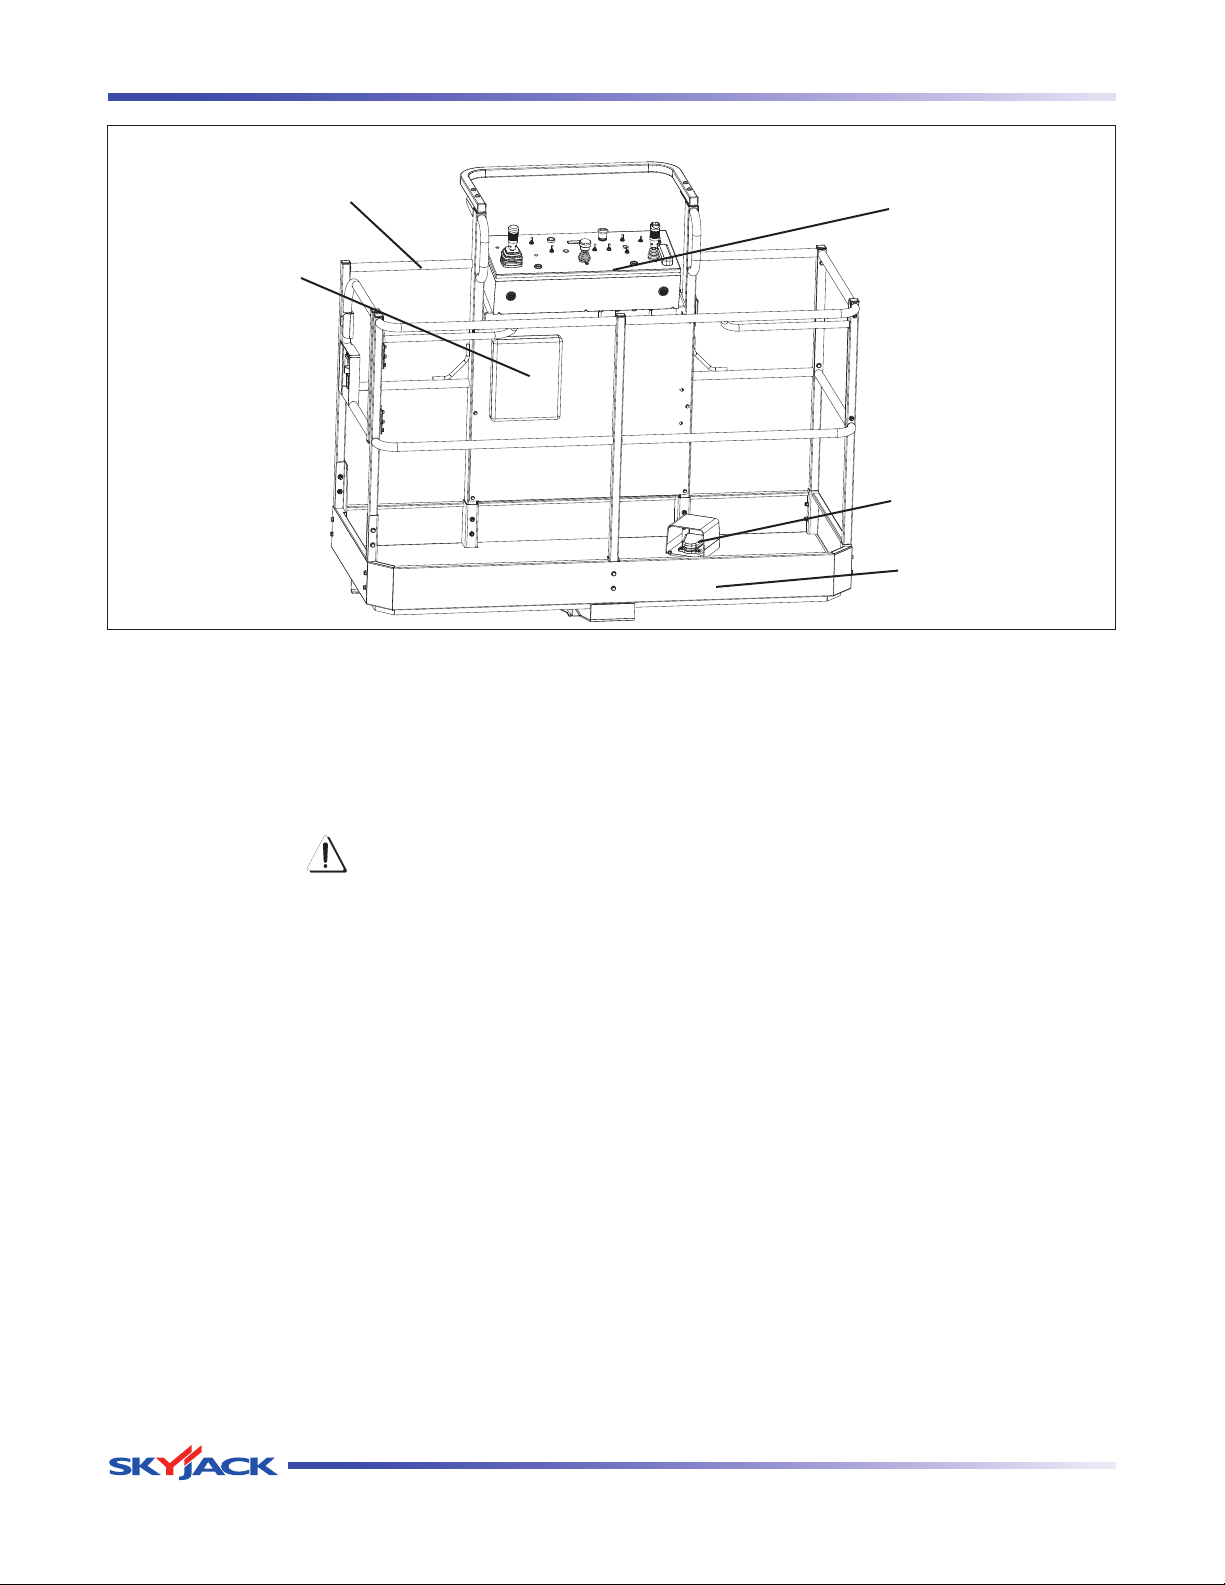
Platform
Railing
Manual Box
2.8 Visual & Daily Maintenance
Inspections
Begin the visual and daily maintenance inspections
by checking each item in sequence for the conditions
listed in this section.
Platform Control
Console
Footswitch
Platform
Assembly
Inspect the following areas for chafed, corroded
and loose wires:
boom to platform cable harness•
engine compartment electrical panel•
engine wiring harness•
rotary manifold wiring•
WARNING
To avoid injury, do not operate an aerial
platform until all malfunctions have been
corrected.
WARNING
To avoid possible injury, ensure aerial
platform power is off during your visual
and daily maintenance inspections.
NOTE
While doing visual and daily inspections
in different areas, be aware to also inspect
limit switches, electrical and hydraulic
components.
2.8-1 Labels
Refer to the labels section in this manual and determine
that all labels are in place and are legible.
2.8-2 Electrical
Maintaining the electrical components is essential
to good performance and service life of the aerial
platform.
2.8-3 Limit Switches
Ensure limit switches are properly secured with no signs
of visible damage and movement is not obstructed.
2.8-4 Hydraulic
Maintaining the hydraulic components is essential
to good performance and service life of the aerial
platform.
Perform a visual inspection around the following
areas:
hydraulic tank filter, fittings, hoses, emergency •
power unit and turret/base surface
engine compartment fittings, hoses, main •
pump, filter and turret/base surface
all hydraulic cylinders•
all hydraulic manifolds•
underside of the turret•
underside of the base•
ground area under the aerial platform•
SJ 46A & SJ 46AJ
December 2007 Page 25
Page 25
TM
Visual and Daily Maintenance Inspections Section 2 - Operations
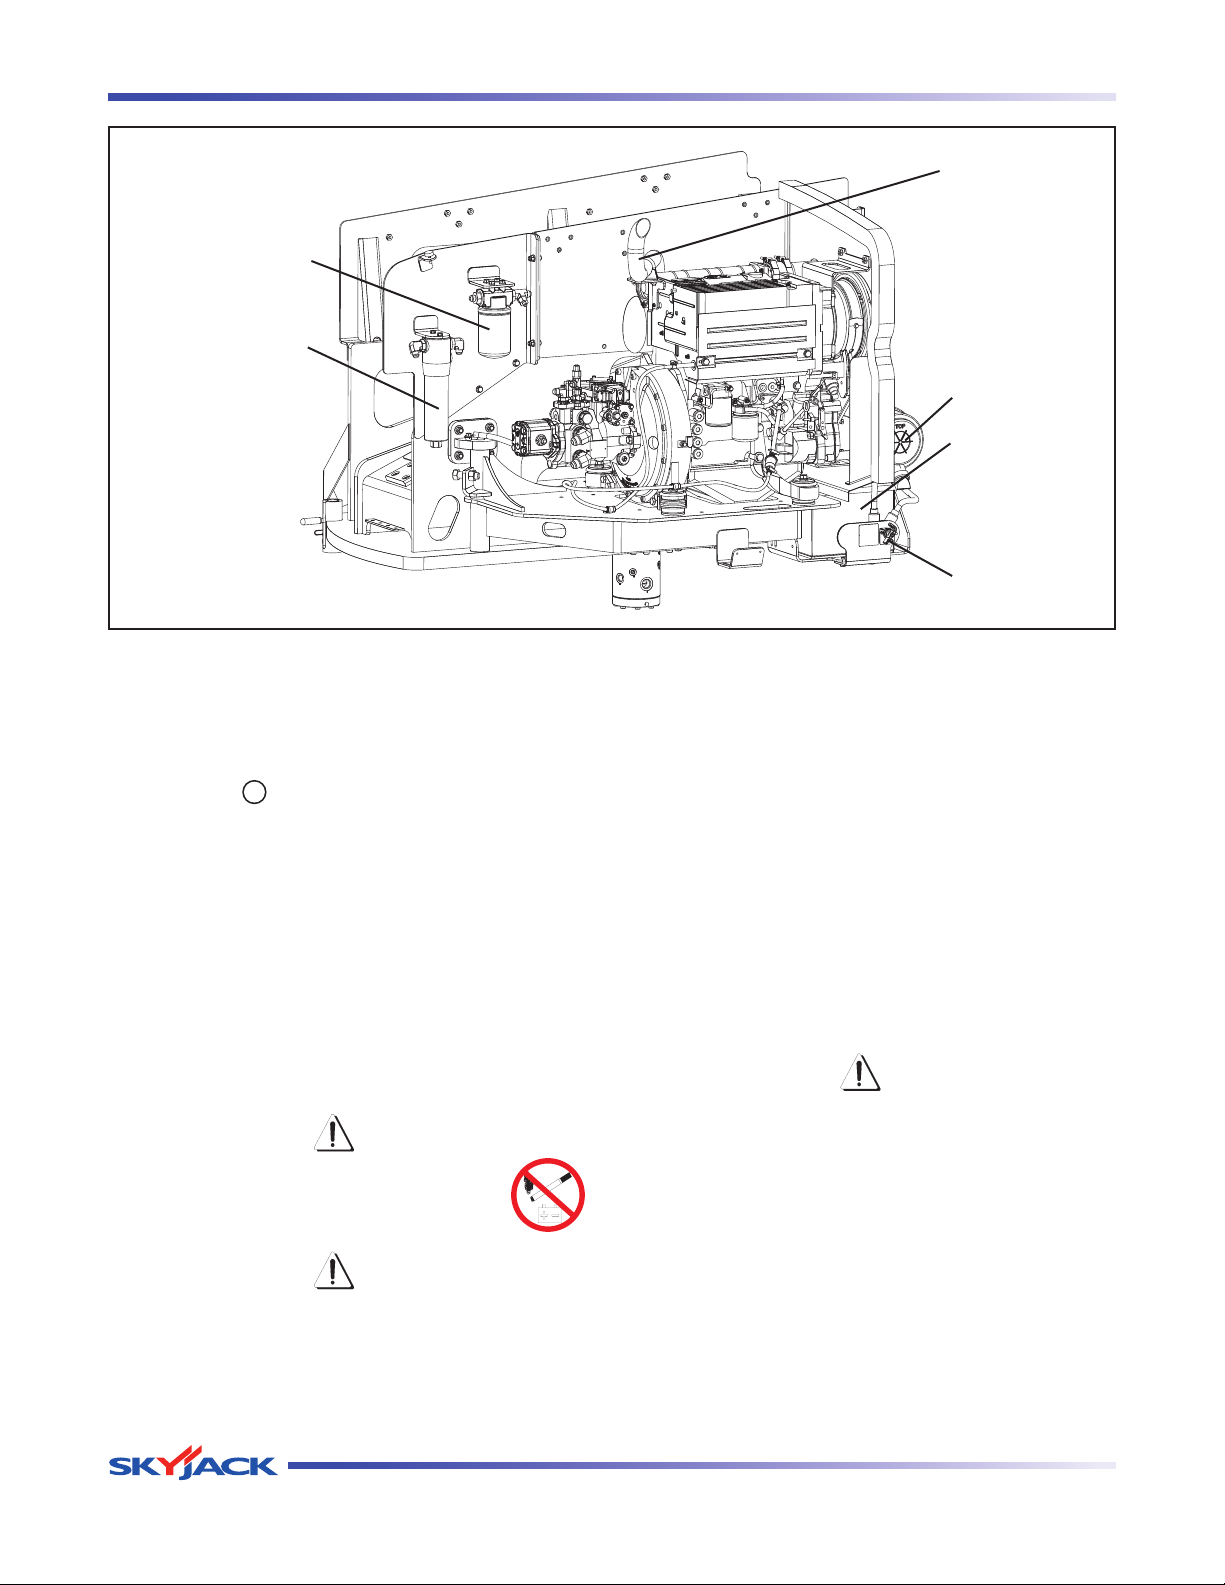
Muffler
Charge Pressure
Filter
High Pressure
Filter
Air Filter
Battery
Main Power
Disconnect
Switch
2.8-5 Engine Compartment
Ensure all compartment latches are secure -
and in proper working order.
Main Power Disconnect Switch•
Turn main power disconnect switch to
-
“ ” off position.
Ensure there are no loose or missing
-
parts and there is no visible damage.
-
Ensure all cables are secure and switch
is in proper working condition.
Battery•
Proper battery condition is essential to good
engine performance and operational safety.
Improper fluid levels or damaged cables and
connections can result in engine component
damage and hazardous conditions.
WARNING
Explosion hazard. Keep flames
and sparks away. Do not smoke
near batteries.
1. Check battery cases for damage.
2. Clean battery terminals and cable ends
thoroughly with a terminal cleaning tool or
wire brush.
3. Ensure all battery connections are tight.
4. If applicable, check battery fluid level. If
plates are not covered by at least 1/2”
(13 mm) of solut ion, add dist ille d or
demineralized water.
5. Replace battery if damaged or incapable of
holding a lasting charge.
WARNING
Use original or manufacturer-approved
parts and components for the aerial
platform.
WARNING
Battery acid is extremely corrosive Wear proper eye and facial protection as
well as appropriate protective clothing.
If contact occurs, immediately flush with
cold water and seek medical attention.
Page 26 December 2007
SJ 46A & SJ 46AJ
Page 26
TM
Section 2 - Operation Visual and Daily Maintenance Inspections
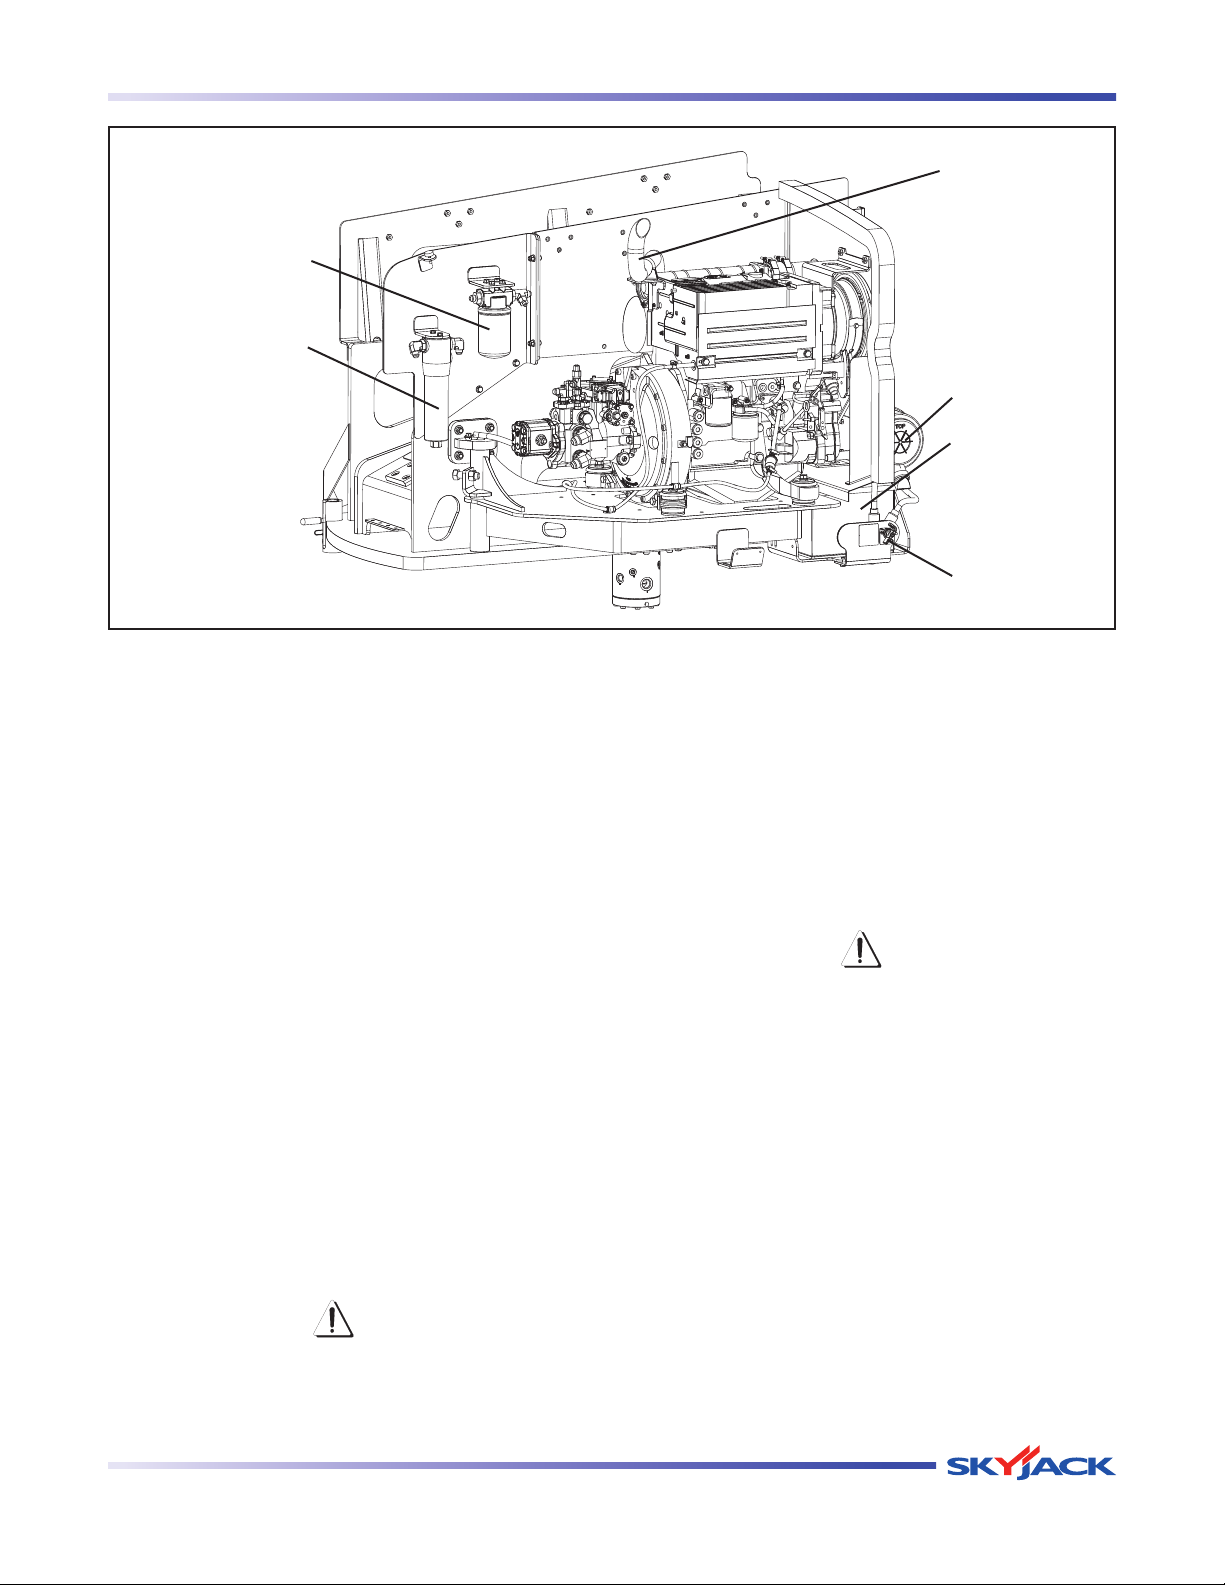
Muffler
Charge Pressure
Filter
High Pressure
Filter
Air Filter
Battery
Main Power
Disconnect
Switch
High Pressure Filter •
Ensure housing is secure and shows no -
visible damage or leakage.
Hydraulic Pumps•
Ensure there are no loose or missing -
parts and there is no visible damage.
Ensure all bolts are properly tightened.
-
Ensure all fittings and hoses are properly -
tightened and there is no evidence of
hydraulic leakage.
Muffler and Exhaust •
Ensure muffler and exhaust system are -
properly secured, with no evidence of
damage.
Engine Pivot Tray•
Ensure there are no loose or missing -
parts and no visible damage to the engine
pivot tray. Ensure that tray-securing bolt
is in place.
Engine Oil Level •
Maintaining the engine components -
is essential to good performance and
service life of the aerial platform.
Check oil level on dipstick
Oil level should be in the “safe” zone. -
Add oil as needed. Refer to Table 2.2b for
recommended oil type.
Engine Air Filter •
Ensure there are no loose or missing -
parts and there is no visible damage.
Fuel Leaks•
Ensure that there no fuel leaks.
-
DANGER
Engine fuels are combustible. Inspect
the aerial platform in an open, wellventilated area away from heaters,
sparks and flames. Always have an
approved fire extinguisher within easy
reach.
Ensure fuel tank, hoses and fittings show -
no visible damage and no evidence of
fuel leakage.
Beware of hot engine components.
SJ 46A & SJ 46AJ
WARNING
December 2007 Page 27
Page 27
TM
Visual and Daily Maintenance Inspections Section 2 - Operations
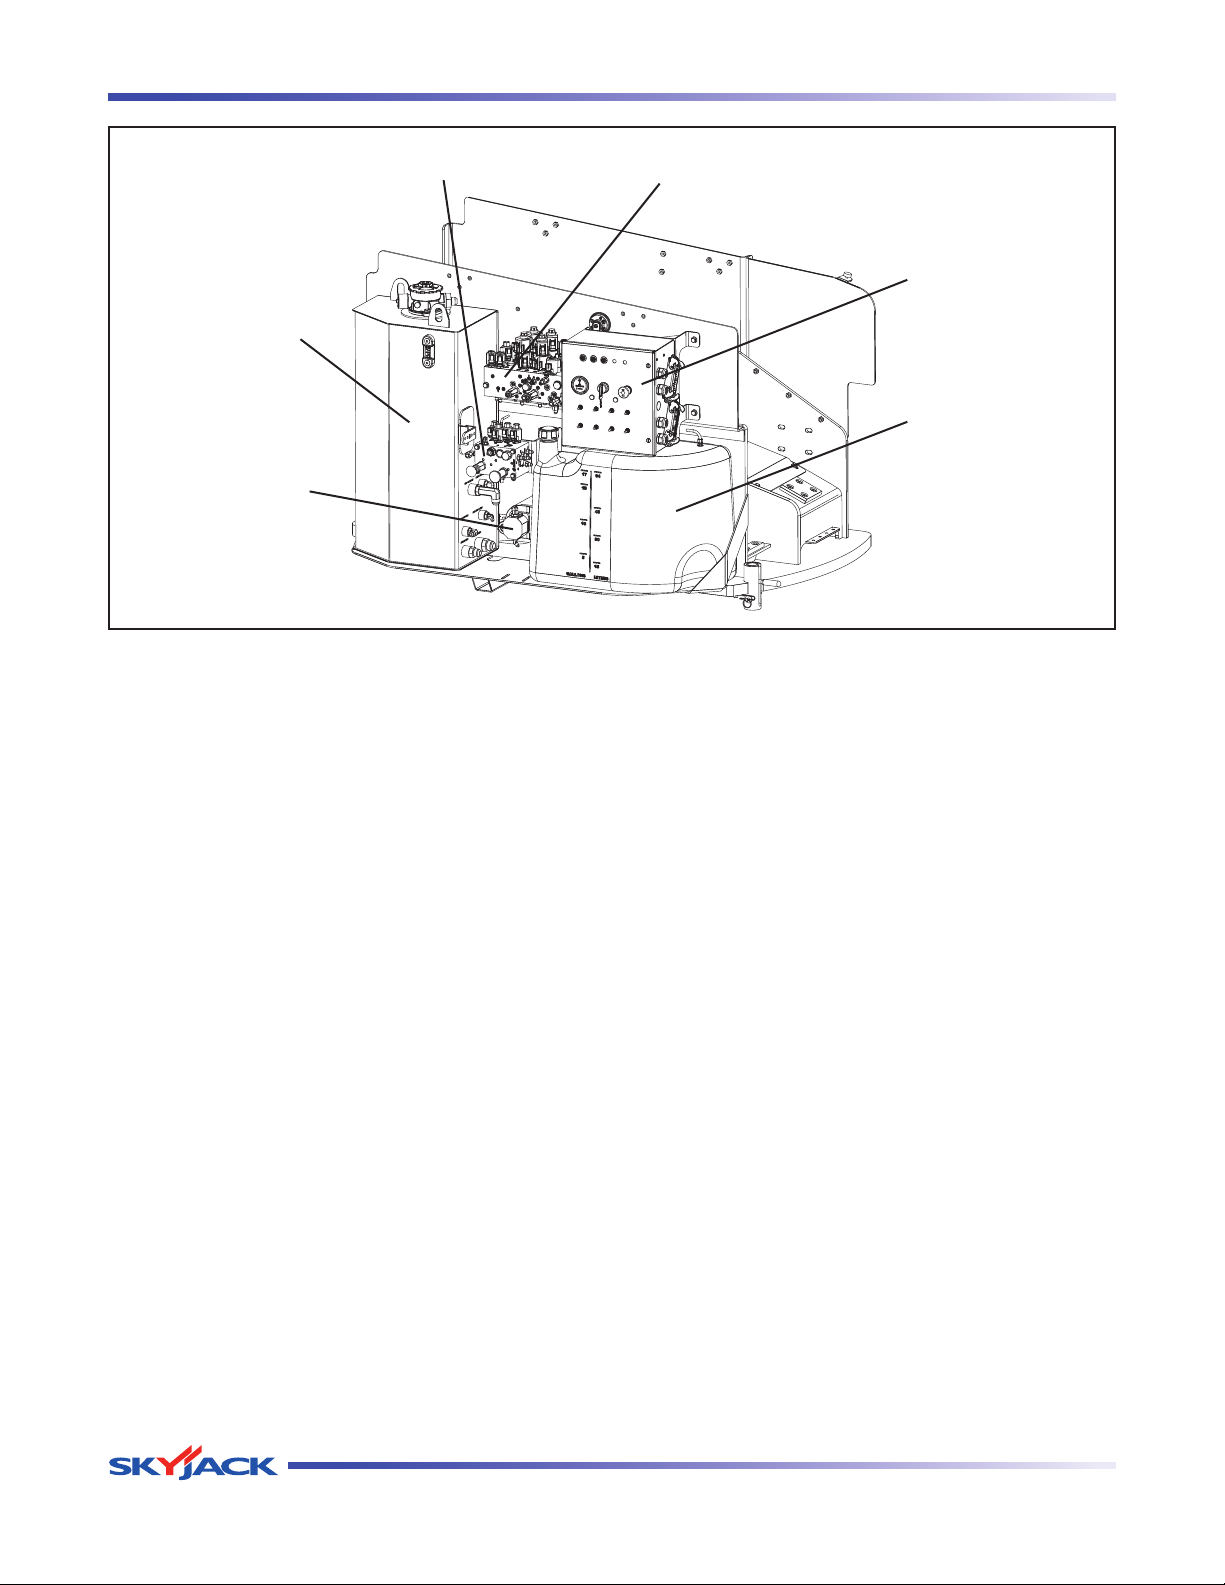
Brake Manifold Main Manifold
Base Control
Console
Hydraulic Tank
Fuel Tank
Emergency Power
Unit
2.8-6 Control Compartment
Ensure all compartment latches are -
secure and in proper working order.
Base Control Console•
Ensure all switches are returned to their -
neutral positions.
Ensure there are no loose or missing -
parts and there is no visible damage.
Hydraulic Tank •
Ensure hydraulic filler cap is secure. -
Ensure tank shows no visible damage -
and no evidence of hydraulic leakage.
Hydraulic Oil•
Be sure that the boom is in the stowed -
position, and then visually inspect the
sight gauge located on the side of the
hydraulic oil tank.
The hydraulic oil level should be between -
the minimum and maximum marks on the
sight glass. Add oil as needed. Refer to
Table 2.2b for recommended oil type.
Brake and Main Manifolds•
Ensure all fittings and hoses are properly -
tightened and there is no evidence of
hydraulic leakage.
Ensure there are no loose wires or -
missing fasteners.
Emergency Power Unit •
Ensure there are no loose or missing -
parts and there is no visible damage.
Ensure there are no loose wires or -
missing fasteners.
Ensure all fittings and hoses are properly -
tightened and there is no evidence of
hydraulic leakage.
Fuel Tank •
IMPORTANT
Before using your aerial platform ensure
there is enough fuel for expected use.
Ensure fuel filler cap is secure. -
Ensure tank shows no visible damage -
and no evidence of fuel leakage.
Page 28 December 2007
SJ 46A & SJ 46AJ
Page 28
TM
Section 2 - Operation Visual and Daily Maintenance Inspections
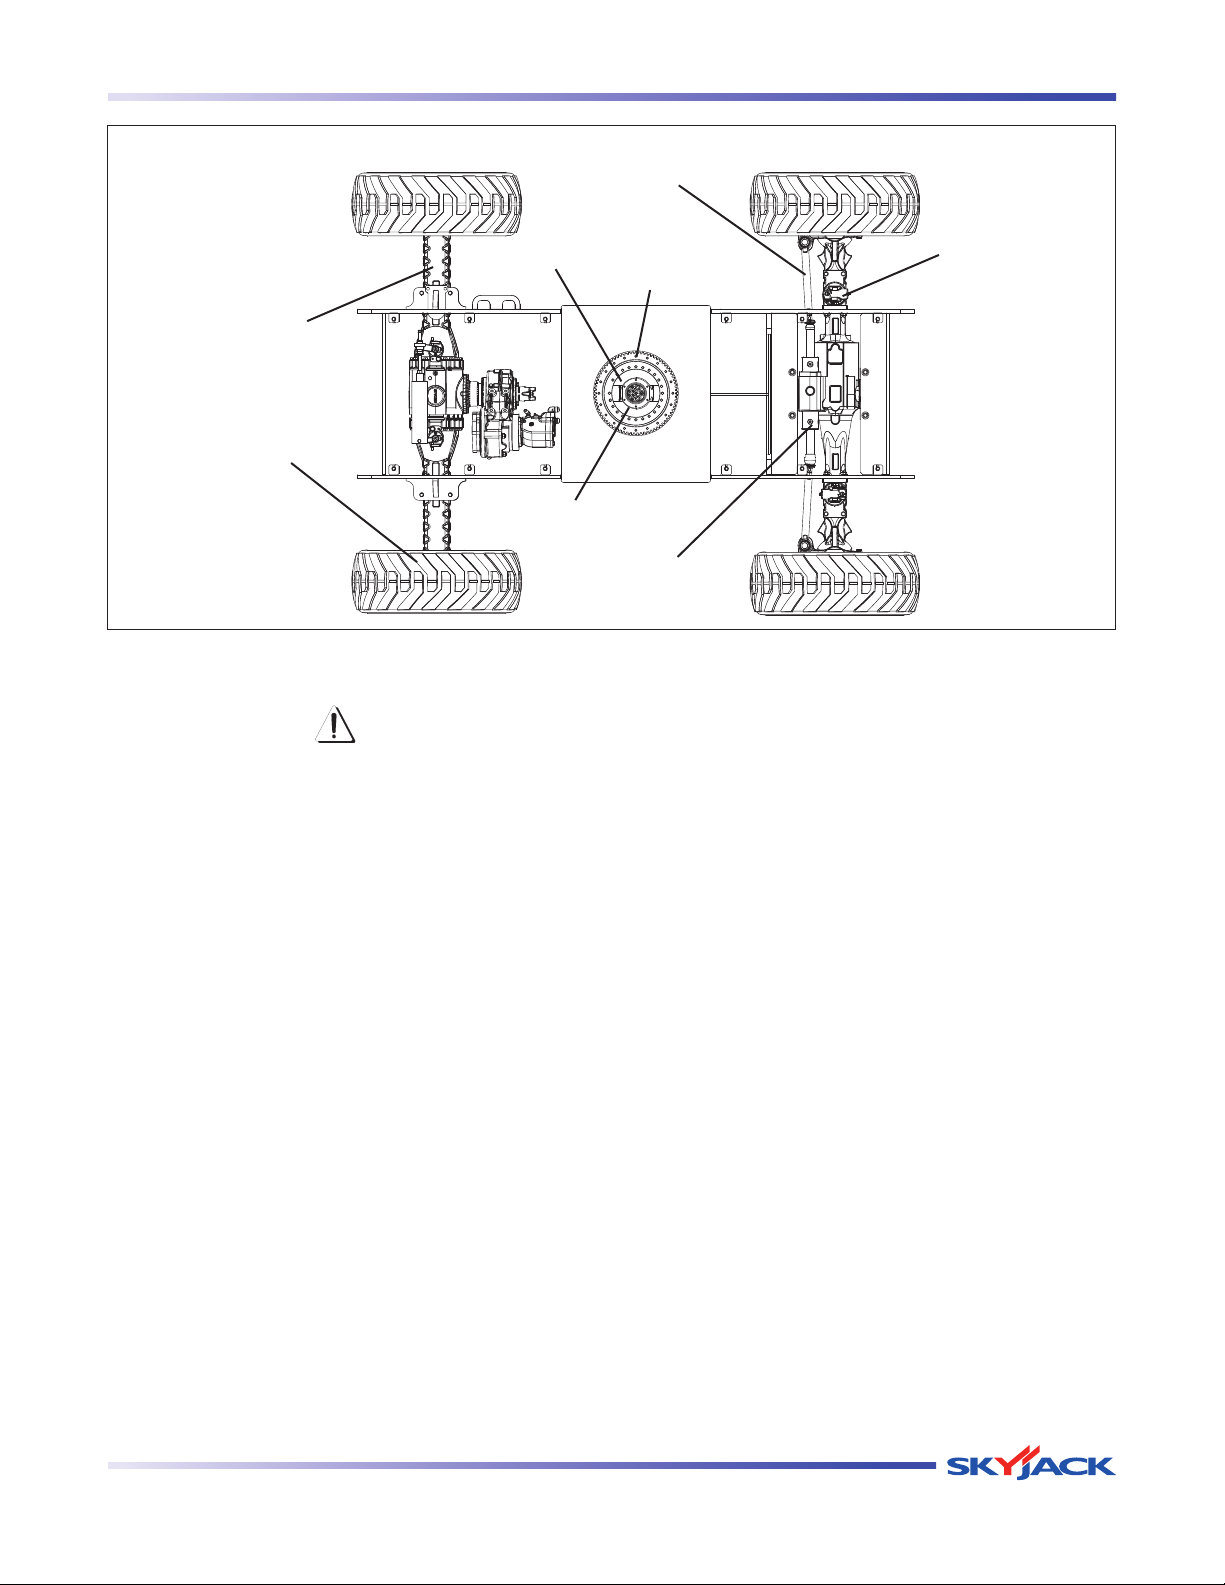
Overhead View
Tie Rod
Oscillating
Cylinder
Assembly
Drive Axle
Wheel/Tire
Assembly
Limit Switch
Rotary
Manifold
Turret Rotation
Gear
Steer Cylinder
Assembly
Fuel Leaks•
Engine fuels are combustible. Inspect
the aerial platform in an open, wellventilated area away from heaters,
sparks and flames. Always have an
approved fire extinguisher within easy
2.8-7 Base
Turret Transportation Lock•
Drive Axle •
Ensure that there no fuel leaks. -
DANGER
reach.
Ensure fuel tank, shutoff valve, hoses and -
fittings show no visible damage and no
evidence of fuel leakage.
Ensure turret transportation lock is -
unlocked, there are no loose or missing
parts and there is no visible damage.
Ensure drive axle is properly secured, -
there are no loose or missing parts, all
fittings and hoses are properly tightened
and there is no evidence of hydraulic
leakage.
Oscillating Cylinder Assembly•
Ensure oscillating cylinder assembly is -
properly secured, there are no loose
or missing parts, all fittings and hoses
are properly tightened and there is no
evidence of hydraulic leakage.
NOTE
Oscillating axle is locked when aerial
platform is in work mode. Refer to
Diagram 2.3. Axle Oscillation Diagram.
Steer Cylinder Assembly•
Ensure steer cylinder assembly is properly -
secured, there are no loose or missing
parts, all fittings and hoses are properly
tightened and there is no evidence of
hydraulic leakage.
Tie Rod•
Ensure there are no loose or missing -
parts, tie rod end studs are locked and
there is no visible damage.
SJ 46A & SJ 46AJ
December 2007 Page 29
Page 29
TM
Visual and Daily Maintenance Inspections Section 2 - Operations
Platform
Railing
Manual Box
Wheel/Tire Assembly •
The aerial platform is either equipped with
air tires or foam-filled tires. Tire and/or wheel
failure could result in an aerial platform tip
over. Component damage may also result if
problems are not discovered and repaired in
a timely fashion.
Platform Control
Console
Footswitch
Platform
Assembly
2.8-8 Manuals
Ensure a copy of operating manual, and other
important documents are enclosed in manual
storage box.
Check to be sure manual storage box is -
present and in good condition.
WARNING
An over-inflated tire can explode and
may cause death or serious injury.
Check all tire treads and sidewalls for cuts, -
cracks, punctures and unusual wear.
Check each wheel for damage and cracked -
welds.
Check each lug nut for proper torque to -
ensure none are loose.
To maximize stability, it is essential to maintain
proper pressure in all air-filled tires.
Check each tire with an air pressure gauge -
and add air as needed.
Refer to Table 2.4 for tire/wheel specifications.
Ensure manuals are legible and in good -
condition.
Always return manuals to the manual storage -
box after use.
2.8-9 Platform Assembly
Ensure there are no loose or missing parts -
and there is no visible damage.
Ensure all fasteners are securely in place. -
Ensure all railings are properly positioned -
and secured.
Ensure gate is in good working order. -
Ensure footswitch is in good working order -
and has not been modified, disabled or
blocked.
2.8-10 Platform Control Console
Ensure all switches/controllers are returned -
to neutral and are properly secured.
Ensure there are no loose or missing parts -
and there is no visible damage.
Page 30 December 2007
SJ 46A & SJ 46AJ
Page 30
TM
Section 2 - Operation Visual and Daily Maintenance Inspections
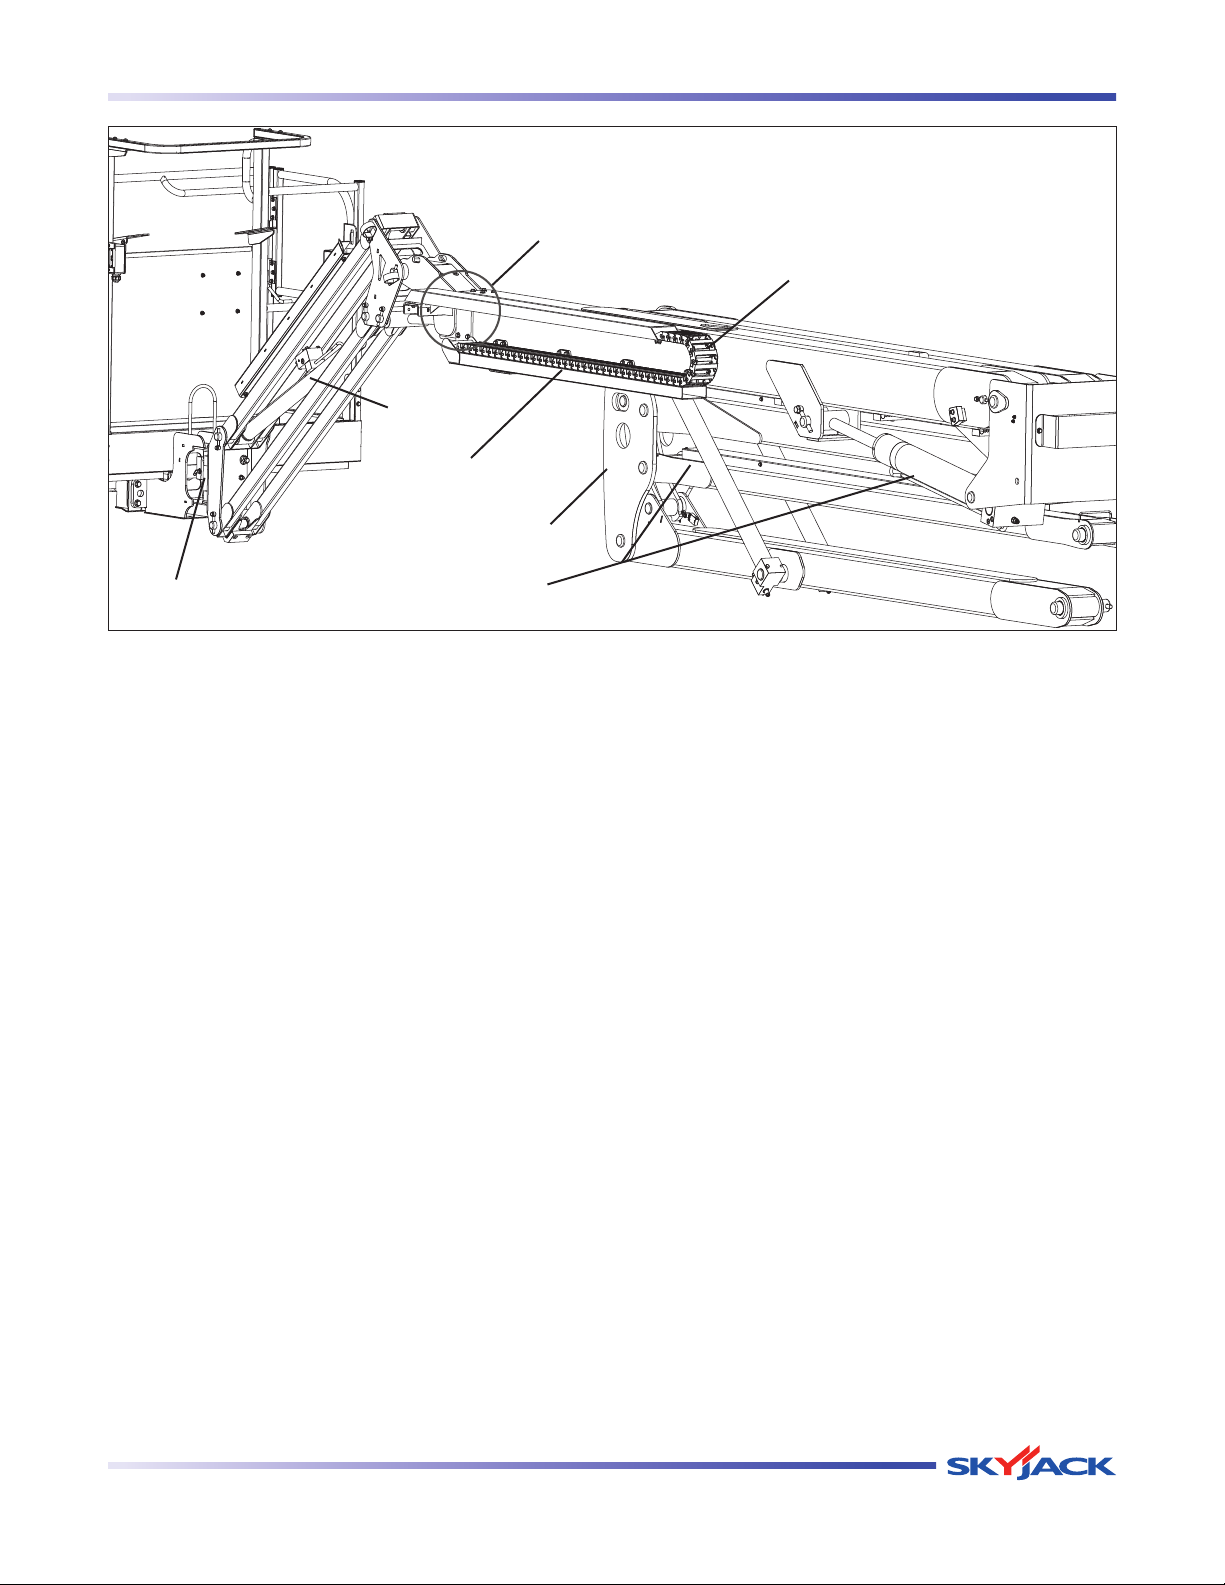
Wear Pads
Main and Fly Booms
Jib
Power Track
Riser
Rotary Actuator
2.8-11 Rotary Actuator
Ensure there are no loose or missing parts -
and there is no visible damage.
En sure all bo lts and pins are properly -
tightened.
Ensure all hoses are properly tightened and -
there is no evidence of hydraulic leakage.
2.8-12 Jib (If Equipped)
Ensure there are no loose or missing parts -
and there is no visible damage.
En sure all bo lts and pins are properly -
tightened.
Ensure all hoses are properly tightened and -
there is no evidence of hydraulic leakage.
Cylinders
2.8-13 Boom
Ensure there are no loose or missing parts -
and there is no visible damage.
En sure all bo lts and pins are properly -
tightened.
Ensure there are no visible cracks in welds -
or st ructure and there ar e no signs of
deformation.
Ensure all hoses are properly tightened and -
there is no evidence of hydraulic leakage.
Cylinders•
Ensure all cylinders are properly secured -
and there is no evidence of leakage.
Wear Pads•
Ensure all bolts are tight, there is no -
visible damage to the wear pads and that
no parts are missing.
Hoses•
Ensure all hoses are properly tightened -
and there is no evidence of hydraulic
leakage.
SJ 46A & SJ 46AJ
Power Track•
Ensure there are no loose or missing -
parts and there is no visible damage.
December 2007 Page 31
Page 31
TM
Visual and Daily Maintenance Inspections Section 2 - Operations
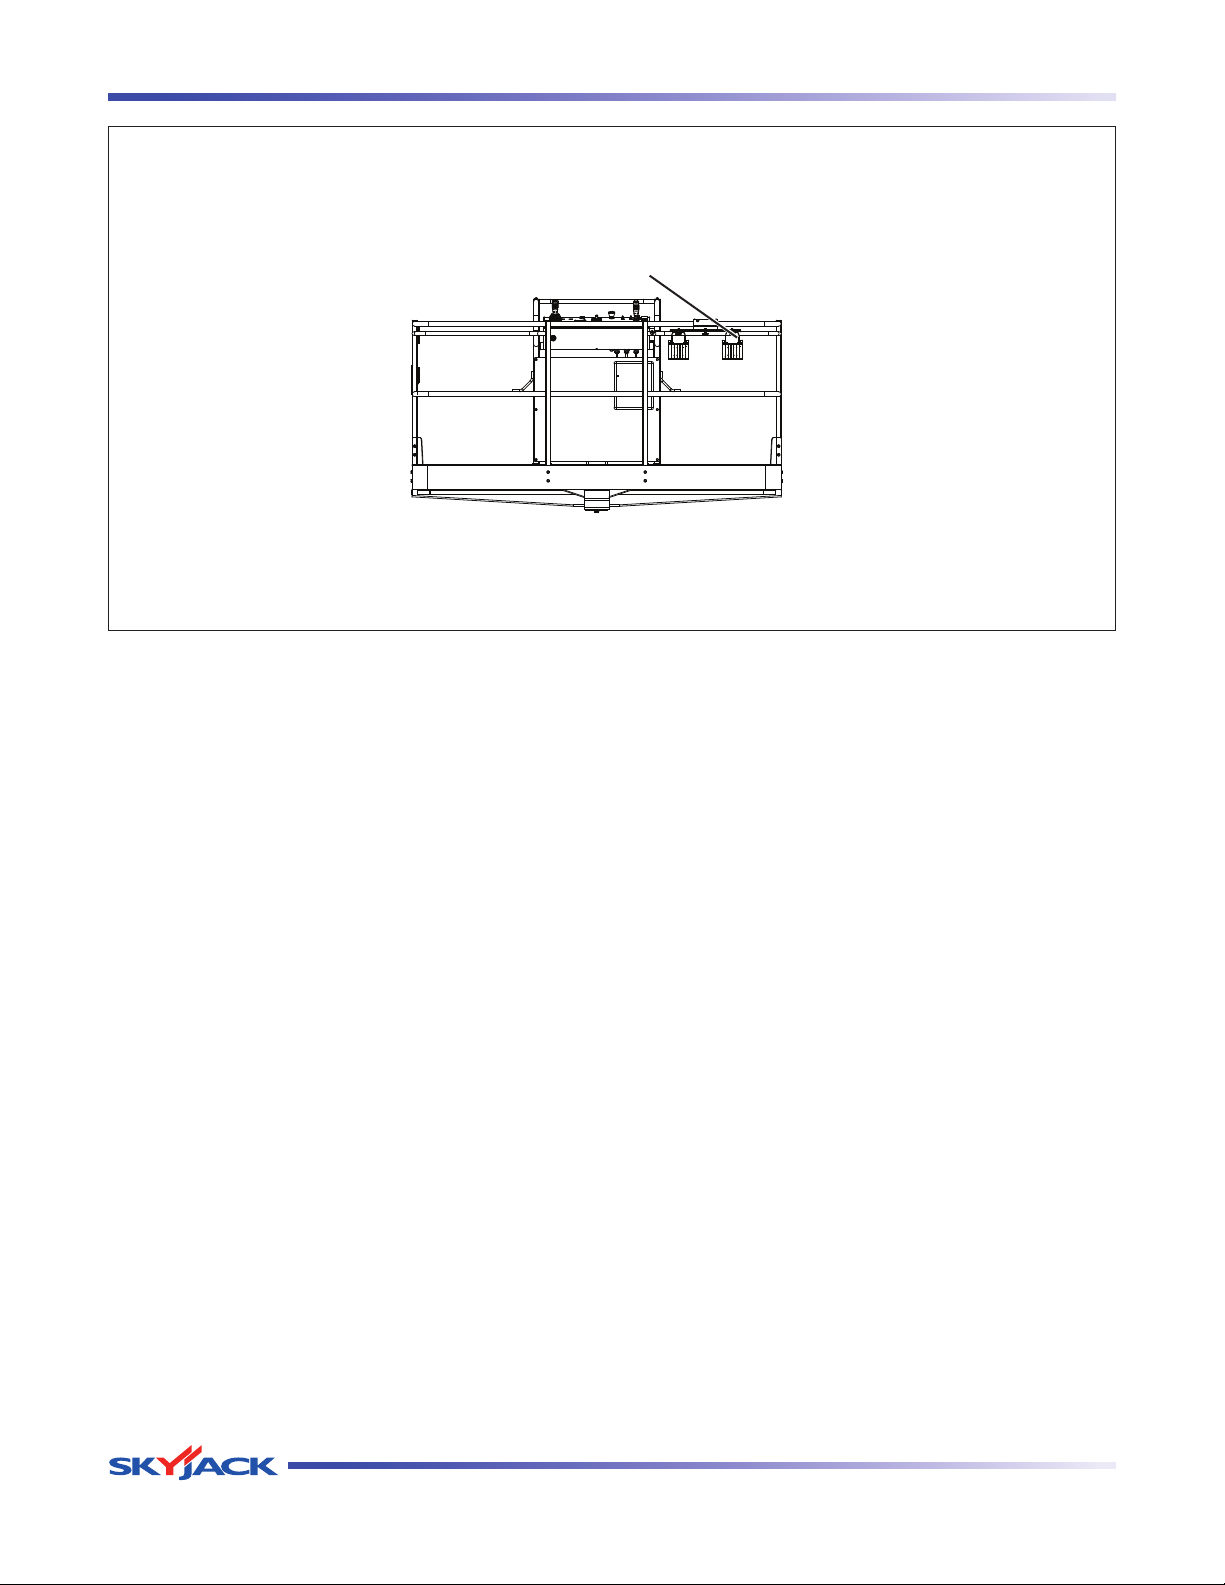
Work Light
2.8-14 Special Options
Battery Warmer/Hydraulic Oil Heater •
(If Equipped)
Ensure battery warmer/hydraulic oil -
heater cord is properly secured with no
signs of visible damage and hydraulic
leakage.
Work Light (If Equipped)•
Ensure lamps are properly secured with -
no signs of visible damage.
Ensure mounting bracket is properly -
secured.
Ensure there are no loose wires or -
missing fasteners.
Flashing Amber Light (If Equipped)•
Ensure lamp is properly secured with no -
signs of visible damage.
Page 32 December 2007
SJ 46A & SJ 46AJ
Page 32
TM
Section 2 - Operation Function Tests
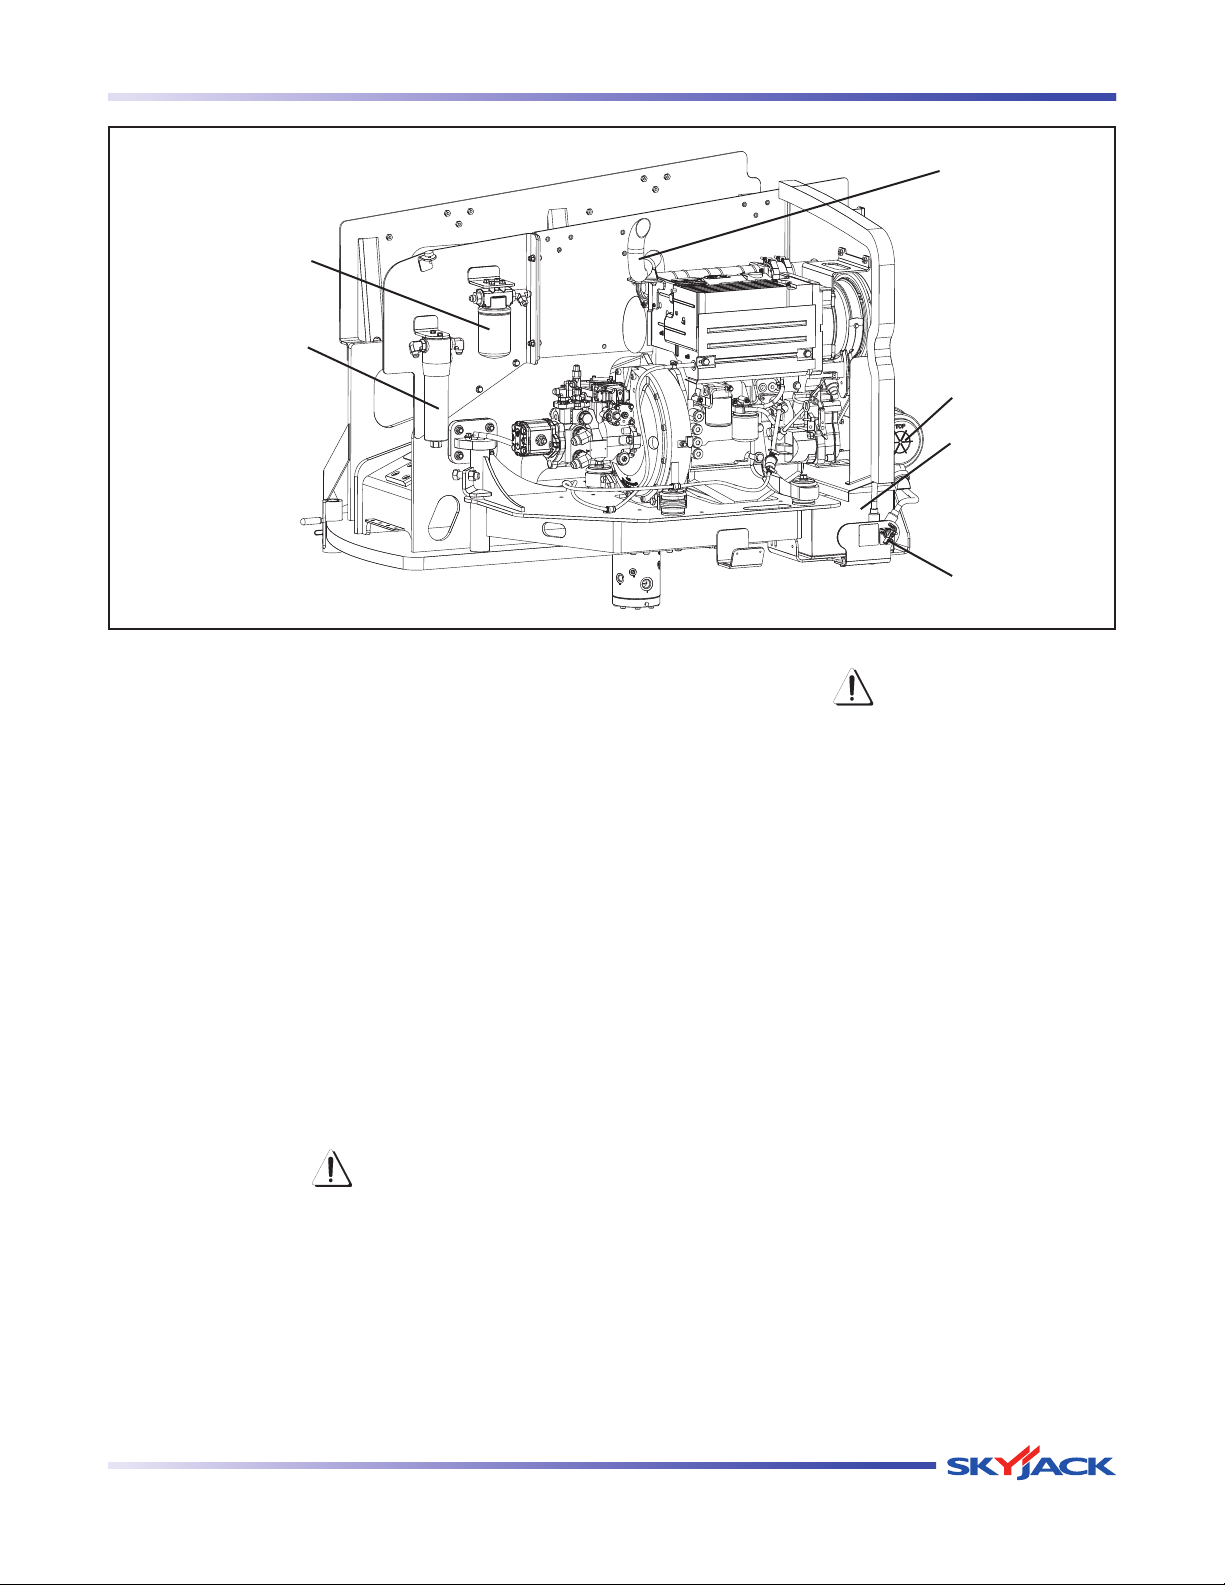
Muffler
Hydraulic Return
Filter
High Pressure
Filter
Air Filter
Battery
Main Power
Disconnect
Switch
2.9 Function Tests
Function tests are designed to discover any malfunctions
before aerial platform is put into service. The operator
must understand and follow step-by-step instructions
to test all aerial platform functions.
IMPORTANT
Nev er use a ma lfuncti oni ng aer ial
platform. If malfunctions are discovered,
aerial platform must be tagged and
placed out of service. Repairs to aerial
platform may only be made by a qualified
service technician.
After repairs are completed, operator must perform a
pre-operation inspection and a series of function tests
again before putting aerial platform into service.
Prior to performing function tests, be sure to read and
understand Section 2.10 - Start Operation.
CAUTION
Allow engine to warm up for a few
minutes at low speed before applying
any load.
WARNING
Cold Weather - Caution must be
exercised when operating aerial platform
in cold temperature. Cold temperature
can affect the performance of the aerial
platform. Braking response and other
functions may delay. Throughout the
following procedures, test all functions
several times until they are at acceptable
operating performance.
NOTE
All-function motion alarm should sound
while operating any boom and drive
function.
SJ 46A & SJ 46AJ
December 2007 Page 33
Page 33
TM
Function Tests Section 2 - Operation
Base Control Console
Base/Off/Platform Key
Switch
Emergency
Stop
Start/Function Enable/
Emergency Power Switch
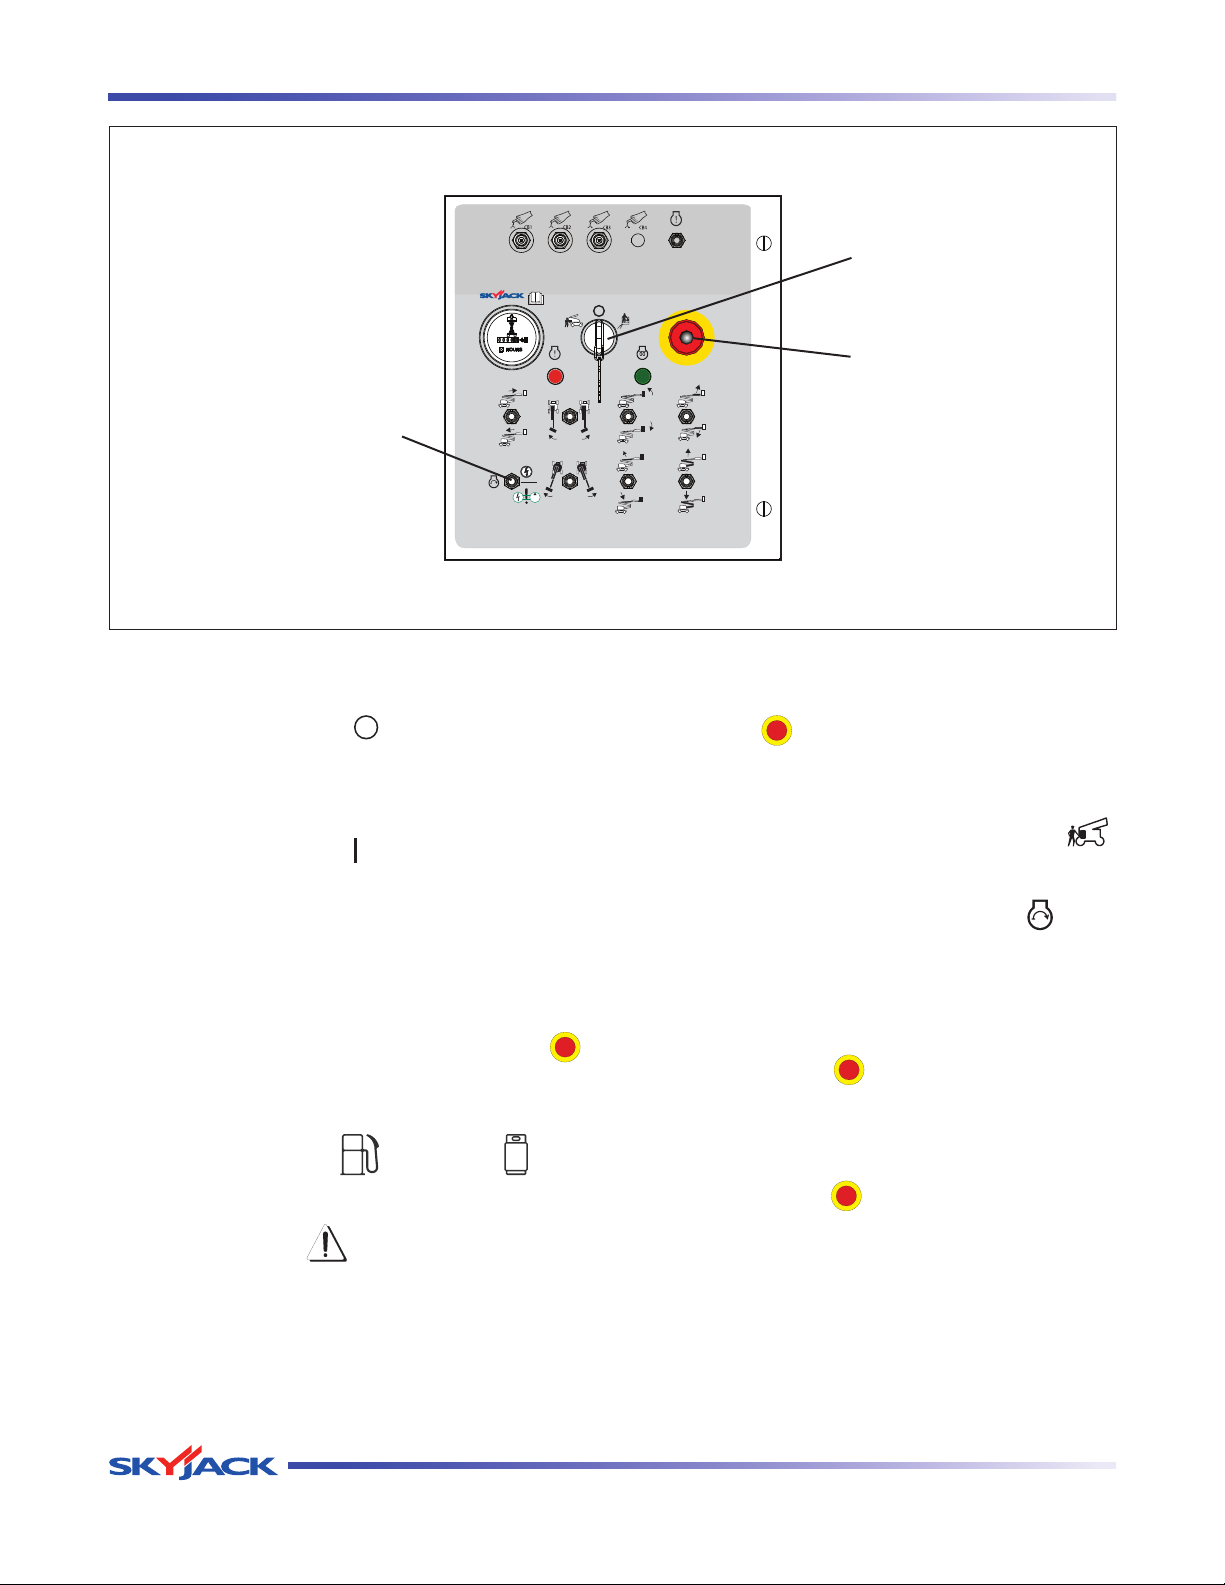
2.9-1 Test Main Power Disconnect Switch
1. In engin e co mpartmen t, tu rn ma in po wer
disconnect switch to “ ” off position.
Result: Aerial platform functions should not
operate.
2. In engin e co mpartmen t, tu rn ma in po wer
disconnect switch to “
” on position.
NOTE
Close all cowlings before proceeding to
next item.
2.9-2 Base Control Console
1. On platform control console, pull out “
emergency stop button.
2. For dual fuel engine, select fuel supply by moving
fuel switch to either “
” gasoline or “ ” liquid
propane gas position.
WARNING
Ensure that you maintain three points of
contact to mount/dismount platform.
Test Base Emergency Stop Light•
1. On bas e cont rol co nsole, pul l out
” emergency stop button.
“
Result: Emergency stop light should
continuously illuminate.
2. Turn base/off/platform key switch to “ ”
base position.
3. Start engine by selecting “
” start
position from start/function enable/
emergency power switch.
Test Base Emergency Stop•
”
1. Push in “
” emergency stop button.
Result: Engine should shut down and
aerial platform functions should not
operate.
2. Pull out “
” emergency stop button and
restart engine.
Page 34 December 2007
SJ 46A & SJ 46AJ
Page 34
TM
Section 2 - Operation Function Tests
Base Control Console
Base/Off/Platform Key
Switch
Emergency
Stop
Start/Function Enable/
Emergency Power
Switch
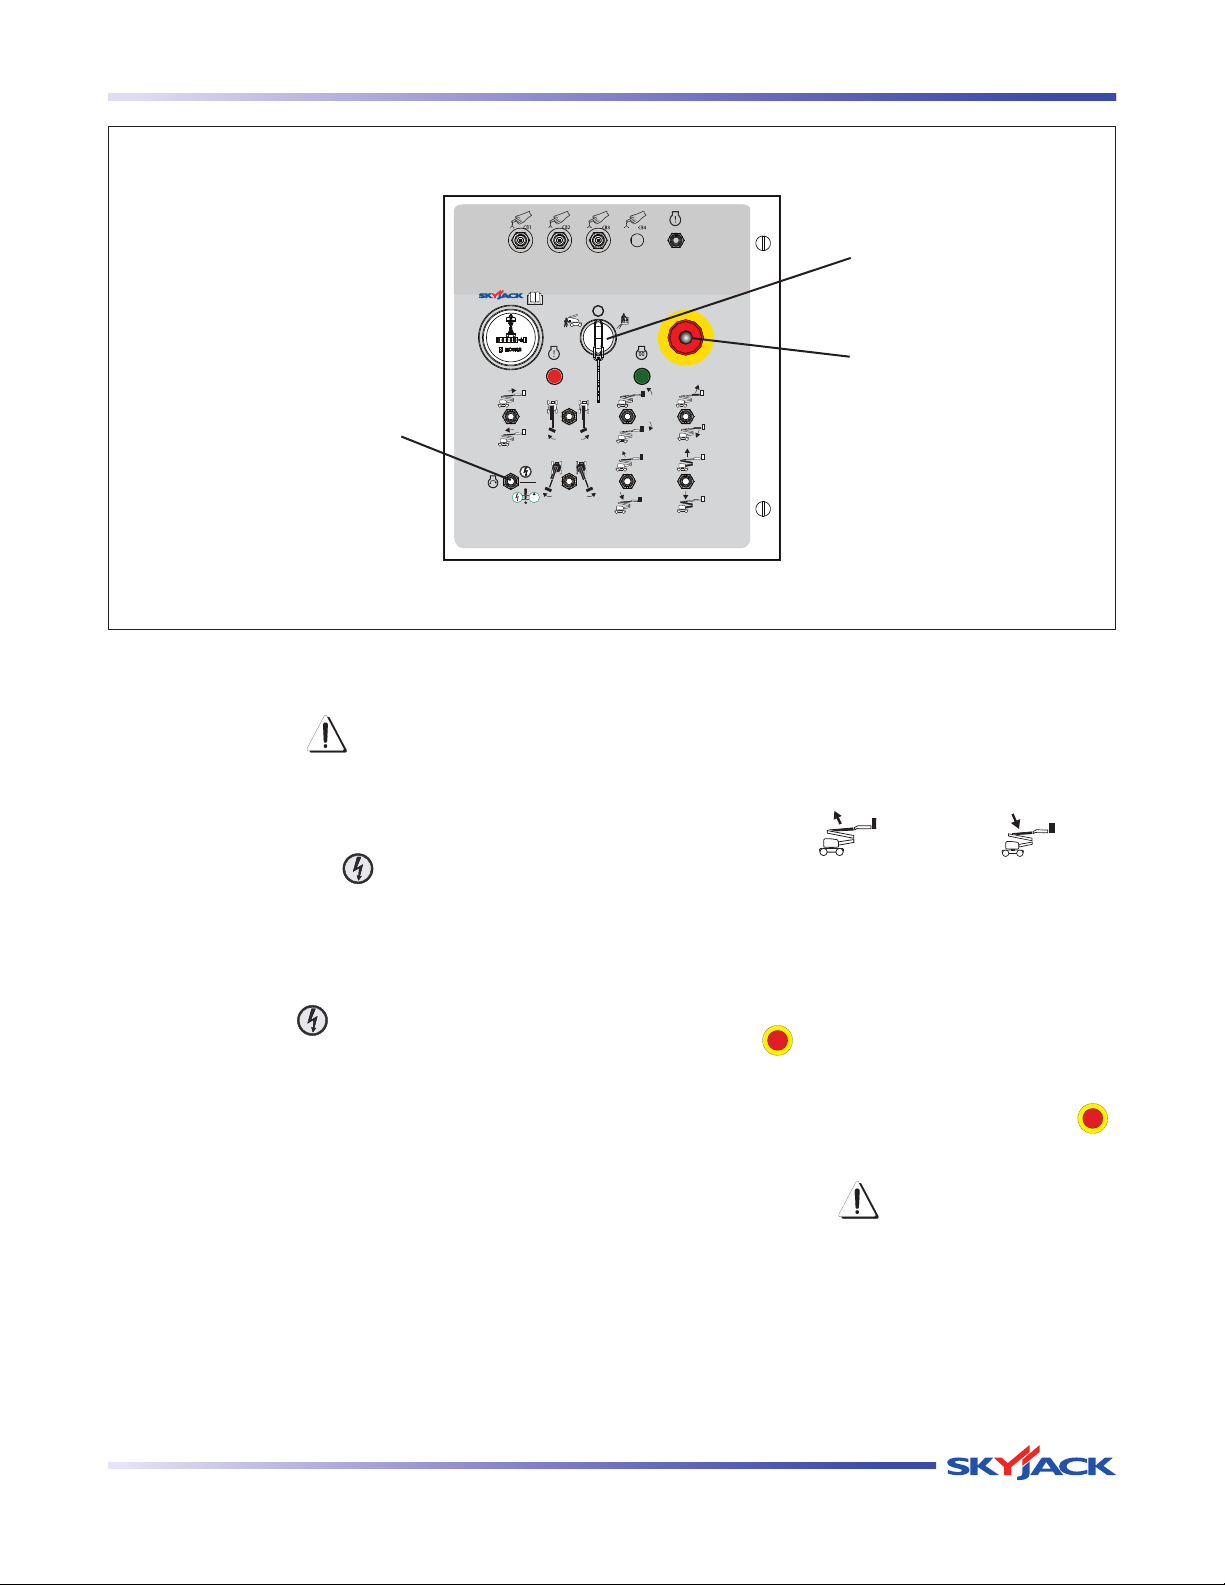
Test Function Enable Switch and All •
Boom Functions
WARNING
Ensure that there are no personnel or
obstructions in test area and there is
sufficient room for boom to swing.
1. Do not hold “
” function enable switch.
Attempt to activate each boom and
platform switch.
Result: All boom and platform functions
should not operate.
2. Hold “
” function enable switch
and activate each boom and platform
function.
Result: All boom and platform functions
should operate as selected.
Test Platform Self-leveling•
1. Lower boom to stowed position.
2. Adjust platform to a level position using
platform leveling switch.
3. Raise “
” and lower “ ” main
boom through a full cycle.
Result: Platform should remain level at all
time.
Test Emergency Power•
1. On bas e co ntr ol con sol e, pus h in
” emergency stop button to turn
“
engine off.
2. On platform control console, push in “
emergency stop button.
CAUTION
When operating on auxiliary power, do
not operate more than one function
at a time to avoid overloading 12-Volt
au xiliary pump mot or. Do not use
emergency power unit continuously for
more than two minutes.
”
SJ 46A & SJ 46AJ
December 2007 Page 35
Page 35
TM
Function Tests Section 2 - Operation
Base Control Console
Base/Off/Platform Key
Switch
Emergency
Stop
Start/Function Enable/
Emergency Power
Switch
NOTE
To conserve battery power, test each
function through a partial cycle.
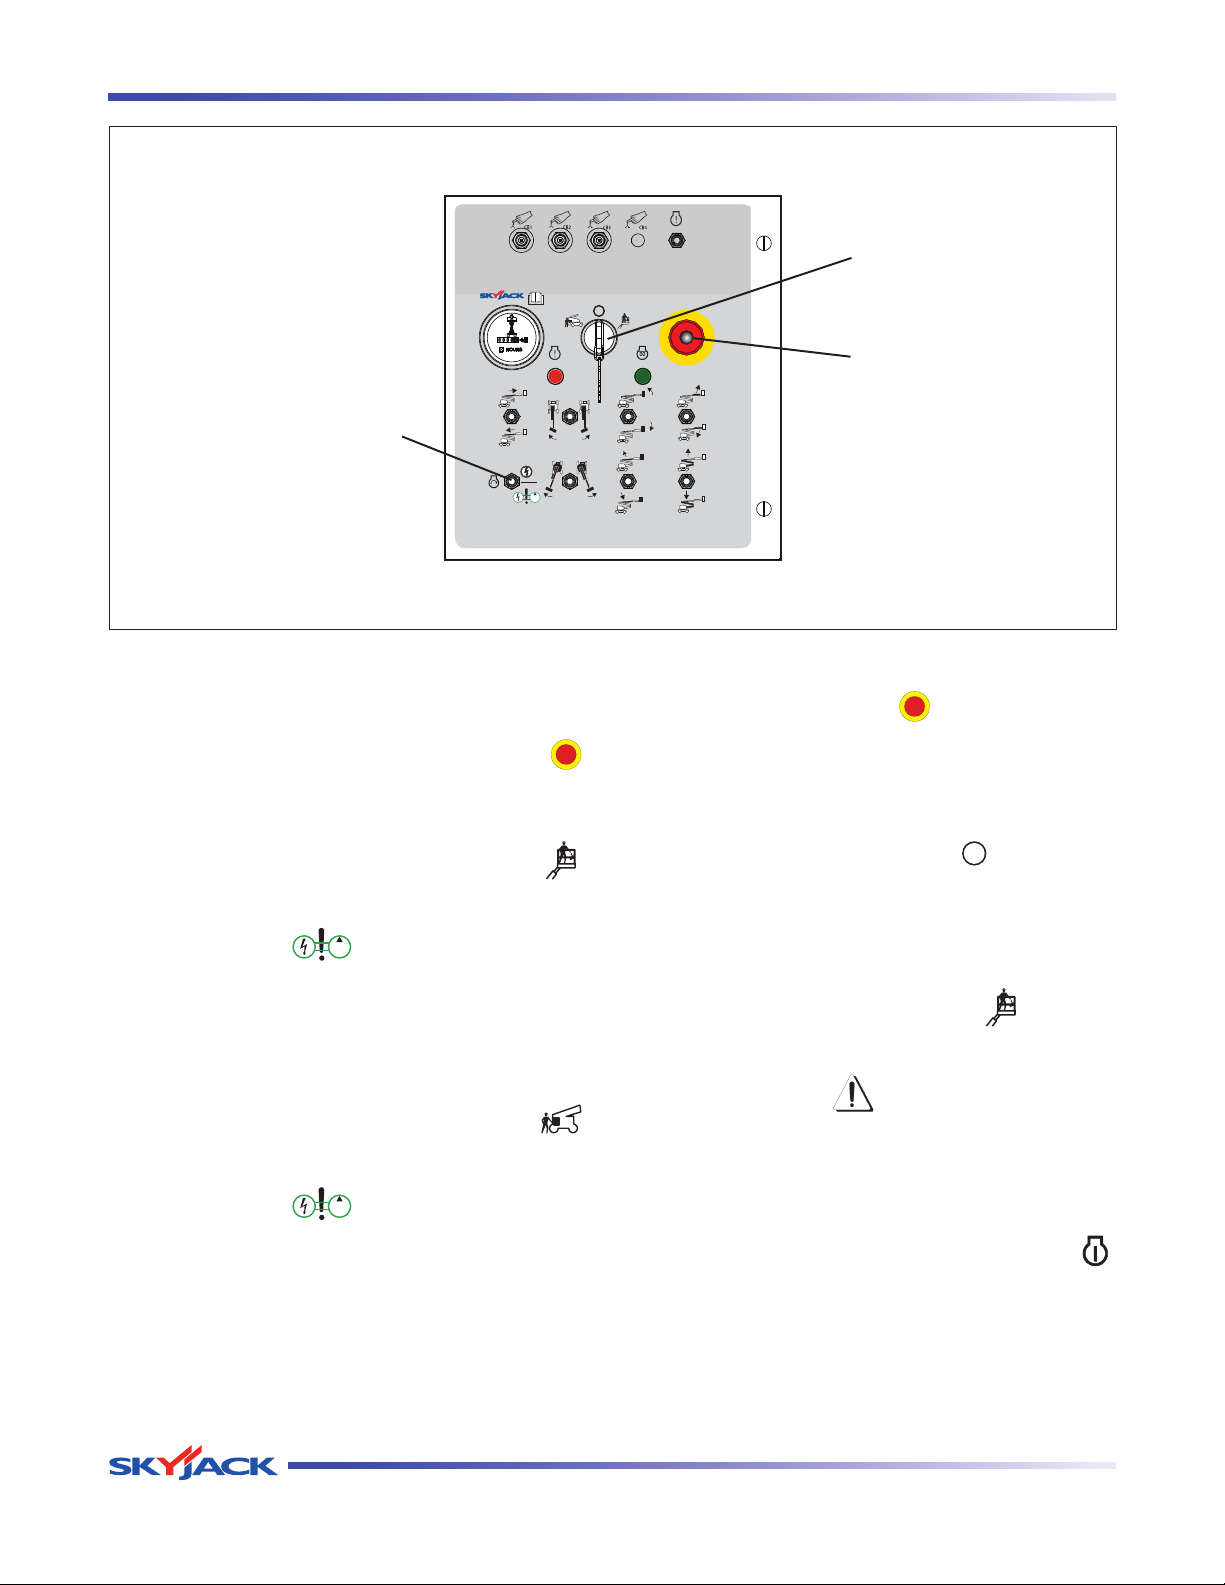
3. On base control console, pull out “
emergency stop button.
4. O n ba s e co n t r o l con s o l e , tur n
base/off/platform key switch to “
platform position.
5. Select “
” emergency power position
from start/function enable/emergency
power switch and activate each boom
function.
Result: All selected functions should
operate.
6. Turn base/off/platform key switch to “ ”
base position.
7. Select “
” emergency power position
from start/function enable/emergency
power switch and activate each boom
function.
Result: All selected functions should
operate.
Test Base/Off/Platform Switch•
1. Ensure bo th “
” eme rgenc y s top
buttons are pulled out.
”
2. Start engine.
3. On base control console, turn base/off/
”
platform key switch to “ ” off position.
Result: Engine should shut down and
aerial platform functions should not
operate.
4. On base control console, turn base/off/
platform key switch to “
” platform
position.
WARNING
Ensure that you maintain three points of
contact to mount/dismount platform.
5. Enter platform and close gate.
6. On platform control console, select “
”
on position from engine enable switch.
NOTE
The emergency power unit has two-minute
duty cycle.
Page 36 December 2007
SJ 46A & SJ 46AJ
Page 36
TM
Section 2 - Operation Function Tests
Emergency Stop
Platform Railing
Manual Box
Tie-off Point
7. Select “ ” start position from engine
start/on/off switch to start engine.
8. Dismount from platform.
9. On base control console, attempt to
activate each boom and platform switch
while holding function enable switch.
Result: All boom and platform functions
should not operate while holding function
enable switch.
10. Push in “
” emergency stop button to
turn engine off.
Drive/Steer Controller
Platform Control
Console
Tie-off Point
Footswitch
Footswitch
Platform
Platform
Assembly
Assembly
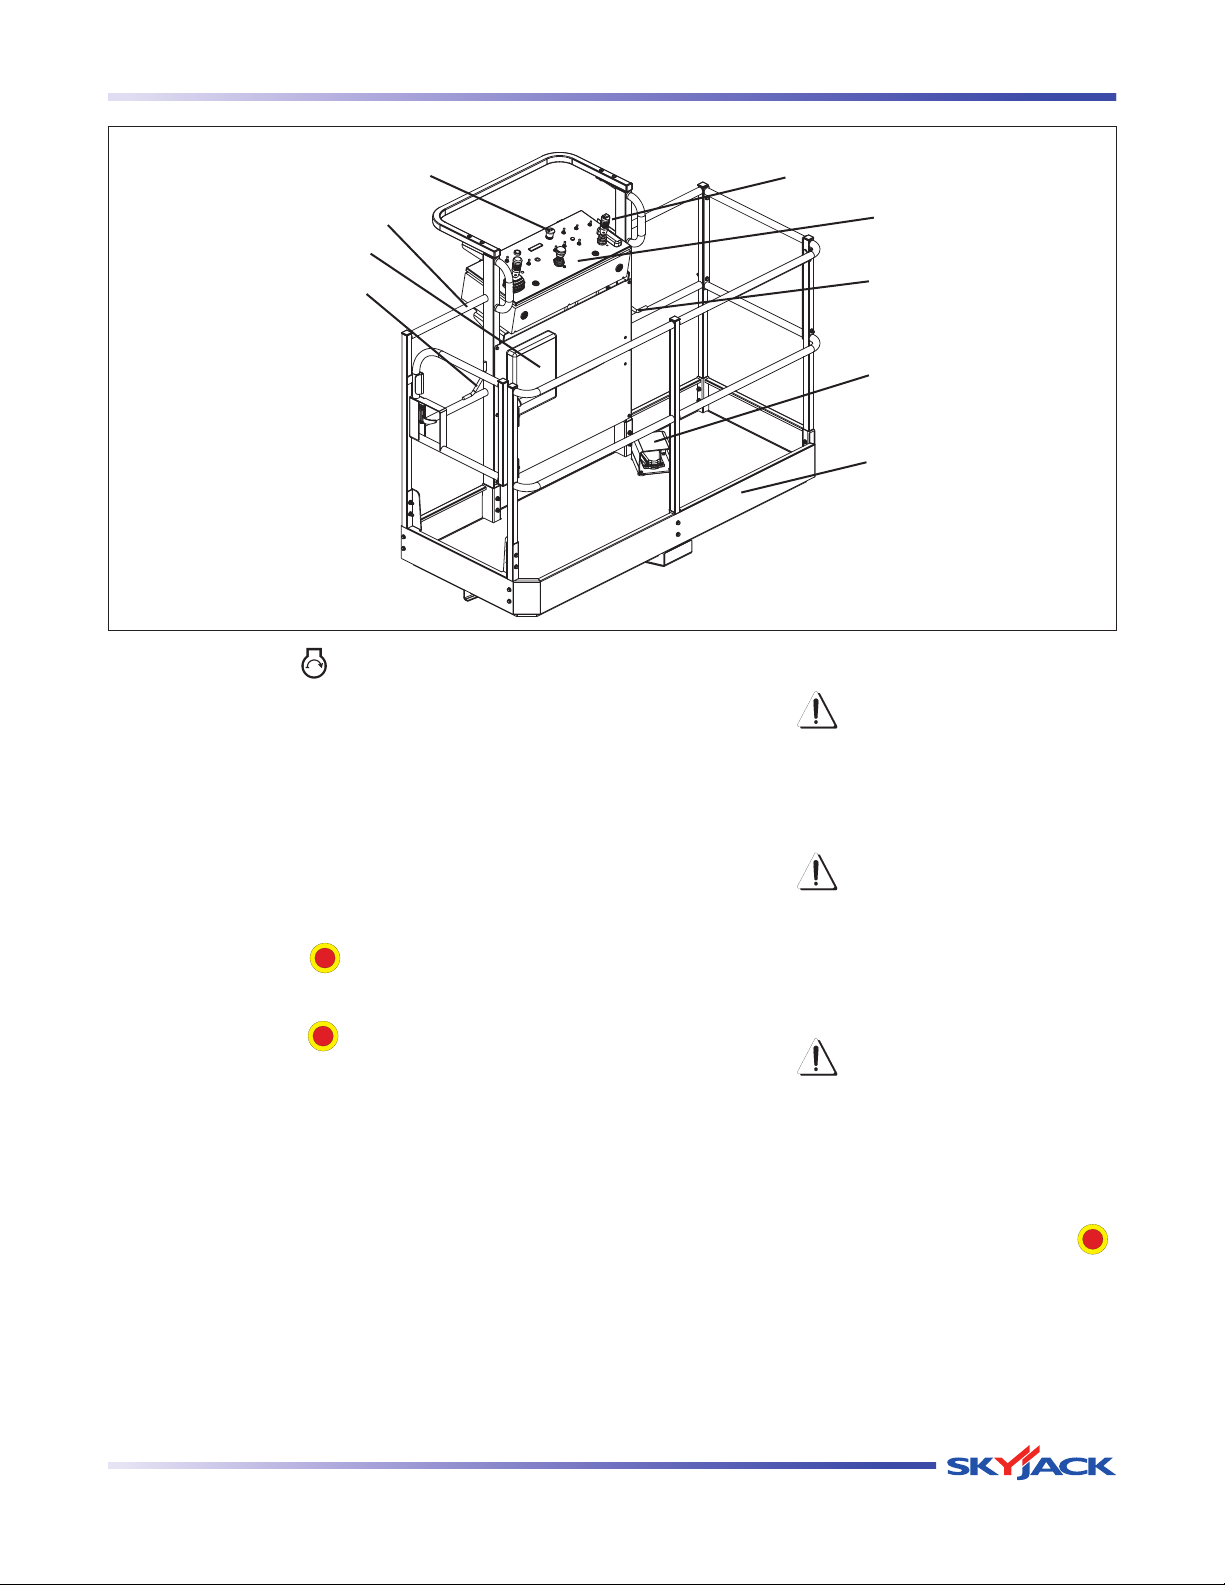
2.9-3 Platform Control Console
WARNING
Ensure that you maintain three points of
contact to mount/dismount platform.
1. Enter platform and close gate.
WARNING
DO NOT operate any control on platform
co ntrol consol e wit hout proper fall
protection secured to designated location
in platform. Failure to avoid this hazard
could result in death or serious injury!
11. Pull out “
SJ 46A & SJ 46AJ
” emergency stop button.
December 2007 Page 37
WARNING
Ensure that there are no personnel or
obstructions in test area and that there is
sufficient room for boom to swing.
Test Platform Emergency Stop Light•
1. On platform control console, pull out “
emergency stop button.
Result: Emergency stop light should
continuously illuminate.
”
Page 37
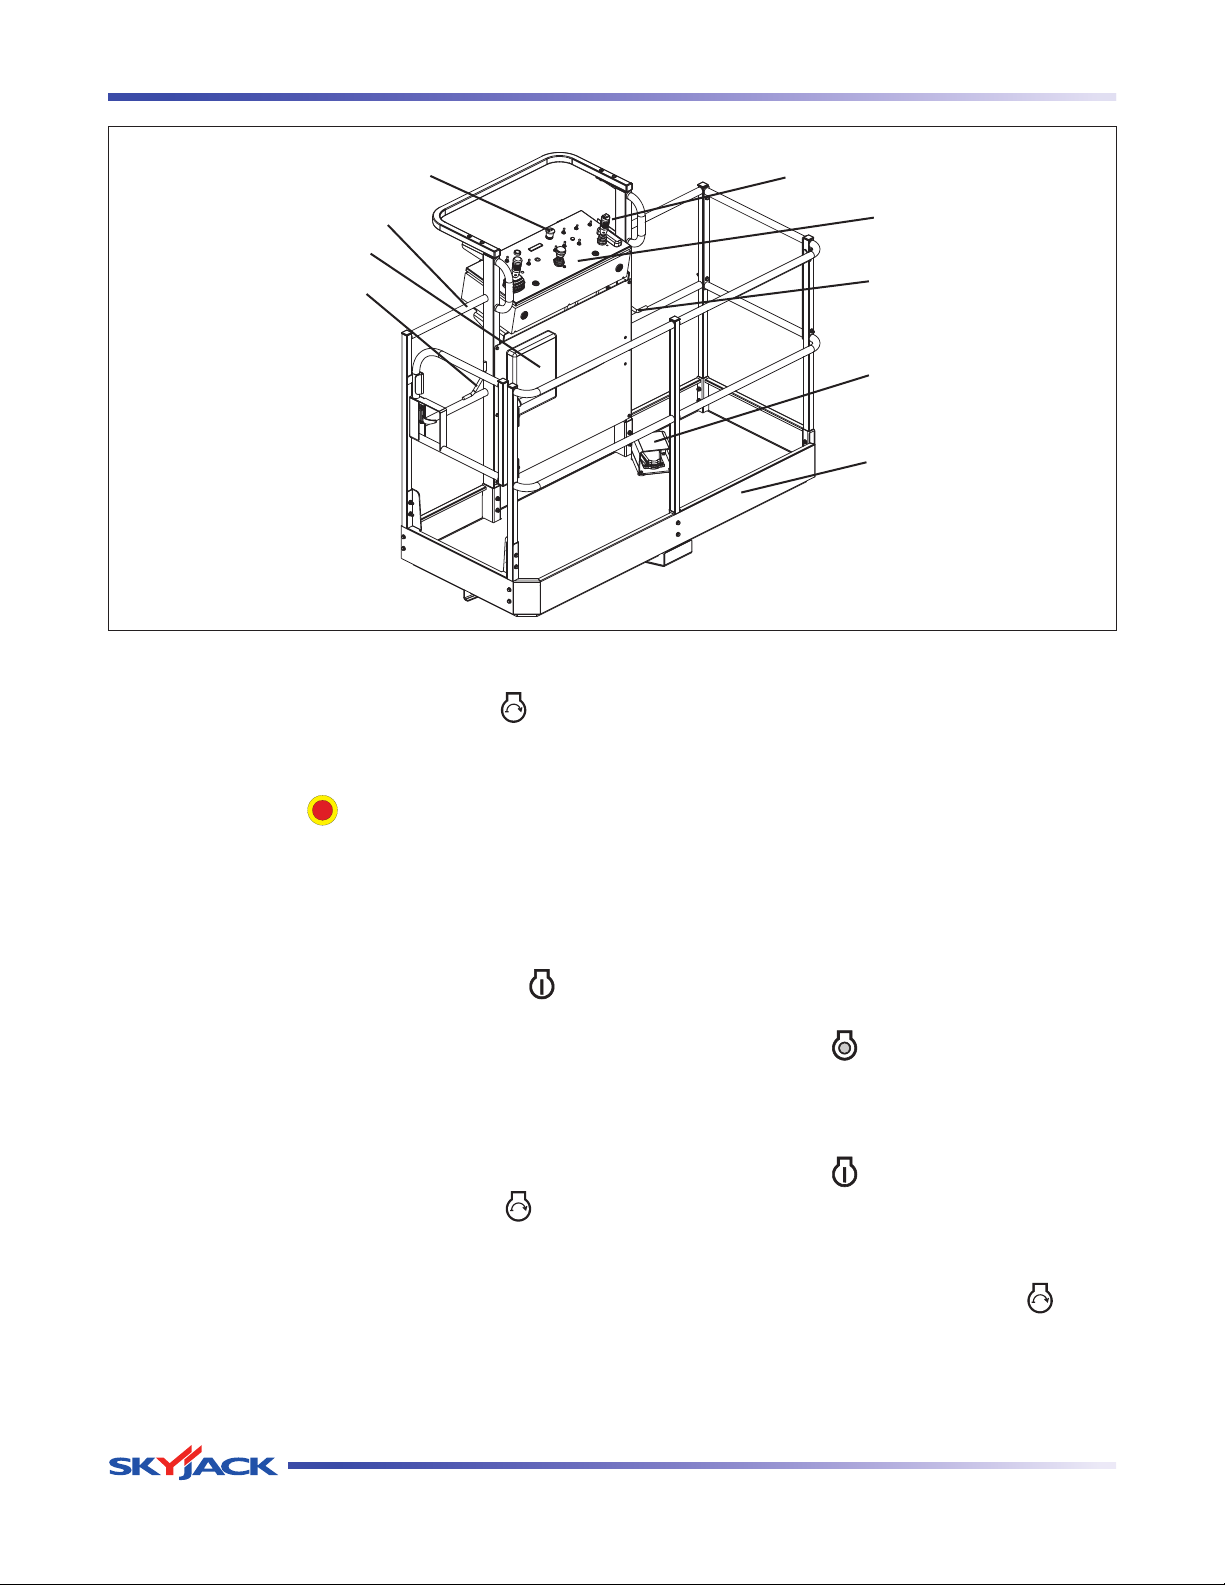
TM
Function Tests Section 2 - Operation
Emergency Stop
Platform Railing
Manual Box
Tie-off Point
Test Platform Emergency Stop•
1. Start engine by selecting “
position from engine start/on/off switch.
Result: Engine should start.
” start
Drive/Steer Controller
Platform Control
Console
Tie-off Point
Footswitch
Footswitch
Platform
Platform
Assembly
Assembly
6. With e n g ine run n i ng and w i thout
depressing footswitch, test each boom
and platform function.
Result: Aerial platform functions should
not operate.
2. Push in “
” emergency stop button.
Result: Engine should shut down and
aerial platform functions should not
operate.
Test Footswitch•
1. Ensure engine enable switch is in “
” on
position.
2. Do not start engine.
3. Select generator on/off switch to off
position (if equipped).
4. Depress and hold footswitch and attempt
to start engine by selecting “
” start
position from engine start/on/off switch.
Result: Engine should not start.
5. Without depressing footswitch, try to start
engine.
Result: Engine should start.
NOTE
A 15-second anti-tiedown feature
deactivates footswitch when operator
depresses it for 15 seconds without
activating any function.
Test Engine Enable Switch•
1. Ensure engine is running.
2. Select “
” off position from engine
enable switch.
Result: Engine should shut down and
platform control console is disabled.
3. Select “
” on position from engine
enable switch.
Result: Platform c ontrol console is
enabled.
4. Start engine by selecting “
” start
position from engine start/on/off switch.
Page 38 December 2007
SJ 46A & SJ 46AJ
Page 38
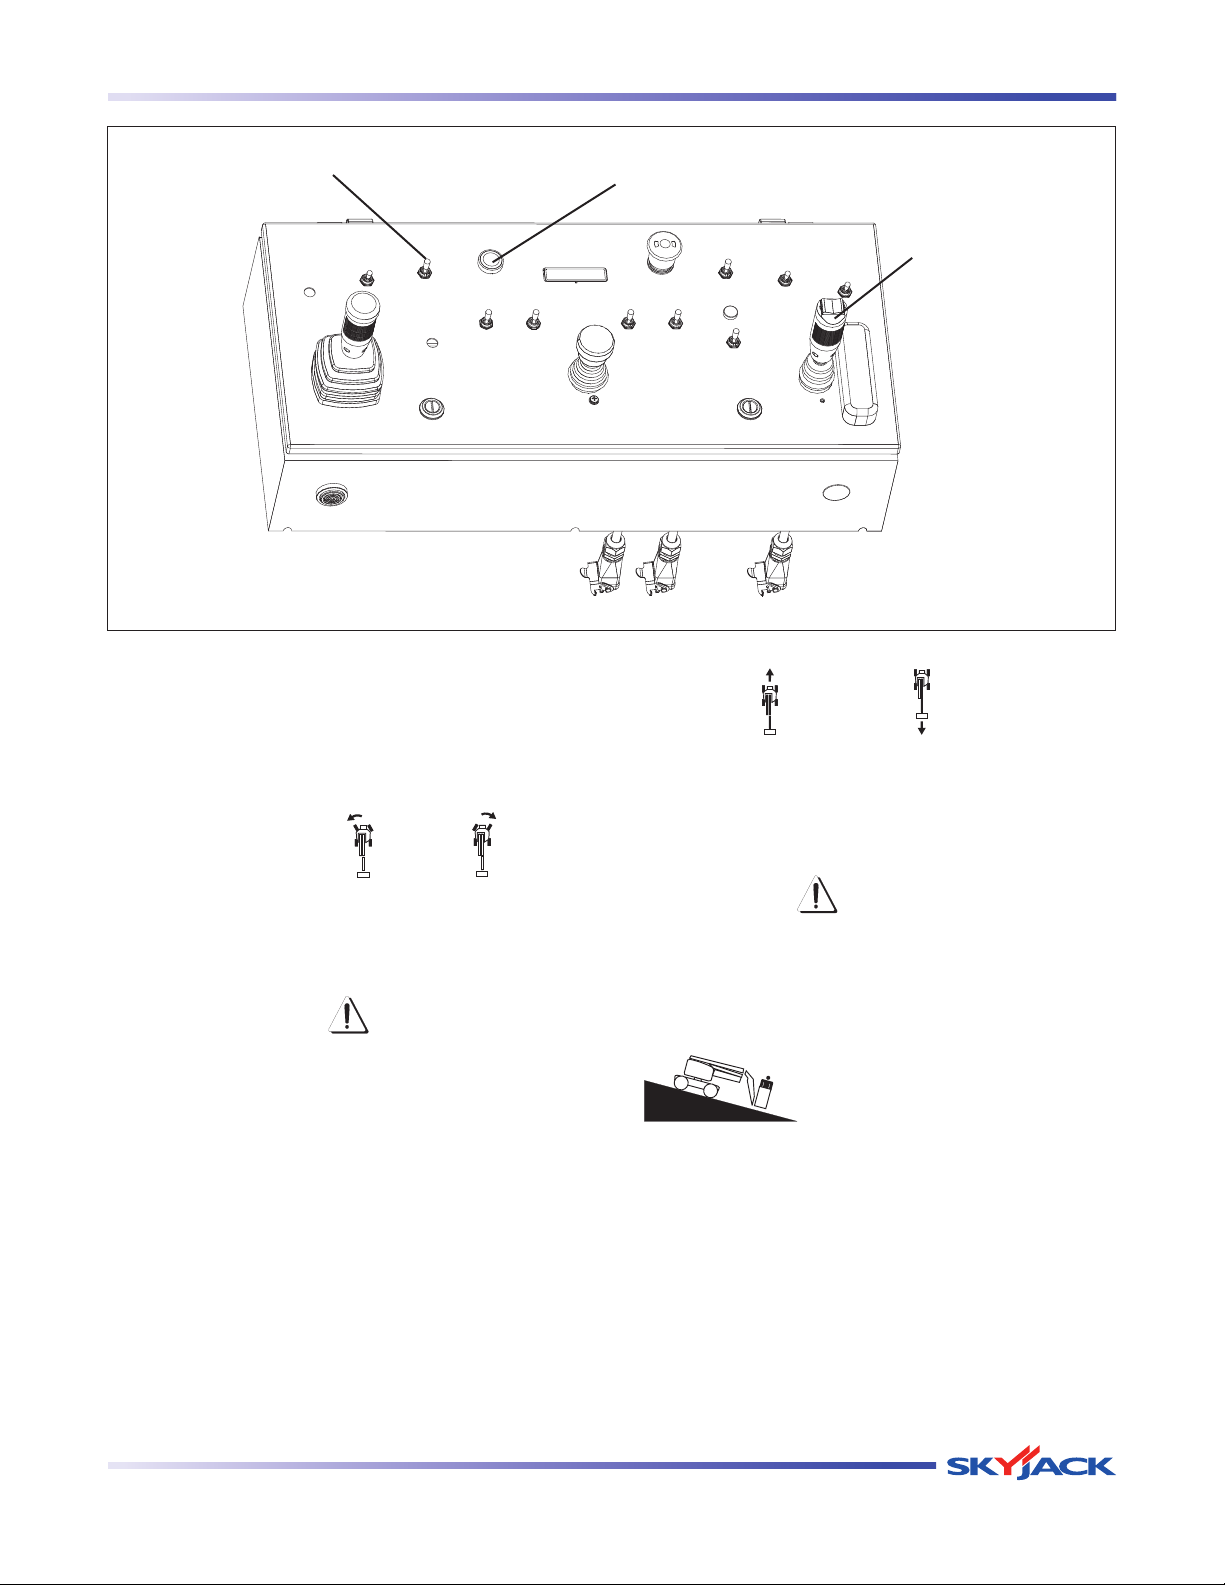
TM
Section 2 - Operation Function Tests
Engine start/on/off
Switch
Horn
Drive/Steer
Controller
Test Steering•
1. Restart engine.
2. Depress and hold footswitch.
3. Press rocker switch on top of drive/steer
controller to “
” left and “ ” right.
Result: Steer wheels should turn left and
right.
Test Driving Function•
WARNING
Ensure that there are no personnel
or obstructions in the path of travel,
including blind spots.
1. Ensure path of intended motion is clear.
2. Ensure boom is in stowed position and fly
boom fully retracted.
3. Depress and hold footswitch.
4. Slowly move drive/steer controller in
“
” forward or “ ” reverse direction
until aerial platform begins to move, and
then return handle to center position.
Result: Aerial platform should move in
forward or reverse direction, and then
come to a stop.
WARNING
DRIVING ON A SLOPE
When driving on a slope greater •
than 30%, the platform capacity
is limited to 300 lb. (136 kg).
The platform must be between •
the non-steer wheels and must
be on the downside of the hill.
When slope i ncre a ses t o •
above 45%, the forward drive
is disabled but reverse drive
remains active.
SJ 46A & SJ 46AJ
December 2007 Page 39
Page 39
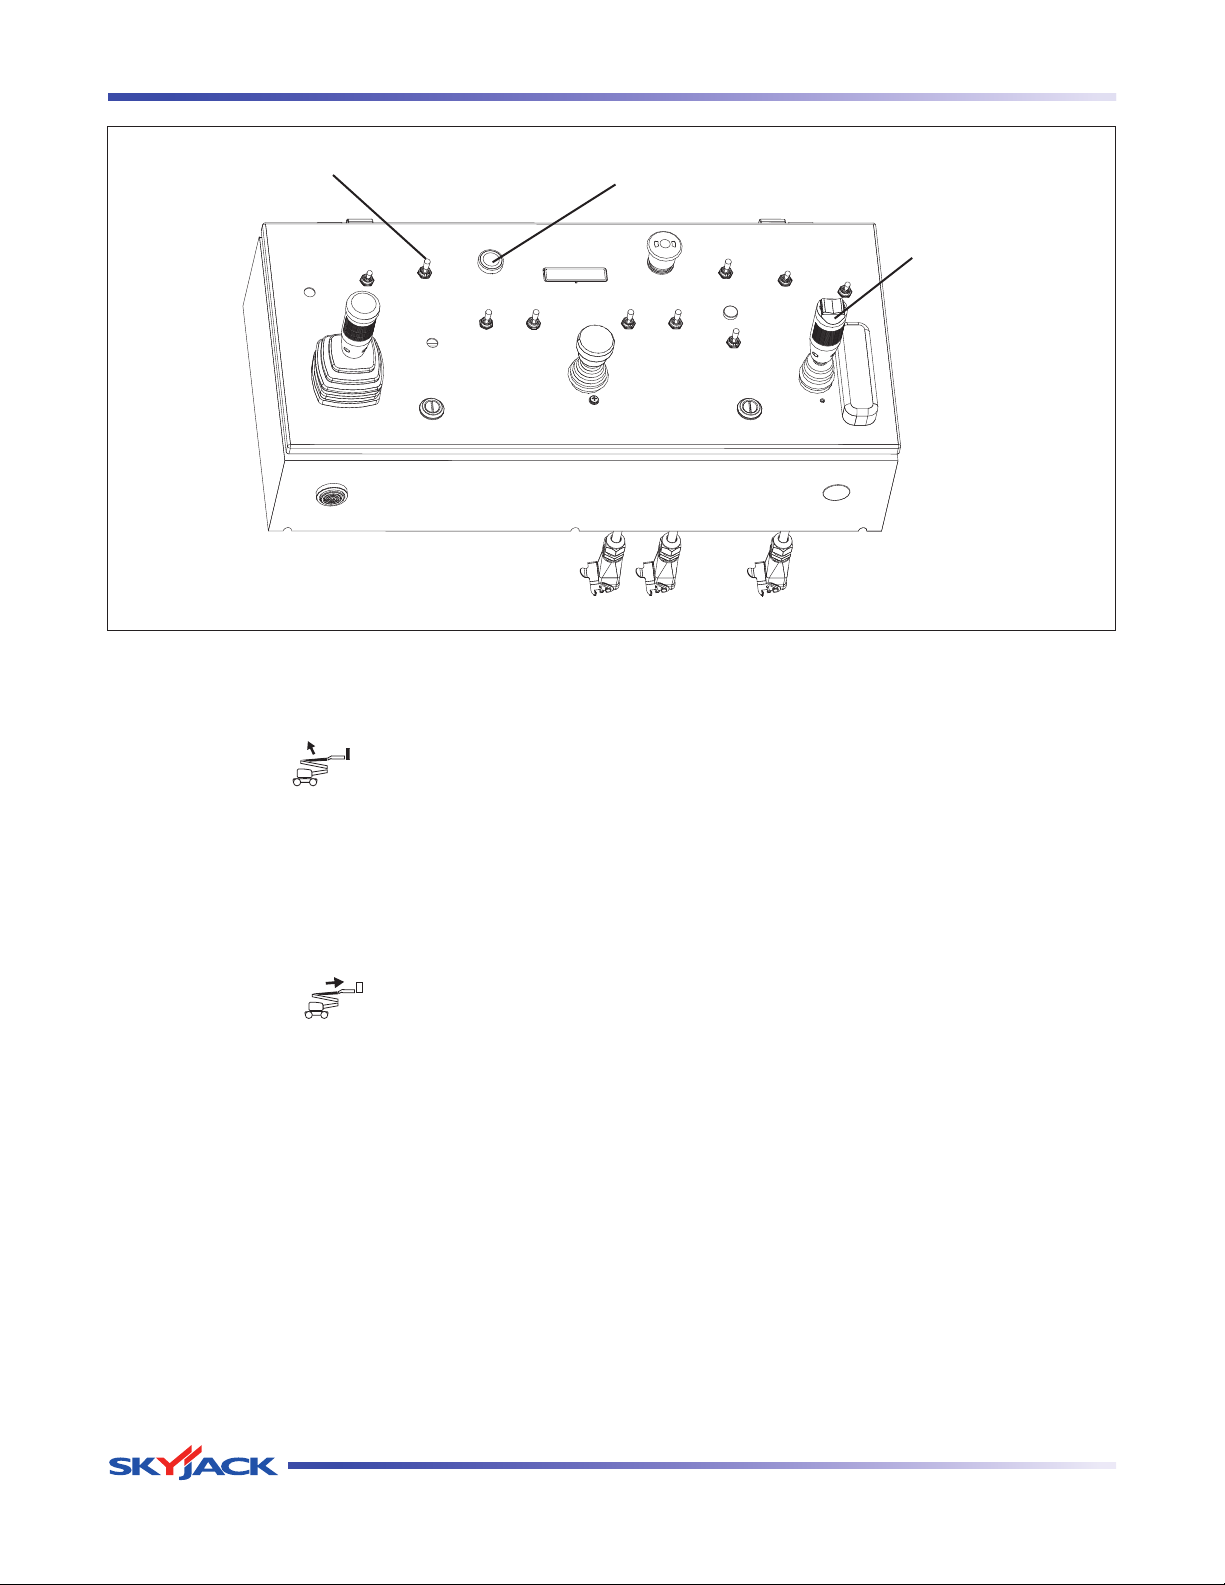
TM
Function Tests Section 2 - Operation
Engine start/on/off
Switch
Horn
Drive/Steer
Controller
Test Driving Speed•
1. Depress and hold footswitch.
2. Raise “
” main boom 4 ft. (1.2 m)
above ground and then slowly move drive/
steer controller to full drive position.
Result: The maximum achievable drive
speed should be significantly less than
stowed drive speed.
3. Lower boom to stowed position.
4. Extend “
” fly boom approximately
12 in. (30 cm) and then slowly move drive/
steer controller to full drive position.
Result: The maximum achievable drive
speed should be significantly less than
stowed drive speed.
5. Retract fly boom.
6. Raise riser approximately 4 ft. (1.2 m)
above ground.
Result: The maximum achievable drive
speed should be significantly less than
stowed drive speed.
Page 40 December 2007
SJ 46A & SJ 46AJ
Page 40
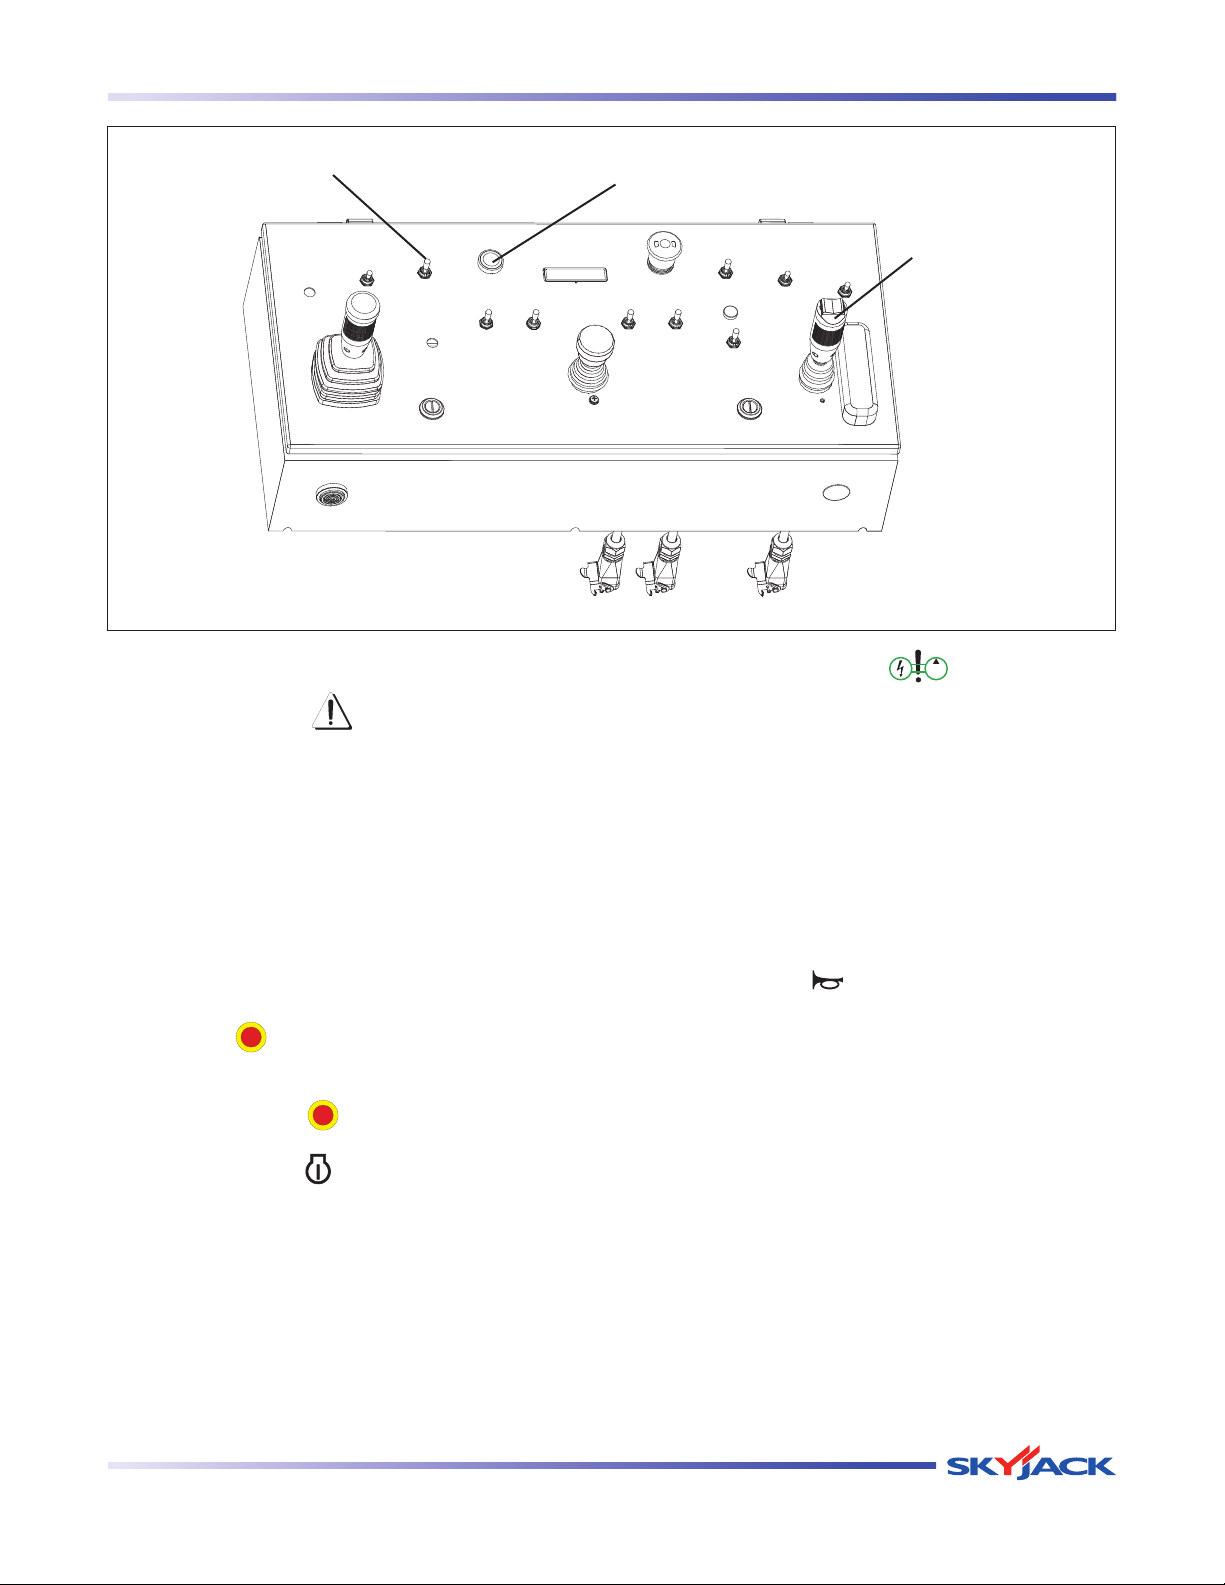
TM
Section 2 - Operation Function Tests
Engine start/on/off
Switch
Horn
Drive/Steer
Controller
Test Emergency Power•
5. Push and hold “
” emergency power
switch and activate each function control
CAUTION
When operating on auxiliary power, do
not operate more than one function
at a time to avoid overloading 12-Volt
handle or switch.
Result: All boom and steer functions
should operate. Drive functions should
not operate.
au xiliary pump mot or. Do not use
emergency power unit continuously for
more than two minutes.
The emergency power unit has two-minute
NOTE
duty cycle.
NOTE
To conserve battery power, test each
Test Horn•
function through a partial cycle.
” horn pushbutton.
1. On platform control console, push in
” emergency stop button to turn
“
1. Push “
Result: Horn should sound.
engine off.
2. Pull out “
3. Select “
” emergency stop button.
” on position from engine
enable switch.
4. Depress and hold footswitch.
SJ 46A & SJ 46AJ
December 2007 Page 41
Page 41
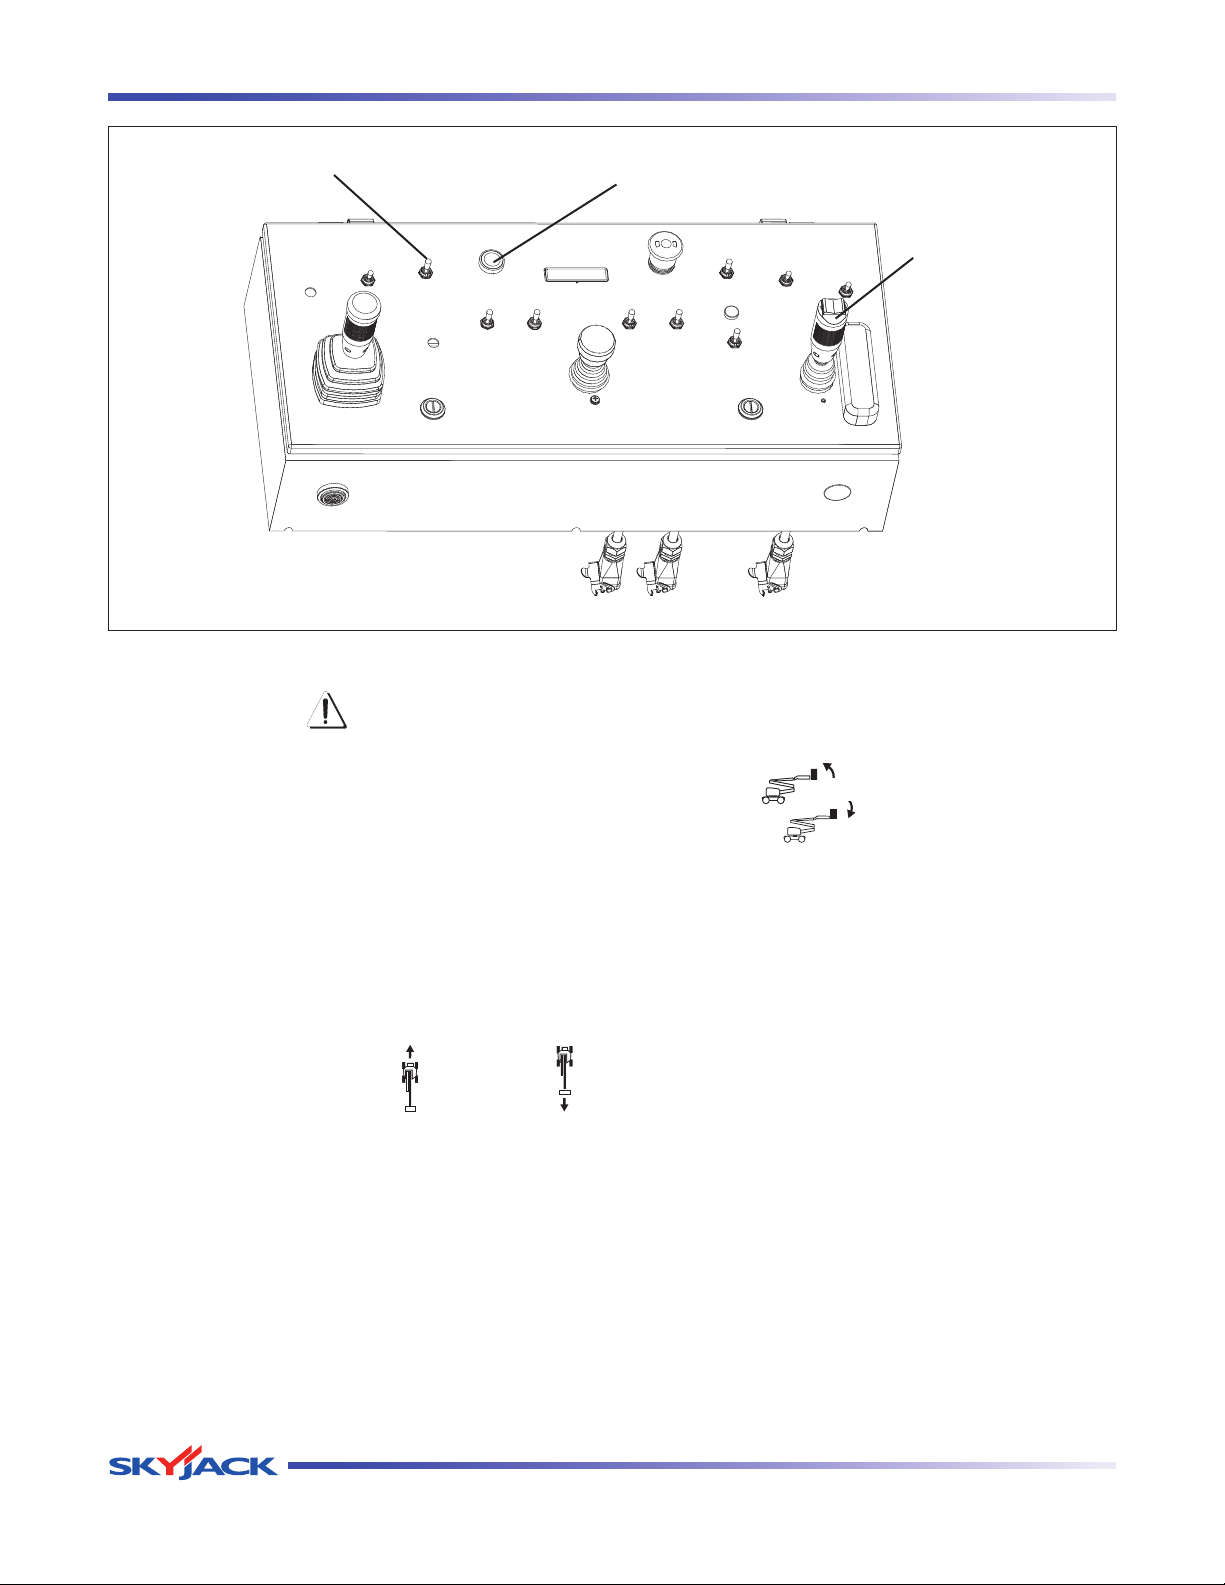
TM
Function Tests Section 2 - Operation
Engine start/on/off
Switch
Horn
Drive/Steer
Controller
Test Brakes•
WARNING
Brakes will engage instantly when
you release footswitch, causing aerial
platform to stop immediately.
1. Restart engine.
2. Move aerial platform to a firm level surface
to ensure similar traction on left and
right.
3. Ensure boom is in stowed position.
4. Depress and hold footswitch and drive
aerial platform first “ ” forward then “ ”
reverse.
5. Remove your foot from footswitch.
Result: Aerial platform should come to
an abrupt stop. If aerial platform does not
stop immediately, or if aerial platform pulls
to one side while stopping, do not operate
aerial platform until brake adjustments
have been checked.
Test Manual Platform Leveling•
1. Depress and hold footswitch.
2. On platform leveling override switch, select
“
or “
” up position to tilt platform up
” down position to tilt platform
down.
Result: Platform should tilt up or down.
Page 42 December 2007
SJ 46A & SJ 46AJ
Page 42
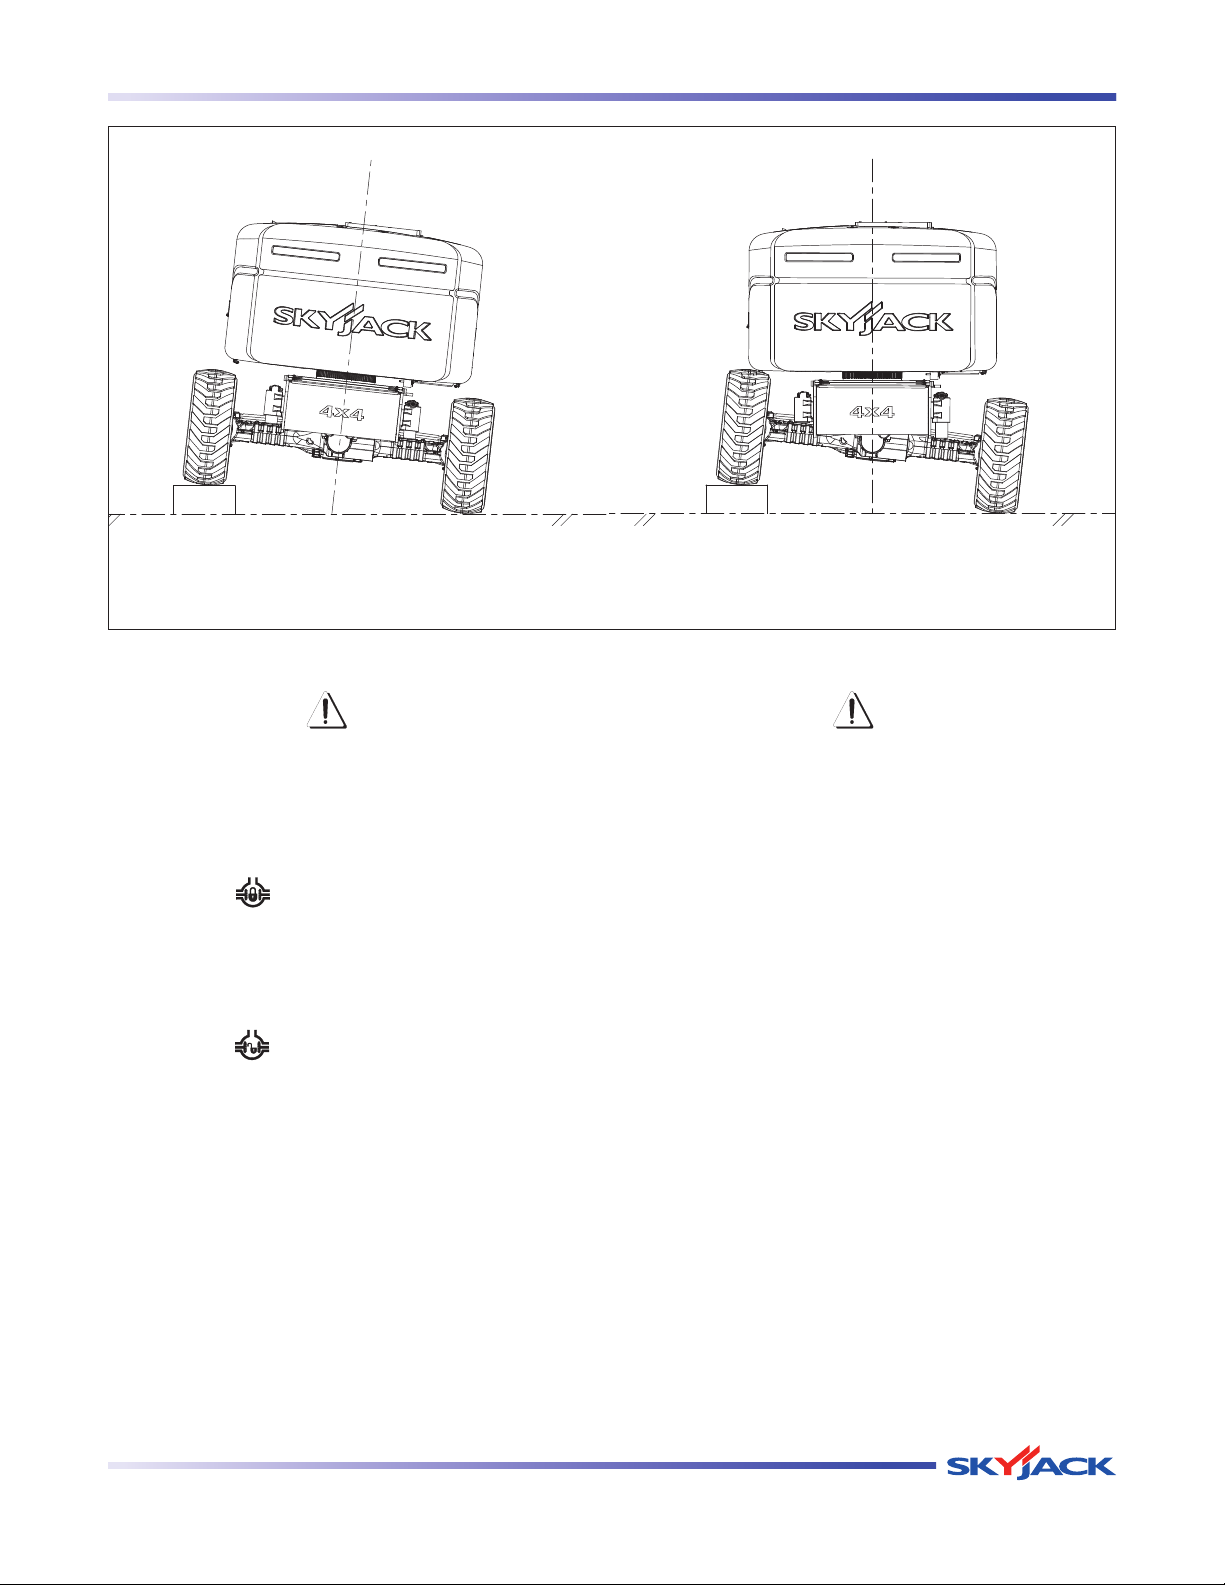
TM
Section 2 - Operation Function Tests
Oscillating Axle - UnlockedOscillating Axle - Locked
Test Differential Lock Switch•
WARNING
Be fore engaging differentia l loc k,
ensu re dr ive/steer controlle r is in
neutral position.
1. On platfor m co ntrol console , pu sh
d i f f e r e nt i a l l ock s w i t ch f o r w a rd
“
” to the locked position and then
release.
Result: Differential lock is engaged and
differential light should turn on.
2. Pull differential lock switch backward
“
” to the unlocked position and then
release.
Result: Differential lock is disengaged
and differential differential light should turn
off.
Test Oscillating Axles•
WARNING
DO NOT operate any control on platform
control console without proper fall
prote ction secure d t o de signa ted
location in platform. Failure to avoid this
hazard could result in death or serious
injury!
1. Extend fly boom 12 in. (30 cm) while on a
firm level ground.
Result: The steer axle should be locked.
2. Drive one of the steer tires up onto a
6 in. (15 cm) block or curb.
Result: An appropriate tilt of the aerial
platform chassis should occur.
3. Retract fly boom while in tilt position.
Result: The steer axle should unlock and
the aerial platform chassis should level
itself to ground.
SJ 46A & SJ 46AJ
December 2007 Page 43
Page 43
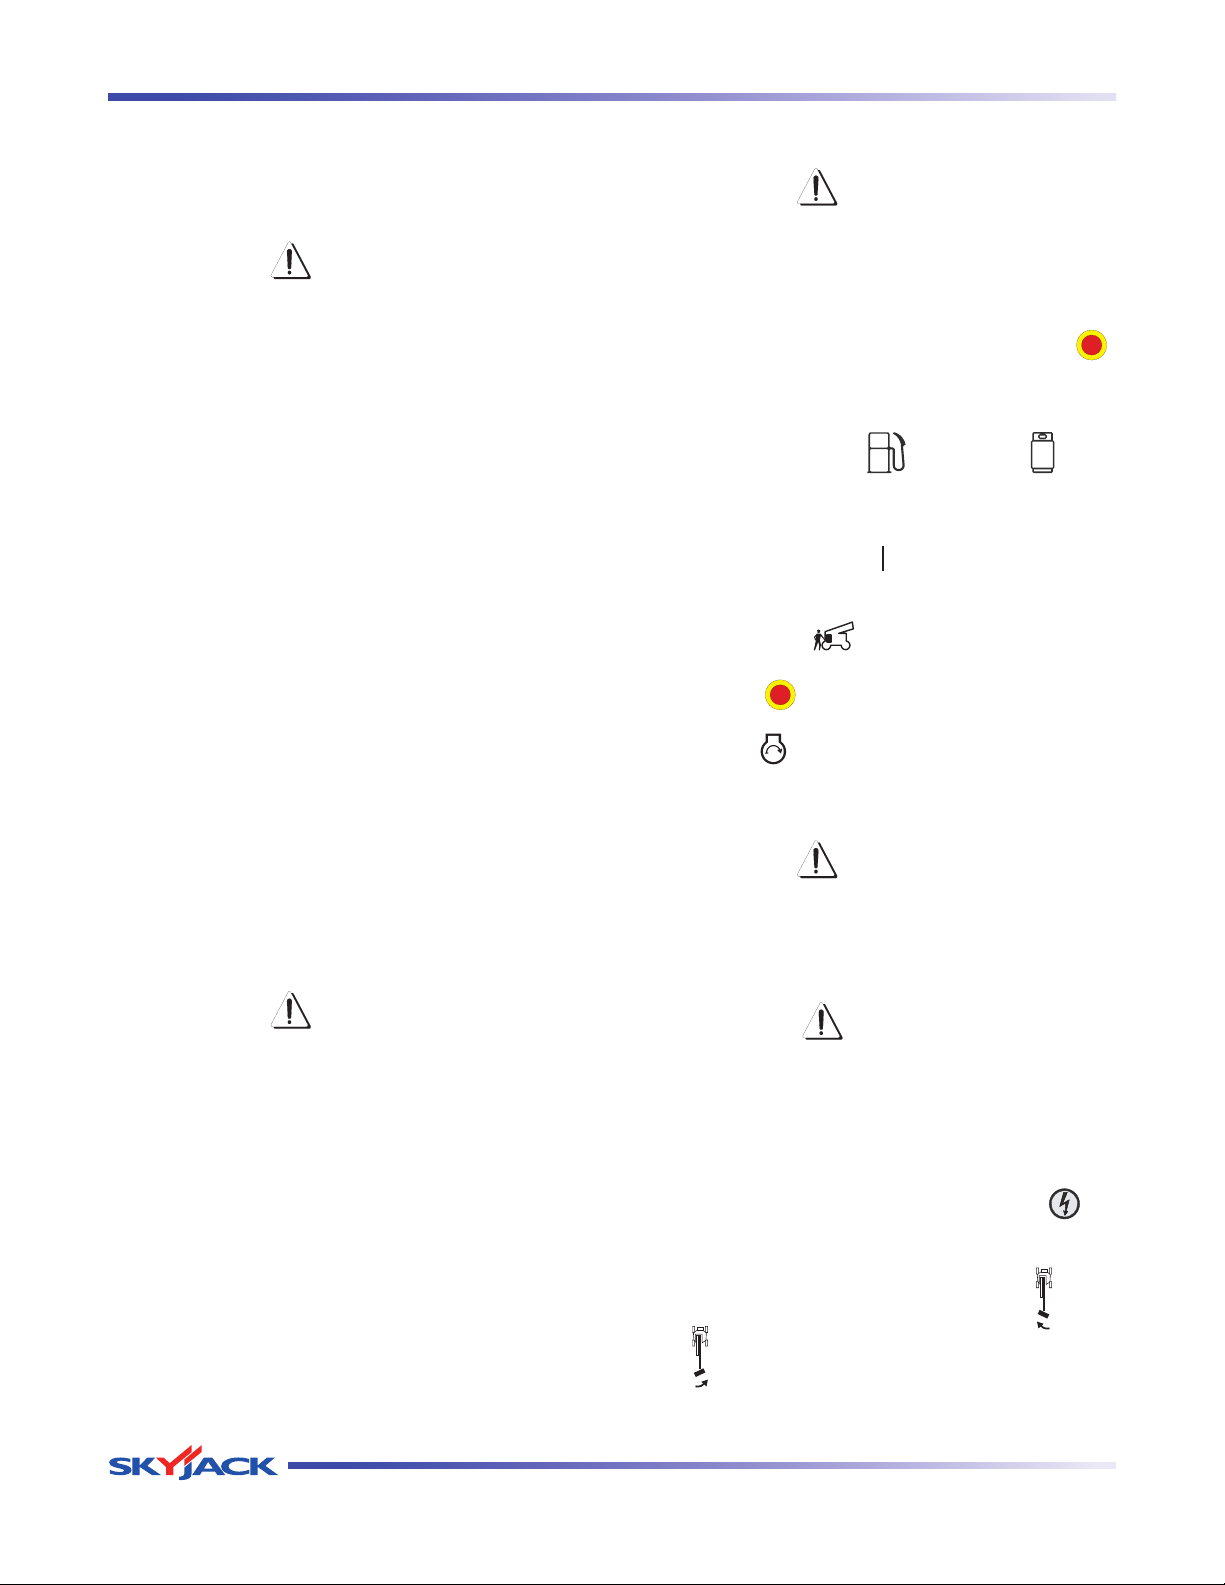
TM
Start Operation Section 2 - Operation
2.10 Start Operation
Carefully read and completely understand the Operating
Manual and all warnings and instruction labels
(refer to labels section) on the aerial platform.
WARNING
DO NOT operate this aerial platform
without proper authorization and training.
Failure to avoid this hazard could result
in death or serious injury.
Before operating this aerial platform, perform the
following steps:
1. Visual a nd daily mai ntena nce i nspec tions
(see Section 2.8)
2. Function tests (see Section 2.9)
3. Jobsite inspection
It is the responsibility of the operator to perform
a jobsite inspection and avoid the following
hazardous situations:
holes or drop-offs•
ditches or soft fills•
floor obstructions, bumps or debris•
overhead obstructions•
electrical cords, hoses and high voltage •
conductors
hazardous locations•
inadequate surface support to withstand all •
load forces imposed by the aerial platform
wind and weather conditions•
the presence of unauthorized personnel•
other possible unsafe conditions•
2.10-1 To Activate Base Control Console
WARNING
Ensure that you maintain three points of
contact to mount/dismount the platform.
1. Enter platform and close gate.
2. On platform control console, pull out “
emergency stop button.
3. For dual fuel engine, select fuel supply by moving
fuel switch to either “
” gasoline or “ ” liquid
propane gas position.
4. In engin e co mpartmen t, tu rn ma in po wer
disconnect switch to “ ” on position.
5. On base control console, turn base/off/platform
key switch to “ ” base position.
6. Pull out “
7. Select “
” emergency stop button.
” start position from start/function
enable/emergency power switch until engine
starts.
WARNING
DO NOT over crank the starter. If engine
fails to start after multiple attempts,
consult “Troubleshooting Information,” in
the Service and Maintenance Manual.
”
WARNING
An operator should not use any aerial platform
that:
does not appear to be working properly.•
has been damaged or appears to have worn or •
2.10-2 To Rotate Platform Using Base Control
missing parts.
has alterations or modifications not approved by •
the manufacturer.
1. Activate and hold function enable switch “
has safety devices which have been altered or •
disabled.
has been tagged or locked out for non-use or •
repair.
2. Push platform rotation switch to either “
Failure to avoid these hazards could result in death
or serious injury.
Page 44 December 2007
CAUTION
Allow engine to warm up for a few minutes
at low speed before applying any load.
Console
pushing it to the right.
” left or
“
” right position. Release switch to stop.
SJ 46A & SJ 46AJ
” by
Page 44
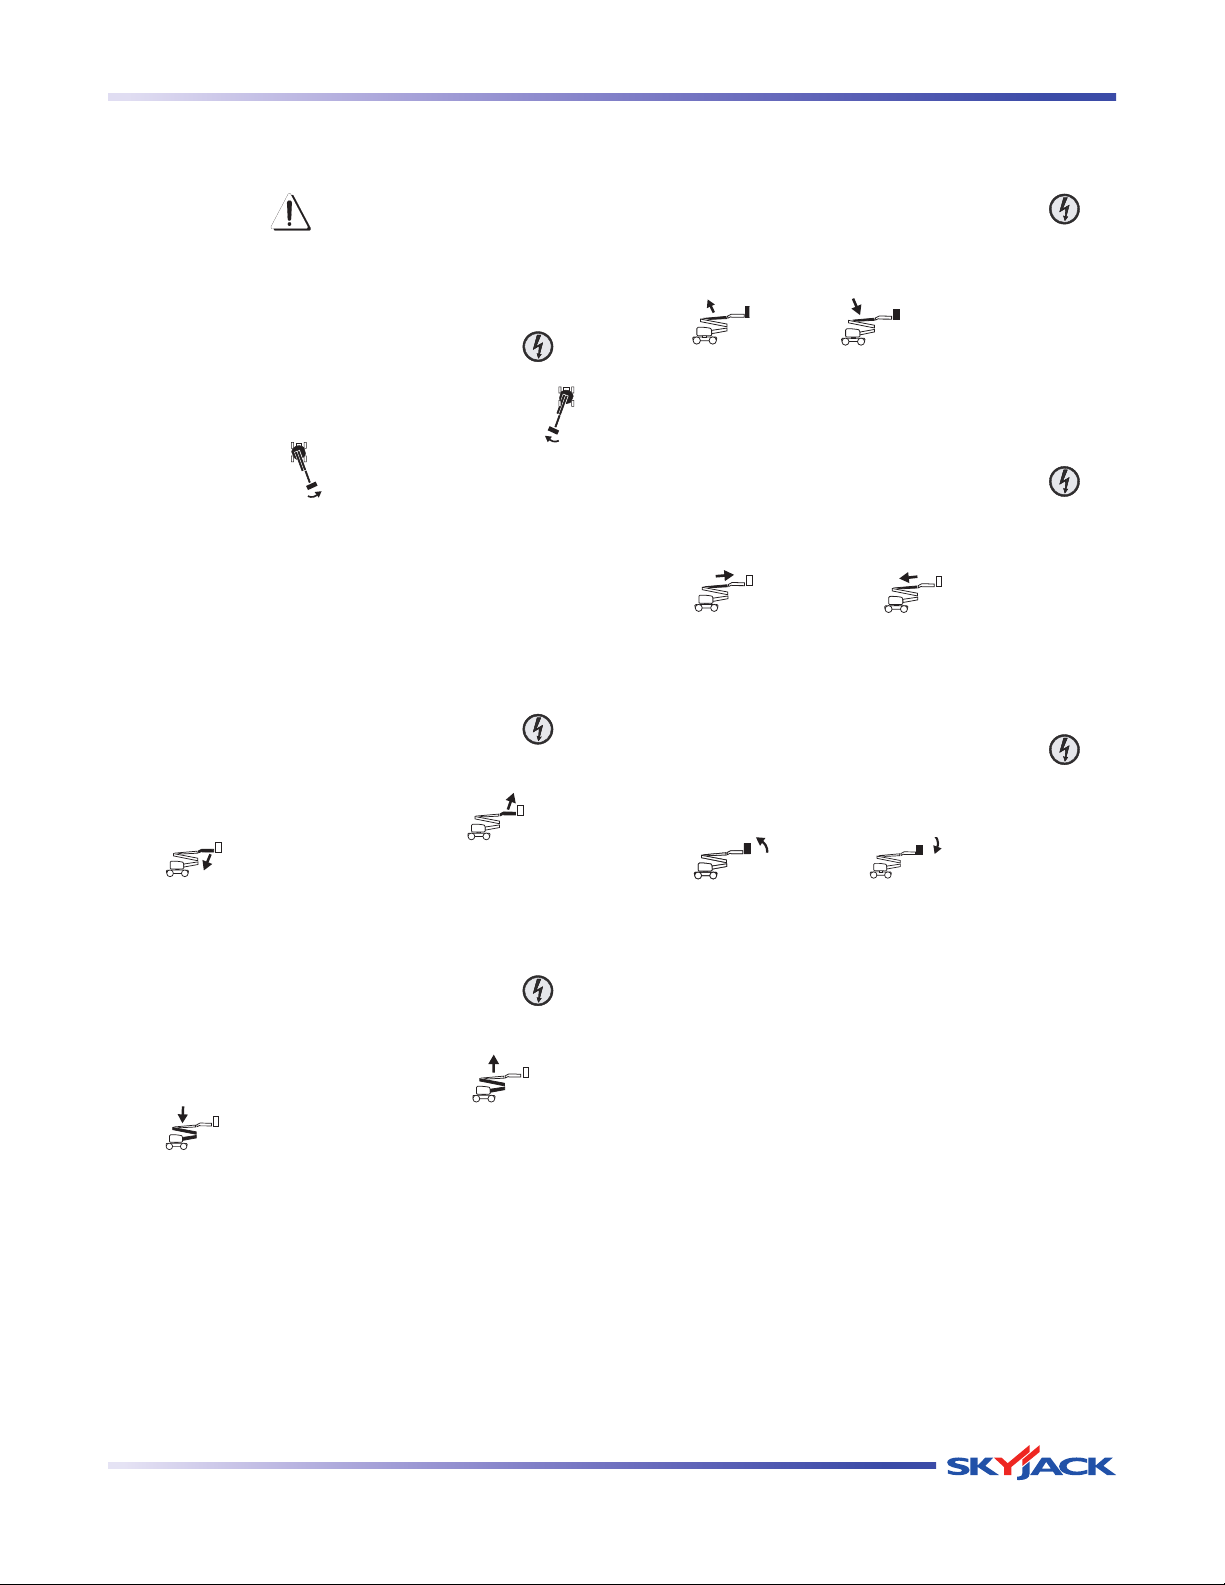
TM
Section 2 - Operation Start Operation
2.10-3 To Rotate Turret Using Base Control
Console
WARNING
When rotating the turret, ensure that there
are no personnel or obstructions in the
path of rotation, including blind spots.
1. Activate and hold function enable switch “
pushing it to the right.
2. Push turret rot at ion switch to either “
clockwise or “
” counterclockwise position.
Release switch to stop.
NOTE
Turret can be rotated continuously
360 degrees.
2.10-4 To Move Jib (If Equipped) Up and
Down Using Base Control Console
” by
2.10-6 To Raise or Lower Main Boom Using
Base Control Console
1. Activate and hold function enable switch “
pushing it to the right.
2. Push main boom raise/lower switch to either
“
” raise or “ ” lower position. Release
switch to stop.
2.10-7 To Extend or Retract Fly Boom Using
”
Base Control Console
1. Activate and hold function enable switch “
pushing it to the right.
2. Push fly boom extend/retract switch to either
“
” extend or “ ” retract position.
Release switch to stop.
2.10-8 To Level Platform Manually Using Base
Control Console
” by
” by
1. Activate and hold function enable switch “
” by
pushing it to the right.
2. Push jib up/down switch to either “
“
” down position. Release switch to stop.
” up or
2.10-5 To Move Riser Up and Down Using Base
Control Console
1. Activate and hold function enable switch “
” by
pushing it to the right.
2. Push riser up/down switch to either “
“
” down position. Release switch to stop.
” up or
1. Activate and hold function enable switch “
” by
pushing it to the right.
2. Push platform leveling override switch to either
“
” up or “ ” dow n p ositi on.
Release switch to stop.
SJ 46A & SJ 46AJ
December 2007 Page 45
Page 45
TM
Start Operation Section 2 - Operation
2.10-9 To Operate Using Emergency Power
Switch at Base Control Console
This is a momentary-type switch. This switch allows
all functions except the drive function to operate in the
event of engine malfunction. Refer to Section 2.13 for
the emergency lowering procedure.
NOTE
The emergency power unit has two-minute
duty cycle.
CAUTION
Do no t use emer gen cy power un it
continuously for m o r e t h a n t w o
minutes.
2.10-10 To Activate Platform Control Console
1. In engin e co mpartmen t, tu rn ma in po wer
disconnect switch to “ ” on position.
2. On base control console, turn base/off/platform
key switch to “
3. On base control console, pull out “
” platform position.
” emergency
stop button.
WARNING
Ensure that you maintain three points of
contact to mount/dismount the platform.
7. Push and hold “
” start position from start/on/off
switch until engine starts.
WARNING
DO NOT over crank the starter. If engine
fails to start after multiple attempts,
consult “Troubleshooting Information,” in
the Service and Maintenance Manual.
NOTE
Engine will not start if you are pressing
down on the footswitch.
8. Select desired engine RPM using throttle switch:
” high or “ ” low.
“
WARNING
DO NOT drive or steer the aerial platform
when the platform position does not allow
you a clear view of the base.
Your area of operation should be cordoned
from other personnel or equipment.
2.10-11 To Drive Forward or Reverse
WARNING
Refrain from climbing hills with slope greater •
than 20%.
When climbing high grades:•
WARNING
DO NOT operate any control on operator’s
co ntrol consol e wit hout proper fall
protection secured to the designated
location in the platform. Failure to avoid
this hazard could result in death or
serious injury.
4. Enter platform and close gate.
1. Depress and hold footswitch.
5. Attach body harness lanyards of each occupant
to platform lanyard rings.
6. On platform control console, pull out “
2. On platform control console, push and hold
”
emergency stop button.
3. Release controller handle to stop.
Page 46 December 2007
all booms must be fully stowed. restrict platform capacity to 300 lb. (136 kg).
CAUTION
When yo u are in the plat for m and
positioned over an axle, the direction
you are facing will be forward.
drive/steer controller in this direction “ ” to drive
forward or “
” to drive backward.
SJ 46A & SJ 46AJ
Page 46
TM
Section 2 - Operation Start Operation
DANGER
The drive orientation can change when
the turret is swung 90 degrees off center
of the normal driving position (roughly
when boom is swung past the rear tire).
Drive re-orientation will not occur while
driving and rotating until the joystick
is released for 6 seconds or when the
footswitch is released.
WARNING
DRIVING ON A SLOPE
When driv ing on a slope •
greater than 30%, the platform
capacity is limited to 300 lb.
(136 kg).
The platform must be between •
the non-steer wheels and
must be on the downside of
the hill.
2.10-14 To Move Riser Up and Down Using
Platform Control Console
1. Depress and hold footswitch.
2. On riser up/down switch, select “
riser up or “
” to move riser down. Release
” to move
switch to stop.
2.10-15 To Extend or Retract Fly Boom Using
Platform Control Console
1. Depress and hold footswitch.
2. On fly boom extend/retract switch, select “
to extend fly boom or “
” to retract fly boom.
Release switch to stop.
2.10-16 To Rotate Platform Using Platform
Control Console
”
Wh en slope incr eases to •
above 45%, the forward drive
is disabled but reverse drive
remains active.
2.10-12 To Steer
1. Depress and hold footswitch.
2. On platform control console, press rocker on top
of drive/steer controller in this direction “
steer left or “
” to steer right.
” to
NOTE
Driving and steering may be active at the
same time.
2.10-13 To Move Jib (If Equipped) Up and
Down Using Platform Control Console
1. Depress and hold footswitch.
1. Depress and hold footswitch.
2. On platform rotation switch, select “
platform left or “
” to rotate platform right.
” to rotate
2.10-17 To Level Platform Manually Using
Platform Control Console
1. Depress and hold footswitch.
2. On platform leveling override switch, select
“
“
” up position to tilt platform up or
” down position to tilt platform down.
2. On jib up/down switch, select “
up or “
” to move jib down. Release switch
to stop.
SJ 46A & SJ 46AJ
” to move jib
December 2007 Page 47
Page 47
TM
Start Operation Section 2 - Operation
2.10-18 To Raise or Lower Main Boom Using
Platform Control Console
1. Depress and hold footswitch.
2. Push and hold boom/turret controller in this
direction “
” to raise main boom or “ ”
to lower main boom.
3. Release controller handle to stop.
2.10-19 To Sound Horn
1. Press “
” horn pushbutton to sound horn.
Release pushbutton to stop sounding horn.
2.10-20 To Rotate Turret Using Platform
Control Console
WARNING
When rotating the turret, ensure that there
are no personnel or obstructions in the
path of rotation, including blind spots.
2.10-21 To Operate Using Emergency Power
Switch at Platform Control Console
This is a momentary-type switch. This switch allows all
functions except drive function to operate in the event
of engine malfunction. Refer to Section 2.14 for the
emergency lowering procedure.
NOTE
The emergency power unit has two-minute
duty cycle.
CAUTION
Do no t use emer gen cy power un it
continuously for m o r e t h a n t w o
minutes.
2.10-22 Shutdown Procedure
1. Completely retract boom and lower platform.
WARNING
Ensure that you maintain three points of
contact to mount/dismount the platform.
1. Depress and hold footswitch.
2. Push and hold boom/turret controller in this
direction “
” to rotate clockwise or “ ” to
rotate counterclockwise.
3. Release controller handle to stop.
NOTE
Turret can be rotated continuously
360 degrees.
2. Push in “
” emergency stop button on platform
control console and on base control console.
3. Turn base/off/platform key switch to “
” off
position. Remove key.
4. Turn main power disconnect switch to “
” off
position.
For aerial platform with cold weather start option:
NOTE
When temperature gets below -11°C
(+11°F), ensure aerial platform is parked
close to AC outlet.
5. Plug in battery warmer/hydraulic oil heater into
AC outlet at least 4 hours before starting engine.
Page 48 December 2007
SJ 46A & SJ 46AJ
Page 48

TM
Section 2 - Operation Refueling Procedure
2.11 Refueling Procedure
This section provides the operator with the procedure
on how to refuel the engine with regular fuel and install
the propane cylinder.
IMPORTANT
Before using the aerial platform ensure
there is enough fuel to finish the job.
WARNING
Follow all local and national regulations
for propane handling.
WARNING
Failure to heed the following safety
precautions could result in death or
serious injury:
Use extreme caution while refueling •
aerial platforms.
Ensure engine and all systems are •
turned off before refueling.
Refuel aerial platform only in a well •
ventilated area away from open
flame and other sources of ignition,
authorized by your employer and
supervisor.
Liquid propane gas fuel is a gas •
that is heavier than air. It settles in
low spots. Any flame or spark could
cause a fire that could cause serious
injury.
When changing liquid propane gas •
cylinder, check all connections for
damage or missing parts. Never try
to start an aerial platform if you smell
gas.
2.11-1 Regular Fuel
Ensure engine and all systems are turned off and 1.
emergency stop buttons are depressed.
Open fuel compartment door and remove fuel 2.
cap.
Carefully pour fuel into tank ensuring that no 3.
spillage occurs.
Securely replace fuel cap.4.
Ensure there are no leaks in the fuel system.5.
Wipe up any spilled fuel.6.
Dispose of rags in an approved container.7.
Protection of Environment from Chemical
Dangers
WARNING
Gasoline, diesel fuel, engine oil and
hydraulic fluid are chemicals, which can
contaminate the environment. If they
are spilled during filling and reach the
water, they can cause damage to the
environment, e.g., death of fish. For
such damage, the party responsible is
liable! Therefore, gasoline, diesel fuel,
engine oil or hydraulic fluid must not get
into the sewage system, streams, rivers
or other surface water. For that reason,
immediately remove the dripped off or
spilled gasoline, diesel fuel, engine oil
or hydraulic fluid with appropriate means
and dispose of these means according to
the regulations.
For gasoline engine models, use only •
unleaded gasoline with an octane
rating 87 or higher.
WARNING
Do not smoke in an area where aerial
platforms are stored or refueled.
SJ 46A & SJ 46AJ
December 2007 Page 49
Page 49

TM
Refueling Procedure Section 2 - Operation
2.11-2 Propane
WARNING
Follow all local and federal regulations
for propane handling.
To remove a propane cylinder:
Ensure engine and all systems are turned off and 1.
emergency stop button is depressed.
Turn propane cylinder’s main valve clockwise to 2.
shut off fuel supply to engine.
Start engine and allow it to stop naturally. Restart 3.
engine to ensure fuel lines are empty.
Disconnect hose f r o m e m p t y p r o p a n e 4.
cylinder by detaching the coupling. Turn fitting
counterclockwise.
Loosen two propane cylinder straps by pulling 5.
up on the metal clips. Disconnect straps from
hooks.
To install a propane cylinder:
Ensure engine and all systems are turned off and 1.
emergency stop button is depressed.
Pla ce pro pane cy lin der on bra cket or in 2.
compartment.
Ensure metal peg on bracket or compartment is 3.
inserted into propane cylinder rim.
Reconnect propane cylinder straps to hooks and 4.
fasten tightly.
Attach coupler to propane cylinder and turn 5.
clockwise to tighten fitting.
Apply soap water or neutral detergent to pipe 6.
connection and cylinder.
Open valve 1/4 turn counterclockwise and check 7.
for any gas leaks.
Wipe off soap water or detergent after inspection 8.
is completed.
Remove the propane cylinder.6.
Open main valve fully if there are no leaks.9.
NOTE
The aerial platform is now ready for use by
an authorized, qualified operator who has
read and completely understands all of
Section 2 operations in this manual.
Page 50 December 2007
SJ 46A & SJ 46AJ
Page 50
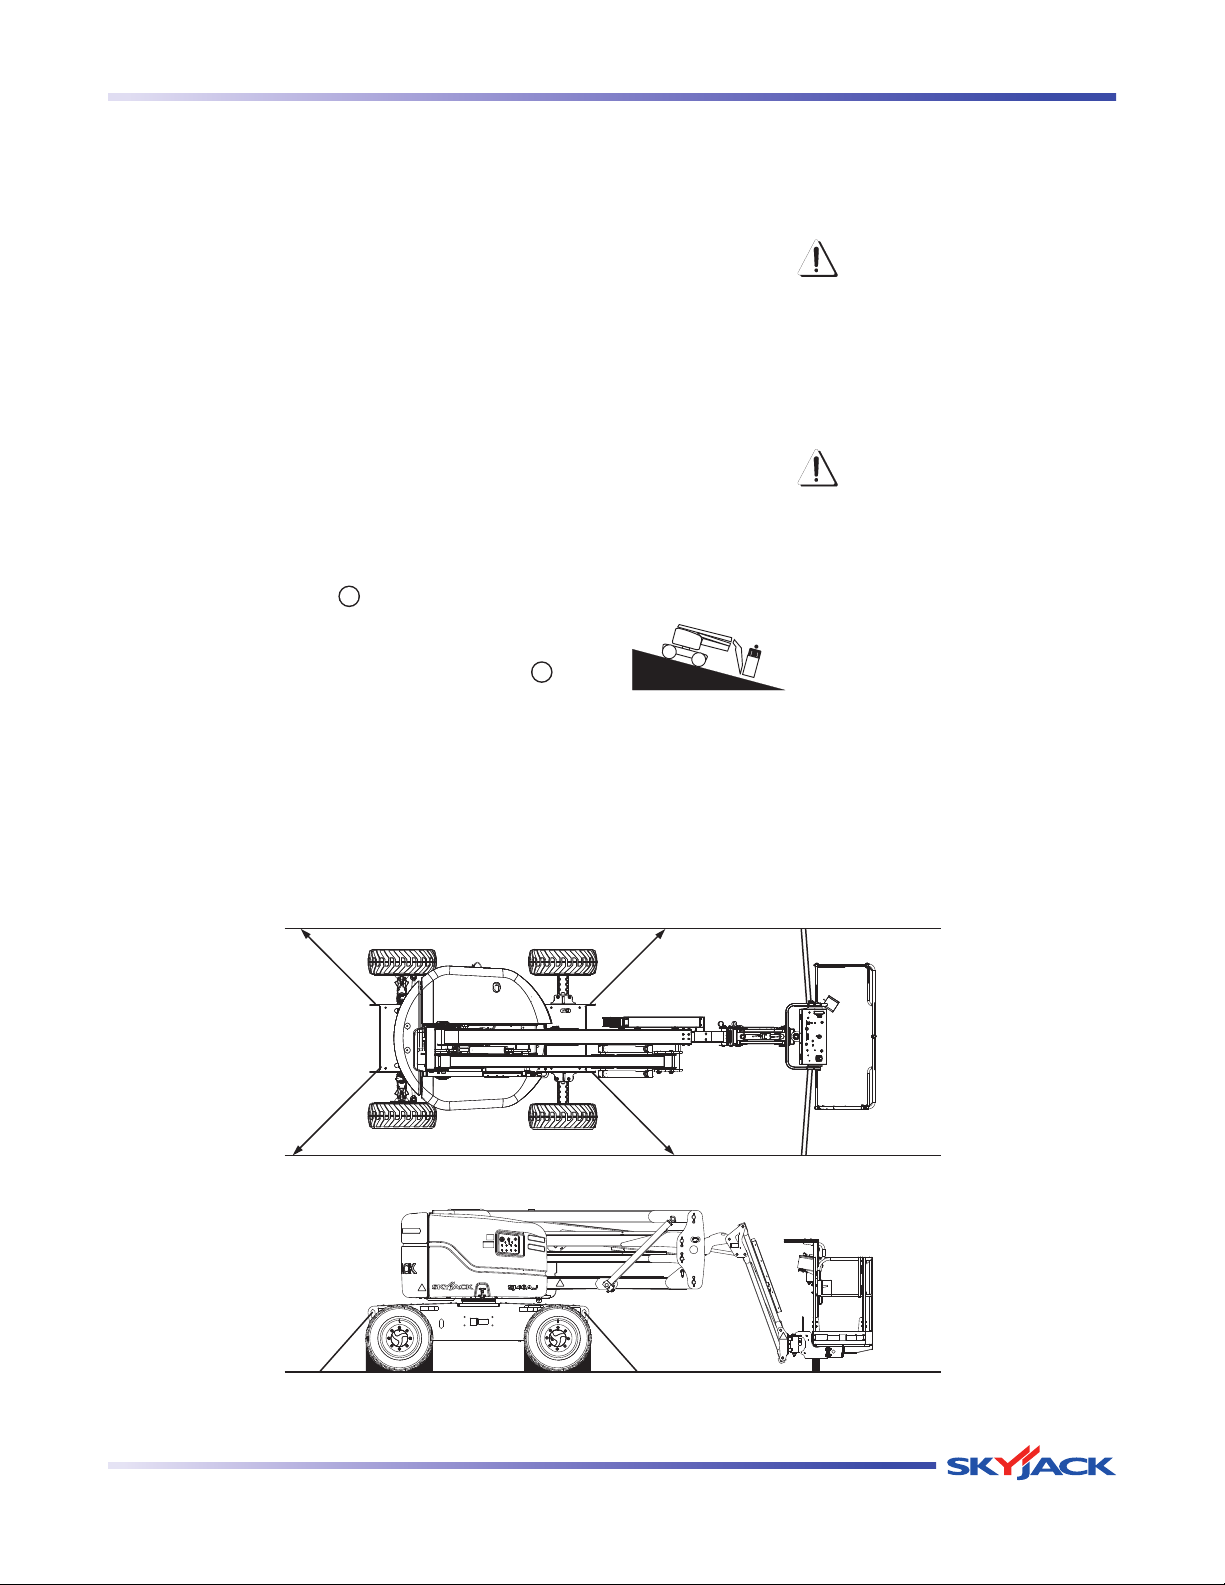
TM
Section 2 - Operation Loading/Unloading
2.12 Loading/Unloading
Know and heed all national, state/provincial and local
rules which apply to transporting of aerial platforms.
Only qualified personnel shall operate machinery
during loading/unloading.
Be sure vehicle capacity and loading equipment
hoists, chains, straps, etc., are sufficient to withstand
maximum aerial platform weight.
The transport vehicle must be parked on a level surface
and must be secured to prevent rolling while aerial
platform is being loaded or unloaded.
2.12-1 Loading and Tie-down
1. Lock turret using turret transportation lock
(refer to Section 2.12-2).
2. Turn key switch to “ ” off position and remove
key before transporting.
3. Turn main power disconnect switch to “
position.
” off
7. Secure boom from side-to-side movement using
lower platform mount between boom end and
platform. Do not use excessive downward force
when securing boom section.
WARNING
Inspect aerial platform for loose or
unsecured items.
NOTE
For loading and unloading using a winch
line, refer to Section 2.13.
WARNING
DRIVING ON A SLOPE
When driving on a slope greater •
than 30%, the platform capacity
is limited to 300 lb. (136 kg).
The platform must be between •
the non-steer wheels and must
be on the downside of the hill.
4. Chock aerial platform wheels (if necessary).
5. Remove all loose items.
6. Anchor down aerial platform to transport surface
using tie-down points (refer to Figure 2-10).
When slope increases to •
above 45%, the forward drive
is disabled but reverse drive
remains active.
SJ 46A & SJ 46AJ
Figure 2-10. Tie-down Points
December 2007 Page 51
Page 51
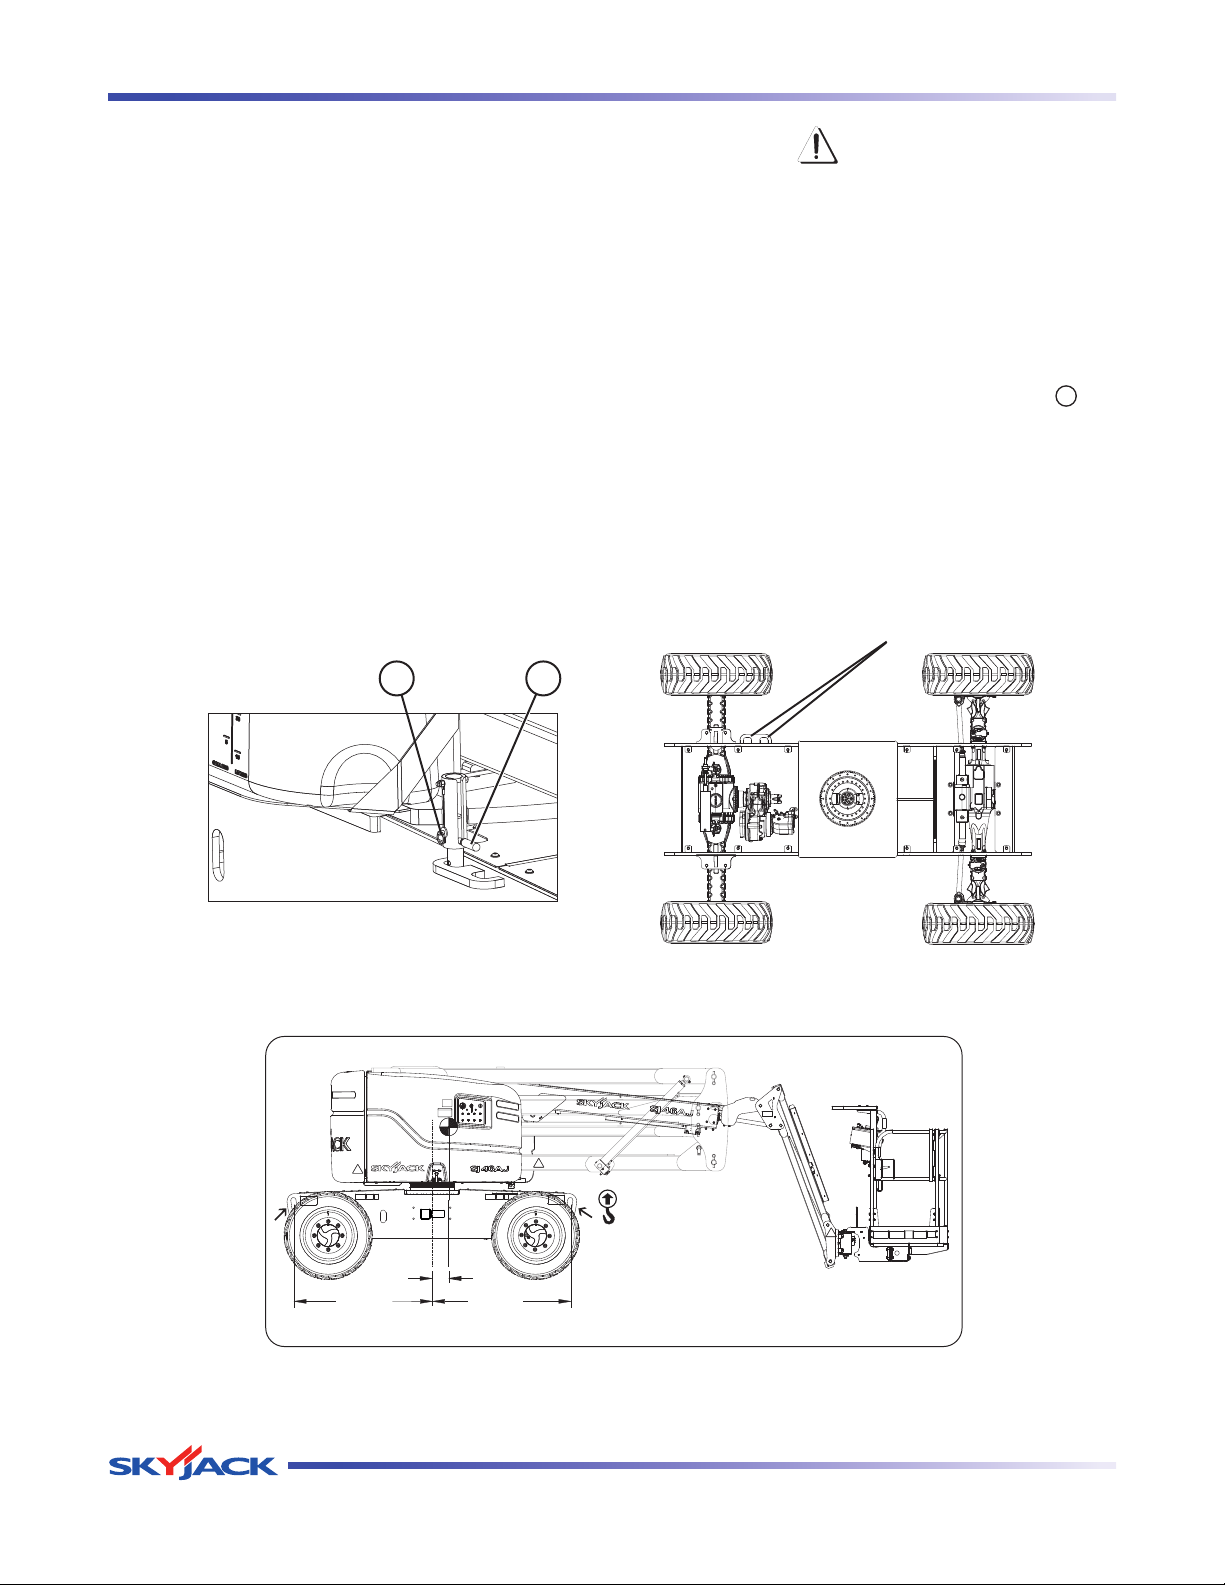
TM
Loading/Unloading Section 2 - Operation
53” 53”
X
C
L
X =9”(230 mm)
46AJ
(1346 mm)(1346 mm)
2.12-2 Locking the Turret
1. Ensure that turret is positioned so that turret
transportation lock tube (item 1 - Figure 2-11) is
aligned into one of two turret locking points in the
turret rotation lock plate.
2. Pull out turret lock retaining pin (item 2 - Figure 2-11).
Lower turret lock into locked position and reinsert
turret lock retaining pin.
2.12-3 Lifting
NOTE
When it becomes necessary to lift aerial
platform, it is very important that lifting
devices are attached only to designated
lifting points (refer to Figure 2-12).
2 1
WARNING
Us e cha ins of am ple l oad c apacity
sufficient to withstand aerial platform
weight.
1. Place bo om in sto wed position centered
between drive wheels. Lock turret using turret
transportation locking pin (refer to Section 2.12-2)
into the transport point (refer to Figure 2-11).
2. Turn main power disconnect switch to “ ” off
position.
3. Remove all loose items from aerial platform.
4. Properly adjust rigging to prevent damage to aerial
platform and so aerial platform remains level.
Transport Point
Figure 2-11. Turret Transportation Lock & Locking Points
Figure 2-12. Lifting Points
NOTE: Center of gravity varies with different options.
Page 52 December 2007
SJ 46A & SJ 46AJ
Page 52
TM
Section 2 - Operation Winching and Towing Procedure
2.13 Winching and Towing Procedure
This section provides the operator with procedure about
winching and towing and on how to manually release
brakes.
WARNING
Ensure boom is in stowed position before
winching or towing. Sudden motion could
cause aerial platform to become unstable.
Death or serious injury could result.
WARNING
In emergency situations where aerial
platform functions are not available and
lowering is impeded by an obstacle,
utmost care must be taken to move
ae rial platfo rm far enough to clear
obstacle. In such cases, operation must
be extremely smooth with no sudden
movements and must not exceed a speed
of 2 in./sec (50 mm/sec).
WARNING
When pushing, winching or towing, do
not exceed 2 mph (3.2 km/h).
4. Position aerial platform on a firm and level
surface.
5. Chock or block wheels to prevent aerial platform
from rolling.
6. Apply brakes by pulling out black brake auto reset
valve.
NOTE
Brakes automatically apply when platform
controls are engaged.
WARNING
Brakes must be applied immediately after
reaching desired location.
WARNING
Do not winch or tow aerial platform on
grade steeper than 45% (4WD).
WARNING
Do not winch or tow aerial platform onto a
slope, or brake the towing vehicle rapidly.
Do not pull aerial platform down an incline
towards a winch.
1. Before winching or towing aerial platform, fully
retract, lower and position boom over rear drive
wheels in line with direction of travel.
2. M an u a l l y r e l e a s e b r a k e s ( r e f e r t o
Section 2.13-1).
3. Remove wheel chocks or blocks, and then winch
or tow aerial platform to desired location.
SJ 46A & SJ 46AJ
December 2007 Page 53
Page 53
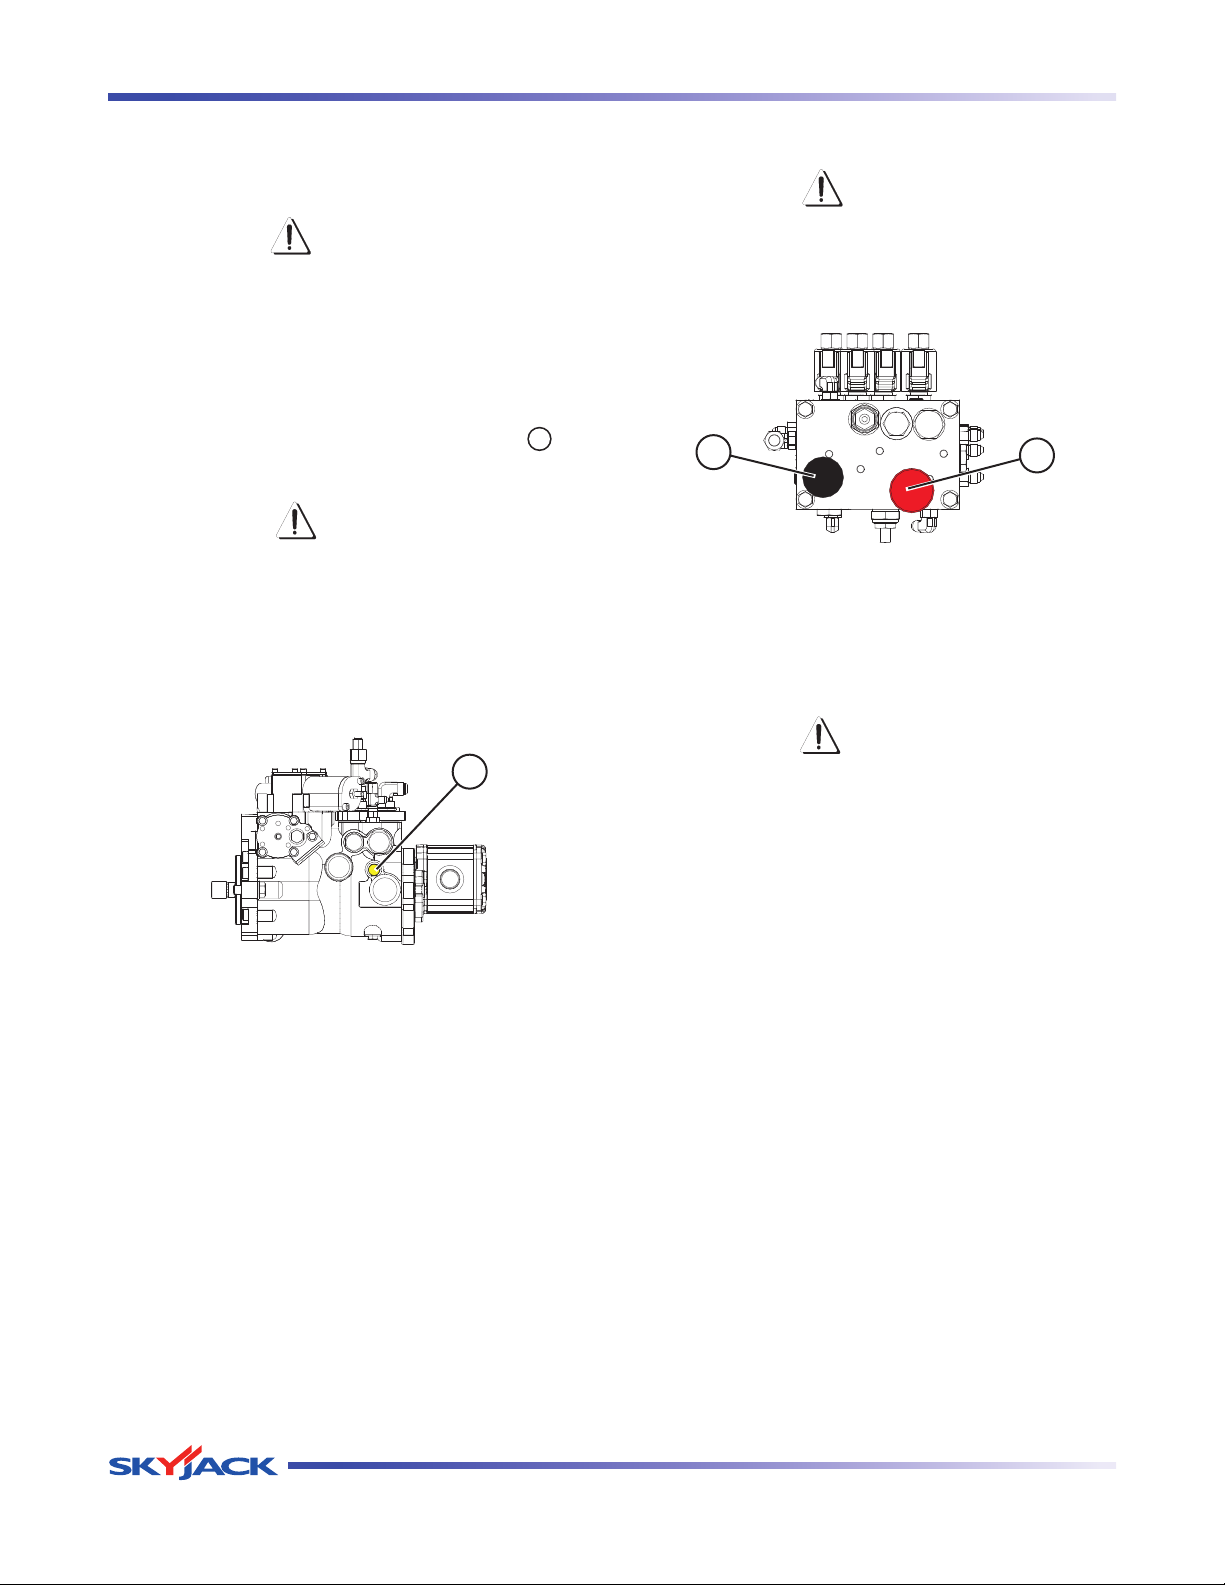
TM
Winching and Towing Procedure Section 2 - Operation
2.13-1 To Release Brakes Manually
Brakes must be manually disengaged for winching or
towing.
CAUTION
WARNING
Do not manually disengage brakes if
aerial platform is on a slope.
1. Ensure aerial platform is on level ground. Chock
or block wheels to keep aerial platform from
rolling.
2. Turn main power disconnect switch to “
” off
position.
CAUTION
Do not use hydraulic power with brake
disengaged.
3. Locate the bypass valve on the inboard side of the
drive pump. Bypass the drive pump by loosening
the valve stem (item 1 - marked with yellow paint)
two revolutions counterclockwise.
1
Do not release brakes before disengaging
drive motor!
4. Push in black brake valve plunger (item 2).
2
3
Figure 2-14. Brake Manifold
5. Actuate red hand pump (item 3) slowly by moving
knob in and out until firm resistance is felt. Brake
is now released.
WARNING
Brakes must be applied immediately
after reaching desired location. Refer
to Section 2.13 on how to reengage
brakes.
Figure 2-13. Drive Bypass Valve
Page 54 December 2007
SJ 46A & SJ 46AJ
Page 54
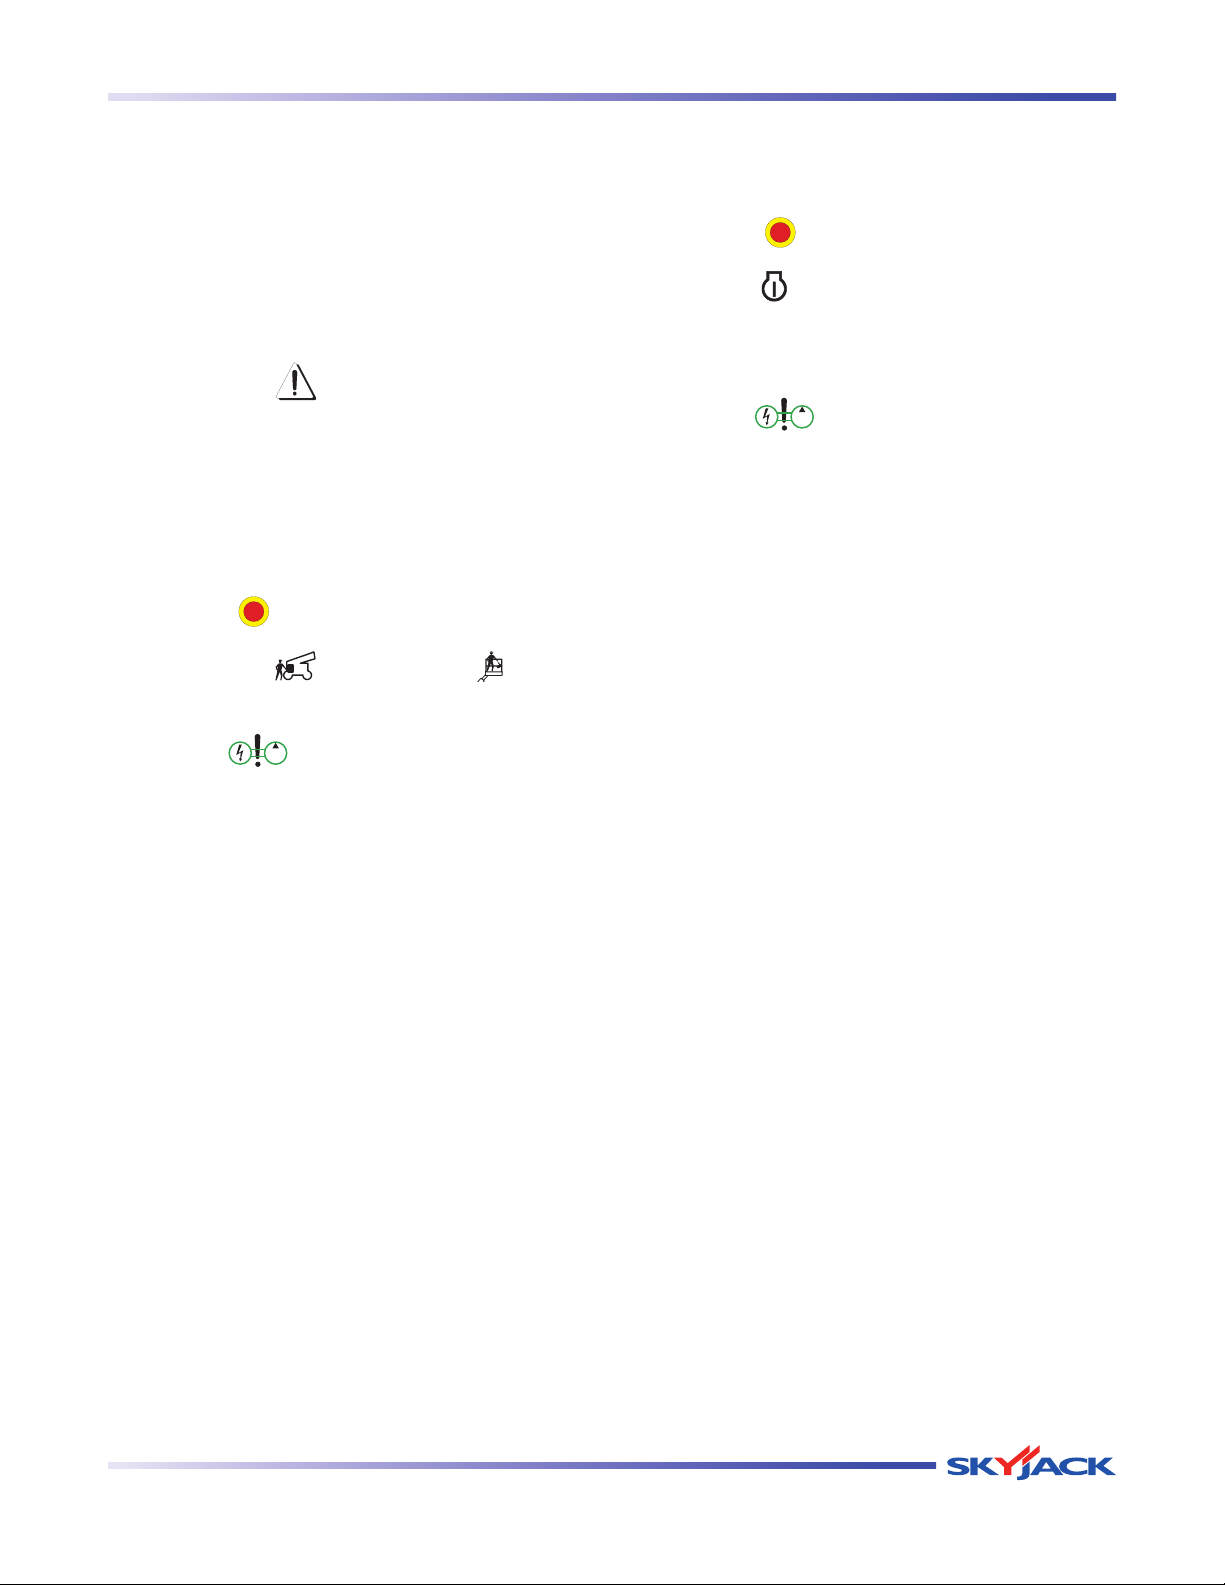
TM
Section 2 - Operation Emergency Lowering Procedures
2.14 Emergency Lowering Procedures
This section guides the operator on how to use
emergency lowering system. This system allows
platform lowering in the event of an emergency or
engine malfunction.
NOTE
The emergency power unit has two-minute
duty cycle.
CAUTION
Do no t use emer gen cy power un it
continuously for m o r e t h a n t w o
minutes.
At Base Control Console:
1. Ensure engine is off.
2. Pull out “
3. Select either “
position from key switch.
” emergency stop button.
” base position or “ ” platform
At Platform Control Console:
1. Ensure engine is off.
2. Pull out “
3. Select “
” emergency stop button.
” on position from engine enable
switch.
4. Depress and hold footswitch.
5. Select “
” emergency power position from
start/function enable/emergency power switch
and activate desired boom function.
NOTE
When platform is overloaded in work mode,
emergency lowering is only available from
base controls.
4. Select “
” emergency power position from
start/function enable/emergency power switch
and activate desired boom function.
SJ 46A & SJ 46AJ
December 2007 Page 55
Page 55
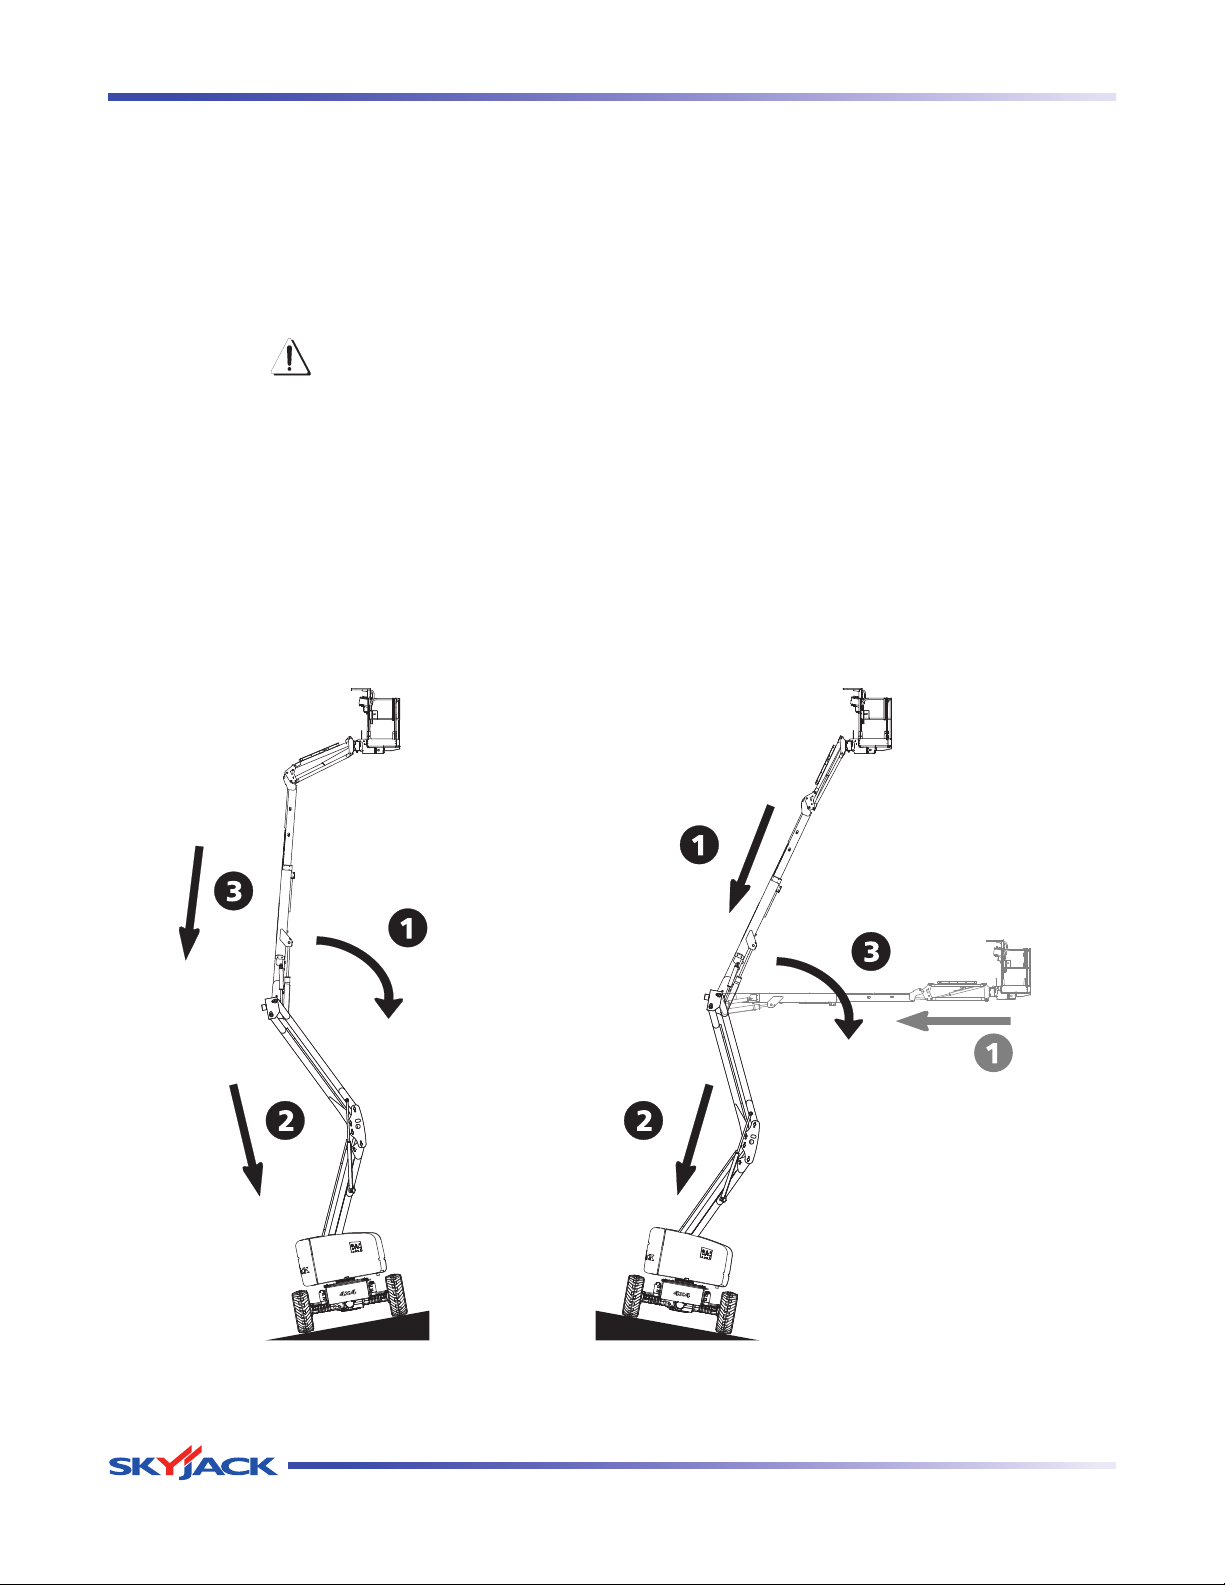
TM
Chassis Tilt Section 2 - Operation
2.15 Chassis Tilt
This section guides the operator with regard to
recovering from an inclined position.
IMPORTANT
When the boom is raised or extended, the
aerial platform must only be operated on
firm level surfaces.
WARNING
When the aerial platform becomes tilted
causing the alarm to sound, the platform
must be fully lowered and retracted
immediately. Drive functions are not
available when the tilt alarm is active.
2.15-1 Platform Uphill
If the aerial platform becomes tilted with the platform
uphill (refer to Figure 2-15) follow the steps below to
return to a lowered and retracted position.
1. Lower main boom completely.
2. Lower riser completely.
3. Retract fly boom completely.
4. Drive to a firm level surface.
2.15-2 Platform Downhill
If the aerial platform becomes tilted with the platform
downhill (refer to Figure 2-16) follow the steps below to
return to a lowered and retracted position.
1. Retract fly boom completely.
2. Lower riser completely.
3. Lower main boom completely.
4. Drive to a firm level surface.
Page 56 December 2007
Figure 2-16. Platform DownhillFigure 2-15. Platform Uphill
SJ 46A & SJ 46AJ
Page 56
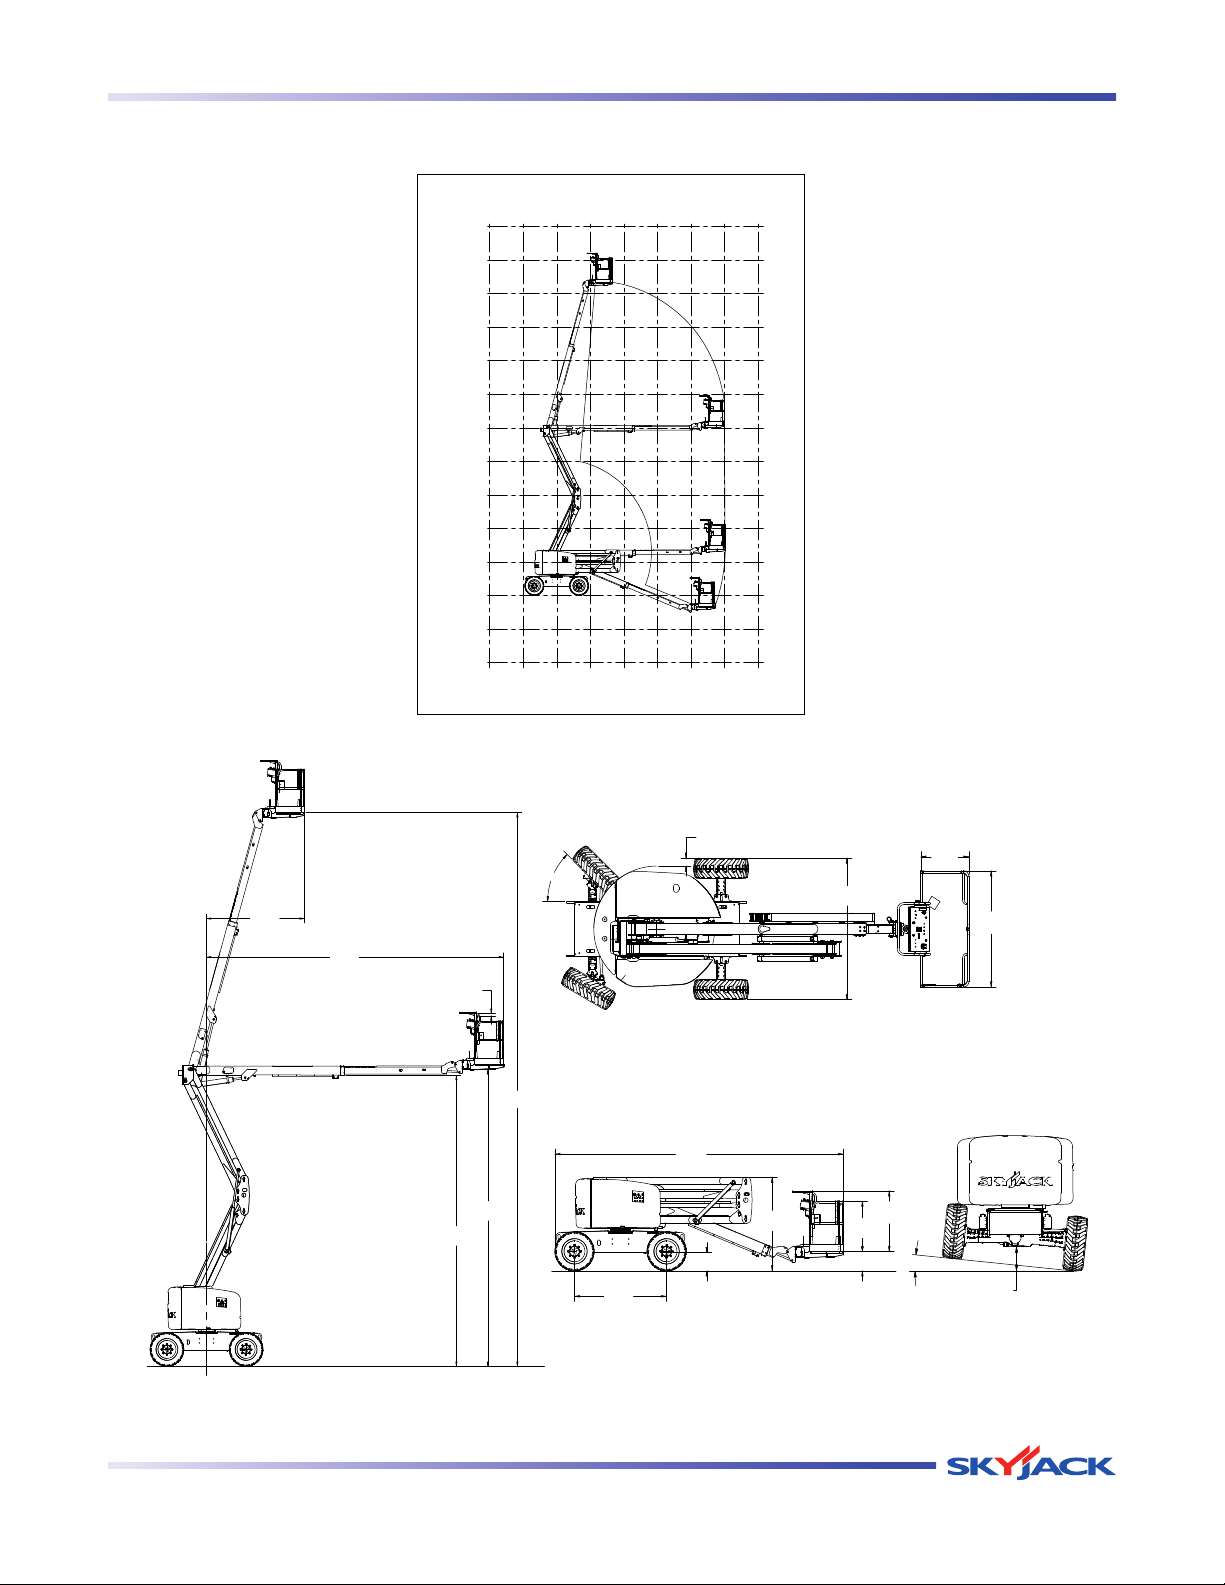
TM
Section 2 - Operation Diagrams
-10
-10
0
30252015105-5 0
(-3.05)
(-1.52)
(1.52) (3.05) (4.57) (6.10) (7.62) (9.14)
(-3.05)
-5
(-1.52)
5
(1.52)
10
(3.05)
20
(6.10)
(4.57)
15
30
(9.14)
(7.62)
25
40
35
50
45
(10.67)
(12.19)
(13.72)
(15.24)
(16.76)
55
Feet
(Meters)
30”
(76 cm)
72”
(183 cm)
45°
-5”
(-12.70 cm)
7’ - 4”
(2.24 m)
6°
11.5”
(29.21 cm)
20’ - 11”
(6.37 m)
70°
44”
(111 cm)
53”
(134 cm)
6’ - 8”
(2.03 m)
16”
(40.6 cm)
6’ - 10”
(2.07 m)
17”
(43 cm)
8’ - 3”
(2.51 m)
25’
(7.63 m)
3.5”
(9 cm)
46’ - 8”
(14.22 m)
25’
(7.63 m)
24’ - 6”
(7.48 m)
Diagram 2.1 Dimension and Reach Diagram - SJ 46A
SJ 46A & SJ 46AJ
Figure 2-17. Reach Diagram - 46A
Figure 2-18. Dimension - 46A
December 2007 Page 57
Page 57
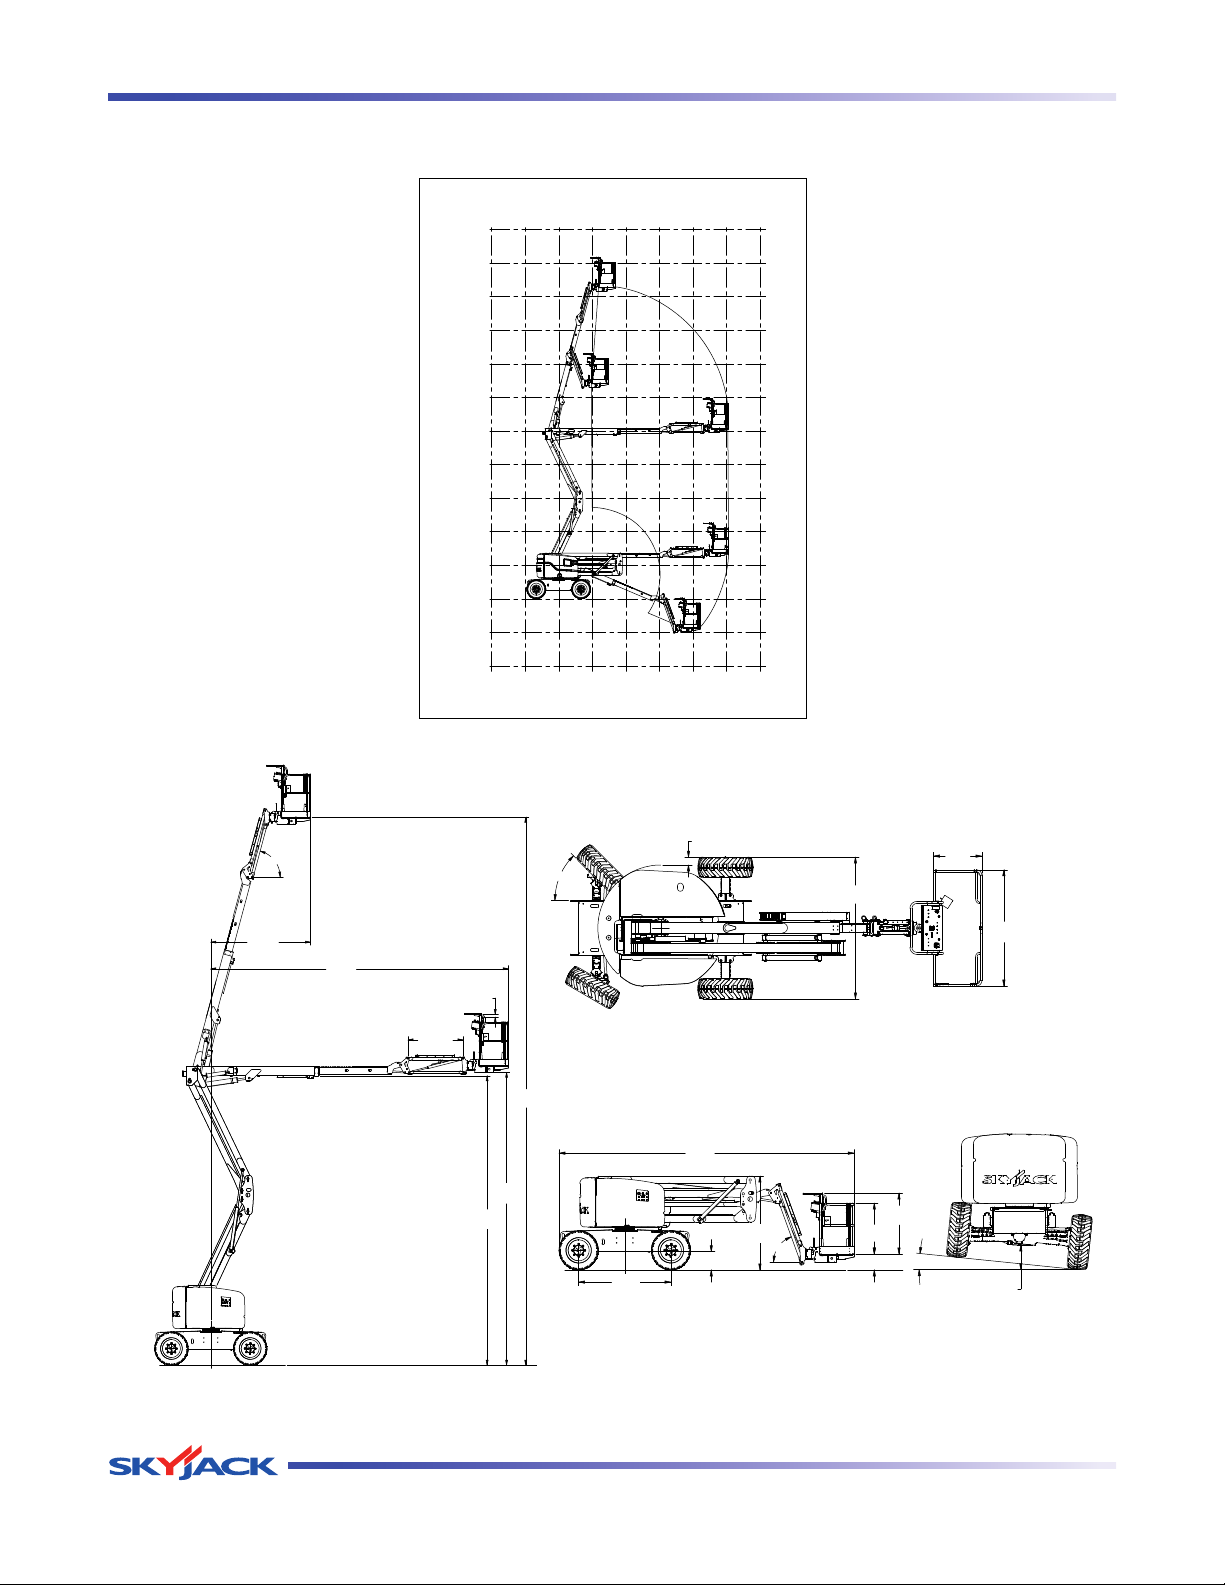
TM
Diagrams Section 2 - Operation
-10
-10
0
30252015105-5 0
(-3.05)
(-1.52)
(1.52) (3.05) (4.57) (6.10) (7.62) (9.14)
(-3.05)
-5
(-1.52)
5
(1.52)
10
(3.05)
20
(6.10)
(4.57)
15
30
(9.14)
(7.62)
25
40
35
50
55
45
(10.67)
(12.19)
(13.72)
(15.24)
(16.76)
Feet
(Meters)
30”
(76 cm)
72”
(183 cm)
45°
-5”
(-12.70 cm)
7’ - 4”
(2.24 m)
8’ - 6”
(2.58 m)
75°
25’ - 2”
(7.68 m)
3.5”
(9 cm)
55.75”
(141.6 cm)
46’ - 5”
(14.15 m)
25’
(7.63 m)
24’ - 6”
(7.48 m)
6°
11.5”
(29.21 cm)
21’ - 4”
(6.5 m)
70°
44”
(111 cm)
53”
(134 cm)
6’ - 8”
(2.03 m)
16”
(40.6 cm)
6’ - 10”
(2.07 m)
14”
(36 cm)
Diagram 2.2 Dimension and Reach Diagram - SJ 46AJ
Figure 2-19. Reach Diagram - 46AJ
Figure 2-20. Dimension - 46AJ
Page 58 December 2007
SJ 46A & SJ 46AJ
Page 58
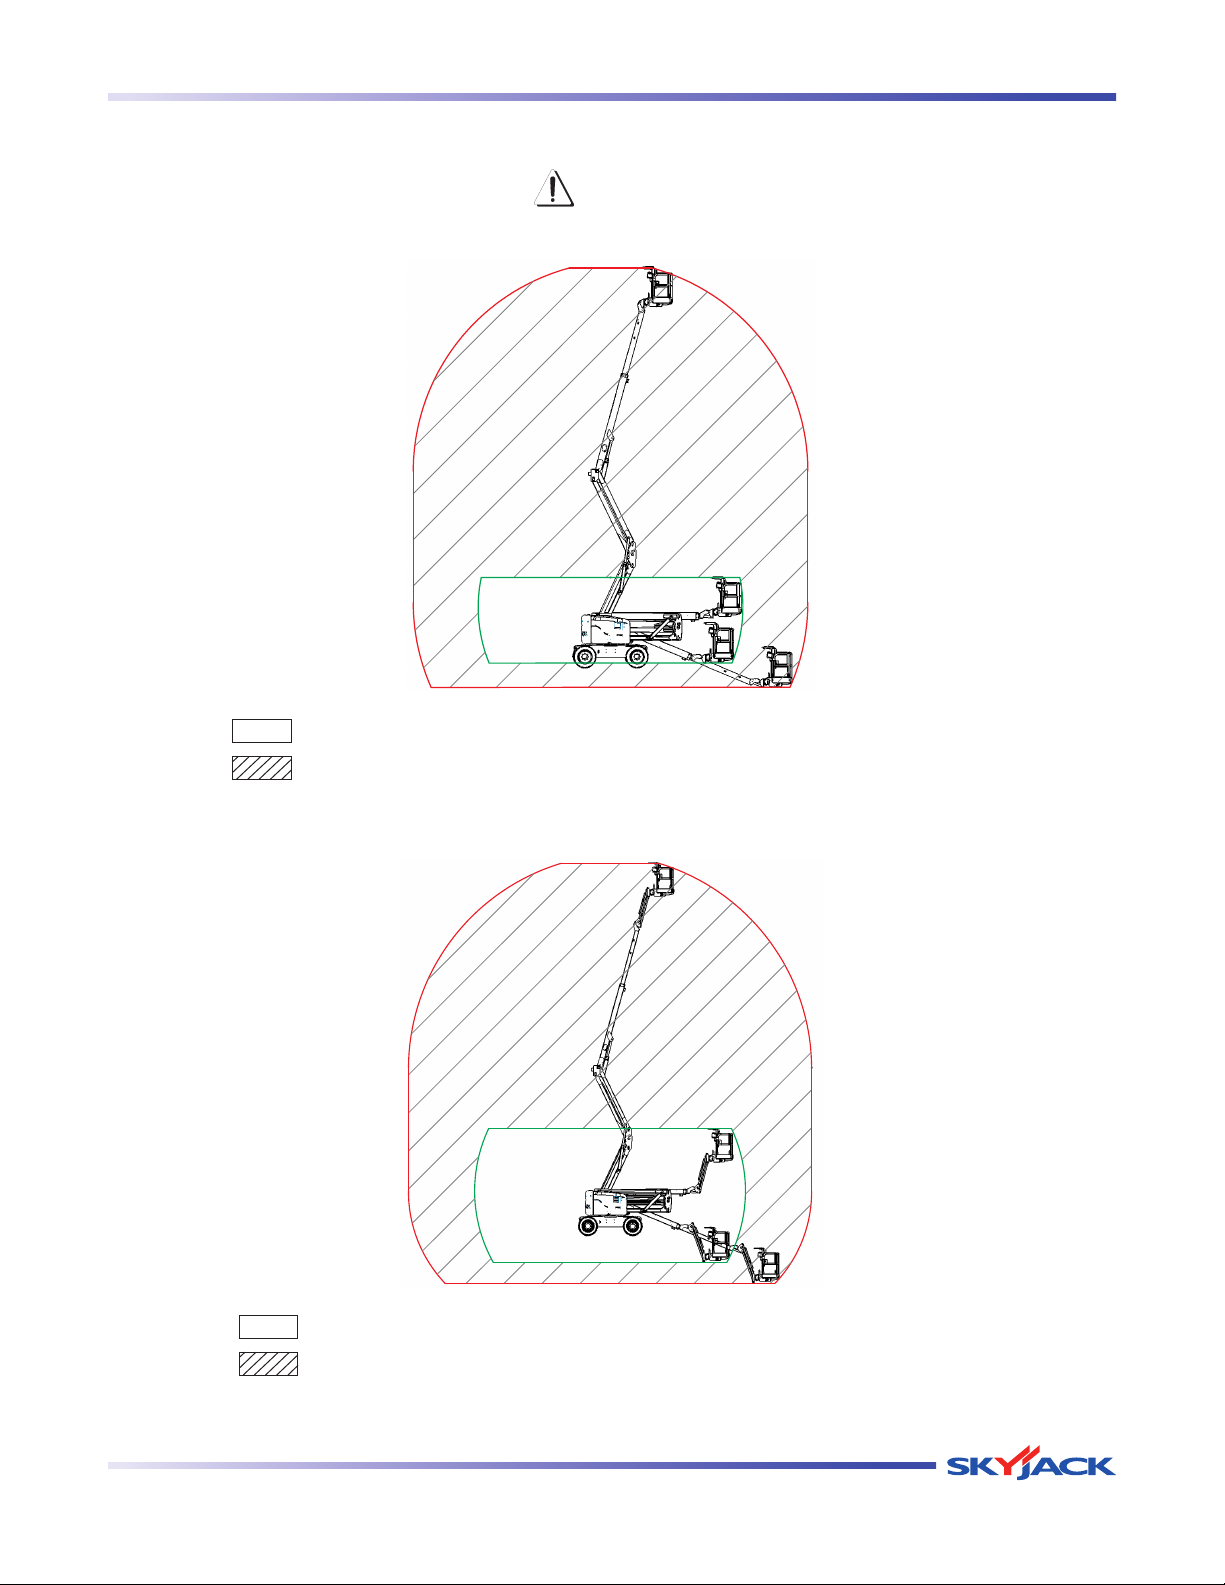
TM
Section 2 - Operation Diagrams
Diagram 2.3 Axle Oscillation Diagrams
WARNING
Do not raise the platform in work mode if it is not on a firm level surface.
Axle oscillation free (travel mode) - drive speed 4.8 mph (7.7 km/h) max.
Axle oscillation locked (work mode) - drive speed 0.5 mph (0.8 km/h) max.
Figure 2-21. Axle Oscillation - SJ 46A
SJ 46A & SJ 46AJ
Axle oscillation free (travel mode) - drive speed 4.8 mph (7.7 km/h) max.
Axle oscillation locked (work mode) - drive speed 0.5 mph (0.8 km/h) max.
Figure 2-22. Axle Oscillation - SJ 46AJ
December 2007 Page 59
Page 59
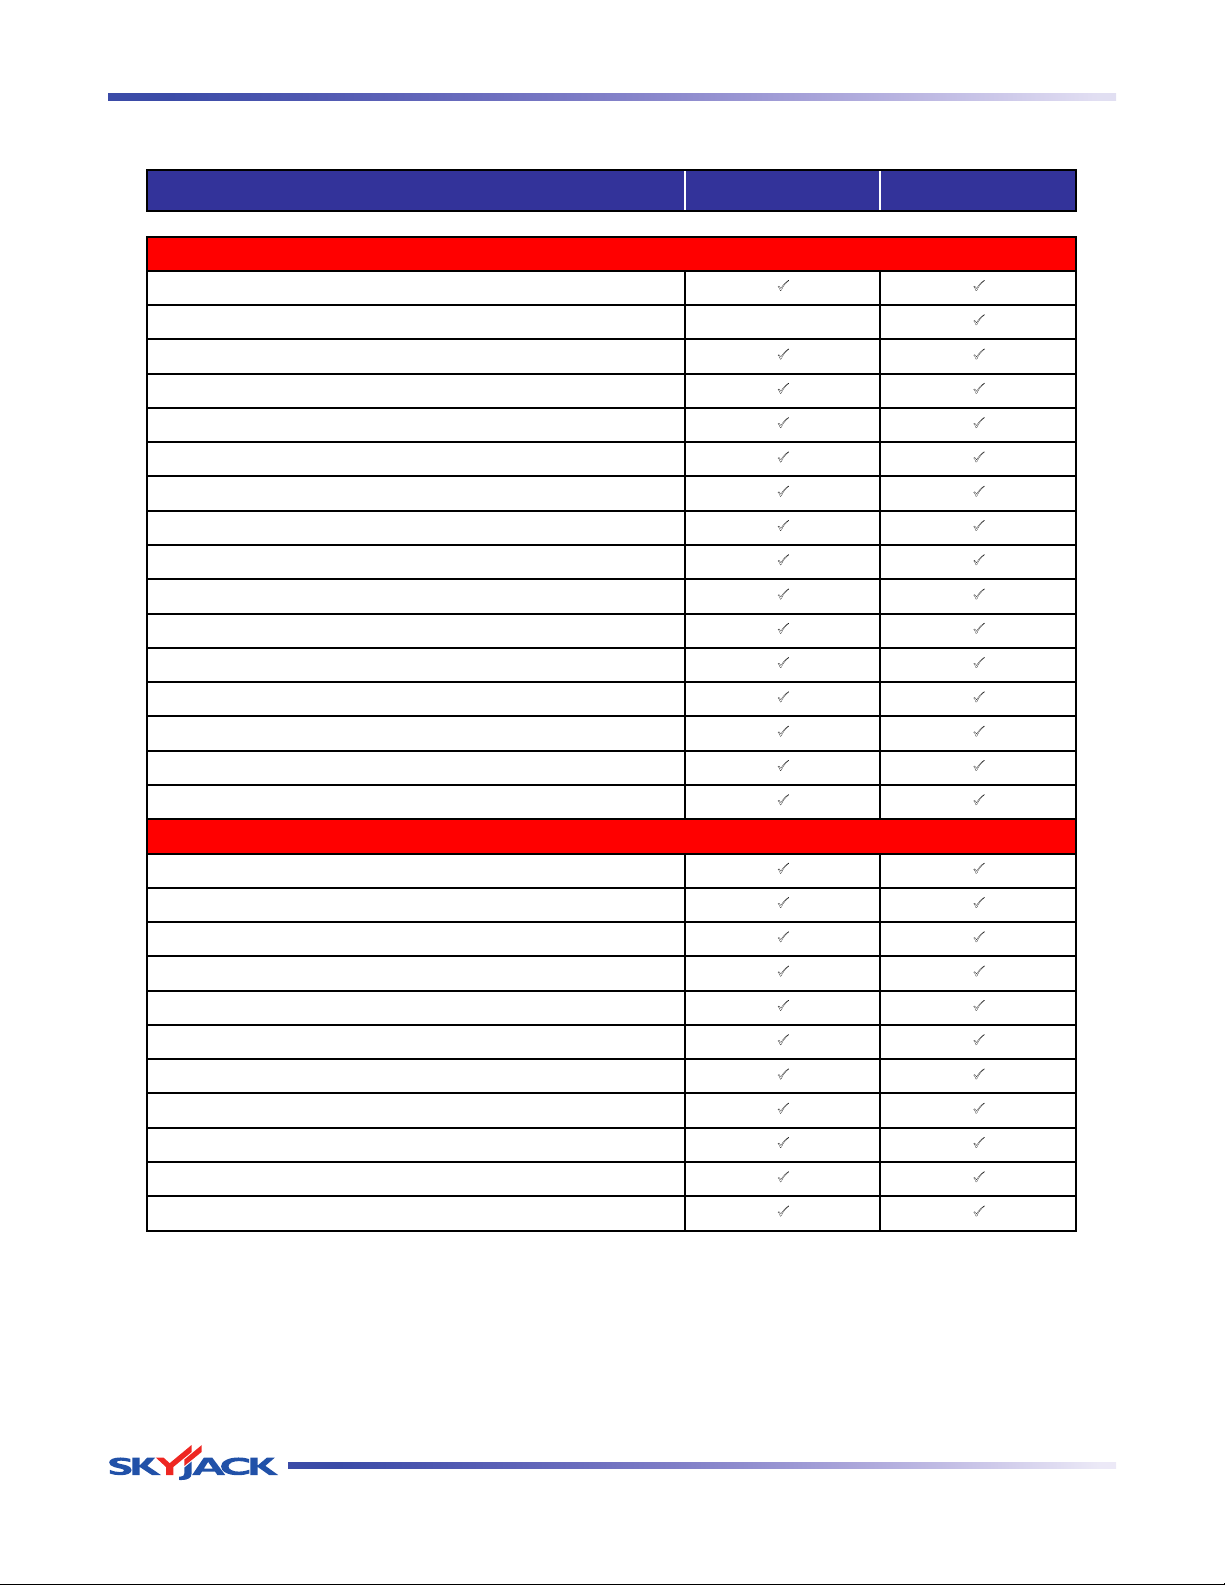
TM
Tables Section 2 - Operation
MODEL SJ 46A SJ 46AJ
12-Volt DC emergency power
3
3
5-foot jib Not Available
3
Base controls
3
3
Platform controls
3
3
Continuous drive and steer directional sensing
3
3
Diesel engine
3
3
Engine anti-restart protection
3
3
Four-wheel drive
3
3
Oscillating axle (steer)
3
3
Glow plug heaters
3
3
Manual brake release
3
3
Operator horn
3
3
72 x 30 in. (183 X 76 cm) platform (side gate)
3
3
Rear entry spring hinged gate
3
3
Spring-applied hydraulically released brake
3
3
Variable speed drive and function controls
3
3
3500KW hydraulic generator
3
3
Receptacle outlet cable on platform
3
3
Air line or hydraulic line to platform
3
3
60 x 30 in. (152 x 76 cm) platform (side gate)
3
3
All function motion alarm
3
3
Foam-filled tires
3
3
Catalytic Muffler (Level 1)
3
3
Catalytic Muffler (Level 2)
3
3
Cold weather start kit (diesel)
3
3
Flashing amber light
3
3
Platform work light
3
3
60635AB-ANSI
S T A N D A R D E Q U I P M E N T
O P T I O N A L E Q U I P M E N T
Table 2.1 Standard and Optional Features
Page 60 December 2007
SJ 46A & SJ 46AJ
Page 60
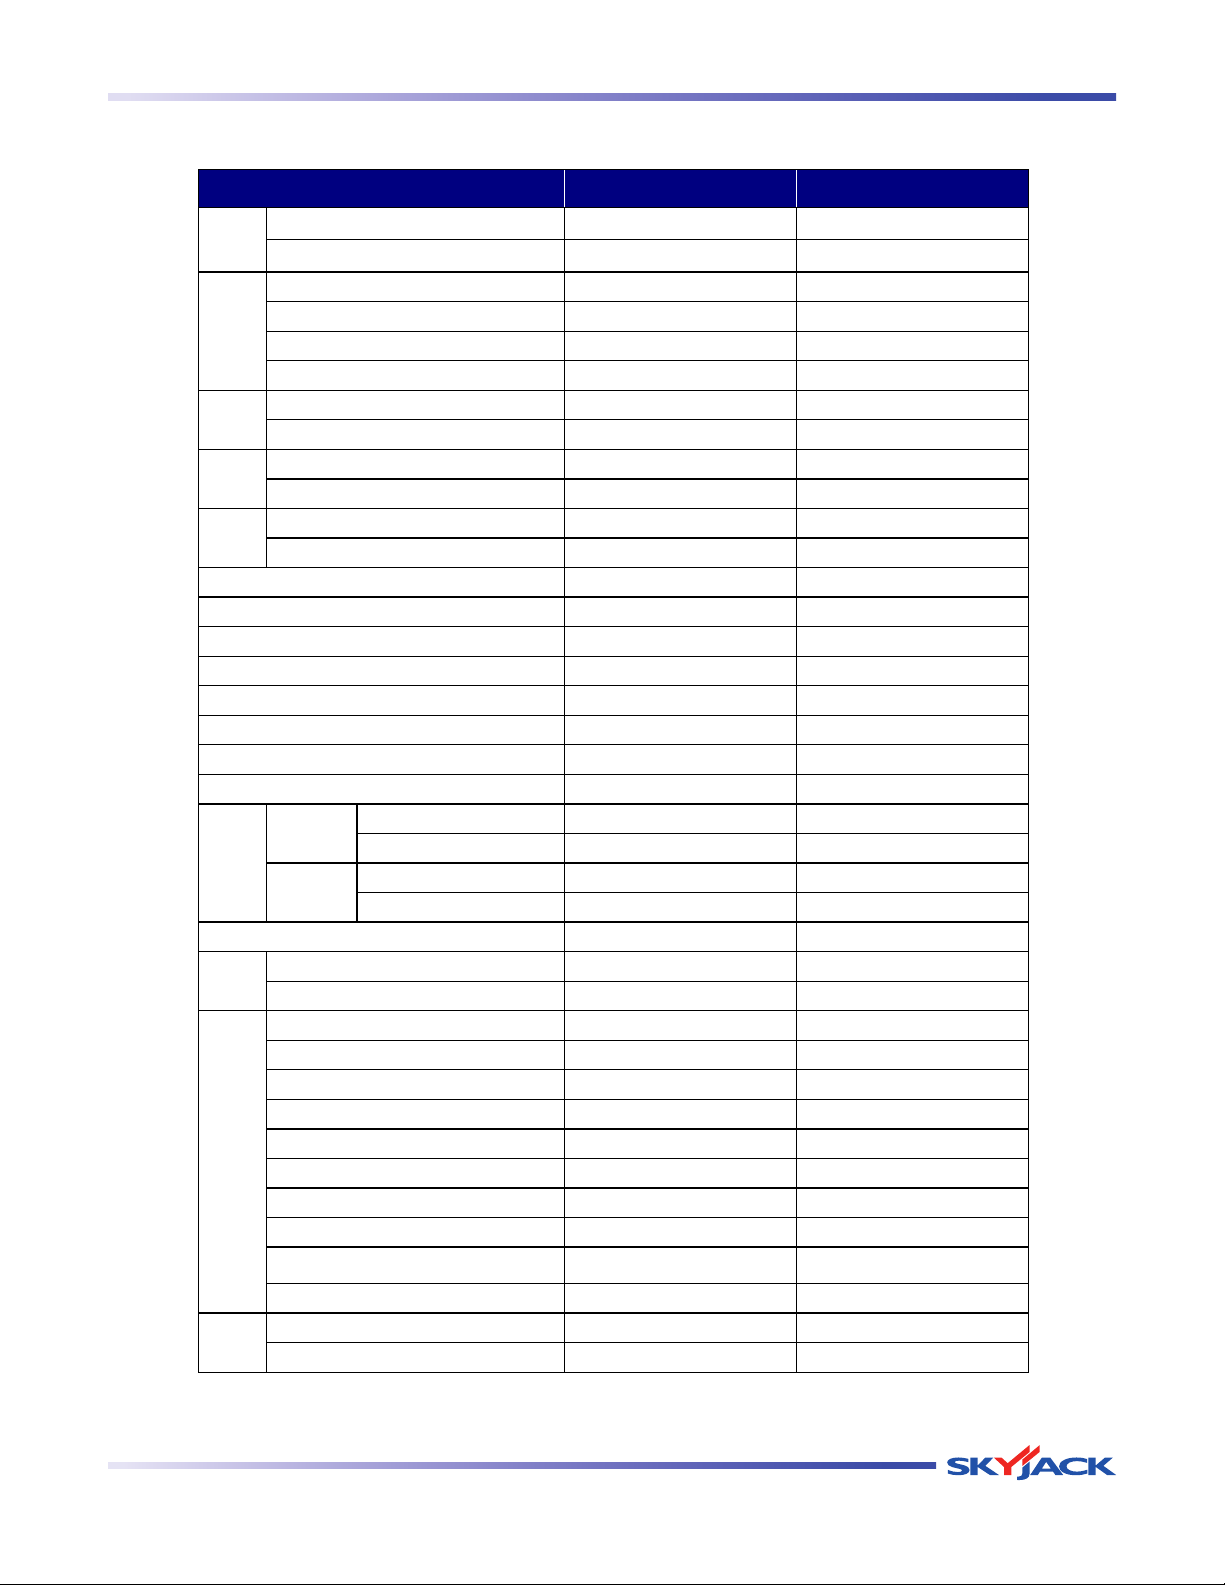
TM
Section 2 - Operation Tables
SJ 46A SJ 46AJ
72 in. (183 cm) 72 in. (183 cm)
30 in. (76 cm) 30 in. (76 cm)
50 ft. 8 in. (15.44 m) 50 ft. 5 in. (15.37 m)
46 ft. 8 in. (14.22 m) 46 ft. 5 in. (14.15 m)
Driveable at all Heights Driveable at all Heights
6 ft. 10 in. (2.08 m) 6 ft. 10 in. (2.08 m)
20 ft. 11 in. (6.37 m) 21 ft. 4 in. (6.5 m)
9 ft. 6 in. (2.9 m) 9 ft. 6 in. (2.9 m)
7 ft. 4 in. (2.2 m) 7 ft. 4 in. (2.2 m)
6 ft. (1.8 m) 6 ft. (1.8 m)
14,558 Ib. (6,603 kg) 14,730 Ib. (6,681 kg)
15,158 Ib. (6,875 kg) 15,330 Ib. (6,954 kg)
180 degrees 180 degrees
25 ft. 0 in. (7.63 m) 25 ft. 2 in. (7.68 m)
8 ft. 3 in. (2.51 m) 8 ft. 6 in. (2.58 m)
6 ft. 8 in. (2.03 m) 6 ft. 8 in. (2.03 m)
360 degrees continous 360 degrees continous
-5 in. (-12.7 cm) -5 in. (-12.7 cm)
45% 45%
16 in. (40.6 cm) 16 in. (40.6 cm)
Differential lock engaged 12 ft. 6 in. (3.83 m) 12 ft. 6 in. (3.83 m)
Differential lock disengaged 8 ft. 2 in. (2.48 m) 8 ft. 2 in. (2.48 m)
Differential lock engaged 21 ft. 2 in. (6.45 m) 21 ft. 2 in. (6.45 m)
Differential lock disengaged 16 ft. 11 in. (5.15 m) 16 ft. 11 in. (5.15 m)
12V DC 12V DC
Lead/Acid Lead/Acid
800A 800A
26 sec (minimum) 26 sec (minimum)
26 sec (minimum) 26 sec (minimum)
26 sec (minimum) 26 sec (minimum)
26 sec (minimum) 26 sec (minimum)
11 sec 11 sec
19 sec 19 sec
N/A 39 sec
N/A 23 sec
90 sec 90 sec
20 sec 20 sec
4.8 mph (7.7 km/h) 4.8 mph (7.7 km/h)
0.5 mph (0.8 km/h) 0.5 mph (0.8 km/h)
122AA-ANSI
Turret
Riser boom down
Outside
Inside
Weight (with air tires)
Horizontal reach @ maximum height
Weight (with foam-filled tires)
Platform rotation
Horizontal reach
Wheelbase
Turret rotation
Driving
Speeds
Operating Times
System Voltage
Type
Cold cranking amperes
Main boom up
Turret rotate - counterclockwise 360°
(fully stowed)
Battery
Main boom down
Riser boom up
Drive speed (maximum-elevated)
Fly boom extend
Fly boom retract
Jib up
Jib down
Platform rotate - full
Drive speed (maximum-stowed)
LengthWidthWeight
Turning
Radius
Gradeability
Ground clearance between wheels
Turret tailswing
Overall with platform
Base and tires
Outside std. tires
MODEL
Platform
Size
Height
Total platform length (outside)
Total platform depth (outside)
Working
Drive
Turret
Platform elevated
Table 2.2a Specifications and Features
SJ 46A & SJ 46AJ
December 2007 Page 61
Page 61
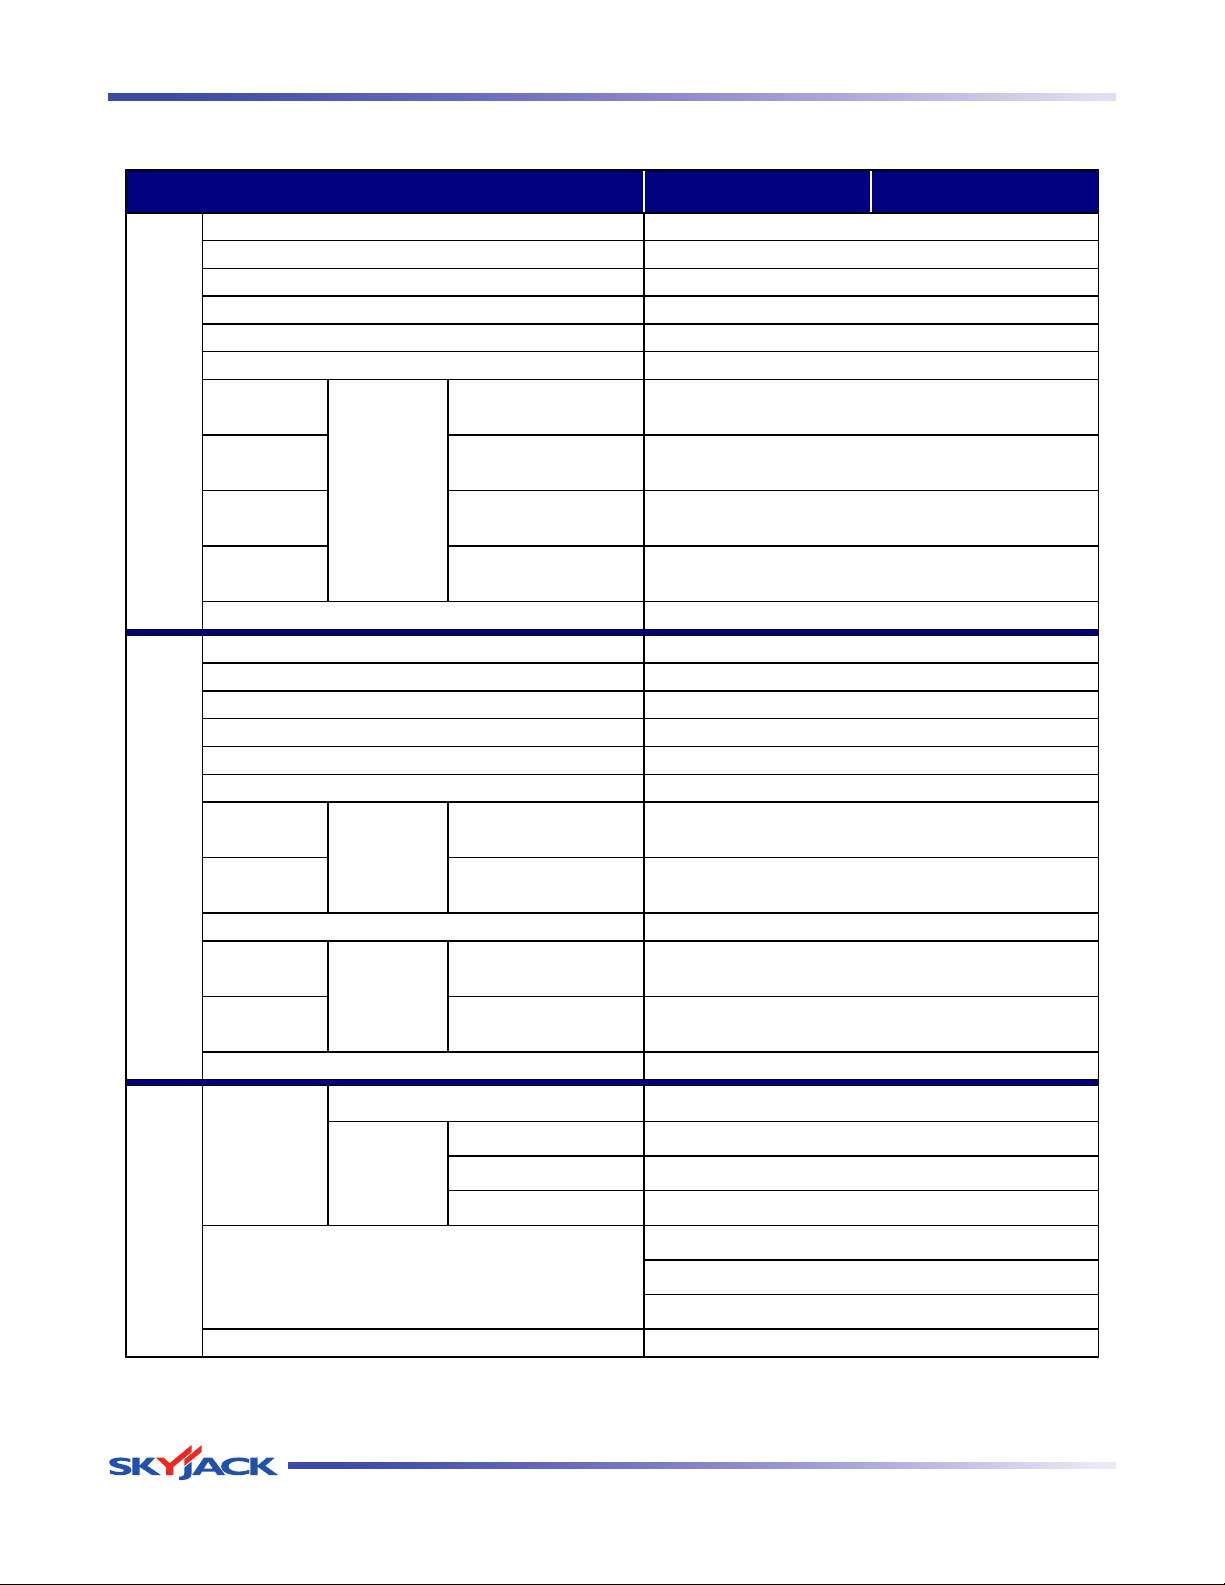
TM
Tables Section 2 - Operation
SJ 46A SJ 46AJ
0°F to 115°F
(- 18°C to +45°C)
- 20°F to 90°F
(- 29°C to +32°C)
- 40°F to 115°F
(- 40°C to +45°C)
- 40°F to 115°F
(- 40°C to +45°C)
- 20°F to 115°F
(- 29°C to +45°C)
- 40°F to 115°F
(- 40°C to +45°C)
Cold Start
Ambient Operation
Max. Oil Temp.
123AA-ANSI
Hydraulic Tank Capacity
Engine - GM
Lube Oil Capacity
Standard
Coolant
Ambient
Temperature
Limits
Arctic Coolant
Option
GM 60/40 Extended Life Coolant
Shell Tellus T46
RPM Settings
Coolant Capacity
Fuel Type - Dual
Fuel Tank Capacity
Standard Oil
Factory Fill
Ambient
Temperature
Limits
Apporved
Alternates
-
RPM Settings
Standard Oil
Factory Fill
Ambient
Temperature
Limits
Cold Lube Oil
Option
Arctic Lube Oil
Option
MODEL
Engine - Deutz
Engine Type
Gross Intermittent HP
Fuel Type
Fuel Tank Capacity
Horsepower @ 2000 rpm (intermittent)
-
Lube Oil Sump Capacity
Apporved
Alternates
Down to 11°F (-11°C)
3.0 gal. (11.4 L)
3.0L GM Dual Fuel
900 Low/1650/2000 High
Gasoline/Propane
SAE 5W-30 API SL
See Engine Manual
1.19 gal. (4.5 L)
GM 50/50 Extended Life Coolant
17 gal. (64 L)
Hydraulic Oil
Recommended
Oil
Type
Operating and
Oil
Temperature
Limits
Approved Alternates
(Note: Cold weather starting temperatures can be improved
with Skyjack options. Please consult your nearest Skyjack
service center.)
Esso Univis N46
24 gal. (91 L)
113°F (+45°C)
200°F(+93°C)
Chevron Rykon MV
Mobilfluid 424
Deutz D2011L03i
1300 Low/1650/2000 High
48 hp (35.8 kW)
38.8 hp (28.9 kW)
54.8 hp (40.8 kW)
SAE 0W-40 API CF/CG/CH-4
See Engine Manual
Engine Type
Gross Intermittent HP
Horsepower @ 2000 rpm (intermittent)
1.45 gal. (5.5 L)
Diesel
17 gal. (64 L)
70 hp (52.2 kW)
SAE 15W-40 API CF/CG/CH-4
SAE 5W-30 API CF/CG/CH-4
Table 2.2b Specifications and Features
Page 62 December 2007
SJ 46A & SJ 46AJ
Page 62
TM
Section 2 - Operation Tables
1000AA
Model Number: _________________ Serial Number:__________________
A
s described earlier in this section, this decal is located on the scissor assembly. It must be completed after an annual
inspection has been completed. Do not use the aerial platform if an inspection has not been recorded in the last 13
months.
20__20__ 20__ 20__ 20__20__ 20__ 20__*
**
20__
Table 2.3 Owner’s Annual Inspection Record
Pictorial Description
Inspection Date
*
**
Inspector Signature
SJ 46A & SJ 46AJ
December 2007 Page 63
Page 63
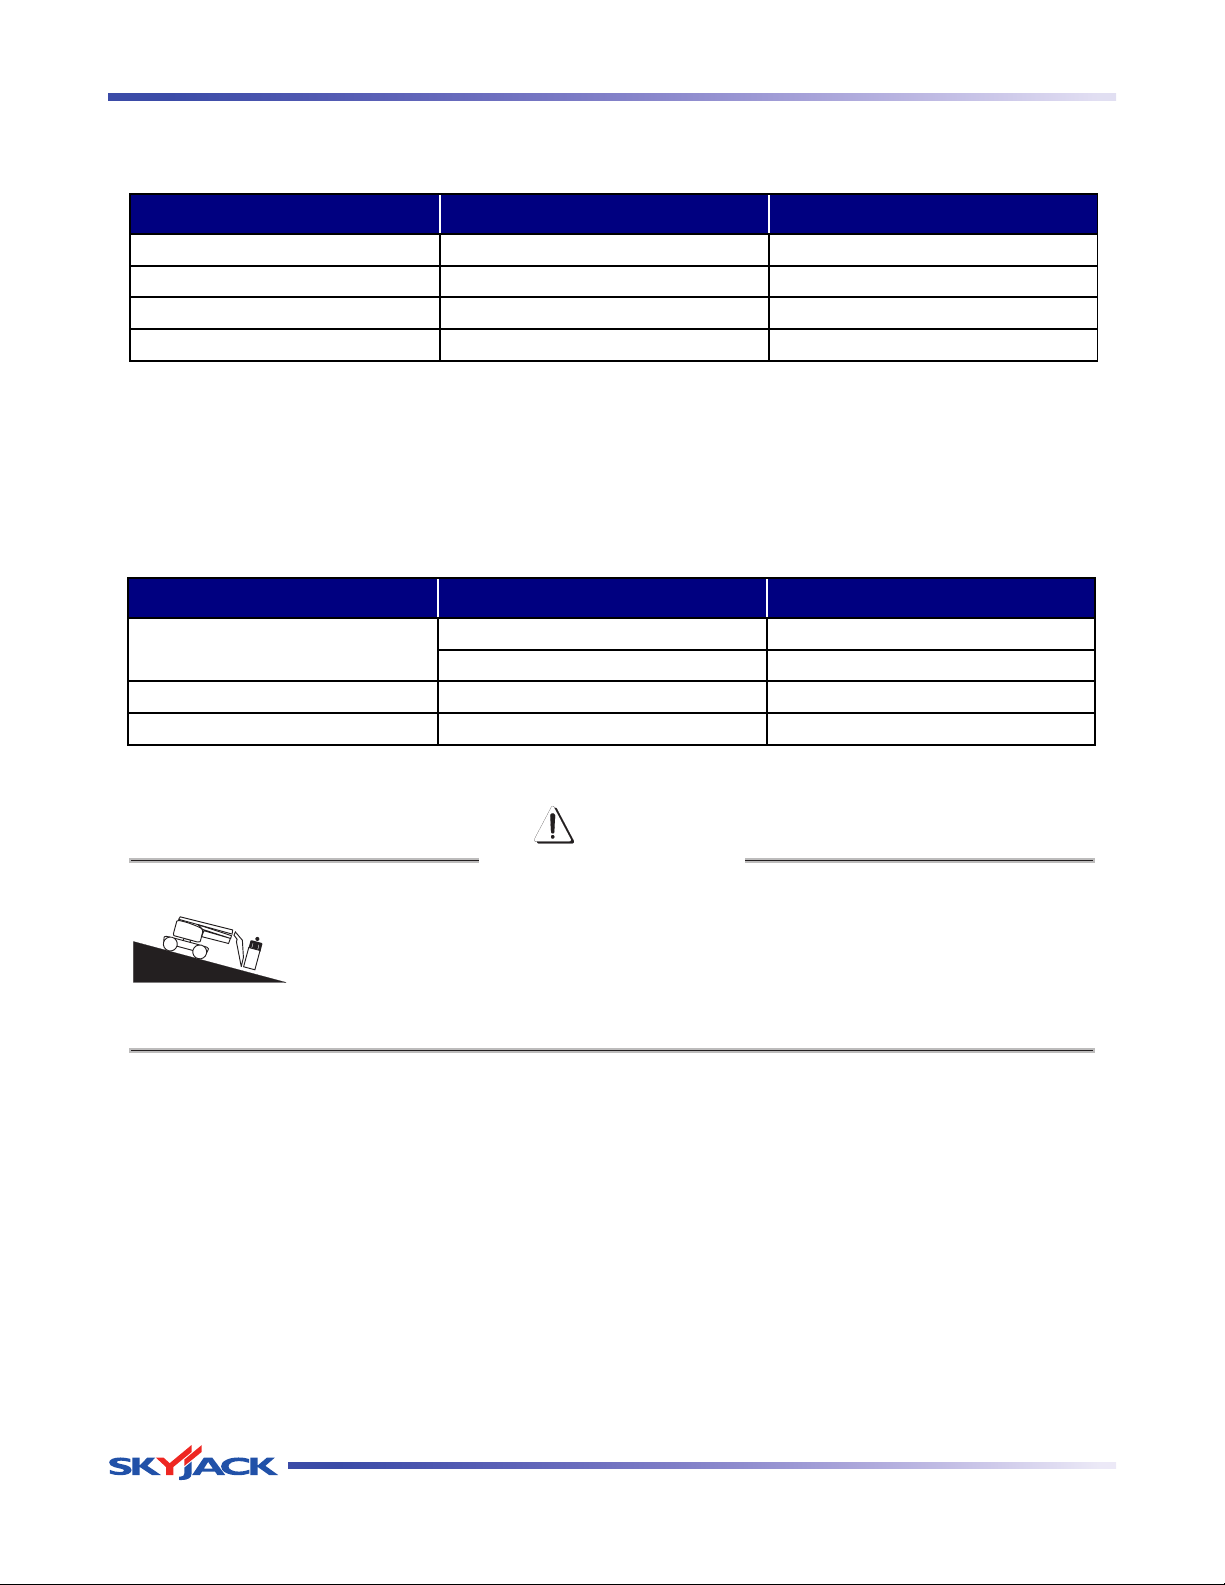
TM
Tables Section 2 - Operation
SJ 46A SJ 46AJ
Tire Size 315/55 D20 315/55 D20
Type Air/Foam-filled Air/Foam-filled
Tire Ply Rating 12 12
Wheel Nuts Torque 290 ft-lb (393.2 Nm) 290 ft-lb (393.2 Nm)
60639AA-ANSI
SJ 46A SJ 46AJ
500 lb. (227 kg) 500 lb. (227 kg)
2 Persons 2 Persons
Maximum Wind 28 mph (12.5 m/s) 28 mph (12.5 m/s)
Maximum Side Force 90 lbf (400 N) 90 lbf (400 N)
60640AA-ANSI
Total Capacity
*
Table 2.4 Tire/Wheel Specifications
IMPORTANT
For proper function of each axle differential, all four wheels must have same tire size installed at
all times. Failure to comply with this requirement will reduce the life of the differentials and reduce
overall mobility of aerial platform.
Table 2.5 Maximum Platform Capacities
*
DRIVING ON A SLOPE
When driving on a slope greater than 30%, the platform capacity is limited to •
300 lb. (136 kg).
The platform must be between the non-steer wheels and must be on the downside •
of the hill.
When slope increases to above 45%, the forward drive is disabled but reverse drive •
remains active.
WARNING
Page 64 December 2007
SJ 46A & SJ 46AJ
Page 64
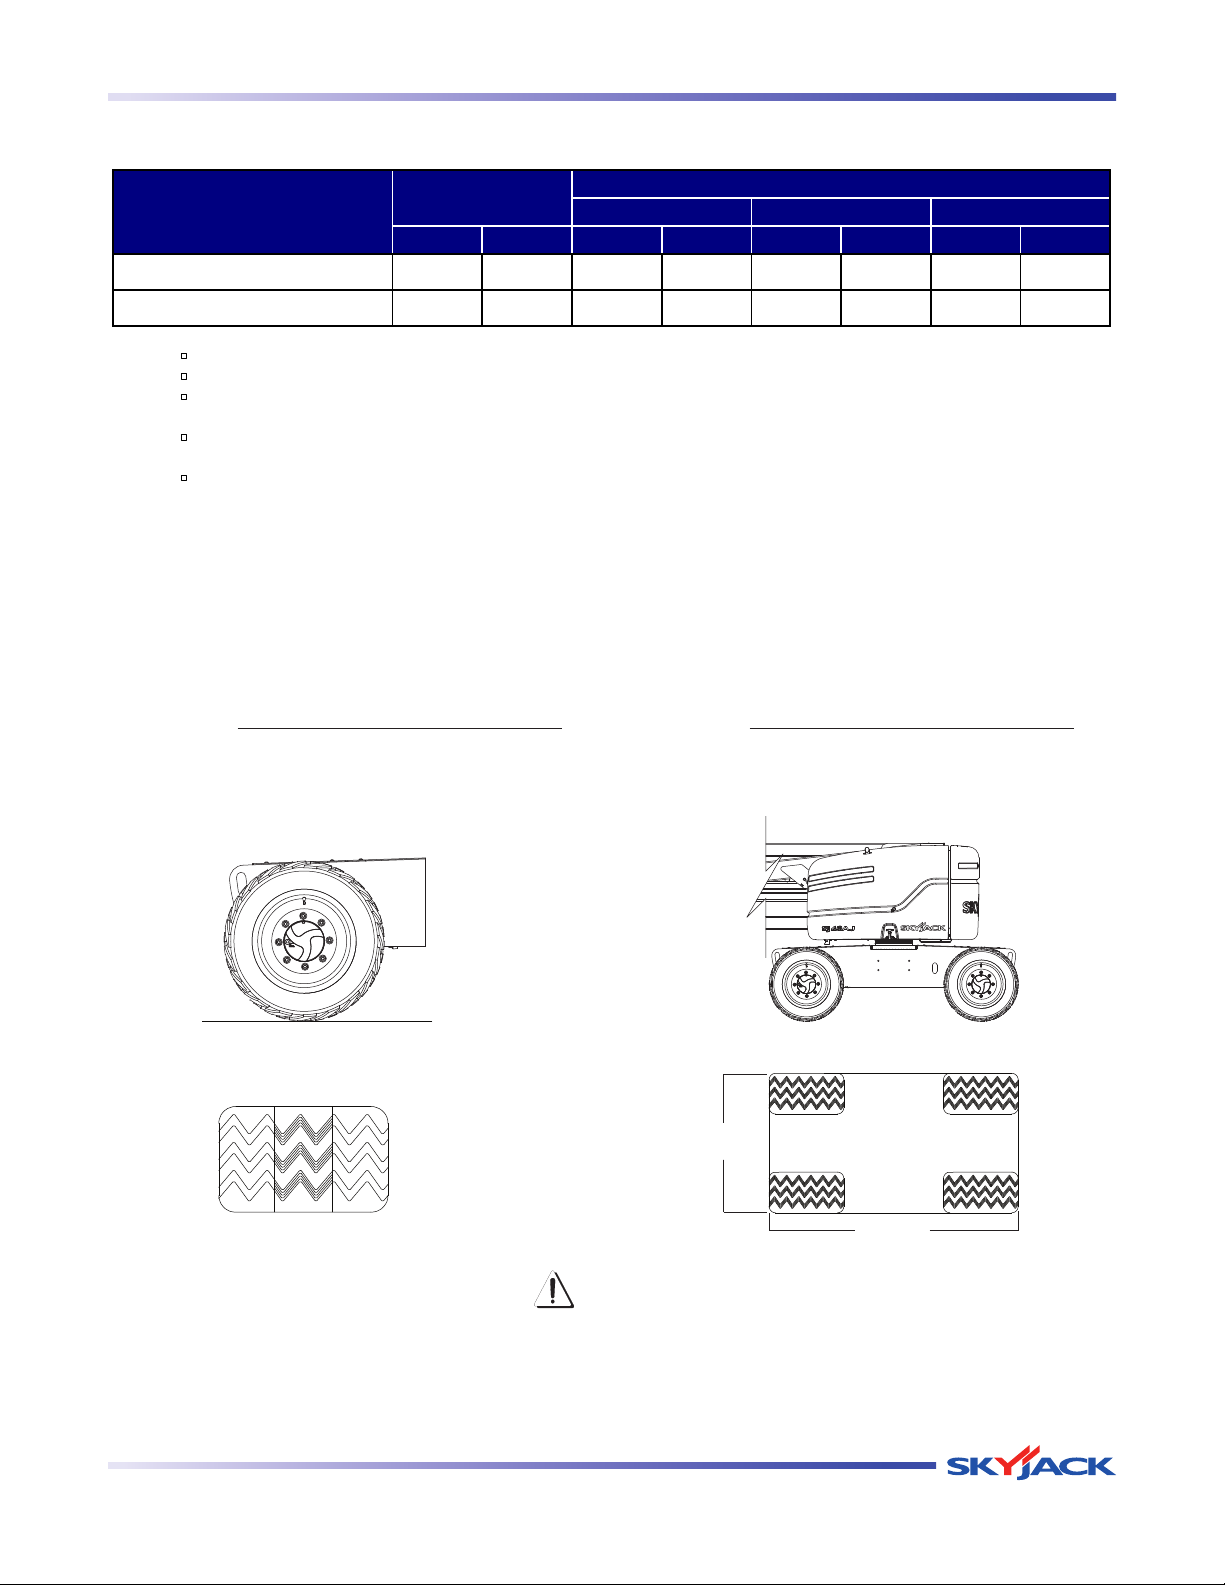
TM
Section 2 - Operation Tables
lb. kg lb. kg psi kPa psf kPa
14,960 6,786 7,775 3,527 108 745 219 10.5
15,230 6,908 7,775 3,527 108 745 219 10.5
60641AA-ANSI
NOTE:
Foam tires option will add approximately 600 lb. (272 kg) to total aerial platform weight and 150 lb. (68 kg) to max wheel load. OUP will
increase by 4% and LCP will increase by approx 11%.
The LCP or OUP that an individual surface can withstand varies from structure to structure and is generally determined by the engineer or
architect for that particular structure.
OUP
LCP – Locally Concentrated Pressure – is a measure of how hard the aerial platform tire tread presses on the area in direct contact with the
floor. The floor covering (tile, carpet, etc.) must be able to withstand more than the indicated values above.
OUP – Overall Uniform Pressure – is a measure of the average load the aerial platform imparts on the whole surface projected directly
underneath it. The structure of the operating surface (beams, etc.) must be able to withstand more than the indicated val
Gross Aerial Platform Weight = Weight + platform capacity
Standard Configuration = 4WD + Oscillating Axle + 315/55 D20 Air Tires
SJ 46AJ (Standard configuration)
SJ 46A (Standard configuration)
MODEL LCP
Total Aerial Platform Load
Gross Aerial Platform
Weight
Wheel
Table 2.6 Floor Loading Pressure
Locally Concentrated Pressure (LCP):
Foot Print Area = Tread Contact Area
LCP
=
Intermixing tires of different types or using tires of types other than those originally supplied with
this equipment can adversely affect stability. Therefore, replace tires only with the exact original
Skyjack-approved type. Failure to operate with matched approved tires in good condition may
SJ 46A & SJ 46AJ
Tread Contact Area
Overall Uniform Pressure (OUP):
Base Area = Length x Width
Maximum Wheel Load
OUP
Foot Print Area
WARNING
Aerial Platform Weight + Capacity
=
Base Area
Width
Length
result in death or serious injury.
December 2007 Page 65
Page 65
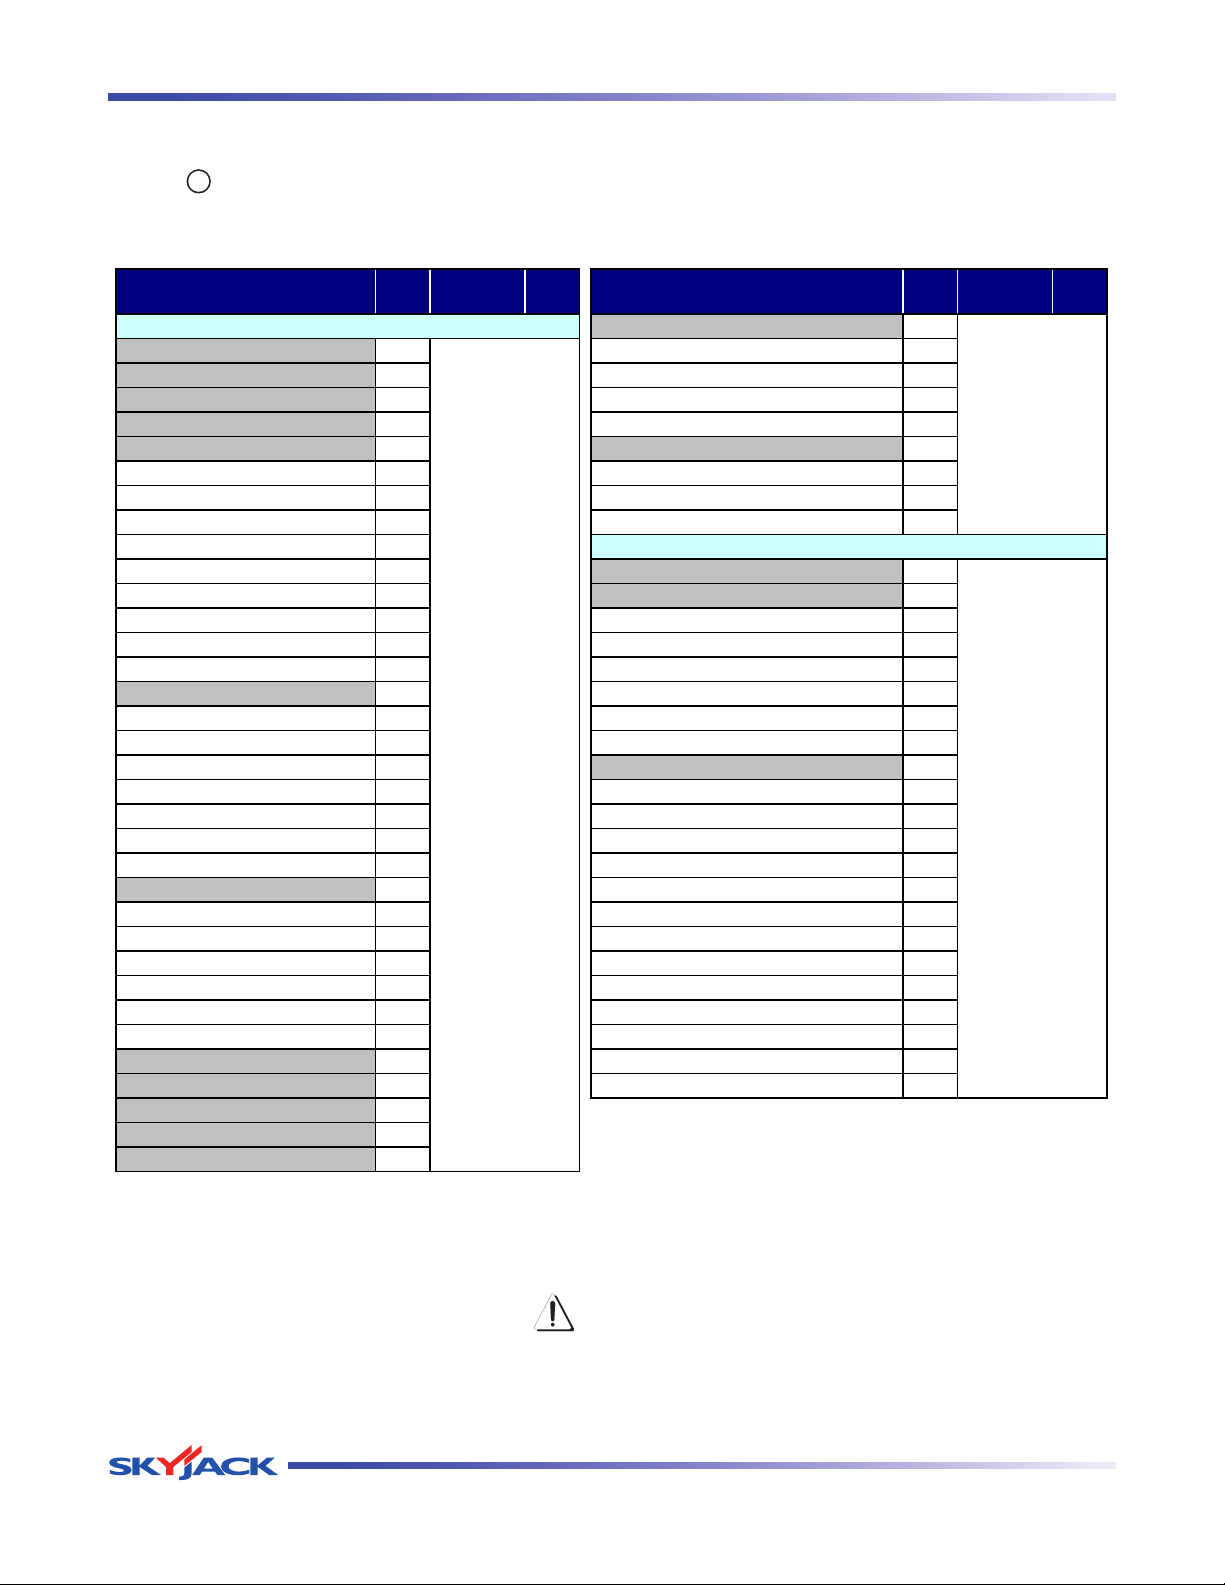
TM
Tables Section 2 - Operation
Frequency
Daily
3 months or
150 hours
Yearly
Frequency
Daily
3 months or
150 hours
Yearly
Boom
Labels A Cylinders A
Electrical A Wear Pads A
Limit Switches A Hoses A
Hydraulic A Power Track A
Engine Compartment Special Options
Main Power Disconnect Switch A Battery Warmer/Hydraulic Oil Heater (If Equipped) A
Battery A Work Light (If Equipped) A
High Pressure Filter A Flashing Amber Light (If Equipped) A
Hydraulic Pumps A Function Tests
Muffler and Exhaust A Test Main Power Disconnect Switch A
Engine Pivot Tray A Base Control Console
Engine Oil Level A Test Base Emergency Stop Light A
Engine Air Filter A Test Base Emergency Stop A
Fuel Leaks A Test Function Enable Switch & All Boom Functions A
Control Compartment Test Platform Self-leveling A
Base Control Console A Test Emergency Power A
Hydraulic Tank A Test Base/Off/Platform Switch A
Hydraulic Oil A Platform Control Console
Brake and Main Manifolds A Test Platform Emergency Stop Light A
Emergency Power Unit A Test Platform Emergency Stop A
Fuel Tank A Test Footswitch A
Fuel Leaks A Test Engine Enable Switch A
Base Test Steering A
Turret Transportation Lock A Test Driving Function A
Drive Axle A Test Driving Speed A
Oscillating Cylinder Assembly A Test Emergency Power A
Steer Cylinder Assembly A Test Horn A
Tie Rod A Test Brakes A
Wheel/Tire Assembly A Test Manual Platform Leveling A
Manuals A Test Differential Lock Switch A
Platform Assembly A Test Oscillating Axles A
Platform Control Console A
60642AC-ANSI
Rotary Actuator A
Jib (If Equipped) A
A - Perform Visual and Daily Maintenance Inspections & Functions Test. Refer to Section 2.8 and Section 2.9 of this manual.
B - Perform Scheduled Maintenance Inspection. Refer to Service & Maintenance manual.
* - Maintenance must be performed only by trained and competent personnel who are familiar with mechanical procedures.
† - Refer to Skyjack's website @ www.skyjack.com for latest service bulletins prior to performing quarterly or yearly inspection.
Visual and Daily Maintenance Inspections
B*†
B*†
B*†
General Maintenance
Before attempting any repair work, disconnect battery by turning main power disconnect switch to
“ ” off position. Preventive maintenance is the easiest and least expensive type of maintenance.
Table 2.7 Maintenance and Inspection Schedule
Page 66 December 2007
Use original or manufacturer-approved parts and components for aerial platform.
WARNING
SJ 46A & SJ 46AJ
Page 66
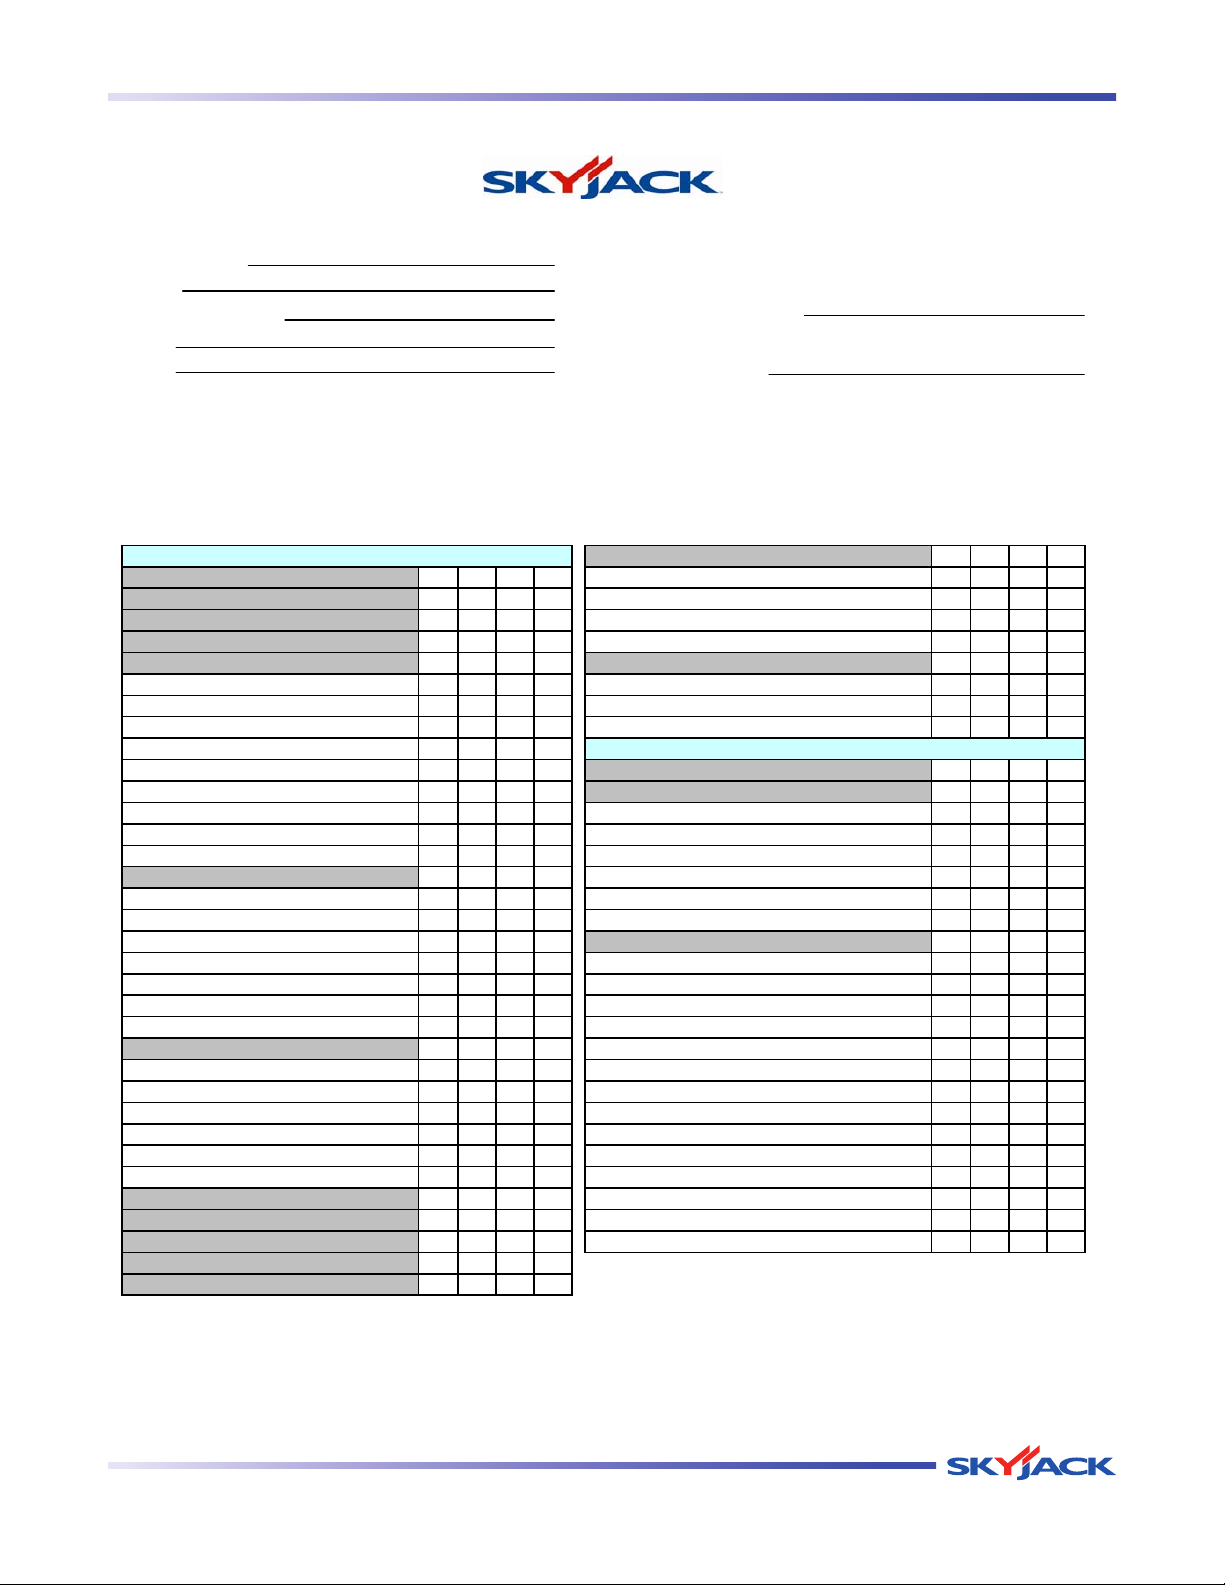
TM
Section 2 - Operation Tables
INSPECTION FREQUENCY
P
F
R
NA
High Pressure Filter
Hydraulic Pumps Function Tests
Muffler and Exhaust
Engine Pivot Tray
Engine Oil Level
Engine Air Filter
Fuel Leaks
60643AB-ANSI
Test Oscillating Axles
Engine Compartment
Visual and Daily Maintenance Inspections
- REPAIRED
Labels
Electrical
Limit Switches
Hydraulic
Time:
- PASS DAILY
- FAIL FREQUENTLY
A
s each item is inspected, check the appropriate box.
- NOT APPLICABLE BI-ANNUALLY
A
NNUALLY
OPERATOR'S CHECKLIST
Each item shall be inspected using the the appropriate section of the Skyjack operating manual.
Serial Number:
Model:
Hourmeter Reading: Operator's Name (Printed):
Date:
Operator's Signature:
Steer Cylinder Assembly
Base Test Steering
Test Driving Function
Wheel/Tire Assembly
Platform Assembly
Rotary Actuator
Manuals
Tie Rod
Test Driving Speed
Test Emergency Power
Test Horn
Test Brakes
Control Compartment
Test Platform Emergency Stop
Test Footswitch
Test Engine Enable Switch
Platform Control Console
Oscillating Cylinder Assembly
Emergency Power Unit
Drive Axle
Test Brakes
Test Manual Platform Leveling
Test Differential Lock Switch
Main Power Disconnect Switch
Test Emergency Power
Test Base/Off/Platform Switch
Test Platform Emergency Stop Light
Battery
Hydraulic Tank
Brake and Main Manifolds
Base Control Console
Hydraulic Oil
Turret Transportation Lock
Fuel Tank
Fuel Leaks
Battery Warmer/Hydraulic Oil Heater (If Equipped)
Work Light (If Equipped)
Flashing Amber Light (If Equipped)
Test Base Emergency Stop Light
Test Base Emergency Stop
Test Function Enable Switch & All Boom Functions
Test Platform Self-leveling
Jib (If Equipped)
Boom
Special Options
Test Main Power Disconnect Switch
Base Control Console
Platform Control Console
Cylinders
Wear Pads
Hoses
Power Track
Note:
Make a copy of this page or visit the Skyjack web site:
www.skyjack.com for a printable copy.
Table 2.8 Operator’s Checklist
SJ 46A & SJ 46AJ
December 2007 Page 67
Page 67
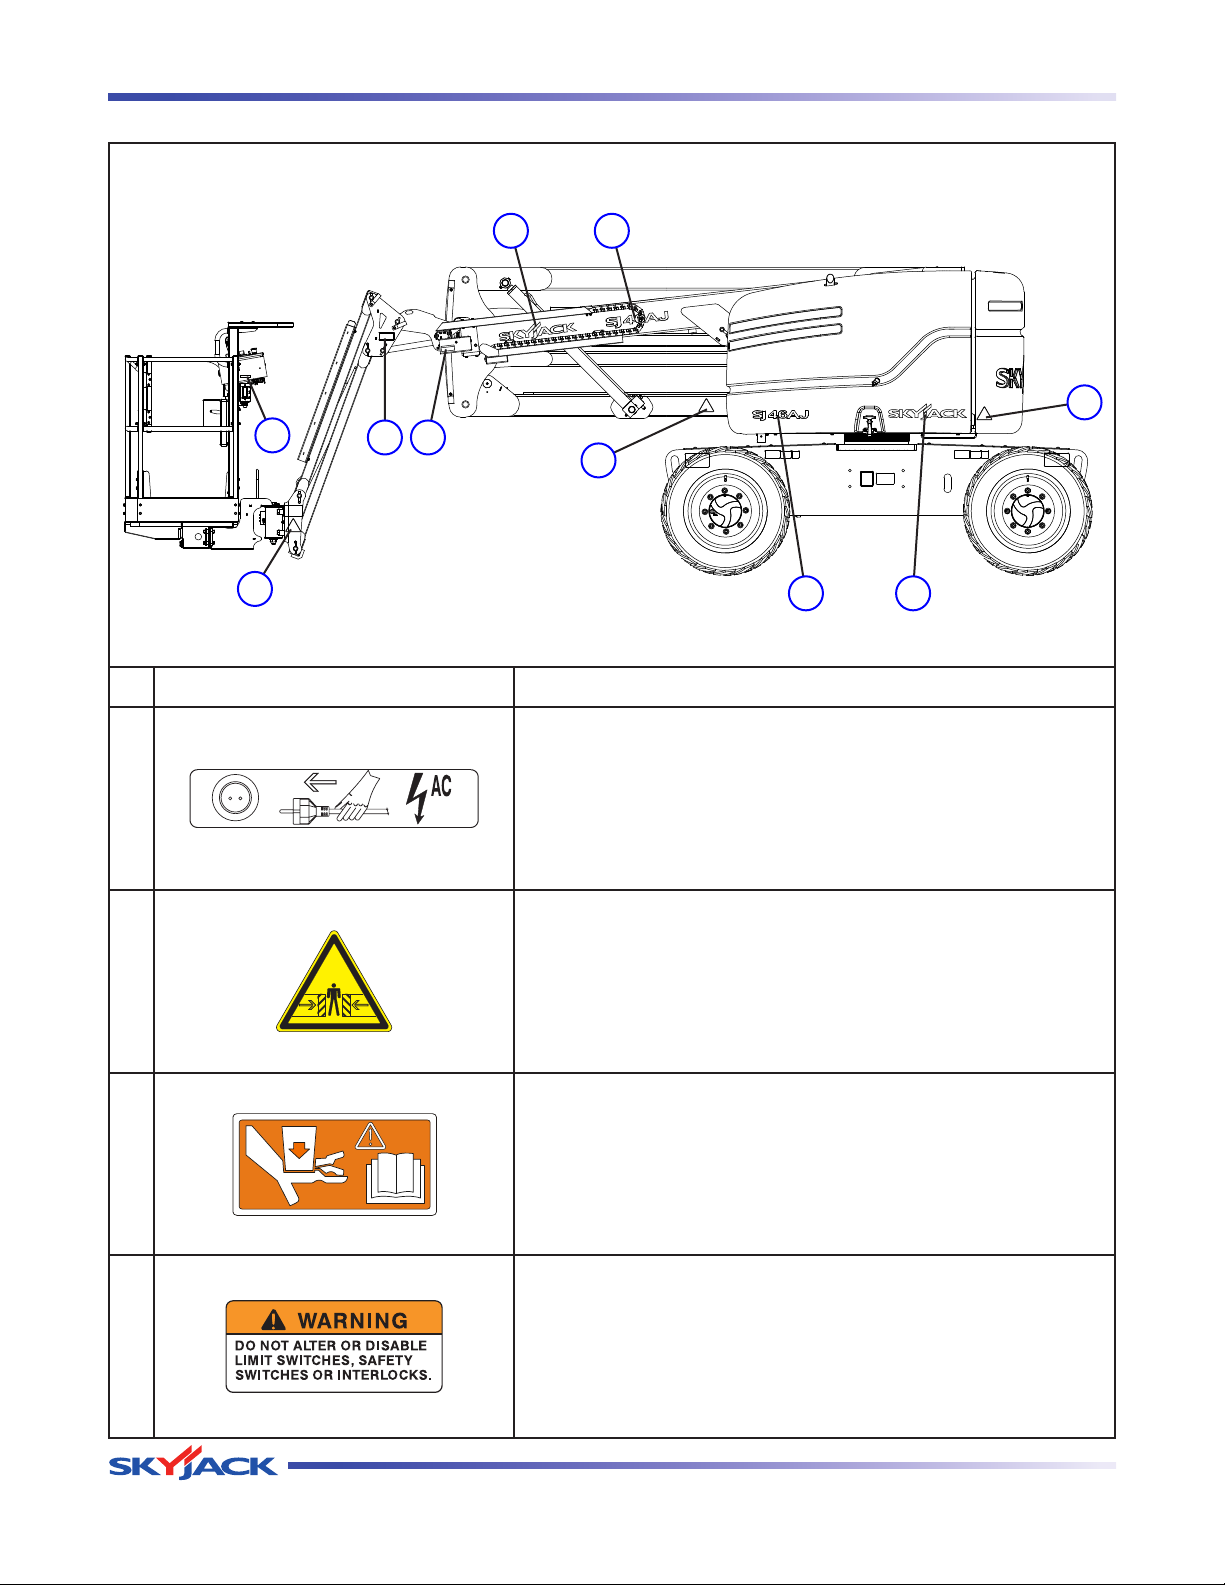
TM
Labels Section 2 - Operation
Engine Side
5 6
2
1
43
2
2
8 7
No. Label Pictorial Description
Connect AC Supply
Connect AC supply here.
1
Body Crushing Hazard
Danger - Body crushing hazard
2
Crushing Hazard
Danger - Crushing hazard
3
Warning - Do Not Alter
Aerial platform altering warning
4
SJ 46A & SJ 46AJ
Page 68 December 2007
Page 68
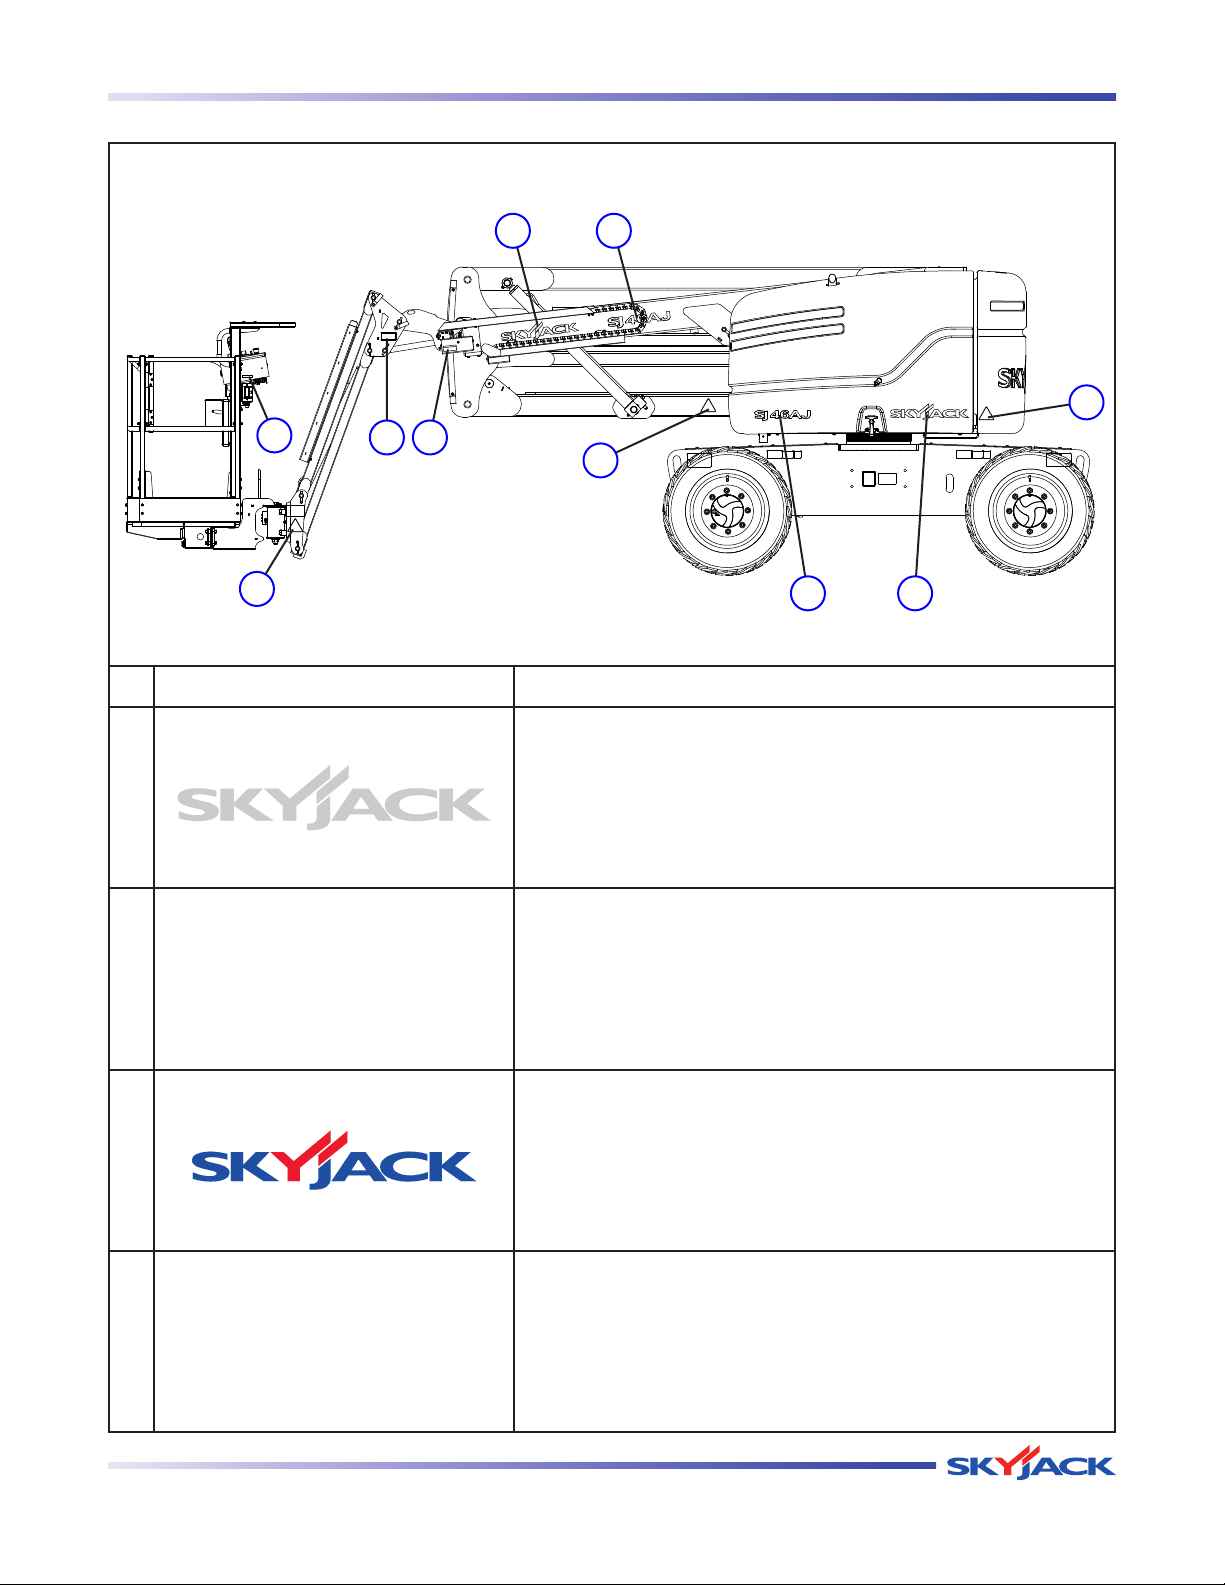
TM
Section 2 - Operation Labels
JS
6
4
A
J
JS
6
4
A
J
Engine Side (Continued)
5 6
2
1
43
2
2
No. Label Pictorial Description
Skyjack Logo
Skyjack logo - grey
5
Model Number*
Product Identifier - grey
6
7
*Model number will vary, may not be as shown.
Skyjack Logo
Small Skyjack logo - blue and red
8 7
Model Number*
Product Identifier - blue
8
SJ 46A & SJ 46AJ
*Model number will vary, may not be as shown.
December 2007 Page 69
Page 69
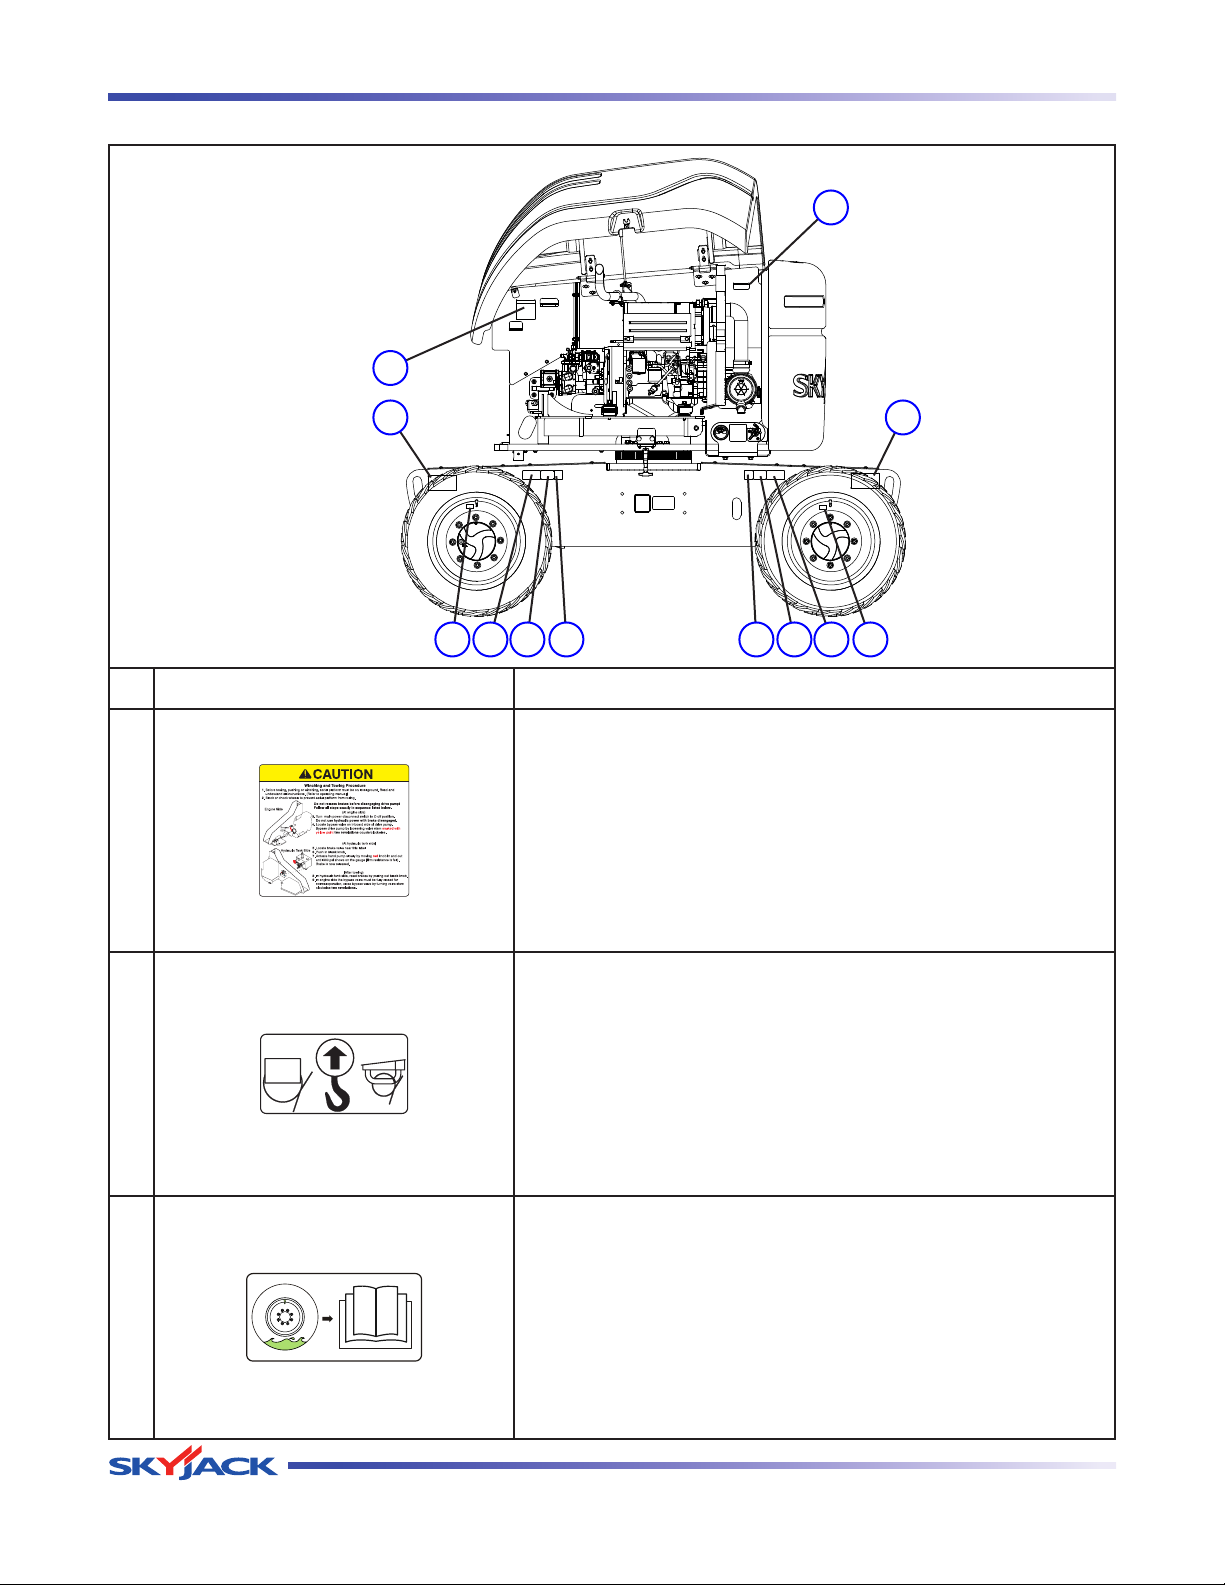
TM
Labels Section 2 - Operation
Engine Compartment
7
1
2 2
6543 3456
No. Label Pictorial Description
Towing and Winching Procedure
Instructions for winching and towing
1
Lift and Tie Down Points
Only use these points for lifting or tying down.
2
Tire Sealant (If Equipped)
Indicates that tire sealant is present inside the tires.
3
Page 70 December 2007
SJ 46A & SJ 46AJ
Page 70
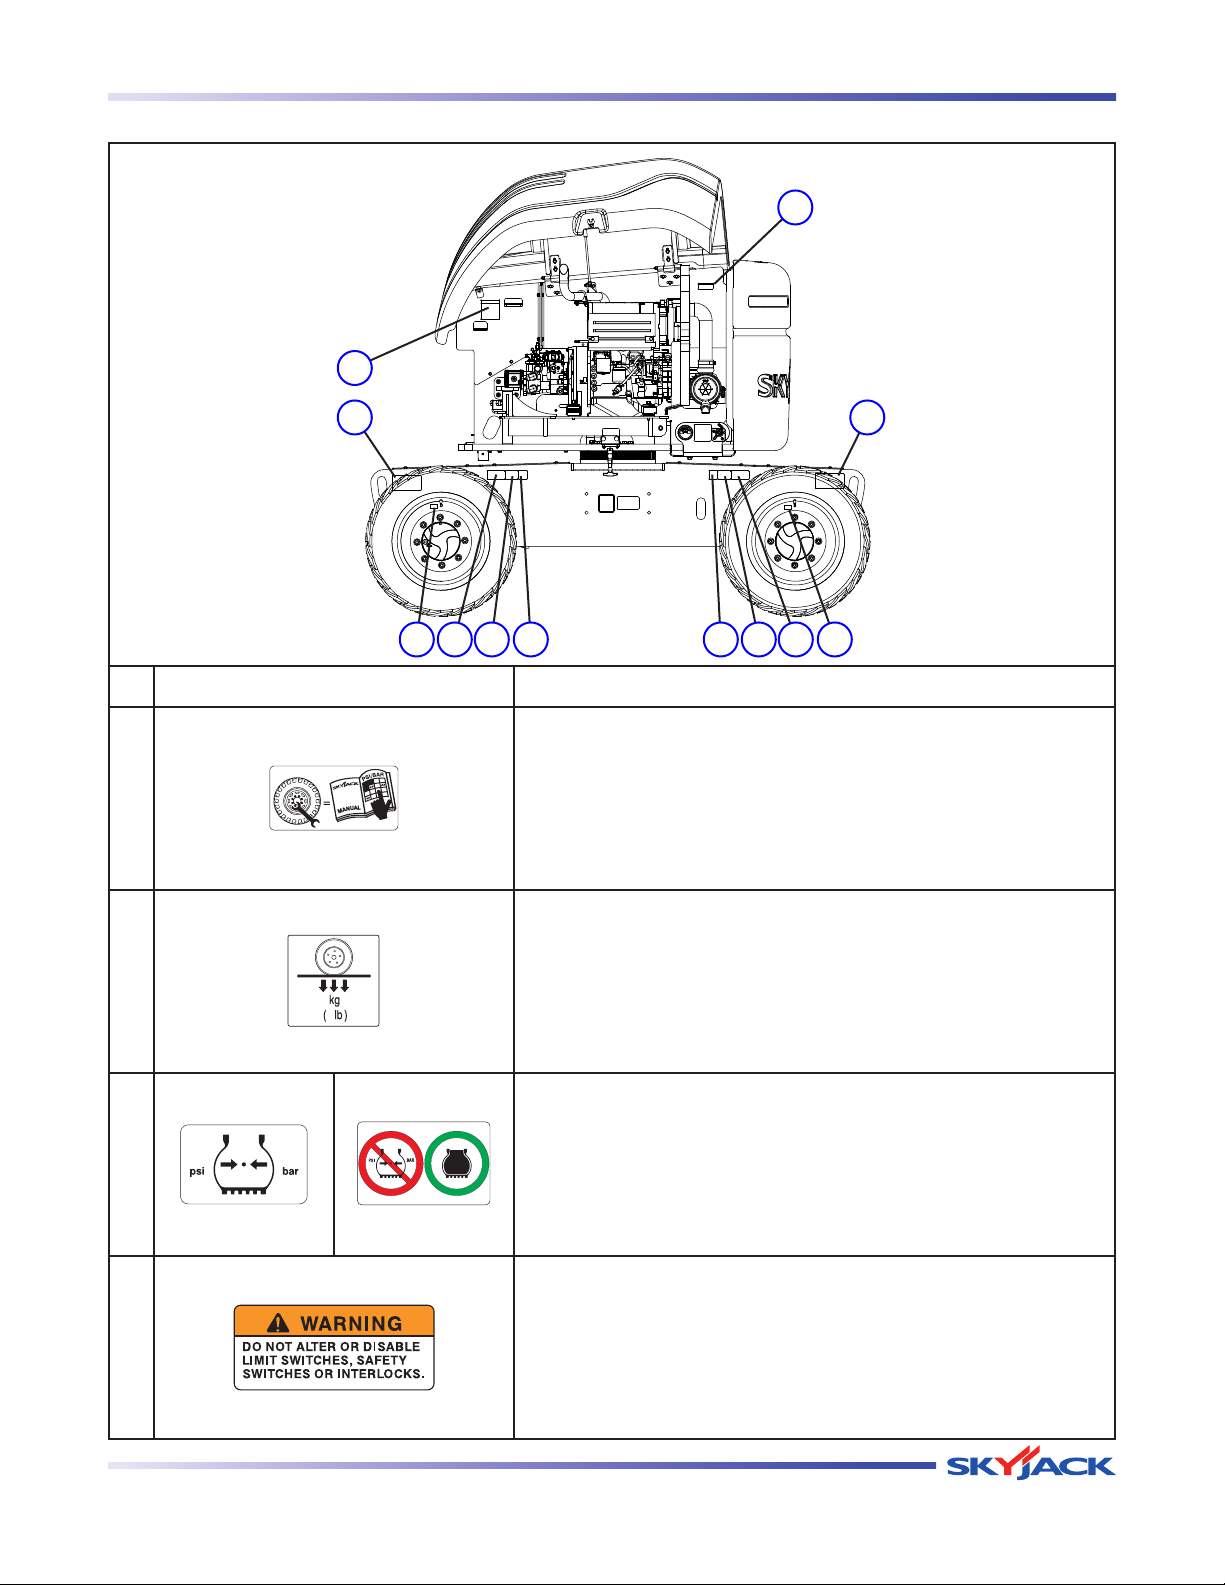
TM
Section 2 - Operation Labels
Engine Compartment (Continued)
7
1
2 2
6543 3456
No. Label Pictorial Description
Wheel Specifications
Refer to manual for wheel type, offset, pressure and torque.
4
Wheel Load*
Indicates rated wheel load.
5
*Wheel load will vary over different aerial platforms.
Tire Pressure*
Indicates rated tire pressure.
*Tire pressure will vary, may not be as shown.
6
Foam-filled Tire (If Equipped)
Indicates foam-filled tire.
7
SJ 46A & SJ 46AJ
Warning - Do Not Alter
Aerial platform altering warning
December 2007 Page 71
Page 71
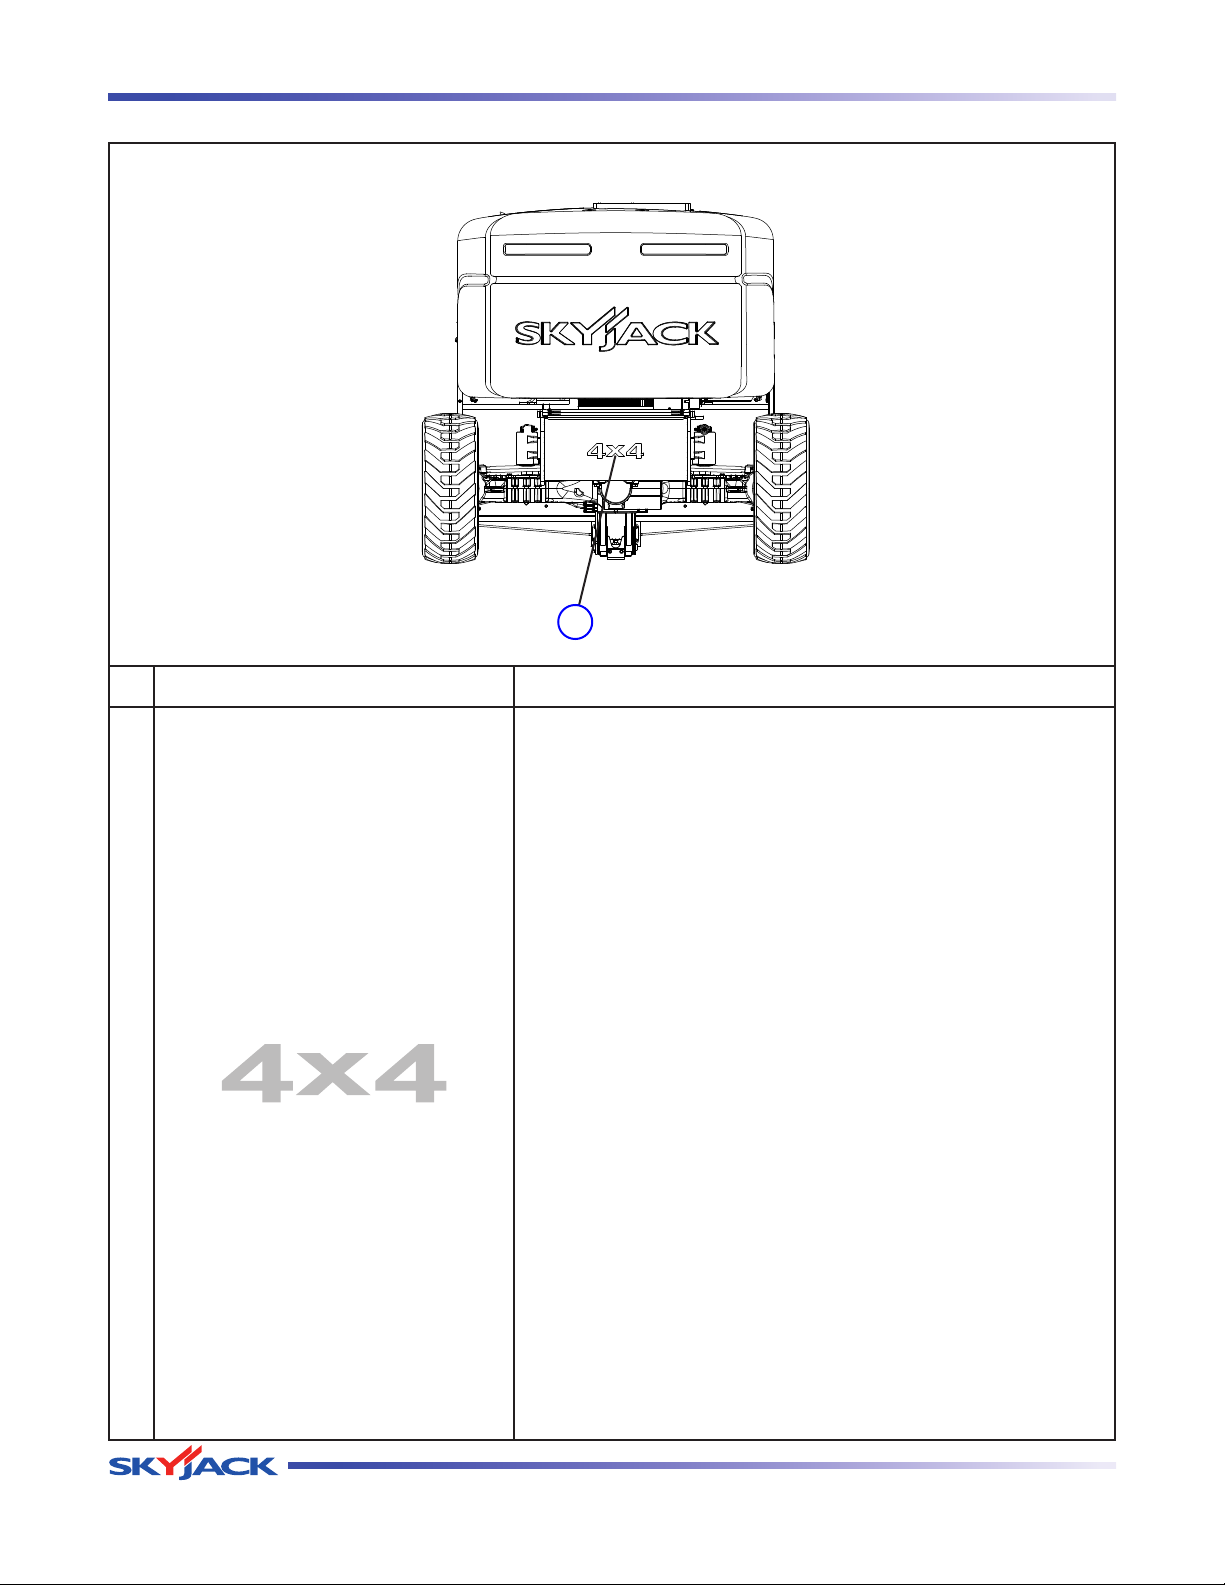
TM
Labels Section 2 - Operation
Rear Side - Base
1
No. Label Pictorial Description
4x4 (If equipped)
Product identifier - 4 wheel drive
1
Page 72 December 2007
SJ 46A & SJ 46AJ
Page 72
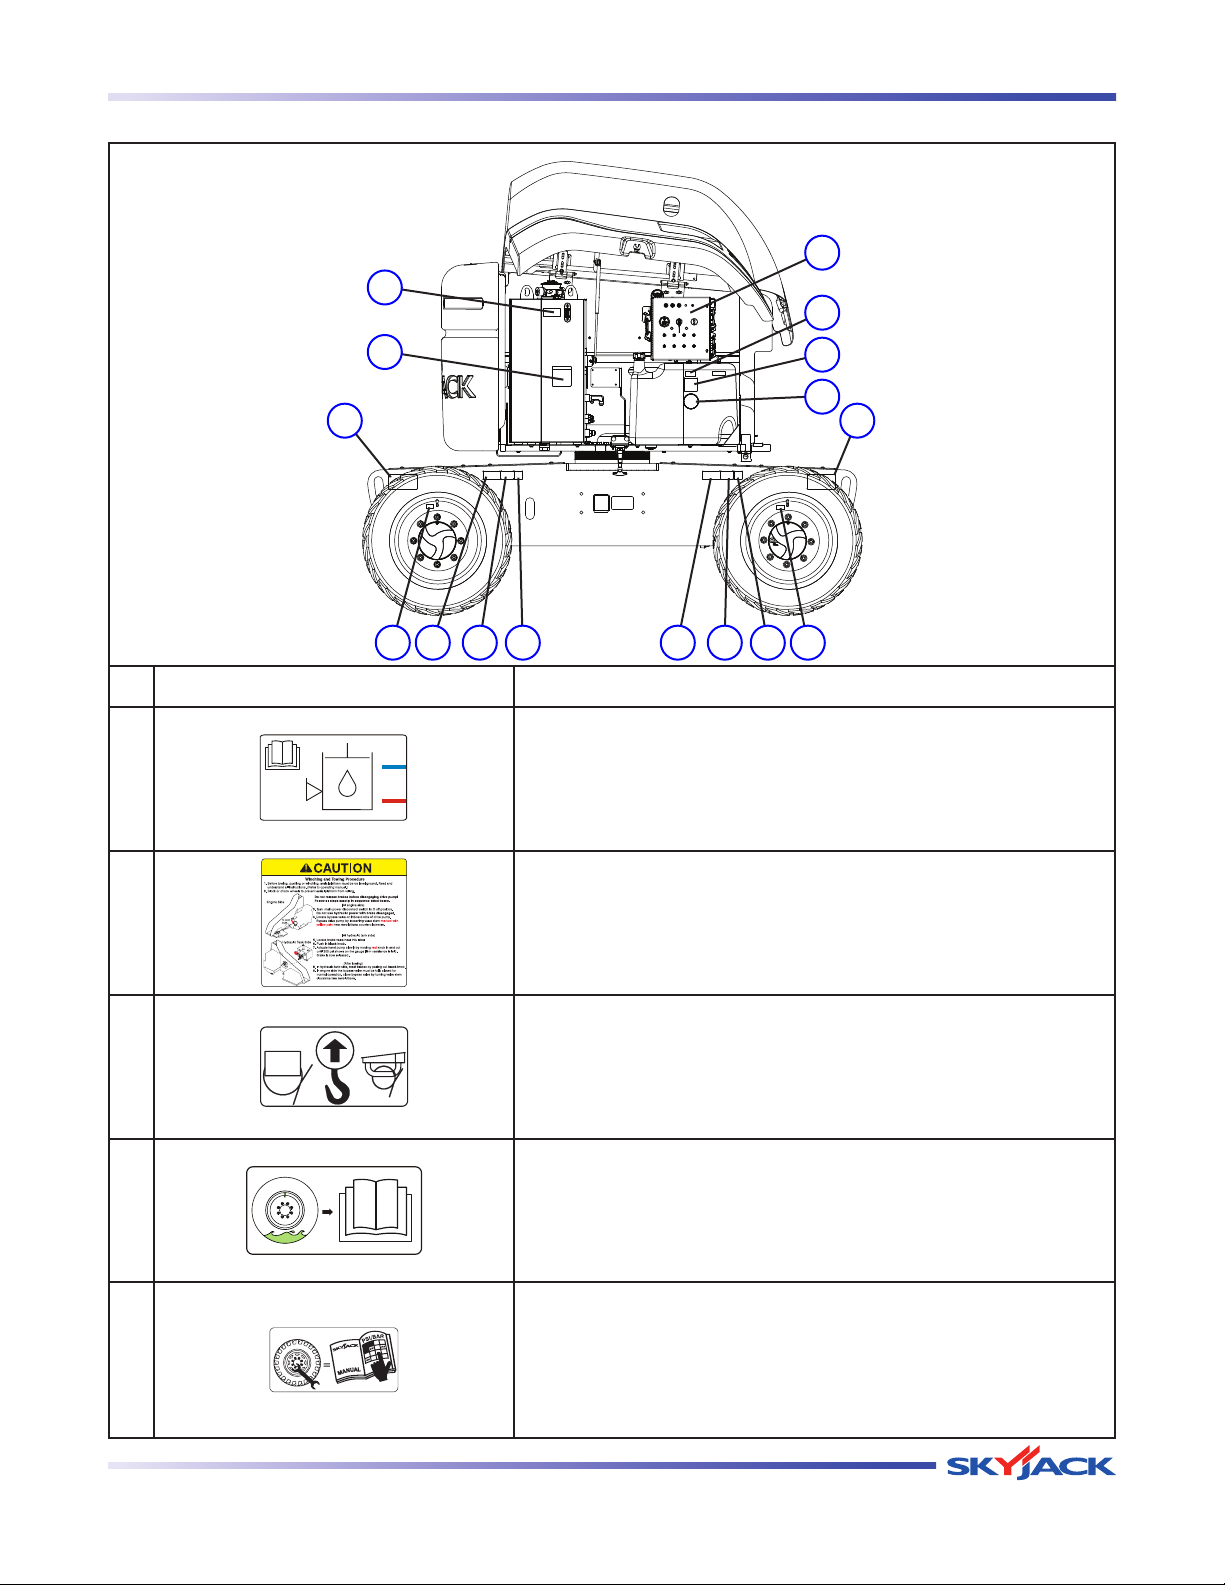
TM
Section 2 - Operation Labels
Control Compartment
11
1
10
2
9
8
3 3
4 4
7 56 65 7
No. Label Pictorial Description
Hydraulic Oil Level
Indicates minimum/maximum oil level.
1
Towing and Winching Procedure
Instructions for winching and towing
2
3
4
5
SJ 46A & SJ 46AJ
Lift and Tie Down Points
Only use these points for lifting or tying down.
Tire Sealant (If Equipped)
Indicates that tire sealant is present inside the tires.
Wheel Specifications
Refer to manual for wheel type, offset, pressure and torque.
December 2007 Page 73
Page 73
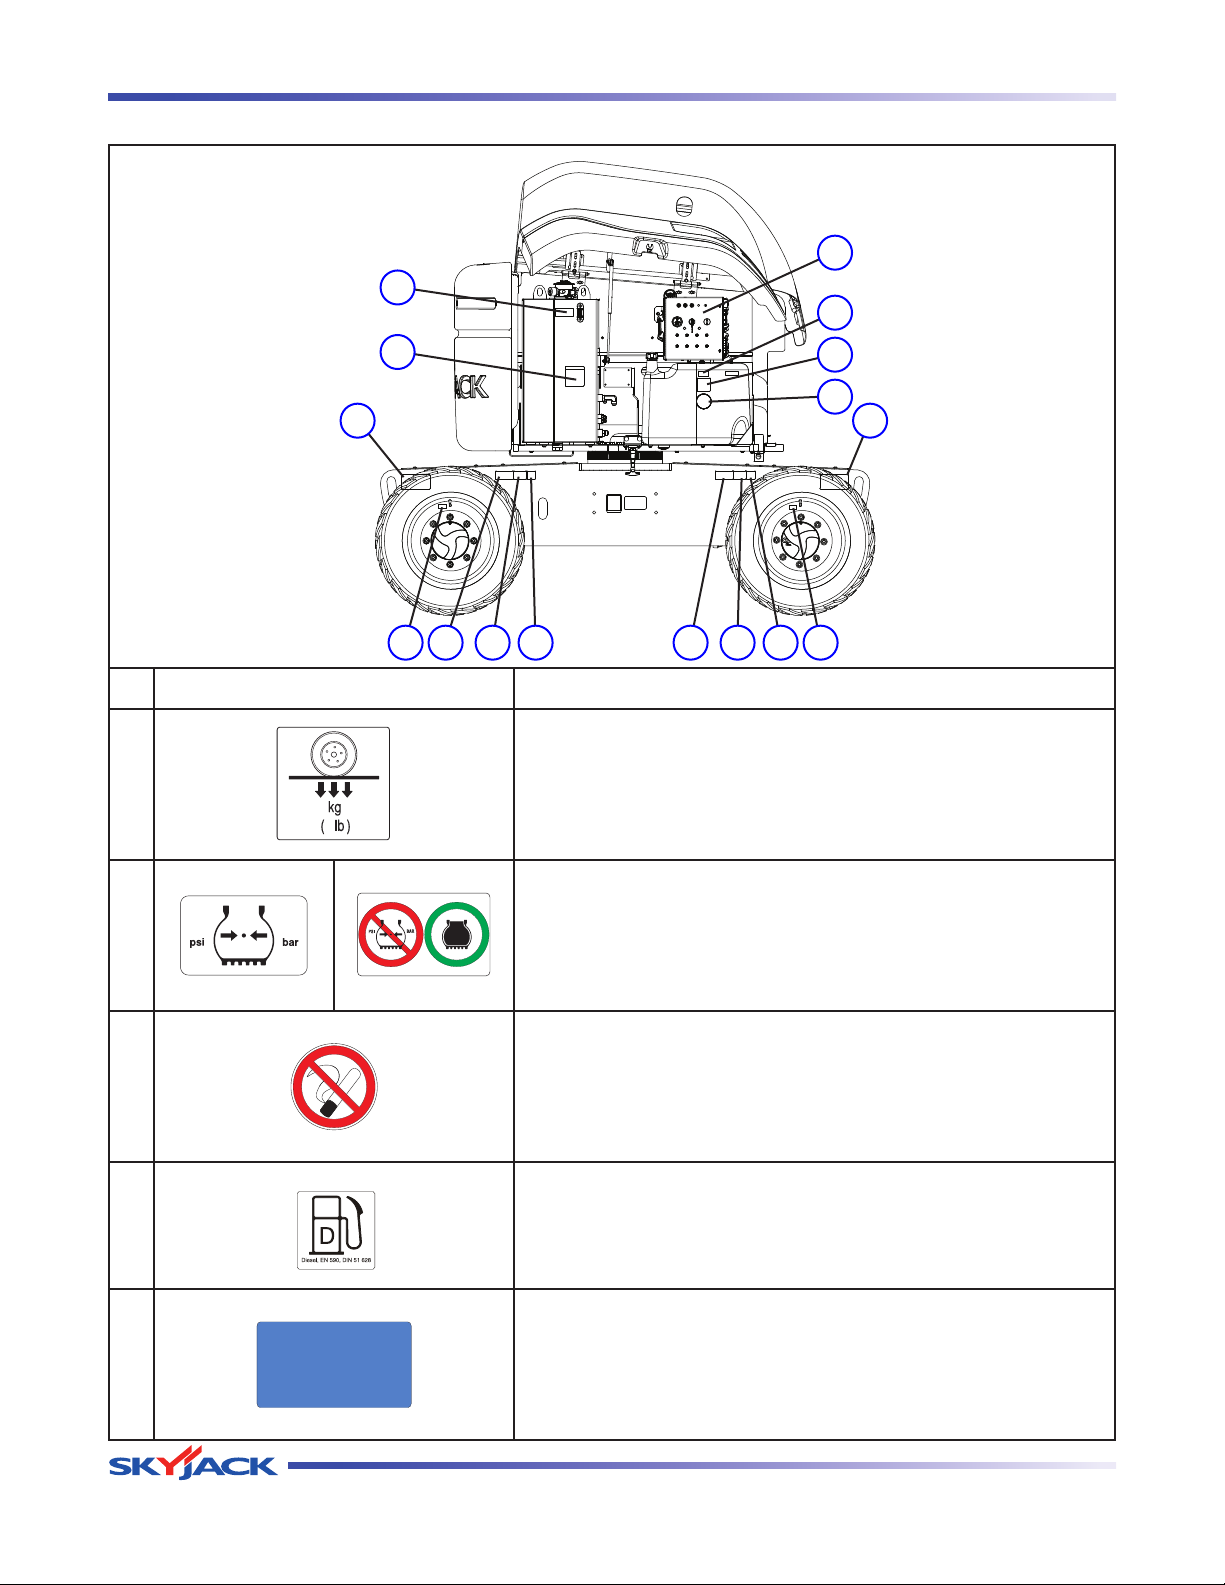
TM
Labels Section 2 - Operation
149502AA
A
LOW SULFUR FUEL
OR ULTRA LOW
SULFUR FUEL ONLY
Control Compartment (Continued)
11
1
10
2
9
8
3 3
4 4
7 56 65 7
No. Label Pictorial Description
Wheel Load*
6
Indicates rated wheel load.
*Wheel load will vary over different aerial platforms.
Tire Pressure*
Indicates rated tire pressure.
7
*Tire pressure will vary, may not be as shown.
8
9
10
Page 74 December 2007
Foam-filled Tire (If Equipped)
Indicates foam-filled tire.
No Smoking
Do not smoke near this location.
Diesel (If Equipped)
Use diesel fuel only.
Low Sulfur Fuel
Use low sulfur fuel only.
SJ 46A & SJ 46AJ
Page 74
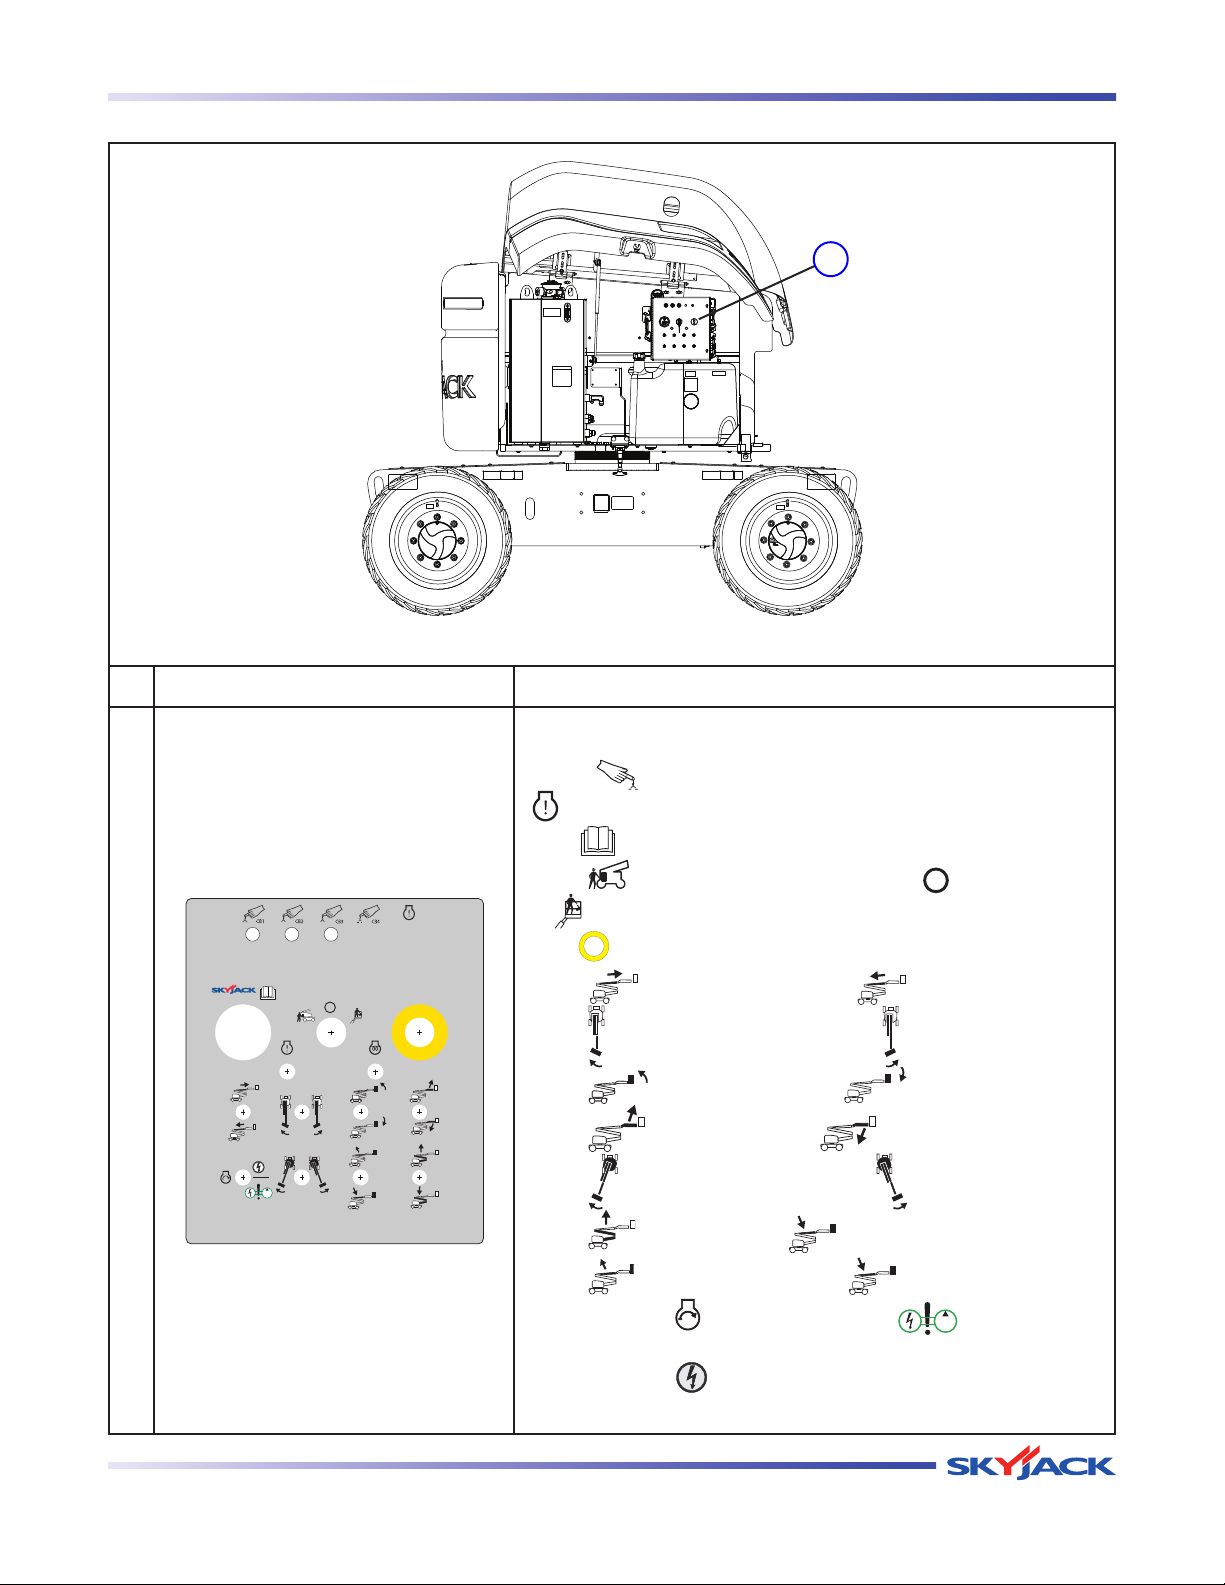
TM
Section 2 - Operation Labels
Control Compartment (Continued)
11
No. Label Pictorial Description
Base Control Console
Push “ ” b reak e r back i n to res e t. Se l ect an d h old
” to enable error blink code for engine control unit (ECU).
“
Read “
Select
or “
Push “
Select
” operating manual.
“ ” to enable base control console, “ ” to turn engine off
” to enable platform control console.
” emergency stop to stop engine and disable controls.
“ ” to extend fly boom or “ to retract fly boom.
Select “ ” to rotate platform to the left or “ ” to rotate to the right.
11
Select
“ ” to tilt platform up or “ ” to tilt platform down.
“ ” to move jib up or “ ” to move jib down.
Select
Select
“ ” to rotate turret to the left or “ ” to rotate to the right.
“ ” to raise riser or “ ” to lower riser.
Select
SJ 46A & SJ 46AJ
Select
“ ” to raise main boom or “ ” to lower main boom.
Push and hold “
” to start engine or “ ” to enable the
emergency power unit.
Push and hold “
” in either direction to enable base control
functions.
December 2007 Page 75
Page 75
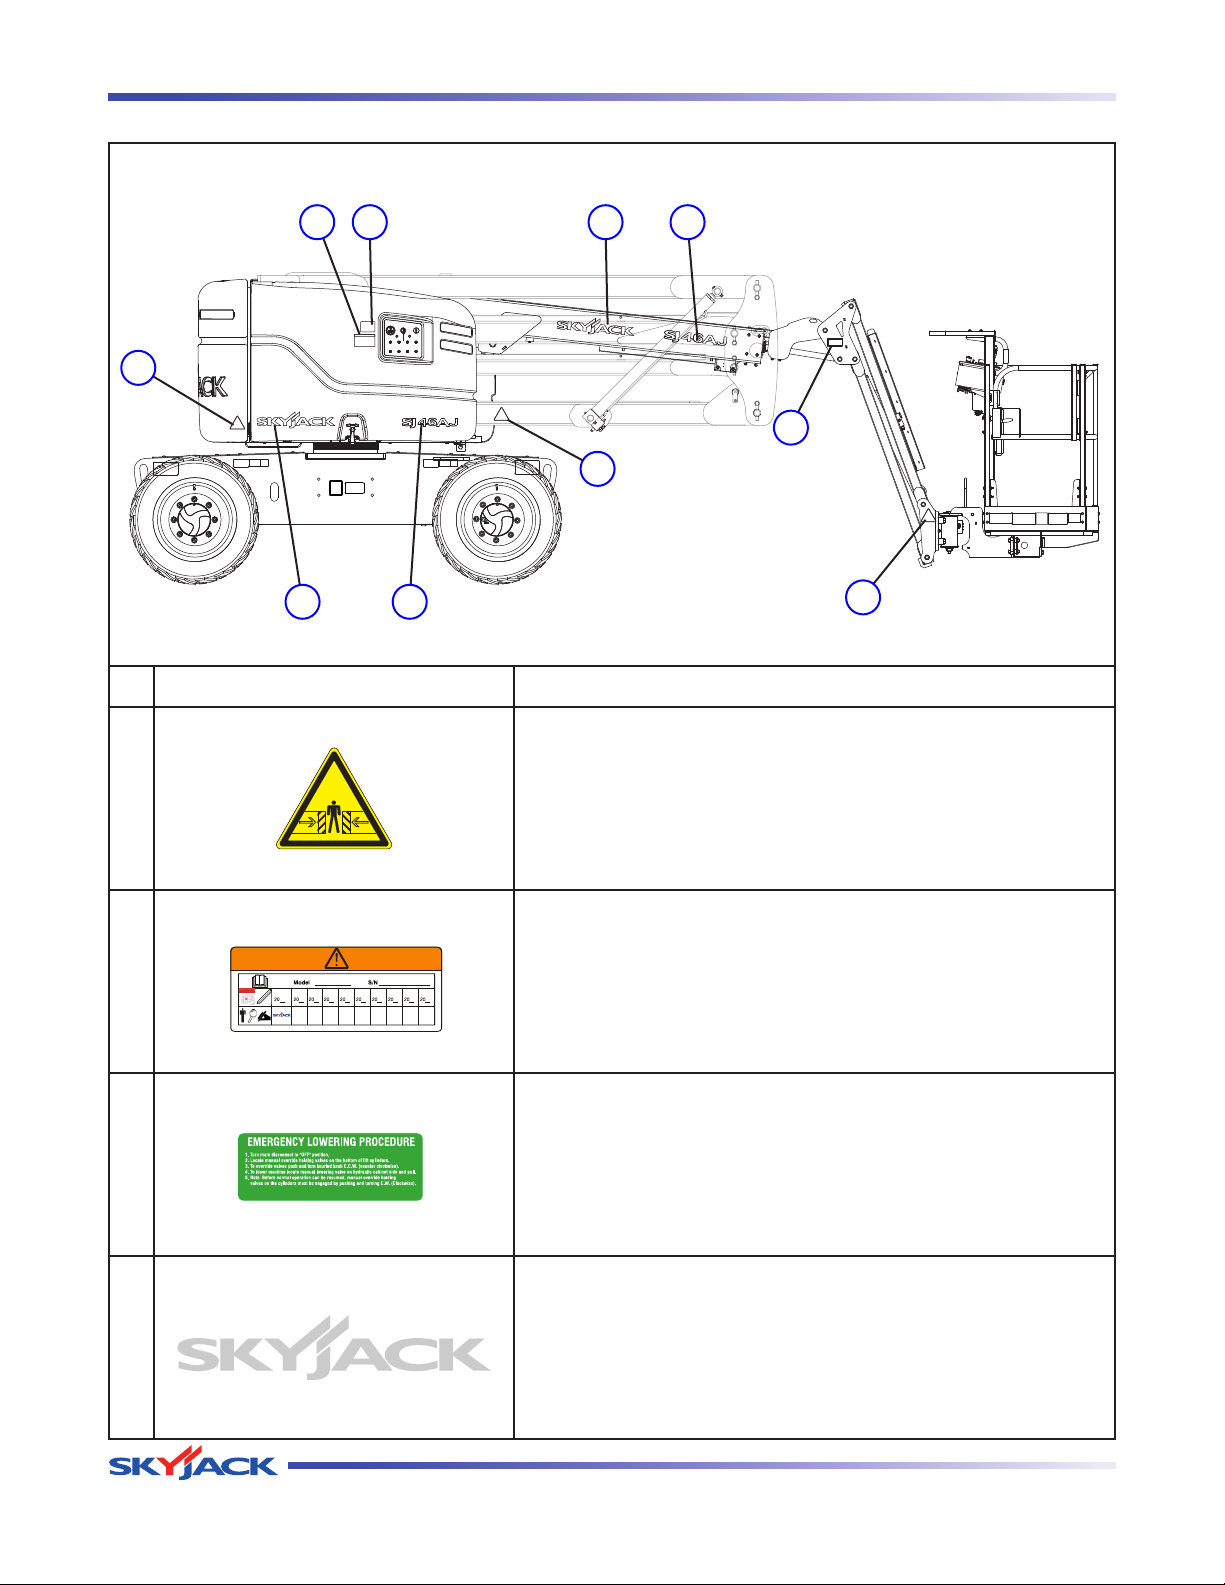
TM
Labels Section 2 - Operation
Control Side
3 4 52
1
6
1
8 7
No. Label Pictorial Description
Body Crushing Hazard
Danger - Body crushing hazard
1
Annual Inspection
Ensure that work platform has received annual inspection prior
2
to operation.
Emergency Lowering Procedure
In case of emergency, follow procedure outlined in label to lower
3
the platform.
1
Skyjack Logo
Big Skyjack logo - grey
4
Page 76 December 2007
SJ 46A & SJ 46AJ
Page 76
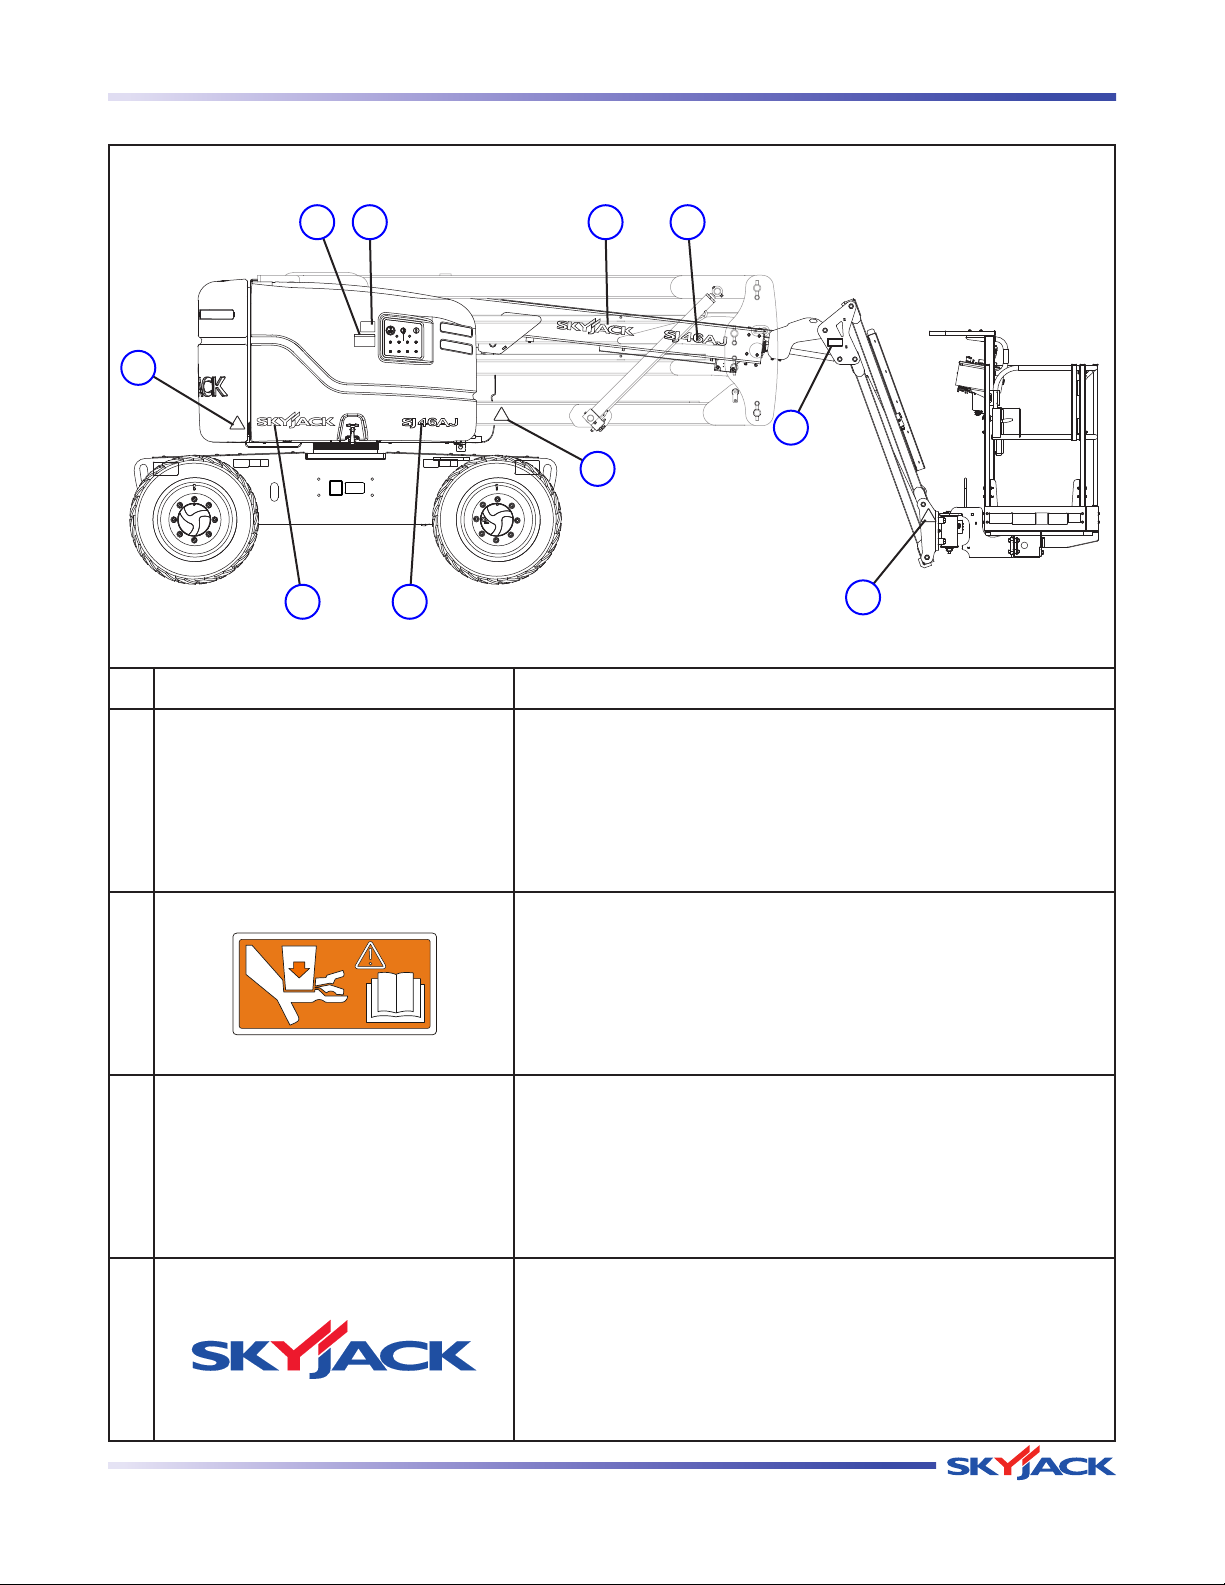
TM
Section 2 - Operation Labels
JS
6
4
A
J
JS
6
4
A
J
Control Side (Continued)
3 4 52
1
6
1
8 7
No. Label Pictorial Description
Model Number*
Product Identifier - grey
5
6
7
*Model number will vary, may not be as shown.
Crushing Hazard
Danger - Crushing hazard
Model Number*
Product Identifier - blue
*Model number will vary, may not be as shown.
1
Skyjack Logo
Small Skyjack logo - blue and red
8
SJ 46A & SJ 46AJ
December 2007 Page 77
Page 77
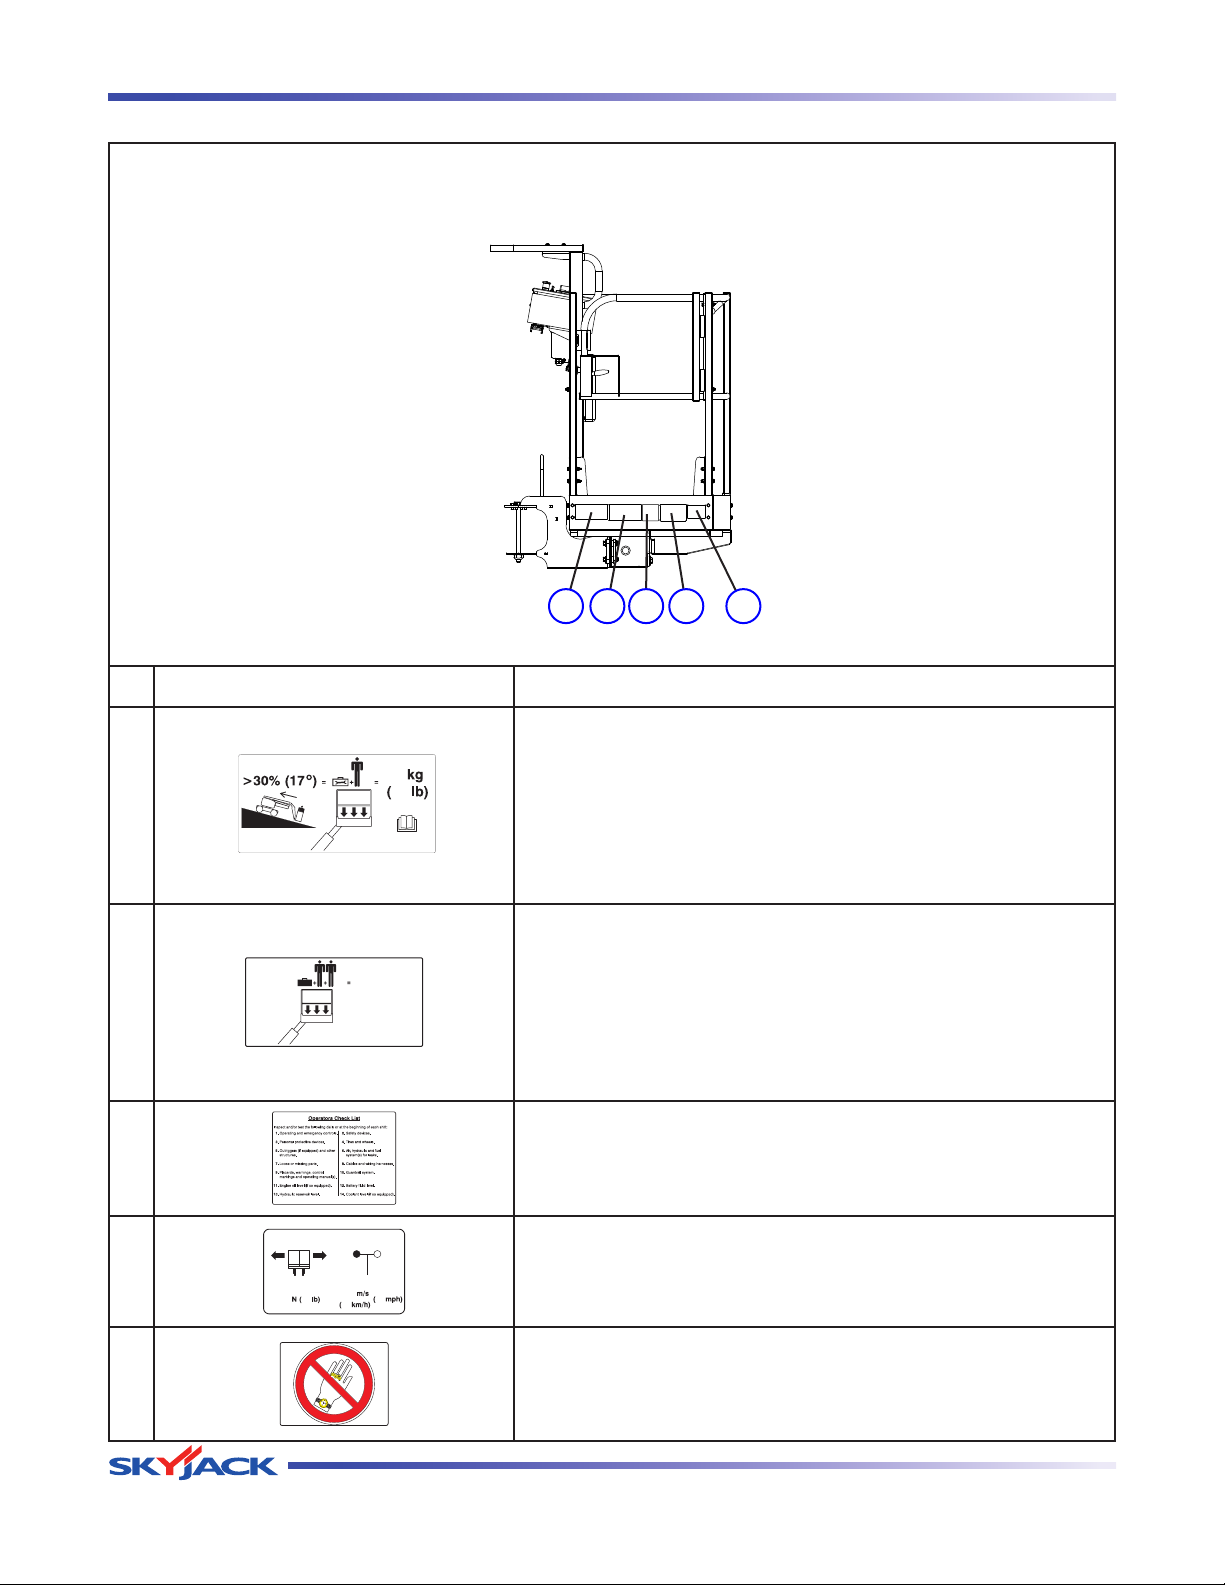
TM
Labels Section 2 - Operation
kg
( lb)
Platform
3 421 5
No. Label Pictorial Description
Platform Capacity - Driving on a Slope*
Rated work load when driving on a slope between 30% and
1
45%. Rated work load includes the weight of both personnel and
material, and maximum number of people in each configuration.
Do not exceed total weight or maximum number of people. Load
platform uniformly.
*Platform capacity will vary over different aerial platforms.
Platform Capacity - Operating on Level Ground*
Rated work load when operating on a level ground. Rated
2
work load includes the weight of both personnel and material,
and maximum number of people in each configuration. Do not
exceed total weight or maximum number of people. Load platform
uniformly.
*Platform capacity will vary over different aerial platforms.
Operator checklist
3
Operator checklist. Perform check prior to use.
Horizontal Load Rating
4
Apply no more than indicated side load. Operate below indicated
wind speed only.
No Jewelry
5
Page 78 December 2007
Caution - Do not wear jewelry.
SJ 46A & SJ 46AJ
Page 78
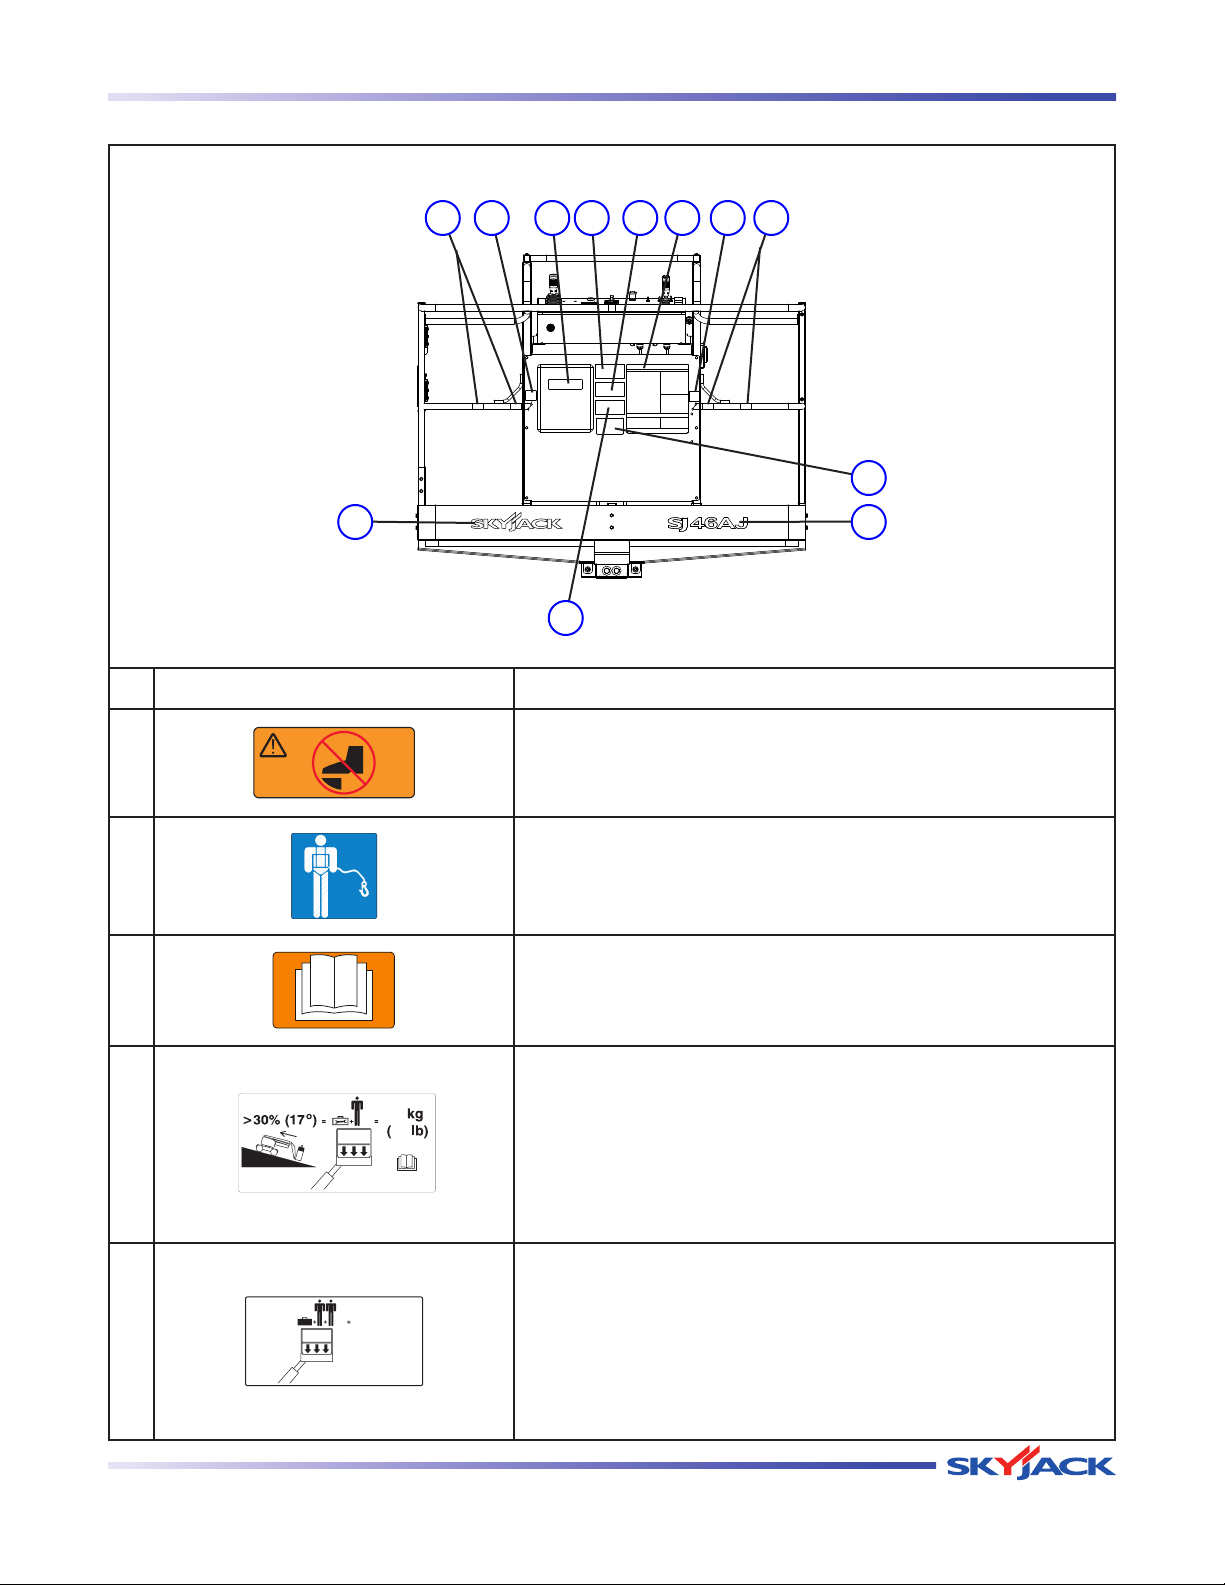
TM
Section 2 - Operation Labels
kg
( lb)
Platform (Continued)
21 13 4 25
6
9
No. Label Pictorial Description
Warning - No Step
1
No step warning
7
810
Harness Anchorage
2
Anchor safety belt/harness tethers here.
Manual Box
3
Indicates location of operating manual.
Platform Capacity - Driving on a Slope*
Rated work load when driving on a slope between 30% and
4
45%. Rated work load includes the weight of both personnel and
material, and maximum number of people in each configuration.
Do not exceed total weight or maximum number of people. Load
platform uniformly.
*Platform capacity will vary over different aerial platforms.
Platform Capacity - Operating on Level Ground*
Rated work load when operating on a level ground. Rated
5
work load includes the weight of both personnel and material,
and maximum number of people in each configuration. Do not
exceed total weight or maximum number of people. Load platform
uniformly.
*Platform capacity will vary over different aerial platforms.
SJ 46A & SJ 46AJ
December 2007 Page 79
Page 79
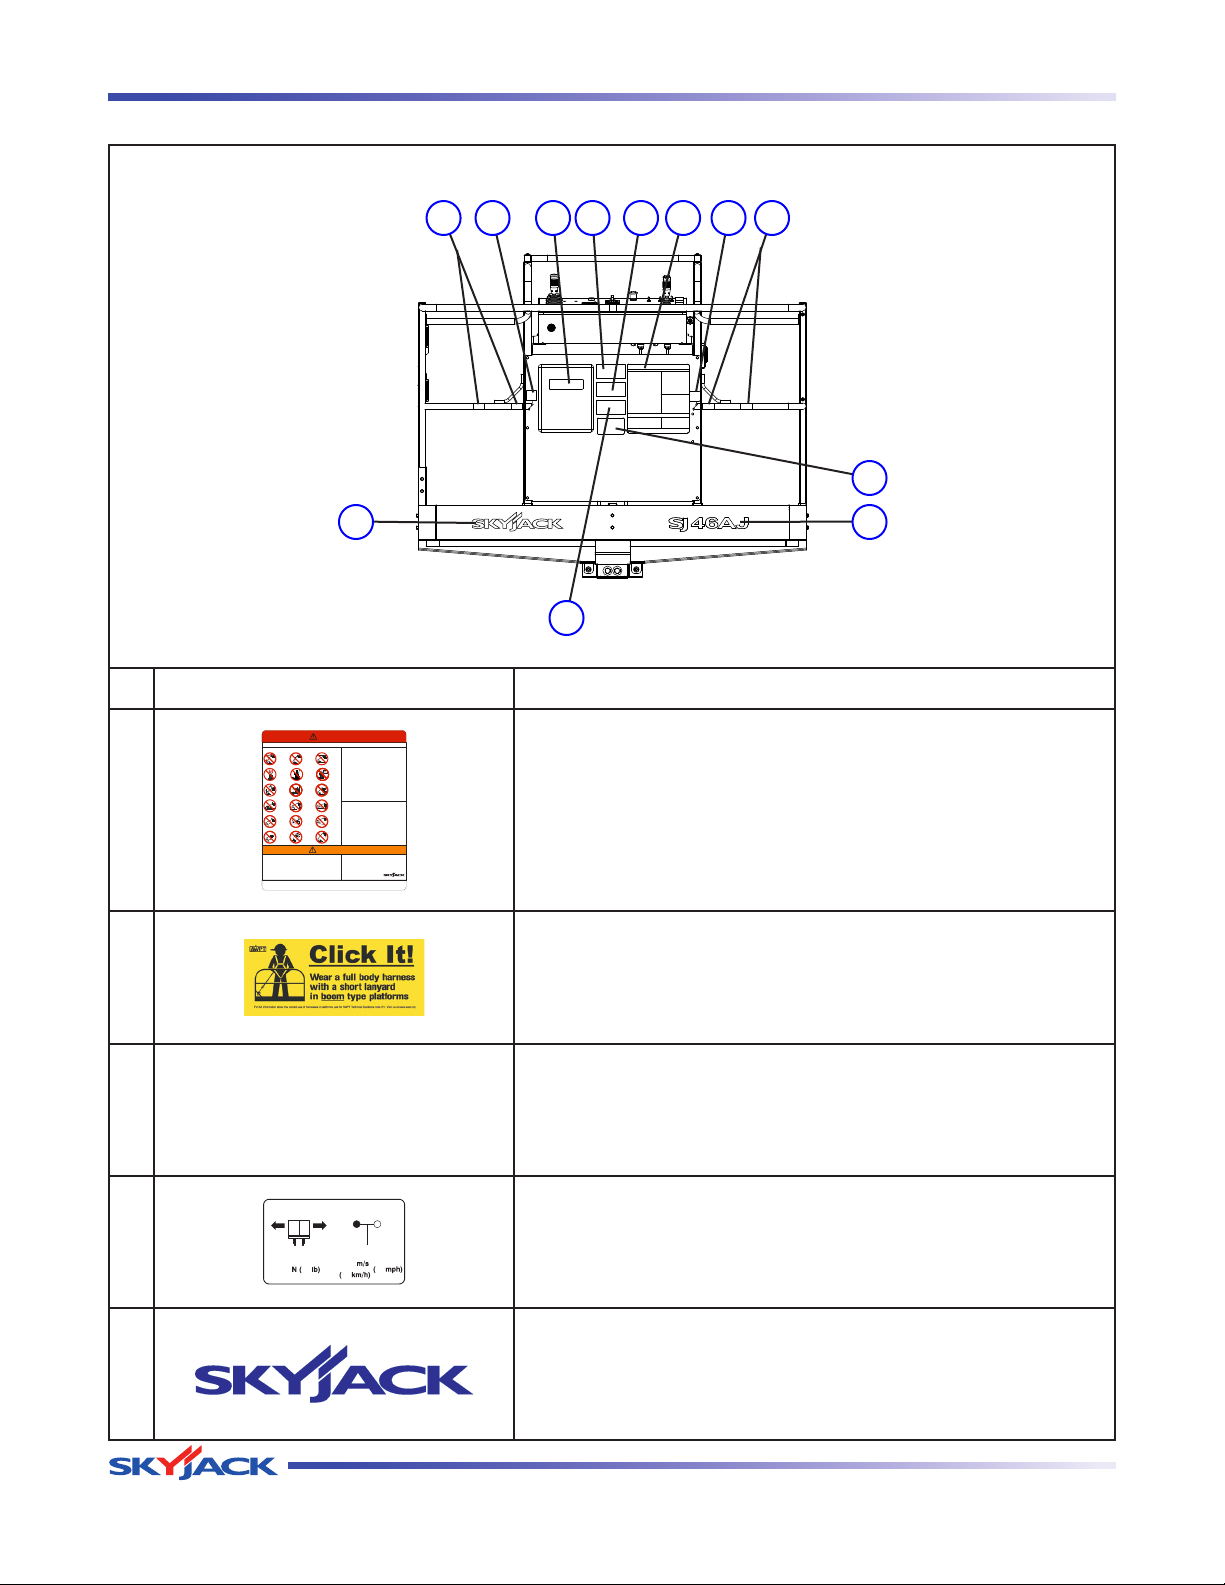
TM
Labels Section 2 - Operation
Read operating manual for full explanation of these hazards.
Other Hazards
* Do not operate if aerial platform is not working properly or if any
parts are damaged or worn.
* Do not exceed rated load or distribute load unevenly at any time.
* Do not alter or disable limit switches, safety switches or interlocks.
* Do not leave aerial platform unattended with key in key switch.
* Do not raise platform while aerial platform is on truck, fork lift or
other device or vehicle.
* Do not use under influence of alcohol or drugs.
* Do not use with improperly inflated/damaged tires or wheels.
Tires should be checked daily for pressure, torn side walls
and soft spots.
* Do not use without guardrails and entry gate in place.
* Do not operate without safety harness and lanyard properly
attached.
Failure to operate this equipment in accordance with operating instructions on this
equipment and in operating manual could result in death or serious injury!
A
143511AD
Use only original replacement parts. Parts such as
batteries, chargers, wheels, railings, etc. with weight and
dimensions different from original parts will affect stability
of aerial platform and must not be used without
manufacturer's consent.
Do not operate aerial platform without proper authorization and training.
It is operator's responsibility to:
* Read and completely understand all Dangers, Warnings, Cautions and
Instructions on aerial platform and in operating manual.
* Ensure that aerial platform has been properly maintained and inspected
in accordance with government regulations before using it.
* Perform all daily maintenance inspections.
WARNING
Electrocution Hazard
Failure to avoid these hazards will result in death or serious injury!
Avoid soft,
uneven
surfaces.
Avoid slopes.
Do not
release
brake
on incline.
Avoid
entanglement
with ropes,
cords or
hoses.
Avoid
falling.
Do not wear
jewelry or
loose
clothing.
3
9
6
2
1
Avoid
overhead
obstructions.
Avoid
drop-offs.
Ladders,
scaffolding
prohibited.
Do not
use as
a crane.
It is
prohibited.
Avoid
lowering
obstructions.
Do not lift
the chassis.
Do not raise
while on a
truck or
other
devices or
vehicle.
Avoid
side
forces.
Avoid
crushing
hazards.
Be aware
of blind
spots.
Stay off
guardrails
and boom
arms. It is
prohibited.
Avoid
lightning
and storms.
Avoid wind.
Do not
increase
lateral
surface area.
Avoid
power
lines.
As per CSA B354.4-02
“The operator shall maintain the minimum safe approach distance from
energized conductors at all times in accordance with the authority having jurisdiction.”
(MSAD)
Per ANSI A92.5-2006 8.10(7)
“The operator shall perform only that work for which he or she is qualified, in
compliance with all applicable safety related work practices intended to prevent
electric shock covered by the Code of Federal Regulations (CFR) 1910.333. The
operator's level of competence shall be established only by persons qualified to do
so. Operators shall maintain the appropriate minimum approach distance
from energized power lines and parts covered by CFR 1910.333 (c).”Unqualified
persons must maintain a minimum approach distance of 10 feet from any energized
power line up to 50 kV. Energized power lines over 50 kV require a greater minimum
approach distance to be maintained. Refer to CFR 1910.333.
(MAD)
As per AS 2550.1-2002
Elevating Work Platforms must remain 6.4m from electrical distribution lines up to
133kV and 8m from transmission lines greater than 133kV. State regulations may
take precedence over these approach distances.
This aerial platform is not electrically insulated.
must allow
This aerial platform does not provide
protection from contact with or proximity to an electrically
charged conductor.
Maintain a
Minimum Safe Approach Distance (MSAD) from energized power
lines and parts as listed below. The operator for the
platform to sway, rock or sag.
DANGER
JS
6
4
A
J
Platform (Continued)
21 13 4 25
6
9
No. Label Pictorial Description
Hazard Identification
Read and understand outlined risks associated with this work
6
platform prior to operation.
7
810
AWPT “Click It!” (ANSI/CSA)
7
Indicates full body harness awareness.
Model Number*
8
Product Identifier - blue
*Model number will vary, may not be as shown.
Horizontal Load Rating
9
Apply no more than indicated side load. Operate below indicated
wind speed only.
Skyjack Logo
10
Page 80 December 2007
Small Skyjack logo - blue
SJ 46A & SJ 46AJ
Page 80
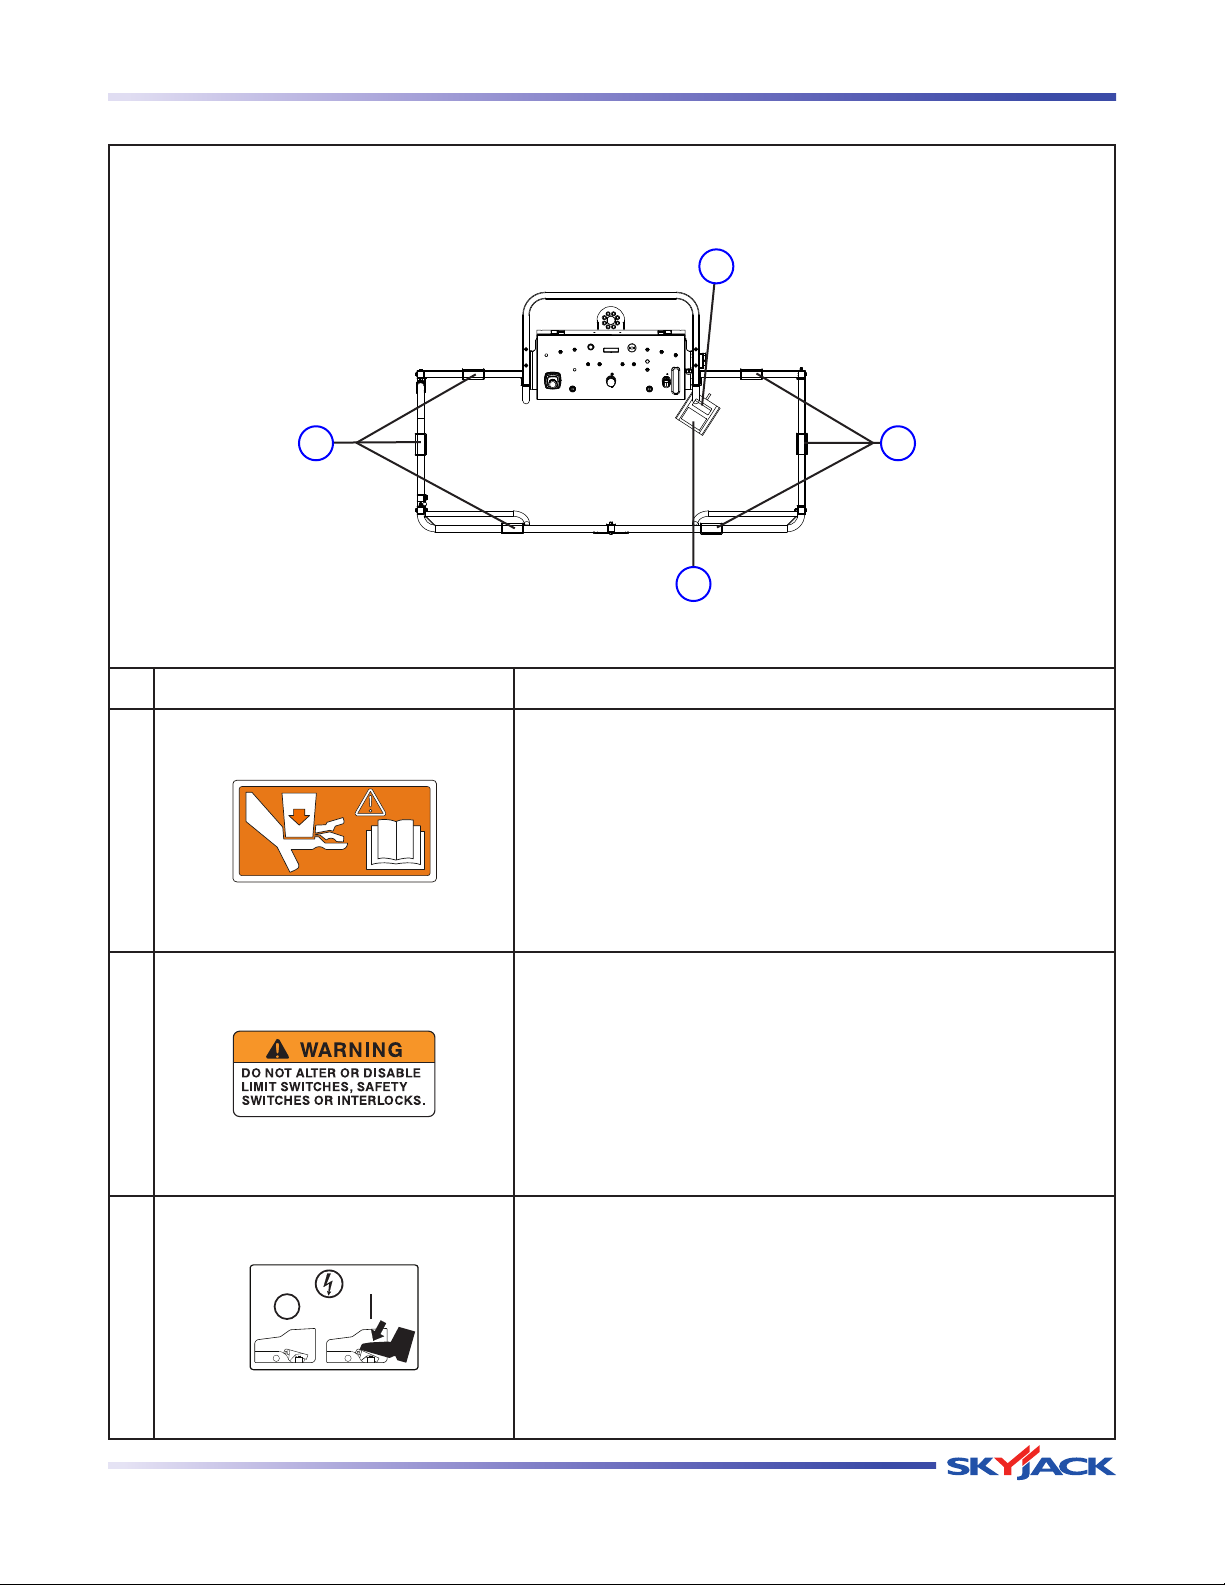
TM
Section 2 - Operation Labels
Platform (Continued)
2
1
3
No. Label Pictorial Description
Crushing Hazard
Danger - Crushing hazard
1
Warning - Do Not Alter
Aerial platform altering warning
1
2
3
SJ 46A & SJ 46AJ
Footswitch Enable (On/Off)
Depress and hold footswitch to enable platform function.
December 2007 Page 81
Page 81
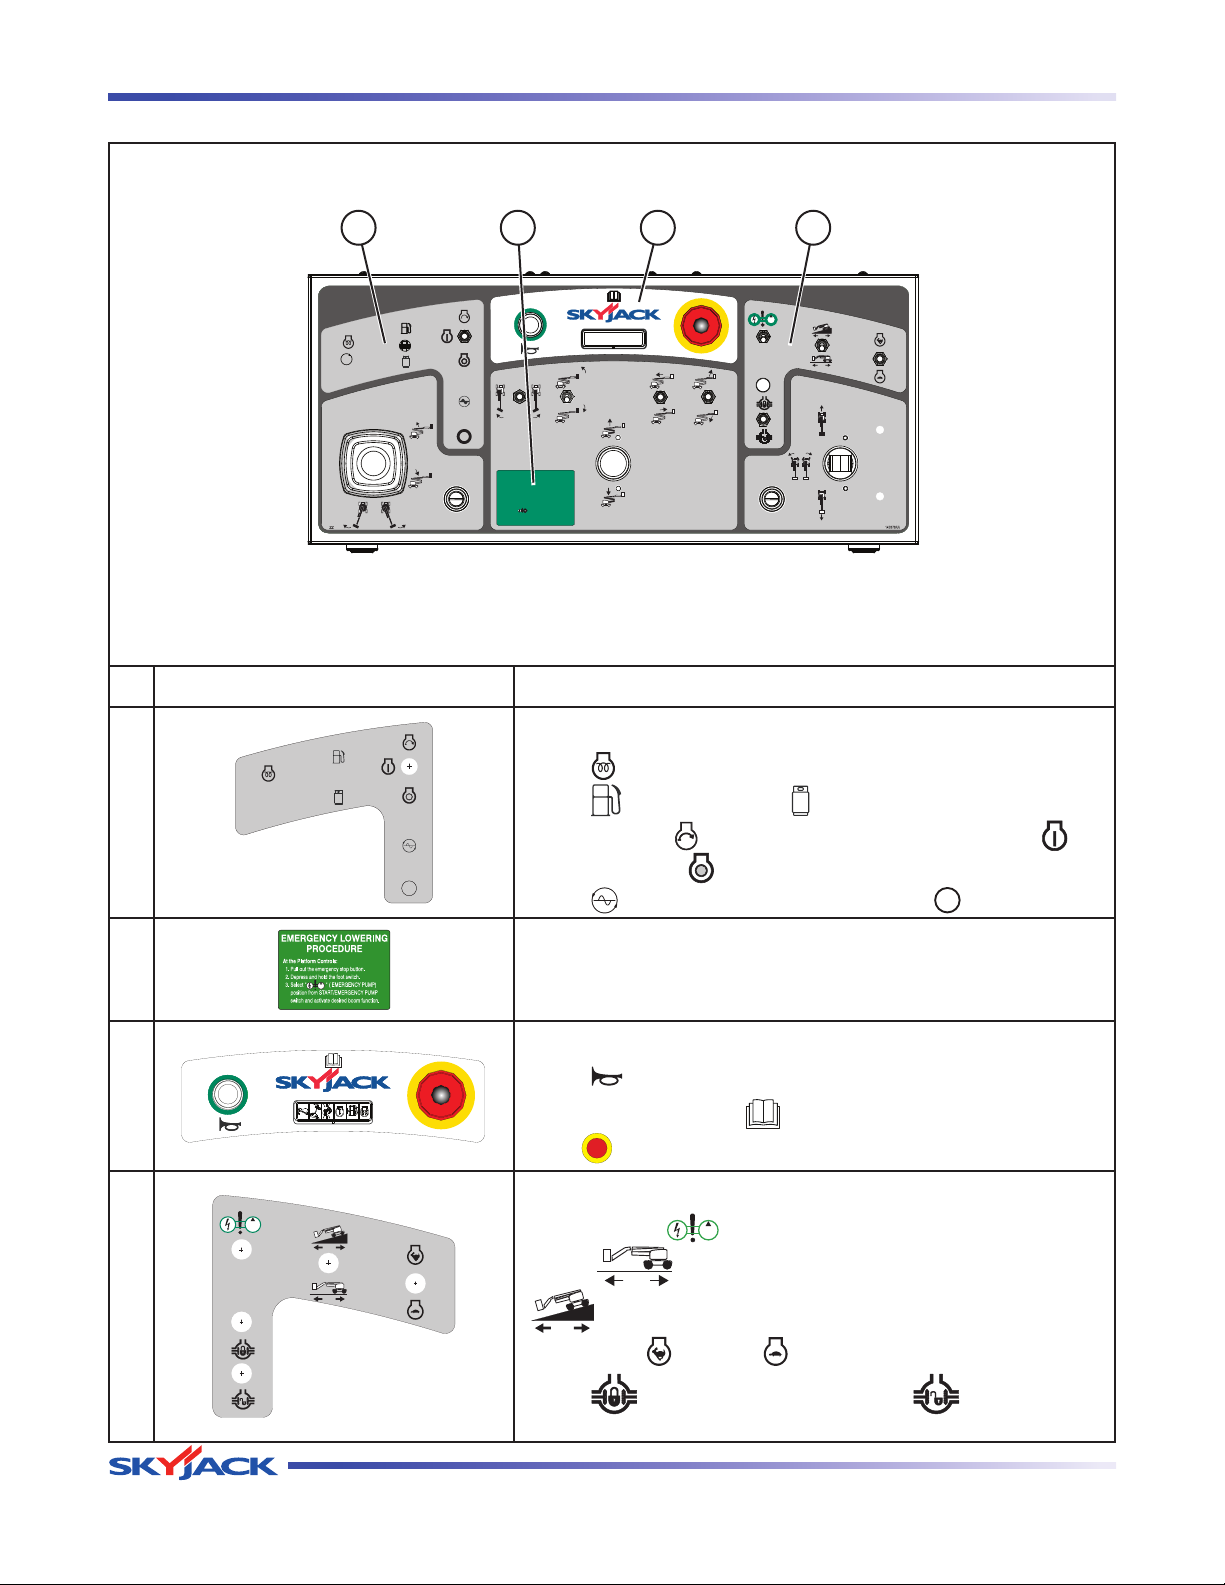
149432AA
At Platform Controls:
1. Pull out emergency stop button.
2. Depress and hold foot switch.
3. Activate emergency pump switch.
4. Activate desired boom function.
EMERGENCY LOWERING
PROCEDURE
149432AA
At Platform Controls:
1. Pull out emergency stop button.
2. Depress and hold foot switch.
3. Activate emergency pump switch.
4. Activate desired boom function.
EMERGENCY LOWERING
PROCEDURE
148979AA
At Platform Controls:
1. Pull out emergency stop button.
2. Depress and hold foot switch.
3. Activate emergency pump switch.
4. Activate desired boom function.
EMERGENCY LOWERING
PROCEDURE
TM
Labels Section 2 - Operation
Platform Control Console
41 32
No. Label Pictorial Description
Glow Plugs/Emergency Power Unit
Select “
1
Select “
Push and hold “
position or select “
Select “
” to energize glow plugs.
” for diesel fuel or “ ” for propane fuel.
” to start engine and then return to “ ” on
” to turn engine off.
” to turn hydraulic generator on or “ ” to turn it off.
Emergency Lowering Procedure
2
Follow procedure outlined in label to lower the platform.
E-Stop/Horn
3
Select “
Read operating manual
Push “
” to sound horn.
“ ”.
” emergency stop to stop engine and disable controls.
Engine Controls
Push and hold “ ” to enable emergency power unit.
Select “
4
“
” high torque when driving on a slope.
Select either “
Select “
” to engage diferential lock or “ ” to disengage
differential lock.
Page 82 December 2007
” low torque when driving on level ground or
” high or “ ” low engine throttle speed.
SJ 46A & SJ 46AJ
Page 82
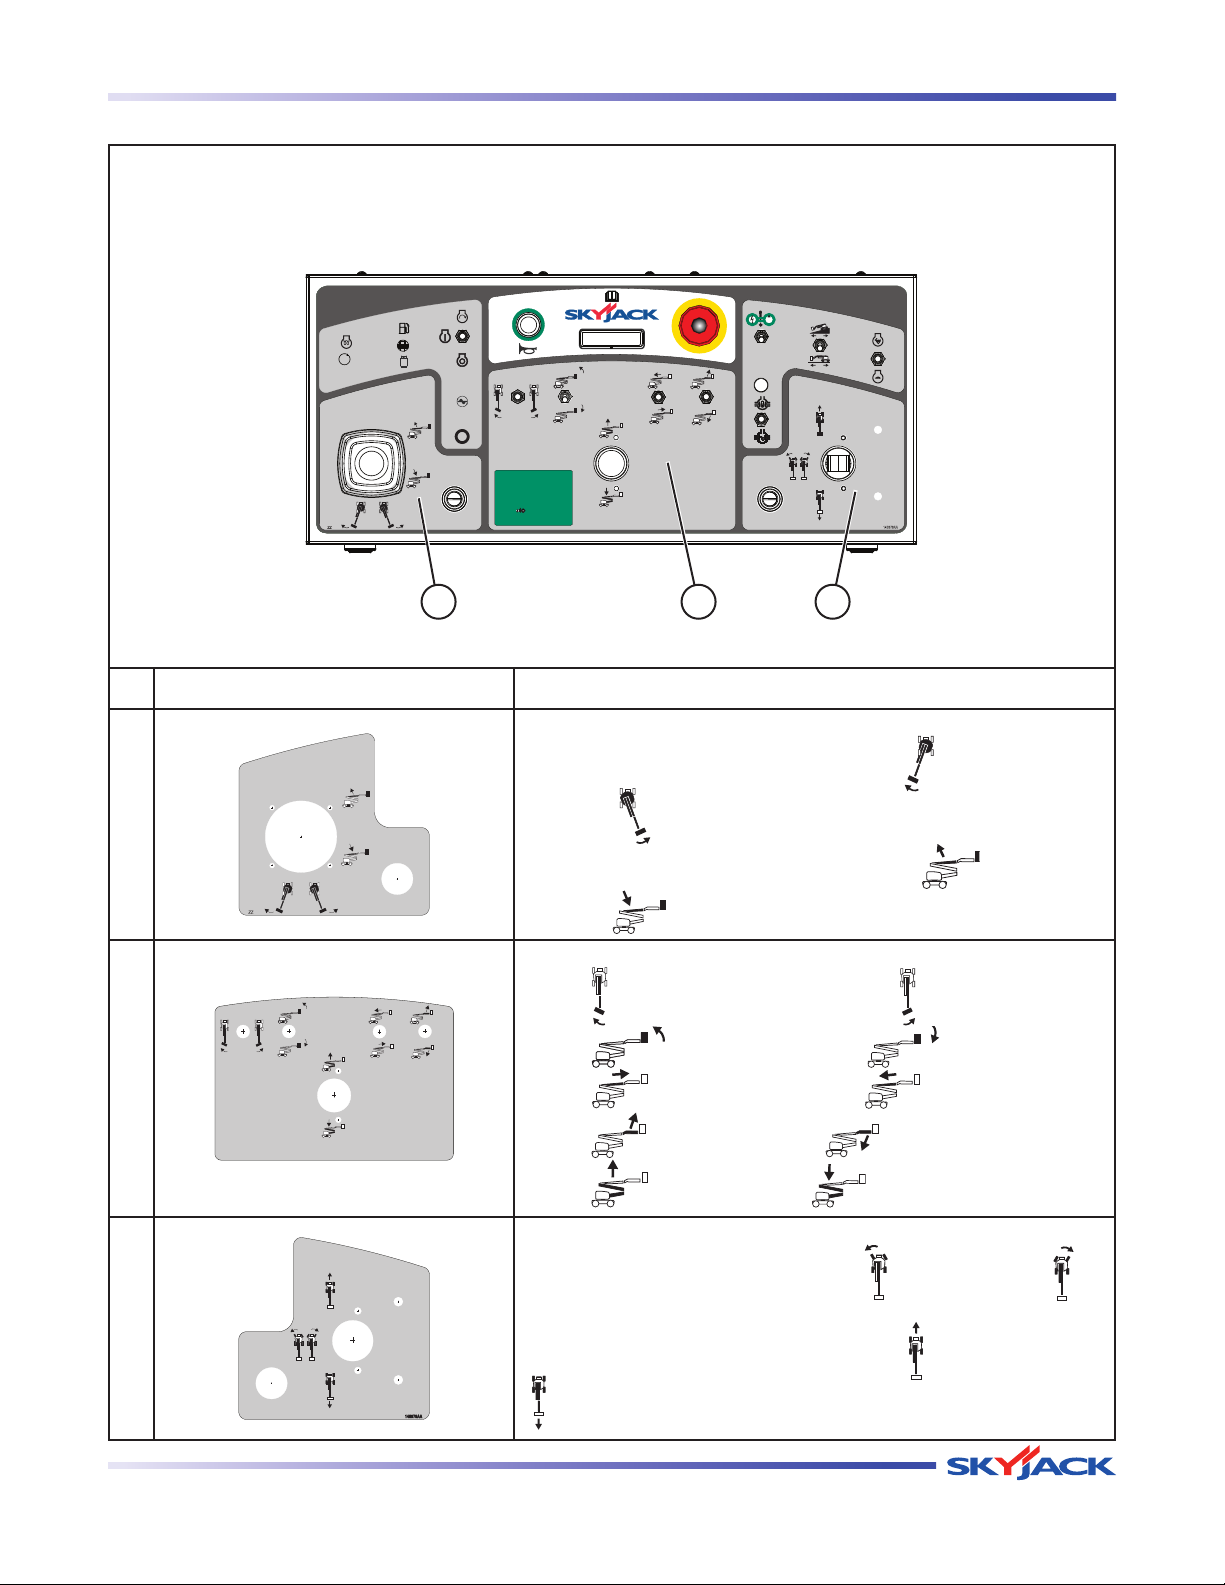
149432AA
At Platform Controls:
1. Pull out emergency stop button.
2. Depress and hold foot switch.
3. Activate emergency pump switch.
4. Activate desired boom function.
EMERGENCY LOWERING
PROCEDURE
149432AA
At Platform Controls:
1. Pull out emergency stop button.
2. Depress and hold foot switch.
3. Activate emergency pump switch.
4. Activate desired boom function.
EMERGENCY LOWERING
PROCEDURE
148979AA
At Platform Controls:
1. Pull out emergency stop button.
2. Depress and hold foot switch.
3. Activate emergency pump switch.
4. Activate desired boom function.
EMERGENCY LOWERING
PROCEDURE
TM
Section 2 - Operation Labels
Platform Control Console (Continued)
5 6 7
No. Label Pictorial Description
Boom/Turret Controller
Push and hold controller in this direction “
5
the left or “
” to rotate turret to the right.
Push and hold the controller in this direction “
boom or “
” to lower main boom.
Boom/Jib/Platform Controls
Select “
Select “
” to rotate platform to the left or “ ” to the right.
” to tilt platform up or “ ” down
6
Select “
Select “
Select “
” to extend fly boom or “ ” to retract fly boom.
” to move jib up or “ ” to move jib down.
” to raise riser or “ ” to lower riser.
Drive/Steer Controller
” to rotate turret to
” to raise main
7
SJ 46A & SJ 46AJ
Press rocker switch in this direction “
” to steer left or “ ” to
steer right.
Push and hold controller in this direction “
” to drive backward.
“
” to drive forward or
December 2007 Page 83
Page 83
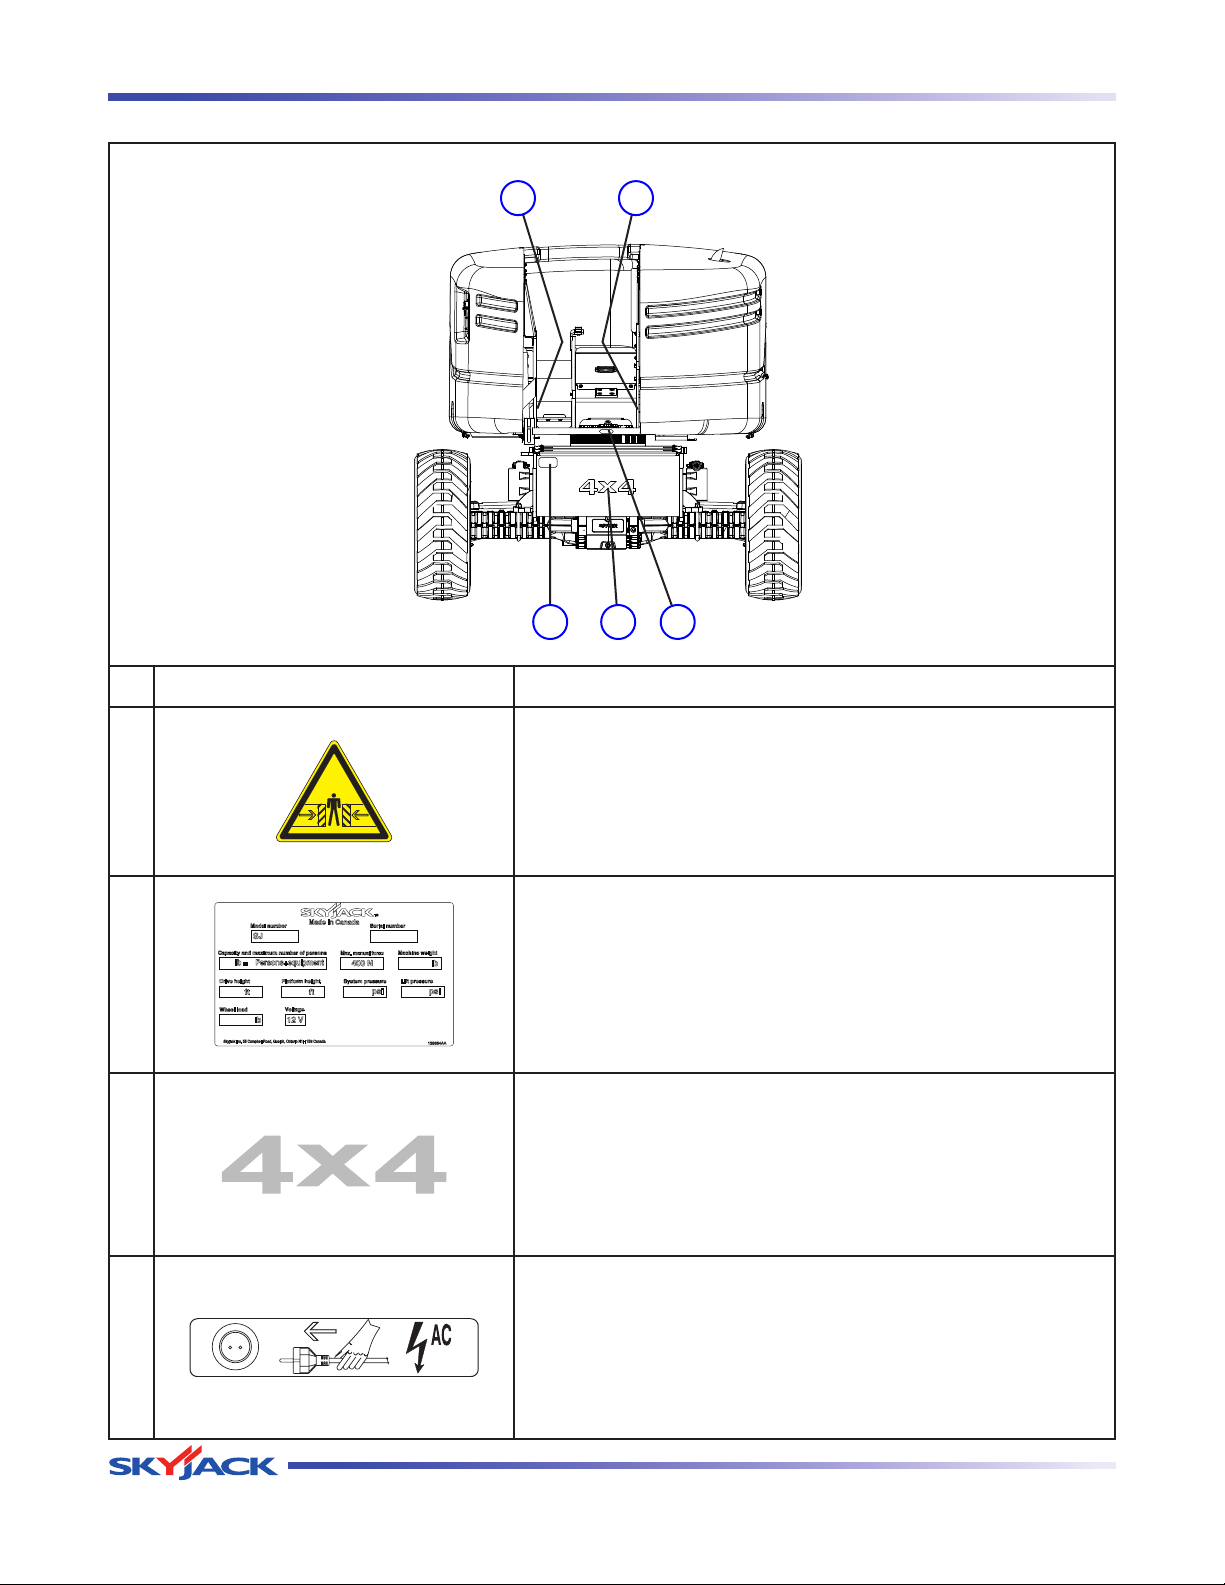
TM
Labels Section 2 - Operation
Front Side - Base
1 1
4
2
3
No. Label Pictorial Description
Body Crushing Hazard
Danger - Body crushing hazard
1
Serial Plate*
Product identification and specifications
2
*Serial plates will vary, may not be as shown.
4x4 (If equipped)
Product identifier - 4 wheel drive
3
Connect AC Supply
Connect AC supply here.
4
Page 84 December 2007
SJ 46A & SJ 46AJ
Page 84
California Proposition 65
WARNING
Engine exhaust and some of its constituents are known to the State of
California to cause cancer, birth defects, and other reproductive harm.
Battery posts, terminals, and related accessories contain lead and lead compounds, chemicals known to the State of California to cause cancer, birth
defects, and other reproductive harm.
WASH HANDS AFTER HANDLING.
Page 85

Reliable lift solutions by people who care.
www.skyjack.com
 Loading...