

Page 1
MySOS
user guide
Europe’s Premier
Personal Safety Service
SG MD 370 / Issue 7 / Aug 2015
Page 2

Contents Page
Welcome 3
• What’s in the Box
• Our Contact Details
• Disclaimer
Glossary of Terms 4
Getting to Know Your MySOS 5
What Do the Lights Mean? 6
Getting Started 7
• Enter your Account Details
• Charging the MySOS Device
• Switching the MySOS on and off
• Acquire GSM & GPS signals
• Perform a Test Call
How to Use Your Device 9
• Activating an SOS Alarm
• Making a Phone Call
• Leaving a Voice Memo
• Sending a Position Report
• On Demand Position Request
• Mandown Alarm Feature
• Things to Remember
- 2 -
Page 3

Welcome
The MySOS, exclusively developed by Skyguard, is Europe’s smallest and
lightest GPS enabled personal safety device. Fully certied to the highest industry
standards, the device links directly to Skyguard’s Incident Management Centre,
at the touch of a button. The MySOS Mandown variant also features a mandown
sensor which will automatically raise the alarm if the user has a slip, trip or fall
making it the perfect solution for ultimate peace-of-mind.
What’s in the Box
When you receive your MySOS device, you should nd the following items:
1. MySOS device (tted with a SIM card and battery)
2. Mains charger
3. Three lanyards
4. User guide
5. Quick reference guide keyring
6. Keyring holder
If you are missing any of the above, please contact Customer Support between
Monday – Friday, 9am – 5.30pm using the details below.
Our Contact Details
Address: Skyguard House, 457 Kingston Road, Epsom, Surrey KT19 0DB
Tel: 0844 257 0314
Email: [email protected]
www.skyguard.co.uk
Disclaimer
It is important that you follow the instructions in this guide carefully. Skyguard
cannot be held liable for non-performance of your MySOS device or the Incident
Management Centre and any ensuing consequences, if you do not follow proper
usage and maintenance procedures.
Deliberate false alarms or hoax activations are in breach of the Terms &
Conditions and can result in termination of the service.
- 3 -
Page 4

Glossary of Terms
GPS Global Positioning System - an accurate location system based on
signals received from satellites.
GPRS General Packet Radio Service - a technology which allows the device
to send its location.
IMC Skyguard’s 24/7 Incident Management Centre.
GSM Global System for Mobile communications (mobile phone network).
CSC Customer Service Centre – Skyguard’s online customer portal where
the user’s personal and work details are securely held.
- 4 -
Page 5
Getting to Know Your MySOS Device
The following information should be read and understood before using your
MySOS.
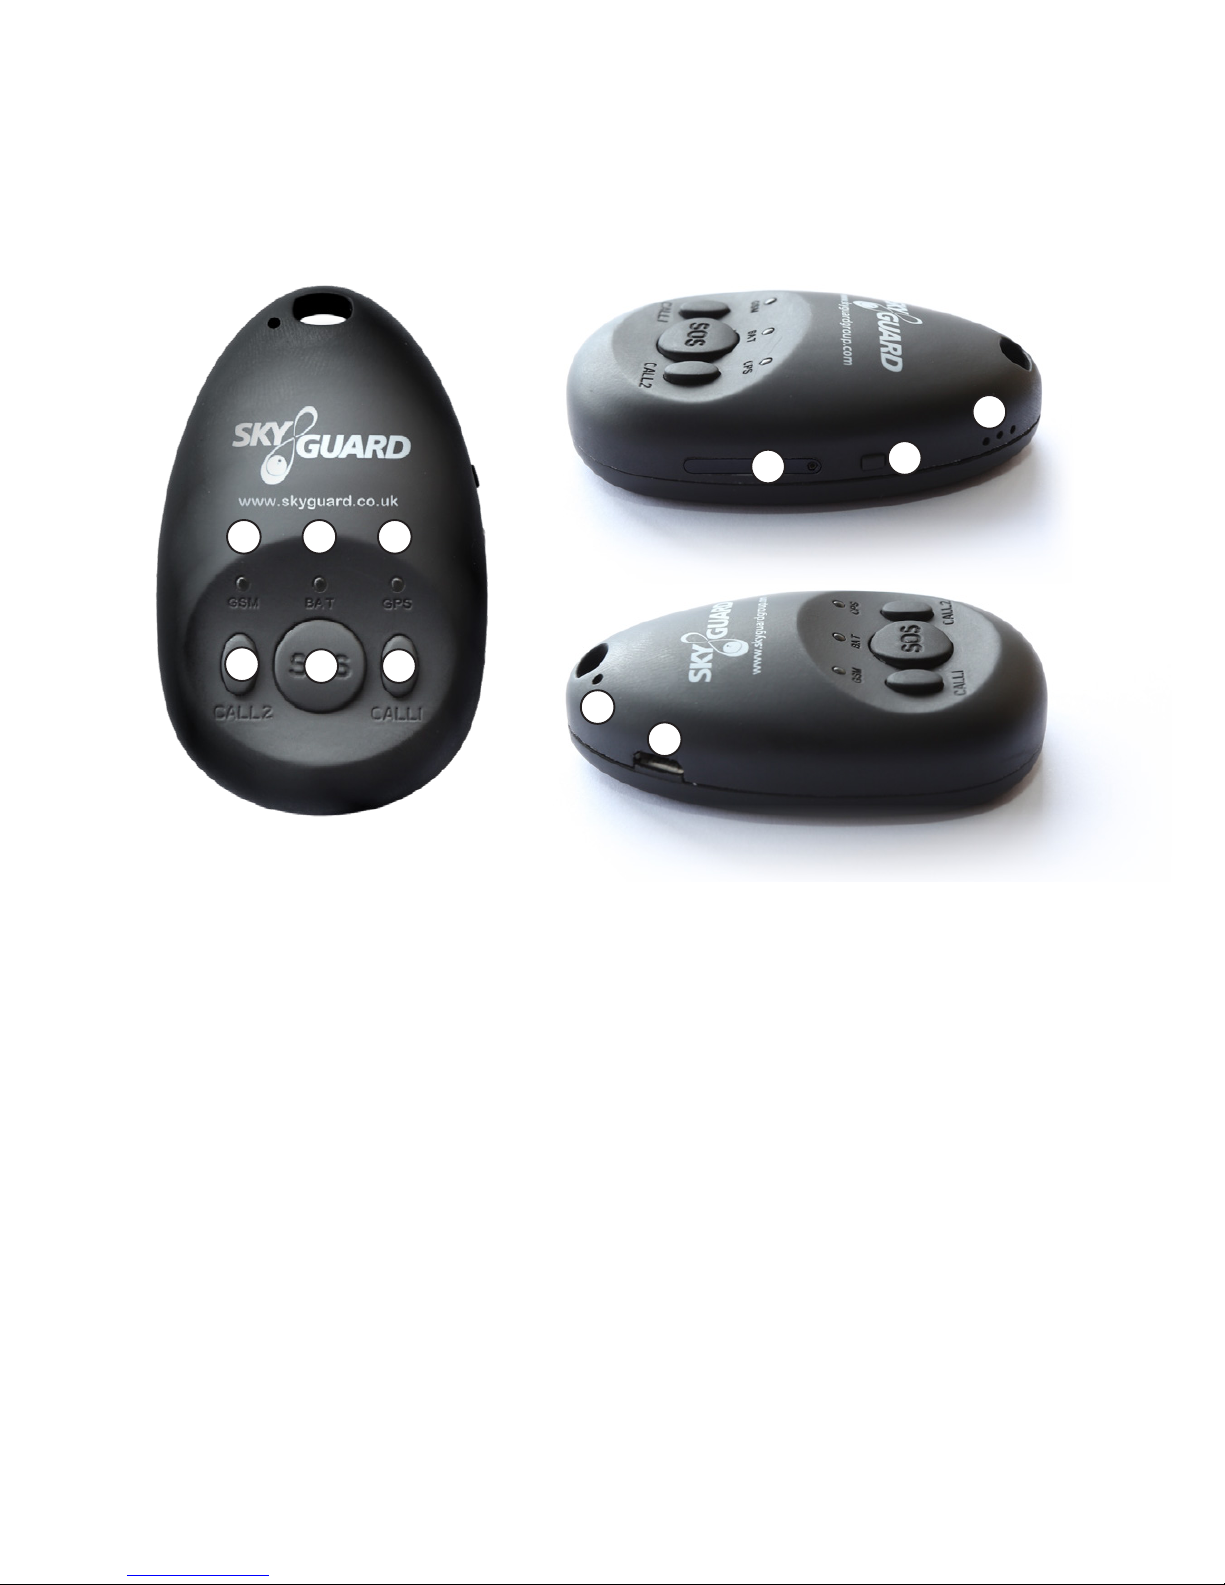
1 2 3
4
65
7
8
9
11
10
1. GSM Light (Amber)
2. Battery Light (Red)
3. GPS Light (Blue)
4. CALL 2 Button
5. SOS Button
6. CALL 1 Button
7. SIM Card Slot
8. On/Off / Send Position
Button
9. Loudspeaker
10. Microphone
11. USB Charging Port
- 5 -
Page 6
What do the Lights Mean?
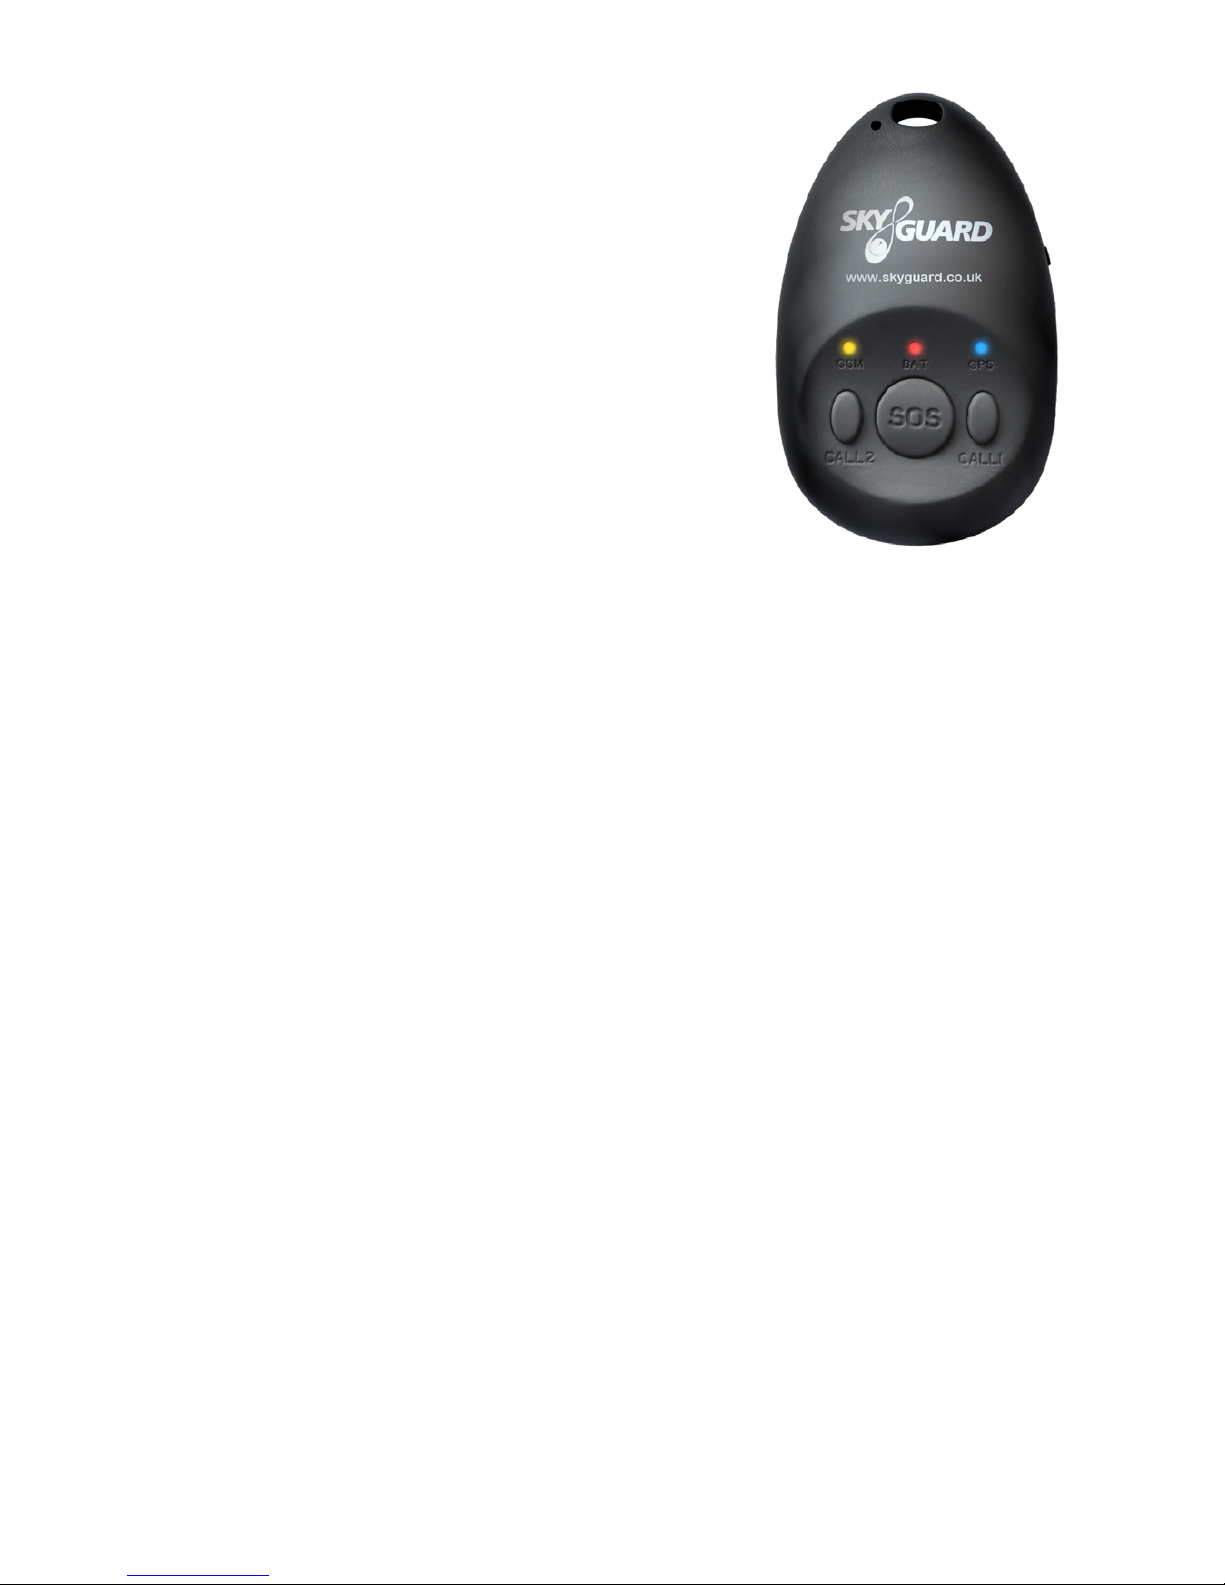
MySOS device status indicators.
1. GSM light (Amber)
• Light shows a slow single ash every ve
seconds when the device has a GSM signal.
Light shows a slow double ash every ve
seconds when the device is registered
to the GPRS network. Light not ashing.
This means the device has been unable to
connect to the network.
2. Battery light (Red)
• Continuously lit when battery is charging and switches off when fully
charged.
• Light ashes once every two seconds when operating normally.
• When the SOS button is pressed, the battery indicator light will ash rapidly
to acknowledge button press and will then double ash every two seconds
while the request is being performed. It will then ash normally.
• Light double ashes every two seconds while performing a position request
or making a phone call. It will then ash normally.
• The light will ash three times every ve seconds when the battery is low
and requires charging.
3. GPS light (Blue)
• Light ashes blue every ve seconds when device has acquired a GPS
signal and has an up to date position.
All lights
• All lights ashing simultaneously at the same time is a warning that the
SIM card has failed to register with the device. The MySOS needs to be
restarted to rectify the problem.
• If the problem persists, the battery is low in power and needs recharging
immediately.
- 6 -
Page 7

Getting Started
It is essential that you complete the following ve step process in order to be able
to use your MySOS device.
1. Enter Your Account Details
Using your customer login details which were included in your welcome letter/
email, please access Skyguard’s Customer Service Centre (CSC) via the
Skyguard website – www.skyguard.co.uk Login via the ‘Customer Login’
button (found at the top right hand corner of the screen) and complete all
the necessary Account and User details. If the CSC is managed by your
organisation’s Administrator, please contact them regarding your user details on
the CSC.
Instructions should include emergency contact numbers for people who are to
be informed in the event of an emergency, and will be in a position to assist the
Skyguard controllers and the user.
Before entering these instructions, ensure that all contacts are aware and are
willing to be contacted 24 hours a day to help in an emergency. It is also useful
to include your own mobile phone number, as the Skyguard controllers may
need to contact you directly in an incident.
It is important that the information on the CSC is kept up to date at all times.
All personal information is fully protected and stored in such a way that Skyguard
controllers at the Incident Management Centre have no access, until the alarm is
activated.
2. Charging the MySOS
You must fully charge the battery before using the device for the rst time. Plug
the charger into the MySOS unit’s USB port and connect to a 240 volt wall
socket. Please do not use excess force when plugging the charger into the USB
port as this may damage the connection. The device will take between 3 - 5
hours to charge each time. The battery light (red) will switch off once the MySOS
is fully charged.
Please note, the device should only be charged with chargers supplied by Skyguard. It is
important that you keep your MySOS charged daily to ensure it is ready for use when you
need it.
- 7 -
Page 8
Switching the MySOS on and off
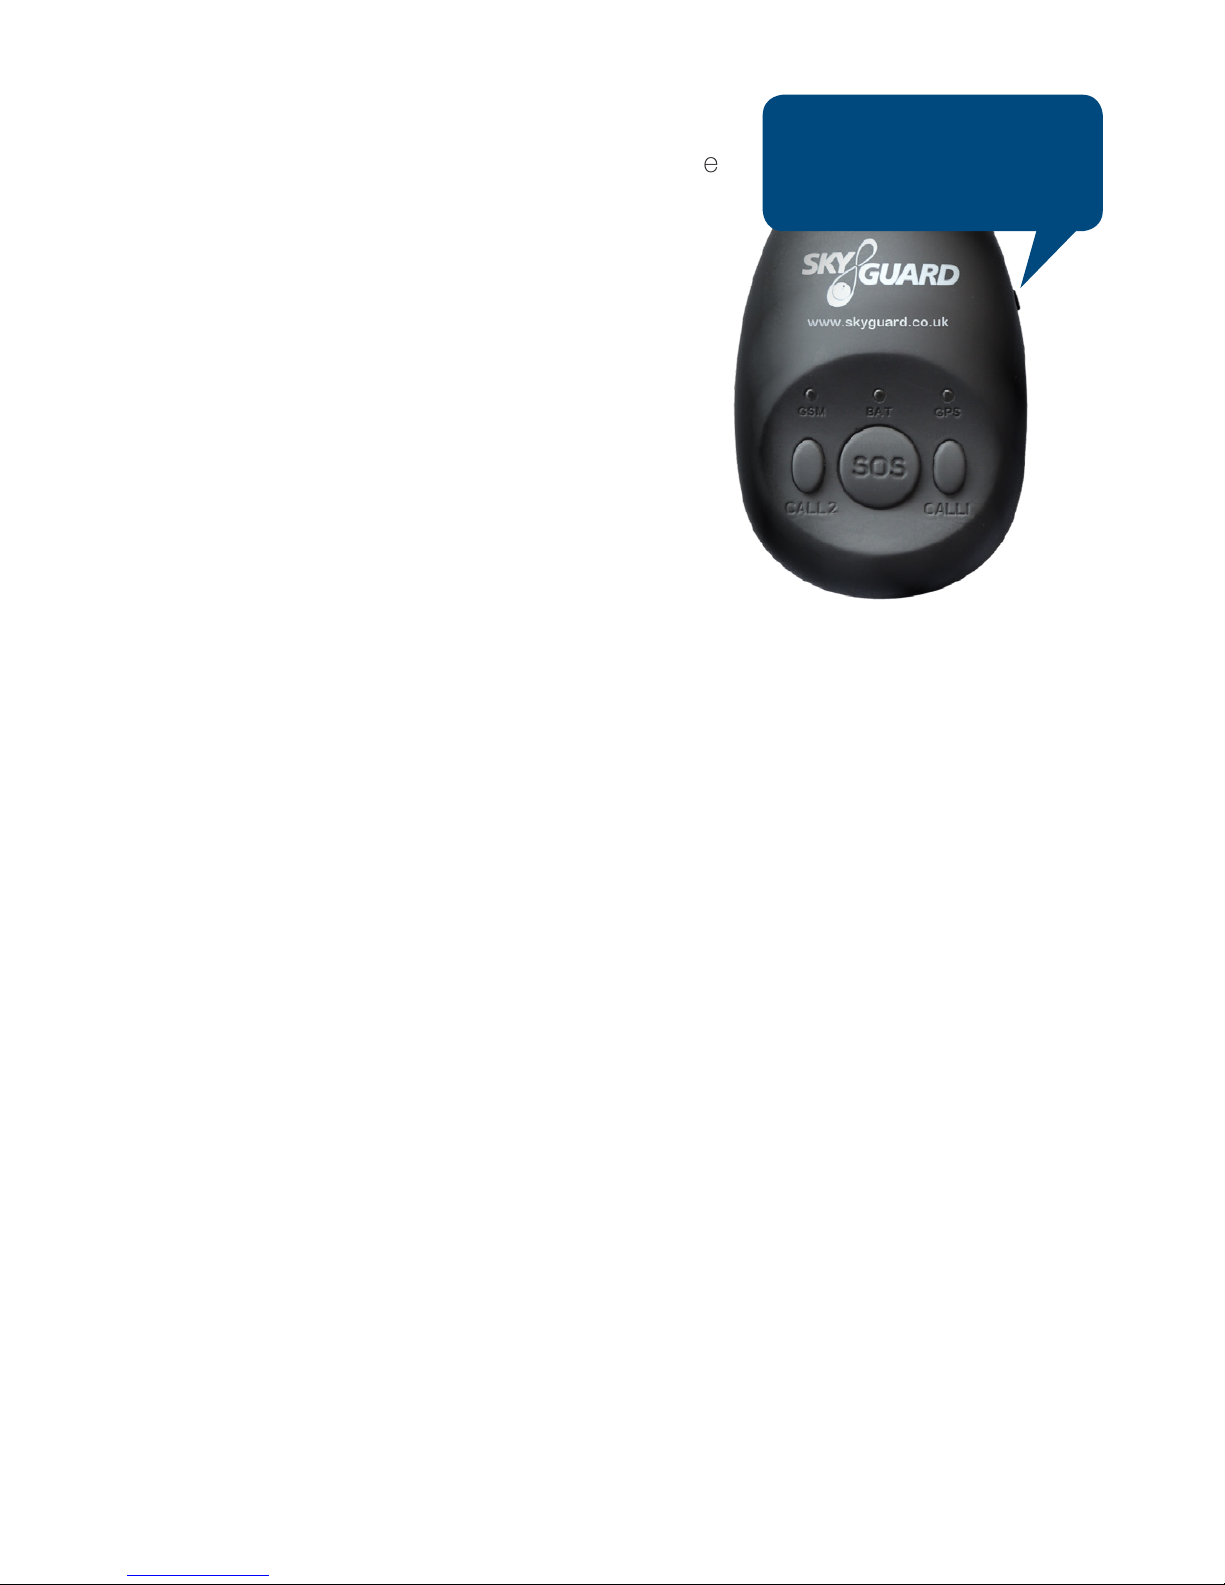
To switch the device on or off, press and hold the
side ‘On / Off’ button for four seconds. All three
lights will illuminate fully and then rapidly ash
when the device is turned on. The unit will also
vibrate.
When turning the MySOS off, the battery light
will illuminate fully along with the GSM and GPS
lights ashing, to conrm the device is switched
off. The unit will also vibrate.
3. Acquire GSM & GPS signals
Once your MySOS has been fully charged, it will
automatically search for GSM and GPS signals. To ensure it has acquired
these signals, unplug the device from the mains socket and if it is not already
switched on, turn it on by pressing the on/off button on the right hand side of
the unit for four seconds and release the button when all the lights start to ash
simultaneously.
Standing outside, hold the MySOS where it has a clear and unobstructed* view
of the sky. The device will scan for GPS satellites to obtain its current position,
which may take several minutes the rst time you activate the device.
The GSM light on the device will show a double ash every ve seconds if
GSM and GPRS signals are available, (indicating a strong network signal), and
a single ash every ve seconds if only a GSM signal is available (indicating a
weak network signal). The GSM light will not ash if it is not connected to a GSM
network, (indicating no network signal).
* Possible obstructions that may hinder the device from connecting to GPS
satellites include: at the bottom of a handbag, indoors, in tunnels and in narrow
alleys between tall buildings.
- 8 -
Press and hold the
small side button for 4
seconds to turn on / off
Page 9
4. Perform a Test Call
Performing an activation (test) call will conrm to us that you have everything
setup to use your device and that you know how to use its primary feature –
raising an SOS alarm to Skyguard’s IMC.
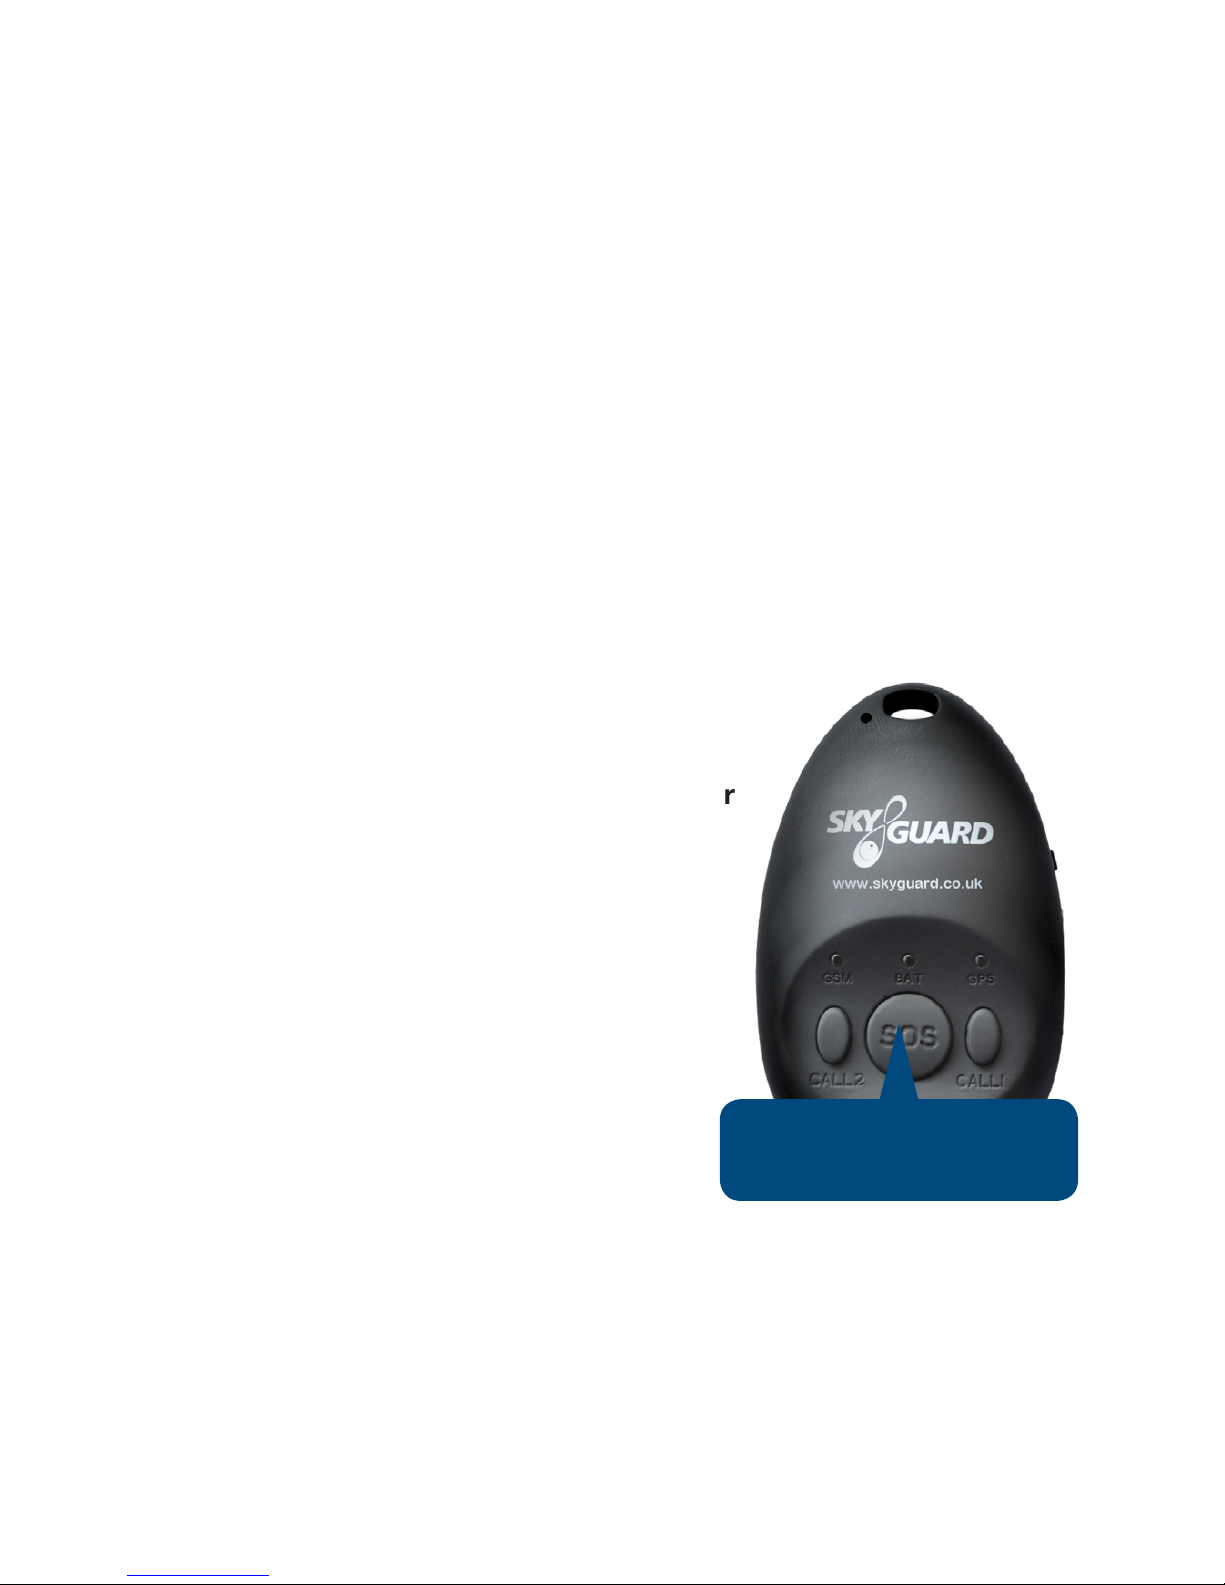
Press and hold the SOS button until the unit starts to vibrate. When the SOS
alarm is activated the unit will vibrate again and a beep will be heard; this signies
a Skyguard Controller is silently monitoring. Note: it can take up to one minute for
the device to connect.
After hearing the beep or when the unit vibrates, speak clearly and say
“Activation call”. The Controller will respond stating the device’s location and will
conrm the user information assigned to the device. Having conrmed it is not an
emergency alarm; the controller will end the call and your test is complete.
How to Use Your Device
Activating an SOS Alarm
Press and hold the large SOS button for four
seconds.
The battery light will start to ash and the unit will
vibrate to conrm the request.
An alarm containing the device’s location will be
sent to Skyguard’s IMC. The unit will vibrate again
and an audible beep will be heard conrming the
two-way voice connection has been made.
Note; this can take up to one minute.
The Skyguard Controller will be listening to the
call silently and only talk if they believe it is safe to do so.
If you activate the MySOS device by mistake, please inform the Skyguard
Controller as soon as the call is answered by saying “Activation call”. The
controller will ask questions based on your user details to conrm that it is not an
emergency and will then end the call.
- 9 -
Press SOS for 4 seconds
to trigger emergency call
Page 10
Making a Phone Call
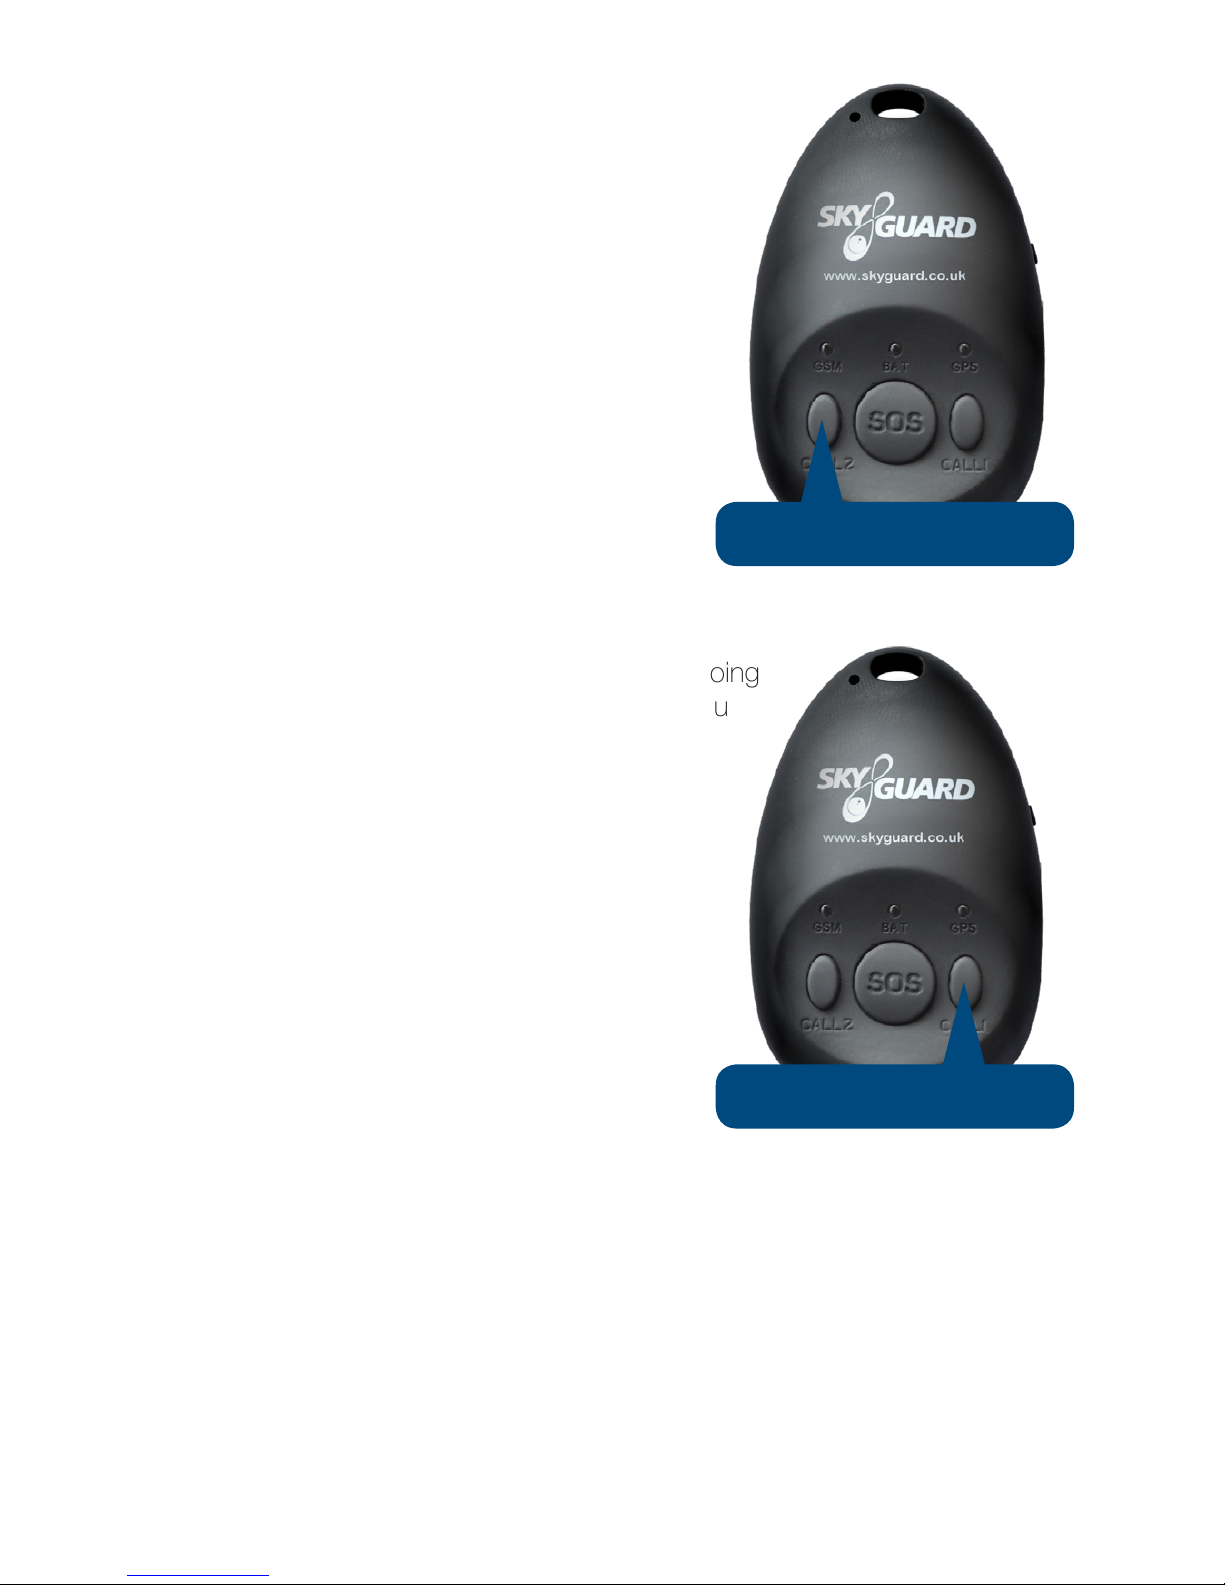
Speed dial “CALL 2” button will call the phone
number that you provided during registration, (or
Skyguard’s Customer Support Team, if you did
not provide a number).
To make a call, press and hold the “CALL 2”
button for three seconds. The GSM light will start
to ash to conrm the request. To end the call,
press the “SOS” button.
Leaving a Voice Memo
You may wish to leave a voice memo if you are going
into a building or underground, explaining who you
are meeting and where, as GPS is less likely to
work in these situations.
A voice memo can be left by pressing speed dial
“CALL 1” button for three seconds.
The GPS light will start to ash to conrm the
request. Speaking clearly, leave your voice
message when prompted. To end the call, press
the “SOS” button.
The voice memo will be available to the IMC in
the event of an emergency, providing vital
additional information to the controller.
- 10 -
Call 2 button
Call 1 button
Page 11
Sending a Position Report
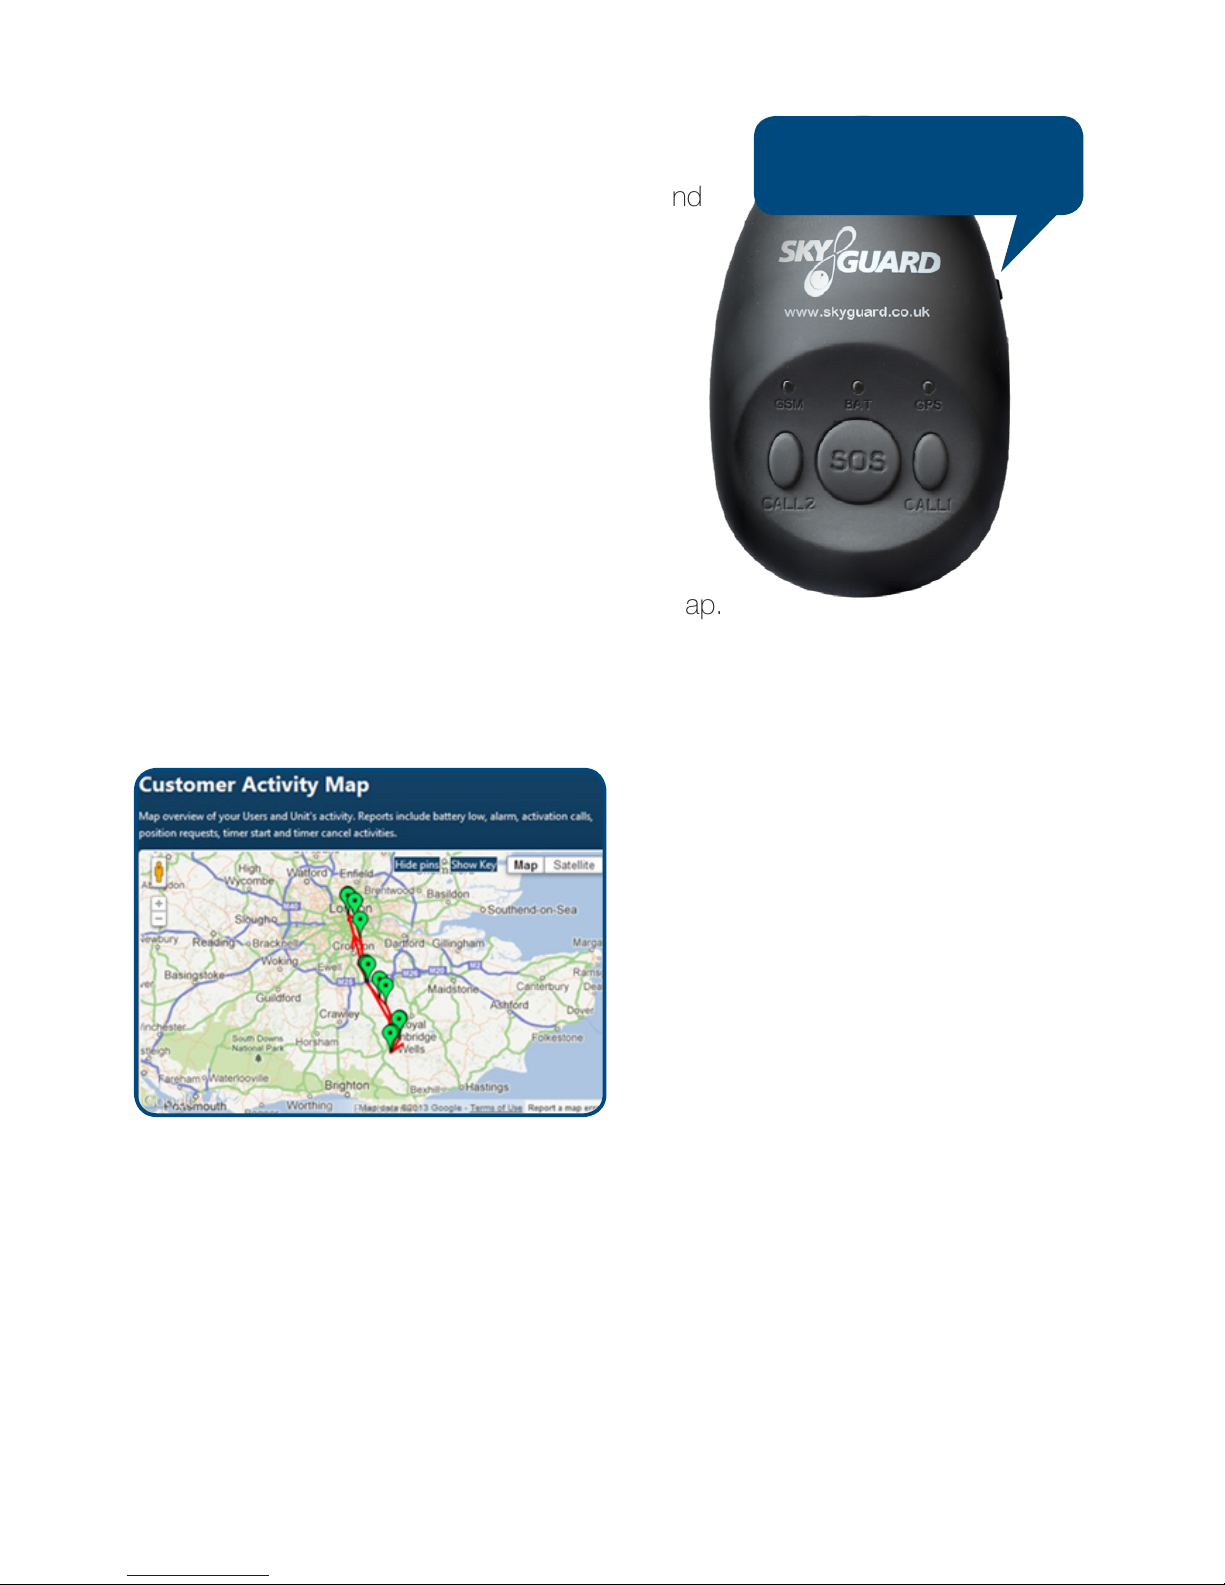
Press and hold the small side button for one
second until the GPS light starts to ash to send
details of the current location of the MySOS
device to the IMC.
This information is shown on a map relative
to where the position report was sent and
is stored against your account. It will be
accessible in the case of a future incident or
when a location report is requested.
You can also view this information by
logging on to the Customer Service Centre
where the position report will be shown on a map.
(see below).
Note, holding the side button for four seconds will switch the device off.
On Demand Position Request
The telephone number assigned to the “Call 2” button can request an ondemand position for the device. To request, simply send the following SMS
text message, “999999F” (upper case) to the phone number the MySOS is
registered with (you will nd the MySOS phone number in your welcome email).
The MySOS device’s position is then sent via an SMS text message containing a
web link to a map to the number it was requested from.
- 11 -
Small side button to
send location details.
Page 12

Mandown Alarm Feature (MySOS Mandown variant only)
The MySOS Mandown variant of the device contains a mandown sensor which
enables the device to automatically send an alarm to Skyguard IMC if it detects
a rapid movement followed by an impact. This feature can be useful in instances
when the user slips, trips, or falls, and therefore may not be able to raise an
alarm manually.
The mandown feature must be specied as enabled or disabled by the customer
when placing the order, prior to the device being despatch. The device can
be setup either with mandown permanently enabled, or manually switched on/
off when required from within Skyguard’s CSC portal. Please check with your
administrator or Skyguard Customer Support to establish if this feature has been
enabled on your device.
The mandown feature should be enabled only when the device is being worn
in a holster or ID badge holder accessory and securely attached to the user, in
order to prevent false alarms.
If you raise a mandown alarm to Skyguard’s IMC by mistake, please inform the
Controller as soon as the call is answered, by saying “Activation call, activation
call”. The Controller will ask questions based on your user details to conrm that
it is not an emergency and will then end the call.
- 12 -
Page 13

Things to Remember
• Fully complete the CSC online with all account and user details.
• Ensure the device is charged daily.
• Do not use excess force when plugging the charger into the USB port.
• Ensure the device acquires a GPS signal every time it is powered on.
• Ensure the device is carried with the user at all times.
• When using the MySOS Mandown variant, ensure the device is worn in the
holster, or afxed securely using the ID badge holder accessory
If you have any queries about the use of your MySOS device, please
contact Customer Support. Our contact details can be found on
page 2.
- 13 -
Page 14

Notes
- 14 -
Page 15

Page 16
Skyguard Ltd
Skyguard House, 457 Kingston Road, Epsom, Surrey KT19 0DB
Telephone: 0844 257 0314 Email: [email protected]
www.skyguard.co.uk
Skyguard Ltd is part of the Send For Help Group
Europe’s Premier
Personal Safety Service
 Loading...