

Page 1
HAVIR
Instruction of Bluetooth Anti-lost alarm
BLE
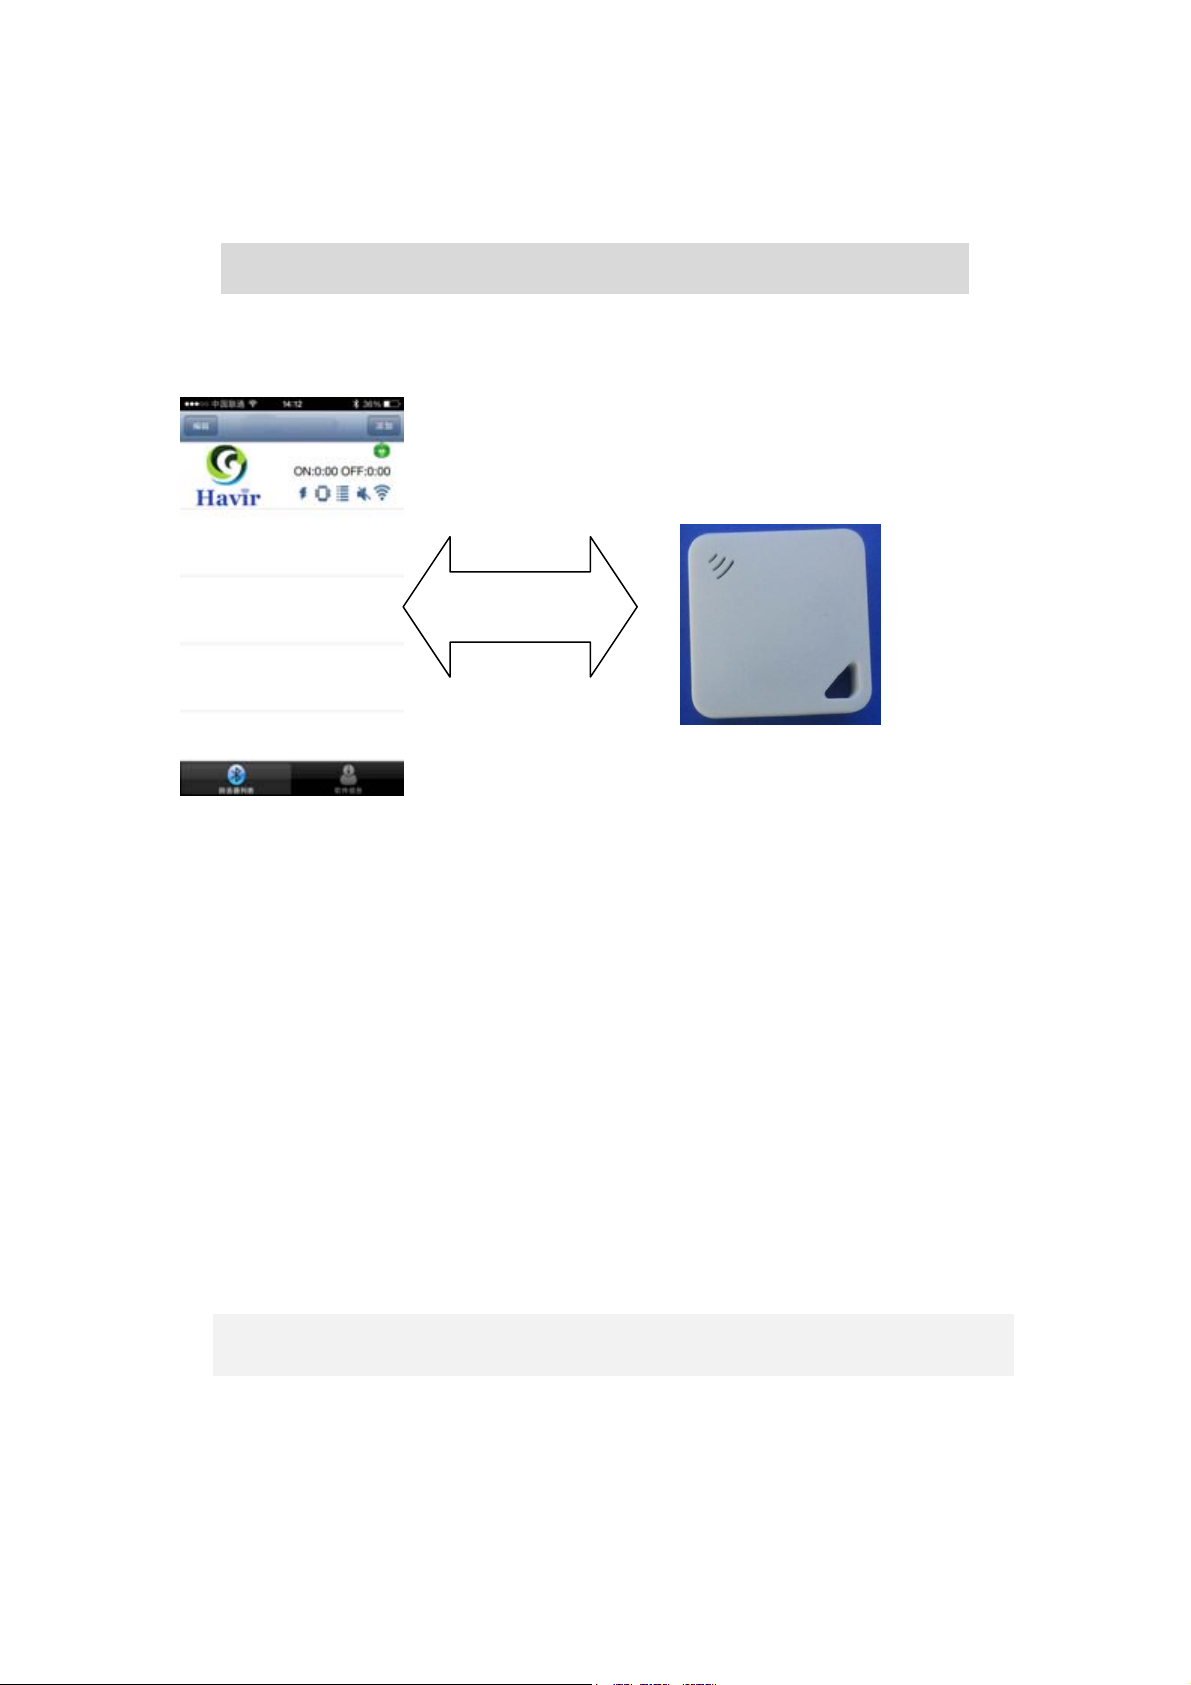
(Click the product icon “Havir” of the application software to search the anti-lost alarm
and press the middle round button of the anti-lost alarm to find the phone)
Remark: When u get the bluetooth anti lost device for the first time, please charging for
half an hour before using.
What do you do when you are walking with your kids but lost her/him accidentally?
What do you do when you get off the bus but find the handbag left on bus?
What do you do when you lose your valuables?
What do you do when you find you lose your phone just now?
Owning the iPhone bidirectional anti-lost bluetooth alarm, you will not be easy to lose
anything.
The anti-lost alarm is light and small, also high quality, functional and easy use.
For iPhone, there is no need to hang anything, just install our software and
bidirectional anti-lost function works.
1
Page 2

According to your request, you would choose 0-30M as safe distance to search and
anti lost.
Multi-voices alarm model (with vibration), the anti- lost alarm is good stuff for you
when go outside with your kids, pet and luggage.
1. Direction:
First time to use it, please download the software at APP Store.
The Bluetooth anti-lost device is used to be communicated with the Bluetooth 4.0 and App.
Before using the App, you need to switch on your Bluetooth. If it is first time to use Havir, u
should type the keywords “Havir” at APP store, then download the HAVIR Bluetooth
anti-lost software for free and keep pressing the anti-lost key for 3 seconds to switch on at
the same time. Then click addition and the phone will search the anti-lost device by itself.
Like Pic.2, Then click connection.
2. Add new devices
First, click the button “addition” at Pic.1 and then go into the Pic.2, please click the
device found in Pic.2. Then go into Pic.3 and it will connect the device automatically. Last,
click the button “finished”, so another anti-lost alarm connects your phone. If you have
added another anti-lost successfully, your phone will vibrate and voice reminds.
2
Page 3

3. Main interface icon
Pic.1 Pic.2 Pic.3
Direction
1. Keep pressing for 3 seconds ( the red light and blue light flash at the same time and the buzzer
keep alarming for a long while) then the Anti-lost alarm into switch on mode.
After switching on, the blue light will be flash in every 3 seconds, that means it is working..
To turn it off, also keep pressing 3 seconds ( the red light and blue light flash at the same time and
the buzzer keep alarming for a short while)
The anti-lost alarm can not be turned off if it is connected with cell phone.
2. After connecting, the red light will be flash in every 10 seconds
After connecting, press once on the button means it searches phone. Press again on the button
means stop search the phone
3. If you keep pressing 3 seconds means you would setup the anti-lost safe distance and on/off
anti-lost function.
4. It will alarm if goes beyond the set distance. Press the alarm key to stop alarm.
5. The red light is on while it is charging and off for finished charging.
3
Page 4
Pic.4
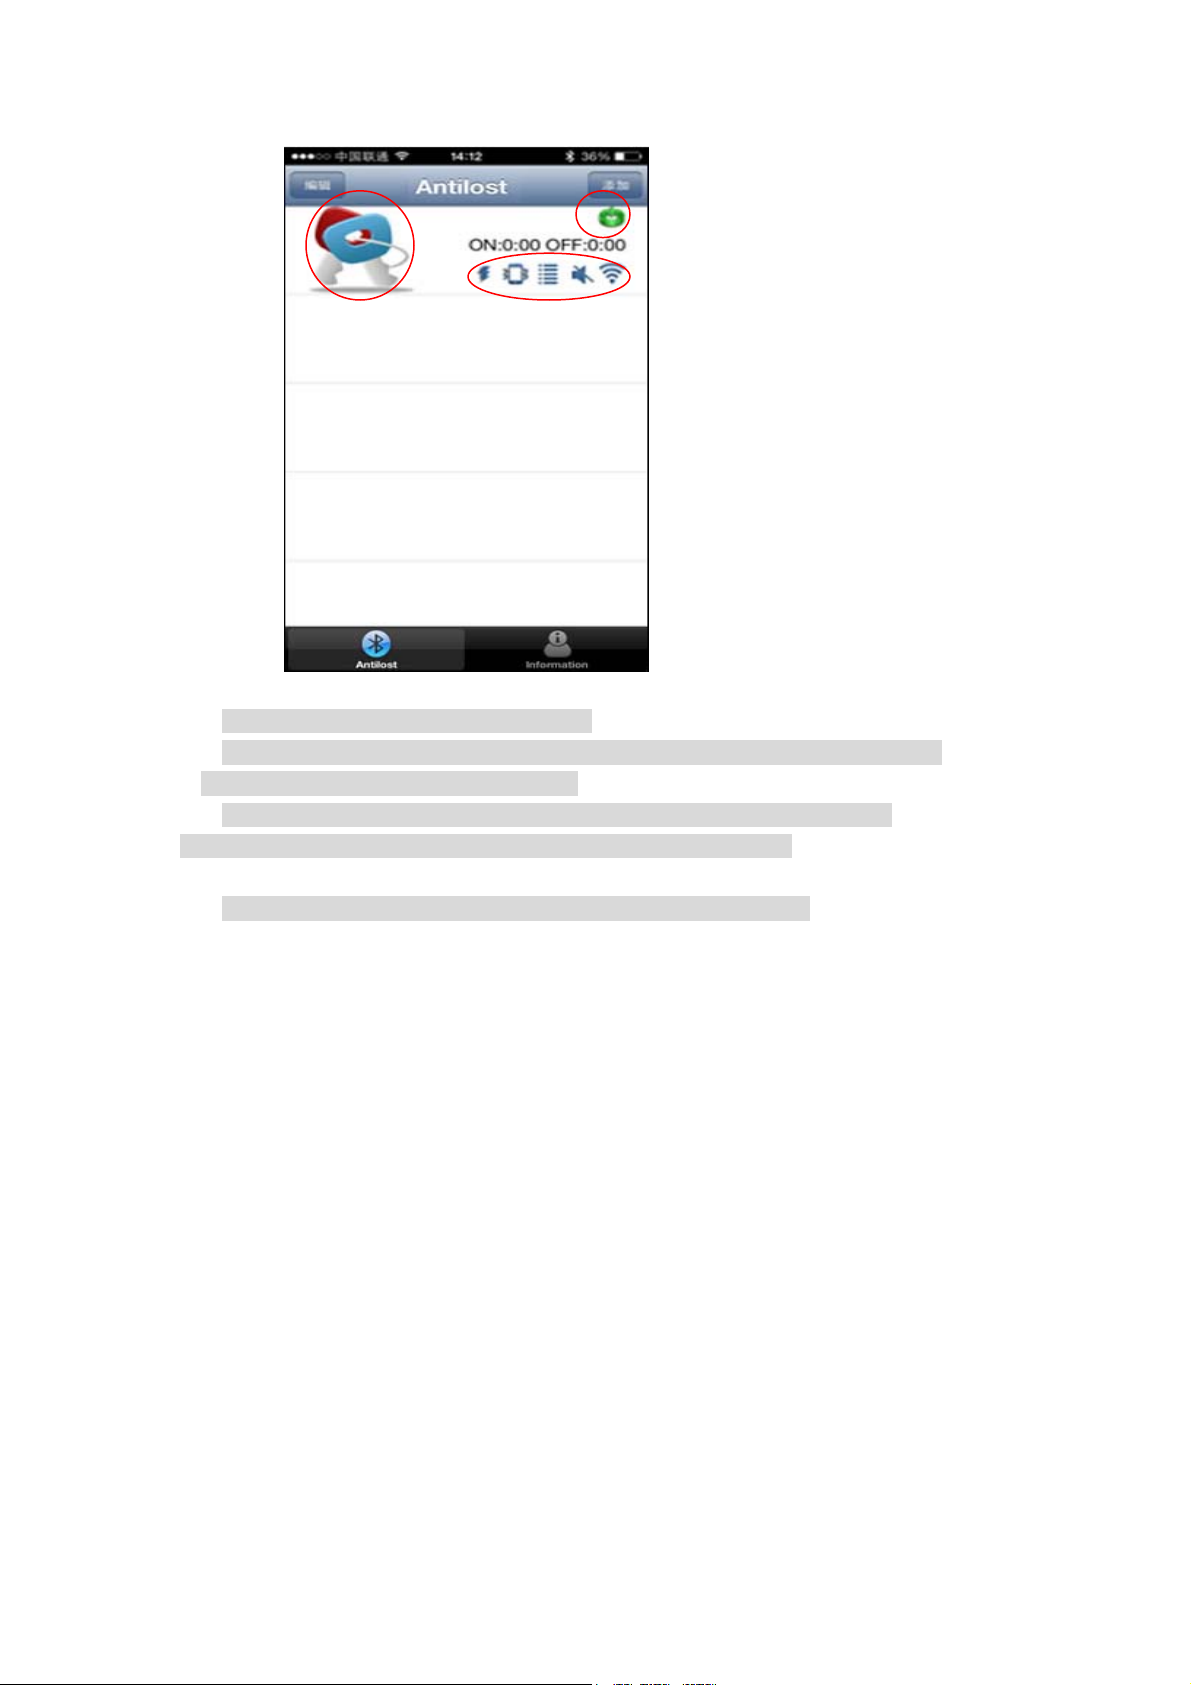
It is not connected with phone, see picture 4.
If not connected successfully, the 5 functions in Pic.3 will be grey and not workable.
Otherwise, they will be blue for workable.
On the top left corner, there is a green power pattern which is to set the distance
Icon explains ( from left to right, the icon is blue means function works.)
Instruction of the icon (from left to right, if the icon is blue, this function is working.)
Product icon: Click the icon, the phone will search the anti-lost
Flash icon: Flash light option..
Vibration icon: Vibration option,
Information icon: Words remind option
Silence icon: No sound option
Signal icon: Indicate the RSSI signal between anti-lost and phone.
Power switch icon: with this icon, means the anti-lost function is on and without this icon,
means function is off
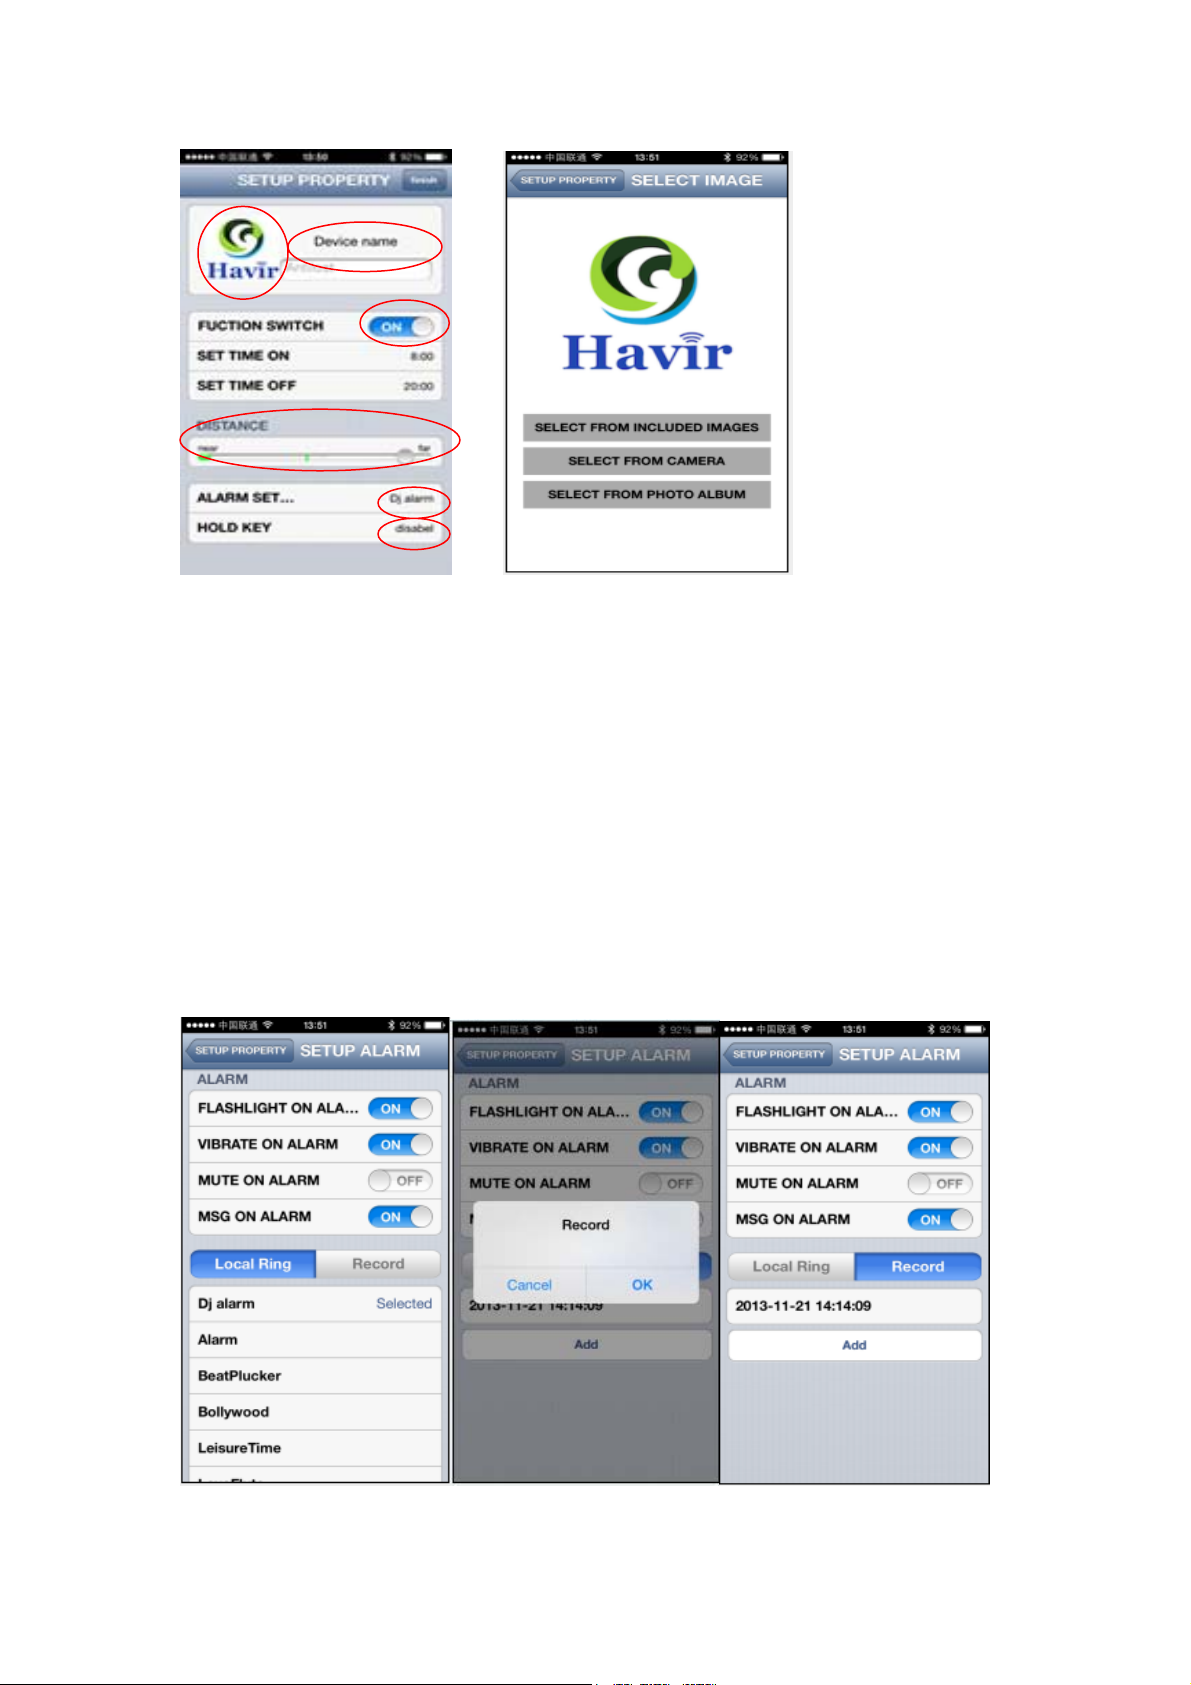
3. Click the device name to go into the attribute setup
4
Page 5
Pic.3 Pic.5
Press the top left icon and go into Pic.5, click the anti-lost image ( 3 ways to get the image: find
picture from picture warehouse, taking picture and choose picture from current)
Input the anti-lost name in the top right input field.
Click the button “the anti-lost function switch”, then you would setup the function at fixed
time. Setup the time you want to open or close and it will work at the fixed time next.
Beyond safe distance setup, you would slide to choose the warning distance. From left to
right is 1M to 30M
Click the reminder button and go into the Pic.8. You could choose flash light, vibration,
silence and words reminding functions.
Records alarm function: click the record button and recording works. You could choose your
records as alarm.
5
Page 6
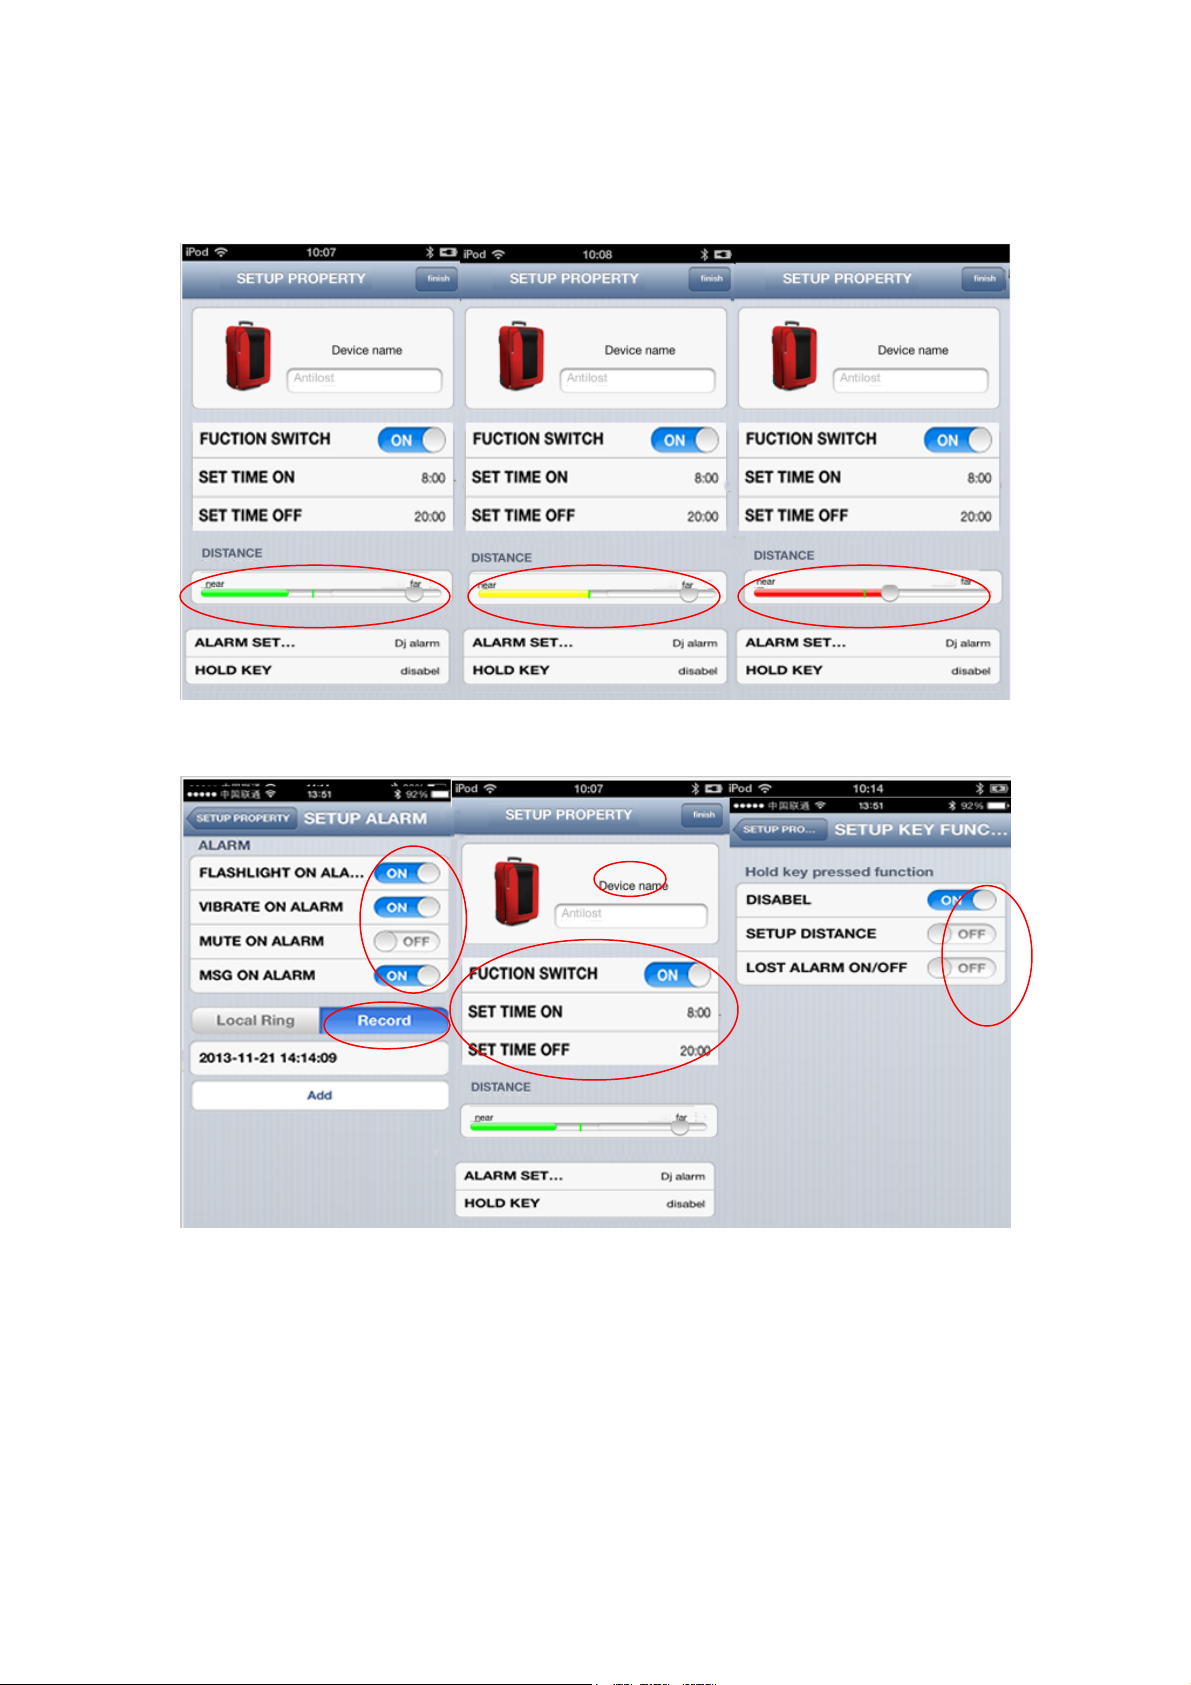
Click the 3S key and go into the Pic.10. You could setup on/off alarm when beyond the safe
distance
Pic.3 Pic.6 Pic.7
Pic.8 Pic.9 Pic.10
4. Function description
Bidirectional search function: After connecting, click the anti-lost machine icon, the
anti-lost machine will let you know where it is via LED flash and voice alarm. Also, the
signal on phone will remind you, short distance, strong signal; otherwise, week signal.
Bidirectional anti-lost function: after connecting, both your phone and the anti-lost
machine will alarm when not in safe distance. The anti-lost machine will keep alarm and
6
Page 7

flash LED light until in safe distance 1M;You also could press the anti-lost button to stop
the warning remind.
5.
SPECIFICATION
Model: HV-100
Voltage: DC 5V
Function Key: Switch/sourcing
LED Indicator light: 2pcs
Dimension: D41*T11mm
6.
Package
HAVIR Bluetooth Anti-lost alarm
Instructions
Kind reminder
1:
When the anti-lost machine disconnects the cell phone for 10 mins, the bluetooth will be
shut down by itself; when you need phone connects the anti-lost machine in short distance,
just need to re-open the software.
2:
When delete the connected anti-lost machine on phone, the anti-lost machine will be shut
down right away to save the power.
3:
When the anti-lost machine is connecting with your phone, it can’t be shut down to avoid
not tracking down.
7、
Language change
Support Chinese and English 2 languages. You could setup at your phone setting.
8、
Software information
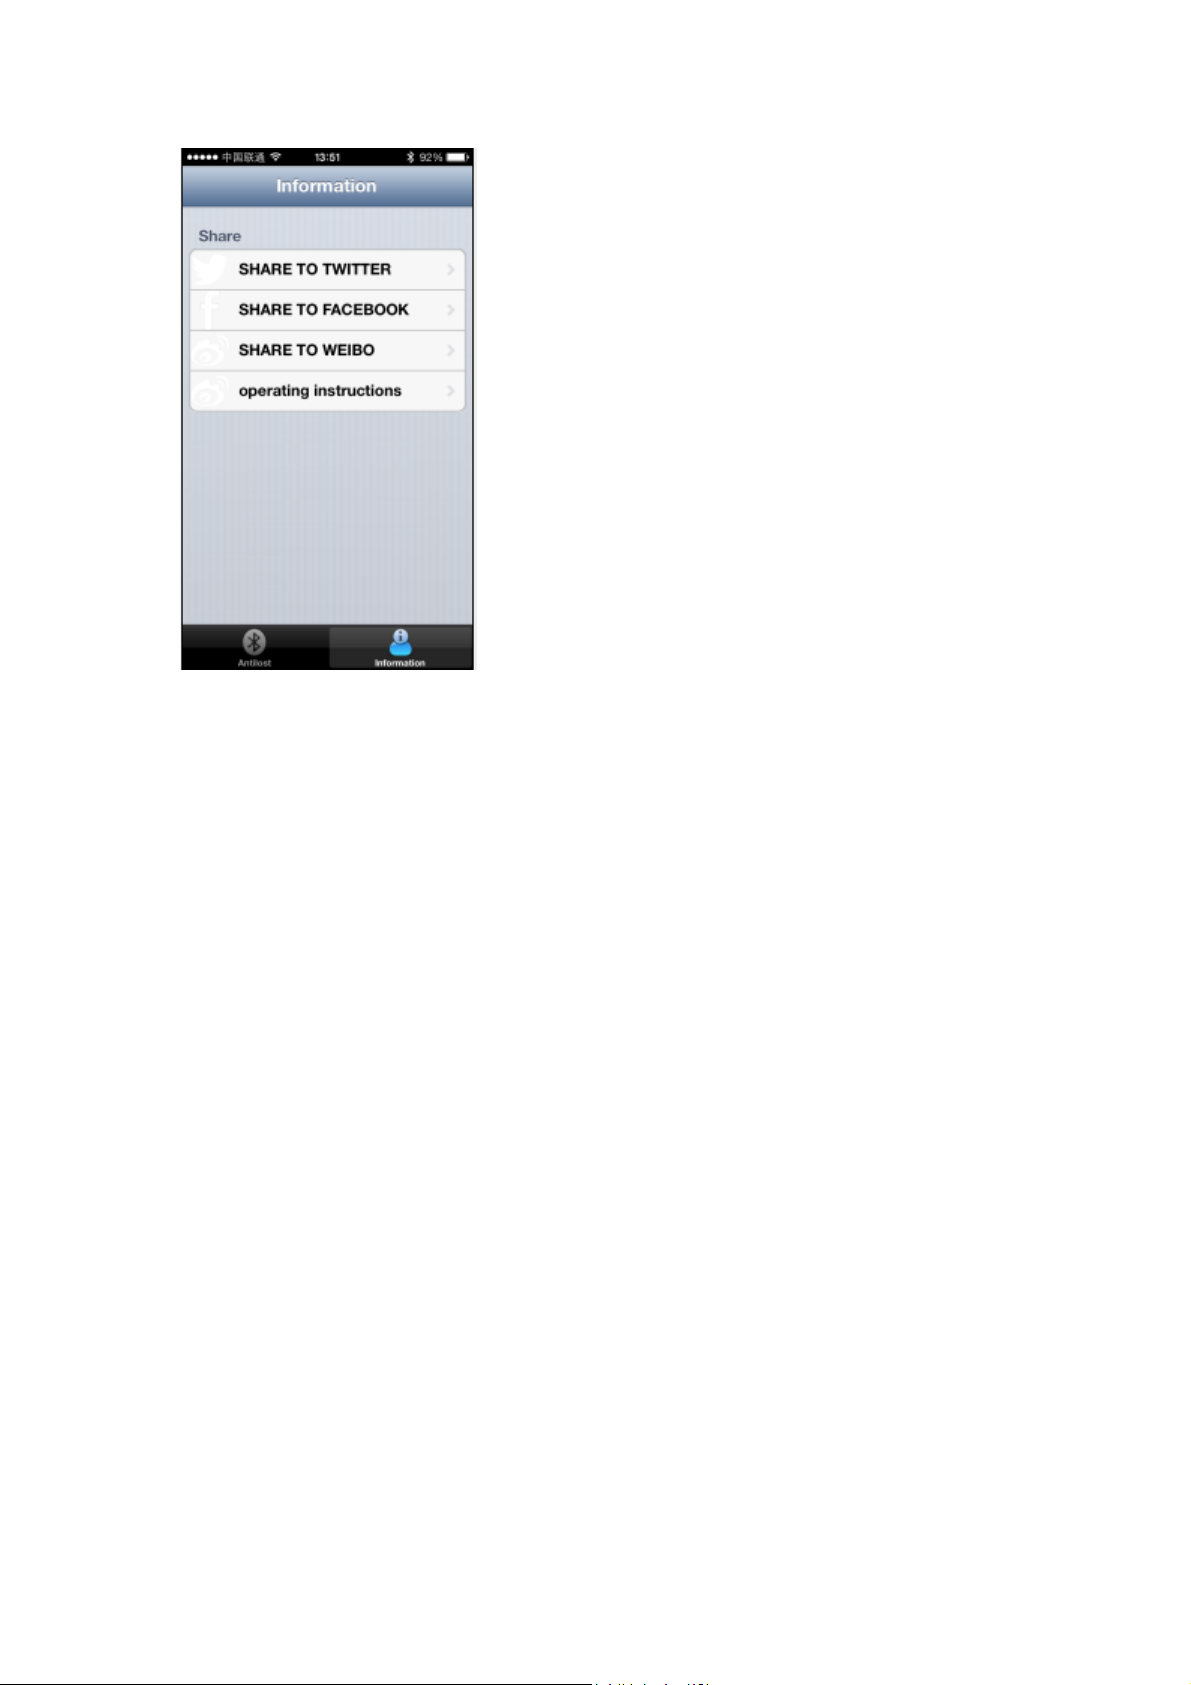
Click the software information icon and go into the page. Here, you could post new
information to Twintter, Facebook and Sina blog. Also you would review the operation
direction to know detail.
7
Page 8
This equipment has been tested and found to comply with the limits for a Class B digital device,
pursuant to Part 15 of the FCC Rules. These limits are designed to provide reasonable protection
against harmful interference in a residential installation. This equipment generates uses and can
radiate radio frequency energy and, if not installed and used in accordance with the instructions,
may cause harmful interference to radio communications. However, there is no guarantee that
interference will not occur in a particular installation. If this equipment does cause harmful
interference to radio or television reception, which can be determined by turning the equipment off
and on, the user is encouraged to try to correct the interference by one or more of the following
measures:
-- Reorient or relocate the receiving antenna.
-- Increase the separation between the equipment and receiver.
-- Connect the equipment into an outlet on a circuit different from that to which the receiver is
connected.
-- Consult the dealer or an experienced radio/TV technician for help.
This device complies with part 15 of the FCC Rules. Operation is subject to the following two
conditions: (1) This device may not cause harmful interference, and (2) this device must accept
any interference received, including interference that may cause undesired operation.
Changes or modifications not expressly approved by the party responsible for compliance could
void the user's authority to operate the equipment.
The device has been evaluated to meet general RF exposure requirement. The device can be used
in portable exposure condition without restriction.
8
 Loading...