

Page 1

Quick Start Guide
Skybox 5500 Appliance
Revision: 11
Page 2

© Copyright 2002-2013 Skybox® Security, Inc. All rights reserved.
This documentation contains proprietary information belonging to Skybox Security and is provided
under a license agreement containing restrictions on use and disclosure. It is also protected by
international copyright law.
Due to continued product development, the information contained in this document may change
without notice. The information and intellectual property contained herein are confidential and remain
the exclusive intellectual property of Skybox Security. If you find any problems in the documentation,
please report them to us in writing. Skybox Security does not warrant that this document is error-free.
No part of this publication may be reproduced, stored in a retrieval system, or transmitted in any form
or by any means – electronic, mechanical, photocopying, recording, or otherwise – with out the prior
written permission of Skybox Security.
Skybox
®
, Skybox View®, Skybox® Security, Skybox Firewall Assurance, Skybox Network Assurance,
Skybox Risk Control, Skybox Threat Manager, Skybox Change Manager, Skybox
5000/5000W/5500/6000 Appliance, are trademarks and registered trademarks of Skybox Security, Inc.
Check Point™, SiteManager-1™, FireWall-1
®
, Provider-1™, SmartDashboard™, VPN-1®, and
OPSEC™ are trademarks or registered trademarks of Check Point Software Technologies Ltd. or its
affiliates.
All other trademark and registered trademark products mentioned in this document are the property of
their respective owners.
Skybox Security, Inc.
Telephone (in the U.S.): 866-6-SKYBOX (866-675-9269)
Telephone (outside the U.S.): 1-408-441-8060
Fax: 1-408-441-8068
Website: http://www.skyboxsecurity.com
E-mail: [email protected]
Page 3

Skybox 5500 Appliance version 3
Overview ............................................................................................................................................. 5
Basic architecture .................................................................................................................................. 5
Related documentation .......................................................................................................................... 5
Skybox 5500 specifications ................................................................................................................ 6
What’s in the box .................................................................................................................................. 6
Physical specifications .......................................................................................................................... 6
Environmental specifications ................................................................................................................ 7
MTBF estimates for Skybox 5500 Appliance ....................................................................................... 8
Front panel ............................................................................................................................................ 8
Back panel connectors ......................................................................................................................... 10
Port mapping ................................................................................................................................ 10
Setting up Skybox 5500.................................................................................................................... 11
Installation ........................................................................................................................................... 11
Starting Skybox 5500 ................................................................................................................... 11
System configuration .......................................................................................................................... 11
Configuring connection................................................................................................................ 11
Setting up Skybox 5500 for configuration ................................................................................... 12
First-time configuration parameters ............................................................................................. 13
What’s next ......................................................................................................................................... 13
Configuration and management options........................................................................................ 14
Installing the Skybox View Manager ............................................................................................. 16
Manager system requirements ............................................................................................................. 16
Installing the Manager ......................................................................................................................... 16
Upgrading the Manager ....................................................................................................................... 17
Upgrading the Web Administration ............................................................................................... 18
Rolling back changes to the Web Administration ............................................................................... 18
Restore............................................................................................................................................... 19
Installing additional software packages ......................................................................................... 20
Troubleshooting ............................................................................................................................... 21
Regulatory and safety information ................................................................................................. 22
Product regulatory compliance............................................................................................................ 22
Safety compliance ........................................................................................................................ 22
Contents
Page 4

Skybox 5500 Appliance Quick Start Guide
Skybox 5500 Appliance version 4
EMC compliance – Clas s A com pliance ...................................................................................... 22
Environmental requirements ........................................................................................................ 23
Product regulatory compliance markings ............................................................................................ 23
Electromagnetic compatibility notices for the server board ................................................................ 26
Index ............................................................................................................................................... 29
Page 5

Skybox 5500 Appliance 5
Chapter 1
The Skybox 5500™ Appliance is a hardware solution that allows you to deploy Skybox View easily,
without the burden of maintaining your own server.
Skybox View
®
is an Automated Risk and Compliance Management (ARCM) platform that helps
enterprise IT departments to discover and resolve potential security and compliance risks before they
impact your organization.
Skybox View is a multi-tier platform. Skybox 5500 runs the Server and users run Managers (clients)
that connect to the Server over the network. Skybox 5500 also runs an additional Skybox View
component, the Collector, which connects to data sources and imports the data to the Server.
The Skybox View Server and Collector are preinstalled on Skybox 5500 and run automatically at
startup.
In this chapter
Basic architecture ...................................................................................................... 5
Related documentation .............................................................................................. 5
Basic architecture
The Skybox 5500 platform consists of a three-tiered architecture with a centralized server (Skybox
View Server), data collectors (Skybox View Collectors), and a user interface (Skybox View Manager).
Skybox 5500 can be scaled easily to suit the complexity and size of any infrastructure.
For additional information, see Skybox View architecture, in the Skybox View Installation and
Administration Guide.
Related documentat ion
Related documentation includes:
• Skybox 5500 Quick Start Guide
• Skybox View online help
• Skybox View documentation, available in the following locations:
On the installation DVD, in the
Docs folder
On each Manager machine, in the
<Skybox_View_Home>/docs folder
Overview
Page 6

Skybox 5500 Appliance 6
Chapter 2
This chapter contains product specifications and packaging information.
In this chapter
What’s in the box ....................................................................................................... 6
Physical specifications .............................................................................................. 6
Environmental specifications .................................................................................... 7
MTBF estimates for Skybox 5500 Appliance ........................................................... 8
Front panel ................................................................................................................. 8
Back panel connectors ............................................................................................. 10
What’s in the box
The following items are included in the shipping carton:
• Skybox 5500 Appliance
• Rack mount kit
• Front bezel
• AC power cord
• RJ45 to DB9 serial console cable
• Skybox 5500 Quick Start Guide
• 2 DVDs
Skybox View: Used to install Skybox View on the Skybox 5500 Appliance; it contains the
Skybox View software and additional documentation
Restore Appliance: Used to restore the Skybox 5500 Appliance to factory settings
Physical specifications
The physical features of Skybox 5500 are listed in the following table.
Feature Description
Form factor 1U rack
Rack dimensions
(H x W x D)
1.70" x 17.24" x 27.93" (43.2mm x 438 mm x 709.37 mm)
Weight
• System weight: 35.8 lb (16.24 kg)
•
Packaged weight: 42.4 lb (19.23 kg)
Power suppl y 450W 1+1 redundant AC +12V DC and +5V standby
Data storage RAID 1
Skybox 5500 specifications
Page 7

Chapter 2 Skybox 5500 specifications
Skybox 5500 Appliance 7
Feature Description
System cooling
• Two dual rotor managed 40mm x 56mm system fans
• One 40mm x 40mm system fan
•
Two power supply fans
Front panel features
• 1 power button with integrated LED
• 1 system ID button with integrated LED
• 1 system status LED
• 4 NIC LEDs
• 1 HDD activity LED
• 1 system cold reset button
• 2 USB 2.0 connectors
•
Bezel with lock support
External I/O
connectors
(back panel)
• DB-15 video connector
• DB-9 serial port A connector
• 2 USB 2.0 Ports
• 2 USB 3.0 Ports
• Six RJ-45 network interface (LAN) connectors supporting
10/100/1000 Mb
Compliant standards Ctick, NRTL, CE, FCC, EMC, BSMI, KC, and more
Note: For detailed information, see Regulatory and safety
information (on page 22).
Environmental specifications
Environmental specifications for Skybox 5500 are listed in the following table.
Parameter Limits
Operating
temperature
+10° C to +35° C with the maximum rate of change not to exceed
10° C per hour
Non-operating
temperature
-40° C to +70° C
Non-operating
humidity
50% to 90%, non-condensing with a maximum wet bulb of 28° C
Acoustic noise Sound pressure: 55 dBA (rack mount) in an idle state at typical
office ambient temperature. (23 C +/- 2 C)
Sound power: 7.0 dBA in an idle state at typical office ambient
temperature. (23 +/- 2 degrees C)
Shock, operating Half sine, 2 g peak, 11 msec
Shock, unpackaged Trapezoidal, 25 g, velocity change is based on packaged weight
Shock, packaged
Non-palletized free fall height 18 inches (
≧
40 lbs to > 80 lbs)
Vibration Unpackaged: 5 Hz to 500 Hz, 2.20 g RMS random
Packaged: 5 Hz to 500 Hz, 1.09 g RMS random
ESD Air discharge: 12.0 kV
Page 8
Skybox 5500 Appliance Quick Start Guide
Skybox 5500 Appliance 8
Parameter Limits
Contact discharge: 8.0 kV
System cooling
requirement in
BTU/Hr
849.3 BTU/hour
EMI operating EMI testing of this product is conducted at an open field site
according to the current BKM methodology. Conducted and
radiated emissions shall comply with FCC and CISPR 22 limits for
Class A products. Test reports are made available through EPG
Product Regulations
MTBF estimates for Skybox 5500 Appliance
The estimated mean time between failures (MTBF) and Failure in Time (FIT) rates for Skybox 5500
Appliance are listed in the following table.
Subassembly MTBF (hours) FIT (failures/10^9 hours)
Intel® Server Board S1200V3RPM 371,523 2,692
Backplane board 935,180 1,069
Power supply 450W MiniERPS 967,300 1,034
Cooling fan (1-fixed fans) 490,000 2,041
Cooling fans (2-fixed fans) 77,680 12,873
Front Panel board 8,272,282 121
Total without motherboard 58,300 17,138
Total with motherboard 50,400 19,830
Note: The estimates listed here are for Skybox 5500 Appliance in 40oC ambient air.
Front panel
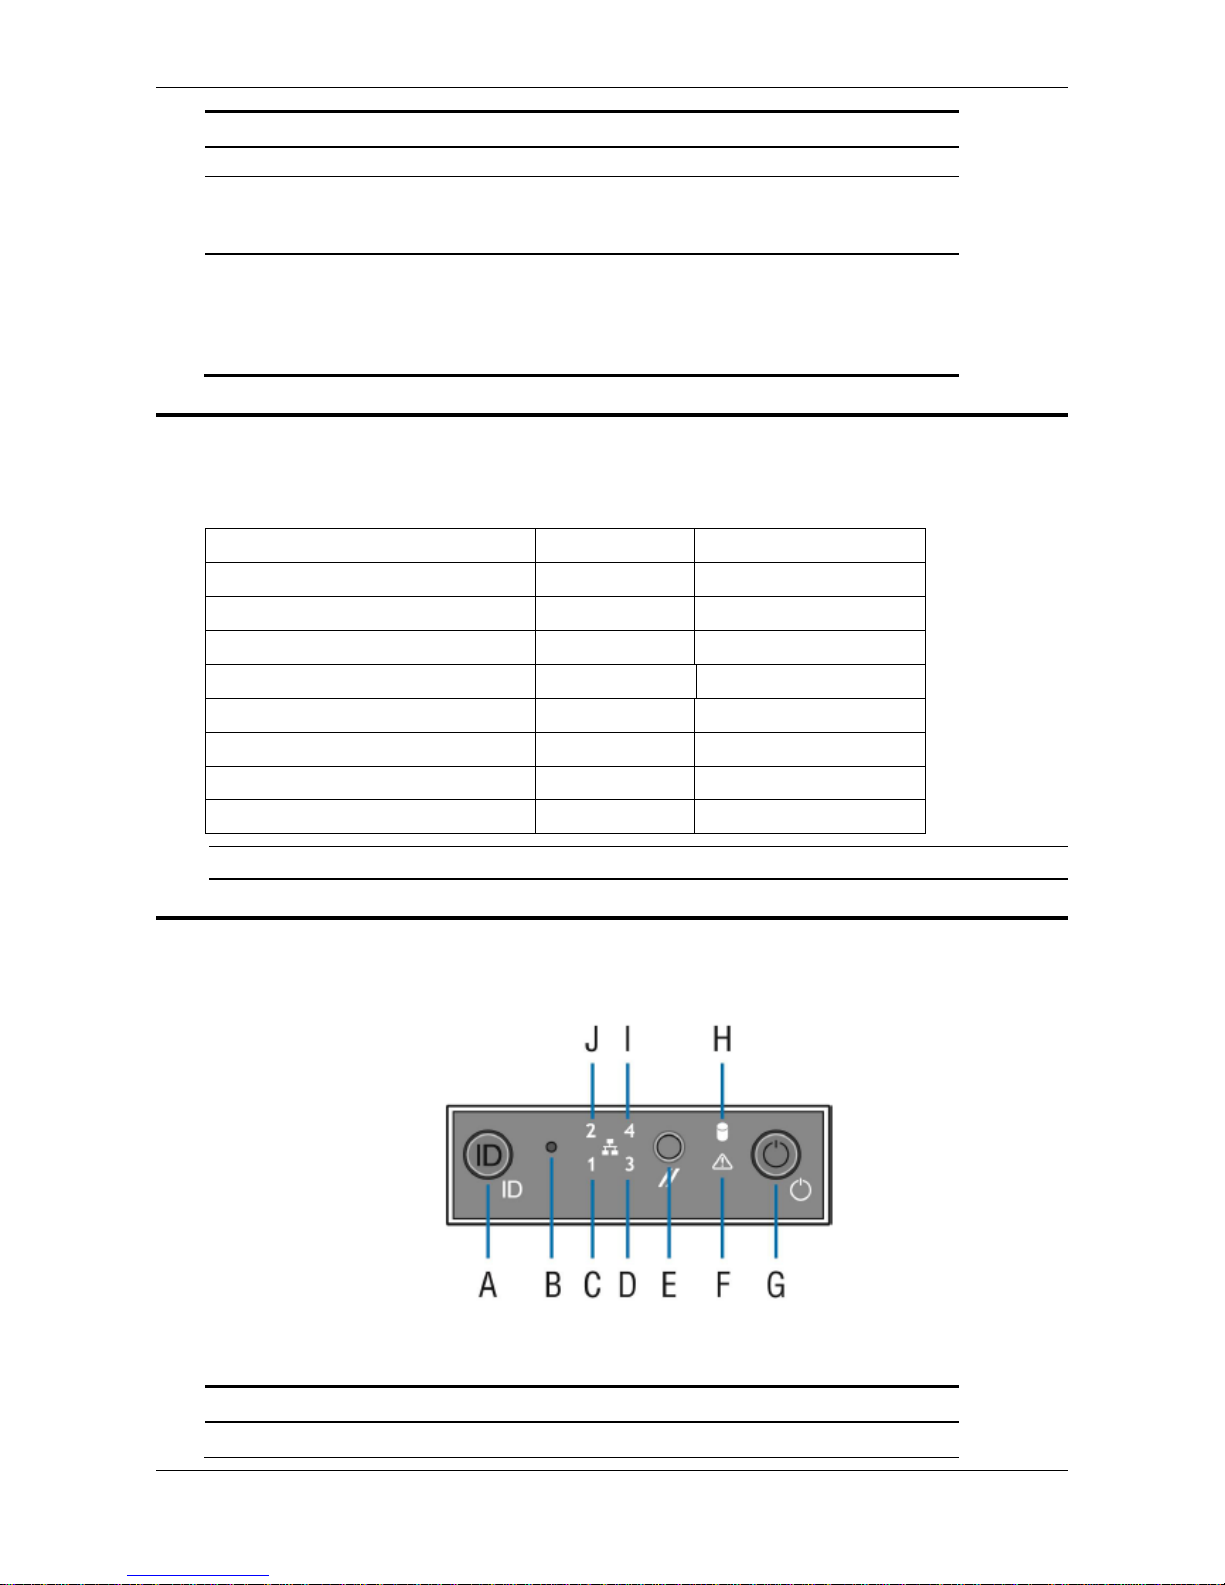
Skybox 5500’s front panel includes a power switch, a USB connector, and several LEDs.
Figure 1: Front Panel 5500 Appliance
Front panel features
Letter Feature
A System ID button with integrated LED
Page 9

Chapter 2 Skybox 5500 specifications
Skybox 5500 Appliance 9
Letter Feature
B NMI button (recessed; tool required for use)
C NIC-1 activity LED
D NIC-3 activity LED
E System cold reset button
F System status LED
G Power button with integrated LED
H Hard drive activit y LED
I NIC-4 activity LED
J NIC-2 activity LED
Front panel LED functions
LED Color/state Description
Power/Sleep
Green/on Power on
Green/blinking Sleep
Off Power off
NIC LEDs
Green/on Network link but no network activity
Green/blinking Network activity
Off No link
System Status
Green/on System ready/no alarm
Green/blinking System ready, but degraded: redundancy
lost such as a power supply or fan failure;
non-critical temp/voltage threshold; battery
failure; or predictive power supply failure.
Amber/on Critical Alarm: Critical power modules
failure, critical fans failure, voltage (power
supply), critical temperature and voltage
Amber/blinking Non-Critical Alarm: Redundant fan failure,
redundant power module failure, non-critical
temperature and voltage
Off Power off: System unplugged
Power on: System powered off and in
standby, no prior
degraded\non-critical\critical state
Page 10
Skybox 5500 Appliance Quick Start Guide
Skybox 5500 Appliance 10
Back panel connect ors
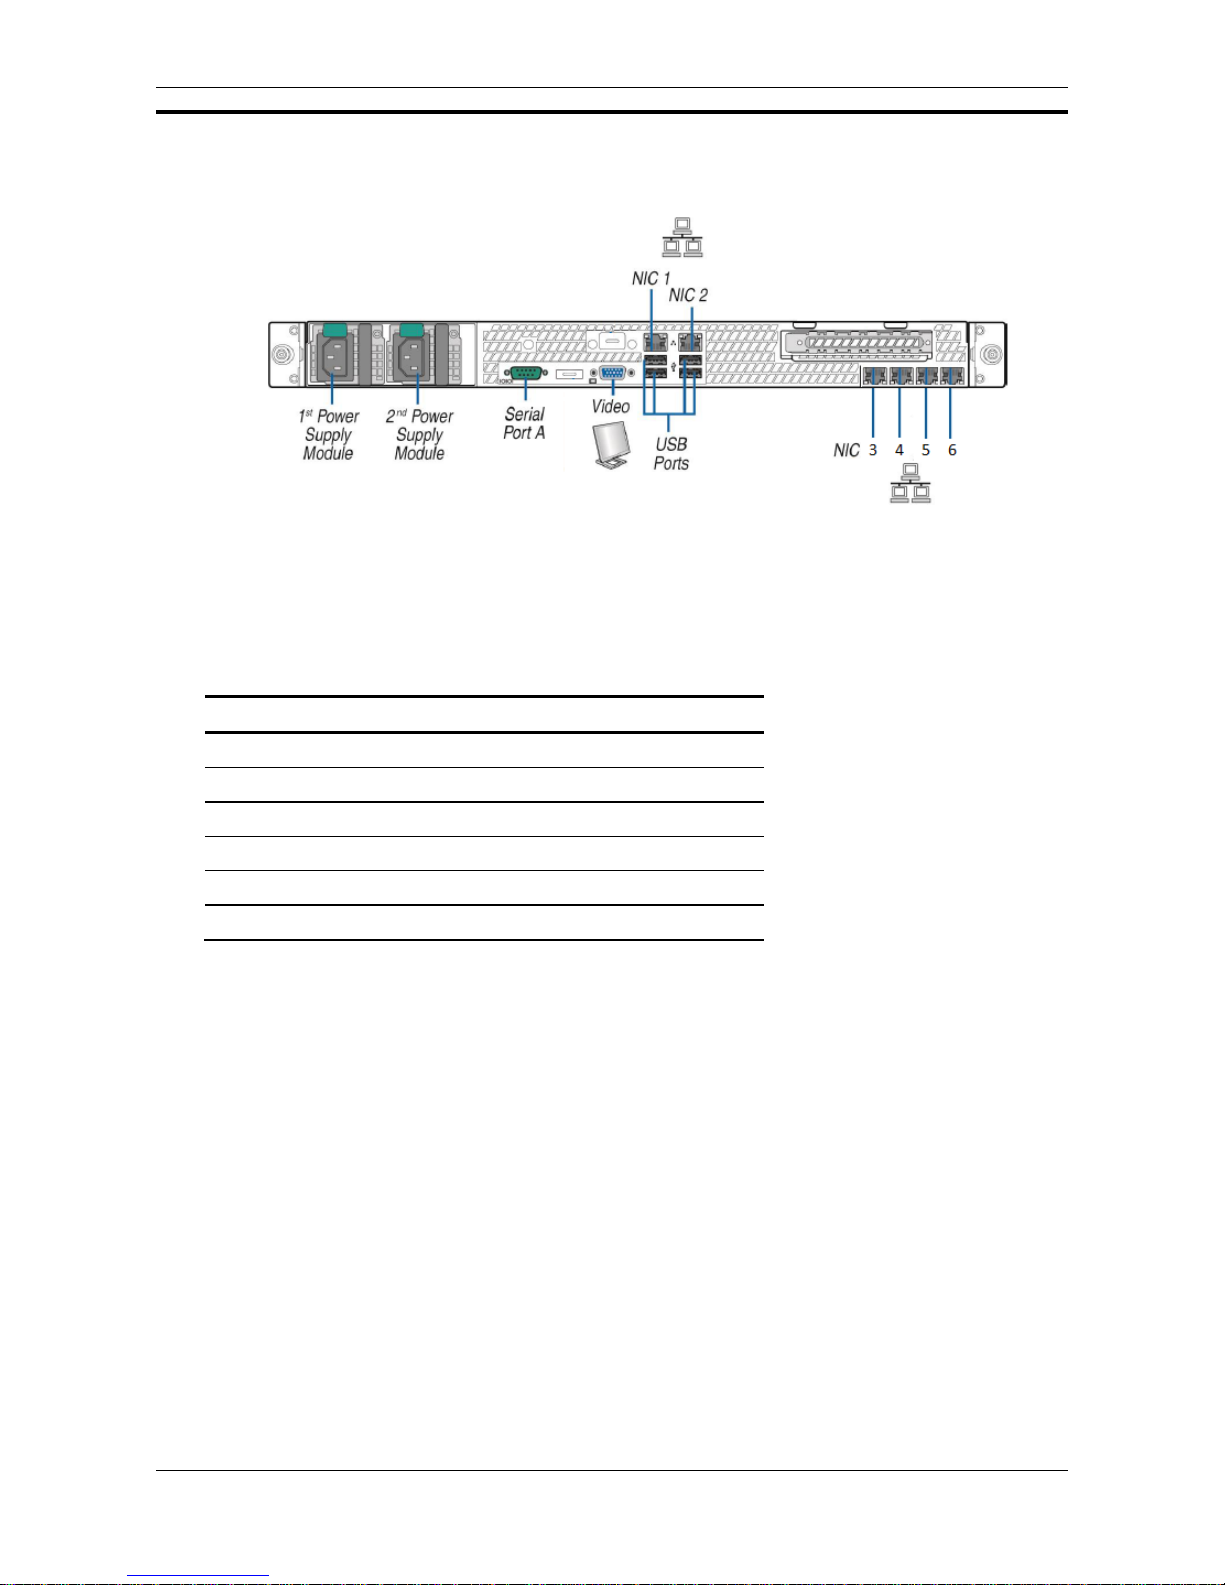
Skybox 5500’s back panel includes the following connectors:
Figure 2: Back panel connectors 5500
Port mapping
The mapping between physical ports on the back panel of Skybox 5500 Appliance and logical ports
are listed in the following table.
Back panel connector Logical port to which it is mapped
NIC1 eth4
NIC2 eth5
NIC3 eth0
NIC4 eth1
NIC5 eth2
NIC6 eth3
Page 11

Skybox 5500 Appliance 11
Chapter 3
This chapter explains how to set up Skybox 5500.
In this chapter
Installation ............................................................................................................... 11
System configuration ............................................................................................... 11
What’s next .............................................................................................................. 13
Installation
This section explains how to install the Skybox 5500 Appliance.
Starting Skybox 5500
To start Skybox 5500
1 Connect the AC power cords to the AC connectors on Skybox 5500’s back panel and connect the
other ends to a power supply.
Note: Skybox 5500 can be used with either 110 or 220 volt power.
2 On Skybox 5500’s front panel, press the power button.
3 Lock the front bezel in place using the key provided.
System configuration
Before running the Skybox View Server, configure the Skybox 5500 Appliance to be part of your
network and perform some initial system configuration.
Configuring connection
Before using the Skybox 5500 Web Administration, you must configure connection of Skybox 5500 to
your network. This configuration is done locally, using either:
• Mouse, keyboard and screen
• Serial port connection
Note: For a diagram of the connectors used in the following procedures, see Back panel connectors
(on page 10).
Setting up Skybox 5500
Page 12

Skybox 5500 Appliance Quick Start Guide
Skybox 5500 Appliance 12
To configure connection using a mouse, keyboard, and screen
1 Connect one end of a standard network cable to the NIC 3 port on the Appliance’s back panel;
connect the other end of the cable to a network socket.
2 Connect a mouse, keyboard, and screen to the appropriate connectors on the Appliance’s back
panel.
3 Log in to the Appliance using the default login (root) and the default password (skyboxview).
4 Run the command
nw_config (used to configure NICs and DNS).
5 Configure the IP address of Skybox 5500 either manually or via DHCP.
Note: The default setting of eth0 is DHCP; the default setting of eth1 is 192.168.1.1
6 If you are using DHCP, run ifconfig and write down the IP address assigned to the Appliance.
To configure connection using a serial port connection
1 Connect one end of the serial cable to a serial port (such as COM1) on the management computer;
connect the other end to the serial port on the back panel of the Appliance.
2 On the management computer, start a terminal emulation program (such as PuTTY), select the
COM port, and configure the following port settings:
Bits per second: 9600
Data bits: 8
Parity: none
Stop bits: 1
Flow control: none
(When using PuTTY as your terminal emulator) Character set translation on received data:
UTF-8
3 Press the Power button on the Appliance’s front panel and verify that the Power LED turns green.
4 Log in to the Appliance using the default login (root) and the default password (skyboxview).
5 Run the command
nw_config (used to configure NICs and DNS).
6 Configure the IP address of Skybox 5500 either manually or via DHCP.
Note: The default setting of eth0 is DHCP; the default setting of eth1 is 192.168.1.1
7 If you are using DHCP, run ifconfig and write down the IP address assigned to the Appliance.
Setting up Skybox 5500 for configuration
To prepare for configuring the system remotely
1 Connect one end of a standard network cable to the NIC 3 port on the Appliance’s back panel;
connect the other end of the cable to a network socket.
2 From a different machine on the network, open a Web browser to connect to the Skybox 5500
Web Administration using the following URL, where <appliance_IP> is the IP address of Skybox
5500 that you configured in Configuring connection (on page 11):
https://<appliance_IP>:444
3 The default login is skyboxview; the default password is skyboxview.
The main page of the Skybox 5500 Web Administration appears.
Page 13

Chapter 3 Setting up Skybox 5500
Skybox 5500 Appliance 13
First-time configuration parameters
It is recommended that you configure the date and time and change the passwords before using the
Server. All other parameters are optional and can be configured later.
To configure the date and time of Skybox 5500
1 From the System tab, select Date and Time Configuration.
2 For manual date and time configuration, do the following:
a) Select Manual Date and Time Configuration.
b) Click Change Date and Time; set the date and time for Skybox 5500’s time zone.
c) Click Change Time Zone; set the time zone for the location where Skybox 5500 is installed, so
that reports and other data are timestamped accurately.
3 For automatic configuration, do the following:
a) Select Automatic Date and Time Configuration Using NTP Server.
b) Click Change NTP Server; add the IP address or DNS of the time server to use, such as
0.asia.pool.ntp.org.
c) Click Change Time Zone; set the time zone for the location where Skybox 5500 is installed, so
that reports and other data are timestamped accurately.
To change the passwords
1 From the Security tab, select Appliance Passwords.
2 To change the root password of the machine, click Change Root Password.
3 To change the password of the Web Administration, click Change SkyboxView Password.
What’s next
The Skybox View Manager is the client application that is used to communicate with the Server. After
installation and configuration of Skybox 5500, you must install the Manager on at least one remote
machine. For additional information, see Installing the Skybox View Manager (on page 16).
Page 14

Skybox 5500 Appliance 14
Chapter 4
Skybox 5500’s configuration options are described in the following tables.
About tab
Pane Description
System Information Provides information about Skybox 5500 configuration.
Network tab
Note that changes to the configuration information made in this tab are only saved after you click Save
Network Configuration.
Pane Description
Network
Configuration
Summary
Displays a summary of the Skybox 5500 configuration
information.
Click Export Network Information to File to save this information to
an HTML file.
Note: If the Web Administration is running on Windows Internet
Explorer, you might experience problems when trying to export
network information to file. In this case, it is recommended that
you open the Web Administration in a different browser.
Network Interfaces
Configuration
Enables you to configure network parameters (connection
method, IP address, mask, and gateway) for each network
interface connection.
Note: This pane includes a link to a drawing of the back pane to
help you understand the connections.
DNS Configuration Enables you to edit the DNS configuration of Skybox 5500.
System tab
Pane Description
Date and Time
Configuration
Enables you to view and change the exact date and time in
Skybox 5500’s time zone.
Notes:
• When setting this information manually, set the date and
time and then the time zone for the location where Skybox
5500 is installed, so that reports and other data are
timestamped accurately.
• Automatic configuration synchronizes Skybox 5500 with an
atomic clock. You must provide the IP address or DNS of the
NTP server to use, such as 0.asia.pool.ntp.org (click Change
NTP Server). Set the time zone after setting the NTP server.
Syslog Server Starts/stops the syslog server and opens/closes the syslog port.
Host Name Enables you to change the host name of the Appliance.
Change System
Mode
Toggles between Server mode (where the Appliance functions
as both Server and Collector) and Collector mode (where the
Configuration and management options
Page 15

Chapter 4 Configuration and management options
Skybox 5500 Appliance 15
Appliance functions only as a Collector).
Security tab
Pane Description
Appliance
Passwords
Enables you to change the root password for the Appliance and
the password for the Web Administration.
SSH Toggles the SSH service on and off.
Control tab
Pane Description
SkyboxView
Services
Toggles the Server and Collector on and off.
Note: Turning a Skybox service off stops the service and
switches it to Manual mode. Turning the service on restarts the
service and switches it back to Automatic mode.
Appliance
Operations
Enables you to reboot or shut down Skybox 5500. After
shutdown, a manual reboot is required to power on the
Appliance.
Support tab
Pane Description
Logs Enables you to view Server, Collector, and other logs of Skybox
5500 .
Launch Log Analyzer: Launches the log analyzer, an advanced
tool that analyzes the logs for debugging purposes.
Get Packlogs: Runs the packlogs utility and saves the packlogs
(ZIP) file to a local directory so that you can send the file easily
to support.
Note: If the Web Administration is running on Windows Internet
Explorer, you might experience problems (due to the IE security
settings) when trying to save packlogs. In this case, it is
recommended that you open the Web Administration in a
different browser.
SkyboxView
Manager
Enables you to download the Manager for installation.
Upgrade Web
Administration
Enables you to upgrade the version of the Web Administration.
See Upgrading the Web Administration (on page 18).
Page 16

Skybox 5500 Appliance version 16
Chapter 5
You can install the Manager from the DVD included with Skybox 5500 or you can download it from
the Skybox 5500 machine over HTTP using the machine’s IP address
(
https://<ip_address>:444/manager). For additional information, see Installing the Manager
(on page 16).
The Manager runs on Windows.
In this chapter
Manager system requirements ................................................................................. 16
Installing the Manager ............................................................................................. 16
Upgrading the Manager ........................................................................................... 17
Manager system requirements
The Skybox View Manager is a Java client application that connects to the Skybox View Server.
If necessary, you can install multiple Managers on a single computer. This is useful when connecting
to Servers of different versions.
It is recommended that you allow communication through ports 8443 and 9443 only.
The operating systems supported for the Manager are listed in the following table.
Operating system
Windows XP Professional (SP2 or higher)
Windows Vista
Windows 7
Windows 2003 Server
Windows 2008 Server (64bit only)
The hardware requirements for the Manager are listed in the following table.
Item Minimum Recommended
CPU Pentium 4 2.0 GHz Pentium 4 2.0 GHz
RAM 512 MB 2 GB
Available disk space 512 MB 2 GB
Installing the Manager
Installing the Skybox View Manager on Windows requires administrator privileges.
Installing the Skybox View Manager
Page 17

Chapter 5 Installing the Skybox View Manager
Skybox 5500 Appliance version 17
To install the Manager on Windows
1 Run the installation file (SkyboxViewInstaller-<version#>-<build#>.exe).
2 Follow the directions in the wizard.
The options that must be selected in specific screens are listed in the following table. In all other
places, either use the default option or make the necessary change.
Screen Action
Choose Install Set
Select Manager (GUI).
Choose Install
Folder
Specify the installation folder .
Note: For Windows Vista and Windows 7, installation under the
<Drive>:\Program Files
folder is not supported.
Preferences
In the Server Host field:
• If the Manager and Server are on the same machine or if you
do not know the Server’s IP address, do not change the
default value (localhost).
•
Otherwise, type the IP address of the Server machine.
Upgrading the Manager
In some cases, the Manager installation file on the Skybox 5500 Appliance is outdated. In this case,
you can use the new Manager installation file that you downloaded (or received from Skybox
Security’s product support team) to replace the old installation file. This way, when Skybox View
users install the Manager via the Appliance, they will be installing the latest version.
To upgrade the Manager installation file
1 Copy the installation fi le (SkyboxViewInstaller-<version#>-<build#>.exe) to the
Skybox 5500 Appliance using PuTTY, WinSCP, or any other client program.
The file should be saved at:
/opt/skyboxwebadmin/web/manager/.
2 Delete any other files in this directory, including the previous installation file that was there. The
directory must contain only the new installation file.
Page 18

Skybox 5500 Appliance 18
Chapter 6
You will be notified by email when Skybox Security publishes an upgrade to the Web Administration,
and the email will explain how to obtain the upgrade file. After saving the file, use the following
instructions to perform the upgrade.
To upgrade the Web Administration
1 In the Support tab, click Upgrade Web Administration.
2 Click Browse and navigate to the location where the update file (*.tar.gz) is stored.
3 Click Upgrade.
4 The update begins automatically. In the process, you are logged out of the Web Administration.
When the update is finished, you can log in again.
In this chapter
Rolling back changes to the Web Administration ................................................... 18
Rolling back changes to the Web Administration
When you upgrade the Web Administration, a backup copy is saved. You can use this backup to revert
to the previous version if there are any problems with the upgrade.
This procedure should be done via SSH after logging in as the root user.
To restore the previous version of the Web Administration, run the following commands:
1 service sysconf stop
2 service httpd stop
3
cd /opt/
4 mv skyboxwebadmin skyboxwebadmin_<date> (renames the current web administration
directory)
5
cp skyboxwebadmin_backup_<timestamp>/ skyboxwebadmin (copies the backup directory
to the skyboxwebadmin directory)
6
service sysconf start
7
service httpd start
Upgrading the Web Administration
Page 19

Skybox 5500 Appliance 19
Chapter 7
The Restore Appliance DVD that comes in the Skybox 5500 package is used to restore Skybox 5500 to
factory defaults.
Warning: Restoring Skybox 5500 erases all data on the Appliance.
To restore
1 Insert the DVD in the DVD-ROM drive.
2 Reboot the Appliance.
3 As soon as you see the Skybox Installation Menu window, press any key.
Note: If you do not press a key within several seconds, the Appliance boots from the local
drive.
4 In the menu, select the second option (Skybox Appliance Installation).
Note: The restore process takes approximately 25 minutes.
5 When the installation finishes, proceed from System configuration (see page 11).
Restore
Page 20

Skybox 5500 Appliance 20
Chapter 8
Skybox 5500 Appliance was created to be as light and secure as possible. On occasion, it may be
necessary to install additional software packages (RPMs). These RPMs can be installed via the
Internet or using a local repository. The following instructions explain how to do this.
Some of the most common packages include:
• gcc
• diff
• dos2unix
The most frequently needed packages are combined into a package group named Basic Appliance
Development Tools.
• To list the available package groups, run the following command.
yum --disablerepo=\* --enablerepo=skyboxview-appliance grouplist
• To display details about a package group, run the following command. The package group name
must be set off by quotation marks.
yum --disablerepo=\* --enablerepo=skyboxview-appliance groupinfo <package
group name>
For example:
yum --disablerepo=\* --enablerepo=skyboxview-appliance groupinfo "Basic
Appliance Development Tools"
• To install one of the package groups, run the following command. The package group name must
be set off by quotation marks.
yum --disablerepo=\* --enablerepo=skyboxview-appliance groupinstall
<package group name>
Installing additional software packages
Page 21
Skybox 5500 Appliance 21
Chapter 9
If you need to know the version of Skybox 5500 (otherwise known as the image version) and the
version of the Web Administration at a time when the Web Administration is not available, you can
find this information by running the following script from the CLI:
• get_appliance_details
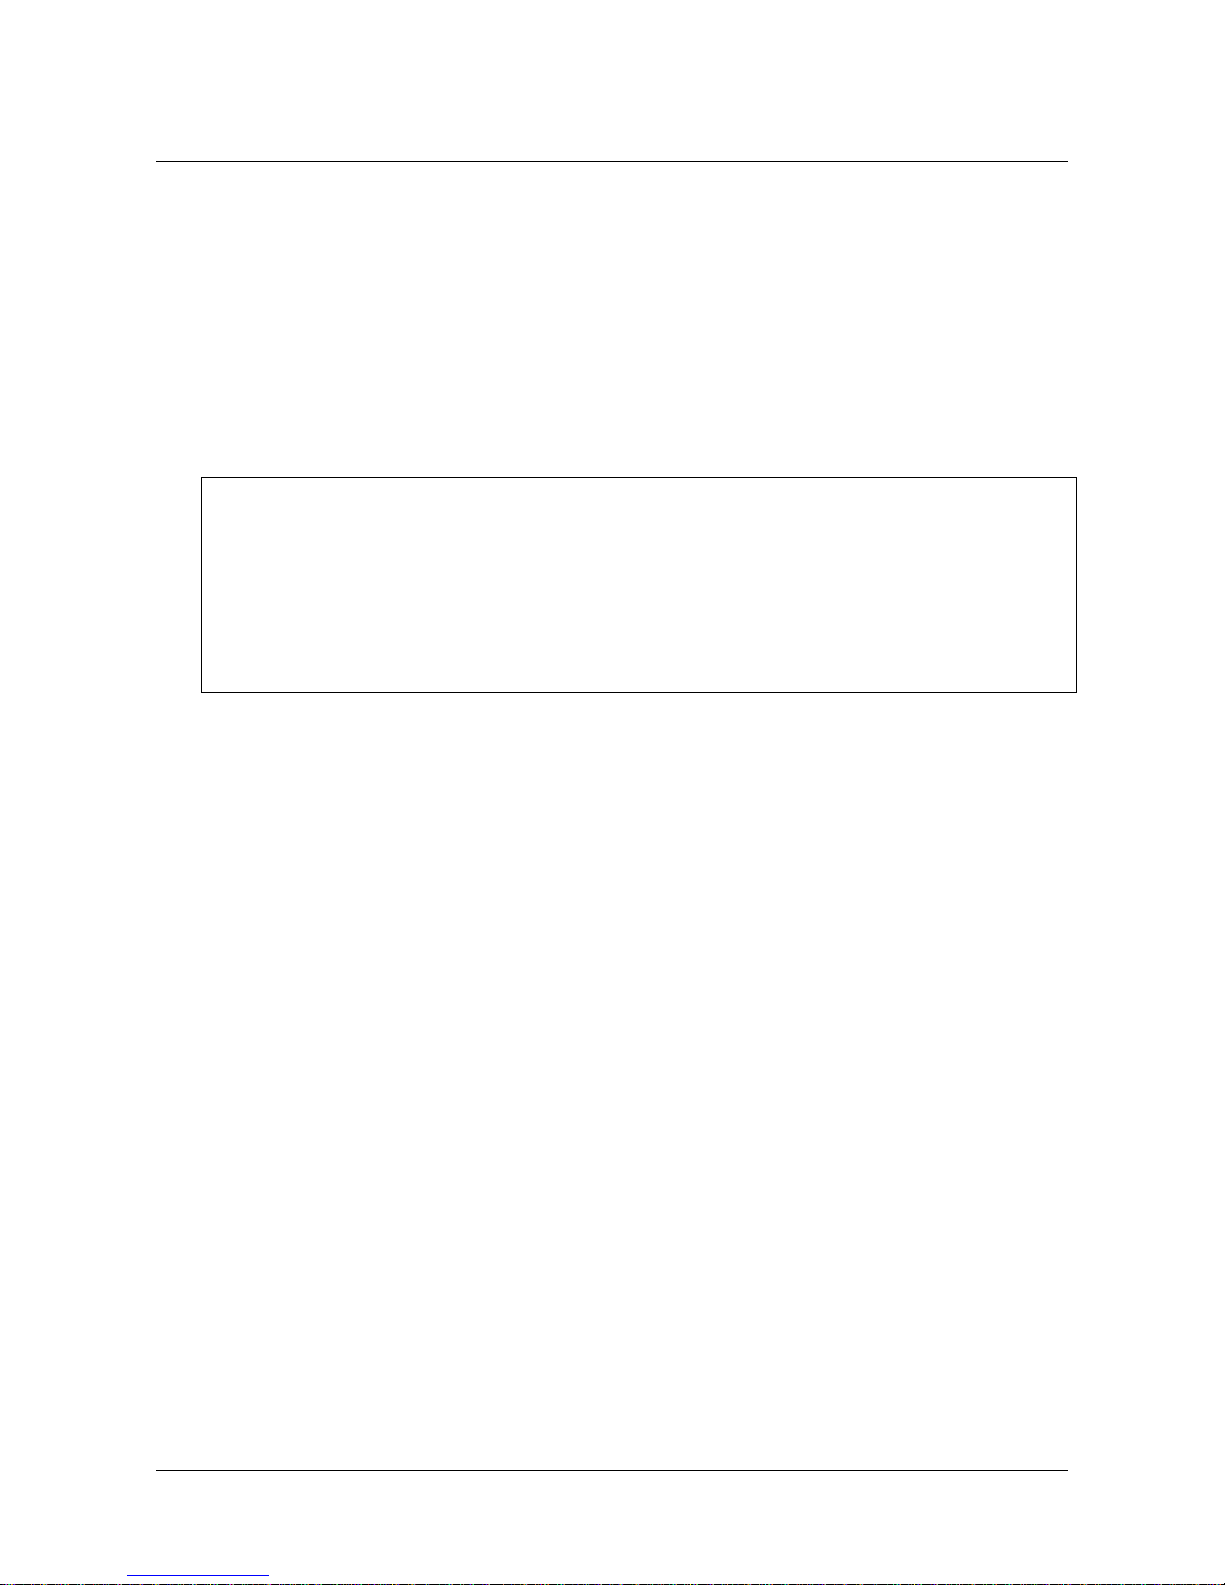
The following is a sample output of this script:
APPLIANCE_VERSION: 6.4.36-2.46
Core: 8
MODEL: 5000
Mode: SERVER
RAM: 32065 MB
SBV: 6.5.703
SERIALNUM: 091115000001
WEBADMINVER: 2.46
Troubleshooting
Page 22

Skybox 5500 Appliance 22
Chapter 10
This chapter includes regulatory and safety information for Skybox 5500’s hardware.
In this chapter
Product regulatory compliance ................................................................................ 22
Product regulatory compliance markings ................................................................ 23
Electromagnetic compatibility notices for the server board .................................... 26
Product regulatory compliance
Intended application
This product is to be evaluated and certified as Information Technology Equipment (ITE), which may
be installed in offices, schools, computer rooms, and similar commercial type locations. The suitability
of this product for other product certification categories and environments (such as: medical,
industrial, telecommunications, NEBS, residential, alarm systems, test equipment, and so on), other
than an ITE application, will require further evaluation and may require additional regulatory
approvals.
Note: The use and/or integration of telecommunication devices such as modems and/or wireless
devices have not been planned for with respect to these systems. If there is any change of plan to use
such devices, then telecommunication type certifications will require additional planning. If NEBS
compliance is required for system -level products, additional certification planning and design is
required.
Safety compliance
• UL60950 – CSA 60950 (USA/Canada)
• EN60950 (Europe)
• IEC60950 (International)
• CB Certificate & Report, IEC60950 (report to include all country national deviations)
• GS Certification (Germany)
• GOST R 50377-92 – Certification (Russia)
• Ukraine Certification (Ukraine)
• CE – Low Voltage Directive 2006/95/EC (Europe)
• IRAM Certification (Arg en tin a)
• BSMI CNS14336 Emissions (Taiwan)
EMC compliance – Class A compliance
• FCC /ICES-003 – Emissions (USA/Canada) Verification
Regulatory an d safety information
Page 23

Chapter 10 Regulatory and safety information
Skybox 5500 Appliance 23
• CISPR 22 – Emissions (International)
• EN55022 – Emissions (Europe)
• EN55024 – Immunity (Europe)
• EN61000-3-2 – Harmonics (Europe)
• EN61000-3-3 – Voltage Flicker (Europe)
• CE – EMC Directive 2004/108 EC (Europe)
• VCCI Emissions (Japan)
• AS/NZS 3548 Emissions (Australia/New Zealand)
• BSMI CNS13438 Emissions (Taiwan)
• GOST R 29216-91 Emissions (Russia)
• GOST R 50628-95 Immunity (Russia)
• Ukraine Certification (Ukraine)
• KC Certification (Korea)
Environmental requirements
Intel has a system in place to restrict the use of banned substances in accordance with worldwide
regulatory requirements. A Material Declaration Data Sheet is available for Intel products. For more
reference on material restrictions and compliance you can view Intel’s Environmental Product Content
Specification at http://supplier.intel.com/ehs/environmental.htm .
• Europe – European Directive 2002/95/EC – Restriction of Hazardous Subst ance s (R oHS )
Threshold limits and banned substances are noted below.
Quantity limit of 0.1% by mass (1000 PPM) for: Lead, Mercury, Hexavalent Chromium,
Polybrominated Biphenyls Diphenyl Ethers (PBB/PBDE)
Quantity limit of 0.01% by mass (100 PPM) for: Cadmium
• California Code of Regulations, Title 22, Division 4.5, Chapter 33: Best Management Practices for
Perchlorate Materials
• China – Restriction of Hazardous Substances (China RoHS)
• WEEE Directive (Europe)
• Packaging Directive (Europe)
• REACH Directive (Europe)
Product regulatory compliance markings
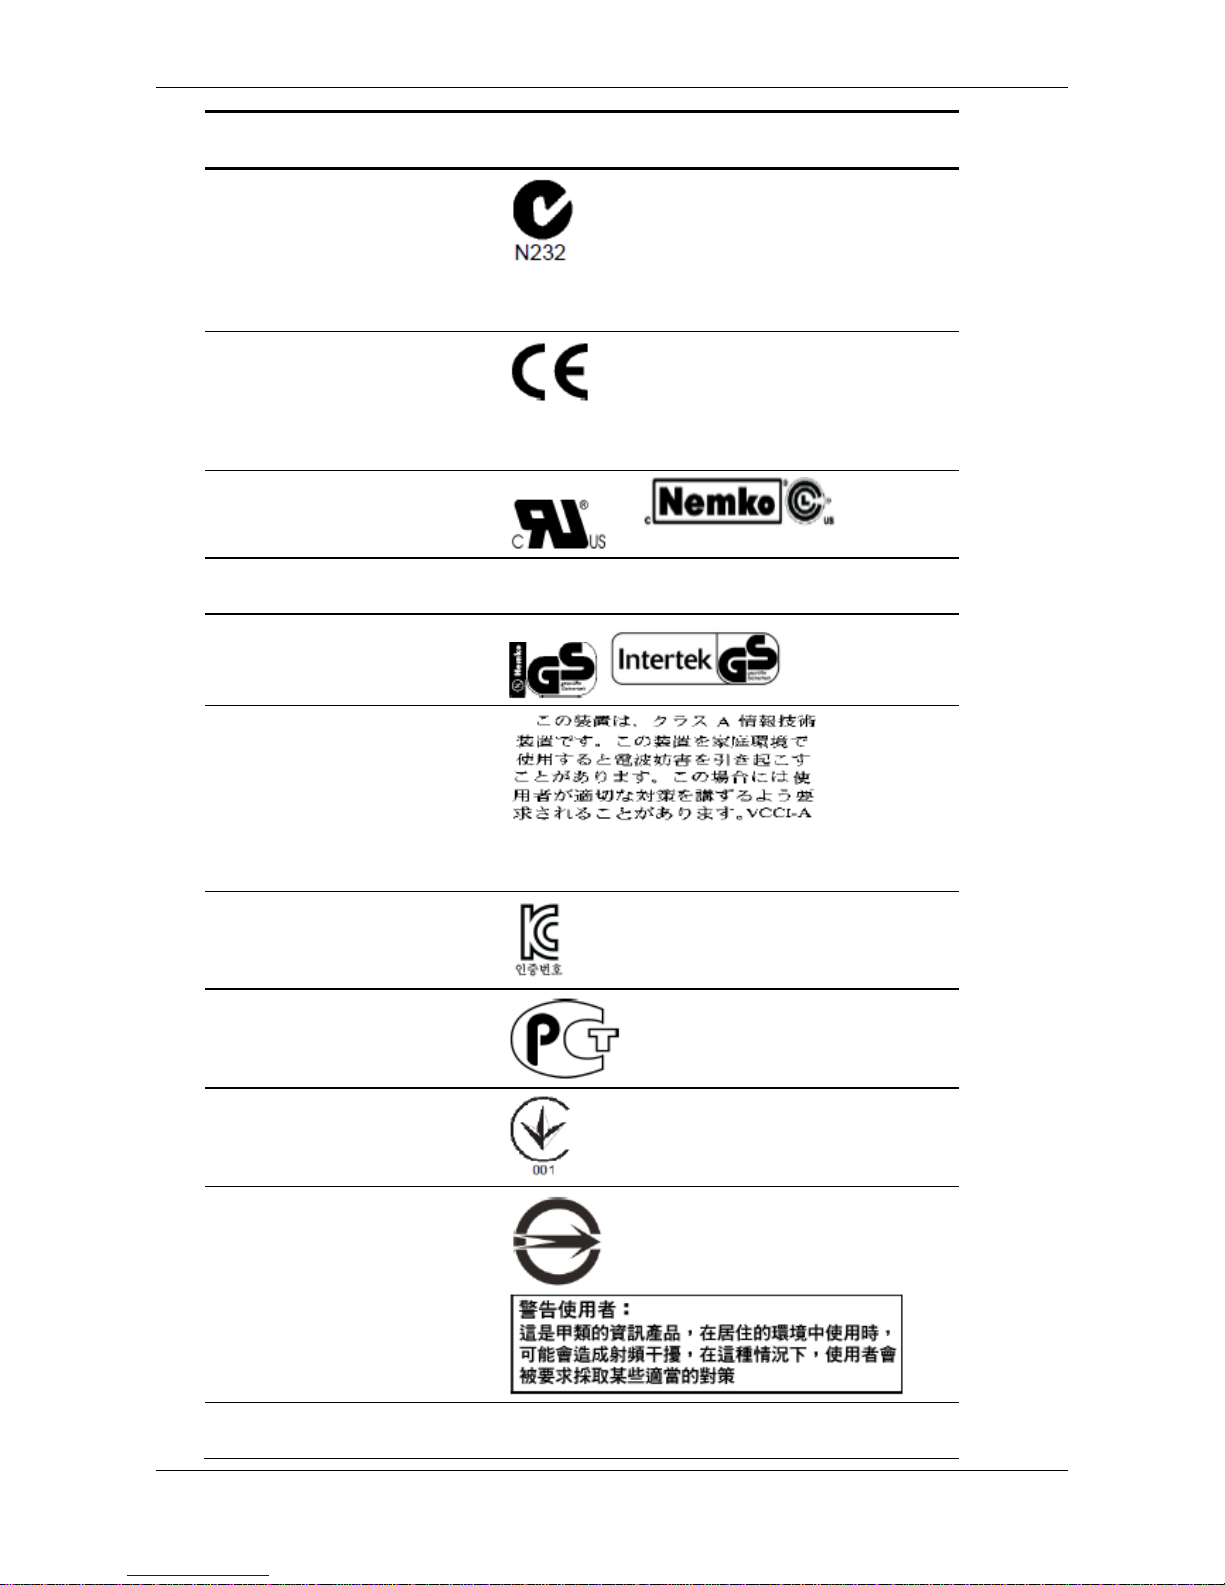
The server is provided with the following regulatory marks.
Regulatory
Compliance
Region Marking
IRAM Argentina
Figure 3: IRAM Marking
Page 24
Skybox 5500 Appliance Quick Start Guide
Skybox 5500 Appliance 24
Regulatory
Compliance
Region Marking
Ctick Australia/N
Z
Figure 4: Ctick Mark
CE Mark Europe
Figure 5: CE Mark
NRTL (National
Recognized Test
Laboratory)
USA/Cana
da
EMC Marking (Class
A)
Canada
CANADA ICES-003 CLASS A
GS Mark Germany
VCCI Marking
(Class A)
Japan
Figure 6: VCCI Mark
KC Mark (Korean
Communications
Commission)
Korea
GOST R Marking Russia
Ukraine Certification Ukraine
BSMI Certification
(RPC) Number &
Class A Warning
Taiwan
FCC Marking (Class
A)
USA This device complies with Part 15 of the FCC Rules.
Operation of this device is subject to the following
Page 25
Chapter 10 Regulatory and safety information
Skybox 5500 Appliance 25
Regulatory
Compliance
Region Marking
two conditions: (1) This device may not cause
harmful interference, and (2) This device must accept
interference receive, including interference that may
cause undesired operation
Nordic Ground Multiple Line 1: “WARNING:”
Swedish on line 2: “Apparaten skall anslutas till jordat
uttag, när den ansluts till ett nätverk.”
Finnish on line 3: “Laite on liitettävä
suojamaadoituskoskettimilla varustettuun
pistorasiaan.”
English on line 4: “Connect only to a properly earth
grounded outlet.”
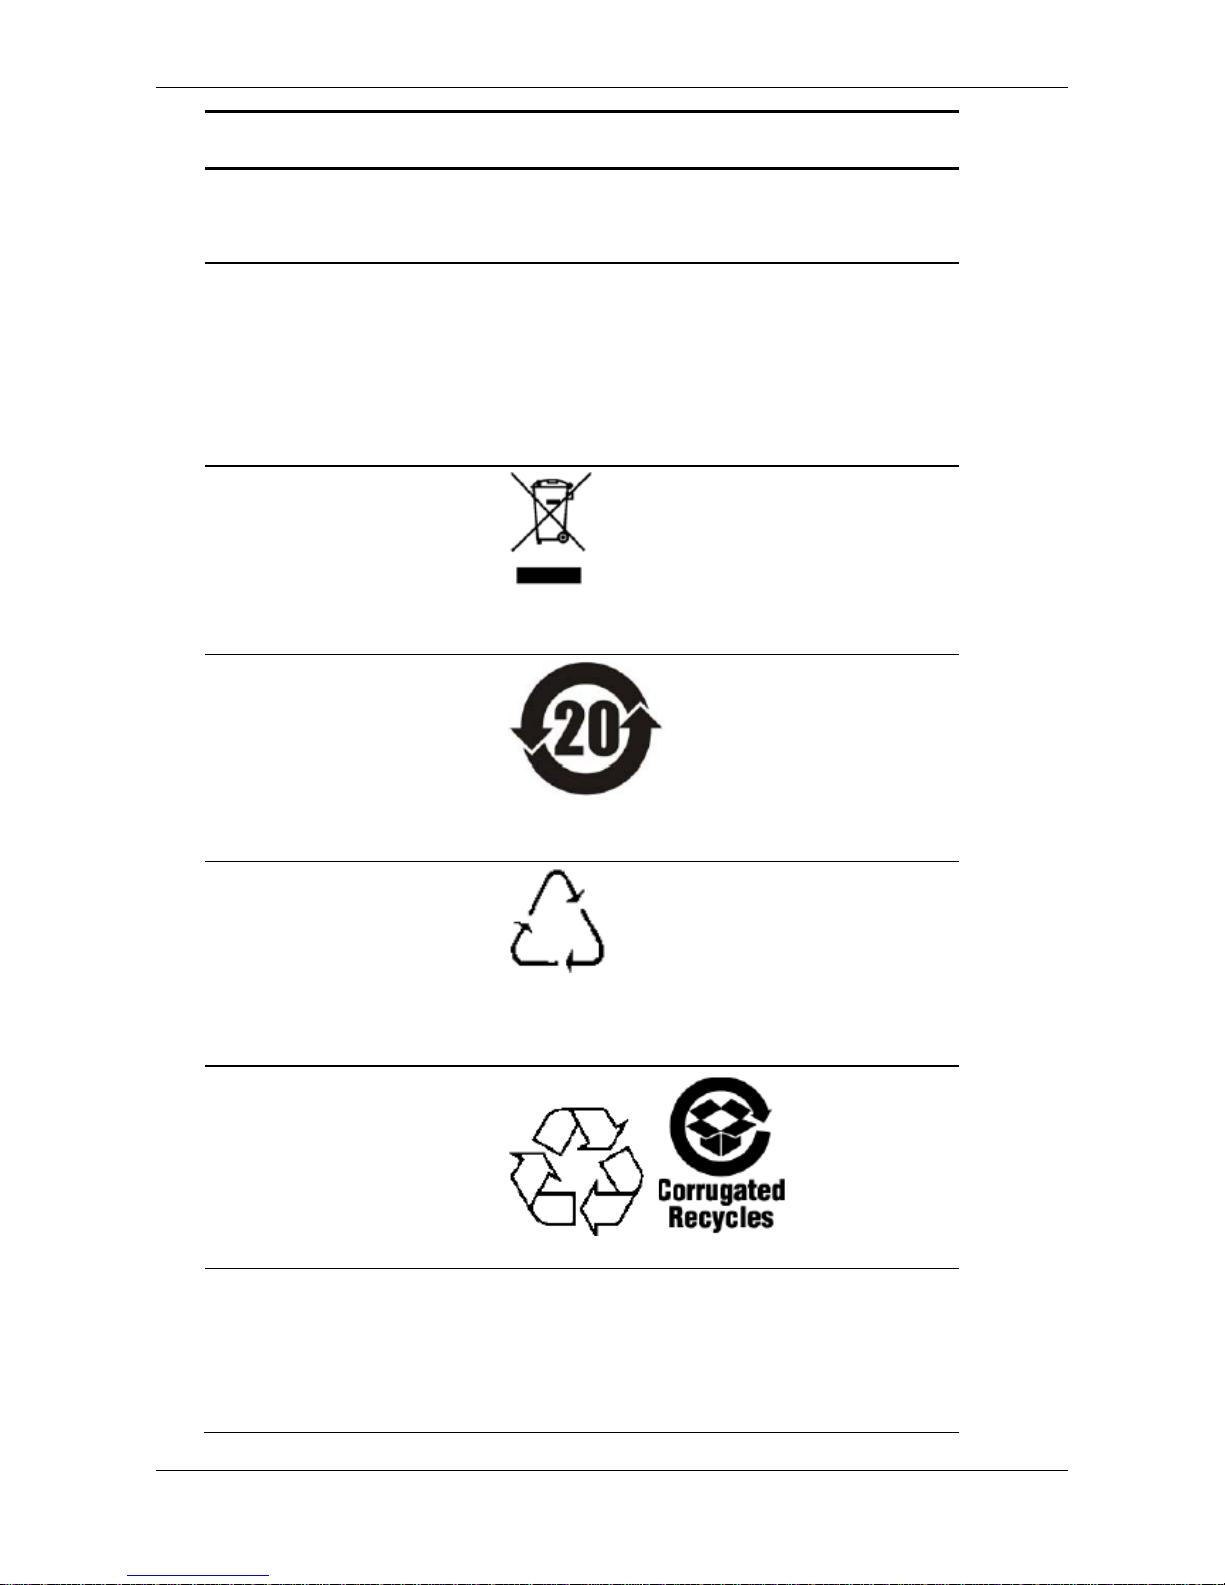
WEEE (Waste of
Electronic and
Electrical
Equipment)
Recycling Mark
Europe
Figure 7: WEEE Mark
China Restriction of
Hazardous
Substance (RoHS)
Environmental
Friendly Use Period
Mark
China
Figure 8: RoHS
Recycling Package
Marks
China
Figure 9: Recycling Package Marks
Will be added on Package label
Other Recycling
Package Marks
Internation
al
Will be added on Package label
Battery Perchlorate
Warning Information
USA (CA) Perchlorate Material – Special handling may apply.
See www.dtsc.ca.gov/ha za r dous waste/perchlorate
This notice is required by California Code of
Regulations, Title 22, Division 4.5, Chapter 33: Best
Management Practices for Perchlorate Materials.
This product / part includes a battery which contains
Perchlorate material.
Page 26
Skybox 5500 Appliance Quick Start Guide
Skybox 5500 Appliance 26
Regulatory
Compliance
Region Marking
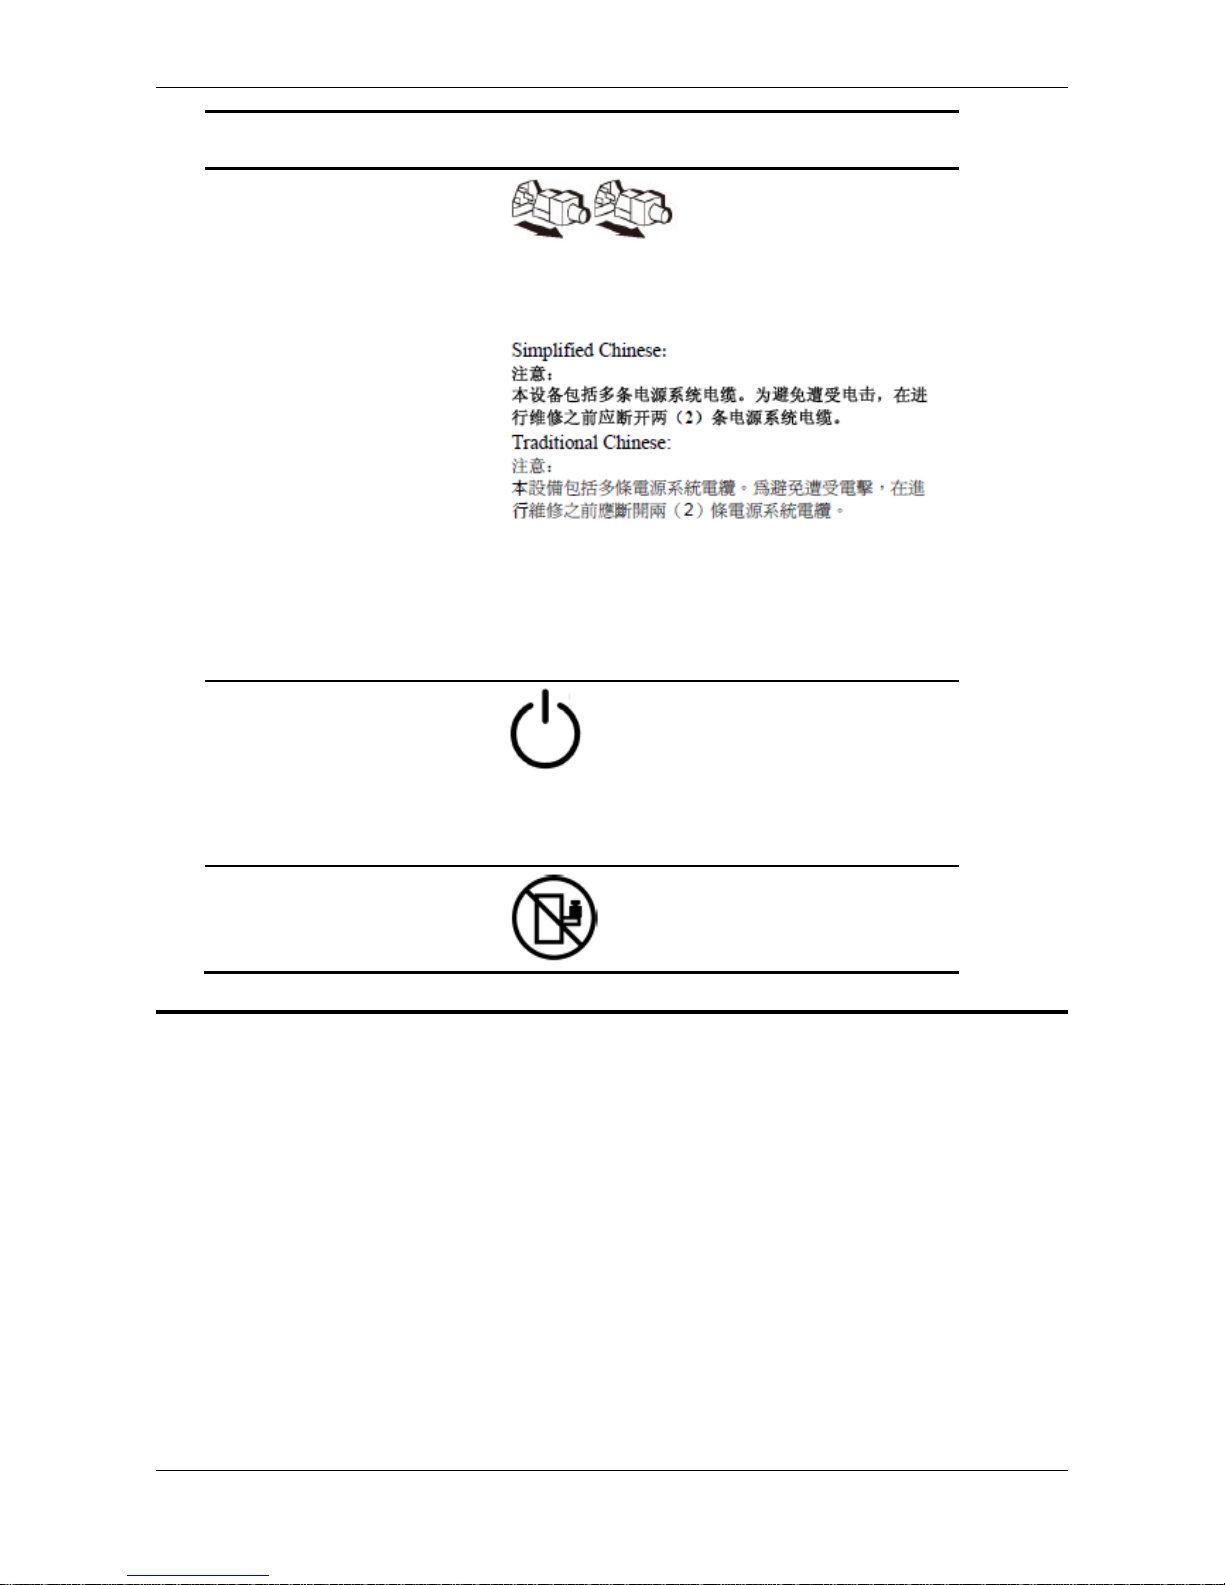
Safety – Multiple
Power Cord
Internation
al
English: This unit has more than one power supply
cord. To reduce the risk of electrical shock,
disconnect (2) two power supply cords before
servicing.
Figure 10: Multiple Power Cord
German: Dieses Geräte hat mehr als ein Stromkabel.
Um eine Gefahr des elektrischen Schlages zu
verringern trennen sie beide (2) Stromkabeln bevor
Instandhaltung.
Safety – Standby
Power button
Internation
al
Figure 11: Power button icon
Note: Should appear on Power button.
Safety – Rack Load
Warning
Internation
al
Electromagnetic compatibility notices for the server
board
FCC Verification Statement (USA)
This device complies with Part 15 of the FCC Rules. Operation is subject to two conditions: (1) This
device may not cause harmful interference, and (2) this device must accept any interference received,
including interference that may cause undesired operation.
Intel Corporation, 5200 N.E. Elam Young Parkway Hillsboro, OR 97124-6497 Phone:
1-800-628-8686
Page 27
Chapter 10 Regulatory and safety information
Skybox 5500 Appliance 27
This equipment has been tested and found to comply with the limits for a Class B digital device,
pursuant to Part 15 of the FCC Rules. These limits are designed to provide reasonable protection
against harmful interference in a residential installation. This equipment generates, uses, and can
radiate radio frequency energy and, if not installed and used in accordance with the instructions, may
cause harmful interference to radio communications. However, there is no guarantee that interference
will not occur in a particular installation. If this equipment does cause harmful interference to radio or
television reception, which can be determined by turning the equipment off and on, the user is
encouraged to try to correct the interference by any of these measures:
• Reorient or relocate the receiving antenna.
• Increase the separation between the equipment and the receiver.
• Connect the equipment into an outlet on a circ ui t different from that to which the rec eiv e r is
connected.
• Consult the dealer or an experienced radio/TV technician for help.
Any changes or modifications not expressly approved by the grantee of this device could void the
user’s authority to operate the equipment. The customer is responsible for ensuring compliance of the
modified product.
All cables used to connect to peripherals must be shielded and grounded. Operation with cables,
connected to peripherals that are not shielded and grounded may result in interference to radio and TV
reception.
ICES-003 (Canada)
Cet appareil numérique respecte les limites bruits radioélectriques applicables aux appareils
numériques de Classe B prescrites dans la norme sur le matériel brouilleur: “Appareils Numériques”,
NMB-003 édictée par le Ministre Canadian des Communications.
English translation of this notice:
This digital apparatus does not exceed the Class B limits for radio noise emissions from digital
apparatus set out in the interference-causing equipment standard entitled “Digital Apparatus,”
ICES-003 of the Canadian Department of Communications.
Europe (CE Declaration of Conformity)
This product has been tested in accordance to, and complies with the Low Voltage Directive
(73/23/EEC) and EMC Directive (89/336/EEC). The product has been marked with the CE Mark to
illustrate its compliance.
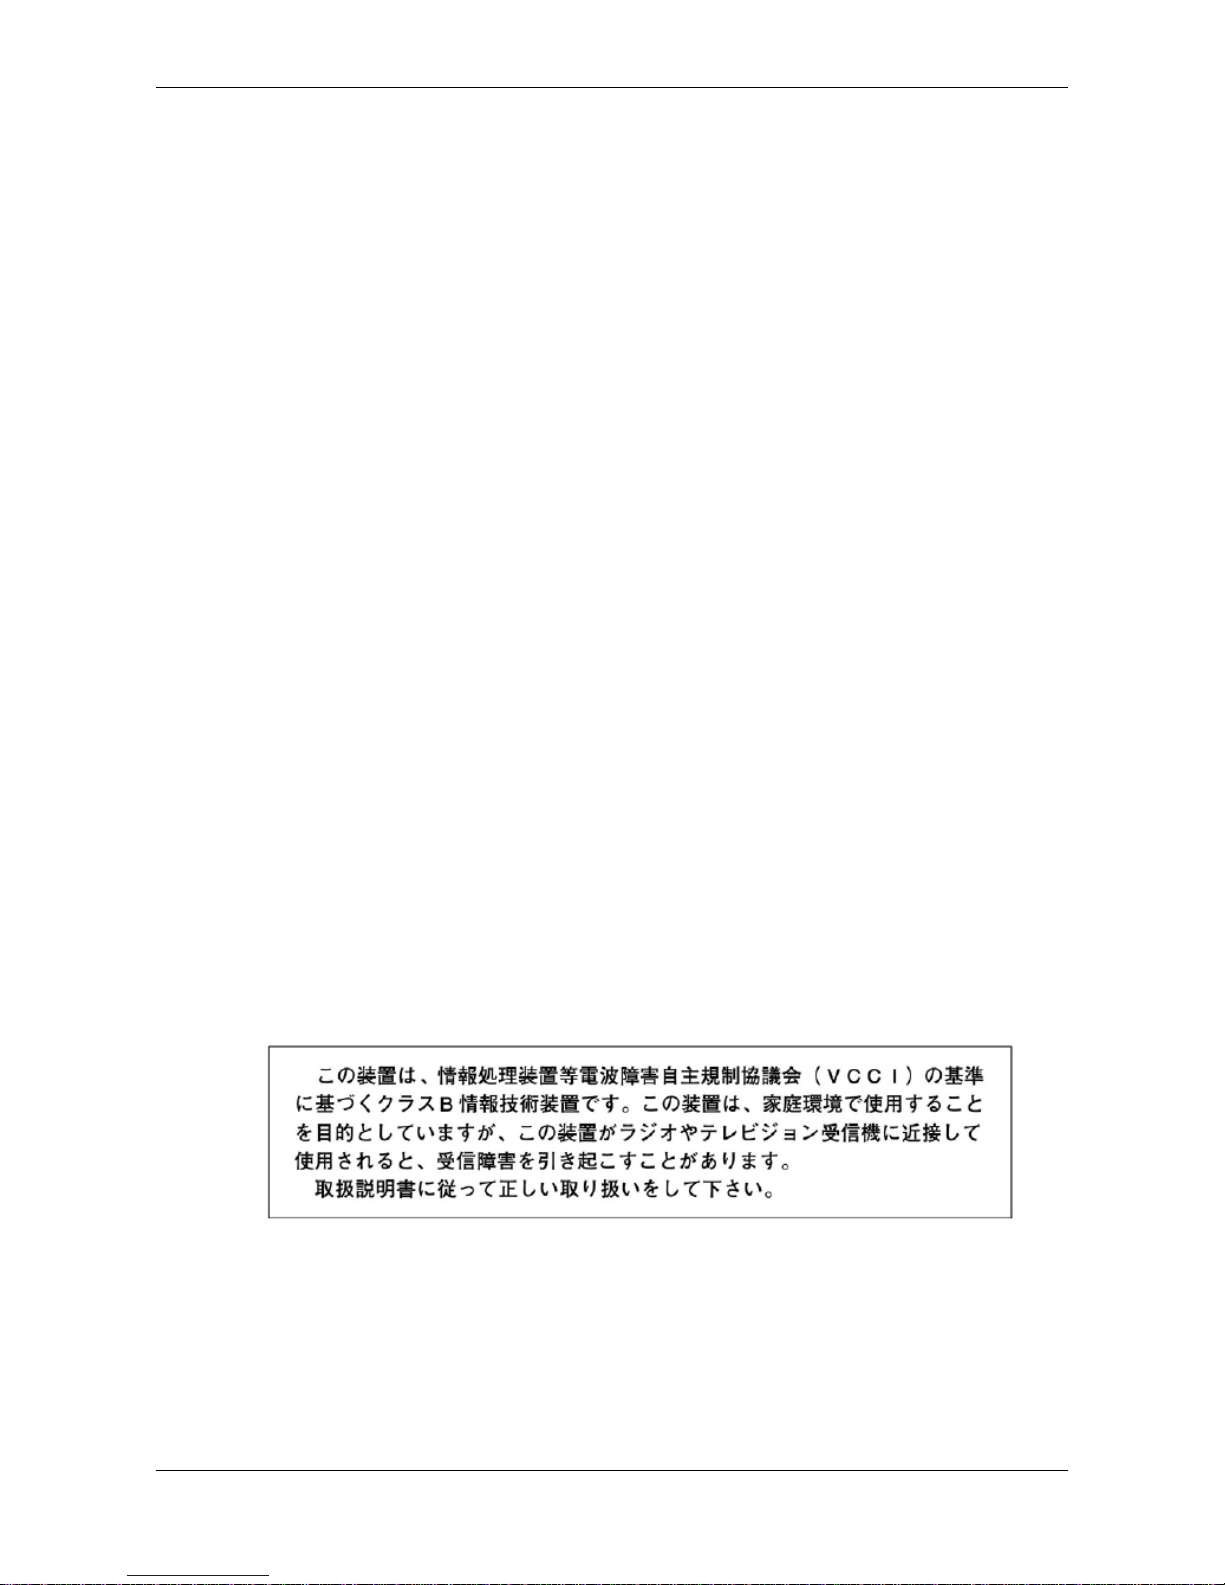
VCCI (Japan)
Figure 12: VCCI Marking - Japan
English translation of this notice:
This is a Class B product based on the standard of the Voluntary Control Council for Interference
(VCCI) from Information Technology Equipment. If this is used near a radio or television receiver
in a domestic environment, it may cause radio interference. Install and use the equipment
according to the instruction manual.
Page 28

Skybox 5500 Appliance Quick Start Guide
Skybox 5500 Appliance 28
BSMI (Taiwan)
The BSMI Certification Marking and EMC warning is located on the outside rear area of the product.
Figure 13: BSMI Marking - Taiwan
RRL (Korea)
Following is the RRL certification information for Korea.
English translation of this notice:
1 Type of Equipment (Model Name): On License and Product
2 Certification No.: On RRL certificate. Obtain certificate from local Intel representative
3 Name of Certification Recipient: Intel Corporation
4 Date of Manufacturer: Refer to date code on product
5 Manufacturer/Nation: Intel Corporation/Refer to country of origin marked on product
CNCA (CCC-China)
The CCC Certification Marking and EMC warning is located on the outside rear area of the product.
Page 29

Skybox 5500 Appliance version 29
B
Back panel connectors • 10
Basic architecture • 5
C
Configuration and management options • 14
Configuring connection • 11
E
Electromagnetic compatibility notices for the
server board • 26
EMC compliance – Clas s A com pliance • 22
Environmental requirements • 23
Environmental specifications • 7
F
First-time configuration parameters • 13
Front panel • 8
I
Installation • 11
Installing additional software packages • 20
Installing the Manager • 16
Installing the Skybox View Manager • 16
M
Manager system requirements • 16
MTBF estimates for Skybox 5500 Appliance • 8
O
Overview • 5
P
Physical specifications • 6
Port mapping • 10
Product regulatory compliance • 22
Product regulatory compliance markings • 23
R
Regulatory and safety information • 22
Related documentation • 5
Restore • 19
Rolling back changes to the Web Administration •
18
S
Safety compliance • 22
Setting up Skybox 5500 • 11
Setting up Skybox 5500 for configuration • 12
Skybox 5500 specifications • 6
Starting Skybox 5500 • 11
System configuration • 11
T
Troubleshooting • 21
U
Upgrading the Manager • 17
Upgrading the Web Administration • 18
W
What’s in the box • 6
What’s next • 13
Index
 Loading...