

SkyBell 2.0 Installation Manual
Installaion Guide

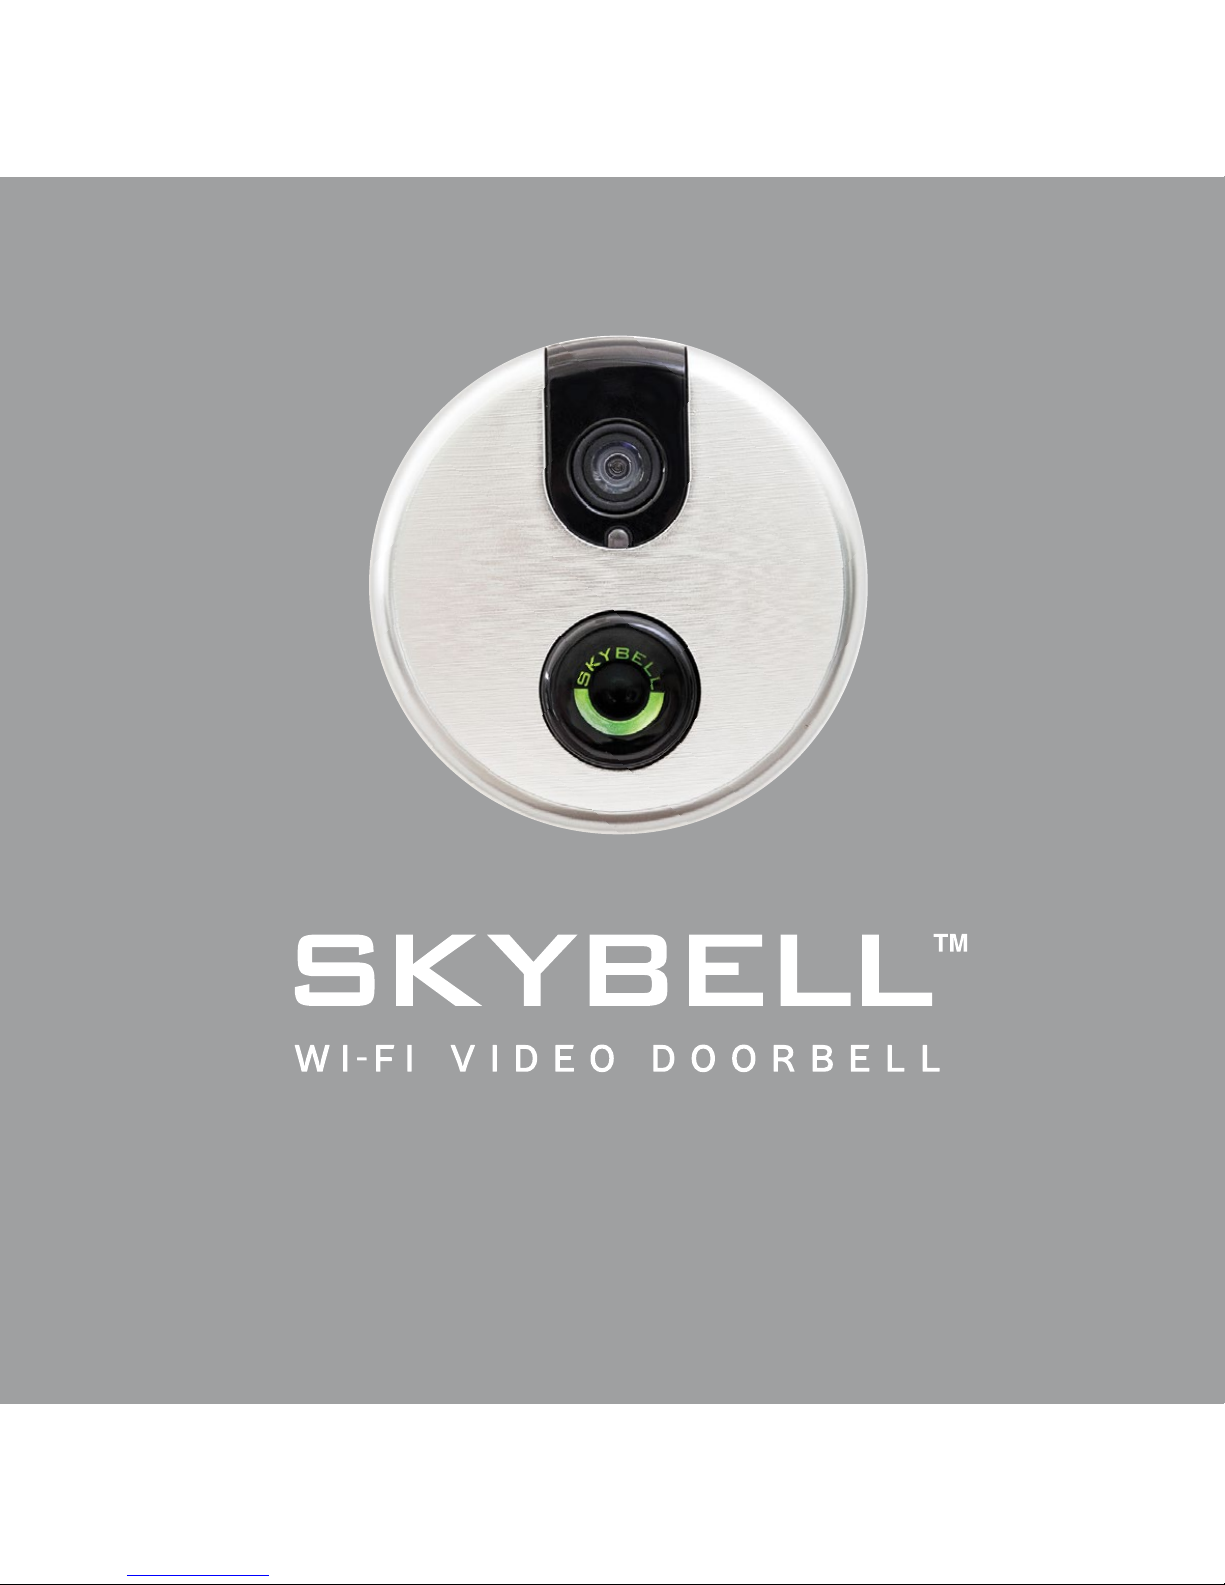
Infrared LED
(Night Vision)
Video
Camera
Main Buon
LED
Indicator
Light
Speaker
Set Screw
Microphone
Moon
Sensor
Contents
SkyBell
Doorbell Devic e
Mounng
Plate
Special Locking To ol
Screw Anchors (2)
Wall Screws (2)
Wire Connectors (4)
(2 extra)
Tools You May Need for Installaion:
• Pliers or Crimpers
• Power Drill
or Screw Driver
• Outdoor Adhesive
• Wire Strippers
SkyBell Components
S
K
Y
B
E
L
L
1
2

Welcome!
Thank you for becoming a member of the SkyBell
family. Please take a minute to carefully review these
instrucions so you can enjoy your SkyBell experience.
Visit our website for instrucional videos and access to
support informaion.
Installaion Videos:
www.skybell.com/support/installaion/
Support:
www.skybell.com/support/
Customer Service:
htp://service.skybell.com
1
PRE-INSTALLATION CHECKLIST
1. Doorbell Chime - SkyBell is compaible with mechanical
and digital door chimes. Wireless door chimes are not
supported. Digital door chimes require an adapter, which may
be sold separately.
2. Wi-Fi Speed - Be sure you have at least 1.5 mbps
consistent upload speed at your front door. For more details on
how to check your Wi-Fi speed, visit :
www.skybell.com/support/wi-fi-speed-test.
3. Router Quality - Your SkyBell experience will only be
as good as your router. We recommend using a router
that is less than 3 years old and is manufactured by a
recognized brand. Old routers and uncommon router
brands may not be supported.
3
4

2
POWER CONFIGURATIONS
Prior to installing your SkyBell, make sure your home is
compaible with one of the power coniguraions listed.
Power coniguraion diagrams are available at
www.skybell.com/support/power.
Unless otherwise indicated, all power coniguraions require
primary power (110/120 VAC in the US and 220/230/240 VAC,
in Europe) and a low-voltage
transformer (10-36V 10 VA).
1. A MECHANICAL DOOR CHIME AND LOW VOLTAGE
TRANSFORMER (Recommended).
2. A DIGITAL DOOR CHIME WITH ADAPTER AND A LOW
VOLTAGE TRANSFORMER.
4. Router Band - SkyBell will only connect to the 2.4 GHz
band. If you have a dual-band router, you must create unique
SSIDs for the 2.4 and 5 GHz bands. Prior to iniiaing the
syncing process, make sure your mobile device is connected to
the 2.4GHz SSID.
5. Router b/g/n - SkyBell works on the b/g network. If you
have an “N-Only” router, please acivate the b/g seing.
6. Router Channel Bandwidth - Make sure your router is
conigured to 20 MHz bandwidth.
7. Transformer - If your SkyBell is being powered by your
home’s transformer, the transformer’s output must be between
10 and 36 VAC 10 VA.
8. Accessories - For more informaion on installing an
accessory, please visit secion 4 before staring the installaion.
5
6
3. WITHOUT A DOOR CHIME
Setup 1:
Primary Power;
Low-voltage transformer (10-36 VAC 10 VA); and
10 Ohm/10 Wat resistor inserted between one wire from the
SkyBell and one wire from the power source
Setup 2:
12 VDC power supply; and
10 Ohm/10 Wat resistor inserted between one wire from the
SkyBell and one wire from the power source
Warning!
Installing your SkyBell with an improper power coniguraion
will automaically void your Limited Warranty
(htp://www.skybell.com/warranty).
Warning!
Coming into contact with a transformer can cause injury or loss
of life. Use extreme cauion when installing SkyBell.
OR
3
INSTALLATION INSTRUCTIONS
1. To begin, press your
current doorbell buton
to make sure your exising
door chime works.
2. Remove your tradiional
doorbell and carefully detach
or cut the 2 wires currently
connected to your tradiional
doorbell.
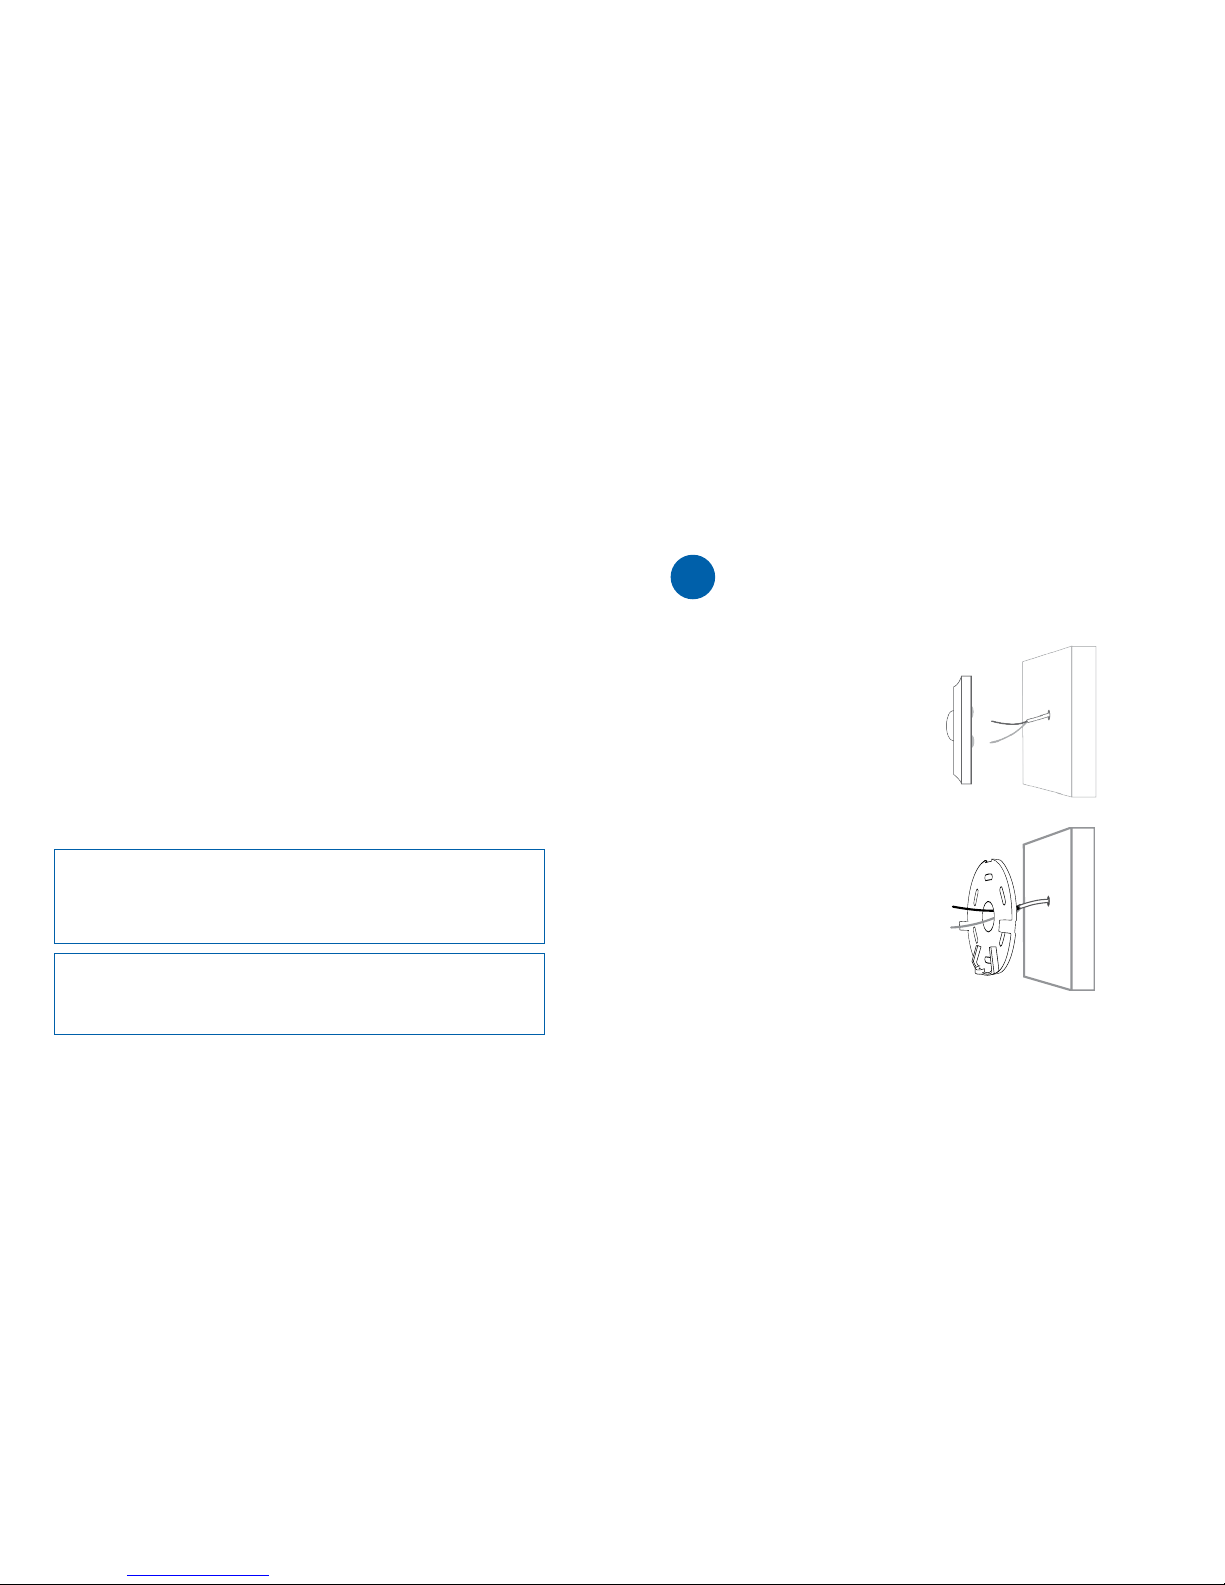
3. Run the wires through
the center of the mouning
plate. Be sure the front side
of the mouning plate
faces you.
7
8
4. Secure the mouning plate to the wall with the two wall
screws. If you have stone, brick or drywall, drill holes with
the correct drill bit for your surface and use the screw
anchors to secure the screws to the wall.
Correct Drill Bit Sizes:
1. Masonry: 3/16”
2. Wood: 9/64”
3. Steel: 9/64”
Warning!
If you do not use a door chime, you must use a 10 Ohm / 10 Wat
resistor with one connecion between SkyBell and the power
source. Failure to do so could damage your device and will
automaically void your limited warranty. For more details:
www.skybell.com/support/power and www.skybell.com/legal
Instead of drilling into your wall,
you may use an outdoor adhesive
to glue the mouning plate to your
wall or door frame.
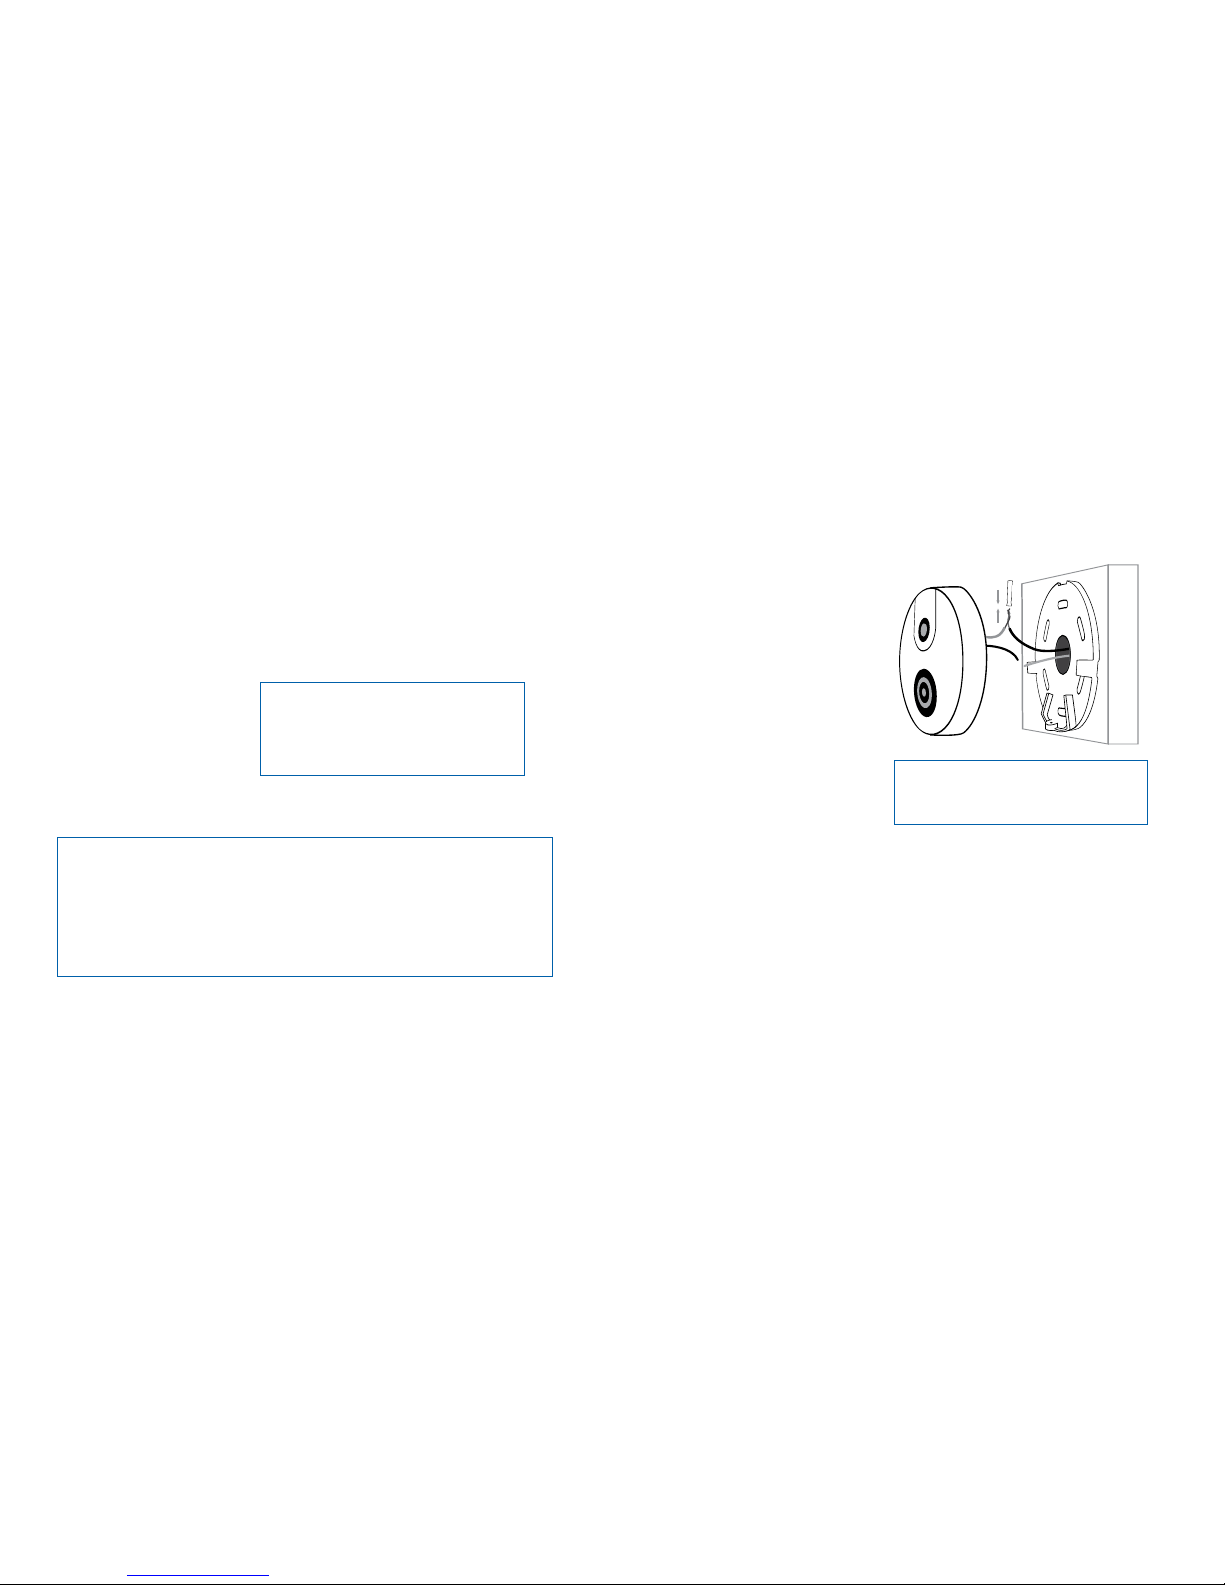
5. Gently twist together
the ends of a SkyBell wire
and a home doorbell wire
as shown.
6. Next, insert the
joined wires into a
blue wire connector
and push unil the
wires reach the end
of the wire connector.
7. With a pair of pliers, clamp down on the wire connector and
crimp the wires together.
8. Repeat steps 5-7 with the other two wires.
Either wire from your SkyBell may be
connected to either wire from your
home.
9
10
 Loading...