

Page 1
"Telecommunication Products to solve Telecommunication Problems"
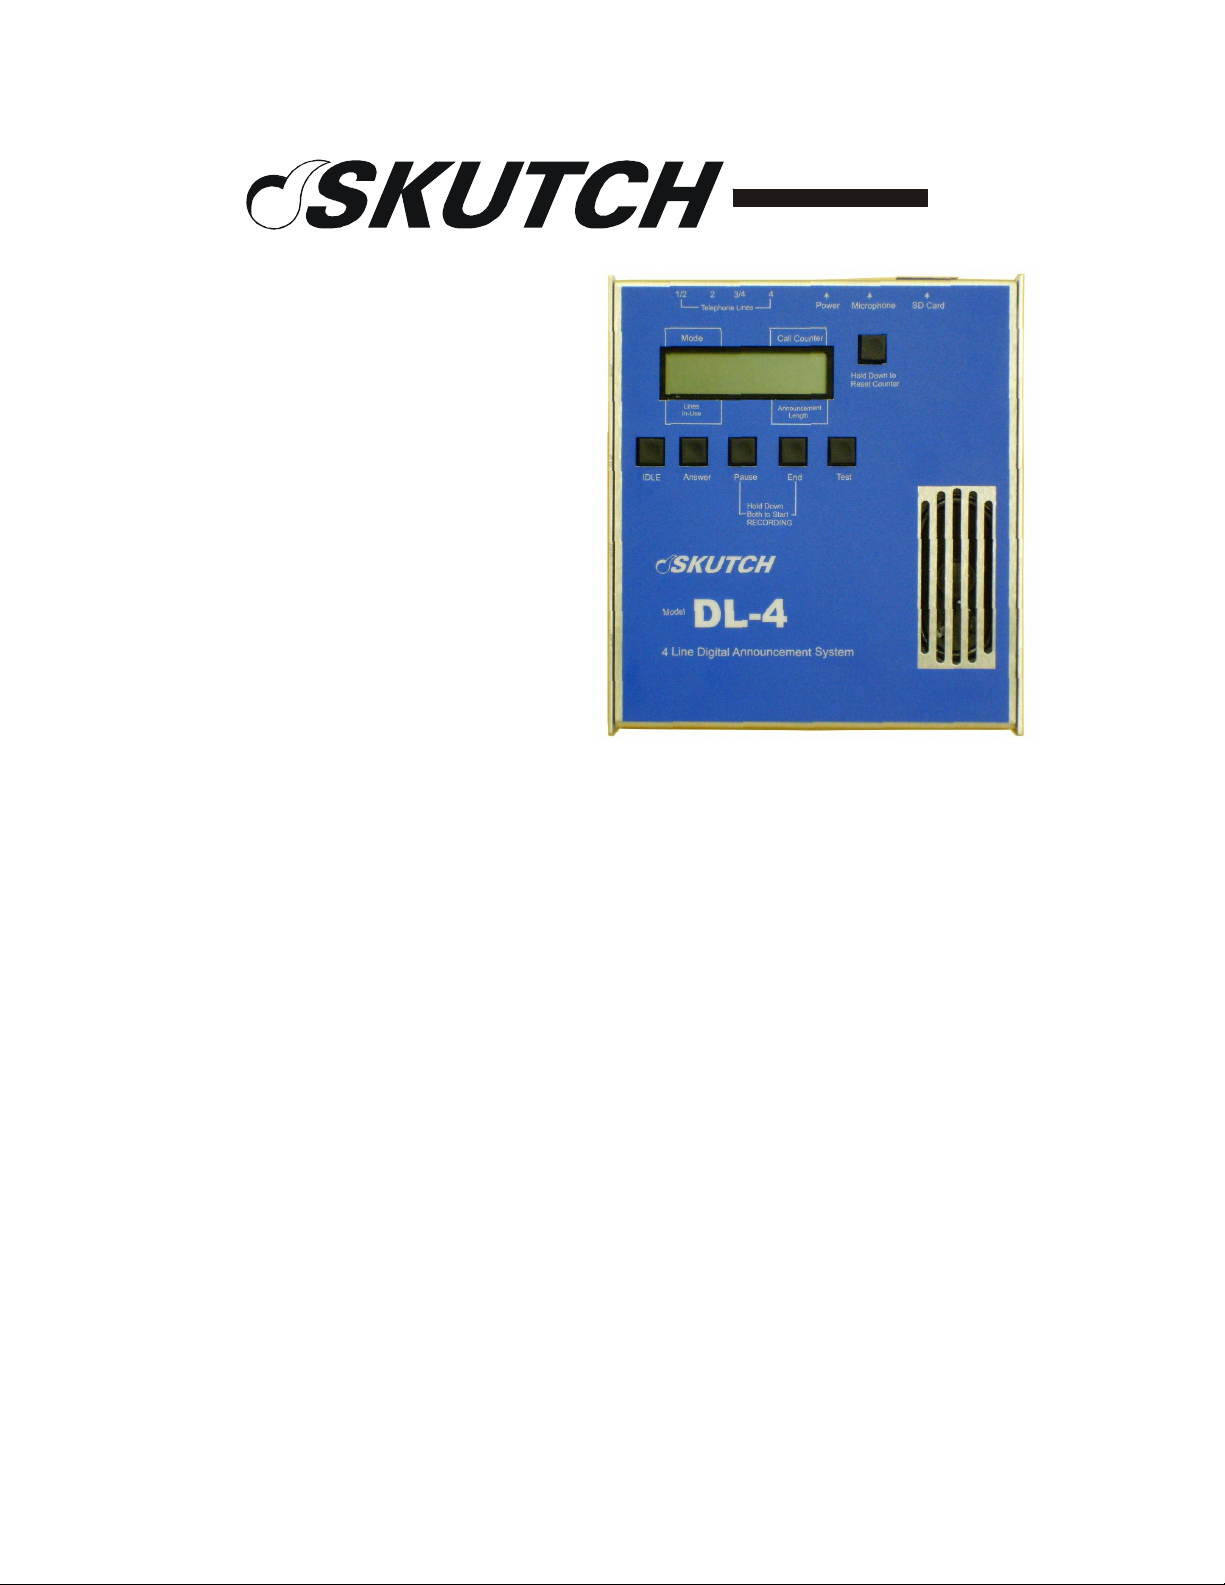
DL-4
4 Line Telephone Digital
Announcement System
11/12/08
Introduction
Thank you for purchasing the Skutch
DL-4 four line Announcement System.
This unit was designed for heavy duty
applications, such as movie theaters,
that requires a pre-recorded
announcement to be played to a high
volume of incoming callers. Each caller
always hears the announcement from the
beginning, no matter how many lines are currently in use.
The DL-4 is a totally digital system. This means that there are no moving parts during
the play back process which makes this unit much more reliable then tape based systems.
Best of all the audio quality will not degrade with usage or time. The DL-4 stores the
audio data on a user replaceable manufacture specific SD memory card. Each SD card
can only hold one pre-recorded announcement. This card can easily be replaced or
swapped with another by the end user. This gives the end user the ability to have many
different pre-recorded announcements available to switch out at any time. This is an
awesome feature. The DL-4 can use SD cards from 128MB to 2GB in size. Not all SD
Cards are compatible with the DL-4. You should only use one of the recommended
brands as stated in the SD Card section of this manual.
A 2GB SD card, the maximum size that can be used, will record annoucements up to
17 Hours, 28.5 minutes in length.
The DL-4 uses a standard WAV file format that is compatible with Windows based
computers. This makes it possible for the end user to produce and/or store audio files
directly on their computer. The DL-4 uses a sampling rate of 16K per second, at 16 bits,
uncompressed, Mono. This provides an audio quality twice as good as most
telecommunication devices which only use a sampling rate of 8K per second.
The DL-4 is easy to use and is the perfect choice for high volume, announcement only
applications.
Page 1 of 7
Page 2
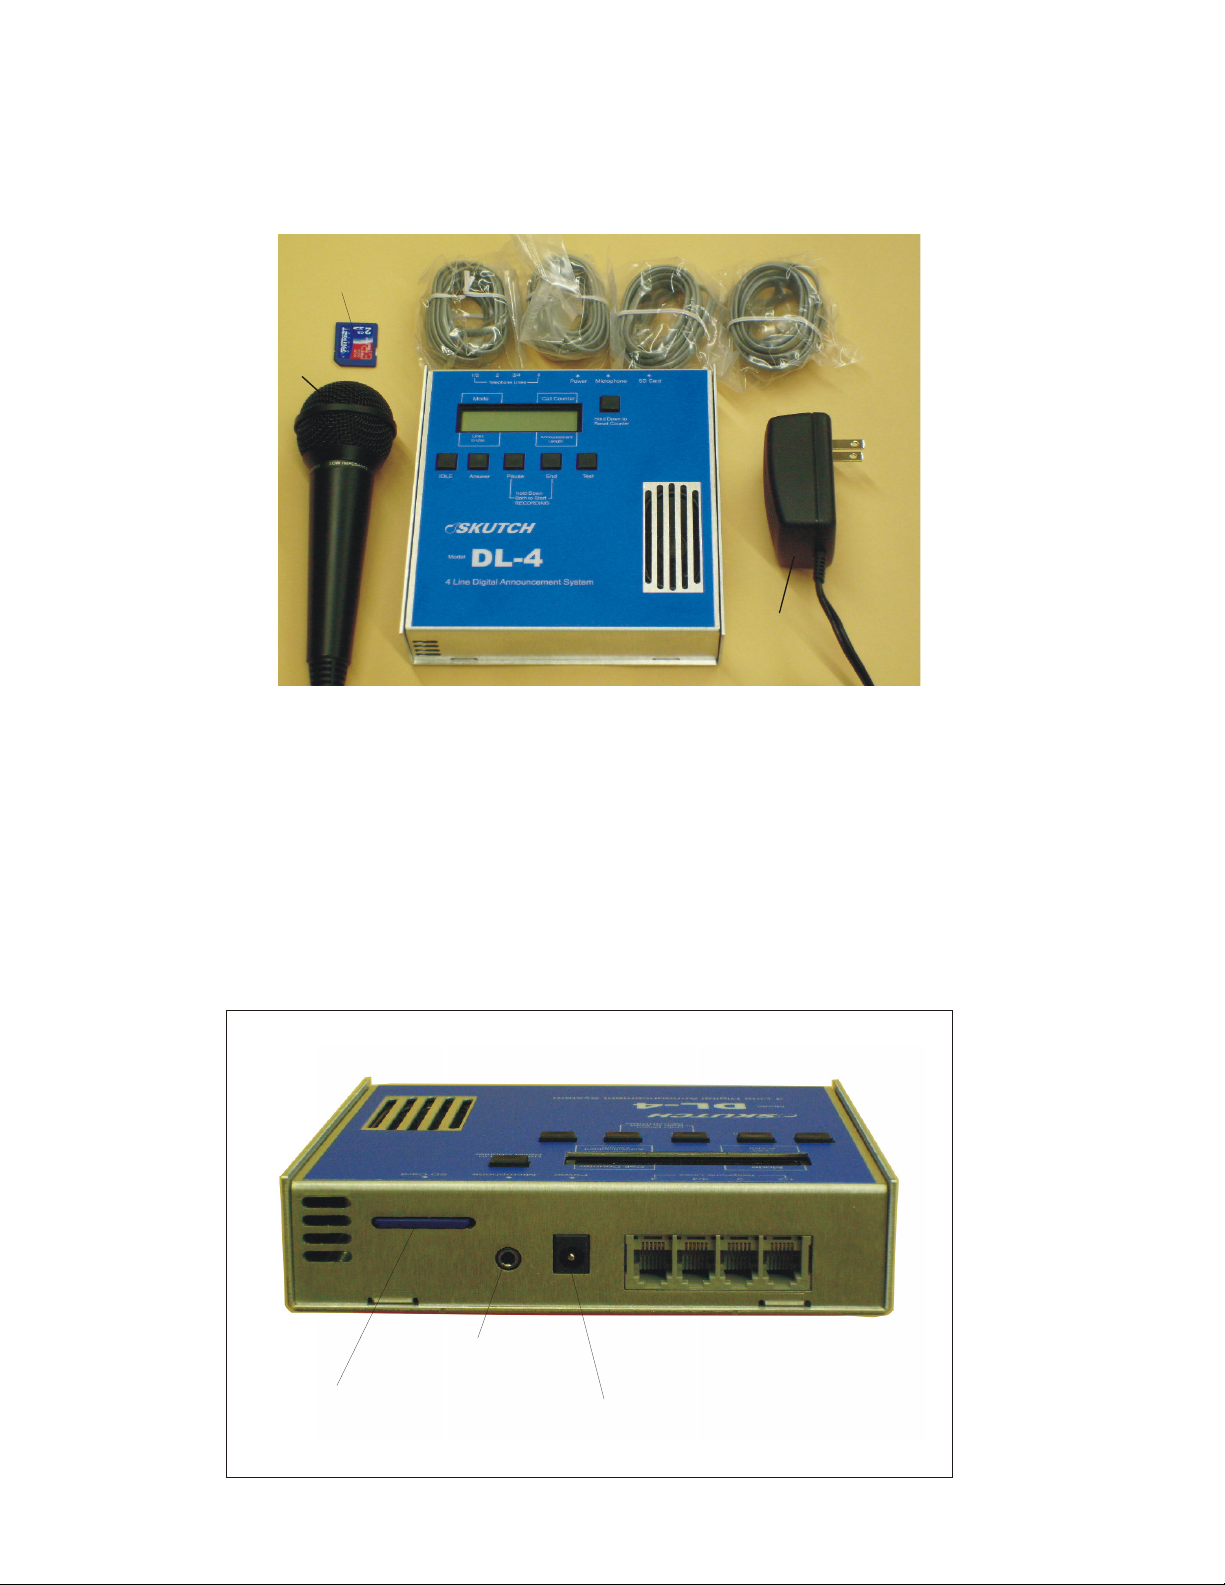
MIC Jack
SD Card
Modular Cords
Power
Adapter
Installation
1- The DL-4 supports both single line per modular cord (RJ-11), or two lines per modular
cord (RJ-14) telephone jacks. There are 4 modular jacks on the rear of the DL-4.
Connect the modular cords from the wall jack to the proper jack rear of the DL-4
2- Connect the Power Adapter to the DL-4, then to a 115vac Power Outlet.
3- Connect the Microphone to the microphone jack on the back of the DL-4. The
microphone can be left connected to the DL-4 if desired.
SD Card
Power Input
4 3 2 1
Telephone Lines
Page 2 of 7
Page 3

IDLE MODE
When the DL-4 is first powered up, it will come up in the IDLE MODE. This mode is
basically the OFF state for the unit. While in the IDLE mode, the DL-4 will not answer
any incoming calls. You MUST be in the IDLE state to initiate an announcement record
or test sequence. You must also be in the IDLE mode to RESET the six digit call counter.
Version Number
The number directly to the right of the word "IDLE" represents the version of the
firmware in the DL-4.
Resetting the Call Counter
This function can ONLY be done while in the IDLE mode. Press down the "Hold Down
to Reset Counter" button until the display reads CALL COUNTER RESET.
Announcement Record
Once the Announcement Record mode is entered, the current announcement is erased. In
order to get the best sounding audio quality from the DL-4 we decided NOT to put an
automatic volume control on the microphone circuit of the DL-4. Simply put, automatic
volume control circuits reduce the overall quality of audio recordings. This means that it
is up to the end user to control their volume while recording. If you talk too loud, and/or
too close to the microphone, you will get distortion. If you talk too low, and/or too far
away from the microphone, the audio could sound too low. Consistency while recording
is very important. I suggest that you practice recording a few times to find the best
distance and speech volume while recording. For best results, try to speak into the
microphone at a consistent volume and distance.
1. Make sure that you are in the IDLE MODE.
2. Connect the microphone to the jack on the rear o panel of the DL-4.
3. Make sure that the MIC SWITCH is ON, and the LOCK switch on the SD Card is in
the UNLOCK position.
4. Press both the PAUSE and END buttons down, at the same time, until you hear the
BEEP. When the BEEP stops, immediately start dictating your new announcement.
5. When you have finished your announcement, immediately press the END button. The
unit will take a moment to store the newly recorded announcement then will
automatically play it back over the internal speaker, then will return to the IDLE MODE.
Pausing during Record
If you need to PAUSE during a recording, simply press the PAUSE button. The display
will show the word PAUSE as confirmation. To start recording again, where you left off,
simply press the PAUSE button again and the unit will BEEP. As soon as the BEEP ends,
immediately start dictating.
Page 3 of 7
Page 4

Testing the Pre-recorded Announcement
From the IDLE MODE simply press the TEST button and the current announcement will
play back through the internal speaker. If you wish to abort the TEST simply HOLD
down the IDLE button until the unit stops playing.
ANSWER MODE
After you have recorded your announcement you are now ready to start answering calls.
To place the DL-4 in the answer mode, simply press the ANSWER button until the unit
BEEPS.
Answer Mode Display Information
Upper Left hand corner = MODE
Upper Right Hand Corner = Six Digit Call Counter (Must be in IDLE MODE to RESET)
Lower Left hand Corner = Shows the lines that are currently active
Lower Right Hand Corner = Shows the length of the pre-recorded announcement
Exiting ANSWER MODE
Simply press the IDLE button for 2 seconds.
Answering the Call
The DL-4 answers all line after the first ring. This can not be adjusted.
Disconnect Methods
The DL-4 has two disconnect methods.
CPC Disconnect
If the DL-4 detect a CPC or Battery Reversal during an inbound call, it will automatically
disconnect
Play Loop Disconnect
The DL-4 will automatically hang up after the announcement has played a preset number
of times. The default value is 3. The number of LOOPS can be adjusted from 1 to 6.
To adjust the number of loops do the following:
1- From IDLE MODE press and HOLD DOWN the COUNTER RESET Button until the
unit BEEPS (approximately 18 seconds). The display will read: Play Loops. Press the
Page 4 of 7
Page 5

PAUSE button to decrease setting, and TEST button to increase the setting. Press IDLE
button to exit.
The SD Card
The SD card should ONLY be installed or removed from the DL-4 while it is in the IDLE
MODE or when the unit is removed from power. The DL-4 is not compatible with all SD
cards. It will ONLY work with one of the following SD Cards. Due to the
inconsistencies in the specifications of SD Cards from one manufacture to the next, the
DL-4 is not compatible with all SD Cards. The following is a list of approved SD Cards.
Only one of these types of cards should be used.
Compatible SD Cards
1- Toshiba "High Performance" SD Memory Card (Not Over 2G in size)
2- ScanDisk SD Card (Not over 2G in size)
3- ScanDisk Ultra II SD Card (Not over 2G in size)
Using the SD Card in your Computer
The SD Card can be inserted into a Windows based computer and the audio wav file can
be copied or replaced by the computer. There is ONLY one file that should be stored on
the DL-4 SD card. It is named "DL4.WAV" (all capitals). If you wish to store a WAV
file from your computer to the SD card, you MUST change the name of the file first. The
name of the new file MUST be "DL4.WAV" before you copy it to the SD Card. If any
other file is stored on the SD Card, the DL4.WAV file might not play back properly, and
the other file could be corrupted. If you wish to replace the DL4.WAV file, simply write
the file to the SD Card. The old file will automatically be deleted. If you have problems,
try re-formatting the SD Card before you copy the file.
Size of Card
The DL-4 uses approximately 1.92MB of memory for each minute of recorded audio.
Even though a card states a specific size, you don't have access to all of the memory in
the card. A certain amount of memory is lost to overhead for the card. The following
shows the maximum message length for each size of size of SD memory card:
(Can not use SD cards under 64MB)
128MB = 1 Hour, 2.5 Minutes
Page 5 of 7
Page 6

256MB = 2 Hours, 5.5 Minutes
512MB = 4 Hours, 12 Minutes
1GB = 8 Hours, 42 Minutes
2GB = 17 Hours, 28.5 Minutes
(Can Not Use SD cards over 2GB)
SD Card Lock
The LOCK switch on the SD card can be used to protect an announcement from
accidental erasure. When the LOCK switch is in the ON position, the DL4 will not allow
the user to record a new announcement. The unit will play back normally with the LOCK
switch ON.
Life of SD Card
All SD memory cards have a maximum number of times that you can write to them. In
general most cards have approximately a 100,000 write cycle life. There is no limit on the
number of times that you read the data. The DL-4 will display a message indicating that
the card is bad when it is worn out.
Audio WAV File
The DL-4 uses a specific WAV file format that is compatible with Windows based
computers. This makes it possible for the end user to produce and/or store audio files
directly on their computer. The specifications for the WAV file format is as follows:
File Name =
File Type=
Sampling Rate =
Sample Size =
Compression = No Compression
Channels = MONO
DO NOT store any other files on the DL4 SD Card. The only file that should be on the
SD Card is "DL4.WAV".
DL4.WAV
WAV
16,000 per second
16 bits
(All Capitals) Must be stored on SD card with this name.
(16K)
Tech Support - 916-786-6186
If you have any problems getting the unit to work properly feel free to give us a call.
Technical Support is available between the hours of 7:30 AM and 4:30 PM Pacific Time,
Monday through Friday.
Page 6 of 7
Page 7

• ONE YEAR LIMITED WARRANTY
This SKUTCH PRODUCT is warranted against defects for a period of one (1) year from
the date of the original invoice. Within this period, we will repair it without charge for
parts and labor. To obtain warranty service the product must be returned, at the
customer's expense, to SKUTCH Electronics along with a copy of the original invoice.
After the unit has been repaired, SKUTCH will ship the PRODUCT back via UPS
GROUND service at our expense. If any other form of return shipment is requested, the
customer will pay for 100% of the shipping cost.
This Warranty does not apply if in the sole opinion of SKUTCH Electronics, the
PRODUCT has been damaged by lightning or any other Acts of God, or by accident,
misuse, neglect, or improper packing, shipping, modification or servicing by other than
an authorized SKUTCH Service Center.
EXCEPT AS SPECIFICALLY PROVIDED IN THIS AGREEMENT, THERE ARE NO
OTHER WARRANTIES, EXPRESSED OR IMPLIED, INCLUDING, BUT NOT
LIMITED TO, ANY IMPLIED WARRANTIES OR MERCHANTABILITIES OR
FITNESS FOR A PARTICULAR PURPOSE AND IN NO EVENT SHALL SKUTCH
ELECTRONICS BE LIABLE FOR LOSS OF PROFITS OR BENEFITS, INDIRECT,
SPECIAL, CONSEQUENTIAL OR OTHER SIMILAR DAMAGES ARISING OUT OF
ANY BREACH OF THIS WARRANTY OR OTHERWISE.
Page 7 of 7
 Loading...