

SKUTCH CK-1P10 User Manual
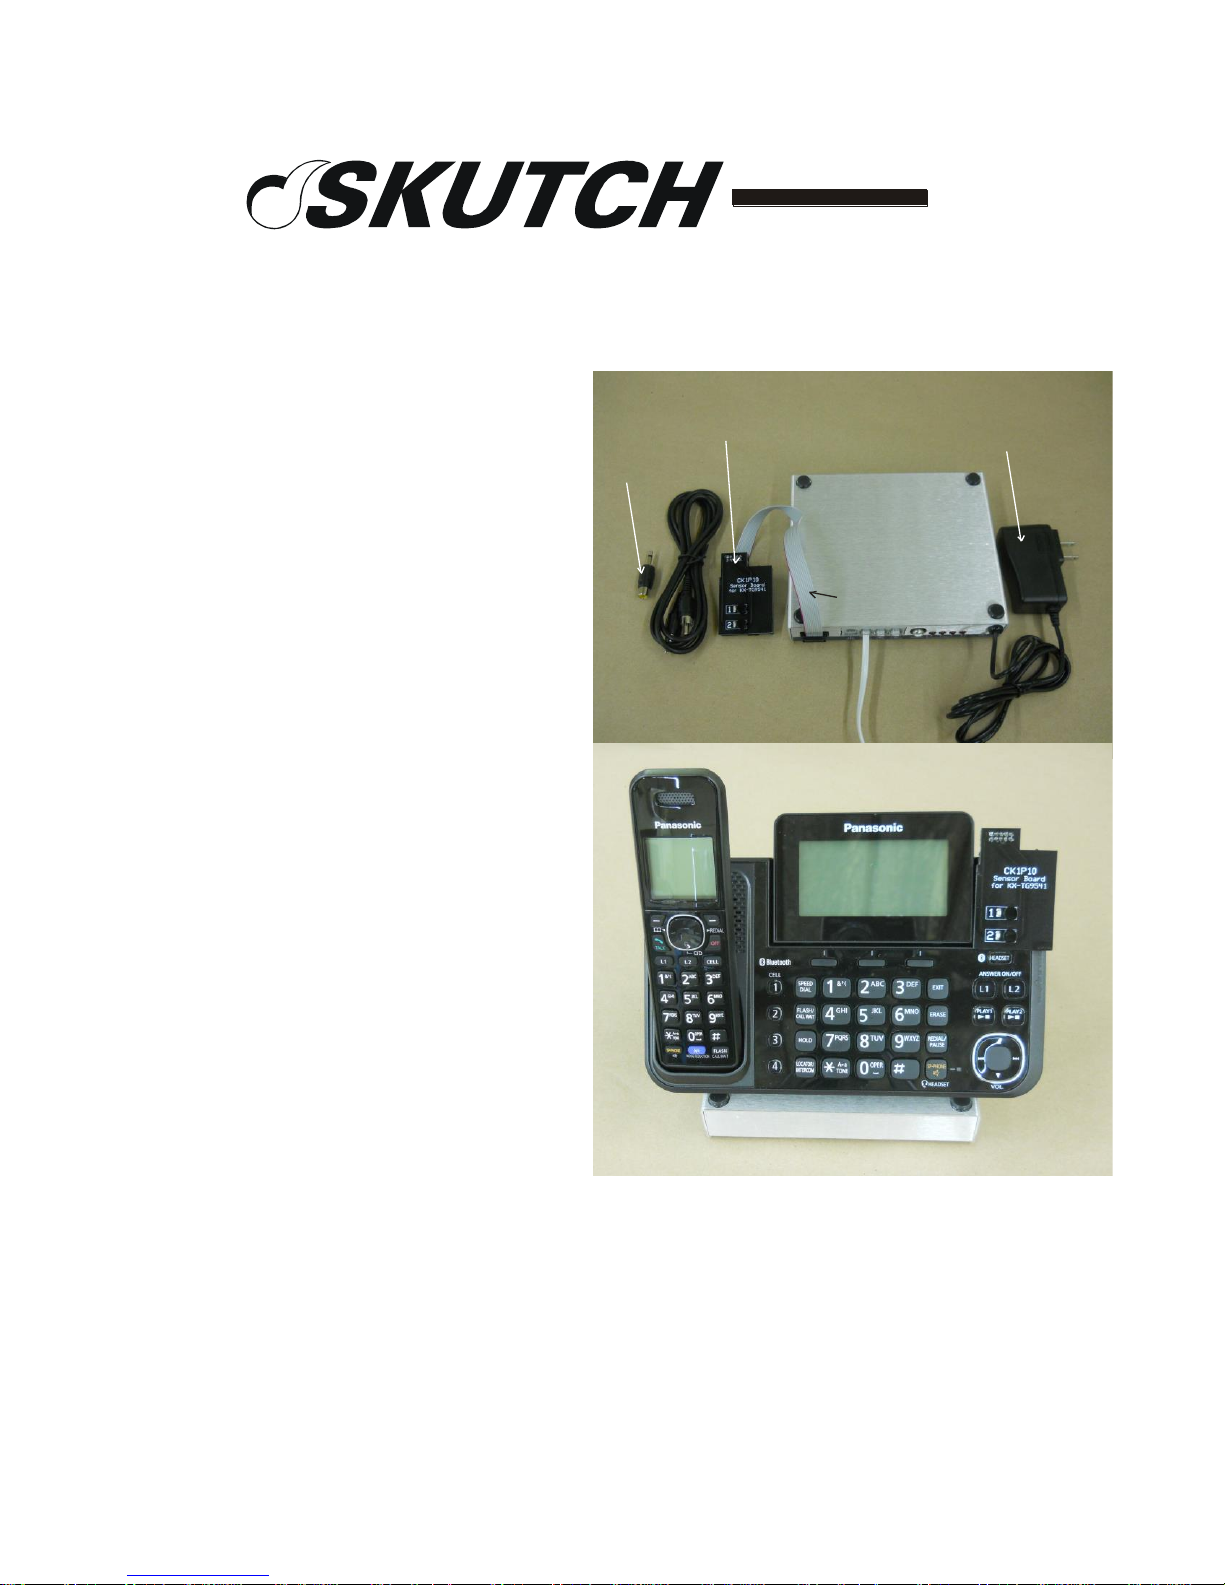
CK-1P10
Box
Sensor Board
Audio Cord
Power Cube
Flat Cable
Adapter
CK-1P10 installed on KX-TG9541B
"Telecommunication Products to solve Telecommunication Problems"
Promotion-On-Hold
For the Panasonic KX-TG9541B
Introduction
Thank you for purchasing the Skutch
CK-1P10 Promotion-On-Hold Module
for the Panasonic KX-TG9541B two
line expanded phone system. This unit
ONLY works with one specific KXTG9541B BASE phone, and on all of
the cordless units, KX-TGA950 units,
that are registered to that specific BASE
unit. It will NOT supply promotion-onhold to Cell Phone calls that are Linked
to this phone. This phone allows you to
register a maximum of 6 handsets to the
BASE phone. The CK-1P10 is a true
plug and play device. This unit requires
an external sound source such as a
Digital MP3 Player to provide the
Promotion-On-Hold audio. When a call
is placed ON HOLD, from the base or
any of the phone’s cordless units, the ON HOLD caller will hear the Promotion-On-Hold
audio. When the line is re-answered, the audio automatically stops. It's that simple!
CK-1P10
Module
telephone
03/22/16
Installation
The SENSOR Board MUST be attached to the BASE phone or this unit will not function.
The Sensor board MUST completely cover the LINE 1 and LINE 2 buttons on the phone.
1- Make sure that the surface on the telephone is clean and free of dust and/or oil.
Page 1 of 4
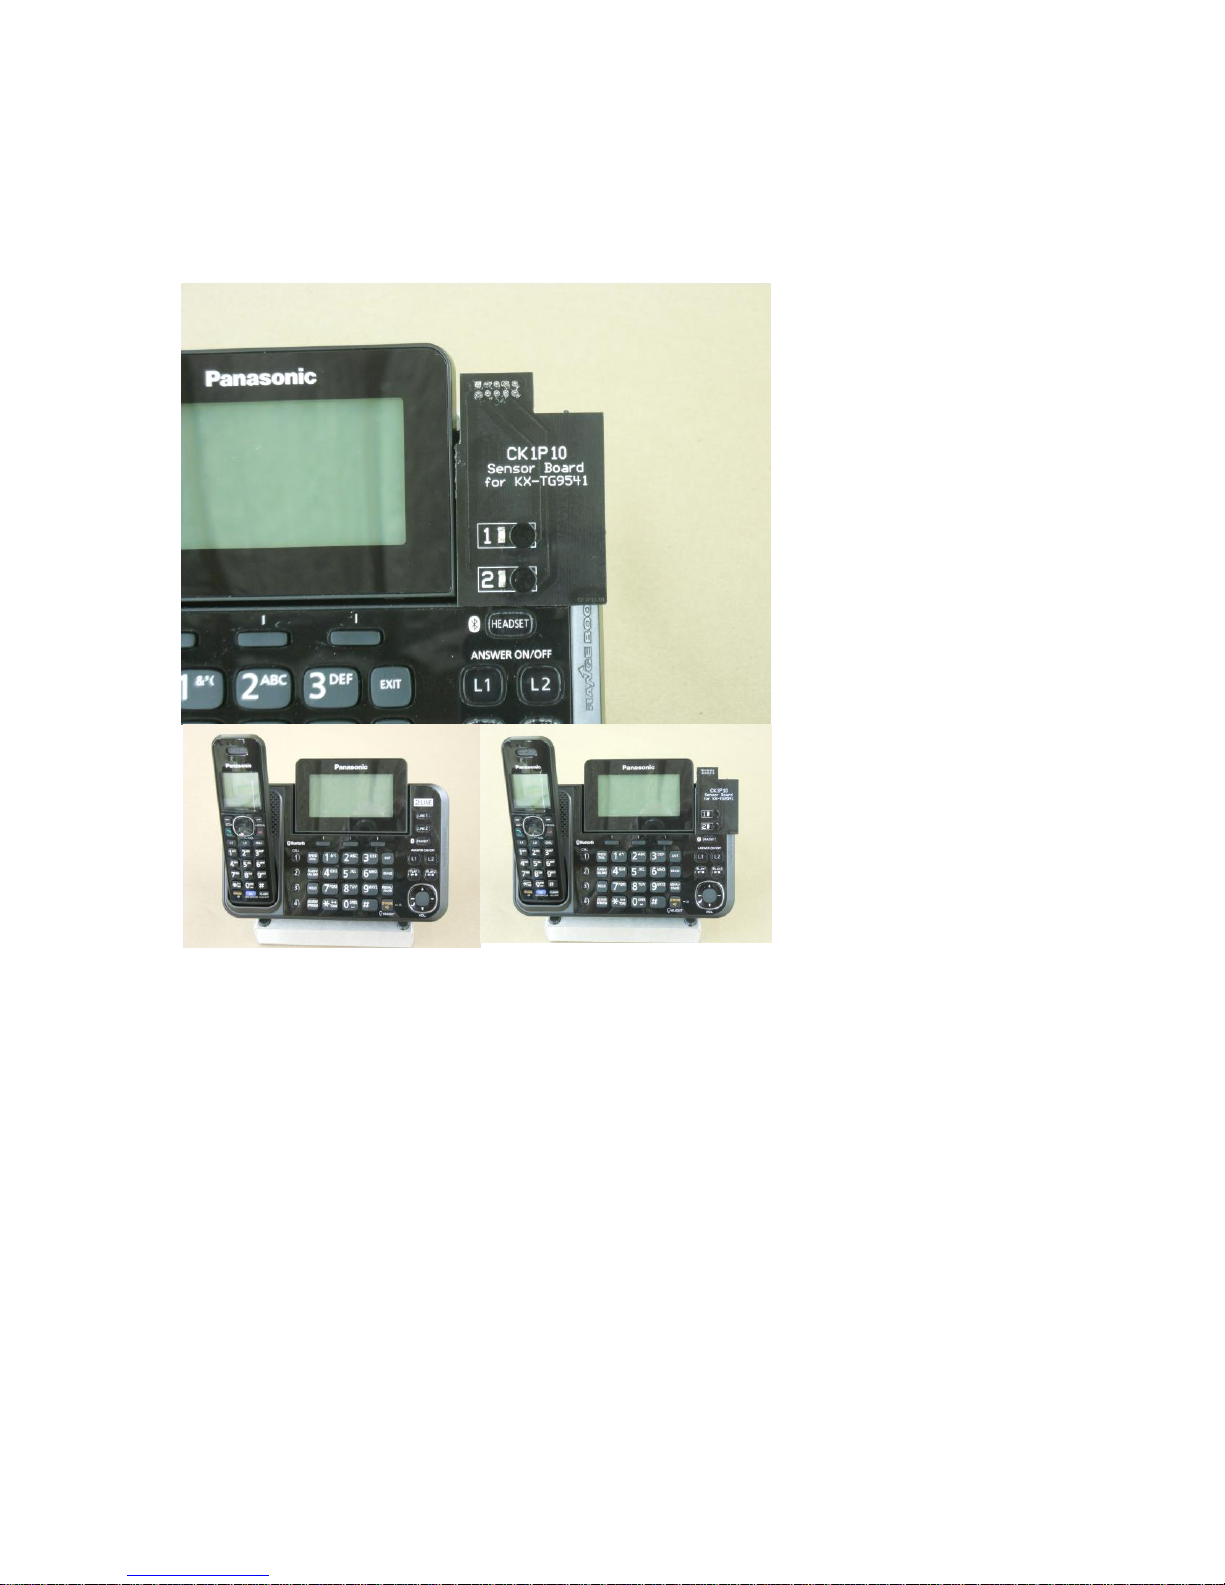
2- Peel the paper protectors off back side of the "SENSOR BOARD" . Align as shown in
Fig #2
Before
After
Fig. 2. The Sensor Board MUST completely cover the line selector buttons on the phone
and fit flush against the phone. Once you are SURE it is aligned correctly, press down
firmly to adhere to phone.
3- Position the CK-1P10 box under the base telephone with the jacks facing towards the
back of the phone. (See Fig. 3).
4- Connect the short modular cord from [1&2 to Phone] on the CK-1 to the [LINE 1/2]
jack on the Phone.
5- Connect a MOD cord from Telephone Wall Jack 1&2 to [1&2 to Line] on CK-1.
6- Connect one end of the audio cord to the CK-1P10 in the AUDIO IN jack. Connect the
other end to the output of your audio player. Do NOT use the supplied Audio Adapter on
the CK-1P10 side.
7- Connect the POWER CUBE from the CK-1 box to 115VAC power.
Page 2 of 4
 Loading...