

Page 1
MOUNTING INSTRUCTION BLUEMELS MATT ¬ 10434 + 10433 + 10435
ASSEMBLING FRONT MUDGUARD
ALLROAD
ROAD
MOUNTAIN
BA
4
C1
7
D
C2
1
3
2
MOUNTING
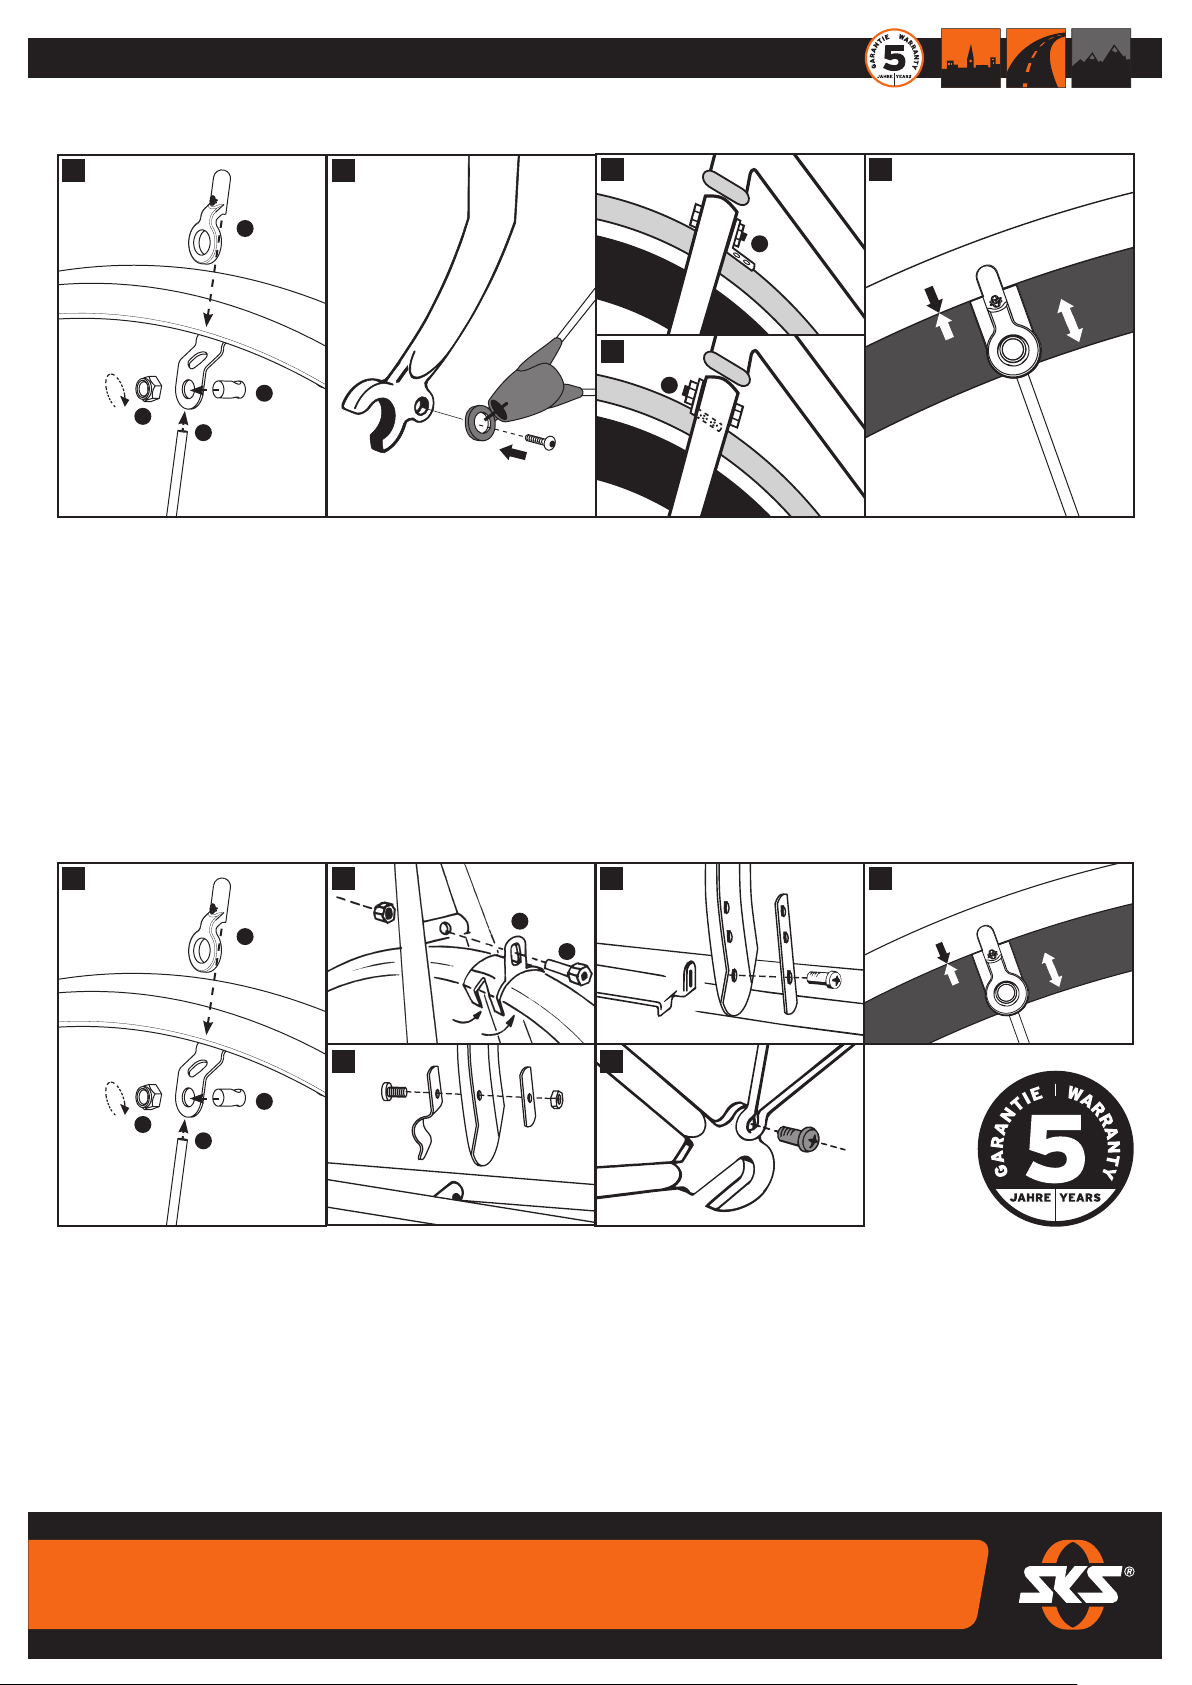
Open the polybag containing the ttings and check all parts are complete. To simplify the procedure prepare the stays rst.
MOUNTING THE FRONT MUDUARD
Before mounting the endcap, guide the stays through the bridge and eyebolt. The eyebolt nuts should only be tightened slightly. Now set the optimal alignment of the wheel guard to the tire. Mark
the appropriate length and cut the stays with a hacksaw. Pass the stay ➋ through hole in bolt ➊ and tighten with nut ➌. After that push the endcap ➍ on the stay and over the tighencel nut.
(pic.A). The prepared front mudguard (prole & ASR-stay) should be xed slightly with the enclosed screws to the fork lug eyes. (pic.B).Bolt the front mudguard shackle with the enclosed screw to
the brake bolt (pic.C1+C2). Make all the nal adjustments for a perfect t (pic.D). Secure in place by tightening the nuts ➌ with 2 Nm on the bolts ➋. The protruding stay can either be cut o or
tted with an endcap. The enclosed spacers allow the assembling at forks with disc brakes, if they are on the line with the stay (Abb.E1 + E2). A maximum of 4 spacers are used at once.
7
MOUNTING REAR MUDGUARD
A
4
1
3
2
Before mounting the endcap ➍, guide the stays through the bridge and eyebolt. The eyebolt should only be tightened slightly. Now set the optimal alignment of the wheel guard to the tire. Mark
the appropriate length and cut the stays with a hacksaw.
Pass the stay ➋ through hole in bolt ➊ and tighten with nut ➌. After that push the endcap ➍ on the stay and over the tighened nut. (pic.A).
Fix sliding bridge ➎ with the enclosed screw ➏ to the seatstay plate or bridge. Fit the rear mudguard ensuring the slot for xing to the chainstay is to the front. Once in position the ends of the sliding
bridge can be bent around the mudguards to secure it in place (pic.B).
Depending on the type of chainstay plate or bridge there are two methods of xation:
• x directly through the hole with plate/washer, screw and nut (pic.C).
• pre-assemble the clip with plate/washer, screw and nut (pic.D).
Place the pre-assembled mudguard on the rear wheel and x it rst to the chain stay plate, then to the seat stay bridge and nally the V-stays to the frame lug eyes (pic.E.).
Make all the nal adjustments for a perfect t (pic.F).
B
5
C
D F
6
E
MADE IN GERMANY SKS-GERMANY.COM
GERMANY
 Loading...