

Page 1
QUICK START GUIDE
Congratulations!
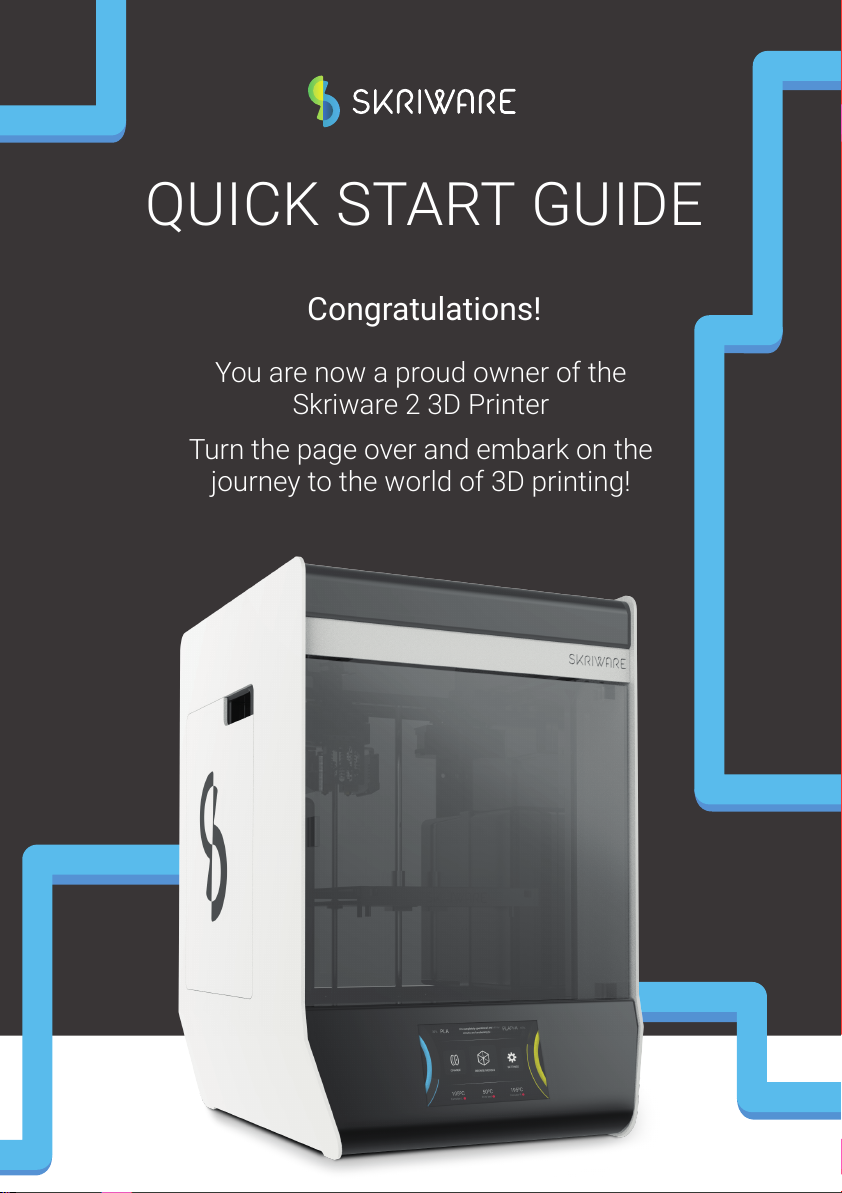
You are now a proud owner of the
Skriware 2 3D Printer
Turn the page over and embark on the
journey to the world of 3D printing!
Page 2
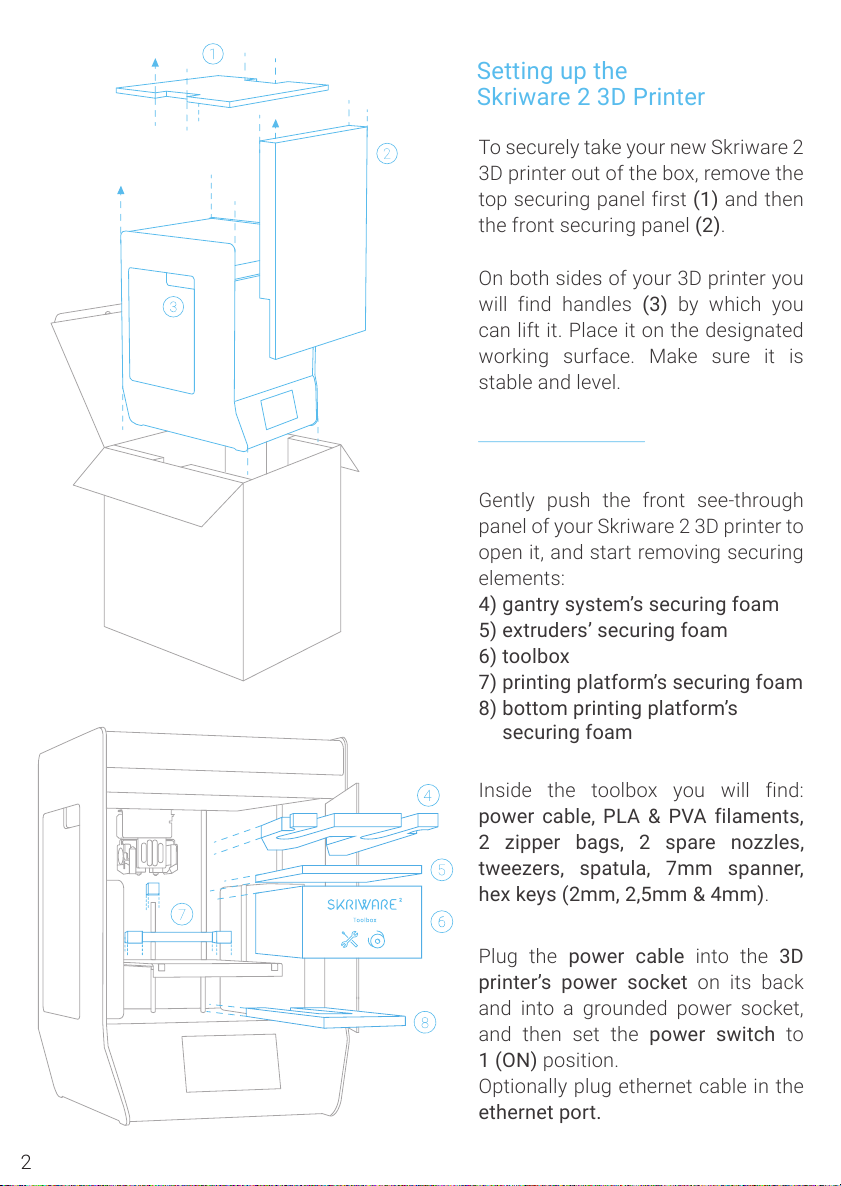
To securely take your new Skriware 2
3D printer out of the box, remove the
top securing panel first (1) and then
the front securing panel (2).
On both sides of your 3D printer you
will find handles (3) by which you
can lift it. Place it on the designated
working surface. Make sure it is
stable and level.
Inside the toolbox you will find:
power cable, PLA & PVA filaments,
2 zipper bags, 2 spare nozzles,
tweezers, spatula, 7mm spanner,
hex keys (2mm, 2,5mm & 4mm).
Plug the power cable into the 3D
printer’s power socket on its back
and into a grounded power socket,
and then set the power switch to
1 (ON) position.
Optionally plug ethernet cable in the
ethernet port.
Gently push the front see-through
panel of your Skriware 2 3D printer to
open it, and start removing securing
elements:
4) gantry system’s securing foam
5) extruders’ securing foam
6) toolbox
7) printing platform’s securing foam
8) bottom printing platform’s
Setting up the
Skriware 2 3D Printer
2
securing foam
Page 3
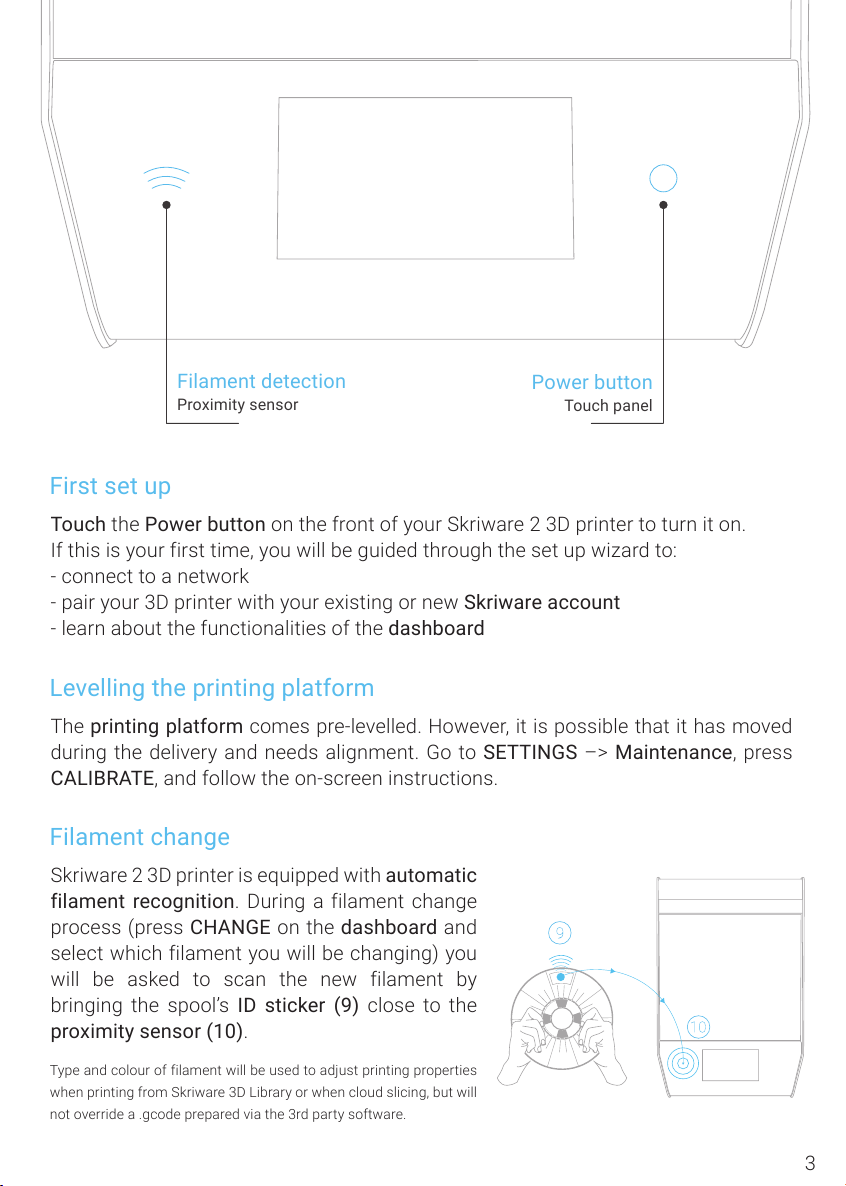
Filament detection
Proximity sensor
Power button
Touch panel
First set up
Touch the Power button on the front of your Skriware 2 3D printer to turn it on.
If this is your first time, you will be guided through the set up wizard to:
- connect to a network
- pair your 3D printer with your existing or new Skriware account
- learn about the functionalities of the dashboard
Levelling the printing platform
The printing platform comes pre-levelled. However, it is possible that it has moved
during the delivery and needs alignment. Go to SETTINGS –> Maintenance, press
CALIBRATE, and follow the on-screen instructions.
Filament change
Skriware 2 3D printer is equipped with automatic
filament recognition. During a filament change
process (press CHANGE on the dashboard and
select which filament you will be changing) you
will be asked to scan the new filament by
bringing the spool’s ID sticker (9) close to the
proximity sensor (10).
Type an d colour of filament will be used to ad just printing proper ties
when printing from Skriware 3D Library or when cloud slicing, but will
not override a .gcode prepared via the 3rd party software.
3
Page 4
Safety & compliance
Risk of burns
Skriware 2 3D printer itself operates in a safe temperature spectrum
but some of its parts can get extremely hot (up to 275OC/530OF). Never
touch the hotend, extruder, or printing platform and their vicinities
while you can see the red symbol on the display. These parts can
stay hot up to 30 minutes after the 3D printer finishes operating.
Moving mechanical elements
Never reach into the Skriware 2 3D Printer’s work area, and be careful
around it, while it operates. Extruders’ gantry system uses mighty
engines that may pull in a piece of clothing or clip a body part.
Risk of electrocution
Skriware 2 3D Printer requires electric power to operate. Always
connect the power cable to a grounded power socket. Never perform
any maintenance while it is connected to a power socket, unless it is
explicitly stated otherwise.
Dangerous vapours
Skriware 2 3D Printer has been designed to print with Skriware
filaments. It is advised to use your Skriware 2 3D Printer in a well
ventilated area. Depending on a type of filament, some dangerous
vapours can be released during a print process. Use other than
officially supported Skriware filaments at own risk as such use will
void your warranty.
Electromagnetic and radio interference
Skriware 2 3D Printer is an electronic device and may cause radio and
television interference. It also utilizes Wi-Fi radio which may cause
disruptions in certain environments.
For more information on how to take the full advantage of your new,
awesome machine go to www.skriware.com/support. You can always
contact us at support@skriware.com.
 Loading...