

Skoot-Eze TBSC79020, TBSC79920 User Manual
CAUTION
Read all warnings and instructions
in this manual before using the
scooter. Keep this manual for future
reference.
User’s Manual
Model No. TBSC79020
Model No. TBSC79920
Table of Contents
Important Precautions . . . . . . . . . .2
Before You Begin . . . . . . . . . . . . .3
How to Set Up the Scooter . . . . . . .4
How to Operate the Scooter . . . . . .6
Maintenance and
Troubleshooting . . . . . . . . . . . . . . .8
Part List . . . . . . . . . . . . . . . . . . . .11
How to Order
Replacement Parts . . . . . . . . . . . .11
Limited Warranty . . . . . .Back Cover

2
Important Precautions
WARNING :To reduce the risk of serious injury, read these warnings before using the scooter.
1. Read, understand, and follow all warnings and
instructions on the scooter and in this manual.
Save this manual for future reference.
2. It is the owner’s responsibility to ensure that all
users of the scooter are adequately informed of,
and follow, all warnings and instructions.
3. Inspect the scooter and tighten or replace any
loose or missing parts before each use. In addition, make sure that the wheels rotate freely; the
wheel bolts are tight; the horn, turn signals, mirror, and front light function well; and the brake
is properly adjusted and working.
4. Keep the tires properly inflated. Do not use the
scooter if the tires are underinflated; this can
cause loss of control and can damage the motor
or batteries.
5. Always wear protective equipment, including a
helmet, knee pads, wrist guards, elbow pads, and
closed-toed shoes, when using the scooter.
6. Keep children away from the scooter at all times.
Always turn the key to the off position and
remove it when the scooter is not in use. Always
store the scooter in a protected area where unauthorized use is prevented.
7. The scooter should not be used by children.
8. Never ride the scooter on streets, roadways, or
driveways that enter vehicle traffic routes. Always
comply with all local laws and regulations. Use
the turn signals before turning.
9. The scooter is not recommended for riders
weighing more than 300 pounds. To prevent serious injury or damage to the scooter, do not
exceed this maximum user weight limit.
10. Never ride the scooter on wet or uneven surfaces
or when visibility is poor. Use the front light in
darkened conditions.
11. Do not allow more than one person to ride the
scooter at a time. Never tow another person or
vehicle behind the scooter. Never allow the scooter to be towed behind a bicycle, motorcycle, or
vehicle.
12. Never place hands near moving parts when the
power is on. Make sure the on/off switch is in the
off position before performing any of the maintenance or troubleshooting procedures described
in this manual.
13. Do not ride the scooter on unpaved surfaces. Do
not leave the scooter in dusty, wet, or rainy
areas. Clean the scooter after each use with a
damp cloth and a small amount of mild detergent. Keep the batteries and electronics dry and
protected from dirt and contaminants. Charge
the scooter only in a dry, well-ventilated area
and follow all instructions.
14. Ride the scooter only in the restricted speed setting until you have familiarized yourself with the
operation of the scooter. Always use the restricted speed setting when riding the scooter indoors
or when riding the scooter in reverse.
15. The scooter is capable of high speeds, even when
the motor is first started. Adjust the speed in
small increments to avoid sudden jumps in
speed.
16. Use only the supplied charger to charge the
scooter. Do not use the charger or the scooter if
any wires or electric components become damaged or frayed. Use only components or parts
supplied by the manufacturer for all repairs and
replacements.
17. Never remove the nuts holding the rims together
without first deflating the tires.
3
Before You Begin
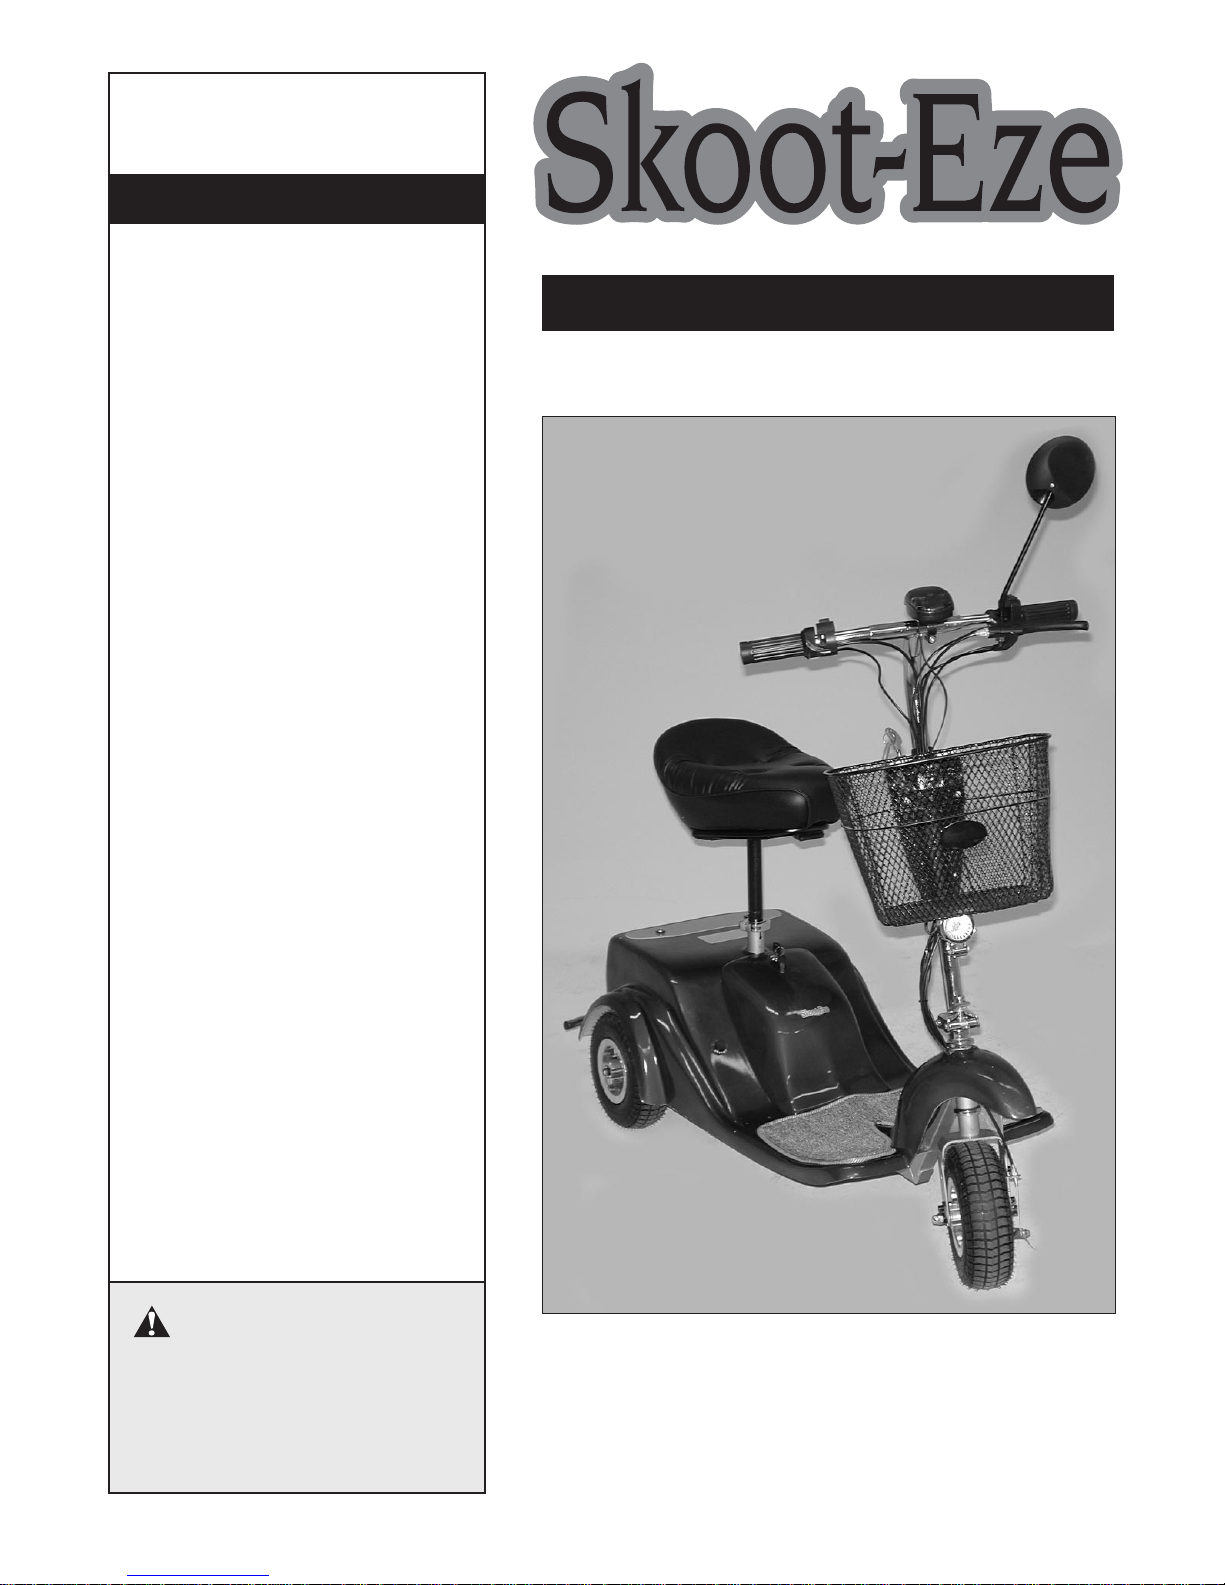
Thank you for selecting the new SCOOT-EZE™motorized scooter. The SCOOT-EZE motorized scooter combines
quiet electric power with a sturdy, compact design to provide you with comfortable motorized transportation. For
your safety and benefit, carefully read all of the warnings and instructions in this manual before using the
scooter.
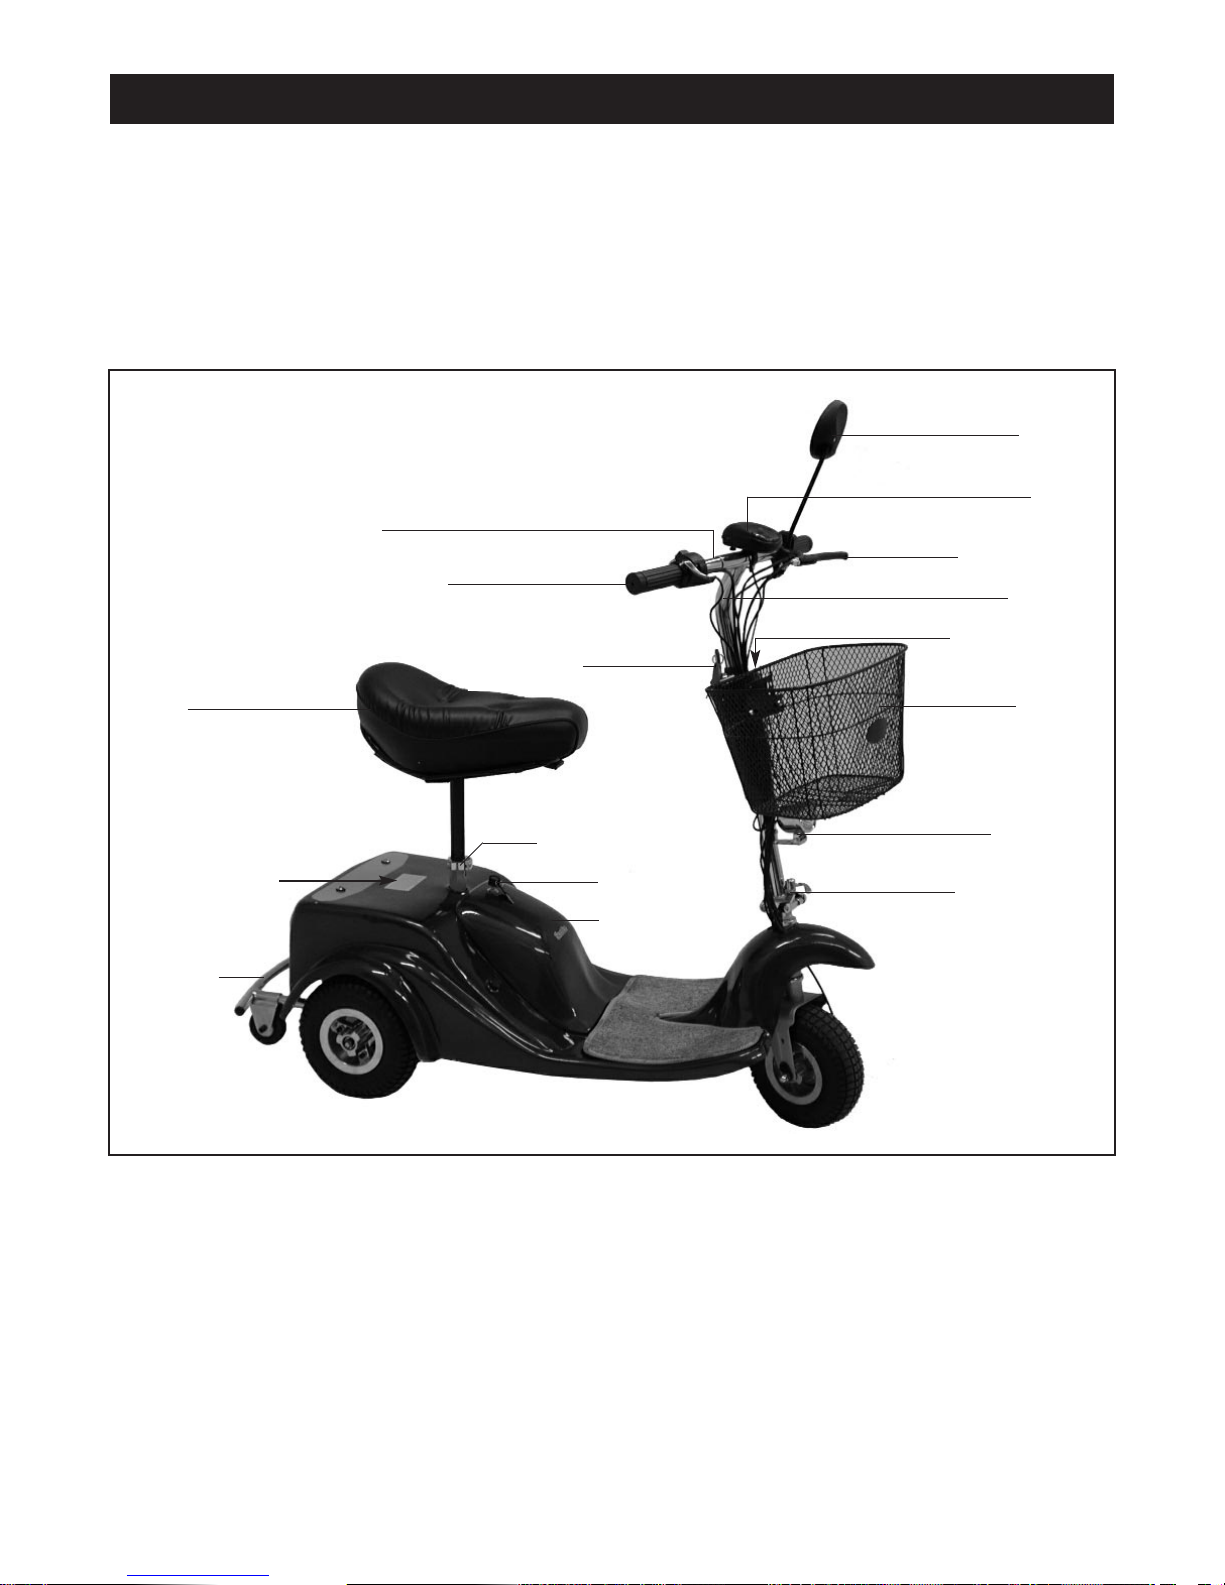
Before reading further, please take a moment to familiarize yourself with the parts of the scooter that are labeled in
the drawing below.
A caution decal has been placed on the scooter in the location shown above. If the decal is missing or illegible,
please call our Customer Service Department toll-free at 1-800-999-3756, Monday through Friday, 6 a.m. until
6 p.m. Mountain Time, to order a free replacement decal. Apply the replacement decal in the location shown.
Headlight
Seat Clamp
Seat
Horn
On/Off Keys
Handlebar
Handgrip Throttle
Battery Cover
Basket
Cover Keys
Bumper
Caution Decal
Upright Latch
Brake Handle
Power Display
Upright
Mirror
4
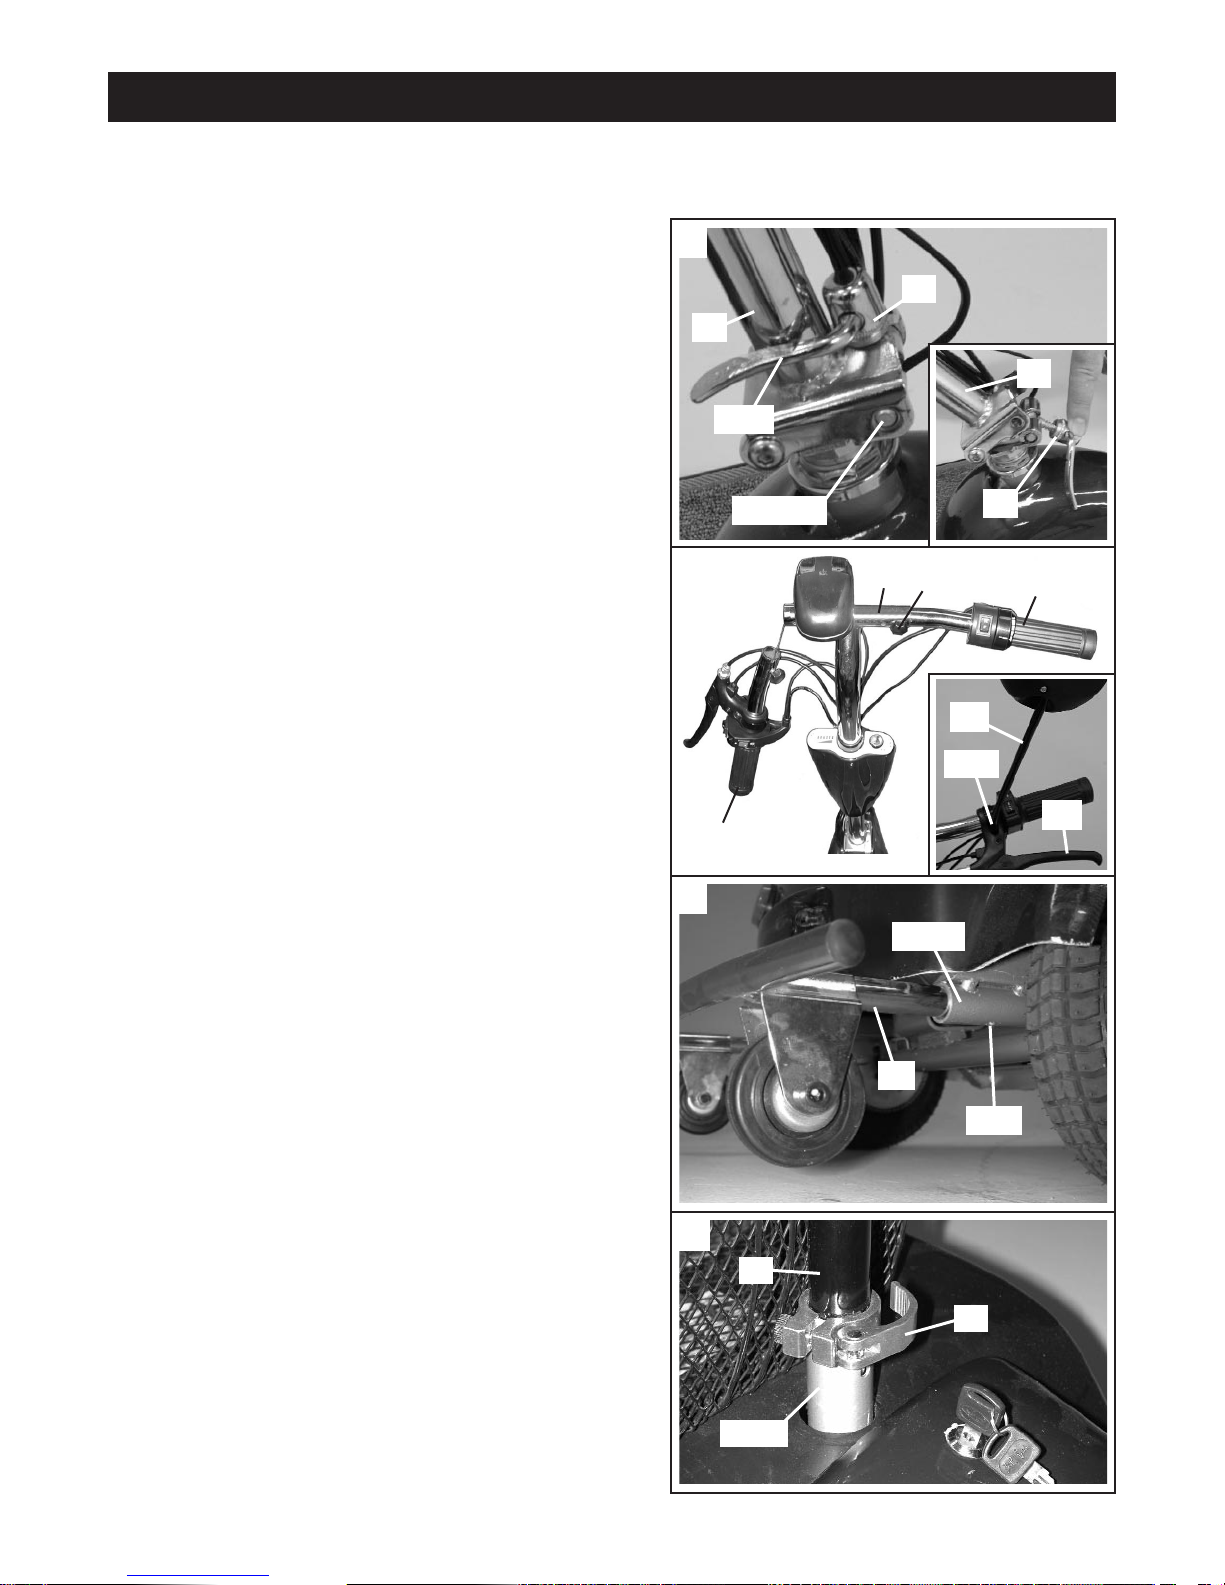
How to Set Up the Scooter
Follow the steps below to set up the scooter for use. Assembly requires the included tool kit.
2. Insert the Right Handlebar (26) into the crossbar on the
Upright (41) as shown. Attach the Right Handlebar by
tightening a Handlebar Screw and Handlebar Washer
(22) into the outer hole in the crossbar.
Attach the Left Handlebar (27) to the crossbar in the
same manner.
See the inset photograph. Remove the screw (not
shown) from the indicated hole. Tighten the Mirror (24)
into the hole until the Brake Handle (28) is held securely.
3. Insert the Bumper (8) into the indicated tubes on the
frame. Note: It may be necessary to use a rubber mallet
to fully insert the Bumper.
Tighten a Bumper Screw (not shown) into the indicated
hole in each of the tubes on the frame.
4. Open the lever on the Seat Clamp (3). Insert the Seat
Post (2) into the frame. Close the lever on the Seat
Clamp.
2
1. See the inset photograph. Press and hold down the
Upright Latch (19). While holding down the Upright
Latch, fully raise the Upright (41).
Raise the Upright Latch (19), making sure that the latch
pins snap securely into the holes in the bracket on the
Upright (41). Securely fasten the Upright Latch by folding down the lever on the Upright Latch to the position
shown.
3
1
Latch Pin
19
41
41
19
Lever
Hole
Tube
8
Hole
24
28
26
22
41
27
4
2
Frame
3
 Loading...