

SIMPLY CLEVER
ŠkodaFabia
ŠkodaRoomster
SUPPLEMENT TO THE OWNER'S MANUAL
Technical Changes 11/2010
Introduction 1
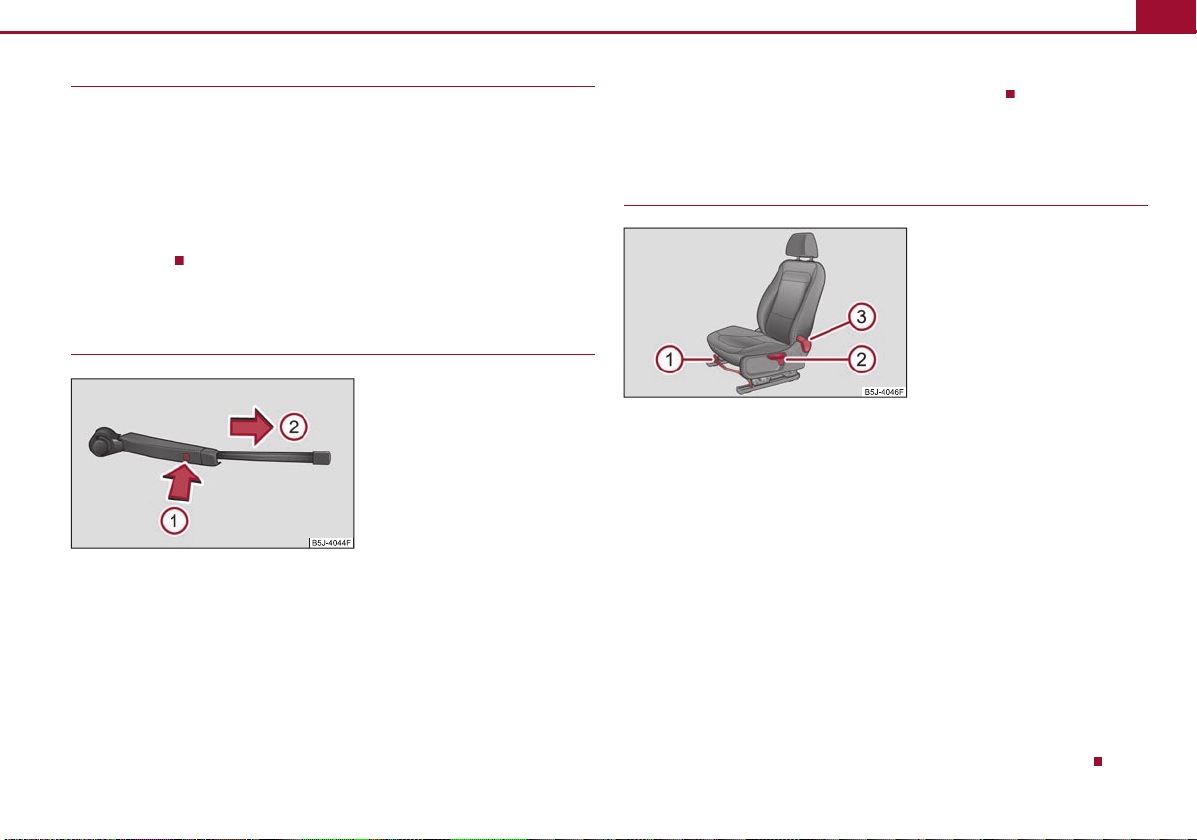
Fig. 1 Wiper blade for rear window
A
1A2
Fig. 2 Control elements at the seat
A
1A1A2A2A3A3
Introduction
This supplement to the FABIA Owner's manual Edition 05.10 and the ROOMSTER
Owner's manual Edition 03.10, henceforth referred to as the Owner's manual.
The information given in this supplement takes preference over the information in the
Owner's manual.
Special equipment is marked with the symbol *.
We wish you a good journey
Škoda Auto a.s.
Replacing the wiper blade for rear window
(FABIA GreenLine)
Taking off the wiper blade
– Fold wiper arm out from the windscreen and position the wiper blade at right
angles to the wiper arm fig. 1.
– Hold the window wiper arm at the top end with one hand.
– With the other hand unlock the locking button and remove the wiper blade in
the direction of arrow .
Attaching a wiper blade
– Push the wiper blade onto the wiper arm until it engages.
– Check whether the wiper blade is correctly attached.
– Fold the windscreen wiper arm back onto the windscreen.
Front seats
Adjusting the front seats
This seat variant is not available in all countries.
Adjusting a seat in a forward/back direction
– Pull the lever (in the centre) fig. 2 up and push the seat into the desired posi-
tion.
– Release the lever and push the seat further until the lock is heard to engage.
Adjusting height of seat*
– Move the lever upwards again to raise the seat.
– Lower the seat if required by pushing or pumping lever downwards.
Adjust the angle of the seat backrest
– Relieve any pressure on the seat backrest (do not lean on it) and turn the lever
to the back. Push with the back against the seat backrest to adjust the desired angle
of the backrest.
– Release the lever . The seat backrest remains in the adjusted position.
“START - STOP”*2
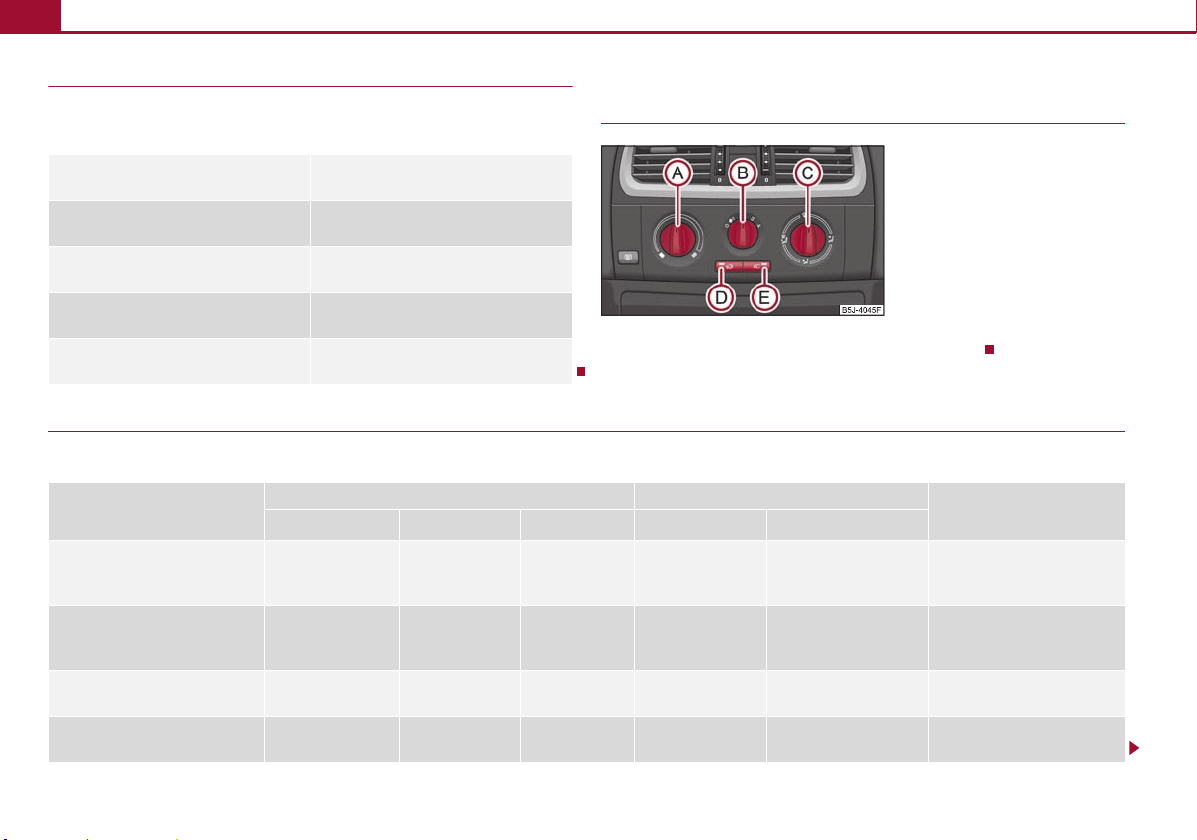
Fig. 3 Climatic: Control elements
AAABACADA
E
“START - STOP”*
Messages in the instrument cluster display (valid for vehicles without MAXIDOT
info display*)
ERROR START STOP
START STOP NOT POSSIBLE Automatic engine shut down is not possi-
START STOP ACTIVE Automatic engine shut down (stop
SWITCH OFF IGNITION
START MANUALLY
Climatic Setting
Recommended settings for the Climatic control elements:
Adjusting
Defrost function, windscreen and
side windows
Anti-fog function, windscreen
and side windows
Quickest-possible heating
Comfort temperature
Error in the START-STOP system
ble
phase)
Switch off the ignition
Start the engine manually
Switch positions Button
To the right up to the
stop
Desired tempera-
ture
To the right up to the
stop
Desired tempera-
ture
3
2
3
2 or 3
Climatic*
Using the system
The set temperature will not be maintained automatically.
Do not switch on Switched off
Do not switch on Activated
briefly switched on Switched off Opening
Do not switch on Switched off Opening
Air outlet vents 4
Open and adjust the flow of
air in direction of the side win-
dow
Open and adjust the flow of
air in direction of the side win-
dow
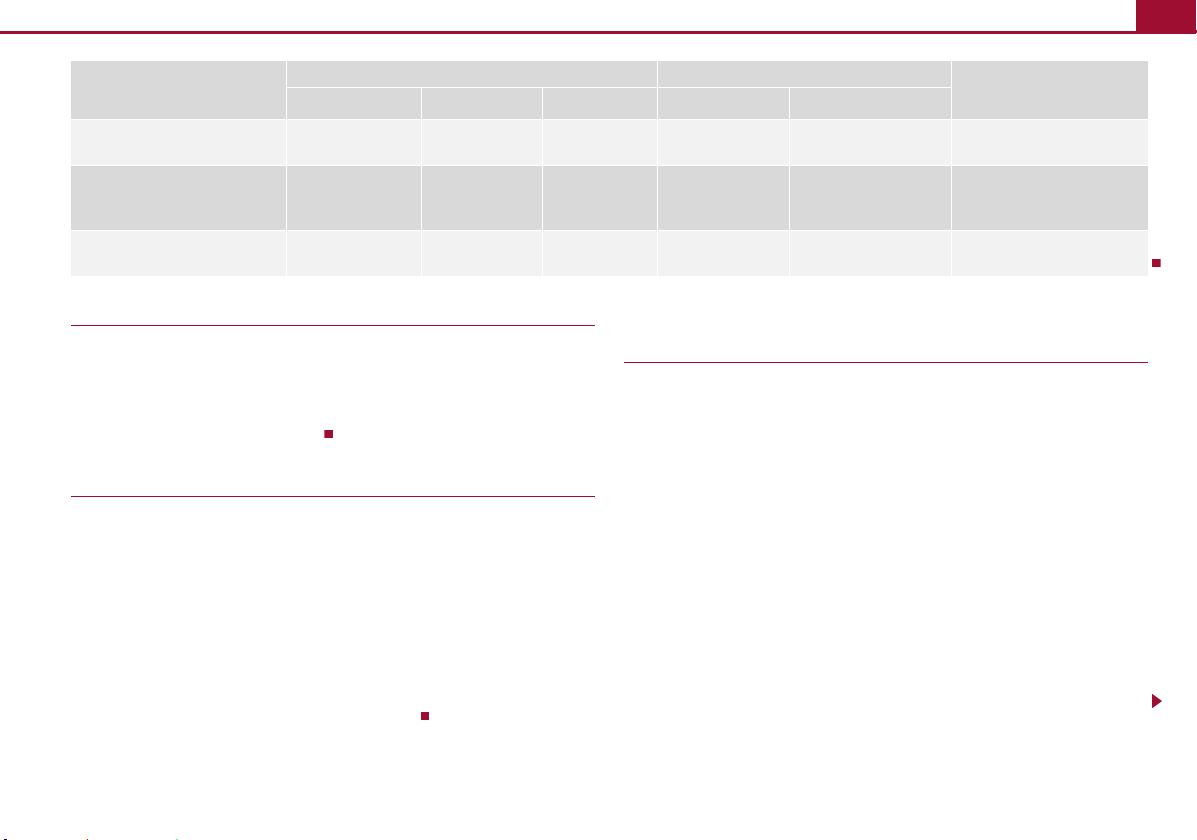
Electronic Differential Lock (EDL and XDS)* 3
AAABACADA
E
Adjusting
Quickest-possible cooling
optimal cooling
Fresh air mode - ventilation
To the left up to the
stop
Desired tempera-
ture
To the left up to the
stop
Switch positions Button
briefly4, then 2or
3
1, 2 or 3
required position:
Electronic Differential Lock (EDL and XDS)*
XDS function (Fabia RS and Fabia RS Combi only)
XDS is an extension to the electronic differential lock. XDS does not respond to traction,
but to the relief of the inner front wheel during fast cornering. XDS applies pressure to
the brake of the inner wheel to prevent it from spinning. Thus, the traction is improved
and the vehicle follows the desired track.
Grades of petrol
Prescribed types of fuel - unleaded petrol RON 98/95
Use unleaded petrol 98 RON. You can also use unleaded RON 95. However some loss
of power is to be expected when doing so.
If unleaded RON 98 or RON 95 is not available, you can refuel with unleaded RON 91
in an emergency. After refuelling, continue driving at medium engine speeds and
minimum engine load. Driving at high engine speeds or heavy engine loads can lead
to serious engine damage! Refuel with petrol with the specified octane number as
often as possible.
Fuel with a lower octane number than RON 91 must not be used even in an emergency. Otherwise you can cause serious engine damage!
Air outlet vents 4
briefly switched on Activated Opening
Do not switch on Activated
Do not switch on Switched off Opening
Open and adjust the flow of
air in direction of the vehicle
roof
Tyre repair kit*
General information
The tyre repair kit is located in a box under the carpet in the luggage compartment.
Use the tyre repair kit to reliably repair tyre damage caused by foreign bodies or a
puncture with diameters up to 4 mm. Do not remove foreign bodies, e.g. screws or
nails, from the tyre!
The repair can be undertaken on the vehicle immediately.
The repair with the tyre repair kit is not at all intended to replace a permanent repair
on the tyre, this repair only serves to reach the next specialist garage.
Do not use the tyre repair kit:
• to repair wheel damage,
• in outside temperatures of less than -20 °C (-4 °F),
• with tears or punctures greater than 4 mm in size,
• to repair damage to the tyre wall,
• when driving with very low tyre pressure or with a completely flat tyre,
• if the use-by-date (see inflation bottle) has passed.
Tyre repair kit*4
WARNING
For the sake of the environment
Note
A
1A2A3A4A5A6A7A8A9A10A11A1A11
• If you find yourself in flowing traffic switch on the hazard warning lights
system and place the warning triangle on the side of the road at the prescribed
distance from your vehicle. Comply with the national legal regulations. In this
way you are protecting not only yourself but also other road users.
• Park the vehicle as far away as possible from the traffic flow. Park on as flat
and firm a surface as possible.
• A tyre filled with sealant has the same driving characteristics as a standard
tyre.
• Do not drive faster than 80 km/h, (50 mph).
• Avoid accelerating at full throttle, sharp braking and fast cornering.
• Check the tyre inflation pressure after driving 10 minutes.
• Sealant is hazardous to heath. Remove immediately if it comes into contact
with the skin.
Used or aged sealant must be disposed of in accordance with environmental protection regulations.
• Observe the manufacturer's usage instructions for the tyre repair kit.
• You can purchase a new bottle of sealant from the range of the Škoda original
accessories.
• Change the wheel that was repaired using the tyre repair kit or consult a specialist
garage about possibilities for getting repairs done.
Components of the tyre repair kit
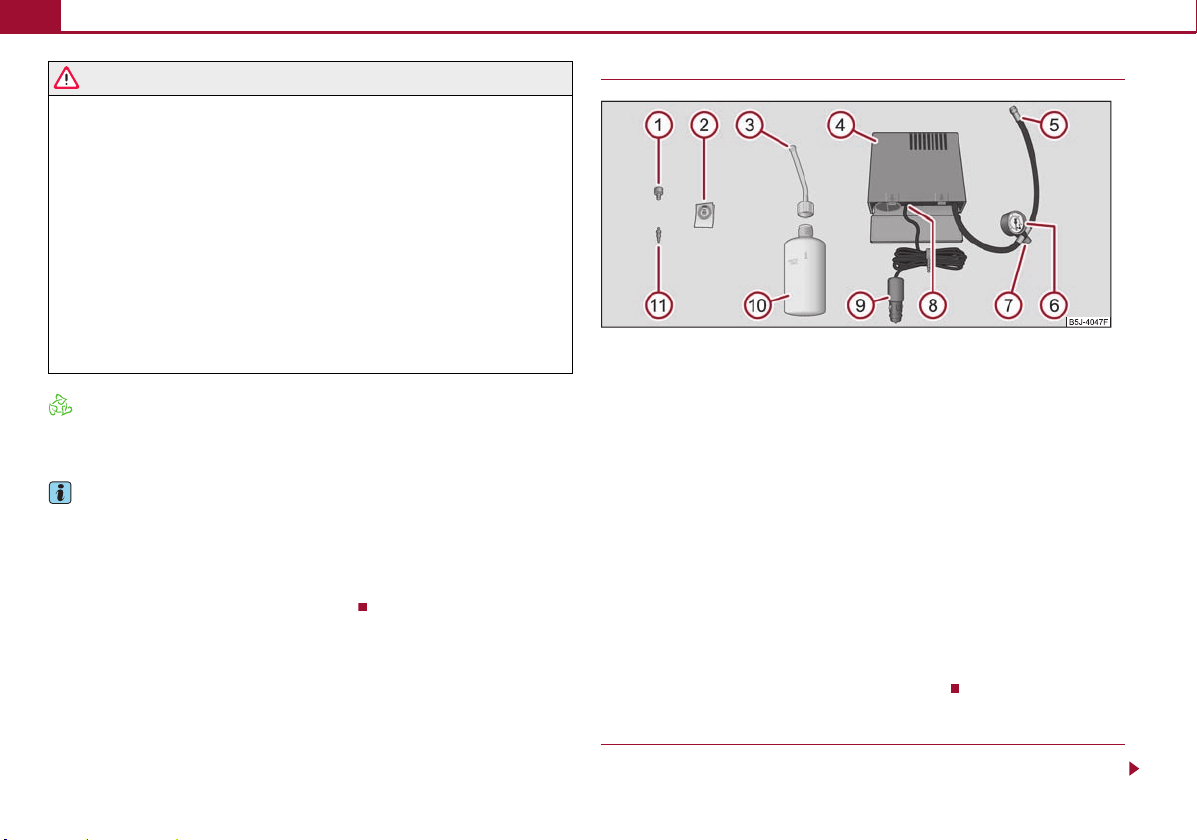
Fig. 4 Components of the tyre repair kit
The tyre repair kit is made up of the following parts:
Valve remover
Sticker with speed designation “max. 80 km/h” / “max. 50 mph”
Inflation hose with plug
Compressor
Tyre inflation hose
Tyre inflation pressure indicator
Air release valve
ON and OFF switch
12 volt cable connector
Tyre inflator bottle with sealing agent
Replacement valve core
The valve remover has a slot at its lower end which fits into the valve core. This is
the only way in which you can remove and re-install the valve core from the tyre valve.
The same also applies to the replacement valve core .
Preparing to use the tyre repair kit
Before using the tyre repair kit, carry out the following preparatory work:
 Loading...