

Page 1

SIMPLY CLEVER
ŠkodaAuto
CAR RADIO BOLERO
Page 2

Škoda Auto pursues a policy of constant product and model development. We trust
that you will understand that changes to models in terms of shape, equipment and
engineering, may be introduced at any time. The information about scope of
delivery, appearance, performances, dimensions, weight, fuel consumption,
standards and functions of the vehicle is only correct at the time of publication.
Certain items of equipment might only be installed later on (information given by
the local authorised Škoda Service Partner) and only envisaged for particular
markets. It is therefore not possible for legal claims to be made based on the data,
illustrations and descriptions contained in this Owner's Manual.
Reprinting, reproduction or translation, either in whole or in part, is not permitted
without the written consent of Škoda Auto.
Škoda Auto expressly reserves all rights relating to copyright laws.
We reserve the right to make changes to this document.
Issued by: ŠKODA AUTO a.s.
© ŠKODA AUTO a.s. 2009
Bolero.indd 2Bolero.indd 2 16.4.2009 8:54:1716.4.2009 8:54:17
Page 3

Contents 1
Contents
General information . . . . . . . . . . . . . . . . .
Equipment overview . . . . . . . . . . . . . . . . . . . . . . . . . .
Important information . . . . . . . . . . . . . . . . . . . . . . . .
Anti-theft protection . . . . . . . . . . . . . . . . . . . . . . . . . .
General - operation . . . . . . . . . . . . . . . . . . . . . . . . . . .
Basic setting . . . . . . . . . . . . . . . . . . . . . . . . . . . . .
Switching the unit on and off . . . . . . . . . . . . . . . . .
Audio settings . . . . . . . . . . . . . . . . . . . . . . . . . . . . . . . . .
RADIO selector key . . . . . . . . . . . . . . . . . . . . . . . . . . .
Range selector key MEDIA . . . . . . . . . . . . . . . . . . . .
Range selector key SETUP . . . . . . . . . . . . . . . . . . . .
Range selector key PHONE . . . . . . . . . . . . . . . . . . .
2
2
2
3
4
6
6
6
6
9
14
16
s3p4.a.book Page 1 Friday, March 13, 2009 3:04 PM
Page 4
General information2
General information
Equipment overview
Switching on/off: Control button for switching the navigation
system on/off (press) and volume control (turn)
Setting up button
− RADIO mode - turn for manual station adjustment; press briefly to
start or stop the automatic play (Scan)
− MEDIA mode - turn to change track; press briefly to start or stop
the automatic play (Scan)
Range selector key for selecting the corresponding Setup:
− - changes over into the radio mode and changes the
frequency range when in the radio mode
− - changes over to the last played media source or selects
a new media source
− - activates the phone function1) - Muting of the current
audio source
− - TIM function (Traffic Information Memory) recorded traffic
announcements can be replayed. After entering up to two
different TIM recording times in the SETUP Setup, a recording of
the traffic announcements is also possible if the unit is switched off
− - Switch the traffic information function (Traffic Program) on or
off or interrupt the currently recorded traffic announcement
− - enables setting-up the individually selected field
- opens the sound and volume settings Setup
Touchscreen (Touch-screen): Fields circled in colour on the display
are presently “active” and are operated by touching the display
CD case
Eject key - press briefly to move an inser ted CD into the initial
position ready for removal
Memory card case: SD memory cards (“Secure Digital Memory
Cards”), SDHC (“Secure Digital High Capacity Card”) and MMC
(“Multimedia Cards”) measuring 32 mm x 24 mm x 2.1 mm and with
a capacity of up to 32 GB are available. The case for the memory card
is located under the display.
Explanation of symbols
* items of equipment which are marked in such a way are only installed as standard
on certain models or are supplied as special equipment.
End of a section.
The section is continued on the next page.
Note
This Owner's Manual describes the range of functions at the time of going to press.
The illustrations can differ in minor details from the version of your unit.
Important information
Warran ty
The equipment warranty terms and conditions also apply for new vehicles.
After the expiration of the warranty, a piece of equipment in need of repair will be
replaced with a reconditioned, original item with spare part warranty. It is, however,
a precondition that the housing has not been damaged and no unauthorised
attempts have been made to carry out repairs.
1)
Valid for universal Phone preinstallation GSM III and GSM II.
A1A2A
3
RADIO
MEDIA
PHONE
TIM
TP
SETUP
A
4
A
5
A6A
7 /
A
8
s3p4.a.book Page 2 Friday, March 13, 2009 3:04 PM
Page 5

General information 3
Note
Damage within the meaning of the warranty must not be the result of improper
handling of the system or from unprofessional repair attempts. It is also essential
that there is no external damage.
Device operation
The unit should only be used, if the traffic situation permits it.
The volume settings must be selected in such a way that audible signals from the
outside, e.g. a Martins horn from utility vehicles (police cars, ambulances and fire
brigade), can be heard at all times.
WARNING
Please concentrate fully at all times on your driving! As the driver you are
fully responsible for road safety. Only use the functions of the radio in such
a way that you are always in full control of your vehicle in all traffic situations!
Caution
• Inserting a second CD while a CD is being ejected can destroy the CD drive in
the unit. Please note that the CD ejection lasts a few seconds after pressing the
Eject key . During this time the lock in front of the CD case is open. It is essen-
tial that you wait until the CD has been fully ejected before you try to insert a new
CD.
• Press the buttons and the keys of the unit gently in order to avoid damaging
them. Gentle pressure on the appropriate key is sufficient to operate the unit.
Please note that the control buttons have predetermined breaking points, in order
to reduce the risk of injury.
• Do not use any pointed or sharp-edged objects to operate the touch-screen.
Slight finger pressure sufficient to operate the equipment. A text in the display,
which cannot be called up by pressing the button, is therefore not available at that
time.
Using the display
Carefully handle the display because dents and scratches can occur through pressure of the finger or contact with sharp objects.
The display can be cleaned with a soft cloth and finger marks can be wiped away
with pure alcohol.
Note
Do not use solvent such as turpentine or petrol as they will corrode the display
surface.
Anti-theft protection
Anti-theft coding
Your radio is equipped with a convenience coding. If the radio is being operated for
the first time, the safety code is not only stored in the radio but also in the vehicle.
After disconnecting and reconnecting the battery, first of all switch on the ignition
and then the radio.
If you wish to install the radio in another vehicle, the safety code must be entered.
In this case, please do not hesitate to contact an authorised Škoda Service Partner
or a Škoda importer.
As the unit only functions after entering the safety code, this practically excludes its
use after a theft - a contribution to increased anti-theft safety.
Note
The code is stored in the instrument cluster. This ensures that it is automatically
decoded (convenience coding). Manual input of the code is normally not
necessary.
/
s3p4.a.book Page 3 Friday, March 13, 2009 3:04 PM
Page 6

General information4
Enter code
If a keypad appears after switching on with the command to enter the
code, the unit can be unlocked by entering the correct four-digit code
number. The number of the possible attempts is shown in the second
display line.
– Press directly a digit from to on the digit block displayed on the
display. The digit is accepted in the entry line.
– After a four-digit order has been entered, the group of digits will turn
grey (inactive) and no further digits can be accepted in the entry line.
– Press on the display to erase the digits in the entry line from right
to left and thereby correct your input, if necessary.
– If the correct code number is displayed in the entry line, press .
Code number
The code number can only be called up “online” via the Škoda system, as this guarantees even more effective anti-theft protection. Please contact your authorized
Škoda Service Partner, if necessary.
Incorrect code number
If an incorrect code is confirmed after entry of the code, the procedure can be
repeated once again. The number of attempts is shown in the second display line.
If the code number is entered incorrectly for the second time, the unit will be
blocked for approx. one hour. It is possible to enter again the safety code after one
hour has expired, when the unit and the ignition have been switched on.
If two invalid attempts are then made again, the navigation system will be blocked
again for an hour.
The cycle - two attempts, blocked for an hour - will continue to apply.
General - operation
The screen of the unit is a so-called touch screen (touch-screen). Fields
circled in colour on the touch-screen are presently “active” and are operated by touching the screen.
“Function keys” on the screen
– Active fields, which call up a function or a Setup, are called “function
keys”.
– By using the function key you can change back from each Setup to
the previous Setup.
Moving objects or regulators
– Place your finger on the display of a moving object on the touch-
screen, for example the “sliding regulator” in a “scrollbar”.
– Now move your finger over the touch-screen without interruption.
The object will follow your movements, but can only be moved within
the pre-defined range.
– Lift the finger from the touch-screen at the desired position.
– To view the displayed Setup section, move the right sliding regulator
in the scrollbar completely to the bottom.
– Alternatively, you can move the sliding regulator on the touch-screen
to the bottom and top by touching the function keys and .
– A sliding regulator in a set-up bar
can alternatively be moved by
pressing or
“Scrollbar”
The vertical bar on the right side of the display with a sliding regulator between the
arrow keys and is called a “scroll bar”. It indicates that further Setup entries
become visible if the sliding regulator is moved completely to the bottom.
0 9
OK
- +
s3p4.a.book Page 4 Friday, March 13, 2009 3:04 PM
Page 7
General information 5
Display settings
In a set-up Setup a set-up or value is infinitely adjustable. Move the sliding regulator
or press or to change a setting. Press the function key , to take over a
changed setting and to switch back to the initial Setup.
“Pop-up window”
A function key with an arrow behind another function key shows the presently
selected set-up, e.°g. with an .
If you press on the function key on the display, a so-called “pop-up window”
will open where all the set-up options are displayed.
Briefly press the desired set-up option. The pop-up window is closed and the
setting you have selected is displayed. To close the pop-up window without
changing the set-up, press the function button in the pop-up window .
“Check box”
There is a so-called “check box” in front of a function which can only be switched
on or off. A tick in the check box indicates that the function is switched on, an
empty check box , indicates that it is switched off.
Briefly press the corresponding function key for switching on or off.
+ -
Confirmation tone Off
Off
s3p4.a.book Page 5 Friday, March 13, 2009 3:04 PM
Page 8

Basic setting6
Basic setting
Switching the unit on and off
– The system is switched on or off by pressing the control button .
The last active audio source before switching off is repeated.
If the key is pulled out of the ignition lock while the unit is switched on, the unit will
switch off automatically. You can then switch the unit on again. If the ignition is
switched off, the unit (discharge protection of the vehicle batter y) switches off automatically after approx. one hour. This process can be repeated as often as
necessary.
Audio settings
By pressing the button you can select the following parameters:
• - Setting of height, middle and depth;
• - Volume ratio (left and right = balance), (front and rear = fader);
• - , and * - Switch on
volume, traffic announcements and volume of park distance control signal;
• - Speed dependent volume adaptation;
• - Switching on or off the tone signal when storing the radio
stations.
Reducing the volume when activating the parking aid (PDC)*
If your vehicle is equipped with “parking aid”, the volume is automatically
decreased to a pre-defined value, when the “parking aid” is active.
GALA function
Your radio increases automatically its volume with the increasing vehicle speed. A
higher setting value results in a stronger volume increase.
RADIO selector key
Selecting a radio station
Call up main Setup RADIO and choose frequency range
– Press the range selector key to call up the RADIO main Setup.
The currently heard radio station is indicated at the top of the display.
– To change the frequency range, press the button or the func-
tion key and on or in the opening pop-up wi ndow. The
current frequency range is indicated at the top left of the display.
Changing radio station
– By pressing the arrow keys on the display of the RADIO main Setup,
you can change to the previous or the following station.
Selecting a radio station from the station list
– Press the function key to display all radio stations that can
currently be received. The list “skips” directly to the display of the
currently heard radio station.
– Choose the desired station by pressing the respective selection. After
about 20 seconds without operation the image of the station list will
close automatically.
Function keys in the Radio main Setup
to - Station keys for storing or calling up a stored radio station.
- Button for selecting the desired frequency range.
- opens the list of the presently receivable radio stations.
- opens the list of the stored radio stations.
A
1
Treble-Mid-Bass
Balance fader
Volu me Startup volume Traffic announcements PDC
GALA
Confirmation tone
RADIO
RADIO
Band FM AM
Station list
1... ...42
Band
Station list
Memory
s3p4.a.book Page 6 Friday, March 13, 2009 3:04 PM
Page 9

Basic setting 7
- Button for calling up the automatic play or for the radio text to fade
in .
- activates manual station finding.
The process of searching for and storing the radio stations
Manual search
– Turn the Set button in the RADIO main Setup or press on the func-
tion key . The scale of the selected frequency range is inserted in
the frequency band in the lower part of the display.
– Briefly press the set button to terminate the manual frequency selec-
tion and to display once again the function keys.
Storing a radio station on a displayed station key
– Continue to press one of the six station keys to displayed in
the RADIO main Setup until a signal tone sounds. The currently heard
radio station is then stored on this station key.
Deleting a radio station from the memory list
–In the RADIO main Setup, press the function key to open the
memory list.
– Press the function key behind the station you wish to delete.
– Confirm the following safety interrogation by pressing the function
key to finally remove the station from the memory list.
If the currently heard radio station is already stored in the memory list, the memory
space number is displayed behind the description of the frequency range (FM or
AM).
Use the Setup Radio main Setup, to determine which of the six station keys are to
be displayed in the main Setup RADIO.
Function SCAN
The stations of a waveband can be played briefly one after the other (for
ten seconds).
– Press the set button , the radio searches automatically all available
stations of the current waveband.
– Alternatively, press the function key and press in the
opening pop-up window.
– During the current automatic play the function key will change from
to .
– Press the set button or function key again to end the auto-
matic play of the currently heard radio station.
RDS functions
Switching radio text on and off
–In the RADIO main Setup, press on the function key and on
in the opening pop-up window. Instead of the six station
keys, the window for displaying the radio text is now opened in the
lower half of the display.
– The window for displaying the radio text must fade out again to enable
the station keys to be displayed again. Briefly press on the display
window of the radio text.
– Alternatively, press the function key and the function key
shown as highlighted in the opening pop-up window.
RDS (“Radio Data System”) serves to transmit program identification and additional
services therefore also enabling automatic tracking of stations.
In the event of sufficiently satisfactory reception, the suitable RDS radio stations will
display the station name instead of the station frequency.
Extras Scan
Radio Text
Man.
A
2
Man.
1 ... 6 ...
Memory
Delete
Delete
A
2
Extras Scan
Extras Scan
A
2 Scan
Extras
Radio Text
Extras
Radio Text
s3p4.a.book Page 7 Friday, March 13, 2009 3:04 PM
Page 10

Basic setting8
If a radio station sends additional information via the RDS function while a station
is being stored, it can occur that the name of the radio station is later displayed
incorrectly in the memory list.
Traffic information function
– Press on the button , in order to switch the traffic information func-
tion on or off.
The display “TP” in combination with a station name (e. g. in the station or memory
list), indicates a traffic information station.
The operational readiness of the traffic information function is indicated by “TP” at
the top right in the display.
If no traffic information station can be received because, for example, radio reception is interrupted in general, “No TP” will be displayed instead of “TP”. Remember
that car parks, tunnels, high buildings or mountains can interrupt the radio signal
up to the total loss of reception.
Incoming traffic announcement
When a traffic announcement is being received, a pop-up window will open.
If you wish to interrupt the transmission of the traffic announcement, press on the
function key in the pop-up window Traffic announcement. The traffic information function remains available and a following traffic announcement is made
again while the audio mode is in operation. Pressing the function key
will switch off the traffic information function permanently.
Traffic information memory
Automatic recording of traffic reports
If the traffic information function is switched on and a traffic information station is
received, the incoming traffic reports will be recorded, as long as the ignition is
switched on. This way you are informed at any time of the current traffic situation,
even if you have your radio switched off for a lengthy period while driving.
If the vehicle is not in use (ignition off) while a traffic information station is received
and the traffic information function is switched on, incoming traffic reports from
this station are recorded for two hours.
When switching the ignition off the current traffic information station is displayed
for about five seconds, from which the next 65 minutes of traffic reports will be
recorded. During this display of five seconds, you can select another traffic information station using the arrow keys on the unit, which will be recorded.
If, when the vehicle is not in use, the reception of the set traffic information station
is too poor because of external influences, it will automatically search for another
traffic information station.
A maximum of nine traffic announcements with a total length of up to four minutes
can be recorded. The oldest traffic report will always be overwritten if the memory
is full.
TIM recording times
You also have the possibility to set two TIM recording times, to which the unit will
also record traffic reports when the vehicle is not in use. Then the radio starts
according to the set TIM recording time with the recording of all the incoming traffic
reports on the set traffic information station.
For example, when you drive your vehicle to work everyday at a certain time, only
enter the approximate start time. The radio starts with the recording at the set start
time and ends the recording 65 minutes afterwards. In this way, before you begin
your journey, you can retrieve the last traffic reports and t une into the current traffic
situation of the distance to be driven.
Note
• In case of a message of over four minutes long, the beginning is overwritten.
• If the vehicle has not been used for more than three days, no further traffic
reports are recorded, in order to stop the vehicle battery from running down.
TP
Cancel
TP deactivated
s3p4.a.book Page 8 Friday, March 13, 2009 3:04 PM
Page 11

Basic setting 9
Playing traffic reports
– Press on the button , in order to listen to the stored traffic reports.
The play function starts with the last recorded traffic report and runs
through to the oldest recorded traffic report.
– Press on the button , in order to switch to the beginning of the
currently heard traffic report.
– In order to skip a traffic report, press on the button .
– You can interrupt the play function by pressing the button . The
button changes to . Pressing the button will continue the play
function from the last point.
Range selector key MEDIA
MEDIA main Setup
Calling up the main Setup MEDIA and changing the audio source
– By pressing the button the play function of the last played
audio source will continue.
If audio sources are currently selectable at the unit, use the range selector key
to change between the last audio sources.
If a previously played media source is selected again, play will continue from the
last played part.
If a media source cannot be selected at the present time because, for example, non
is available (e.g no memory card), the function key will be displayed with a grey
background.
Function keys for controlling the current audio sources
- pressing this briefly changes over to the beginning of the current title or
chapter, repeated pressing changes over to the beginning of the previous title or
chapter.
- briefly pressing this changes over to the next title or chapter.
- Pause: the play function is stopped at the current position and the symbol
changes to - pressing will continue the play function at this position.
Selectable audio sources in the Setup MEDIA
- changes over to the last played CD from the internal CD changer.
- changes over to an inserted memory card.
- changes over to a connected external audio source*. Operating an externally connected audio source is possible with certain restrictions and depends
largely on the type of the connection.
Additional function keys in the MEDIA main Setup
- starts the automatic play Scan. If is already displayed with the func-
tion key, the automatic play has started - press the button to terminate.
- starts the random play function Mix. If is already displayed with the
function key, the random play function has started - press the function key to terminate.
- opens the pop-up window for switching on the repeat function. In addi-
tion, it is determined if only the current or the current or the current
for the MP3 operation is repeated.
- opens the title list of the current audio source in order to choose
another title or source.
Inserting or ejecting a CD
Inserting the CD
–Press the button .
– Choose the location .... for storing the CD in the internal CD
changer. Wait until “Please insert CD” is displayed.
– Push a CD with the written side facing up as far as possible into the CD
case until it is automatically drawn in. The play function will start automatically.
TIM
MEDIA
MEDIA
CD
SD card
AUX
Scan Scan
Mix Mix
Repeat
Tra ck CD
Folde r
Selection
/
1 6
s3p4.a.book Page 9 Friday, March 13, 2009 3:04 PM
Page 12

Basic setting10
Taking out the CD
– Press on the button , the CD is driven to the initial position.
If a CD is not taken out in the initial position, it will be reinserted after approximately
10 seconds for safety reasons.
WMA Data (Windows Media Audio)
The copyright of audio data compressed by Windows Media Audio, can also be
protected by the DRM procedure (Digital Rights Management). Such WMA data is
not supported by the unit.
Inserting or removing a memory card
Inserting a memory card
– Push the memory card into the memory card case with the trimmed
edge to the front right, until it is locked in position. The play function
will start automatically.
Taking out a memory card
– Press against the spring resistance of the inserted memory card, the
memory card “skips” back into the Eject position.
Only MP3 data and unprotected WMA data can be read from the SD card. All other
data is ignored.
Memory card empty or data not readable
If a memory card is inserted, on which no audio data has been stored, it will not be
switched over into the memory card mode after the loading procedure. In the
Setup MEDIA the function key remains inactive in the top display line and
the function cannot be seleced.
Requirements of the memory card
Memory cards measuring 32 mm x 24 mm x 2.1 mm or 1.4 mm can be inserted into
the memory card case.
Other memory cards of suitable size are not read by the unit.
Selecting a CD from the CD changer
– Press the button , in order to open the MEDIA main Setup.
– If the unit is not already in the CD mo de, pres s on the fun cti on k ey
in the top display line.
– Press on the function key , in order to display the title list of
the currently played CD.
– Press on the function key as often as necessary until the CD selec-
tion Setup is displayed.
– Press on one of the buttons to , in order to start the
play function of the CD from the corresponding position.
If the currently played CD is selected in the CD selection Setup, the title list is
opened.
A CD compartment, in which no CD is inser ted, is marked by “Empty” and the function key is shown as inactive.
The CD which is currently playing, is indicated in the MEDIA main Setup at the top
left of the display.
- Random play function; the tracks will be played in a random order.
– Scroll through the CD. The first 10 seconds of each title are played.
Note
CDs, which cannot be read by the CD changer, are also not selectable in the CD
selection Setup of the radio (Display: “Empty”).
Select track
Press the range selector key to switch to the main Setup MEDIA.
/
SD card
MEDIA
CD
Selection
CD 1: CD 6:
Mix
Scan
MEDIA
s3p4.a.book Page 10 Friday, March 13, 2009 3:04 PM
Page 13

Basic setting 11
Audio CD: Select track
– Press on the function key , in order to display the title list of
the currently played audio CD. The currently played track is shown as
highlighted.
– Select one of the titles from the title list by briefly pressing the function
key .
MP3 Data: Select track
– Press on the function key , in order to display the title list with
the currently played title and, if necessary, to display the sub-folder
contained in this folder. The currently played track is shown as highlighted.
– Press to choose another title. If the title you are searching for is in
another folder, you must first of all search the folder structure.
– Press on the display of a data folder to open it (in picture: ).
– Press the function key to open the appropriate higher priority
folder.
Repeat title
– Press the function key .
– Press in the opening pop-up window to automatically repeat the
current title at the end.
– If you press (Audio CD operation) or (MP3 operation) in
the opening pop-up window the titles of the current CD or the current
folder are repeated automatically.
Note
You can also change titels in the Setup MEDIA by turning the set button .
• If a data carrier in the internal CD drive is ready to play, “CD int.” will be indi-
cated at the top left in the display.
• When playing MP3 data, the name of the artist, the album and the title of the
MP3 data will be displayed, if available, as ID3 tag. The list and data name will be
displayed if there is no ID3 tag.
• Some audio CDs support “CD Text”. With these CDs the title name is displayed
instead of “Trac k ”.
General information for MP3 operation
Requirements for the MP3 data and data carrier
• CD-ROM, CD-R, CD-RW with a capacity of 650 MB and 700 MB.
• The CDs must correspond to the ISO 9660 Level 2 standard as well as the Joliet
data system (single and multi-session).
• Data names must be no longer than 64 characters.
• The list structure is restricted to a depth of 8 list levels.
• The name of the artist, the album and the title of the reproduced MP3 data can
be shown as ID3 tag, providing this information is available. The list and data name
will be displayed if there is no ID3 tag.
• Playlists are supported.
• WMA data (Windows Media Audio) can also be played even if the copyright is
additionally protected by the DRM procedure (Digital Rights Management). Such
WMA data is not supported by the unit.
Bit rate (data flow per time unit)
• The system supports MP3 data with bit rates of 32 to 320 KB/s as well as MP3
data with variable bit rates.
• The indicated playing time data with variable bit rates is not reliable.
Information on how to use a CD
CD to jump
Uneven road surfaces and strong vibrations may cause the CD to jump.
Selection
Track ...
Selection
F1.1.1
Repeat
Title
CD Folder
A
2
s3p4.a.book Page 11 Friday, March 13, 2009 3:04 PM
Page 14

Basic setting12
Formation of condensation
When it is cold and after rain showers, moisture can deposit in the CD drive
(condensation). This can effect the CD jump or impair the play function. In such
cases wait until the moisture has dissipated.
Notes for the care of the CDs
If a CD is soiled, please never clean the CD in the direction of a circle but rather from
ins ide t o outs ide w ith a s oft l int-f ree cl oth. I n cas e of se vere l ayers of dir t we r ecomme nd t o cl ean the CD w ith a co mme rci all y av ail abl e CD cle ane r. Al so i n t his cas e do
not clean the CD in the direction of a circle but rather from inside to outside and
then let it dry off.
WARNING
• The CD player is a 1st class laser product. There is a definite risk of injury
from invisible laser beams if it is opened.
• The CD player contains no parts that have to be serviced or repaired.
Please contact your specialist garage if a mechanical defect occurs or the CD
player has to be repaired.
Caution
• Never use liquids such as gasoline, paint thinner or disk cleaner, otherwise the
surface of the CD could get damaged!
• Never expose the CD to direct sun rays!
• Please never write or affix the CD!
Note
Dir t or dam age of a CD can lea d to dif ficulties when “reading” the information. The
difficulty in reading the error depends on the dirt or on the severity of the mechanical damage. Severe scratches cause reading errors which can make the CD jump or
“get stuck”. All CDs must be treated carefully and always be stored in a protective
case.
External sources*
Input AUX-IN
– Activate the AUX-IN input in the Setup Setup Media by pressing the
function key .
– The input for external audio sources AUX-IN is located under the
armrest of the front seats.
– External audio sources, which are connected to the AUX-IN input,
cannot be operated via the radio.
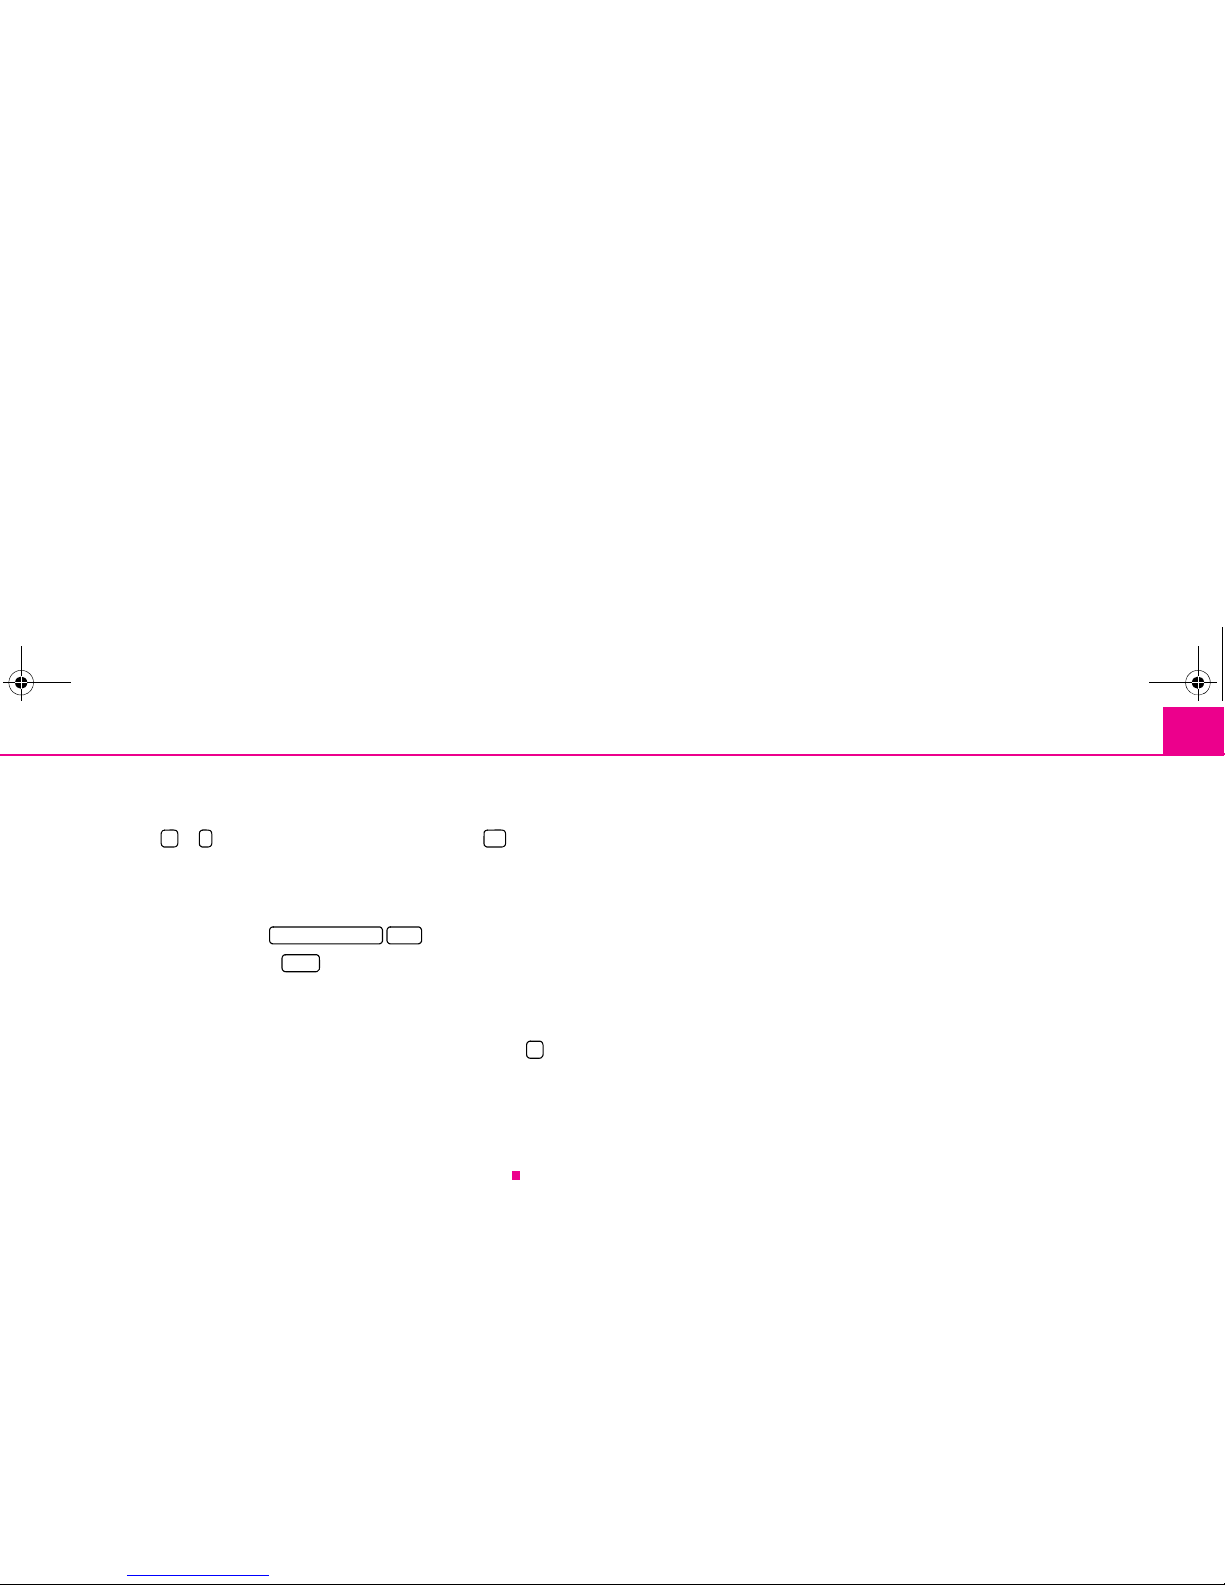
Input MDI - Multimedia socket
– Activate the MDI input in the Setup Setup Media by pressing the func-
tion key .
– The input for the external audio sources MDI is located under the
armrest of the front seats, in the storage compartment of the front
passenger side or in a storage compartment of the centre console
(according to vehicle model).
– Audio data in MP3, WMA, OGG Vorbis and AAC format from the
external data stickers, connected to the MDI input, can be played via
the radio.
Fig. 1 Input MDI
AUX
PD
s3p4.a.book Page 12 Friday, March 13, 2009 3:04 PM
Page 15

Basic setting 13
– External audio sources, which are connected to the MDI input, can be
operated via the radio ⇒ page 9, “MEDIA main Setup”.
It is possible to play back external audio sources via the loudspeakers of the radio
in the vehicle.
You can select another audio source on the radio at any time. As long as the external
audio source is not switched off, it remains always active in the background.
Please refer to the Owner's manual of the respective manufacturer for the operation of the external audio source.
If a MDI input is additionally installed, the button is displayed instead of the
function key in the Audio Setup. Please note that an audio source connected
to the AUX-IN socket can only be replayed, if there is currently no data carrier
connected to the MDI input.
Adjust the play function volume of the external audio source
The play function volume of the external audio source can be changed via the
volume control on the radio.
Depending on the connected audio source, the output volume on the external
audio source can be changed.
You can also change the input sensitivity of the external audio source, in order for
the play function volume of the external audio source to adapt to other audio
sources or to avoid distortions of the play function volume.
Adapter
A 3.5 mm jack plug is required to connect external audio sources via the AUX-IN
input. If the external audio source does not have this jack plug, you must use an
adapter.
A special adapter is required to connect audio sources via the input MDI.
We recommend that you purchase an adapter for connecting the USB devices, the
devices with Mini USB output or an iPod, at a Škoda Service Partner.
Conditions for proper connection
• Only USB devices with the specification 2.0 can be connected.
• The version of the file allocation table FAT (File Allocation Table) of the
connected device must be FAT16 (< 2 GB) or FAT32 (> 2 GB).
• In order to replay from a unit with a hard disk (HDD) which includes a large data
volume, it can lead to a time delay when reading in the overview of the music data.
• In order to replay from a unit, which includes a complicated folder structure, it
can lead to a time delay when reading in the overview of the music data.
• The folder structure in the connected unit must not exceed a depth of 8 levels.
One folder must not contain more than 1000°data.
• A USB extension cable or USB distributor (HUB) must not be used to connect
the unit.
WARNING
• On no account place an external audio source on the dash panel. You
could make sudden manoeuvres in the passenger compartment and injure
the occupants.
• On no account place an external audio source close to the airbags. You
could be thrown back in the passenger compartment by the airbags being
deployed and injure the occupants.
• You must not hold the external audio source in the hand or on the knees
while driving. You could make sudden manoeuvres in the passenger
compartment and injure the occupants.
• Always guide the connection cable of the external audio source in such a
way that is does not restrict you when driving.
Caution
The AUX-IN input must only be used for audio sources!
Note
• The external audio source, which is connected via AUX-IN, can only be used if
no unit is connected via MDI at the same time.
PD
AUX
s3p4.a.book Page 13 Friday, March 13, 2009 3:04 PM
Page 16

Basic setting14
• If an external audio source is connected via AUX-IN, which is equipped with an
adapter for external power supply, it can occur that the audio signal is interrupted.
This depends on the quality of the adapter which is used.
• The loudspeakers in the vehicle are matched to a power output of the radio of
4x20 W.
• For the equipment sound system*, the loudspeakers are matched to a power
output of the amplifier of 4x40°W + 6x20 W.
Range selector key SETUP
Main Setup set-ups (Setup)
– Press the range selector key to open the main Setup Setups.
– Select the area for which you wish to change the set-ups or carry out
set-ups by pressing on your selection.
– Press on the function key , to switch back to the last selected Setup.
Overview of the set-up Setups
- When in the radio mode, carry out set-ups for the function of the arrow
keys, for the displayed memory keys, the memory list and the traffic reports.
- Determine the set-ups for the play and display of MP3 data and activate
or deactivate the external audio sources.
- Change the system set-ups such as voice response and time and cancel
or delete stored set-ups in individual areas.
- Select preferred TMC station and determine the area for TMC
announcements.
- Adjust the brightness of the screen and select/deselect the confirmation
tone for the keystroke.
- Update the phone book in the unit, delete all call lists and modify the
assignment of the shortcut keys.
Setup Radio
Call up the Setup Setup Radio by pressing the selector key and the
function key . Press on the function key or on the function key to determine from which list in the radio mode the
stations are to be selected with the arrow keys. If the is
selected, only stored stations from the memory list are called up.
“Memory” is displayed at the top left in the main Setup RADIO.
Select station keys for display
– Press on the function key behind the function key in the
Setup Setup Radio.
– In the pop-up window, press and select the station keys to be
displayed in the main Setup RADIO.
Switching the RDS function on or off (RDS regional)
– Press on the function key and select a set-up in the
opening pop-up window.
– Press on the function key , doing so will always choose the
frequency for the radio station heard, which offers the best reception
at the present time.
– When pressing on the function key , the unit attempts to hold a
radio station emitting regionally long enough until the reception
quality is so bad, that there is a risk of a program loss.
Delete memory list
– In the Setup Setup Radio move the sliding regulator to the bottom to
display the function key .
– Press the function key and confirm the following
safety interrogation in order to erase all radio stations stored in the
memory list.
SETUP
Radio
Media
System
Traffic program
Display
Phone
SETUP
Radio Station list
Memory list
Memory list
Station keys
RDS regional
Automatic
Fix
Delete memory list
Delete memory list
s3p4.a.book Page 14 Friday, March 13, 2009 3:04 PM
Page 17

Basic setting 15
Traffic station set-ups
Call up the TIM Setup recording time Setup by pressing the range selector
key and the function key .
– Press on the left of the display on TIM recording time, in order to open
the Time setting Setup.
–In the Time setting Setup, briefly press on the arrow keys or on
the display, below the display of the hours or minutes, in order to
gradually change the respective time unit down or up.
– Keep pressing the corresponding arrow key, in order to continuously
change the time unit. Release the button if the desired value has been
reached.
– Press on the function key in order to take over the indicated TIM
recording time and to exit the Setup Time setting.
– In this way you can set both desired TIM recording times.
– Activate or deactivate the desired TIM recording time by pressing the
function key . If the check-box is active
the accompanying
TIM recording time is activated.
The unit starts with the recording 90 minutes before the set start time and ends the
recording 30 minutes afterwards.
Setup Media
Call up the Setup Media Setup by pressing the range selector key
and the function key .
Function keys in the Setup - Setup Media
- for playback of an external audio source.
- enables a wireless transfer of MP3 data from the Phone
preinstallation.
- according to the set-ups the title and performer
name or only the data and folder name will be displayed for audio CDs with CD
texts and in the MP3 operation.
- plays all MP3 data one after the other
according to the sequence on the played medium, which are stored in the folders
and sub-folders.
- the input sensitivity of the AUX-IN input for adjusting the play
function volume of a connected external audio source can be adapted to other
audio sources in three steps. Press on the function key and select
the desired input sensitivity in the opening pop-up window. If a MDI input is additionally installed, this setting also applies for the audio sources which are
connected to this input.
System set-ups
Call up the Setup System Setup by pressing the range selector key
and the function key .
Change the system language manually
– Press on the function key and select the desired
language in the opening pop-up window. The system language is
normally preset to the set language in the instrument cluster
“Automatic”. If desired, another language can be selected for the
radio as described.
Resetting the factory settings on the unit
– Press on the function key .
– Confirm the following safety interrogation, the unit will be reset in the
as-delivered condition and all the stored data will be erased.
Rear lighting of the control buttons
– Press on the function key .
SETUP Traffic information
Active
SETUP
Media
Activate AUX input
Activate Bluetooth audio
Deactivate performers/Title names
Scan/Mix/Repeat including sub-folder
AUX Input level
AUX Input level
SETUP
System
System language
Fac tor y se ttings
ILLUMINATION
s3p4.a.book Page 15 Friday, March 13, 2009 3:04 PM
Page 18

Basic setting16
– On the unit, you can switch the rear lighting of the control buttons
and on or off , if the ignition is switched on.
Display of the setting for the Climatronic unit*
– Press on the function key .
– You can switch the display of the Climatronic values on or off.
Phone set-ups
Call up the Setup Phone Setup by pressing the range selector key
and the function key .
Updating phone data in the unit
– Press on the function key
2)
to update all entries in
the unit, the phone book of the mobile phone or the SIM card entered
since the last connection. This procedure can take a few minutes.
– Confirm the following safety interrogation. The “old” data in the
phone book can still be selected at the unit while the data is being
updated.
– In this case, consult the instruction manual applicable to your vehicle.
Deleting call lists
2)
– Press the function key .
– If you confirm the following safety interrogation by pressing ,
the stored call numbers of all calls made and calls accepted in the unit
will be deleted.
Modifying assigned shortcut keys
– Press the function key to modify the assigned shortcut
keys.
– To change the assignment of a particular shortcut key, select the
respective shortcut key by pressing the key in the following Setup.
– Change the entry as described.
Range selector key PHONE
Main Setup PHONE
Connect your mobile phone with the mobile phone program according
to the instruction manual applicable to your vehicle.
– Press the selector key to call up the main Setup PHONE.
After the connection process, it will take a few minutes (depending on the size of
the Phone book) until the phone book data of the mobile phone connected to the
radio unit is available.
Function keys in the main Setup PHONE
- Take calls, establish or hold. After pressing the call list, the selected phone
numbers are displayed in the main Setup PHONE.
- End conversation or reject call.
3)
- establishes a connection to a an emergency number after further confirmation. This function is also possible without a connected mobile phone. It is,
however, necessary that a connection can be established via a mobile phone
company.
2)
Only valid for the universal Phone preinstallation GSM III.
A1A
2 2 1
CLIMATE POP-UPS
SETUP
Phone
Update phone book
Delete call lists
Delete
3)
Only valid for the universal Phone preinstallation GSM III.
Speed dial
PHONE
SOS
s3p4.a.book Page 16 Friday, March 13, 2009 3:04 PM
Page 19

Basic setting 17
3)
and to - Shortcut keys; these can be allo-
cated to, in each case, one number.
- opens the number block for entering a call number.
3)
- opens a pop-up window for selecting a call list. Only call lists of missed,
dialed or accepted calls from the mobile phone preparation program can be
displayed.
and
3)
or - switches off the microphone
during a conversation. Conversations held inside the vehicles cannot be heard by
the other party when the microphone is switched off.
- opens the phone book of the connected mobile phone for selecting a call
number.
Enter call number
Enter a number and select
– Press on the function key in the main Setup PHONE, in order to
open the number block for entering a call number.
– Press an inserted number key to accept the corresponding number in
the entry line.
– You can delete the characters in the entry line from right to left by
pressing the function key .
– Press function key when the desired call number is indicated in the
entry line. The connection to the entered call number is established.
You can select the character “+” instead of the first two digits (for example “00”)
when entering a country code. For this step, hold the function key with the little
triangle “” pre ssed until a pop -up wi ndow w ith t he fun ctio n keys and fad es
in. Press to accept the desired character into the entry line - the pop-up window will
close. If no entries are entered, the pop-up window will close automatically after a
few seconds.
The special keys “Stars” and “Rhombus” have the same function as those on
a phone keypad. These characters are primarily needed when transmitting sound
signals during a call.
4)
Phone book
Opening the phone book
– Press on the function key in the bottom right in the main Setup
PHONE, in order to open the phone book.
Select phone number from the phone book
– When in the Setup Phone book move the sliding regulator in the
scrollbar to the bottom to view further stations.
– Press on the function key to select a phone book entry via a
search mask.
– Press in the left column on the display of a phone book entry. The
connection to the first call number stored for this entry in the phone
book, will now be established.
5)
Displaying information relating to a phone book entry
5)
– Press the function key on the right next to the phone book entry
you which to display. The call numbers stored under this entry are
displayed.
– If you press on the entry of a call number, the connection to this call
number will be established.
Voice mailbox Memory 2 Memory 6
[:::]
Calls
Extras Conference details Microphone off
[:::]
0
0 +
4)
Only valid for the universal Phone preinstallation GSM III.
5)
Only valid for the universal Phone preinstallation GSM III.
* #
Search
s3p4.a.book Page 17 Friday, March 13, 2009 3:04 PM
Page 20

Basic setting18
Searching an entry in the phone book
– Press on the function key in the Setup Phone book to select a
phone book entry via a search mask.
– Press a selectable character on the keypad while in the search window
to accept it in the entry line.
– Press the function key to open the input window for digits and
special characters. Press , to change again to the letter input mask.
– You can delete the characters in the entry line starting from the posi-
tion of the character insertion cursor from right to left by pressing the
function key .
– If you press on the button , the connection to the first call number
is established, by doing so an assigned name is displayed in the entry
line in the Phone.
The upper and lower case which is used when searching for a phone book entry, is
not of importance.
Editing field: Indicate specific characters
Some letters are also marked with a small triangle “”. This indicates that specific
characters based on this letter can be selected.
Continue to press down on the corresponding button with your finger until a popup window with these specific characters fades in. Press to accept the desired character into the entry line - the pop-up window will close. If no entries are entered,
the pop-up window will close automatically after a few seconds.
Adapt a call number
Open the display of a call number from the phone book or a call list as
described in the corresponding chapter.
– Press the arrow keys or to move the character entry cursor in
the entry line.
– Press on a character inserted into the keypad to accept it behind the
character entry cursor in the entry line.
– The connection to the displayed call number will be established as
soon as you press the function key .
Call lists
Only valid for the universal Phone preinstallation GSM III.
Only the dialed numbers which are missed, selected and accepted by the
mobile phone preparation program in the vehicle are stored. The call
lists stored in a mobile phone will not be transferred to the vehicle.
– Press on the function key in the main Setup PHONE.
– Select the call list from which you wish to select a call number by
pressing your selection in the opening pop-up window. The corresponding list is displayed. Call numbers, for which an entry exists in
the phone book, will be displayed together with the corresponding
name.
You can use the function key , to display further information relating to the
stored call number.
• - shows a list of the non-accepted calls from the mobile phone
preparation program.
• - shows a list of call numbers, with which the mobile phone
preparation program has attempted to establish a connection.
• - shows a list of calls accepted by the mobile phone preparation
program.
If the call number from a call list is stored in the phone book the stored name in the
phone book is displayed instead of the call number.
Incoming calls rejected with the function key will be stored in the call list of the
accepted calls.
Search
A-Z
Calls
Missed calls
Dialed numbers
Calls taken
s3p4.a.book Page 18 Friday, March 13, 2009 3:04 PM
Page 21

Basic setting 19
Ca ll li sts a re al way s ass ign ed to a use r profile and are only displayed once the corresponding SIM card is connected again with the mobile phone preparation.
Shortcut keys
At the time of the first connection with the SIM card of your mobile Phone
all shortcut keys have still not been assigned after the first call from the
main Setup PHONE.
Assigning free shortcut keys
– If you press briefly on a non-assigned shortcut key the Setup Shortcut
will open to enable a name and phone number to be entered.
– If you press the function key , an input mask will open to enable
a name to be assigned.
– If you press the function key a mask will open to enable a
number to be assigned.
– Press the function key or to accept a call number
for these shortcut keys from the corresponding list.
– Press the function key to erase all entries in all entry lines at once
after confirmation with .
– If you have completed your entries in the Setup Shortcut, press the
function key .
– The entered name will be displayed in the shortcut key of the main
Setup PHONE. The call number entered will be assigned to a shortcut
key.
Calling up a connection via the shortcut key
–Briefly press an assigned shortcut key to establish the connection to
the assigned call number.
Modifying assigned shortcut keys
– If the assignment of a shortcut key is to be modified, keep pressing the
corresponding shortcut key until the Setup shortcut has opened for
modification.
The assignment of the shortcut keys remains stored in the unit and will only be
displayed again when the corresponding SIM card is connected a gain to the mobile
phone preparation program.
Shortcut key
6)
The shortcut key has not yet been assigned a call number in the
factory, as this depends upon the corresponding mobile phone company and
country. The name for this shortcut key has, however, been specified and cannot be
changed. You should now store your mail box number so that you can quickly check
your voice mail.
Editing field: further input possibilities
- changes from upper case to lower case and vice versa.
- opens the editing field for the entry of digits and special characters. The
button changes to . Press on , to change again to the letter editing field.
- space key for entering spaces.
or - moves the cursor in the entry line to the left or right.
- deletes characters in the entry line from right to left, star ting from the position
of the cursor.
Phone conversation
If you have started the process of connecting to a call number or
accepted a call, the main Setup PHONE will change to the display Phone
conversation.
Name
Number
Call lists Phone book
OK
OK
6)
Only valid for the universal Phone preinstallation GSM III.
Voice mailbox
Voice mail box
A-Z A-Z
s3p4.a.book Page 19 Friday, March 13, 2009 3:04 PM
Page 22

Basic setting20
Incoming phone call
– An incoming phone call will be indicated on the display by “Incoming
call” followed by the call number of the caller. If the number of the
caller is stored in the phone book, the name of the caller will be
displayed instead of the call number.
– Press the function key to accept the call.
– Press the function key to reject the call.
During a phone conversation
7)
– If you press the function key during a phone conversation the
current conversation will be switched to “mute” (Display: “Call is
held”). This means that the connection remains intact while the audio
transmission is interrupted.
– If you press the function key , again the conversation can be
continued.
– If you press the function key , during a phone conversation, the
connection to the current call number will be terminated and the unit
will change to the main Setup PHONE.
Carrying out an additional phone conversation
7)
– Press on the function key during a phone conversation to put the
current conversation on “hold” as described above.
– Select a new call number or select a stored call number.
– If you are holding an additional conversation, you can switch between
both parties (“alternate”).
“Call waiting” and changing between two parties (Alternate)
– If you are called while holding a conversation, the number and the
name of the caller will appear below the current conversation on the
display (Function: “Call waiting”).
– Press on the function key in the line “Incoming call” to reject the
second call.
– Press on the function key in the line “Incoming call” to accept the
second call. The connection to the first party will be interrupted but
not broken (Display: “Call is held”).
– If you press the function key in the line “call is held”, the conver-
sation with this party will continue and the other party will be “put on
hold”. In this way you can alternate between two parties.
7)
– Press the function key , to break the connection to the call number
displayed in this line.
DTMF key tones
7)
A particular DTMF key tone is assigned to each each key of a phone. DTMF key tones
are used, for example, for the input of a password via the phone or for choosing a
colleague in a “Call center”.
If a DTMF key tone has to be entered during a conversation, you can open the
keypad field by pressing the function key at the bottom left and follow the instructions (for example: “For a private conversation with one of our co-workers, please
press ”).
You can store a longer DTMF key tone on your mobile phone. If, during a conversation, this DTMF key tone has to be entered, call up the corresponding entry from the
phone book as described.
If you press in the input mask on the function key , the displayed character
sequence in the entry line will be played as DTMF key tone sequence.
Please note that in a DTMF key tone sequence the character “+” must not appear,
as it interrupts the playing of a DTMF key tone.
7)
Only valid for the universal Phone preinstallation GSM III.
3
DTMF
s3p4.a.book Page 20 Friday, March 13, 2009 3:04 PM
Page 23

Škoda Auto pursues a policy of constant product and model development. We trust
that you will understand that changes to models in terms of shape, equipment and
engineering, may be introduced at any time. The information about scope of
delivery, appearance, performances, dimensions, weight, fuel consumption,
standards and functions of the vehicle is only correct at the time of publication.
Certain items of equipment might only be installed later on (information given by
the local authorised Škoda Service Partner) and only envisaged for particular
markets. It is therefore not possible for legal claims to be made based on the data,
illustrations and descriptions contained in this Owner's Manual.
Reprinting, reproduction or translation, either in whole or in part, is not permitted
without the written consent of Škoda Auto.
Škoda Auto expressly reserves all rights relating to copyright laws.
We reserve the right to make changes to this document.
Issued by: ŠKODA AUTO a.s.
© ŠKODA AUTO a.s. 2009
Page 24

www.skoda-auto.com
Autorádio Bolero
Octavia, Yeti anglicky 05.09
S00.5610.64.20
1Z0 012 095 EL
Bolero.indd 1Bolero.indd 1 16.4.2009 8:54:1416.4.2009 8:54:14
 Loading...